Rucking is safe - when you respect the load
Rucking injury rates are significantly lower than running. Long-distance runners sustain injuries at rates of 20-50% per year, depending on how you measure it. Rucking, by comparison, has injury rates more like 5-10% when done sensibly. The most comprehensive review of foot-march injury patterns - Knapik et al. (2014), Journal of Special Operations Medicine - synthesized decades of military medical surveillance and found that the two strongest predictors of overuse injury are load exceeding 30% of bodyweight and weekly-volume increases above 10-15%. Both are controllable.
But here's the key caveat: most rucking injuries are overuse injuries, not acute injuries. They're preventable. They happen gradually because of too much weight, too fast progression, or poor form. And the good news is that this means you have control. You can follow simple principles and avoid the vast majority of injury risk.
This guide is educational, not medical. We're translating published research into actionable guidance. If you develop an injury or have pre-existing conditions, see a healthcare professional for diagnosis and personalized treatment.
Disclosure: some retailer links in this guide are affiliate links. If you buy through them, Ruck Authority may earn a commission at no extra cost to you. Safety recommendations do not change based on commission.
Assess your risk
This quick assessment considers your weight carried, weeks of experience, frequency, any current pain or previous injuries, and outputs a risk level (low/moderate/high) with specific recommendations for your situation. Use it to calibrate your progression.

The most common rucking injuries
The #1 complaint from ruckers, especially beginners. Pain around the kneecap or lateral knee from too much weight added too fast, overstriding, or weak quad and glute stabilizers.
Prevention: Respect the 10% rule on load increases. Shorten your stride - quicker and shorter beats longer and slower. Squats, lunges, and glute bridges 2-3x/week.
For the full clinical breakdown and return-to-rucking progression, read Rucking knee pain.
Pain along the inner edge of the shinbone, usually in the first 10-15 minutes of a ruck and worse on pavement. The #2 most-reported overuse injury in load-carriage research (Knapik 2014). Caused by too much volume too fast, hard surfaces with no cushion, or shoes with insufficient stack height.
Prevention: Cap weekly distance increases at 10%. Add trail or grass days to the rotation - pavement is the highest stress surface for shins. Avoid worn-out shoes (most rucking shoes need replacement at 300-400 miles).
For early-warning signs and the recovery protocol, see Rucking shin splints.
Heel or arch pain, worst in the morning or after sitting. Inflammation of the plantar fascia from shoes that are too soft, rapid volume increases, or tight calves.
Prevention: Firm-soled shoes with 8-12mm drop. Progress distance gradually. Daily calf stretching, especially before rucking.
For the full protocol, see Rucking plantar fasciitis.
Pain in the lumbar spine during or after rucking. Almost always mechanical, not a disc issue - caused by weight sitting too low in the pack, excessive forward lean, or a weak core. Tight hip flexors are a frequent hidden driver - see our hip flexor fix for ruckers.
Prevention: Pack weight high and tight against your spine. Stand tall - imagine a string pulling the crown of your head up. Core work: planks, dead bugs, bird dogs.
Soreness in the upper traps and shoulders from strap pressure or poor load distribution. The main cause: all the weight on your shoulders because you're not using your hip belt.
Prevention: Hip belt transfers 30-40% of load to your hips - use it. Keep shoulders relaxed; shrugging is a fatigue compensation pattern. Check strap width and padding for your build.
Tingling or numbness in fingers during rucking. A nerve compression issue, not blood flow. Caused by shoulder straps that are too narrow or compress the brachial plexus, or limited arm swing.
Prevention: Adequate strap width and padding. Let your arms swing naturally - don't pin them to your sides. Loosen straps slightly on long rucks.
Full clinical explanation: Numb hands while rucking.
Most common in the first 2-4 weeks before your feet toughen up. Cotton socks, wet feet, poorly fitting shoes, or new shoes not broken in.
Prevention: Merino wool socks always. Remove wet socks immediately after rucking. Break in new shoes on short rucks first. Apply Body Glide Original to heels, sides of feet, and toes before heading out.

The prevention framework: the 10% rule and beyond
The 10% rule is the most important tool in injury prevention: don't increase your weekly load OR distance by more than 10% per week.
Apply this to weight increases: if you're carrying 20 pounds, the most you add next week is 2 pounds. Not 10 pounds. Not even 5 pounds if you're just starting out. Add 2-5 pounds every 1-2 weeks.
Apply this to distance: if your longest ruck is 2 miles, increase by 0.2 miles per week, not by doubling to 4 miles. Add 0.25-0.5 miles per session, every 1-2 weeks.
Never increase weight AND distance in the same week. If you're adding load, keep distance flat that week. If you're adding distance, keep load flat.
Here's why: your muscles adapt quickly (2-4 weeks), but your connective tissue (tendons, ligaments) adapts much more slowly (8-16 weeks). The 10% rule is conservative specifically because tendons lag behind muscle adaptation. Your muscles feel ready to go harder, but your tendons aren't.
The two strongest predictors of foot-march injury in Knapik's 2014 review (PubMed 25399383) are load over 30% of bodyweight and weekly-volume increases above 10-15%. The 10% rule is conservative - and that is the point. Every cited study shows that conservative progression prevents injuries while aggressive progression causes them.
The biomechanical case for the rule comes from gait research. Birrell, Hooper & Haslam (2007), Gait & Posture measured 3-D lower-limb kinematics under loaded marching and showed that added load increases peak vertical and forward-backward ground reaction forces - the forces driving cumulative joint and connective-tissue stress. Walsh & Low (2021), PMC9863443 extended this to postural control, showing that load measurably degrades center-of-pressure stability and stride consistency, especially uphill. Both findings explain why the 10% rule isn't arbitrary: it gives the structures that absorb those forces time to adapt before the load goes up again.

The prehab routine: 8 exercises to prevent every injury
Prehab (preventative maintenance) is more efficient than rehab (fixing a problem after it happens). This 8-exercise routine takes 12-15 minutes and targets the six weak points that cause most rucking injuries: feet, calves, glutes, quads, core, and shoulders. Do this 2-3 times per week.


That's it. Twelve minutes. The only kit you need: a resistance loop band set for the clamshells (under $15) and a foam roller for the recovery work after. Do this 2-3 times per week, and you've addressed the structural weaknesses that cause 95% of rucking injuries.
For progressions, advanced variations, and detailed form cues, get the full routine: The rucking prehab routine - 8 exercises to prevent every injury.
Tracking heart rate and recovery
Monitoring your heart rate during rucking helps you stay in the right intensity zones for adaptation while avoiding overtraining. A Garmin Instinct 3 Solar provides reliable zone tracking without overthinking it, giving you real-time feedback that keeps you from overextending.

When to push through vs when to stop
Not every ache is a sign to stop rucking. But some are. Here's the decision tree:
Muscle soreness (DOMS) from a previous ruck. Delayed onset muscle soreness is normal and expected. It means your muscles were stressed and adapted. Rucking actually feels better once you warm up.
General fatigue. If you feel flat and tired but without pain, that's often just low energy for the day. Rucking often fixes this as you warm up.
Mild stiffness in the first 5 minutes. Your joints are cold. Once you've been moving for 5 minutes, they warm up and feel fine.
Pain that doesn't improve after 10 minutes of walking. If something hurts for the first mile and then you forget about it, that's usually not serious. If something hurts the entire ruck, that's a signal to modify.
Recurring aches in the same spot across multiple rucks. Occasional soreness is normal. Soreness in the exact same location every single ruck is a pattern that suggests tissue irritation.
Compensation patterns (limping, favoring one side). If you're favoring your right knee or left foot to avoid pain in your left knee or right foot, you're loading other tissues asymmetrically. Stop and address the underlying issue.
Reduce your load or distance by 20-30% for one week, then progress more slowly.
Sharp or stabbing pain. This is different from soreness or aching. Sharp, stabbing pain often indicates acute injury or nerve involvement.
Numbness that doesn't resolve within minutes of adjusting your straps. Tingling fingers from strap compression usually goes away when you loosen the straps. If it persists despite adjustment, something else is going on.
Swelling in any joint. Swollen knees, ankles, shoulders-these indicate inflammation beyond normal exercise stress.
Pain that worsens as you continue rucking. If you take 5 more steps and the pain gets worse, stop. Don't push through.
Any sensation you'd describe as "something isn't right." Your body is smart. If your intuition says something is wrong, listen to it. Rest a few days and reassess.
Stop rucking, rest for 3-7 days, and see a healthcare professional if it doesn't resolve.

Recovery and mobility
Rucking creates stress on your body. Recovery is where the adaptation happens.
Post-ruck routine (5-10 minutes): After every ruck, spend 5-10 minutes stretching. Target your calves, hip flexors, shoulders, and thoracic spine. These are the tissues under most load during rucking.
Weekly mobility session (15-20 minutes): Once per week, do a dedicated mobility and dynamic stretching session. See Rucking Mobility Guide for specific routines.
Sleep (7-9 hours per night): This is the #1 recovery tool. During sleep, your body releases growth hormone, repairs muscle tissue, consolidates neurological adaptations, and regulates inflammation. If you're only sleeping 5-6 hours, you're sabotaging your recovery no matter what else you do.
Nutrition: Protein within 60 minutes of rucking for muscle recovery. Carbohydrates to replenish glycogen. Water to rehydrate. This matters more the harder and longer your rucks are.
Active recovery: On rest days, easy walking, swimming, yoga, or light stretching promotes blood flow and recovery without additional stress.
Track your recovery: Heart-rate variability is the clearest signal of whether you're adapting or digging a hole. Our guide to the vagus nerve and HRV for ruckers explains how to read it and when to back off.

Special populations
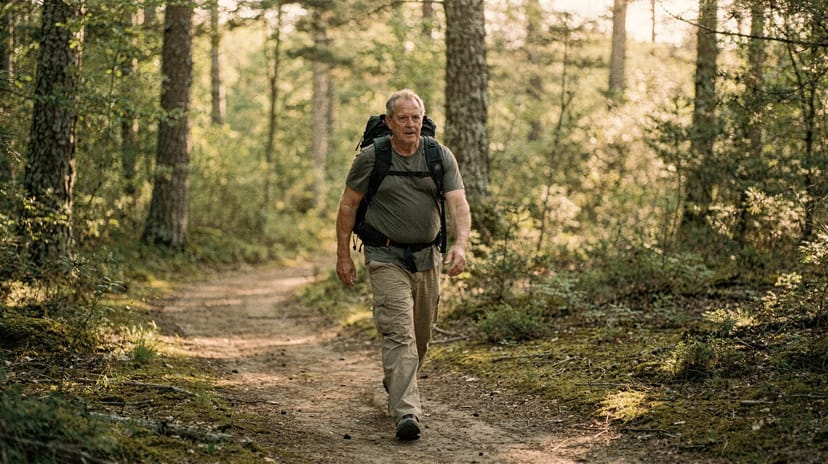
Rucking over 50
If you're over 50, you can absolutely ruck. But progression should be more conservative than for younger people.
Start lighter: Begin with 8-12 pounds, not 15-20. Your connective tissue has less natural elasticity, so it needs more time to adapt.
Progress slower: Add weight every 3-4 weeks instead of every 1-2 weeks. This gives your bones and joints adequate time to adapt.
Joint considerations: Pre-existing arthritis, lower bone density, or previous joint injuries may require medical clearance and specific modifications.
The upside: Loaded walking is exceptional for bone density maintenance. Rucking helps prevent osteoporosis, which is a huge health concern for older adults.
See our rucking for seniors guide for age-specific progressions and research-backed recommendations.
Rucking with previous injuries
Back injuries: Get medical clearance from a healthcare professional. Start with 5-10 pounds. Prioritize core strengthening-this is non-negotiable. Avoid rucking if it reproduces your original pain.
Knee injuries: Use a shorter stride (faster cadence, shorter steps). Stay lighter on weight. Do quad strengthening regularly. Consider a knee brace if recommended by a professional.
Shoulder injuries: Hip belt is mandatory-it transfers load away from your shoulders. Keep loads light. Gradually load the shoulder straps as you progress.
Arthritis: Loaded walking can actually support joint health when scaled correctly. Our guide to rucking with arthritis covers what the research says and how to manage load on affected joints.
Always get medical clearance before starting rucking if you have significant injury history. Your doctor or physical therapist can give you personalized guidance based on your specific situation.
The best injury prevention tool is boring: start lighter than you think you need to, progress slower than you want to, never skip the warm-up or prehab, and pay attention to the signals your body is sending. The ruckers who stay injury-free year after year are the patient ones.
The prevention stack
Most rucking injuries start at the feet. A cushioned shoe, merino socks, and a foot-care kit (tape, balm, patches) prevent 80% of blister, plantar, and shin issues before they start. Compression sleeves handle the calf-tightness piece that drives overuse injuries.
Three pieces of kit cover the prevention stack across feet, recovery, and monitoring. Anti-chafe for the friction injuries, a foam roller for the tissue-tightness injuries, and a watch for the overtraining injuries that don't show up until week 8.
| Role | Pick | What it prevents |
|---|---|---|
| Anti-chafe | Body Glide Original | Heels, sides of feet, hot-spot prevention. The blister insurance that fits in a pocket. |
| Foam roller | TriggerPoint GRID | Addresses calf/IT-band tightness that drives knee, ankle, and plantar issues. |
| Watch | Garmin Instinct Solar | Zone tracking + recovery metrics. Stops the overtraining injuries before they start. |
Go deeper
- Rucking knee pain - types, causes, and fix - biomechanics research, symptom decision tree, and return-to-rucking progression
- Rucking plantar fasciitis - prevention, treatment phases, and footwear recommendations
- Numb hands while rucking (rucksack palsy) - the first accessible article on this clinical condition for recreational ruckers
- The rucking prehab routine - 8 exercises targeting feet, knees, hips, back, and shoulders
- Rucking mobility guide - warm-up, cool-down, and recovery routines
- Is rucking bad for your back? - what the science says about loaded walking and spinal health
- Rucking for seniors - safe-start guide for adults over 50
Frequently Asked Questions
Intermittent knee pain under load often indicates early-stage patellofemoral irritation or IT band tightness. Drop your load by 20-30% for two weeks and focus on the quad strengthening and glute bridge exercises from the prehab routine. If pain persists or worsens, see a healthcare professional before continuing.
You'll need medical clearance first, but rucking can actually be easier on plantar fasciitis than running since there's no impact phase. Start with very light loads (5-10 pounds), ensure you have proper rucking shoes with firm soles, and do daily calf stretching. The key is progressing extremely slowly to avoid re-aggravating the tissue.
Footwear issues typically cause blisters, hot spots, or arch pain that starts within the first 15-20 minutes and gets worse throughout the ruck. Form issues usually manifest as knee pain, back pain, or fatigue patterns that develop after 30+ minutes under load. If you're getting foot pain immediately, it's likely your shoes.
Mild soreness lasting 24-48 hours is normal, especially when starting out. But 2-3 days of soreness suggests you're carrying too much weight on your shoulders instead of transferring load to your hips through the hip belt. Make sure your hip belt is snug and positioned correctly on your hip bones, not your waist.
Muscle fatigue feels like burning, heaviness, or general tiredness in large muscle groups (quads, glutes, calves) and often improves briefly when you slow down or rest. Pain you should stop for is sharp, localized to joints or specific spots, worsens when you continue moving, or causes you to limp or change your gait.
Either works, but most people find it easier to stay consistent by doing prehab on rest days. If you do it on ruck days, complete the prehab routine before you ruck as a warm-up, not after when you're already fatigued. The key is hitting it 2-3 times per week consistently rather than perfect timing.
Minor overuse injuries (early-stage knee pain, mild plantar fasciitis) typically require 1-2 weeks of modified activity followed by 2-3 weeks of gradual return to full loads. More significant injuries can require 6-12 weeks. This is why prevention through conservative progression is so much more efficient than trying to rush back from injury.