
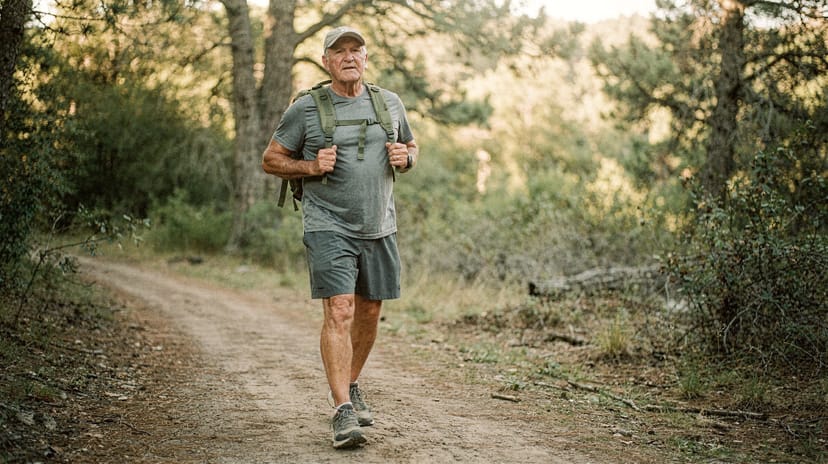
Military ruck marches are a different beast than casual neighborhood walks with a weighted pack. They demand sustained effort over long distances under real load - the kind of training that separates "I like rucking" from "I can actually ruck."
Whether you're prepping for military fitness tests, GORUCK selection events, Ranger School simulation, or just want a serious challenge, this 12-week program will build you from a 20-pound baseline to humping 35+ pounds over 12 miles like the actual Army standard.
Training for a 20-mile military ruck march? Use this 12-week program plus a Week 13 capstone. Phase 1 (Wks 1-4) builds aerobic base at 25-30 lb across 4-6 mi. Phase 2 (Wks 5-8) progresses load to 35 lb across 8-12 mi. Phase 3 (Wks 9-12) peaks at 15-18 mi long rucks. Add a 20-mile capstone in Week 13 with 35 lb at 3.0-3.5 mph sustained pace (target 6:00-6:40 finish). Events that test the 20-miler: EIB, Sapper Leader Course, Ranger School Darby, SFAS-prep. The full week-by-week schedule, pace targets, and Week 13 build are below.
20-mile military ruck training program: fast answer
A 20-mile military ruck training program should not be 20 miles every week. Build the base first: complete the 12-week program, peak at 15-18 miles under 35 lb, then add one Week 13 capstone at 20 miles. That sequence gives your feet, knees, hips, and lower back enough loaded mileage to adapt without turning the final distance into an overuse injury.
The practical target is 35 lb at 3.0-3.5 mph. That gives a 6:00-6:40 finish and matches the endurance demand of long military ruck marches better than trying to force a 15-minute-mile Army 12-miler pace for the full 20 miles. Use the rucking pace chart to set pace by load, and use the rucking prehab routine if knees, hips, or shins start talking during Phase 2.
Who This Program Is For
The 20-mile ruck march standard
This 12-week program is also the path most ruckers use to build to a 20-mile ruck march under military standards. The 20-miler shows up in EIB (Expert Infantryman Badge), Sapper Leader Course, Ranger School entry, and SFAS - typically at 35-45 lb plus weapon and water, with cutoffs in the 5-7 hour range depending on the program.
| Event | Distance | Load | Time standard |
|---|---|---|---|
| Army 12-miler (EIB / AGR) | 12 mi | 35 lb dry | 3:00:00 |
| Norwegian Foot March | 18.6 mi (30 km) | 24.2 lb (11 kg) | 4:30:00 |
| EIB 12-mile + 20-mile prep | 20 mi | 35 lb | 6:00:00 typical training cutoff |
| Sapper Leader Course | 12 mi (often 20+ in training) | 35-45 lb | 3:00:00 |
| Ranger School Darby | 12 mi + multiple 20+ mi field movements | 45-65 lb | varies |
To train for a 20-miler at military pace (3.0-3.5 mph sustained), you need three things this program builds: a sustained 4+ hour aerobic base (Phase 1), tissue tolerance to 35-45 lb load over distance (Phase 2), and the specific 15+ mile peak rucks that calibrate pace and fueling (Phase 3). Phase 3's peak session is a 16-18 mile ruck at 35 lb. Add a 20-mile capstone in Week 13 if the 20-miler is your actual test event - the dedicated build below.
Week 13: The 20-mile capstone
Run this as a single-week block on top of the standard 12-week program. Do not add a 20-miler inside Phase 3 - the program's 15-18 mi peak rucks already maximize the recoverable load Phase 3 can absorb.
| Day | Session | Load | Distance | Pace target | Notes |
|---|---|---|---|---|---|
| Mon | Recovery walk | bodyweight | 30-45 min | easy | Light, no load. Reset legs after Phase 3. |
| Tue | Strength (Phase 2 protocol) | bodyweight | 30 min | n/a | Bulgarian split squats, single-leg RDL, calf raises, plank carry. |
| Wed | Pace tune-up ruck | 25 lb | 4-5 mi | event pace | Short and fast. Calibrates the 3.0-3.5 mph sustained pace at light load so the body remembers what target pace feels like. |
| Thu | Rest | - | - | - | Sleep 8+ hours. |
| Fri | Walk + mobility | bodyweight | 30 min | easy | 15 min walk + 15 min hip / ankle / thoracic mobility. |
| Sat | 20-mile capstone ruck | 35 lb | 20 mi | 3.0-3.5 mph | Target finish 6:00-6:40. Carry water for 6+ hours. Eat 200-300 cal/hr from mile 2 on. Treat blisters proactively at every break. |
| Sun | Complete rest | - | - | - | No training. Foot care, hydration, sleep. |
Capstone session execution:
- Start fueled. Eat a 400-600 cal carb-heavy meal 2-3 hours before. Hydrate the day before, not the morning of (over-hydrating triggers GI distress and bathroom stops).
- Pace the first 5 miles. Hold 18-19 min/mile for the first quarter. Going out at goal pace (17-18 min/mi) almost always means a positive split and a brutal final 5 miles.
- Plan two scheduled stops: one at mile 7 (refuel, foot check) and one at mile 14 (refuel, blister tape). No more than 5 minutes each. Standing too long stiffens the legs.
- Fueling target: 200-300 cal/hr starting at mile 2. Energy chews, gels, or real food (PB sandwich, dates, jerky). Water + electrolyte mix - one bottle plain water, one bottle with salts.
- Pace rescue: if you're 10+ min behind goal at mile 12, accept the slip. Pushing through the final 8 mi to "claw it back" is the most common cause of late-ruck injury (Achilles, IT band, knee).
For the full 20-miler pace target by load and surface, see our rucking pace chart. For pre-event taper and event-day logistics, the Tough Ruck Boston training plan covers the same long-distance event prep mechanics.
Who this program is for
This is intermediate to advanced training. Before you start:
- You've done some rucking already (at least a few months of casual walks)
- You can comfortably ruck 3 miles at a normal pace
- You have no active injuries or joint pain
- You're willing to commit 3-4 days per week for 12 weeks
If you're brand new to rucking: Start with our rucking form guide and how heavy should your ruck be first. Come back to this program in 4-6 weeks.
If you have joint issues: Work through our rucking prehab routine for 2 weeks before starting Phase 1.
The Program Philosophy
Military rucking isn't about speed. It's about moving efficiently under load for hours.
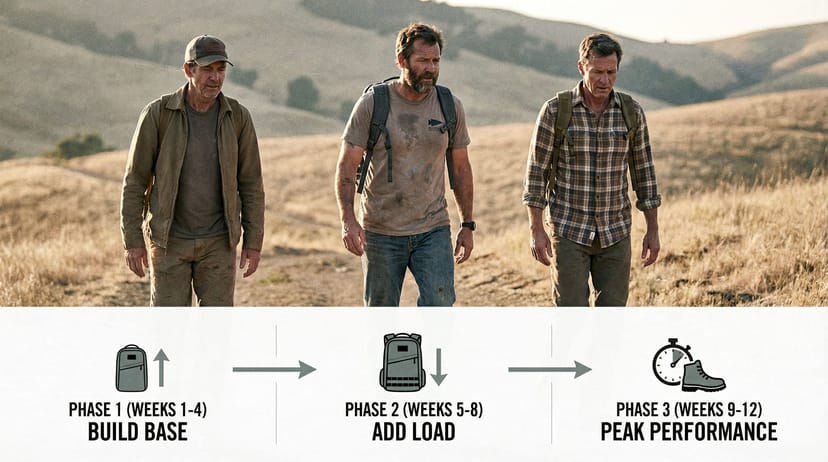
The goal is time on feet at a sustainable pace, not crushing yourself every session. This program follows a three-phase progression:
- Build the base (Weeks 1-4): Light load, moderate distance, consistent volume
- Add load and distance (Weeks 5-8): Heavier weight, longer marches, terrain variation
- Peak and simulate (Weeks 9-12): Race-weight loads, full distances, event conditions
Each phase has one "long march" day per week where you push distance and time. The other sessions are shorter, higher-intensity work or supportive cross-training.
Want a program built to your current fitness level and event date?

Phase 1: Base Building (Weeks 1-4)

Goal: Adapt your body to load and develop aerobic capacity.
Phase 1 Weekly Structure
| Day | Workout | Load | Distance | Pace Target |
|---|---|---|---|---|
| Monday | Long March | 20-25 lbs | 3-5 miles | 18-20 min/mile |
| Wednesday | Weight + Speed | 15 lbs | 2 miles | 16-17 min/mile |
| Friday | Long March | 20-25 lbs | 3-5 miles | 18-20 min/mile |
| Saturday (optional) | Cross-train | - | - | Easy yoga, swim, bike |
Week Breakdown
Week 1
- Mon: 3 miles, 20 lbs (60 min)
- Wed: 2 miles, 15 lbs at 16:30/mile (32 min)
- Fri: 3 miles, 20 lbs (60 min)
Week 2
- Mon: 4 miles, 20 lbs (80 min)
- Wed: 2 miles, 15 lbs at 16:00/mile (32 min)
- Fri: 4 miles, 20 lbs (80 min)
Week 3
- Mon: 4 miles, 22 lbs (82 min)
- Wed: 2 miles, 15 lbs at 16:00/mile + 8 × 30-second hill repeats (35 min total)
- Fri: 5 miles, 22 lbs (102 min)
Week 4
- Mon: 5 miles, 25 lbs (105 min)
- Wed: 2 miles, 15 lbs at 15:30/mile (31 min)
- Fri: 5 miles, 25 lbs (105 min)
Phase 1 Notes
- Rest days matter. Take Tue, Thu completely off or do light mobility work.
- Pace over perfection. If your long marches slow down toward the end, that's fine. Aim for even splits, not fast finishes.
- Don't skip the Wednesday workouts. The lighter, faster sessions train your cardiovascular system while giving your joints a break from heavy load.
- Fuel properly. Eat carbs and protein 2-3 hours before each session. See the nutrition section below.
By the end of Phase 1, your hips, knees, and lower back should feel adapted. If you're still experiencing sharp pain (not muscle soreness), take an extra rest day and consider working through prehab exercises before moving to Phase 2.
Phase 2: Load Progression (Weeks 5-8)

Goal: Increase weight and distance. Introduce terrain variation.
Phase 2 Weekly Structure
| Day | Workout | Load | Distance | Pace Target |
|---|---|---|---|---|
| Monday | Long March | 30-35 lbs | 5-8 miles | 19-21 min/mile |
| Tuesday | Strength | Bodyweight + weights | - | Squats, lunges, carries |
| Thursday | Hill or Speed Work | 20 lbs | 2.5-3 miles | Varied terrain, fast |
| Saturday | Long March | 30-35 lbs | 5-8 miles | 19-21 min/mile |
Week Breakdown
Week 5
- Mon: 5 miles, 30 lbs (105 min)
- Tue: Lower body strength (squats, Bulgarian split squats, carries)
- Thu: 2.5 miles, 20 lbs on varied terrain at 17:00/mile (42 min)
- Sat: 6 miles, 30 lbs (120 min)
Week 6
- Mon: 6 miles, 30 lbs (120 min)
- Tue: Lower body strength + core (farmer carries, planks, dead bugs)
- Thu: 3 miles, 20 lbs on hills at 18:00/mile (54 min)
- Sat: 6 miles, 32 lbs (125 min)
Week 7
- Mon: 6 miles, 32 lbs (125 min)
- Tue: Lower body strength + loaded carries (trap bar, dumbbell carries)
- Thu: 2.5 miles, 25 lbs at tempo pace 16:30/mile (41 min)
- Sat: 7 miles, 32 lbs (140 min)
Week 8 (Deload week - lighter overall volume)
- Mon: 5 miles, 32 lbs (105 min)
- Tue: Light mobility and 4 × 3-minute carries at moderate load
- Thu: 2 miles, 20 lbs easy (38 min)
- Sat: 6 miles, 30 lbs easy (120 min)
Phase 2 Terrain Notes
Start mixing in:
- Trails: Uneven surfaces build stabilizer muscles and proprioception.
- Hills: Include 5-10% grades. Don't just power up; focus on steady, controlled movement.
- Pavement: Mix it in for speed work. Road rucking on hard surfaces demands more from your joints.
See our pavement vs. trail vs. treadmill guide for terrain strategy.
Phase 2 Strength Work
Tuesday should hit lower body and posterior chain. Sample session:
- 4 × 6 back squats (heavy, 3-min rest)
- 3 × 8 Bulgarian split squats per leg
- 3 × 30-second farmer carries at 70-80% max load
- 3 × 10 glute bridges
- 2 × 30-second dead bug holds
This isn't bodybuilding. Keep rep ranges moderate and focus on moving heavy things safely.

If your knees or hips hurt during Phase 2, stop the progression. Spend an extra week at Phase 1 volume. Sharp pain is a signal; soreness is adaptation.
Phase 3: Peaking (Weeks 9-12)
Goal: Build to race weight. Simulate event conditions.
This is where you prove you can ruck like the Army standard: 12 miles, 35 lbs, under 3 hours.
Phase 3 Weekly Structure
| Day | Workout | Load | Distance | Pace Target |
|---|---|---|---|---|
| Monday | Strength or Recovery | Bodyweight + light load | - | Maintenance |
| Wednesday | Tempo or Hill | 25-30 lbs | 3-4 miles | Fast but controlled |
| Friday | Long March | 35-40 lbs | 8-12 miles | 19-21 min/mile |
| Sunday (optional) | Easy ruck or cross-train | 20 lbs | 2-3 miles | Conversational pace |
Week Breakdown
Week 9
- Mon: Lower body maintenance (3 × 5 squats, 3 × 8 carries)
- Wed: 3 miles, 25 lbs on hills at 18:30/mile (56 min)
- Fri: 8 miles, 35 lbs (160 min ~ 20 min/mile)
- Sun: 2 miles, 20 lbs easy (38 min)
Week 10
- Mon: Lower body + core (4 × 3 squats, sled push, planks)
- Wed: 3.5 miles, 30 lbs tempo at 18:00/mile (63 min)
- Fri: 9 miles, 35 lbs (180 min ~ 20 min/mile)
- Sun: 2 miles, 20 lbs easy (38 min)
Week 11
- Mon: Lower body maintenance (light day)
- Wed: 4 miles, 30 lbs at 18:30/mile (74 min)
- Fri: 10 miles, 35 lbs (200 min ~ 20 min/mile)
- Sun: 2 miles, 20 lbs easy (38 min)
Week 12 (Race week - taper)
- Mon: Light mobility, no heavy load
- Wed: 2 miles, 25 lbs at goal pace (40 min)
- Fri: Event day or final practice
- Sun: Complete rest
Phase 3 Race Simulation
In weeks 10-11, pick one session to fully simulate your target event:
- Same route (or similar terrain)
- Same load (35-45 lbs)
- Same start time (if your event is early morning, start early)
- Same gear and hydration strategy you'll use
- Same nutrition timing
This is your rehearsal. If something doesn't work, you'll know before race day.

Understanding Pace Targets
This program uses 19-21 min/mile as the gold standard for heavy rucking. Why that range?
- 19 min/mile: A strong pace. Achieves the Army standard (12 miles, 35 lbs, under 3 hours: 180 min ÷ 12 = 15 min/mile). Our 19 min/mile gives buffer.
- 20 min/mile: Sustainable for most people under load for 2+ hours.
- 21 min/mile: Starting pace. As you get stronger, you'll naturally speed up.
You don't need to hit these exactly. If you're at 21-22 min/mile consistently and not struggling, you're on track. If you're at 16-17 min/mile early on, you're burning matches unnecessarily.
See our rucking pace chart for detailed breakdowns by distance and load.
Military ruck marches don't reward speed; they reward efficiency. Focus on smooth, consistent effort. The best ruckers look relaxed even when carrying heavy loads.
Injury Prevention
Heavy rucking is low-impact compared to running, but it's not zero-impact. The load on your knees, hips, and lower back can add up.
The Big Three Injury Hotspots
1. Knee Pain
- Root cause: Poor load distribution, weak quads, weak stabilizers
- Prevention: Strength work (squats, split squats). Ensure your ruck sits high and tight on your hips.
- Warning sign: Sharp pain during or immediately after rucking. Soreness is fine; pain is not.
2. Lower Back Pain
- Root cause: Anterior pelvic tilt, weak core, overprogression
- Prevention: Maintain neutral spine. Engage your core during marches. Don't let the ruck pull you forward.
- Warning sign: Pain that radiates down your legs or gets worse the next day.
3. Hip Flexor or Glute Tightness
- Root cause: High mileage without mobility work
- Prevention: Spend 10 minutes post-ruck on dynamic stretches (leg swings, deep lunges, hip circles).
- Warning sign: Stiffness that limits your range of motion the next day.
Prehab Routine (2x per week, 15 min)
Run this on your off days to build resilience:
- 2 × 10 clamshells per side
- 2 × 10 glute bridges (pause 2 sec at top)
- 2 × 10 Copenhagen adductor squeezes per side
- 2 × 30-second glute med hold per side (side plank position)
- 2 × 10 bird dogs per side
- 2 × 10 dead bugs
- 10 deep lunges per leg
See our full rucking prehab routine for videos and modifications.
Nutrition for Heavy Rucking
Rucking 8-12 miles with 35+ pounds demands fuel.
Before Your Ruck (2-3 Hours Prior)
- Carbs + protein. Aim for 30-50g carbs + 10-20g protein.
- Examples: Toast + peanut butter + banana, oatmeal with berries, rice + chicken, bagel + cheese.
- Hydration: Drink 16-20 oz water from a Nalgene Wide Mouth 32oz bottle 2-3 hours before. Avoid huge volumes right before (bloating is real).
During Your Ruck (For 90+ Minutes)
- Short marches (under 90 min): Water only.
- Long marches (90-180 min): Add carbs every 30-40 minutes. 30-60g carbs/hour total.
- Sports drink (Gatorade, Liquid IV)
- Energy gels or chews
- Pretzels or crackers (yes, really - they work)
- Dates or dried fruit
- Electrolytes matter. Sweat loss = sodium loss. Replenish both.
After Your Ruck (Within 2 Hours)
- Carbs + protein in a 3:1 or 4:1 ratio. 40-60g carbs + 15-20g protein.
- Examples: Chocolate milk, rice + lean meat, pasta + tuna, banana + Greek yogurt.
- Why it matters: Recovery carbs refill glycogen. Protein repairs micro-tears from load.
Real talk: You don't need expensive supplements. Real food works great. But if you like sports nutrition products, use them consistently in training so your stomach knows what to expect on event day.
Gear for Heavy Rucking
At 35+ pounds, your ruck choice matters. Five items decide whether your hips, feet, and shoulders survive 12 weeks of progressive load - the pack that distributes weight to your hip belt instead of your traps, socks and anti-chafe that keep your feet intact through 8+ mile rucks, hydration sized for two-hour sessions, and a stuffable backup pack for travel weeks.
| Role | Pick | Why it matters under load |
|---|---|---|
| Heavy-load pack | 5.11 RUSH 24 | 37L MOLLE platform. Frame sheet keeps the load off your lumbar at 40+ lbs. |
| Heavy-load alt | Direct Action Dragon Egg Mk II | 25L with internal weight pocket. Lower profile than RUSH 24 for road work. |
| Socks | Darn Tough Light Hiker | Merino blend, lifetime warranty. The "no-blister" baseline for high-volume programs. |
| Anti-chafe | Body Glide Original | Apply to inner thighs, underarms, and trapezius before any ruck over 60 minutes. |
| Hydration | Nalgene 32oz Wide-Mouth | Two liters covers 90+ minutes of summer rucking. Wide mouth fits LMNT packets. |
The sub-sections below cover the "why" - what to look for if you're picking a different pack, sock, or fueling system than the ones above.
Backpack
Look for:
- Load capacity: 35-50 lbs minimum
- Hip belt: Non-negotiable. The belt should carry 60-70% of the load, not your shoulders.
- Back panel: Padded, contoured to fit your spine
- Compartments: Multiple pockets help distribute weight (don't throw everything in one pack)
Options like the 5.11 RUSH 24 or Direct Action Dragon Egg handle heavy loads well. See our best rucking gear guide for more comparisons.
Footwear
Your shoes take a beating under load.
- Cushioning: More than casual shoes, but not marshy. You need ground feel.
- Support: Reinforced heel counter. Arch support (or aftermarket insoles if needed).
- Terrain-specific: Trail shoes for trails, hiking boots for rocks, sturdy running shoes for pavement.
Darn Tough socks and Body Glide Original for foot care during long marches are worth the investment. See our best rucking shoes by terrain guide for footwear recommendations by surface.
Load (Weight Inside)
Most ruckers use:
- Weighted plates (Ruck Plates, DIY sandbags)
- Water bottles (1 liter = ~2.2 lbs, cheap and adjustable)
- Books or spare clothes (low cost, good distribution)
Distribution: Pack heaviest items near your back panel, mid-pack. Even distribution left-right. Avoid top-heavy.

If you're training for GORUCK or Ranger Indoc, use the exact same ruck and load setup you'll use on event day. Your body adapts to specific gear. Switching rucks week-of means losing efficiency when you need it most.
Recovery Between Training Weeks
This program is volume-focused, not intensity-focused. That means recovery is as important as the training itself.
Sleep
- Aim for 7-9 hours. Heavy training demands it.
- During the 12 weeks, prioritize sleep over social life (yes, really).
- Poor sleep = slower recovery = higher injury risk.
Mobility & Stretching
- 10 minutes of dynamic stretching post-ruck (leg swings, lunges, hip circles).
- 15 minutes of static stretching on rest days (hold 30-60 sec per stretch).
- Foam rolling lower legs, quads, and glutes 2-3x per week (2 min per muscle group).
Active Recovery
- Walk casually for 20-30 min on rest days. Movement aids recovery without taxing your system.
- Swimming is excellent (low-impact, full-body).
- Yoga (especially hip and hamstring focused) is great on Thu or Sat.
Deload Week (Every 4 Weeks)
Every 4th week, reduce volume by ~30%. This is built into the program (e.g., Week 8, Week 12). Don't skip it. Deloads are when adaptation happens.
What to Expect: Real Timeline
Week 1-2: Your legs will be sore. Hips and lower back might tighten. This is normal. Stretch and keep moving.
Week 3-4: Soreness fades. Rucking starts feeling more sustainable. Small pace improvements.
Week 5-6: First mental challenge. 30+ lbs feels heavy. Your aerobic system is adapting. Trust the process.
Week 7-8: Noticeable strength gains. Carrying 30+ lbs that felt hard in Week 5 is now manageable.
Week 9-10: You're rucking 8+ miles. This is long. Mental toughness becomes the limiter, not fitness.
Week 11-12: You've done it. If you execute race day like you trained, you'll crush the standard.
Troubleshooting Common Issues
"My legs are too sore to do the Wednesday workout."
- You're going too hard on Mondays. Scale back 1-2 min/mile pace.
- Or: Increase rest between long marches from 2 to 3 days (do Wed workout Tue instead).
- Soreness is okay. Inability to train is not.
"I'm not hitting pace targets."
- You might be undertrained for that load. Stay at Phase 1 or 2 for an extra 2-4 weeks.
- Or: Your gear is suboptimal (loose ruck, poor load distribution). Fix it.
- Or: You're not fueling enough. Eat more carbs before long sessions.
"I feel fine but my knees hurt after rucking."
- Stop and recover. Do the prehab routine for 2 weeks, no heavy rucking.
- Once pain-free, return to Phase 1 and progress slower (add 1 mile every 3 weeks, not 1 week).
"I'm bored with the same route."
- Mix terrain. Trails, hills, pavement all build different adaptations.
- Find 3-4 routes that let you hit your distance targets, rotate them.
- Or: Ruck with a friend and keep each other accountable.
Final Thoughts
This program isn't flashy. It's not "tactical training for warriors." It's structured, evidence-based progression that works because it respects how human bodies adapt to load.
You're building:
- Aerobic capacity to sustain effort for hours
- Strength to carry heavy things without breaking
- Mental toughness to push through when it gets hard
- Efficiency to move well under fatigue
By week 12, you won't just be able to ruck 12 miles in under 3 hours. You'll have the capacity to do harder things - rucks with more load, longer distances, tougher terrain.
That's the point. Military ruck marches aren't the end goal. They're proof that you're built for challenge.
Now get after it.
Related Resources
- Rucking Form Guide - Perfect your stride and load carry
- How Heavy Should Your Ruck Be - Weight selection by fitness level
- Rucking Prehab Routine - Bulletproof your joints
- Rucking Pace Chart - Pace targets by distance and load
- How Often Should You Ruck - Frequency and recovery
- Best Rucking Gear 2026 - Backpack and load reviews
- Best Rucking Shoes by Terrain - Footwear for different surfaces
- Pavement vs. Trail vs. Treadmill - Where to ruck for best results

Frequently Asked Questions
The standard 20-mile military ruck training program is a 12-week base build followed by a Week 13 capstone. Weeks 1-4 establish aerobic base at 25-30 lb across 4-6 mi. Weeks 5-8 progress to 35 lb across 8-12 mi with terrain variation. Weeks 9-12 peak at 15-18 mi long rucks at 35 lb. Week 13 is the 20-mile capstone at 35 lb targeting 3.0-3.5 mph sustained pace (6:00-6:40 finish). This is the build path used by EIB candidates, Sapper Leader Course aspirants, Ranger School entrants, and SFAS-prep ruckers. The full schedule, pace targets, and Week 13 day-by-day are in this article.
A 20-mile ruck march at military standards (35-45 lb, 5-7 hour cutoff depending on event) is a 12-week build from a 6-8 mile base. Phase 1 (weeks 1-4) establishes a sustained aerobic base at 25-30 lb. Phase 2 (weeks 5-8) progresses load to 35-45 lb at 8-12 mile distances. Phase 3 (weeks 9-12) peaks at 15-18 mile rucks with one optional 20-mile capstone in week 13. Pace target is 3.0-3.5 mph sustained, which is what events like EIB, Sapper Leader Course, and SFAS-prep selection courses test for.
The standard military training pace for a 20-mile ruck march is 3.0-3.5 mph sustained, or roughly 18-20 minutes per mile. That translates to a 6:00-6:40 finish for the full 20 miles. The Army's 12-mile event has a tighter 15:00/mile cutoff (3 hours total at ~4.0 mph), but 20-mile events typically allow slower pace because the distance and load combine to tax aerobic capacity more than speed. Train to hit your target pace at 35-45 lb during Phase 3 peak rucks, not at lower training weight.
Scale back to the previous week's load and distance, then progress more slowly. Add only 1 mile every 2-3 weeks instead of weekly, or increase weight by 2-3 lbs instead of 5 lbs. The program assumes steady progression, but your body might need more time to adapt.
Yes, but check your branch's specific standards first. The Army standard is 12 miles at 35 lbs in under 3 hours, but Marines might require different distances or weights. You can adjust the final phase loads and distances to match your target event.
Jump back in at the previous week's volume rather than where you left off. If you miss Week 6, restart at Week 5 loads and distances. Don't try to make up lost time by skipping ahead, as this increases injury risk significantly.
Wear your event boots for at least 50% of your training, especially the long marches in Phase 3. However, mixing in other supportive footwear during shorter sessions can help prevent overuse injuries and give your feet variety in loading patterns.
Complete the final week of each phase without significant pain or inability to maintain pace targets. If Week 4 leaves you struggling to hit 20 min/mile pace with 25 lbs, repeat Weeks 3-4 before progressing to Phase 2's 30+ lb loads.
Take at least 48 hours between heavy load sessions (Monday to Friday, Friday to Monday). Your joints and connective tissue need this recovery time. The Wednesday speed work uses lighter loads specifically to maintain fitness while allowing recovery.
Stick to the program's structure, especially the Tuesday strength work in Phase 2. Adding extra running or intense lifting increases injury risk and can interfere with recovery between ruck sessions. The program already balances volume with adaptation time.
Yes, and group training improves adherence on this kind of 12-week block. Find a local ruck club for the Saturday long marches especially - having other people committed to showing up is the single biggest factor in finishing a long base-building plan. The Ruck Authority directory lists clubs across 35+ countries, many of which run weekend long rucks built around exactly this kind of programming.


