
Flat Rucking Got You Here. Hills Get You Everywhere Else.
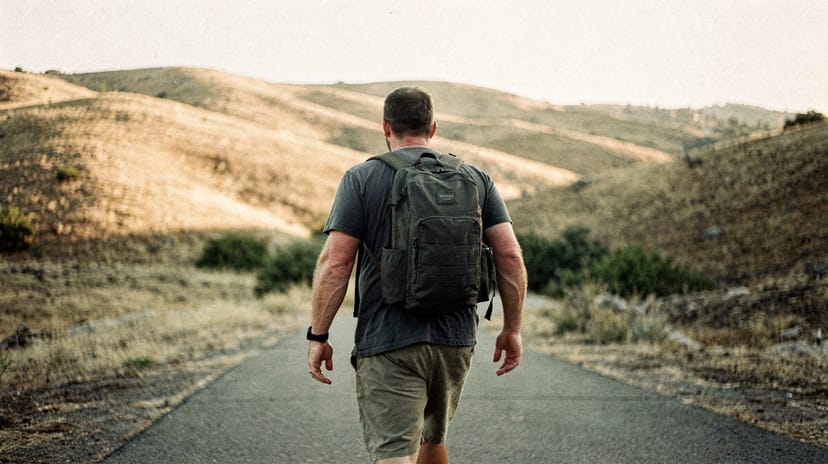
Flat rucking builds your aerobic base. You can log miles, manage steady effort, and dial in your pace. It's foundational. But if you've been rucking on pavement for a few weeks and want to accelerate your fitness gains, elevation is the fastest way to get there.
Hills do something pavement can't: they force your body to work harder without you adding more weight. A 10% grade ruck with 20 lbs feels roughly like a flat ruck with 35 lbs, but your joints take a fraction of the pounding. Hills teach power, resilience, and the mental toughness that shows up in every other part of your training.
This guide breaks down why hills work, how to train them safely, and what to do if the closest elevation near you is a parking garage (spoiler: that's enough).
Why Hills Change Everything
The Physics of Elevation
When you ruck uphill, you're not just overcoming air resistance and rolling friction. You're lifting your bodyweight plus your pack against gravity with every step. This changes everything about the training stimulus.
Here's what the data shows: a 10% grade hill reduces your ruck pace by roughly a third compared to flat ground. But here's the cheat code - your cardiovascular demand roughly doubles. Your heart rate climbs into zone 3 or 4 even at a walking pace. That's why a 30-minute hill ruck can feel like work that would normally take 60 minutes flat.
Uphill training creates concentric loading on your glutes, calves, and quads. These are powerful, resilient muscles when trained correctly. Your entire posterior chain lights up. Downhill, by contrast, creates eccentric loading - the muscle is lengthening under tension. This teaches deceleration and builds joint resilience, but it also creates more muscle soreness initially and higher injury risk if you rush it.
The net effect: hills add training stimulus without adding pack weight. You get the cardio hit, the power development, and the durability gains of a heavier ruck - all without the joint stress of carrying 40 lbs up a mountain.
Uphill vs. Downhill (You Need Both)
Most people love uphill rucking. It's hard, the effort is obvious, and you feel accomplished when you reach the top.
Most people neglect downhill. It's boring, it's easy to mess up your knees if you don't know what you're doing, and there's no ego in walking slowly down a hill.
Train both. Here's why:
Uphill teaches power and cardio. Your quads, glutes, and calves do the work. Heart rate spikes. You build the engine that accelerates your fitness.
Downhill teaches deceleration and eccentric strength. You're teaching your quads, knees, and hips to control momentum. This is critical for anyone doing mountain events, trail rucks, or military selection courses where you spend as much time descending as ascending.

Hill Rucking Form: The Details Matter
Four items earn their slot before you take a hill seriously. The pack, the shoes, the poles, and the watch - each one solves a specific failure mode that only shows up on grade.
| Role | Pick | What it solves on hills |
|---|---|---|
| Pack | 5.11 RUSH 24 | Frame sheet + sternum strap keep weight high. Stops the side-to-side sway on descents. |
| Shoes | Salomon XA Pro 3D | Aggressive lugs grip steep dirt. Reinforced toe box absorbs the downhill braking force. |
| Poles | Black Diamond Trail | Reduces knee impact 20-30% on 15%+ descents. Folds small enough to clip to your pack. |
| Watch | Garmin Instinct Solar | Live elevation gain, barometric altitude, Zone 2 alerts on steep climbs. |
Uphill Form
When you're climbing, everything changes from flat rucking.
Stride: Shorten your stride. You're not striding through - you're driving through. Each step is deliberate and powerful. Think 2-foot-per-second pace on a steep hill, not 3-4.
Posture: Lean from your ankles, not your waist. Your torso should stay mostly upright. Bending at the waist puts stress on your lower back and makes the hill harder. Lean slightly forward from the ankles, and let your pack sit high on your shoulders.
Foot strike: Drive through your heels. This engages your glutes and quads more effectively than landing on your midfoot. On a steep climb, heel-first is more stable and powerful.
Arms: Pump harder. Your arms and upper body help drive you uphill. This isn't wasted motion - it's efficient power transfer.
Breathing: Breathe hard. This isn't a sign you're going too fast (unless you can't speak at all). Uphill rucking is supposed to be intense. If your breathing is steady and easy, you're going downhill or you live in Colorado.
Downhill Form
Downhill is where people get hurt. Most knee pain from rucking comes from descents, not ascents.
Knees: Keep your knees slightly bent the entire time. Never lock them straight. Locked knees turn your legs into rigid shock absorbers - bad. Slightly bent knees let your muscles absorb the impact.
Stride: Shorter steps on the way down. The temptation is to let gravity do the work and take long strides. Resist this. Short, controlled steps keep you stable and protect your knees.
Foot strike: Midfoot or heel-first. Let your foot land under your center of gravity, not out in front of you. Landing far in front (overstriding) puts massive eccentric load on your quad - a recipe for knee pain and DOMS. Shoes like the Salomon XA Pro 3D with aggressive tread and good ankle support make a dramatic difference on steep descents - they let you focus on form instead of fighting to stay upright.
Pace: Slower than you think is necessary. On a steep descent with a pack, walking slowly isn't boring - it's smart.
Pack positioning: Make sure your pack isn't pulling you forward or shifting side to side. A well-fitted pack like the 5.11 RUSH 24 with the weight sitting high makes downhill rucking easier and safer.
On steep terrain (15%+ grade), trekking poles reduce the impact on your knees by 20-30%. One pole in each hand, planted ahead of you on the descent. This distributes the load to your shoulders and arms instead of concentrating it all on your knees. The fitness benefit is slightly lower, but the durability gain is worth it - the Black Diamond Trail trekking poles are a solid mid-range pair that won't break the bank.

Five Hill Workouts You Can Actually Do
Pick one or two of these and rotate them into your weekly schedule.
Workout 1: Hill Repeats (The Classic)
This is the bread and butter of hill training. Find a hill between 200-400 meters long with a consistent 8-15% grade.
The structure:
- Ruck up the hill at 80% effort (you can speak in short sentences, but you're definitely working)
- Walk down easy for recovery (2-3 min)
- Repeat
- Start with 4 repeats, work up to 8 over 4-6 weeks
- Pack weight: 20-25 lbs
- Rest 1-2 minutes at the bottom between repeats
Why it works: Hill repeats give you the cardiovascular stimulus of hard intervals without the impact of running. Each repeat teaches your body to recover quickly, and the repeated efforts build power.
Progression: Add one repeat per week until you hit 8. Then add 5 lbs to your pack or find a slightly steeper hill.
Workout 2: Stair Intervals
No natural hills? Stairs work identically.
The structure:
- Find a staircase: stadium stairs, parking garage, apartment building with accessible stairs
- Ruck up at a hard pace (5-10 flights depending on the height)
- Walk down easy for recovery
- 6-10 rounds
- Pack weight: 20-30 lbs
- Rest 1-2 minutes between rounds
Why it works: Stairs compress a hill workout into a smaller space. The steep grade (often 25-30%) means fewer repeats needed for the same stimulus.
The parking garage secret: Parking garages are underrated training locations. They have ramps for descent (saving your knees compared to stairs), consistent grades, and you can adjust your route to make it longer or shorter. Start on level 1, ruck to level 4 or 5, and come down the ramp. Repeat.
Workout 3: Treadmill Incline Ruck
For people without hills, this is your answer.
The structure:
- Set treadmill to 10-15% incline
- Speed: 2.5-3.0 mph (about 20-24 min/mile)
- Duration: 20-30 minutes sustained
- Pack weight: 15-25 lbs
- Intensity: "zone 2-3" - you can hold a conversation with effort, but you're definitely working
Why it works: The cardiovascular stimulus is nearly identical to a real hill. Your body doesn't care if it's a mountain or a machine - it responds to grade.
The flat-lander special: If you live somewhere truly flat (Florida, Kansas, West Texas), treadmill incline rucking is your hill training. Don't write it off as "not real." The adaptation is identical.
Pro setup: Most gyms allow backpacks on treadmills if you hold the straps and don't use them for balance. Some require you to use the back handles instead. Wear a small pack (not a 30L hiking pack) to make this work.
Workout 4: The Roller (Mixed Terrain)
Not all terrain is uniform. This workout teaches you to pace effort, not pace.
The structure:
- Find a route with multiple small to medium hills (not one massive climb)
- Ruck the whole route at a steady effort level, not steady pace
- Your pace will vary with the terrain - faster on downhills and flats, slower on uphills, but your heart rate and breathing stay consistent
- Duration: 45-60 minutes
- Pack weight: Moderate (20-30 lbs)
Why it works: Real terrain isn't uniform. Rolling routes teach you to manage effort on variable grades. This is the closest you can get to trail conditions without actually being on a trail.
How to pace it: Use your breathing and heart rate as the guide, not your watch. Aim for "zone 2-3" the whole time. Slow down on hills until your breathing settles back to your target zone. A Garmin Instinct 3 Solar helps you track elevation gain and maintain pace consistency across varying terrain.
Workout 5: The Long Climb
For people training for mountain rucks, Bataan, or military selection courses.
The structure:
- Find the longest, most sustained uphill you can
- Ruck it at a steady, sustainable pace
- Duration: 60-90 minutes
- Pack weight: Moderate to challenging (25-35 lbs depending on event)
- Pace yourself: If you're breathing through your mouth in the first 10 minutes, you started too fast
Why it works: These events test your ability to move uphill for extended duration. This workout builds that capacity.
The pacing trick: Start conservatively. The first 15 minutes should feel easy. The middle 30-45 minutes is where the work happens. The final 15 minutes tests whether you went out too hard. If you can still think straight and your pace hasn't dropped, you paced it right.

Training for Hills When You Live Somewhere Flat
The good news: you don't need mountains.
Stairs: Any multi-story building works. Office building, apartment complex, parking garage. Even 4-5 flights of stairs creates enough of a grade for training stimulus. The downside: the repetitive stepping is harder on your knees than gradual hill inclines.
Parking garages: Underrated. A typical parking garage ramp has a 5-8% grade (sometimes more). You can ruck up multiple levels and come down the ramp. This gives you both the uphill work and a gentler descent.
Treadmill incline: As covered above. Set it to 10-15% and you get nearly identical stimulus to outdoor hills.
Bridges and overpasses: Many highway overpasses and pedestrian bridges have noticeable grades. They're usually short, but they work.
Artificial hill runs: Some gyms have "ski erg" or rowing-based hill simulation machines. These aren't ideal (you're not actually rucking), but they're better than nothing.
Your body doesn't care about the source of the grade. A 10% incline is a 10% incline whether it's a mountain, a stairwell, or a treadmill. The stimulus is identical. What changes is the impact (stairs are higher impact), the proprioceptive demand (real terrain requires more balance), and the mental experience (mountains feel more rewarding). But the cardiovascular and muscular adaptation is the same.
Programming Hills Into Your Week
Don't add hill work on top of your existing rucking volume. Swap it in.
The basic progression:
- Weeks 1-2: 1 hill session per week (start with Workout 1 or 2), reduce pack weight by 5-10 lbs, keep other rucks easy
- Weeks 3-4: Still 1 hill session per week, start adding back pack weight (2-3 lbs per week)
- Weeks 5-6: Increase hill volume (more repeats or longer duration) before increasing weight
- Week 7+: You can add a second hill session per week if you want, but don't exceed 2
The critical rule: Add volume on hills before adding weight on hills. This protects your knees and gives your stabilizer muscles time to adapt.
Weekly structure example:
- Monday: Easy ruck 30 minutes, flat terrain, 15 lbs
- Wednesday: Hill repeats or stairs (your choice), 20 lbs, 8-10 reps
- Friday: Moderate ruck 45 min, mixed terrain, 20 lbs
- Saturday or Sunday: Optional - a long easy ruck 60+ minutes, flat, 15-20 lbs
Hill rucking is a stimulus, not a punishment. The goal is to get stronger, not to accumulate suffering.
Downhill Training (The Neglected Half)
Most people skimp on downhill work because it seems easier. It's not easier - it's different.
The eccentric loading on your quadriceps when you descend is substantial. You'll likely experience more soreness (DOMS) from downhill work than uphill work initially. This is normal and doesn't mean you did something wrong.
Building downhill tolerance:
- Start with short downhill sections (50-100 meters) and walk them slowly
- Build up to longer descents over 2-3 weeks
- Expect muscle soreness in your quads for 24-48 hours
- This is an adaptation response, not an injury
Critical for: Anyone doing mountain rucking events, trail rucks, or selection courses where you spend 40-50% of the time descending. If your event has elevation loss, your training needs to match.
Knee pain on downhill? Usually one of three causes:
- Too much weight too soon
- Too fast (overconfident on the descent)
- Overstriding (landing with your foot far in front of your body)
All three are fixable. Reduce weight, slow down, and shorten your stride.
Common Hill Mistakes (And How to Avoid Them)
Mistake 1: Going too heavy too soon You can handle 35 lbs on flat ground. That doesn't mean you can handle 35 lbs on hills. Start 5-10 lbs lighter than your flat ruck weight. Build volume first, weight second.
Mistake 2: Only training uphill Downhill work is critical for durability and for any event that has elevation loss. Don't skip it just because it's "easier."
Mistake 3: Starting hill work without a flat base If you've been rucking for fewer than 4 weeks, do that on flat ground first. Your aerobic base and joint resilience need to be established before you add hill work.
Mistake 4: Locking your knees on descent Straight, locked knees are shock absorbers with no give. Bent knees let your muscles absorb impact. Always maintain a slight bend.
Mistake 5: Adding hill work on top of existing volume Your body has a total training load threshold. If you're already doing 3 rucks per week at 45-60 minutes each, don't add a fourth hill ruck. Replace one of your existing rucks with hill work.
Progression and Periodization
Hills are demanding. They should make up about 20-30% of your weekly rucking volume, not 100%.
A sustainable long-term approach:
- Weeks 1-4: Build your flat ruck base (3-4 easy to moderate rucks per week)
- Weeks 5-12: Add 1 hill session per week, keep other rucks easy
- Weeks 13-16: Increase hill intensity (more repeats, longer climbs) or add a second hill day
- Weeks 17-20: Deload week (reduce volume 40-50%)
- Repeat
This pattern prevents burnout and lets your body adapt without grinding down your joints.
Your Next Step
Pick one of the five workouts above. If you have natural hills or stairs nearby, go with Workouts 1, 2, or 4. If you're flat, start with treadmill incline rucking. Give yourself 4 weeks on that single workout before adding variety.
Hills feel hard because they are hard. That hardness is where the adaptation lives.
Related Reading
- Rucking Pace Chart - Find Your Target Speed
- Pavement vs. Trail vs. Treadmill - Which Is Best?
- Rucking Form Guide - Master the Basics
- Rucking Knee Pain - Causes and Solutions
- Speed Rucking Intervals - Advanced Cardio
- Training Programs - Full Schedule
Frequently Asked Questions
Start 5-10 lbs lighter than your flat ruck weight. If you normally carry 30 lbs on flat ground, start with 20-25 lbs on hills. Build volume first over 2-3 weeks, then add weight back gradually.
No. Hill work should make up only 20-30% of your weekly rucking volume, typically one session per week initially. Hills create more muscular stress than flat rucking, and your stabilizer muscles need recovery time between sessions.
Downhill creates eccentric loading where your muscles lengthen under tension, causing more delayed onset muscle soreness (DOMS) than the concentric work of climbing uphill. This quad soreness lasting 24-48 hours after descents is normal adaptation, not injury.
Set your treadmill to 10-15% incline at 2.5-3.0 mph for hill training stimulus. Your body doesn't distinguish between a mountain and a machine - the cardiovascular and muscular adaptation from grade is identical regardless of the source.
On steep terrain (15%+ grade), trekking poles reduce knee impact by 20-30% during descents by distributing load to your shoulders and arms. The fitness benefit is slightly lower, but the joint protection makes them worthwhile for sustained steep work.
Use your breathing and heart rate as the guide, not your watch pace. Aim for consistent zone 2-3 effort where you can hold a conversation with effort but you're definitely working. Your speed will naturally vary with the terrain while your cardiovascular demand stays steady.
200-400 meters of consistent 8-15% grade works for hill repeats. Even 4-5 flights of stairs creates enough stimulus if you don't have natural hills. The key is sustained grade, not total distance.


