The short answer
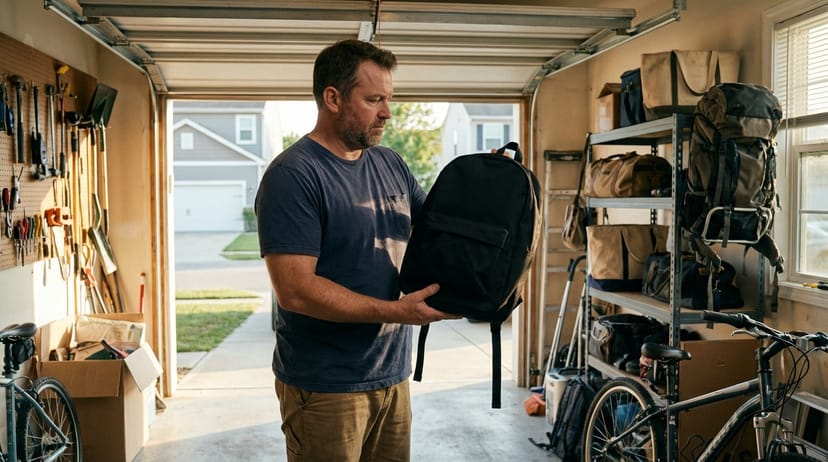
Yes, absolutely. Any sturdy backpack with two shoulder straps will work for your first few months of rucking. You do not need a purpose-built rucksack, a ruck plate, or any specialized gear to start. The most important thing is that you start - not that you start with perfect equipment.
Thousands of ruckers began with a school bag and some books. Many still ruck that way by choice. The gear industry wants you to believe otherwise, but the truth is simple: if you can load weight into a bag and put it on your back, you can ruck.
If you buy anything, buy these last
| Stage | What to use | Upgrade trigger |
|---|---|---|
| First two weeks | The backpack you already own, wrapped bricks, and normal walking shoes | Only change something if it hurts or shifts |
| First upgrade | Darn Tough socks, Body Glide, and Leukotape | Hot spots, rubbing, or blisters |
| Second upgrade | Titan Fitness Ruck Plate | The weight keeps sagging or sliding |
| Later upgrade | GORUCK GR1 or a dedicated ruck | You are rucking often enough that the pack is the limiting factor |
Choosing the right backpack from what you own
Not every bag is a good rucking bag, but most people already own one that will work. Here is what to look for and what to avoid.
What makes a good rucking backpack: Padded shoulder straps are the minimum requirement. Two straps, some padding, and a main compartment large enough to hold 10 to 20 lbs of weight. A chest strap is ideal because it prevents the shoulder straps from sliding outward under load. A hip belt is a bonus - it transfers weight from your shoulders to your hips, which matters more as you go heavier. A rigid or semi-rigid back panel helps distribute the load evenly instead of letting it sag into a ball at the bottom of the bag.
What to avoid: Drawstring bags, single-strap messenger bags, and ultra-thin fashion daypacks. Drawstring bags have no structure and the weight bounces with every step. Single-strap bags load one side of your body and create asymmetric stress on your spine. Thin daypacks with no padding will dig into your shoulders within the first half mile.
The sweet spot: A school backpack, work commuter bag, or hiking daypack in the 20 to 30 liter range. Brands like JanSport, Osprey daypacks, North Face Borealis, or any basic hiking daypack will handle 10 to 25 lbs without complaint. You almost certainly own something that fits this description.
What to use as weight
You do not need a ruck plate. Here are four weight options ranked by effectiveness, from best to serviceable.
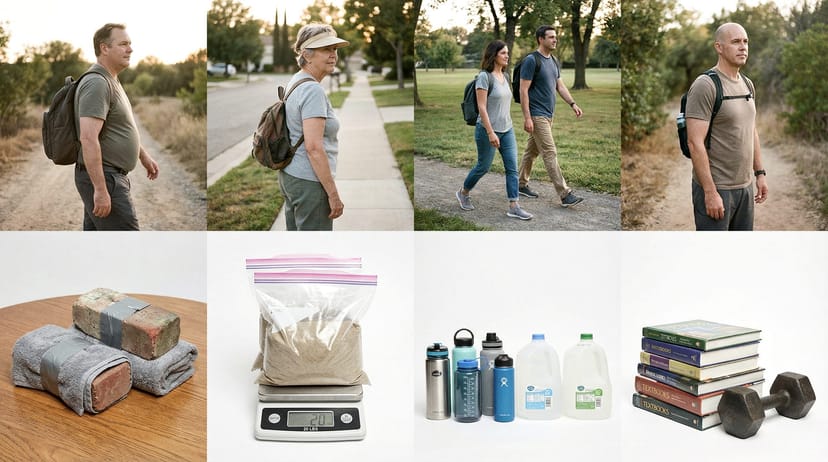
Tier 1: Wrapped bricks or paving stones
Bricks are free, dense, and available at any hardware store or construction site. A standard brick weighs about four to five lbs, so two to three bricks gets most beginners into the right range. Wrap each brick in a towel or old t-shirt to protect the inside of your pack and prevent the hard edges from digging into your back. Duct tape the towel in place so it does not unravel mid-ruck.
The downside is that bricks are rigid and rectangular, which creates pressure points if not padded properly. The upside is that they are completely free and last forever.
Tier 2: Sandbag fillers
Buy a bag of play sand from a hardware store for about five dollars and fill gallon zip-lock bags to your desired weight. Double-bag them to prevent leaks. Use a bathroom scale to dial in the exact weight. Sandbag fillers are moldable, which means they conform to the shape of your pack and sit more comfortably against your back than rigid objects.
This is our recommended budget option. For 10 to 15 dollars total, you get adjustable, comfortable weight that works in any backpack.
Tier 3: Water bottles or a hydration bladder
One liter of water weighs 2.2 lbs. Fill a few water bottles or a hydration bladder to hit your target weight. The advantage is precise adjustability - pour out water to reduce weight mid-ruck if you need to. The disadvantage is sloshing. Water shifts your center of gravity with every step, which makes the pack feel unstable at higher weights. Best for loads under 15 lbs.
Tier 4: Books or dumbbells
Books work in a pinch, but their awkward shapes create pressure points and dead space in the pack. Dumbbells are dense but round, which means they roll to the bottom of the bag and pull you backward. If you use either of these, wrap them in clothing to pad the edges and fill the empty space around them with towels or shirts so they cannot shift.
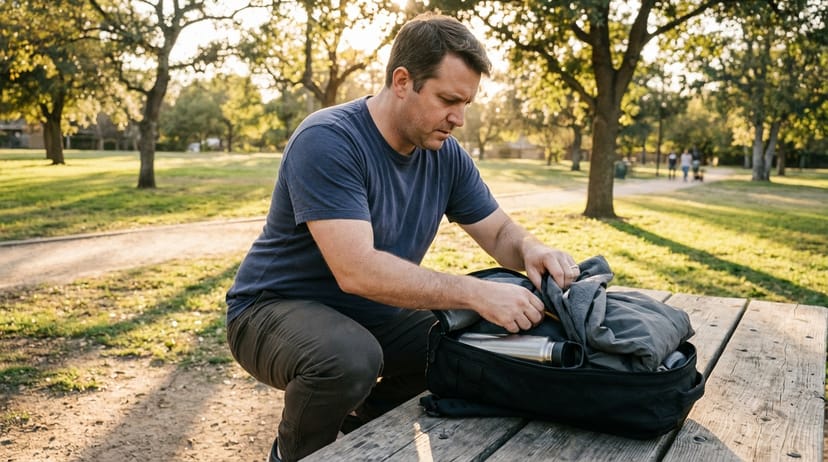
Whatever you use, wrap it in a towel and position it high in the pack - between your shoulder blades, against the back panel. Low-sitting weight pulls you backward and strains your lower back. High-and-tight is the rule.
How to load the pack properly
Weight placement matters as much as weight amount. A well-loaded 20-lb pack feels better than a poorly loaded 15-lb pack.
Position the weight high and centered. The heaviest items should sit between your shoulder blades, pressed flat against the back panel of the pack. This keeps the load's center of gravity close to your spine, which means your core does not have to work overtime to keep you upright.
Fill dead space. Stuff towels, rolled-up clothing, or a small pillow around the weight to prevent it from shifting during the ruck. Every time the weight slides to one side, your body compensates by tilting the other direction. Over a two-mile ruck, hundreds of those micro-corrections add up to fatigue and soreness you did not earn.
Cinch the compression straps if your pack has them. These are the side straps that tighten the pack's profile. Pulling them snug eliminates bounce and lateral sway.
Tighten the shoulder straps until the top of the pack sits at or just below the base of your neck. If the pack hangs down to your lower back, it is too loose. The weight should ride high, not low.
Use the chest strap if your pack has one. Clip it across your sternum and tighten it just enough to keep the shoulder straps from sliding outward. It should not restrict your breathing - if it does, loosen it one notch.
Regular backpack vs rucksack: what is the difference?
| Feature | Regular backpack | Purpose-built rucksack |
|---|---|---|
| Frame sheet | Usually none | Rigid HDPE or aluminum - distributes load |
| Weight stability | Shifts during movement | Plate pocket locks weight against spine |
| Hip belt | Rare on daypacks | Transfers 30-40% of load to hips |
| Durability | 500D-1000D nylon | 1000D Cordura, reinforced stitching |
| Comfort at 20+ lbs | Marginal | Good to excellent |
| Price | $0 (already own it) | $80-300 |
The table tells the story: a regular backpack is free and perfectly adequate for loads under 20 lbs and distances under three miles. A purpose-built rucksack is better at everything but costs money and is unnecessary until the regular backpack becomes the limiting factor.
When to upgrade
A regular backpack will serve you well for your first one to three months. You will know it is time to upgrade when you consistently hit two or more of these signals:
You are rucking three or more times per week. At this frequency, small comfort issues compound. Shoulder hot spots and an unstable load that you tolerated once a week become genuinely annoying at three-plus sessions.
You are carrying 20-plus lbs and the pack is uncomfortable. Most daypacks were designed for laptops and textbooks, not dense plates. Once you push past 20 lbs, the lack of a frame sheet and hip belt becomes noticeable. The weight sags, the straps dig, and the pack bounces.
You are getting hot spots on your shoulders or lower back. Redness, chafing, or persistent soreness in specific spots means the pack is not distributing load properly. This is the most common trigger for upgrading.
You want to go beyond 25 lbs. At this weight, a frame sheet and hip belt are not luxuries - they are how you protect your shoulders and spine on longer rucks.
When you are ready, see our rucking gear guide for recommendations by category and budget tier. If you want to spend as little as possible, our budget rucking starter kit covers everything you need for under 50 dollars. For a complete pre-built setup in one cart - pack, plate, shoes, socks at three budget tiers - see the beginner starter kit loadout. The community standard for a dedicated ruck - the pack every other option gets compared to - is the GORUCK GR1.
The bottom line
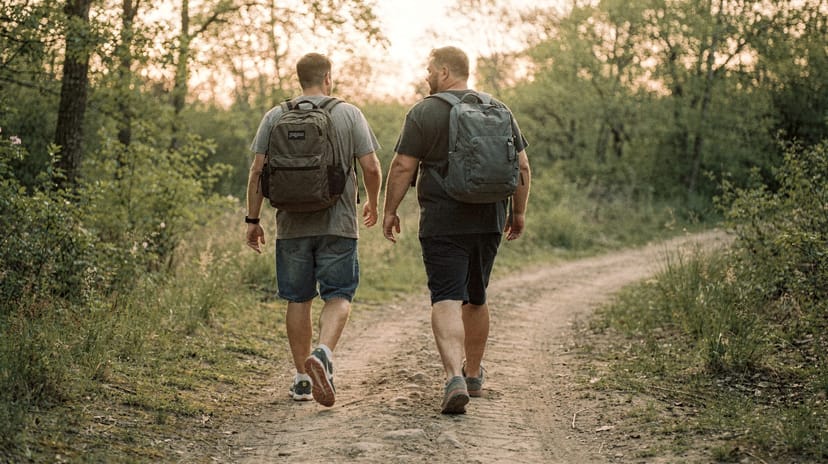
Start with what you have. A JanSport and two wrapped bricks is a legitimate ruck. The gear does not make the rucker - consistency does. Upgrade when the pack becomes the limiting factor, not before.
Rucking started with soldiers carrying whatever they had. A school backpack and some books is a perfectly valid ruck. Go walk.
Frequently asked questions
Will rucking ruin my regular backpack?
Not at beginner weights. Most backpacks can handle 15 to 20 lbs without issue - they were designed to carry textbooks, laptops, and travel gear. At 25-plus lbs with repeated use, you may see accelerated wear on the shoulder strap stitching and the bottom panel. Wrapping your weight in towels protects the pack's interior. If your favorite backpack is irreplaceable, use a different one for rucking.
Can I use a hydration pack or running vest?
Running vests and hydration packs work for very light rucks - 5 to 10 lbs maximum. They are not designed for heavier loads and will bounce, chafe, and potentially tear at the seams. If you already own one, it is fine for your first few sessions. Transition to a standard backpack once you go above 10 lbs.
What about a weighted vest instead of a backpack?
Weighted vests distribute load across your torso rather than concentrating it on your back. They are a valid alternative, especially for shorter rucks and people with shoulder issues. The tradeoff is less capacity - most vests max out at 20 to 30 lbs - and they can restrict breathing at higher loads. See our weighted vest vs rucksack comparison for the full breakdown.
How do I stop the weight from bouncing?
Fill all dead space inside the pack with soft items - towels, shirts, a small pillow. The weight should not be able to move in any direction. Cinch the compression straps and tighten the shoulder straps so the pack sits high and snug. If your pack has a chest strap, use it. Bounce is almost always a packing problem, not a pack problem.
Your next step
You have the backpack and you know how to load it. Now you need to know how much weight to put in it. Our ruck weight guide gives you personalized recommendations by fitness level, goal, and terrain - with an embedded calculator to dial in your exact starting number.
Related reading
- The complete beginner's guide to rucking - the pillar guide this article supports
- How heavy should your ruck be? - weight recommendations by fitness level and goal
- Your first 30 days of rucking - a day-by-day plan once you have your pack loaded
- The $50 rucking starter kit - when you are ready to upgrade on a budget
- Rucking gear guide - the complete buyer's guide for packs, plates, shoes, and accessories