
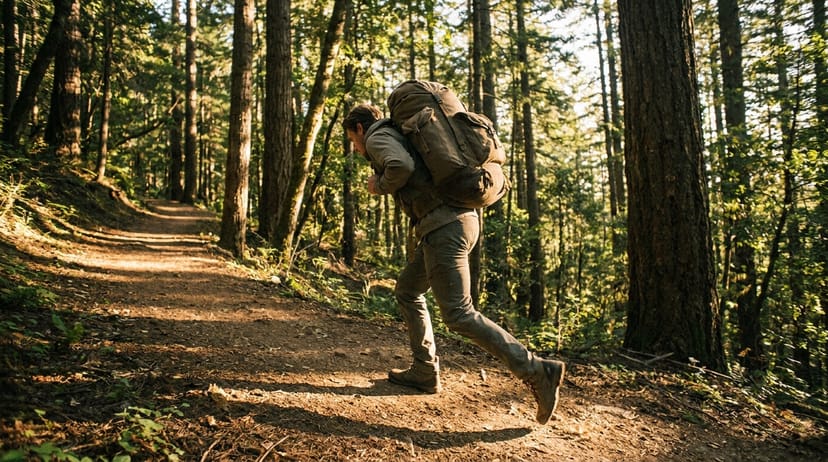
Hip flexor tightness is one of the most common complaints among ruckers, and for good reason. The forward-loading nature of rucking creates a perfect storm for hip flexor dysfunction - combining prolonged hip flexion with compensatory postural changes that can leave you feeling stiff, sore, and limited in your movement.
If you've ever finished a ruck feeling like your hips are locked up, or noticed that getting up from sitting has become uncomfortable, you're experiencing the downstream effects of how rucking affects your hip flexor complex. The good news? Understanding why this happens puts you in control of preventing and fixing it.
The short answer:
- Tight hip flexors from rucking are usually a load + posture problem, not a flexibility problem
- The fix isn't more stretching - it's restoring length, then strengthening in that lengthened range
- Community reports suggest 2 to 4 weeks of daily 10 to 15 minute work is the typical window where ruckers start noticing change - your mileage will vary based on starting point and consistency
- If stretching alone has stopped working, the diagnosis is wrong - read the self-test below
What are the hip flexors and why do they matter?
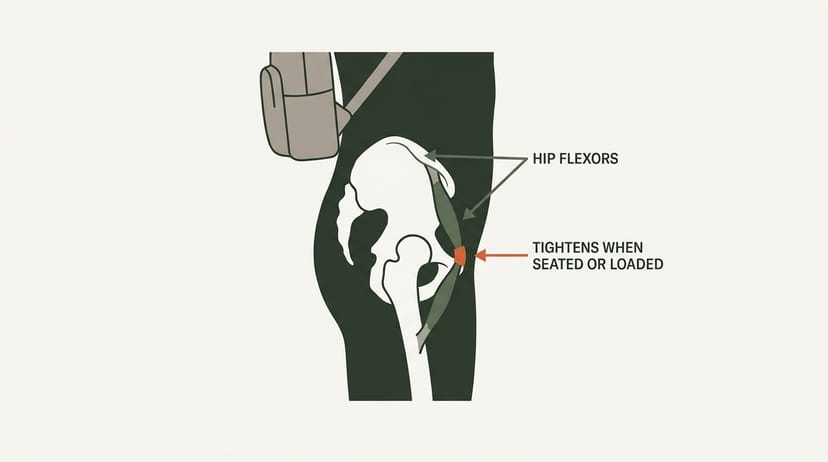
Your hip flexors are a group of muscles that lift your leg forward at the hip joint. The primary players include the iliopsoas (psoas major and iliacus), rectus femoris, and sartorius. These muscles originate from your lower spine and pelvis, crossing the front of your hip to attach to your thigh bone.
During rucking, your hip flexors work constantly to lift your legs with each step while also helping to stabilize your pelvis against the forward pull of your loaded pack. This dual role - prime mover and stabilizer - sets them up for overuse and subsequent tightness.
Think of your hip flexors as the anchor cables on a suspension bridge. They're not just lifting your legs; they're constantly working to keep your pelvis stable against the forward weight of your pack.
How rucking creates hip flexor tightness
The biomechanics of rucking create several factors that contribute to hip flexor tightness and imbalances:
Forward pack loading effects
When you strap on a weighted pack, the load sits behind your center of gravity, creating a forward moment that wants to tip you forward. Your body compensates by adjusting your posture, often leading to an anterior pelvic tilt - where your pelvis tilts forward, increasing the arch in your lower back.
This postural adaptation puts your hip flexors in a shortened position throughout your ruck. Muscles adapt to the positions we hold them in most frequently, so spending hours in this shortened position promotes adaptive tightening.
Repetitive hip flexion
Every step during rucking requires hip flexion to lift your leg forward. With the added weight, your hip flexors work harder than during normal walking. The repetitive nature of the stepping motion, combined with the load, can lead to overuse of these muscles.
This repetitive loading in a shortened range of motion can create what physical therapists call "adaptive shortening" - the loss of resting muscle length after sustained immobilization or repeated use in a shortened range. It's a long-established concept in rehabilitation literature, not a fringe claim.
Compensatory patterns
When your hip flexors become overworked and tight, other muscles often compensate. Your glutes may become inhibited (a phenomenon called reciprocal inhibition - when one muscle in an agonist/antagonist pair contracts, the other is neurally damped; a foundational principle in Sherrington's law of reciprocal innervation), your core may not activate properly, and your back muscles may overwork to maintain posture. These compensatory patterns can perpetuate hip flexor dominance and create a cycle of dysfunction.
The upstream half of this is well documented in load-carriage biomechanics research. Knapik and colleagues' 2004 review in Military Medicine synthesizes decades of military-load studies showing that rear-loaded packs shift the center of mass backward and produce a forward pelvic tilt as the body compensates to keep the load over its base of support. The downstream half - that this sustained anterior pelvic tilt leaves the hip flexors operating in a shortened range over many miles - is the standard biomechanical extension of those findings rather than a separately-named finding in the Knapik review.
Knapik JJ, Reynolds KL, Harman E. Soldier load carriage: historical, physiological, biomechanical, and medical aspects. Military Medicine, 2004;169(1):45-56. This review covers the postural compensations rear-loaded packs produce in the lumbopelvic region. The connection between those postural compensations and chronic hip flexor shortening is a clinical extension of the cited biomechanics, not a direct finding in the review itself.
Signs of hip flexor tightness from rucking
Recognizing hip flexor tightness early lets you address it before it becomes a limiting factor in your training or daily life. The pattern shows up in three places:
During & After Rucking: Lower back over-arching, pulling at the front of the hip, fatigue holding upright posture
Daily Activities: Stiffness rising from sitting, can't touch toes without bending knees, "walking uphill on flat ground" feeling
Movement Quality: Limited hip extension behind your body, lumbar arching during hip-extension drills, glutes that won't fire
The tightness vs. weakness distinction
Here's where many ruckers go wrong: assuming that feeling tight means you need to stretch more. Stretching can help when tightness is genuine, but the physical therapy literature has been pointing at a different mechanism for decades. Two clinicians whose work is widely cited on this point are Czech neurologist Vladimir Janda, who described the "tight-weak" pattern in muscle-imbalance syndromes, and physical therapist Shirley Sahrmann, who wrote the long-used reference text Diagnosis and Treatment of Movement Impairment Syndromes. Both describe the same observation: muscles that feel chronically restricted are often weak muscles working overtime, not genuinely shortened tissue.
When hip flexors are weak, they become overactive and feel tight as they struggle to meet the demands placed on them. Simply stretching weak muscles can lengthen already-compromised tissue without addressing the underlying weakness - which is why the people who stretch hardest often feel the tightest.
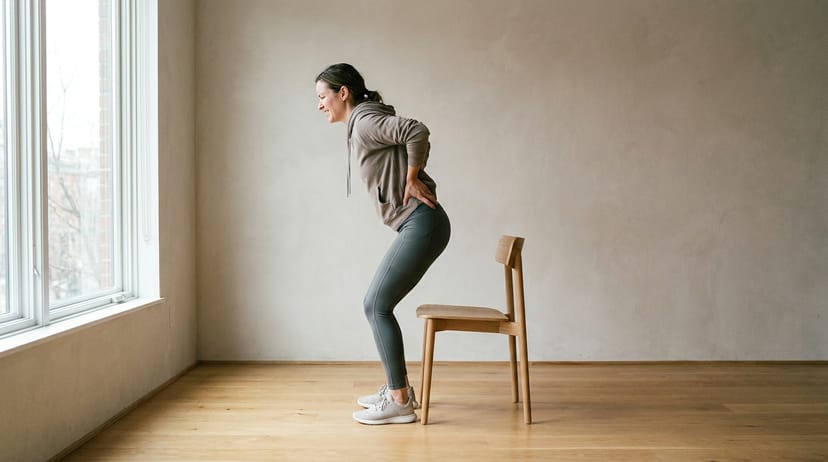
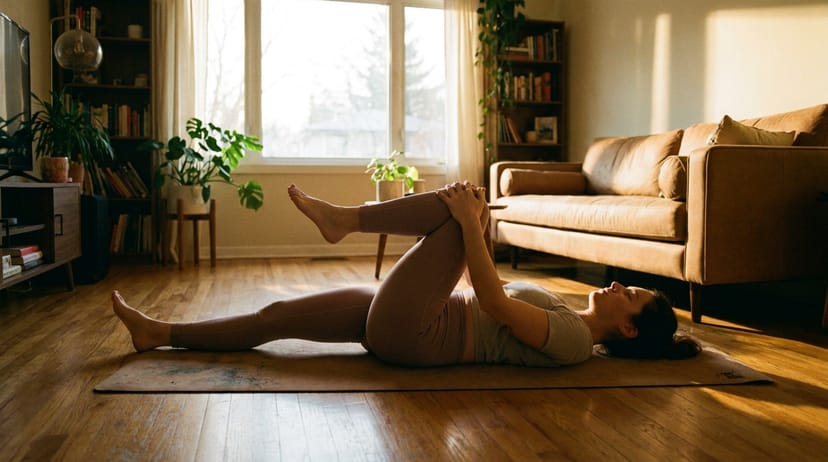
Simple self-assessment
To determine whether your hip flexors are truly tight or just weak, try this modified Thomas test. Set it up carefully so you don't strain your low back or fall off the surface:
Choose a stable surface no higher than your knees - a firm, sturdy massage table, weight bench, or low coffee table. Do NOT do this on a tall bed, a wobbly bench, or a soft mattress. Have a chair, wall, or partner within arm's reach in case you need to grab something. If you're not sure about your balance, do this with a partner spotting you the first time.
- Sit on the very edge of the firm, stable surface so your sitting bones are right at the edge and one leg can hang freely off without your pelvis tipping. The surface has to hold your pelvis flat - that's why a mattress won't work.
- Slowly lower yourself onto your back. Once down, pull one knee firmly to your chest and hold it there with both hands clasped around the shin. Holding the knee in locks your pelvis flat and protects your low back.
- Let the opposite leg hang freely off the edge. Keep your low back pressed against the surface the entire time (no arching - if you feel your back lifting off, pull the held knee in tighter or stop and reset).
- The hanging leg's thigh should drop to about parallel with the floor (or slightly below) if your hip flexor length is normal. The knee on the hanging leg should bend to roughly 70-90 degrees on its own.
If you feel any sense of tipping or instability at the edge, sit up, scoot back a few inches, and try again - or move to the floor and have a partner press your held knee in firmly while you observe the hanging leg.
If your hanging leg stays elevated or your thigh doesn't drop below horizontal, you likely have true hip flexor tightness. If the leg drops appropriately but you feel weak or unstable, weakness might be the primary issue. Stop immediately if you experience any sharp pain.
If you're unsure about your assessment, consider working with a physical therapist or movement specialist. They can provide a more thorough evaluation and help you distinguish between mobility restrictions and strength deficits.
Mobility protocols for tight hip flexors
When you've identified true hip flexor tightness, targeted mobility work can help restore normal length and function. The key is consistency and proper execution rather than aggressive stretching.
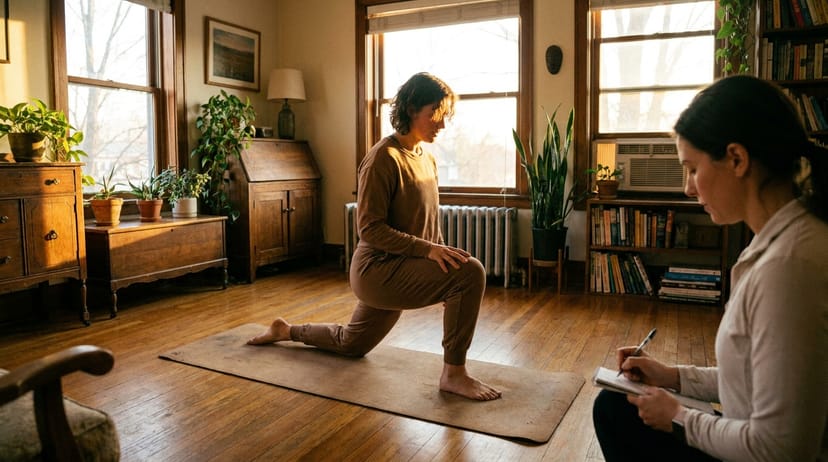
Couch stretch progression
The couch stretch is one of the most effective hip flexor stretches - and one of the easiest to do badly. The most common failure mode is "stretching" the lower back instead of the hip flexor by letting the lumbar spine arch under the load. That feels productive (you feel pulling) but is doing nothing useful and potentially aggravating disc-sensitive backs. Read the safety cues before you start.
The couch stretch can flare up an irritable lower back if your hip is genuinely weak rather than tight. Two things to feel for: - A productive stretch feels diffuse across the front of the hip and upper thigh, dull and pulling, and stays steady or eases as you hold it. Think "wide stretch sensation, 5-7 out of 10 intensity, no specific spot." - A stop signal is anything sharp, localized, or pinching: a single knife-like spot at the front of the hip, a sudden zing in the lower back, a "pinch" feeling deep in the hip socket that gets worse the longer you hold, or anything that radiates into the leg. If you can point at exactly one spot that hurts, stop. If you hit any of the stop signals, back out of the position, build hip flexor strength first using the eccentric work below, then reintroduce the stretch once you can hold a neutral pelvis under load.
Setup:
- Place your back foot on a couch, chair, or wall - your shin should rest flat against the vertical surface, foot pointed
- Step your front foot forward into a half-kneeling lunge position with the front knee stacked over the front ankle
- Tuck your tailbone and squeeze the glute on the side you're stretching (the back-leg side). This neutralizes the pelvis and routes the stretch into the hip flexor instead of the lower back
- Keep your torso upright. If you can't stay upright without your lower back arching, place your hands on the front thigh for support and start there
Progression:
- Start with 30-60 seconds per side, only as deep as you can hold without losing the tucked-tailbone position
- Push your hips forward gently. If your lower back arches, back off until you're tucked again
- Build up to 90-120 seconds per side over 2-3 weeks; don't chase depth at the cost of position
- Stop immediately if you feel anything sharp in the front of the hip or anywhere in the spine
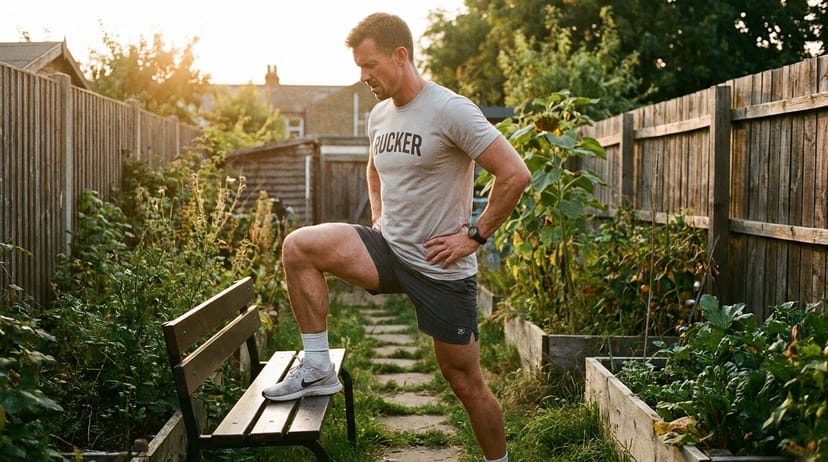
Dynamic hip flexor stretches
Static stretching before rucking isn't ideal, but dynamic movements can help prepare your hip flexors for activity:
Walking high knees:
- Lift each knee toward your chest while walking forward
- Focus on the lengthening sensation in the opposite hip flexor
- 10-15 steps per leg
Reverse lunges with reach:
- Step backward into a lunge position
- Reach your arms overhead on the same side as your back leg
- Feel the stretch along the front of your hip and torso
- 8-10 repetitions per side
Post-ruck restoration
After rucking, when your hip flexors are warm and potentially tight, gentle stretching can help restore length:
Low lunge hold:
- From a kneeling position, step one foot forward
- Sink your hips forward and down
- Hold for 60-90 seconds per side
- Focus on breathing and allowing the stretch to develop gradually
Strengthening protocols for hip flexor balance
Even when hip flexors are tight, they often need strengthening in their lengthened range to create lasting change. This seems counterintuitive but reflects the complex relationship between muscle length, strength, and function.
Eccentric hip flexor strengthening
Eccentric (lengthening) contractions help build strength through a full range of motion:
Reverse Nordic curls (advanced - see regression first):
This is a demanding exercise that loads the hip flexors and quads eccentrically through a long range. If you can't return to upright from even a small lean-back, use the regression below for 2-3 weeks before attempting the full version. The bail-out is to break the hip-to-shoulder line and fold forward onto your hands - never let yourself flop backward uncontrolled into the floor.
- Kneel on a padded surface (folded mat or pillow under the knees) with hips fully extended and torso upright
- Keeping a straight line from knees to shoulders (no bending at the hip), slowly lean backward, controlling the descent over 3-5 seconds with your quads and hip flexors
- Only go as far back as you can return from under control - that may be 5-10 degrees the first session. Owning a small range is the whole point.
- Drive back up to vertical
- 6-10 repetitions, 2-3 sets, with at least 60 seconds rest between sets
Regression - Assisted reverse Nordic (start here):
- Set up the same way, with a sturdy chair or wall about 18 inches behind you
- Lean back only as far as you can reach the chair/wall with your hands, then push off to return to upright
- This lets you train the eccentric portion safely without needing the strength to return unassisted
- 8-12 reps, 2 sets - graduate to the unassisted version once you can hold a 10-degree lean for 3 seconds with no chair contact

Hip flexor isometric holds
Isometric exercises teach your hip flexors to work in their lengthened position. Pair these with the eccentric work above on the same training days - they're complementary, not competing.


Addressing the root cause: pack fit and posture
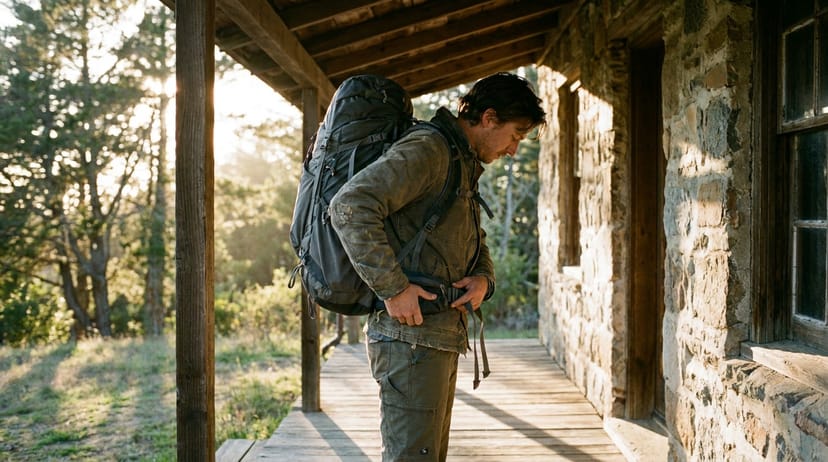
While mobility and strengthening work address the symptoms of hip flexor tightness, fixing the root cause requires attention to your rucking setup and posture.
Pack positioning
Your pack's position dramatically affects your postural demands:
- Load placement: Keep heavier items close to your back and higher in the pack
- Belt usage: A properly fitted hip belt transfers some weight to your pelvis, reducing the forward moment
- Sternum strap: This helps prevent the shoulder straps from pulling you backward
Postural awareness
Developing awareness of your rucking posture helps prevent excessive anterior pelvic tilt:
- Core engagement: Think about gently drawing your ribs toward your pelvis
- Hip position: Imagine tucking your tailbone slightly under
- Chest position: Keep your chest proud but avoid excessive back arching
The single highest-leverage move here is hip-belt usage. Transferring even a portion of the load to your pelvis instead of your shoulders cuts the forward-pulling moment that drives anterior pelvic tilt. If your pack has a real hip belt and you're not using it, start there before any stretching protocol.
Movement breaks during long rucks
For rucks longer than 60-90 minutes, incorporating movement breaks can help reset your posture and prevent adaptive tightening:
Hip flexor reset sequence:
- Stop every 20-30 minutes for 1-2 minutes
- Perform 5-10 gentle hip circles in each direction
- Take 3-5 steps backward to encourage hip extension
- Do 2-3 gentle standing back bends
Complementary strengthening for hip flexor health
Hip flexor health doesn't exist in isolation. Addressing weakness in supporting muscle groups creates a more balanced system that reduces the demand on your hip flexors.
Glute activation and strengthening
Strong glutes counterbalance hip flexor dominance - when the glutes wake up, the hip flexors stop having to do extra postural work.


Core stability work
A strong core reduces the stabilizing demands on your hip flexors during loaded carries.


When to seek professional help
While many hip flexor issues can be addressed with consistent self-care, certain signs warrant professional evaluation:
- Pain that persists or worsens despite following mobility and strengthening protocols
- Numbness or tingling in your legs or feet
- Significant limitations in daily activities
- Hip flexor tightness that doesn't improve after 4-6 weeks of consistent intervention
A physical therapist can provide a thorough assessment, identify any underlying movement dysfunctions, and create a personalized treatment plan that addresses your specific needs.
Remember, persistent or severe pain should always be evaluated by a healthcare professional. The information in this article is for educational purposes and doesn't replace medical advice.
Prevention strategies for long-term hip health
The best approach to hip flexor tightness is preventing it from developing in the first place. The three windows that pay off the most are the pre-ruck warm-up, the post-ruck cool-down, and a small weekly maintenance habit.
The goal isn't perfect hips - it's maintaining hips that can handle the demands you place on them while supporting your long-term movement health.
Frequently asked questions
With consistent daily mobility work and proper addressing of the root causes, most people notice improvements in 2-4 weeks. However, significant changes in movement patterns and strength can take 6-12 weeks of dedicated work. The key is consistency rather than intensity.
Light dynamic stretching can be helpful, but avoid aggressive static stretching before rucking. Instead, focus on dynamic movements like leg swings and walking lunges to prepare your hip flexors for activity. Save longer static stretches for after your ruck when muscles are warm.
Yes, tight hip flexors often contribute to lower back pain during rucking. When hip flexors are tight, they can create an anterior pelvic tilt that increases the arch in your lower back, placing excessive stress on your lumbar spine. Addressing hip flexor tightness often helps reduce associated back pain.
Both are important, but the answer depends on whether your hip flexors are truly tight or actually weak. Many cases of hip flexor "tightness" are actually weakness. A proper assessment can help determine the right approach, but most people benefit from a combination of mobility work and strengthening in the lengthened position.
Start with 10-15% of your body weight and focus on proper form and postural control. Gradually increase weight only after you can maintain good posture throughout your ruck without compensatory patterns. Sometimes reducing pack weight temporarily while addressing hip flexor issues allows better movement patterns to develop.
Yes - pack design and fit have a real impact on hip flexor stress. The three features that matter most: - A load-bearing hip belt - a padded belt that wraps your iliac crests so the pack's weight rides on your skeleton instead of pulling down on your shoulders. - A sternum strap - the thin chest strap linking the two shoulder straps across your sternum, keeping them from sliding outward and pulling the load backward. - Load lifters - short angled straps that run from the top of each shoulder strap to the upper back of the pack frame, pulling pack mass closer to your upper spine. Any pack that hits those three reduces the forward-pulling moment that drives anterior pelvic tilt. Frameless duffel-style rucks - a single tubular bag with simple shoulder straps and no internal frame, hip belt, or load lifters - have nothing transferring weight to the pelvis, so the entire load hangs off the shoulders and pulls the torso backward. Framed packs with structured hip belts sit at the other end of the spectrum and are the best choice for anyone managing hip flexor symptoms. Commonly-cited examples per their manufacturers' specs: the GORUCK GR1 family (frame sheet routes load along the spine), Mystery Ranch Stein-series (load-bearing hip belt with waist transfer), and Osprey Talon-class packs (hip belt + sternum + load lifters - a common entry-level choice). Check the spec sheet before buying.


