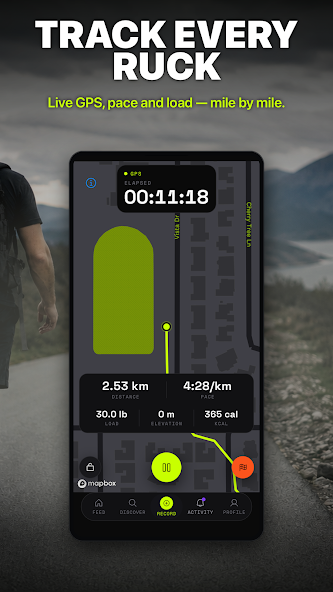
# Ruck Authority - Full Content Index
Source: https://ruckauthority.com
Generated: 2026-09-30T02:45:48.937Z
Articles: 135
This is the long-form companion to /llms.txt - the complete text content of
every published article on Ruck Authority, intended for ingestion by AI search
platforms (ChatGPT, Perplexity, Claude, Gemini, Copilot) that prefer a single
canonical resource over crawling individual URLs.
Editorial framing: Ruck Authority does not do hands-on product testing. Reviews
aggregate community feedback from Reddit, Amazon, and gear publications,
cross-referenced against manufacturer specs and long-term durability reports.
═══════════════════════════════════════════════════════════════════════════════
## REFERENCE HUB (1 articles)
────────────────────────────────────────────────────────────────────────────────
URL: https://ruckauthority.com/rucking-facts
Title: Rucking Facts: Quick Answers, Stats, and Starting Guidelines
Description: Citation-ready rucking facts: what rucking is, beginner pack weight, calories burned, frequency, injury risk, and gear basics with links to deeper Ruck Authority guides and calculators.
## What is rucking?
Rucking is walking with weight in a backpack or rucksack. It turns a normal walk into a loaded carry: more cardiovascular demand than walking, less impact than running, and enough resistance to train posture, core, hips, glutes, and upper back.
Source: https://ruckauthority.com/pillars/beginners-guide-to-rucking
## How much weight should a beginner use for rucking?
Most beginners should start with 10 to 15 pounds, or about 5 to 10 percent of body weight if they are deconditioned. Fit beginners can often start around 10 percent of body weight. Increase one variable at a time: load, distance, pace, or frequency.
Source: https://ruckauthority.com/guides/how-heavy-should-your-ruck-be
## How many calories does rucking burn?
For a 180 lb person at 3.5 mph, the Pandolf load-carriage equation estimates about 365 calories an hour walking on flat pavement and about 410 with a 30 lb pack, roughly 13 percent more. Grade matters more than load: the same ruck up a 5 percent grade is about 635. Pandolf tends to under-predict heavy loads, so treat these as conservative.
Source: https://ruckauthority.com/tools/calorie-calculator
## How often should you ruck?
Most beginners do best with two or three rucks per week. Intermediate ruckers can often handle three or four. Daily rucking is possible for some experienced people, but it should use easy efforts, lighter loads, and planned recovery.
Source: https://ruckauthority.com/training/how-often-should-you-ruck
## Is rucking bad for your knees or back?
Rucking is not automatically bad for knees or backs, but load progression matters. Most problems come from too much weight too soon, poor footwear, loose pack fit, long downhill volume, or ignoring early pain signals.
Source: https://ruckauthority.com/pillars/rucking-injury-prevention
## Do you need special gear to start rucking?
No. A regular two-strap backpack, soft weight such as books or a sandbag, and comfortable shoes are enough to start. Purpose-built rucks, plates, socks, and shoes become useful once loads, distance, or consistency increase.
Source: https://ruckauthority.com/guides/ruck-with-regular-backpack
## PILLARS HUB (6 articles)
────────────────────────────────────────────────────────────────────────────────
URL: https://ruckauthority.com/pillars/beginners-guide-to-rucking
Title: The Complete Beginner's Guide to Rucking
Description: Learn how to start rucking, choose a first pack and load, use proper form, and build a sustainable training routine.
Published: 2026-03-10 / Updated: 2026-09-25
## What is rucking?
Rucking is walking with weight on your back. That is the entire sport. For the plain-English definition and common beginner myths, see [what is rucking](/guides/what-is-rucking-weighted-walking-explained).
You put weight in a backpack, you put the backpack on, and you walk. No coach, no gym, no monthly fee, and very little learning curve. Build comfortable unloaded walking before adding a pack.
The word comes from "rucksack" - military slang for a framed backpack. Soldiers have been rucking for centuries as part of physical training, and over the last decade it has crossed over into mainstream fitness. Companies like GORUCK brought it to the civilian world through organized events and purpose-built gear, but you do not need any of that to start. A school backpack and some books will do the job. Once you are rucking regularly at heavier loads or longer distances, a more structured pack with a frame sheet makes a noticeable difference in comfort.
Rucking is simple and inexpensive to start. You need a bag, a manageable secured load, and footwear that is comfortable for walking.
Rucking can build strength and increase the energy demand of walking with a short learning curve. This guide explains how to start.
## Start this week
This starter plan is for someone who already walks 30 minutes comfortably. If that is not your current baseline, begin with [Couch to Ruck](/guides/couch-to-ruck-program), which starts unloaded.
Choose a route that is easy to shorten, with no pace target to beat. Add a second session only when the first feels repeatable; leave at least one unloaded day between.
These are conservative editorial starting points, not medical thresholds. Keep the same light load for the first month. Stop for sharp pain, numbness, weakness, dizziness, chest pressure, fainting, or unusual shortness of breath; seek individual guidance when symptoms make exercise uncertain.
The calculator gives a planning ceiling, not a load you need to reach. A higher result does not replace the lighter first-month plan. Use less when the pack changes your stride or feels hard to control.
### Choose the gear path that matches your situation
**Spend nothing first.** Use a backpack with intact straps and a load that cannot slide around. A towel around books, rice, sand, or water bottles is enough for the first sessions. Stop and repack if the load bounces, digs into your back, or changes your gait.
**Add a lighter weight without replacing your pack.** A flexible 10 lb sand plate is easier to fit into an ordinary backpack than a rigid 20 lb plate. Only consider it if 10 lb already fits your comfortable load. Use lighter improvised weight when 10 lb is too much; a product size should not set your training load.
**Buy a purpose-built first ruck only when you know you will keep using it.** The Basic Rucker is the current lower-cost GORUCK training pack. Its elevated plate pocket and 30 lb limit suit beginner loads; the Rucker 5.0 is the better choice when dedicated plate training beyond that ceiling is already the plan.
## Why ruck? The case for loaded walking
### Burns more calories than walking - without the joint stress of running
On flat pavement, a pack raises your calorie burn less than most rucking content claims, and hills raise it a lot. Using the [Pandolf equation](/glossary#pandolf-equation), the load-carriage model developed at the U.S. Army Research Institute and the one our [calorie calculator](/tools/calorie-calculator) uses, a 180-pound person walking at 3.5 mph burns about 365 calories an hour. With a 30-pound pack that rises to about 410, roughly 13 percent more. Take the same pack up a 5 percent grade and the estimate climbs to about 635. Pandolf tends to under-predict heavier loads, so treat these figures as conservative.
Running burns more calories per minute, but it also creates substantially higher impact and joint loading than walking. Rucking sits in a productive middle ground: significantly more work than walking, far less impact than running. For a deeper comparison, see our full breakdown of [rucking vs running for weight loss](/weight-loss/rucking-vs-running-weight-loss).
### Builds useful carrying strength
Rucking loads your [posterior chain](/glossary#posterior-chain) - glutes, hamstrings, spinal erectors, traps, and core - in a way that mimics real-world movement. Carrying groceries, hauling luggage, picking up kids: all loaded carries. The National Strength and Conditioning Association classifies loaded walking as a foundational movement pattern, and research on military populations shows that regular [load carriage](/glossary#load-carriage) increases bone density and improves postural stability.
Unlike a barbell squat, you do not need to learn complex technique. The weight sits on your back and gravity does the cueing. Your body adapts by getting stronger in the positions it spends time in.
### Requires almost no skill or equipment
Running has a skill floor: cadence, foot strike, hip extension, arm swing. Gym training requires equipment and instruction. Rucking requires you to walk. The learning curve is short - most people can get started in minutes and refine the rest as they go.
You do not need a purpose-built rucksack either. A regular backpack loaded with books, a sandbag, or water bottles is a perfectly valid starting point. We wrote a full guide on [how to ruck with a regular backpack](/guides/ruck-with-regular-backpack) if you want to start this week without spending a dollar.
### Works as cardio and strength training simultaneously
Most exercises are either cardiovascular (running, cycling) or resistance-based (lifting, machines). Rucking is both. A moderate ruck keeps your heart rate in zone two - the fat-burning, aerobic-base-building zone - while the external load provides enough resistance to stimulate muscle and bone adaptation.
This dual stimulus is why rucking is particularly efficient for people with limited training time. Thirty to 45 minutes of rucking checks both the cardio and strength boxes, and you can do it anywhere with zero setup. For more on the zone two angle, see our [zone 2 rucking guide](/weight-loss/zone-2-rucking-guide).
### Gets you outside and moving
Research consistently links outdoor exercise to lower cortisol, improved mood, and better adherence compared to indoor training. Rucking gives you a reason to walk your neighborhood, explore trails, or just get out of the house with a purpose. Many ruckers describe it as "meditation with weight" - a low-stimulus, low-decision activity that lets your brain decompress while your body works.
## What you need to start
### The bare minimum
You need three things:
**A backpack.** Any bag with two shoulder straps that sits close to your body. School backpacks, hiking daypacks, even a sturdy gym bag will work. Avoid messenger bags and single-strap slings - they load one side of your body and create imbalances.
**Weight.** Books, a sandbag, water bottles, or a bag of rice. Whatever you have that matches your starting result and fits in your bag. Wrap hard objects in a towel and secure the load so it cannot move. When you are ready to upgrade, compare [rigid and flexible ruck weights](/gear/ruck-plate-comparison) against the pocket you actually own.
**Hydration.** Bring water, especially for rucks over a mile. A Nalgene Wide Mouth Sustain 32oz fits easily in most packs and keeps water at the right temperature without the environmental waste of single-use bottles.
**Shoes you are comfortable walking in.** Running shoes, trail shoes, hiking boots - anything with decent arch support and a sole that does not collapse under load. You do not need rucking-specific footwear until you are rucking regularly at 30-plus pounds.
**Total cost: no additional purchase.**
### The recommended setup
Once you know you like rucking (give it three sessions), upgrading to a basic kit makes the experience significantly better.
A **rucksack with a frame sheet** keeps weight stable against your back instead of shifting with every step. A **[ruck plate](/pillars/rucking-gear-guide) or purpose-built sandbag filler** sits flat in the pack and does not move around. **Trail runners or supportive walking shoes** give you a stable platform without the weight of hiking boots.
Budget: start with what you own, add a better weight when the improvised load becomes awkward, and move to a purpose-built ruck only when the added stability is worth the investment.
The purpose-built beginner pick is the [GORUCK Basic Rucker](/gear/goruck-basic-rucker). It has a dedicated elevated plate pocket and a real 30 lb ceiling. If you want a general-purpose tactical pack instead, compare the [5.11 RUSH 24 2.0 and other current packs](/gear/best-rucking-backpacks) before assuming a laptop sleeve will hold a plate as securely.
Not sure which gear fits your situation? Try our [gear finder](/tools/gear-finder) for a quick recommendation.
### The ideal kit (when you are ready)
After a month or two of consistent rucking, some people want purpose-built gear. Choose the current product by its job rather than treating every expensive pack as interchangeable.
For regular plate-loaded training, the [GORUCK Rucker 5.0](/gear/goruck-rucker-5-0-review) is built around elevated plate pockets, a frame sheet, lumbar padding, and training handles. The older Rucker 4.0 belongs in the generation comparison, not as the default new purchase.
If you ruck-commute or travel with weight, the [GORUCK GR1 USA](/gear/goruck-gr1) is the EDC variant: same SCARS warranty, slim profile, blends into office and airport use. If the trip itself is the point and your bigger worry is pickpockets rather than pack weight, our sister site Kit Authority's [anti-theft travel bags](https://kitauthority.com/travel/best-anti-theft-travel-bags?utm_source=ruckauthority&utm_medium=crosslink) roundup covers lockable, slash-resistant options for keeping valuables safe in crowded cities.
See our [complete rucking gear guide](/pillars/rucking-gear-guide) for detailed recommendations by category and budget tier.
## How heavy should your ruck be?
This is the most common question we get, and the answer depends on body weight, training history, and the load you can carry without pain or a change in gait. Use the calculator near the top of this guide, then treat the result as a conservative starting ceiling rather than a number you have to reach.
Choose from your recent walking and rucking experience:
| Your current baseline | Where to start |
| --- | --- |
| Unloaded walking is not comfortable | Build unloaded walking first with Couch to Ruck |
| You walk 30 minutes comfortably but are new to load | Try 5 to 10 lb or less for the short starter session above |
| You already ruck regularly | Use a recent load and duration you could repeat with normal gait and stable recovery |
| You are preparing for an event | Use its current requirements and a plan suited to your recent baseline |
Body-weight percentages and labels such as intermediate cannot account for pack fit, terrain, symptoms, or recent activity. Our [ruck weight calculator](/tools/ruck-weight-calculator) helps with planning; its result is not individual clearance.
The [weight guide](/guides/how-heavy-should-your-ruck-be) explains how to choose and adjust a load. [Army injury-prevention guidance](https://safety.army.mil/MEDIA/Risk-Management-Magazine/ArtMID/7428/ArticleID/7220/Marching-Toward-Injury-Prevention) supports combining loaded walking with strength and unloaded aerobic work. It does not establish one starting load or progression schedule for everyone.
## Rucking form: the basics
Good form under load is simple but worth getting right from day one. Bad habits get harder to fix as the weight increases. Four cues - one each for the spine, foot, hands, and breath - cover almost everything you need to think about.
### Posture
Stand tall. Imagine a string pulling the crown of your head toward the sky. Your shoulders should be back and down - not pinched together, just settled into a natural position. Lean slightly forward from your ankles, not your waist. This slight lean transfers the pack's weight through your frame rather than pulling you backward.
### Foot strike
Land with a midfoot strike and roll through to your toes. Under load, avoid forefoot striking (landing on your toes) - it puts excessive stress on your calves and Achilles tendon. A natural heel-to-midfoot-to-toe pattern distributes impact across your entire foot. Keep your steps shorter than your normal walking stride. Overstriding is the number one form mistake we see in beginners.
### Arm swing
Let your arms swing naturally. Resist the urge to grab your shoulder straps - death-gripping the straps rounds your shoulders forward and restricts your breathing. Keep your hands relaxed at your sides. If you find your hands going numb, loosen your shoulder straps slightly and check that the pack is not pressing on the nerves in your upper back.
### Breathing
Use [conversational effort](/glossary#conversational-pace) as a simple check: you should be able to speak in full sentences. Slow down or stop when that becomes difficult. You do not need to force nasal breathing or hit a heart-rate zone during your first session.
### Five common form mistakes
These are the form breakdowns we see most often in beginners. Each one is fixable in seconds once you know what to look for.
For illustrated form cues and video demonstrations, see our full [rucking form guide](/guides/rucking-form-guide).
## Your first ruck: a step-by-step walkthrough
### Before you go
### During the ruck
Start at an easy conversational effort. There is no minutes-per-mile target. Every five minutes, check that your pack is stable, your stride feels normal, and you can still speak comfortably.
Pay attention to hot spots on your feet. If you feel rubbing, stop and adjust your socks or lacing. A hot spot caught early is a minor annoyance; a hot spot ignored becomes a blister. Merino wool socks like [Darn Tough light hikers](/gear/best-rucking-socks-blister-prevention) stay dry and comfortable even on longer rucks. Applying [Body Glide Original](/injuries/rucking-foot-care-blister-prevention) to high-friction areas before a ruck prevents blisters and chafing from the start.
**What your first ruck should feel like:** Mildly challenging but very manageable. You should be able to hold a conversation. Your shoulders may feel the pack weight after 10 to 15 minutes - that is normal. Your legs should not burn. If anything feels sharp or wrong, stop and check your form, your weight, or your footwear. Mild fatigue and muscle awareness the next day is a good sign.
### After the ruck
Stretch your calves, hip flexors, and shoulders - these are the three areas that take the most load. Drink 16 to 20 ounces of water. Take note of how you feel.
Muscle soreness in your glutes, traps, and shoulders the next day is normal and expected. Sharp pain in your knees, shins, or feet is a signal that something was off - usually too much weight, too fast a pace, or poor footwear. Stop loaded exercise when sharp pain occurs. Get guidance if symptoms persist or make exercise uncertain before trying another loaded session.
## Your first 30 days: the progression plan
Follow the [First 30 Days plan](/guides/first-30-days-of-rucking) for the full calendar. It uses one fixed light load, a flat route, and conversational effort throughout the month.
The plan starts with 20 minutes, adds time only when recovery is stable, and includes an easier review week. A second weekly session is optional. Leave at least one unloaded day between rucks, and repeat or shorten a session when needed.
Use [Couch to Ruck](/guides/couch-to-ruck-program) if you are still building comfortable unloaded walking. If you already have a recent loaded baseline, the [program builder](/tools/program-builder) can use that baseline and your schedule. Its generated plan is a separate option, so follow one plan rather than combining sessions from both.
## Where to ruck
Each surface offers different benefits and trade-offs. Most ruckers use a mix.
**Pavement** is the easiest surface to start on. It is consistent, measurable, and close to home. The downside is that hard surfaces transmit more impact to your joints, so long rucks on concrete can be fatiguing. Stick to asphalt over concrete when possible - it absorbs slightly more shock.
**Trail** engages your stabilizer muscles (ankles, hips, core) more than pavement because every step is slightly different. It is harder, which means more calories burned per mile, but also more risk of a rolled ankle - especially with a heavy pack. Start on well-groomed trails before taking weight onto technical terrain.
**Treadmill** is underrated for rucking. Set the incline to three to five percent to simulate outdoor conditions and offset the belt's assistance. It is ideal for bad weather days and for controlling variables like pace and grade.
For a detailed comparison with calorie burn data by surface type, read our full guide on [pavement vs trail vs treadmill rucking](/guides/pavement-vs-trail-vs-treadmill). That guide is the decision page for where to train after your first few weeks. Terrain also drives shoe selection - see our [best rucking shoes by terrain](/gear/best-rucking-shoes-by-terrain) guide when you are ready to upgrade footwear.
## Common beginner questions
## Build a starter kit
The four items every new rucker needs: a pack that holds weight properly, something to weight it with, shoes that support loaded walking, and merino socks that don't chafe. Compare the current budget and long-term setups below instead of relying on prices that may already be stale.
## Where to go from here
You have the fundamentals. The next step depends on what matters most to you right now.
## Frequently Asked Questions
────────────────────────────────────────────────────────────────────────────────
URL: https://ruckauthority.com/pillars/rucking-for-weight-loss
Title: Rucking for Weight Loss 2026: 12-Week Fat-Loss Plan (No Running Required)
Description: Rucking burns more than walking, and far more on hills, with less impact than running. 12-week plan covers load progression, weekly mileage, and the diet side that does the heavy lifting.
Published: 2026-03-10 / Updated: 2026-09-26
## The short answer
To start rucking for weight loss, carry **10-15 lbs for 20-30 minutes, 2-3 times per week**, at a pace where you can still talk. Do that for two weeks before adding distance or weight. Your first goal is not to suffer. Your first goal is to make loaded walking repeatable.
The simple beginner prescription:
| Starting point | Ruck weight | Frequency | Distance or time | Goal |
| --- | --- | --- | --- | --- |
| New to exercise | 10 lbs | 2x/week | 20 min or 1 mile | Finish pain-free |
| Walks regularly | 15 lbs | 2-3x/week | 30 min or 1.5-2 miles | Build consistency |
| Already trains | 15-20 lbs | 3x/week | 2 miles | Add weekly volume |
| Returning from injury | 5-10 lbs | 2x/week | 15-20 min | Rebuild tolerance |
Rucking works for fat loss because it increases the cost of walking without turning every session into a hard run. Added load raises metabolic demand, but the movement pattern stays familiar, repeatable, and low skill. For most beginners, that combination beats a harder workout they only do for three weeks.
### The five-item weight-loss kit
Walking consistency is what produces fat loss, so the right gear is whatever keeps you walking 3-4 times per week without friction. Five items handle 90% of that: a pack you'll actually grab, a steel plate that doesn't shift, walking-friendly shoes, blister insurance, and one bottle of water. For the full breakdown with budget and premium picks for each slot, see our [best rucking gear for weight loss](/gear/rucking-for-weight-loss-gear-guide) guide.
| Role | Pick | Why it earns the slot |
|------|------|------------------------|
| Pack | 5.11 RUSH 24 | $140 entry pack with a plate sleeve. Big enough for a 30-min walk + water, small enough to wear on a 3-mile loop. |
| Weight | Titan Fitness Ruck Plate | $35 steel. Sits flat against your back. Start at 10-15 lbs, add a second plate when the first feels light. |
| Shoes | Salomon XA Pro 3D | Cushion + arch support for daily walking miles. Reduces joint stress that derails consistency. |
| Anti-chafe | Body Glide Original | Thigh chafe at week 3 is the #1 reason new ruckers quit. Apply before, not after. |
| Hydration | Nalgene 32oz Wide-Mouth | One bottle = 60-90 min of summer rucking. Drop an electrolyte tab in if you sweat heavy. |
This is the kit that gets you to month 3 without "I should buy something else" friction. The educational sections below cover calorie math, the progressive load protocol, and what to do when the scale stalls.
---
## How many calories does rucking burn?
The science behind rucking calories is rooted in military research. The [Pandolf equation](/glossary#pandolf-equation), developed in 1977 and refined by Santee in 2001, is the gold standard for predicting energy expenditure while carrying a load. Unlike generic calorie calculators that assume level terrain and no load, the Pandolf equation accounts for five key variables:
- **Your body weight** - heavier people burn more calories
- **The weight you're carrying** - the load itself requires energy to move
- **Your walking speed** - faster = more calories per minute, but the relationship isn't linear
- **Terrain grade** - uphill is exponentially more expensive; downhill slightly less so
- **Surface type** - soft surfaces (sand, mulch, grass) burn more calories than hard pavement
A 180-pound person carrying 30 pounds at 3.5 miles per hour on flat pavement burns about 410 calories an hour, against about 365 walking the same route without a pack. That 13 percent is less than a lot of rucking content promises. The bigger lever is the route: the same ruck up a 5 percent grade is about 635 calories an hour. Pandolf tends to under-predict heavy loads, so treat these as conservative.
Use the [rucking calorie calculator](/tools/rucking-calorie-calculator) below when you want to calculate your rucking calories by body weight, load, pace, terrain, and duration instead of relying on broad averages.
## The Ruck Authority Progressive Load Protocol
Most weight-loss rucking programs fail for one of two reasons: they start too heavy, or they chase intensity before the habit exists. The Ruck Authority Progressive Load Protocol fixes that by sequencing the stress in the order your body can actually adapt to it:
1. **Load first:** start with a light, stable pack.
2. **Frequency second:** build from 2 rucks per week to 3-4.
3. **Distance third:** add weekly miles once your joints feel normal.
4. **Intensity last:** add hills, pace, or heavier weight only after the base is built.
For beginners, the protocol is intentionally conservative:
If a percentage and a fixed weight disagree, use the lighter number. A 120-pound beginner does not need the same starting load as a 220-pound beginner, and an already active person may tolerate more volume than someone coming off the couch. The protocol is a starting point, not a dare.
The individual variation is important to note: these are estimates based on average metabolism and efficiency. Some people burn slightly more, some slightly less, but the Pandolf equation is accurate enough for practical planning-and importantly, it's directionally correct across populations.
---
## Why rucking works for fat loss (when other things haven't)
### It's sustainable
Running has a dropout rate that should concern the fitness industry. Studies consistently show that 50% of recreational runners sustain an injury serious enough to affect training within a single year. Even among those who don't get injured, the perceived difficulty is a barrier: running feels hard to most people, and the more something feels hard, the fewer days per week you'll do it.
Rucking, by contrast, feels like walking-because it is walking, just with weight. The barrier to starting is near zero. You don't need special genetic advantages for running. You don't need to be "a runner." The first ruck doesn't feel impossible. This matters more than any other factor for fat loss, because adherence is the strongest predictor of success. The best program is meaningless if you quit after three weeks. The moderate program you actually do is worth infinitely more.
### It keeps you in the fat-burning zone
There's a common misconception that you need to hit a high heart rate to burn fat. The science actually points in the opposite direction: Zone 2 cardio, defined as 60-70% of your maximum heart rate, is the sweet spot for sustained fat oxidation. At this intensity, your body preferentially uses fat as fuel rather than glycogen.
Rucking naturally puts most people into Zone 2 without you even trying. A casual ruck at 3.5 mph with 30 pounds sits right in that zone for most fitness levels. A [GPS watch with heart rate monitoring like the Garmin Instinct 3](/gear/best-gps-watches-for-rucking) makes this easy to verify in real time - you'll know you're in the zone without guessing. In contrast, running often pushes beginners into Zone 3 or even Zone 4 (80-90% max HR), which is glycolytic and less fat-efficient.
For the complete breakdown of Zone 2 physiology and how to structure your rucking for maximum fat oxidation, see our [Zone 2 rucking guide](/weight-loss/zone-2-rucking-guide).
### It builds muscle while burning fat
Every ruck you do involves a [loaded carry](/glossary#load-carriage). Loaded carries, with weight distributed across your shoulders and back, activate your [posterior chain](/glossary#posterior-chain), core, leg stabilizers, and other stabilizing muscles throughout the body. This is stimulus for muscle growth.
Running, by contrast, is largely catabolic at higher volumes: your body will actually break down muscle tissue for fuel. This is especially true if you're doing high-volume running on a caloric deficit. More muscle mass means a higher resting metabolic rate, which means more calories burned even when you're sitting on the couch. Rucking provides a modest anabolic stimulus, particularly valuable for sedentary beginners who have muscle-building potential.
### The load itself moves the scale
The best controlled evidence that carrying weight changes body composition comes from weighted-vest trials, and in 2026 they were pooled for the first time.
### It doesn't require recovery like running does
A well-trained runner can handle 4-5 running sessions per week, but this requires a ton of aerobic capacity and comes with injury risk. Most recreational ruckers can handle 4-5 rucking sessions per week indefinitely. Why? The impact on your connective tissue (tendons, ligaments) is substantially lower. Your joints recover faster. Your nervous system isn't hammered by repetitive high-impact forces.
More sessions per week means more total calorie burn, which means faster fat loss. Four one-hour rucks a week at 400 to 600 calories each (flat to hilly) is 1,600 to 2,400 calories of activity, a little under half of which you would have burned sitting still anyway. Paired with a modest food deficit, that adds up.
---
## Rucking vs running vs walking: the calorie comparison
The chart makes the tradeoff visible: running burns more calories per hour than rucking, but that difference often becomes meaningless if you can only sustain running 2 times per week due to injury or fatigue. Four hilly one-hour rucks at about 600 calories burn more in a week than two 45-minute runs at about 630. Walking and rucking figures come from the Pandolf equation; running from Compendium of Physical Activities METs, the same sources our calculator uses.
For the full head-to-head breakdown including detailed calorie tables, injury comparisons, and individual variation, read [Rucking vs running: which burns more fat?](/weight-loss/rucking-vs-running-weight-loss)
---
## The rucking weight loss program
The protocol above gets you through the first eight weeks. The following 12-week framework is the broader program for turning that start into a real fat-loss block. Each phase builds on the previous one, gradually increasing the stress on your system to drive adaptation.
### Phase 1: Foundation (Weeks 1-4)
The first month is about building the habit and letting your body adapt to loaded walking. Your tendons, ligaments, and stabilizer muscles haven't done this before. Your feet need to toughen up. You need to find good routes and integrate rucking into your schedule.
Keep the load light - this is not the time to carry 40 pounds. A 15-20 pound load feels like something at first, but it's not heavy enough to cause problems if your form is decent. A purpose-built [ruck plate like the Titan Fitness cast iron](/gear/ruck-plate-comparison) sits flat against your back and won't shift mid-stride the way dumbbells or water bottles will. The pace should be conversational: you should be able to talk, maybe not sing, during the ruck.
At 3 times per week, you're creating a stimulus without overloading the system. This frequency is also sustainable for almost anyone - it doesn't require rearranging your entire schedule.
### Phase 2: Build (Weeks 5-8)
By week 5, your body has adapted. Your connective tissue is stronger. Your aerobic base is higher. Now you can increase frequency, load, and distance.
The jump to 4 times per week is where the real calorie burn starts to happen. You're now doing roughly 1,000-1,700 calories of rucking per week (not counting your regular daily expenditure). You're adding distance gradually-a half mile per week is sustainable and won't shock your system.
The load increase is also gradual: add 5 pounds from week 1 to week 5. This respects [the 10% rule](/glossary#ten-percent-rule) and gives your body time to adapt. As your distances grow, footwear matters more - trail shoes like the [Salomon XA Pro 3D](/gear/best-rucking-shoes-by-terrain) give you grip and stability that regular sneakers won't. One of these four sessions per week should be your longer ruck (3-4 miles), which builds aerobic capacity and mental toughness but isn't so long that recovery becomes an issue.
### Phase 3: Burn (Weeks 9-12)
By phase 3, you're a functional rucking athlete. Your body is adapted. This is where the fat loss is most dramatic. You're doing 4-5 sessions per week at roughly 300-560 calories each, more on the hill day. That's about 1,500-2,700 calories per week from rucking alone, before we even talk about your baseline metabolism or any deficit you're creating through nutrition.
The intensity is introduced through hills rather than speed. A hilly ruck with moderate weight burns more calories than a fast flat ruck, with less injury risk and better sustainability. One session per week includes hills; the others are flat or mixed terrain at a moderate pace.
## Nutrition guidelines for rucking weight loss
Rucking creates the opportunity for fat loss through caloric expenditure. Nutrition determines whether you actually realize that opportunity or accidentally eat back all the calories you burn.
**The cardinal rule:** Don't eat back all your rucking calories. A common mistake is "I just burned 500 calories, so I can eat an extra 500 calories today." At best, this means your rucking effort created zero deficit. At worst, you slightly overcompensate and gain weight while exercising consistently.
Instead, use your rucking as a contributor to your overall caloric deficit, not as an excuse to increase intake.
**Protein is critical.** Aim for 0.7-1.0 grams of protein per pound of body weight. This is especially important when you're in a caloric deficit because your body will preferentially break down muscle for fuel. Adequate protein tells your body to spare the muscle and use fat instead.
**Don't create an excessive deficit.** A moderate deficit of 500 calories per day (1 pound per week) is sustainable. A 1,000-calorie deficit per day is aggressive and often backfires: your energy crashes, your recovery tanks, and you become vulnerable to injury. Combined with loaded exercise, an aggressive deficit is a recipe for joint problems.
**Hydration matters more with rucking.** Add 12-16 fluid ounces of water per 30 minutes of rucking beyond your normal daily intake. You're carrying weight, which increases your metabolic heat. You need the hydration for thermoregulation and to maintain blood volume for oxygen delivery. For longer rucks, LMNT Electrolyte Variety Pack replenishes sodium and electrolytes, especially critical during longer or hotter sessions. A pack with good weight distribution helps you carry hydration comfortably - see our [best rucking backpacks guide](/gear/best-rucking-backpacks) for packs designed to handle full loads.
**Timing around rucks:** A light carbohydrate 30-60 minutes before a ruck (a banana, a slice of toast with almond butter) provides glycogen without causing digestive discomfort. Post-ruck, consume protein and carbs within 60 minutes to replenish glycogen and provide amino acids for recovery.
We are not registered dietitians. These are general guidelines based on sports nutrition research. If you have significant metabolic concerns or are managing a medical condition, consult a professional for personalized nutrition planning.
## Can rucking be your only exercise?
For fat loss specifically, yes: rucking alone will create a caloric deficit and burn fat. However, fat loss isn't the same as comprehensive fitness. We dig into this question in detail in our dedicated article: [Can rucking be your only exercise?](/weight-loss/can-rucking-be-your-only-exercise)
The short answer: add 1-2 days per week of strength training (even light bodyweight work) to preserve muscle mass and improve body composition beyond just scale weight.
## Tracking your progress
The scale is a poor short-term feedback mechanism for body composition change. A 1-2 pound daily fluctuation based on hydration, sodium intake, and the menstrual cycle is completely normal and tells you nothing about fat loss.
Instead, track weekly averages: weigh yourself daily and average the week, then compare week-to-week. You should expect 1-2 pounds of fat loss per week at a moderate deficit. For a realistic picture of what changes at 30, 60, and 90 days, see our [rucking before and after timeline](/weight-loss/rucking-results-what-to-expect).
Also track:
- **Circumference measurements** (waist, hips, chest)-often these change before the scale does
- **Progress photos** (every 4 weeks)-visual change is sometimes more motivating than scale weight
- **Rucking metrics:** load, distance, pace, heart rate, RPE-you're looking for pace to improve at the same weight, or the ability to carry more weight at the same pace
A GPS watch with built-in heart rate makes the rucking-metric piece automatic. The Garmin Instinct 3 is the rucker's pick - rugged, multi-week battery, accurate Zone 2 tracking. If you want a do-everything lifestyle tracker rather than a rugged outdoor watch, our sister site Kit Authority's [Garmin Vivoactive 5 review](https://kitauthority.com/fitness/garmin-vivoactive-5-review?utm_source=ruckauthority&utm_medium=crosslink) covers that everyday-fitness option.
Early on (weeks 1-4), the scale may not move as much as you'd hope. This is often because you're building muscle as you're losing fat. Your body composition is improving even if the scale is slow. Trust the process. By week 8, momentum is usually visible.
## Common weight loss mistakes with rucking
## The weight-loss kit
For fat loss specifically, three items matter most: a pack with a plate pocket that keeps load against your upper back (not your lumbar), a plate heavy enough to drive intensity without forcing pace, and cushioned shoes that keep your joints quiet over daily sessions. That's it.
## Go deeper
- [Rucking vs running: which burns more fat?](/weight-loss/rucking-vs-running-weight-loss) - data-driven comparison with calorie tables and injury risk
- [Can rucking be your only exercise?](/weight-loss/can-rucking-be-your-only-exercise) - what rucking trains vs what it doesn't
- [How many calories does rucking burn?](/weight-loss/rucking-calorie-calculator-guide) - Pandolf equation, MET values, and our calculator
- [Zone 2 rucking guide](/weight-loss/zone-2-rucking-guide) - the science of loaded low-intensity cardio for fat loss
- [Rucking for women](/weight-loss/rucking-for-women) - weight recommendations, cycle-aware programming, and gear fit
- [How heavy should your ruck be?](/guides/how-heavy-should-your-ruck-be) - our weight calculator and progression guide
- [Ruck weight calculator](/tools/ruck-weight-calculator) - find your recommended starting weight
- [The 5 rucking books worth reading in 2026](/guides/best-rucking-books-2026) - led by Kayla Girgen's *Ruck Fit*, the only book on the market that pairs rucking programs with serious nutrition protocols (Girgen is a Mayo Clinic-trained registered dietitian)
- [Long-term rucking for weight loss: a periodization approach](/weight-loss/long-term-rucking-for-weight-loss-a-periodization-approach) - how to avoid plateaus and keep losing past month three
- [The rucking afterburn effect](/weight-loss/rucking-afterburn-effect) - how weighted walking keeps burning calories even after you stop
- [Progressive overload for weight-loss rucking](/weight-loss/progressive-overload-for-weight-loss-rucking-how-to-keep-bur) - keep burning fat as you get stronger
## Frequently Asked Questions
────────────────────────────────────────────────────────────────────────────────
URL: https://ruckauthority.com/pillars/rucking-gear-guide
Title: Rucking Gear Guide - Packs, Plates & Shoes
Description: The complete guide to rucking gear. Honest reviews, head-to-head comparisons, and budget recommendations - from $50 starter kits to premium loadouts.
Published: 2026-03-10 / Updated: 2026-08-24
## How we evaluate gear
This guide combines manufacturer specifications, warranty and return terms, current availability, product geometry, and published load-carriage research. A product is not described as field-tested unless its article has a completed evidence record naming the tester, period, and load. Otherwise, the recommendation is clearly an editorial comparison of the available evidence.
Fit and comfort are individual, so this guide treats dimensions, adjustment range, load placement, and return policy as decision inputs rather than promises. Where a product has not been tested by Ruck Authority, we say so instead of turning anonymous comments into a fake consensus.
We have a transparent editorial approach: some retailer links are affiliate links, which means Ruck Authority may earn a commission if you buy through them at no extra cost to you. Recommendations do not change based on commission rate. We're upfront about the sources behind each recommendation, and if community data is limited on a product, we say so.
---
## Find your gear in 30 seconds
Answer five quick questions about your budget, primary use, terrain, weight range, and body type, and get personalized gear recommendations. The quiz considers your actual constraints (budget matters), your goals (fitness rucking is different from event prep), and your environment (trail-capable packs are different from road packs).
---
## Rucksacks: the complete buyer's guide
### What makes a good rucking pack
Not all backpacks are built for rucking. A good hiking pack isn't necessarily a good rucking pack. Here's what matters:
**Frame sheet or internal frame.** The weight needs to stay pressed against your spine without sagging. A quality frame or frame sheet prevents the load from shifting forward and pulling on your shoulders. This is non-negotiable.
**[Ruck plate](/glossary#ruck-plate) pocket or sleeve.** This is the dedicated space where ruck plates live, locked tight against your back. It distributes the weight vertically and prevents the plate from sliding around inside the pack. A pack without a ruck plate pocket is a general backpack, not a rucking pack. If you want purpose-built options, start with the [best weighted backpacks for rucking](/gear/best-weighted-backpacks-for-rucking).
**Padded hip belt.** A proper hip belt should transfer 30-40% of the load from your shoulders to your hips. Your hips can handle load far better than your shoulders. A padded hip belt prevents digging and distributes that load over a wider area.
**Comfortable, padded shoulder straps with a [sternum strap](/glossary#sternum-strap).** The shoulder straps bear significant load. They should have padding (at least 0.5 inches) and should be ergonomically shaped. A sternum strap (connecting the two shoulder straps across your chest) prevents shoulder shrug and spread.
**Durable fabric.** 1000D Cordura or similar is the standard. Ripstop nylon is acceptable for lighter loads. You need a fabric that won't shred when you brush against rocks or thorny plants.
**Appropriate volume.** For fitness rucking, 20-25 liters is optimal. Anything smaller and the weight distribution is cramped. Anything larger and you're carrying extra fabric weight. For event rucking or longer expeditions, 25-35 liters gives you room for overnight gear.
### Best rucksacks by category
#### Best overall: GORUCK Rucker 5.0
The [GORUCK Rucker 5.0](/gear/goruck-rucker-5-0-review) is the current purpose-built training pack in the line. Its two elevated pockets hold Standard and Long plate formats close to the upper back, while the lumbar pad and external handles support loaded miles and ruck PT. Check the [current GORUCK lineup guide](/goruck) when work, travel, or a lower entry price also belong in the decision.
The downside is cost and specialization. It does not have the laptop compartment that makes the GR1 useful for work, and beginners staying under a 30 lb Standard plate may not need more than the Basic Rucker.
#### Best value: 5.11 Rush 12 2.0 and alternatives
The [5.11 Rush 12 2.0](/gear/best-rucking-backpacks) delivers about 80% of the performance of a GORUCK Rucker at around 40% of the price. It has a frame sheet, adequate padding, a hip belt, and a dedicated plate pocket. The fabric is durable Cordura.
It's not quite as refined as the GORUCK-the straps are thinner, the hip belt padding is less plush-but it works extremely well for the price and is a legitimate choice for serious rucking without the premium price tag.
See our full [GORUCK alternatives head-to-head](/gear/best-goruck-alternatives) for tested options across multiple price points.
#### Best for women: pack with adjustable/short torso
Women's bodies have different torso-to-leg ratios and different shoulder widths. Many unisex packs are designed around male proportions, which creates fit problems for women.
Look for a pack size and shoulder-strap shape that match the actual torso. GORUCK offers several capacities, but they are not a substitute for trying the loaded fit. There are also women-specific options with narrower harness geometry.
See our [best rucking gear for women](/gear/best-rucking-gear-for-women) guide for fit-specific recommendations for packs, vests, and shoes.
#### Best budget: regular backpack + DIY weight
You don't need a fancy [ruck pack](/gear/best-rucking-backpacks) to start. A regular backpack (even a school backpack or daypack) can work perfectly fine for your first few rucks, as long as it has a hip belt and a frame.
Pair it with DIY weight (bricks, water, sand) in a cheap sandbag or even a drawstring bag, and you have a fully functional rucking setup for under $50.
Our [$50 rucking starter kit](/gear/budget-rucking-starter-kit) proves you don't need expensive gear to get started rucking seriously.
---
## Ruck plates and weight options
### Ruck plates
A ruck plate is a flat, dense weight designed to fit into the ruck plate pocket of a backpack. Think of it as a rectangle of metal or composite material that locks weight against your spine.
**Advantages:** Ruck plates are compact, stable, and won't shift during movement. They're purpose-built. Standard weights are available (10, 20, 30, 45 lbs), and you can stack multiple plates.
**Materials:** Cast iron (cheap but heavy), coated steel (more durable, better handling), and HDPE (lighter per pound, doesn't rust). For rucking, coated steel is the sweet spot-it's durable and the coating prevents rust.
**Cost:** A 20-pound ruck plate typically runs $30-50. A 45-pound plate runs $50-80.
The plate-of-record for the GORUCK Rucker pocket: [GORUCK's own 20-lb steel plate](/gear/ruck-plate-comparison). Sized exactly to the pocket, no shifting, color-coded by weight. The budget-tier swap is the [Titan Fitness cast iron ruck plate](/gear/ruck-plate-comparison) at roughly half the price - same 20 lb, slightly chunkier dimensions, fits most non-GORUCK packs without issue.
For a detailed head-to-head comparison of ruck plates from different manufacturers, including cross-pack fit testing, see [Ruck Plate Showdown](/gear/ruck-plate-comparison).
### Sandbag fillers
Sandbag fillers are cheaper than ruck plates and moldable. You can fill them to any weight-12 pounds, 25 pounds, whatever you want. This flexibility is particularly valuable for beginners because you can start at a lighter weight and progress without buying multiple plates.
A good sandbag filler (canvas or nylon, around 8"x12") costs $10-20 and can be filled with sand or pea gravel from any hardware store.
The downside: sandbag fillers can shift inside your pack unless they're packed tightly, and they don't last as long as ruck plates.
### DIY options
Bricks, water bottles, dumbbells-they all work for starting. A brick weighs about 5 pounds. Water is 8 pounds per gallon. Dumbbells can be placed in a sealable bag.
DIY is great for trying rucking without spending money, but it's not ideal long-term because the weight distribution is uneven and the materials aren't designed for the purpose.
---
## Shoes for rucking
Rucking puts different demands on footwear than running or casual walking. You're carrying 20-40 pounds on your feet for extended periods. Your feet need support, not cushioning. Most running shoes are too soft. Minimalist shoes don't provide enough support under load.
**The ideal rucking shoe is firm-soled and supportive, with a [heel-to-toe drop](/glossary#heel-to-toe-drop) of 8-12mm.** Drop is the height difference between your heel and your forefoot. A 10mm drop (common in trail runners and hiking boots) provides stability while keeping you close enough to the ground for good proprioception.
Look for trail runners, hiking shoes, or firm walking shoes. Not ultra-cushioned running shoes. Not minimalist shoes. The sweet spot is something like a Salomon trail runner or a Merrell hiking shoe-firm sole, adequate cushioning, high drop, durable.
The standby pick across mixed terrain: the [Salomon XA Pro 3D V9 GTX](/gear/best-rucking-shoes-by-terrain). Aggressive Contagrip outsole, 10mm drop, GORE-TEX waterproofing, the shoe most ruckers eventually settle on for everything except pure pavement. For pavement-heavy training, the [Hoka Bondi 9](/gear/best-shoes-for-rucking-on-pavement) is the max-cushion alternative most ruckers reach for when knees start complaining.
For terrain-specific shoe picks and reviews, read our [best rucking shoes by terrain](/gear/best-rucking-shoes-by-terrain) guide. We rank shoes by pavement, gravel, trail, and mixed terrain so you can pick by the surfaces you actually ruck on.
---
## Accessories that actually matter
Not all rucking accessories are created equal. Here's where to spend and where to skip.
---
## Gear by budget tier
Read the full breakdown: [The $50 rucking starter kit](/gear/budget-rucking-starter-kit).
---
## How to maintain your gear
**Rucksack:** Hand wash with mild soap and water, never machine wash. Cordura holds up forever if you don't shred it. Air dry completely before storing. Periodically refresh the Durable Water Repellent (DWR) coating-it's a simple spray-on product that costs $10-15 and takes 30 minutes.
**Ruck plates:** Wipe down after dusty or muddy rucks. If you have cast iron plates, check occasionally for rust and store in a dry place. Steel plates with coating rarely rust, but wipe them down periodically anyway.
**Shoes:** Remove insoles after wet rucks and air dry (never use heat). Rotate between two pairs if possible-this extends the life of the cushioning. Most rucking shoes last 500-800 miles before the cushioning degrades.
## Shop the full kit
Every category covered in this guide, ranked and cross-referenced for compatibility in one place. Individual picks or a pre-built kit. Our compatibility engine flags bad pack-plate combos before checkout.
---
## Go deeper
- [Best GORUCK alternatives](/gear/best-goruck-alternatives) - head-to-head testing of 4+ packs with price/performance matrix
- [Ruck plate showdown](/gear/ruck-plate-comparison) - GORUCK vs Rogue vs Amazon, cross-pack fit testing
- [Best rucking shoes by terrain](/gear/best-rucking-shoes-by-terrain) - pavement, trail, and mixed-terrain picks
- [Best headlamps for rucking](/gear/best-headlamps-for-rucking) - lights for road, trail, winter, and group rucks
- [Best rucking gear for women](/gear/best-rucking-gear-for-women) - fit-specific recommendations for packs, vests, and shoes
- [CAP Barbell Adjustable Weighted Vest](/gear/cap-barbell-adjustable-weighted-vest) - best budget [weighted vest for rucking](/gear/cap-barbell-adjustable-weighted-vest) cross-training
- [Hyperwear Hyper Vest PRO](/gear/hyperwear-hyper-vest-pro) - [premium weighted vest](/gear/hyperwear-hyper-vest-pro) review. Shopping for a vest for everyday fitness rather than as a rucking alternative? Our sister site Kit Authority's [best weighted vests](https://kitauthority.com/fitness/best-weighted-vests?utm_source=ruckauthority&utm_medium=crosslink) roundup covers that side of the market.
- [The $50 rucking starter kit](/gear/budget-rucking-starter-kit) - everything you need on a budget
- [How to ruck with a regular backpack](/guides/ruck-with-regular-backpack) - no gear needed to get started
- [GORUCK Basic Rucker 17L review](/gear/goruck-basic-rucker) - the entry GORUCK pack put through real use
- [What 10 years of GORUCK actually costs](/gear/goruck-loyalty-discount-math) - the buy-it-for-life math vs a budget pack
- [5.11 Tactical base layer collection](/gear/5-11-tactical-base-layer-collection) - tactical-cut base layers for cold-weather rucks
- [Best follow drones for rucking](/gear/best-follow-drones-for-rucking) - a niche pick for ruckers who film their training
- [Starbucks launched a weighted vest - here's what to actually buy](/guides/starbucks-weighted-vest-rucking) - why a coffee-brand vest isn't your training answer
## Frequently Asked Questions
────────────────────────────────────────────────────────────────────────────────
URL: https://ruckauthority.com/pillars/rucking-injury-prevention
Title: Rucking Injury Prevention: Common Injuries and Stop Rules
Description: The injuries ruckers actually get, from blisters and knee pain to shin splints and numb hands, how to build load without them, and when to stop.
Published: 2026-03-10 / Updated: 2026-09-26
## Rucking is safe - when you respect the load
Rucking is walking, and walking is one of the safest ways to train. The risk comes from the pack: more weight means more force through the feet, knees, and back, and military research on foot marching shows what happens when that load climbs faster than the body adapts. [Knapik's 2014 review](https://pubmed.ncbi.nlm.nih.gov/25399383/) lists foot blisters, metatarsal pain, knee problems, and back problems as the common complaints, and an earlier review adds stress fractures and rucksack palsy ([Knapik et al., 2004](https://pubmed.ncbi.nlm.nih.gov/14964502/)). Its prescription is plain: lighter loads, better load distribution, appropriate physical training, and proper equipment.
Nobody has published injury rates for recreational rucking, so we won't pretend to know how it compares with running, where reported yearly injury incidence ranges from about 19% to 79% depending on the study ([van Gent et al., 2007](https://pubmed.ncbi.nlm.nih.gov/17473005/)). The military data come from soldiers carrying far heavier loads than most civilians use. What the research does support is that most load-carriage injuries are overuse problems that build over weeks, and the levers that matter (weight, progression, fit, footwear) are ones you control.
This guide is educational, not medical. If you have an injury, pain that persists, or a pre-existing condition, see a clinician for diagnosis and a plan that fits you.
_Disclosure: some retailer links in this guide are affiliate links. If you buy through them, Ruck Authority may earn a commission at no extra cost to you. Safety recommendations do not change based on commission._
---
## Assess your risk
This quick assessment considers your weight carried, weeks of experience, frequency, any current pain or previous injuries, and outputs a risk level (low/moderate/high) with specific recommendations for your situation. Use it to calibrate your progression.
---
## The most common rucking injuries
---
## The prevention framework: progress one variable at a time
The simplest rule that holds up: change one thing at a time, in small steps, and let a week or two pass before the next change. Weight, distance, pace, and hills are four separate variables. Raise one, hold the rest.
**For weight:** add a few pounds at a time. Going from 20 to 22 or 25 lb is a step; going from 20 to 30 lb is a leap.
**For distance:** add a quarter to half a mile to your longest ruck, not double it.
**Never add weight and distance in the same week.** If you're adding load, keep distance flat. If you're adding distance, keep load flat.
The [10% rule](/glossary#ten-percent-rule) (no more than a 10% weekly increase) is a reasonable way to size those steps. Treat it as a planning guide, not a safety guarantee: a systematic review found very limited evidence linking any specific weekly increase to injury, and one included study found no difference between 10% and 24% weekly increases in runners, while increases above 30% trended riskier ([Damsted et al., 2018](https://pubmed.ncbi.nlm.nih.gov/30534459/)).
The reason to go slowly is that tendons and bone adapt more slowly than your heart and lungs. Your breathing can tell you a heavier ruck is fine weeks before your shins or feet agree.
Those findings don't set a safe number. They explain why load and hills compound, and why the tissues absorbing those forces need time between increases.
---
## The prehab routine: 8 exercises in 15 minutes
Prehab is strength and control work done before anything hurts. The best evidence for it in lower-leg injuries comes from shin splints: in a 2025 meta-analysis of prevention trials, neuromuscular training (strength, balance, and movement-control work) had the clearest preventive effect ([Marques et al., 2025](https://pubmed.ncbi.nlm.nih.gov/40633262/)). This 8-exercise routine takes 12-15 minutes and covers the feet, calves, glutes, quads, core, and shoulders. Do it 2-3 times a week.
That's it. The only kit you need is a resistance loop band for the clamshells and, optionally, a foam roller for afterward. No routine makes injury impossible, but this one builds capacity in the places load carriage stresses most.
For progressions, variations, and form cues, see the full [rucking prehab routine](/injuries/rucking-prehab-routine).
---
## Tracking heart rate and recovery
Monitoring your heart rate during rucking helps you stay in the right intensity zones for adaptation while avoiding overtraining. A [Garmin Instinct 3 Solar](/gear/best-gps-watches-for-rucking) provides reliable zone tracking without overthinking it, giving you real-time feedback that keeps you from overextending.
---
## When to push through vs when to stop
Not every ache is a sign to stop rucking. But some are. Here's the decision tree:
---
## Recovery and mobility
Rucking creates stress on your body. Recovery is where the adaptation happens.
**Post-ruck routine (5-10 minutes):** After every ruck, spend 5-10 minutes stretching. Target your calves, hip flexors, shoulders, and thoracic spine. These are the tissues under most load during rucking.
**Weekly mobility session (15-20 minutes):** Once per week, do a dedicated mobility and dynamic stretching session. See [Rucking Mobility Guide](/injuries/rucking-mobility-guide) for specific routines.
**Sleep (7-9 hours per night):** The recommended range for adults, and the cheapest recovery tool there is. Consistently short sleep makes hard training harder to absorb.
**Nutrition:** Protein and carbohydrate in the next meal after a long ruck, and water to rehydrate. This matters more the harder and longer the ruck.
**[Active recovery](/glossary#active-recovery):** On rest days, easy walking, swimming, yoga, or light stretching promotes blood flow and recovery without additional stress.
**Track your recovery:** Heart-rate variability trends can help show whether you're adapting or digging a hole. Our guide to [the vagus nerve and HRV for ruckers](/injuries/vagus-nerve-hrv-for-ruckers) explains how to read it and when to back off.
If you want a percussion tool for general post-workout recovery beyond rucking, our sister site Kit Authority's [best massage guns for recovery](https://kitauthority.com/fitness/best-massage-guns?utm_source=ruckauthority&utm_medium=crosslink) breaks down the options.
---
## Special populations
### Rucking over 50
If you're over 50, you can absolutely ruck. But progression should be more conservative than for younger people.
**Start lighter:** Begin with 8-12 pounds, not 15-20. Your connective tissue has less natural elasticity, so it needs more time to adapt.
**Progress slower:** Add weight every 3-4 weeks instead of every 1-2 weeks. This gives your bones and joints adequate time to adapt.
**Joint considerations:** Pre-existing arthritis, lower [bone density](/glossary#bone-density), or previous joint injuries may require medical clearance and specific modifications.
**The upside:** Weight-bearing exercise supports bone health, though the evidence for loaded walking specifically is mixed. A 5-year program of weighted-vest exercise plus jumping maintained hip bone density in postmenopausal women ([Snow et al., 2000](https://pubmed.ncbi.nlm.nih.gov/10995045/)), while a 2025 trial found that wearing a weighted vest during weight loss did not prevent hip bone loss in older adults ([Beavers et al., 2025](https://pubmed.ncbi.nlm.nih.gov/40540267/)). Rucking is good training; it isn't an osteoporosis treatment.
See our [rucking for seniors](/training/rucking-for-seniors) guide for age-specific progressions and research-backed recommendations.
### Rucking with previous injuries
**Back injuries:** Get medical clearance from a healthcare professional. Start with 5-10 pounds. Prioritize core strengthening-this is non-negotiable. Avoid rucking if it reproduces your original pain.
**Knee injuries:** Use a shorter stride (faster cadence, shorter steps). Stay lighter on weight. Do quad strengthening regularly. Consider a knee brace if recommended by a professional.
**Shoulder injuries:** Hip belt is mandatory-it transfers load away from your shoulders. Keep loads light. Gradually load the shoulder straps as you progress.
**Arthritis:** Loaded walking can actually support joint health when scaled correctly. Our guide to [rucking with arthritis](/injuries/rucking-with-arthritis) covers what the research says and how to manage load on affected joints.
**Always get medical clearance before starting rucking if you have significant injury history.** Your doctor or physical therapist can give you personalized guidance based on your specific situation.
## The prevention stack
Blisters are the most common load-carriage injury, so the feet come first: shoes that fit, merino or synthetic socks, and a small foot-care kit (tape, balm, patches). Gear supports good progression; it doesn't replace it.
Three pieces of kit cover friction, recovery, and monitoring: an anti-chafe balm for hot spots, a foam roller for post-ruck tightness, and a watch that makes it easy to see when your training load is climbing.
| Role | Pick | What it prevents |
|------|------|------------------|
| Anti-chafe | Body Glide Original | Heels, sides of feet, known hot spots. Fits in a pocket. |
| Foam roller | TriggerPoint GRID | Post-ruck calf, quad, and hip tightness. Comfort, not a treatment. |
| Watch | Garmin Instinct 3 Solar | Heart-rate zones, weekly load, and recovery trends in one place. |
---
## Go deeper
- [Rucking knee pain - types, causes, and fix](/injuries/rucking-knee-pain) - biomechanics research, symptom decision tree, and return-to-rucking progression
- [Rucking plantar fasciitis](/injuries/rucking-plantar-fasciitis) - prevention, treatment phases, and footwear recommendations
- [Rucking shin splints](/injuries/rucking-shin-splints-prevention-early-signs-and-recovery-pro) - early signs, what prevention evidence supports, and stress-fracture red flags
- [Rucking foot care and blister prevention](/injuries/rucking-foot-care-blister-prevention) - socks, lacing, hot spots, and what to carry
- [Numb hands while rucking (rucksack palsy)](/injuries/rucksack-palsy-numb-hands) - why straps compress the brachial plexus and how to refit the pack
- [Hip flexor stiffness after rucking](/injuries/rucking-hip-flexor-tightness-why-it-happens-and-how-to-fix) - what to try and when to get help
- [Rucking with arthritis](/injuries/rucking-with-arthritis) - what the research says about loaded walking and sore joints
- [HRV and the vagus nerve for ruckers](/injuries/vagus-nerve-hrv-for-ruckers) - using recovery data to decide when to back off
- [The rucking prehab routine](/injuries/rucking-prehab-routine) - 8 exercises targeting feet, knees, hips, back, and shoulders
- [Rucking mobility guide](/injuries/rucking-mobility-guide) - warm-up, cool-down, and recovery routines
- [Is rucking bad for your back?](/training/is-rucking-bad-for-your-back) - what the science says about loaded walking and spinal health
- [Rucking for seniors](/training/rucking-for-seniors) - safe-start guide for adults over 50
## Frequently Asked Questions
────────────────────────────────────────────────────────────────────────────────
URL: https://ruckauthority.com/pillars/rucking-lifestyle-guide
Title: Rucking for Life: The Lifestyle Guide
Description: Make rucking part of daily life with practical guides for commuting, travel, family walks, dogs, mental health, community, and long-term health.
Published: 2026-04-04 / Updated: 2026-05-09
Most people find rucking through fitness. They stay because of everything else.
The person who starts rucking to lose weight ends up doing it to clear their head. The one who picks it up for training ends up bringing their dog, then their partner, then starting a ruck club. That's the pattern. Rucking has a way of expanding beyond the workout and into the rest of life.
This guide covers the lifestyle side - the ways rucking fits into real days, real schedules, and real relationships.
The simplest way to build a rucking lifestyle is to attach the loaded walk to something you already do. Walk the dog with 10-15 lbs. Take one errand on foot. Meet a friend for a conversational ruck instead of coffee. Park farther from the office and carry a light pack for the last mile. None of those choices require a new identity or a perfect training block. They just make walking a little more useful.
That matters because consistency beats heroic workouts. A hard weekend ruck can be satisfying, but a life that includes three easy loaded walks per week will usually do more for fitness, mood, and community. The goal is not to turn every walk into a military event. The goal is to make load-bearing movement normal enough that it survives busy weeks.
## The rucking lifestyle framework
Use this framework when deciding where rucking fits:
A collapsible reservoir packs flat in a carry-on, fills at any hotel tap, and turns into 4-6 lbs of TSA-friendly load when you arrive. If your ruck flies as the personal item and you still need a bag for the rest of the trip, our sister site Kit Authority's [best carry-on luggage](https://kitauthority.com/travel/best-carry-on-luggage?utm_source=ruckauthority&utm_medium=crosslink) guide covers the case that rides in the overhead bin.
The common thread is restraint. Lifestyle rucking should leave you better for the rest of the day, not wrecked by 9 a.m. Heavy packs, speed work, and long events still have a place, but those are training choices. The everyday version should feel repeatable.
## Rucking vs. Other Movement
Before diving in, it helps to understand where rucking sits relative to everything else. It's not hiking. It's not just walking. It's not running with a pack. It sits at an interesting intersection that makes it uniquely useful for everyday life.
Walking is the base layer: accessible, low friction, easy to recover from. Rucking adds enough load to make the same walk more muscular and more cardiovascular. Hiking usually depends on destination and terrain. Running depends more on pace tolerance and joint readiness. Rucking sits in the middle, which is why it works for people who want more than a walk but do not want every session to become high-impact cardio.
The crossover appeal is why rucking keeps showing up in unexpected places: [yoga studios are adding rucking classes](/guides/why-yoga-studios-are-adding-rucking-classes-and-how-it), [time-pressed executives are rucking during meetings](/guides/why-ceos-are-rucking-during-meetings-the-executive-s-guide), and [celebrities like Guy Fieri are trading gyms for rucksacks](/guides/why-guy-fieri-and-other-celebrities-are-trading-gyms-for-ruc).
## Rucking and Mental Health
The studies cited here examine nature walking and hiking, not [weighted walking](/glossary#rucking) or added load. They suggest that moving outdoors may support mood and reduce rumination, but they do not show that carrying weight causes those effects.
A Stanford-led PNAS study, [Bratman et al. (2015), nature experience reduces rumination](https://pubmed.ncbi.nlm.nih.gov/26124129/), used functional MRI to compare a 90-minute nature walk with a 90-minute urban walk. The nature group showed less activity in the subgenual prefrontal cortex, a region linked to depressive rumination, and better mood scores. The urban control group showed neither change. A 2021 Pacific Northwest pilot trial, [Stelzer et al. (PMC8461737)](https://pmc.ncbi.nlm.nih.gov/articles/PMC8461737/), studied Veterans diagnosed with PTSD and found larger symptom-score improvements in the nature-hiking group than in the urban-hiking control group. Neither study tested rucking.
The mental-health value comes from the stack: rhythmic movement, outdoor light, a manageable physical task, and the grounding sensation of carrying weight. For some people, that turns a noisy day into something simpler: pick a route, carry the pack, keep walking. It is not therapy, and it does not replace professional care, but it can be a practical support habit.
This is also where group rucking matters. A walking pace makes conversation possible. You can talk or not talk. You can show up tired and still participate. That makes rucking a useful bridge for people who want community without the pressure of a performance-first fitness class.
## Rucking with Others
One of the underrated things about rucking: it's easy to do with other people. The pace is conversational. You don't need matching fitness levels. Kids can join. Dogs can join. It scales.
The trick is to set the session by the least-experienced person, not the most enthusiastic one. If someone is new, keep the load light, choose a flat route, and make the invitation about time together rather than a workout. A 30-minute walk with 10 lbs builds more trust than dragging a friend through a two-hour suffer session.
For dogs, the same rule applies: the human carries the load, the dog controls the pace. For families, keep the distance short enough that the outing can end well. For clubs, make the first event welcoming before you make it challenging.
## Rucking Built Into Your Day
The biggest unlock is treating rucking as transportation, not a separate workout block. Commuting with weight. Rucking on trips. Making the movement happen as part of existing routines rather than carving out extra time.
Start with one fixed slot. If you commute, try one ruck commute per week before adding more. If you work from home, use the first 20 minutes after lunch. If you travel, keep a collapsible water bladder in your bag and fill it at the hotel. The point is to reduce decision-making. When the route, time, and load are already chosen, the habit has fewer ways to fall apart.
Use lighter loads for lifestyle rucks than you would for event prep. Most everyday rucks should be easy enough that you can repeat them tomorrow. If your shoulders ache, your pace collapses, or you dread the next session, the load is probably too high for the role it is supposed to play.
A pack that doesn't look tactical helps the lifestyle angle - you can wear it to the office, on a flight, around town. The [GORUCK GR1](/gear/goruck-gr1) disappears in plain sight while still handling 30+ pounds.
## Rucking for Long-Term Health
Rucking's impact on [bone density](/glossary#bone-density) gets undersold. For women especially - and anyone thinking about aging well - loaded walking is one of the most accessible and effective weight-bearing activities available.
Long-term rucking is less about chasing maximum pack weight and more about keeping the signal consistent. Bones, tendons, feet, and hips adapt gradually. A sustainable plan gives them repeated, tolerable loading over months and years. That is why the lifestyle version matters: it creates enough frequency for adaptation without requiring every session to be a formal training day. It is also why [longevity doctors call rucking one of the most efficient anti-aging exercises](/guides/the-science-behind-why-longevity-doctors-call-rucking-the).
Think of rucking as a durable baseline. You can still lift, run, cycle, swim, or train for events. Rucking simply gives you a practical default on days when you need movement, sunlight, and a little load without a full production.
## Frequently Asked Questions
────────────────────────────────────────────────────────────────────────────────
URL: https://ruckauthority.com/pillars/rucking-training-programs
Title: Rucking Training Programs and Plans
Description: Choose a rucking plan from your current walking and loaded-training baseline, with clear entry requirements, weekly structure, and ways to scale.
Published: 2026-03-10 / Updated: 2026-08-30
## Pick the plan that matches today
The right rucking plan begins with what you have done recently, not the outcome you want six months from now.
| Your current starting point | Start here | What the plan should accomplish |
| --- | --- | --- |
| Regular walking is not comfortable yet | [Couch to Ruck](/guides/couch-to-ruck-program) | Establish three repeatable unloaded walks, then test a light pack |
| You walk regularly but are new to load | [First 30 Days of Rucking](/guides/first-30-days-of-rucking) | Learn pack fit and establish one or two short loaded sessions |
| You already ruck and want a usable next block | [Four-week program builder](/tools/program-builder) | Start from your recent loaded distance and current comfortable load |
| You can comfortably complete a weekly loaded walk | [16-week base-building plan](/training/rucking-base-building-16-week-periodization-program-for-long) | Build a broader aerobic and strength base around one main ruck |
| You have a booked GORUCK event | [GORUCK event training](/training/goruck-challenge-training) | Match the current event tier, required load, time, and tasks |
| You have an official military test or school date | [12-mile military ruck plan](/training/military-rucking-program) | Prepare for the exact unit or school document, not a generic “Army standard” |
## Build a four-week baseline block
The builder uses your recent loaded mileage and current comfortable pack load. It holds load for the full four weeks, adds only a small amount of distance, then backs off. “Training days” includes strength and unloaded aerobic work; it does not turn every available day into a ruck.
## The rules shared by every plan
### Start from a completed baseline
Your first week should resemble training you have already completed without a major change in gait, pain, or recovery. If you have not rucked recently, begin with unloaded walking or one short walk with a light, secure load.
Military load-carriage reviews support combining specific loaded walking with aerobic and resistance training. They do not establish one civilian starting load that is appropriate for every body, age, injury history, route, and pack.
### Keep one primary ruck
A practical default is one primary loaded session each week. Established ruckers can add one shorter, clearly easier loaded session when recovery remains stable. The other days can improve fitness through unloaded walking, cycling, running, or strength work.
U.S. Army H2F guidance also separates long foot marches from endurance runs and heavy lower-body strength work rather than stacking them on consecutive days.
### Change one factor
A loaded walk can become harder through:
- more distance or time
- more pack load
- faster pace
- steeper grade
- rougher terrain
- required equipment
Change one of those factors, then observe the result before changing another. This is easier to evaluate than raising load, distance, and hills in the same week.
### Treat 10% as a heuristic
The familiar “10% rule” can prevent obvious jumps, but research has not validated it as a universal line between safe and unsafe training. Use it as a conservative planning prompt, not a guarantee. A smaller increase can still be too much; an established athlete may sometimes hold a larger change comfortably.
### Repeat weeks without penalty
Training plans are templates. Repeat, reduce, or skip a progression when:
- your walking gait changes under load
- pain persists or worsens
- soreness is not resolving on its usual timeline
- sleep or normal daily activity is slipping
- the route, heat, altitude, or required gear is harder than expected
Do not stack missed sessions to “catch up.”
## What belongs in a complete training week
| Session | Purpose | Loaded? |
| --- | --- | --- |
| Primary ruck | Practice carrying the current load over a repeatable route | Yes |
| Easy aerobic work | Add low-intensity time without more pack stress | No |
| Strength | Train squat, hinge, push, pull, calf, trunk, and carry patterns | Usually no |
| Optional easy ruck | Add specific practice for an established rucker | Yes, but lighter or shorter |
| Faster work | Improve pace with brisk walking, hills, cycling, or running | Prefer unloaded until the loaded base is stable |
| Recovery or rest | Absorb the work and preserve the next quality session | No |
There is no special virtue in filling all seven days. Consistent work that you can repeat is more useful than a complex schedule that collapses after two weeks.
## Plans by goal
### Build a general fitness base
Use one primary ruck, one or two unloaded aerobic sessions, and two short strength sessions. Keep the primary ruck at a conversational effort. Add distance before load when the same pack and route remain comfortable.
[See the weekly rucking routine](/training/rucking-weekly-routine).
### Improve a time standard
First establish the required distance and load. Then practice brief target-pace sections inside a shorter loaded walk or use unloaded intervals to improve aerobic capacity. Do not turn every ruck into a time trial, and do not run with the ruck simply to force the number.
[Use the rucking pace chart](/training/rucking-pace-chart) to translate a required finish time.
### Prepare for an event
Copy the current event page or official unit document into your plan:
1. required dry load
2. additional equipment and water
3. distance or expected duration
4. terrain and elevation
5. pace or cutoff
6. PT, team carry, or night-work demands
Train the gap between your current baseline and those requirements. A GORUCK Light, a Tough, and a 12-mile military test are different products and need different preparation.
### Support weight management
Rucking can contribute to weekly physical activity, but a program cannot promise a particular fat-loss result. Keep loaded work modest and add repeatable unloaded walking rather than multiplying heavy ruck days. Nutrition, sleep, total activity, and health conditions remain part of the outcome.
## How to scale a printed plan
When a table lists a distance or load beyond your current baseline:
1. Keep the week’s purpose.
2. Substitute the longest recent session you completed comfortably.
3. Hold the pack load.
4. Complete the unloaded and strength work as written.
5. Repeat the week before trying a larger step.
For event preparation, scale the training volume but preserve the event-specific practice. For example, practice required gear on a shorter route before extending the route.
## Combining rucking with strength and running
### Strength
Two full-body sessions are enough for most general plans. Prioritize repeatable movement quality over exhaustion:
- squat or step-up
- hinge
- push
- pull
- calf work
- trunk work
- a controlled carry when appropriate
Keep heavy leg work away from the primary long ruck when possible. [See the rucking and lifting guide](/training/rucking-and-lifting).
### Running
Running and rucking can share a week, but they both load the lower legs and feet. Place the hard run and the primary ruck on separate days. If recovery deteriorates, reduce one before adding more of the other.
Do not use ruck running as the default way to meet a pace target. Army injury-prevention guidance specifically cautions that running with a ruck can increase risk.
## Track what changes decisions
After each primary ruck, record:
- distance or duration
- pack load
- route and elevation
- effort from 1 to 10
- any gait change, hot spot, or symptom
- whether you would repeat the session in 48 hours
That last answer is often more useful than a watch metric. A plan should become easier to adjust as you collect real sessions.
## Common programming mistakes
**Every day becomes loaded.** More training days should usually add unloaded aerobic or strength work first.
**Body weight becomes the whole prescription.** A percentage can set a tool boundary, but it cannot account for training history, pack design, terrain, symptoms, or an occupational requirement.
**The event name substitutes for its rules.** Confirm the current event page or official document. Loads, packing lists, and tier names change.
**A missed week triggers a jump.** Resume from the last repeatable week. Do not compress two weeks into one.
**The longest session happens too late.** A hard rehearsal immediately before an event creates fatigue without time to gain fitness. Put the last meaningful rehearsal early enough to recover, then taper.
## Frequently asked questions
### How many days per week should a beginner ruck?
One or two short loaded walks are enough to start. Someone who is not already walking regularly should begin unloaded. Add other training days through ordinary walking and basic strength work.
### Should I add distance or weight first?
If the load is stable and your gait remains normal, adding a small amount of distance is usually easier to evaluate. Hold load, route, and pace steady. Event requirements may eventually force a load change, but that change deserves its own week.
### Is 10% per week safe?
It is a heuristic, not a safety guarantee. Evidence for a universal 10% injury threshold is limited and conflicting. Use it to reject obvious spikes, then let symptoms, gait, recovery, terrain, and training history determine whether the actual step was appropriate.
### Do I need to complete the full event distance in training?
Not always. A shorter official test may justify one carefully placed rehearsal. Longer events often use sub-distance training plus cumulative aerobic and strength work. Avoid a sudden capstone that is far beyond anything already completed.
### What if a plan’s load is above my current comfortable load?
Hold your current load and complete the week’s distance or time only if it remains repeatable. If the higher load is an official requirement, give it a separate progression and enough calendar time. A generic online plan should not overrule a qualified coach, clinician, unit, or event organizer.
## GUIDES HUB (39 articles)
────────────────────────────────────────────────────────────────────────────────
URL: https://ruckauthority.com/guides/best-rucking-books-2026
Title: The 5 Best Rucking Books to Read in 2026
Description: Five books that go deeper than blog posts on rucking - including two flagship 2026 releases (Walk with Weight by Michael Easter and Ruck Fit by Kayla Girgen), the SFAS selection manual, the 2021 book that started the conversation, and the mindset memoir ruckers keep returning to.
Published: 2026-05-21 / Updated: 2026-05-27
For years, "books about rucking" meant a chapter in someone else's fitness book, a self-published military selection guide, or an older Stew Smith program. As of early 2026, that changed. Two Big Five publishers shipped dedicated rucking books within weeks of each other, and the catalog of serious rucking reading suddenly looks credible.
This is the curated list of what's worth reading in 2026, ranked by how directly each book serves the recreational and intermediate rucker. Military selection candidates and history buffs are in here too, but the lead picks are for ruckers training for general fitness, weight loss, or bone density.
Easter is the journalist whose 2021 book The Comfort Crisis (covered below) introduced rucking to the mainstream wellness audience. Walk with Weight is the standalone treatment - "the ultimate book on weighted walking" per the publisher's framing, and a fair description of where it lands relative to the rest of the field.
What's actually in it, based on the publisher's outline and interview content:
- Beginner programming and warm-up routines
- Injury prevention and progressive overload
- Gear selection (packs, plates, footwear) with category recommendations
- Week-by-week training plans across multiple goal types - general fitness, weight loss, bone density, event prep
- The metabolic and longevity research that makes rucking worth doing in the first place
What it's not: a manual for elite military selection or competitive ruck racing. Easter is writing for the reader who heard about rucking on a podcast and wants a single book that takes them from "what is this" to "I have a program." For most ruckers, this is the right starting point.
Girgen is a Mayo Clinic-trained registered dietitian and certified personal trainer. She hosts the Sugar & Strength Podcast and writes on rucking from the angle most rucking authors don't have access to: the nutrition side. That's the book's actual differentiator.
The training-program coverage is solid but not unique - several authors are now publishing reasonable beginner-through-intermediate ruck programs. The nutrition chapters are the moat. Girgen covers:
- Meal-planning protocols specifically calibrated to ruck volume and intensity
- Blood-sugar management for ruckers (her podcast's specialty)
- Body-composition strategy via rucking + dietary structure
- The intersection of weight loss and progressive load that most training-only books skip
She's also explicit about why she wrote the book - rucking was the catalyst for her own reclamation of physical and mental health, and the prose carries that personal credibility throughout.
This is the manual for SFAS candidates, written by a decorated veteran who's been through the selection pipeline. It's not a general-fitness book and it doesn't pretend to be. The audience is narrow: readers actively training for US Army Special Forces Assessment and Selection, or similar selection events that require sustained heavy-load rucking over multi-day timelines.
What's in it:
- Selection-specific ruck protocols (think 50+ mile assessments with heavy loads)
- Mindset and resilience programming
- A field journal format you fill in as you progress
- Honest framing of what selection actually demands and what civilian fitness culture gets wrong about it
If you're not training for selection, the book is still worth a read for the mindset content alone - Walton's takes on suffering, capacity, and goal-setting transfer to any high-volume rucking goal. But the programming is overkill for general fitness use.
The book that put rucking on the wellness map. The Comfort Crisis is a journalism book about modern softness and the case for re-introducing controlled hardship into daily life. The book features Jason McCarthy of GORUCK and covers rucking as a case study in controlled hardship - and it's the reason Peter Attia, Andrew Huberman, and the broader longevity-medicine podcast world all started talking about weighted walking.
This is **context, not protocol**. There's no training plan here. There are no gear recommendations. The book's value to the rucker is understanding why mainstream fitness culture has finally caught on - and being able to articulate that "carry heavy things outside" framing when someone asks why you're walking around with a pack.
For new ruckers, read this *after* you've started training, not before. The Comfort Crisis explains the why; Walk with Weight or Ruck Fit explain the how.
Not a rucking book in the same sense as the others on this list. Goggins is a former Navy SEAL, Army Ranger, and Air Force TACP - the only person in history to complete training for all three. Can't Hurt Me is his memoir, structured around the brutal physical events he's put himself through, many of which involve carrying weight long distances on broken feet and worse.
The book covers Hell Week (which is structurally a 5-day ruck-and-suffer event), his own ultra-distance ruck attempts, and the mental scaffolding he built to keep moving when his body wanted to stop. There's no training plan and the prose style is intentionally aggressive in a way that some readers love and some find exhausting.
What it offers a rucker is mindset. Specifically: the framework for treating discomfort as information rather than a stop signal. Goggins's "40% rule" (when your body says it's done, you've used roughly 40% of your real capacity) is the single most-referenced concept from the book, and it's directly applicable to the moment in a hard ruck when you want to quit and you're nowhere near actually empty.
## How to read these in order
If you're new to rucking and want to build a reading sequence:
1. **Walk with Weight** - foundational reference, read first
2. **Ruck Fit** - layer the nutrition side over your training
3. **The Comfort Crisis** - read after 3-4 months of consistent rucking for the cultural context
4. **Can't Hurt Me** - read when motivation is low or you want to push to a longer event
5. **Ruck Up or Shut Up** - only if you're seriously training toward a military selection event
If you're going to buy just one, **Walk with Weight is the right first purchase** for the recreational rucker. It's the most comprehensive single-volume reference and it's the only one of the five that takes a reader from scratch through advanced training without assuming military or athletic background.
## Frequently asked questions
---
## Related reading
- [The complete beginner's guide to rucking](/pillars/beginners-guide-to-rucking) - if you haven't started yet, start here before buying a book
- [Rucking nutrition guide](/guides/rucking-nutrition-guide) - extends Girgen's Ruck Fit nutrition framework into practical meal protocols
- [The Pandolf equation explained](/guides/pandolf-equation-rucking) - the metabolic math behind every calorie-burn claim in these books
- [Rucking for bone density](/guides/rucking-for-bone-density) - one of the science threads Easter and Girgen both cover
────────────────────────────────────────────────────────────────────────────────
URL: https://ruckauthority.com/guides/couch-to-ruck-program
Title: Couch to Ruck: An 8-Week Beginner Program
Description: An eight-week beginner plan for people returning from inactivity, with two unloaded walking weeks followed by short, lightly loaded sessions.
Published: 2026-03-27 / Updated: 2026-08-30
## Build the walking baseline first
This program is for someone who has been inactive, is returning after a long break, or cannot yet point to a recent repeatable walking routine.
The first two weeks are ordinary walking. That is intentional. Federal physical activity guidance recommends that inactive people begin with small amounts of activity and build over time. A backpack does not need to be part of the first step.
By Week 8, the goal is to have:
- three regular movement days
- two short loaded walks with one light, stable load
- no need to recover for several days after a session
- enough information to choose the next small change
There is no 25 lb graduation requirement.
## The eight-week schedule
| Week | Session 1 | Session 2 | Session 3 | Pack load |
| --- | --- | --- | --- | --- |
| 1 | Walk 20 min | Walk 20 min | Walk 20 min | None |
| 2 | Walk 25 min | Walk 25 min | Walk 25-30 min | None |
| 3 | Ruck 15 min | Walk 25 min | Ruck 15 min | One light load |
| 4 | Ruck 20 min | Walk 25-30 min | Ruck 20 min | Hold |
| 5 | Ruck 25 min | Walk or basic strength 25-30 min | Ruck 25 min | Hold |
| 6 | Ruck 30 min | Walk or basic strength 25-30 min | Ruck 30 min | Hold |
| 7 | Ruck 35 min | Walk or basic strength 25-30 min | Ruck 30 min | Hold |
| 8 | Ruck 20-25 min | Easy walk 20-30 min | Ruck 20-25 min | Hold |
Put at least one unloaded day between loaded sessions. Repeat a week if the prior one was not repeatable.
## Weeks 1-2: Establish unloaded walking
Walk at a pace that allows full sentences. The route should be familiar, mostly flat, and easy to shorten.
Your only job is to make the schedule ordinary. You do not need to:
- chase a step count
- walk fast
- add hills
- carry weight
- make up a missed walk
If 20 minutes is too much, start with 5-10 minutes. Add a few minutes when that amount is comfortable.
## Weeks 3-4: Test a light load
Use **5 pounds or less** for the first loaded sessions. Water bottles are useful because the amount is measurable and can be poured out.
### Set up the pack
1. Put the dense load high and close to your back.
2. Wrap hard edges.
3. Secure the load so it cannot slide.
4. Adjust the shoulder straps until the pack is stable.
5. Walk indoors for two minutes before leaving.
Keep the middle weekly walk unloaded. The goal is not three ruck days; it is regular movement with two small exposures to load.
Hold or remove the load when:
- the bag changes your stride
- you lean or brace to carry it
- a strap causes numbness or tingling
- a foot hot spot develops
- the first ruck changes how you move later that day
## Weeks 5-7: Add time
Keep the same pack load. The progression is time only.
If Week 5 is stable, add five minutes in Week 6. If Week 6 is stable, add no more than five minutes to one Week 7 session.
The unloaded middle day can become a short strength session:
- sit-to-stand or goblet squat
- hip hinge
- wall or elevated push-up
- band row or supported row
- calf raise
- dead bug or side plank
Use controlled repetitions and stop well before failure.
## Week 8: Back off and choose the next step
Reduce the two rucks to 20-25 minutes. This helps you judge the block without carrying Week 7 fatigue into the decision.
Record:
- the load used
- longest comfortable duration
- route and surface
- effort from 1 to 10
- any foot, shoulder, back, or balance issue
- whether you would repeat the session in 48 hours
If the answer to the last question is no, repeat or reduce the plan rather than advancing.
## Gear for the first eight weeks
Start with what already works:
- comfortable walking shoes
- socks that do not create hot spots
- a backpack that stays close to your body
- a small amount of secured water weight
- a familiar route
A dedicated ruck or plate can solve real problems later, but it is not required for the first unloaded walks. Buy after you know what the current setup fails to do.
## What comes after Week 8?
### The load still feels new
Repeat Weeks 5-8. A repeatable 30-minute ruck is a useful base.
### The load and 30 minutes feel comfortable
Move to [Your First 30 Days of Rucking](/guides/first-30-days-of-rucking) or use the [program builder](/tools/program-builder) with the actual weekly distance and load you completed.
### You have an event
Compare your baseline with the exact event requirements using the [event readiness tool](/tools/event-readiness). Extend the calendar instead of making this beginner plan heavier.
## Troubleshooting
### I missed a week
Resume the last week you completed comfortably. Do not double sessions.
### The pack hurts my shoulders
Reduce or remove load, secure it closer, and adjust the straps. If discomfort persists or includes numbness or weakness, stop loaded training and get qualified guidance.
### My feet develop hot spots
Stop and adjust the sock, lacing, or route before the skin breaks down. See the [foot-care guide](/injuries/rucking-foot-care-blister-prevention).
### Walking is fine, but loaded walking changes my balance
Return to unloaded walking. A heavier or more expensive pack does not solve every balance concern.
## Frequently asked questions
### How much weight should a complete beginner use?
None for the first two weeks of this plan. When unloaded walking is repeatable, test 5 pounds or less on a shorter route.
### How often should a beginner ruck?
This plan introduces two short loaded walks per week. A third movement day remains unloaded.
### Do I need to reach 3 miles or 25 pounds?
No. Those numbers are not beginner graduation standards. A repeatable 20-30 minute loaded walk with a light, stable pack is a valid outcome.
### Can I repeat a week?
Yes. Repeat or reduce any week. Calendar speed is not the goal.
### Can I start with the 30-day plan instead?
Use the 30-day plan if you already walk 30 minutes comfortably. Otherwise, keep the unloaded start here.
────────────────────────────────────────────────────────────────────────────────
URL: https://ruckauthority.com/guides/first-30-days-of-rucking
Title: Your First 30 Days of Rucking: A Beginner Plan
Description: A practical 30-day rucking plan for active walkers who are new to carrying load, with one or two weekly rucks, a fixed light pack, and clear checkpoints.
Published: 2026-03-10 / Updated: 2026-09-05
## Who this plan is for
Use this 30-day plan if you can already walk for 30 minutes at an easy pace and want to learn how your body, pack, and feet respond to a light load.
If regular walking is not comfortable yet, use [Couch to Ruck](/guides/couch-to-ruck-program). Its first two weeks are unloaded.
This plan is not event preparation. It creates a recent baseline that makes a later program easier to choose.
## Choose one light load
Use **5 to 10 pounds** or a lighter load you have already carried comfortably. Hold that load for all 30 days. This load range and the sample schedule are conservative editorial starting points, not medical thresholds.
The exact number matters less than the behavior:
- the weight is secured high and close
- the pack does not bounce or pull you backward
- your stride remains normal
- you can speak in full sentences
- you finish feeling that you could repeat the session
Do not use body weight alone to justify a heavier start. A percentage cannot account for training history, pack fit, terrain, or symptoms.
## The plan at a glance
| Week | Loaded sessions | Duration | Load | Route | Purpose |
| --- | --- | --- | --- | --- | --- |
| 1 | 1, optionally 2 | 20 minutes each | One light fixed load | Familiar and flat | Learn pack fit, gait, and foot response |
| 2 | 1, optionally 2 | 25 minutes each | Hold | Same route type | Add a small amount of time |
| 3 | 1, optionally 2 | 30 minutes each | Hold | Same route type | Establish a repeatable baseline |
| 4 | 1, optionally 2 | 20-25 minutes each | Hold | Familiar | Reduce fatigue and review |
Start with one loaded session. Add the second only when the first feels repeatable, your gait is normal, and recovery is stable. Put at least one unloaded day between rucks. More recovery is fine.
## The 30-day calendar
| Days | Session |
| --- | --- |
| 1 | Ruck 20 minutes |
| 2-3 | Normal activity or easy unloaded walking |
| 4 | Optional: ruck 20 minutes if recovered |
| 5-7 | Rest, easy walking, or one short strength session |
| 8 | Ruck 25 minutes |
| 9-10 | Unloaded activity |
| 11 | Optional: ruck 25 minutes if recovered |
| 12-14 | Rest, easy walking, or strength |
| 15 | Ruck 30 minutes |
| 16-17 | Unloaded activity |
| 18 or 19 | Ruck 30 minutes if recovery is stable |
| 20-21 | Rest or easy unloaded walking |
| 22 | Ruck 20-25 minutes |
| 23-25 | Unloaded activity |
| 26 | Optional: ruck 20-25 minutes if recovered |
| 27-30 | Review the block and choose the next step |
Dates can move. Preserve an unloaded day between loaded sessions rather than forcing the calendar.
## Week 1: Learn the setup
### Before the first walk
1. Put the dense part of the load high and close to your back.
2. Secure it so it cannot slide.
3. Walk around the house for two minutes.
4. Shorten or lengthen the shoulder straps until the bag is stable.
5. Choose a flat route with an easy way home.
### During the walk
Keep a normal walking stride. Do not lean aggressively forward or chase a pace. At 5, 10, and 15 minutes, check:
- Is the load shifting?
- Has your stride shortened or widened?
- Is a strap, sock seam, or shoe creating a hot spot?
- Can you still speak in full sentences?
Fix problems early. A hot spot is information, not a toughness test.
## Week 2: Add five minutes
Keep the same load and route type. The only planned change is five minutes.
If Week 1 caused persistent discomfort or altered gait, repeat the 20-minute sessions or walk unloaded. The calendar does not make the progression appropriate.
Use an unloaded strength session between rucks if you want a third training day:
- squat to a chair or goblet squat
- hip hinge
- wall, elevated, or floor push-up
- row or band pull
- calf raise
- side plank or dead bug
Complete controlled sets and stop with several good repetitions still available.
## Week 3: Establish the baseline
A repeatable 30-minute session gives you a recent loaded baseline to record. Add the second session only if recovery is stable.
Keep the pack load fixed. Do not add hills and weight because the first two weeks felt easy. If you want variety, change scenery while keeping the route’s grade and surface similar.
The second session is optional when the first takes longer than usual to recover from.
## Week 4: Back off and review
Reduce each ruck to 20-25 minutes. This is not a test week.
After the final session, write down:
- load carried
- session duration
- route and terrain
- effort from 1 to 10
- foot, shoulder, or back issues
- whether you would comfortably repeat it in 48 hours
Those answers should determine the next block.
## What you need
You can begin with:
- a comfortable backpack
- 5 to 10 pounds of water or another secure, measurable load
- walking shoes that already fit
- socks you have worn without hot spots
- a route close to home
Water is useful starter weight because it is measurable and can be poured out if the load becomes inappropriate. Wrap rigid items so edges cannot press into your back.
You do not need a dedicated plate, new shoes, a watch, or a hydration bladder before Day 1.
## How to choose the next block
### Continue at the same load
Choose this when 30 minutes became repeatable but not easy. Add a small amount of time or distance while holding load.
### Add a small amount of load
Choose this only when the 30-minute baseline is comfortable, gait remains normal, and your next goal actually requires more load. Reduce duration when testing the new load.
### Add terrain
Choose hills or trail only after the flat baseline is stable. Hold duration and load during the first terrain change.
### Prepare for an event
Open the exact event page and compare its required load, duration, gear, and terrain with your 30-minute baseline. Use the [event readiness tool](/tools/event-readiness) to identify the largest gap.
## Common mistakes
**Starting with a 20 lb plate because it is common.** Product sizes are not starting prescriptions.
**Rucking three or more days immediately.** Add unloaded walking or strength first.
**Changing load and distance together.** You lose the ability to identify which change caused a problem.
**Treating soreness as proof.** The goal is a session you can repeat, not the biggest reaction.
**Buying the whole setup before the first walk.** Learn what the current bag and shoes actually fail to do.
## Frequently asked questions
### Is this plan for complete beginners?
It is for beginners to loaded walking who already walk 30 minutes comfortably. Someone beginning regular physical activity should use the unloaded start in [Couch to Ruck](/guides/couch-to-ruck-program).
### How much weight should I use?
Use 5 to 10 pounds or a lighter recent comfortable load. Hold it for the month. The goal is to learn how load changes the same familiar walking task.
### Why one or two rucks per week?
One session provides loaded practice; an optional second adds practice when recovery is stable. Keep room for recovery and unloaded aerobic or strength work. More frequency is not required to establish a beginner baseline.
### Should Week 4 be the hardest week?
No. Week 4 reduces loaded time and gives you a clearer read on what to change next.
### What if I miss a session?
Continue with the next scheduled session. Do not stack two loaded walks together to make up the calendar.
────────────────────────────────────────────────────────────────────────────────
URL: https://ruckauthority.com/guides/goruck-labor-day-sale-2026
Title: GORUCK Labor Day Sale 2026: Current Deals After the Holiday
Description: Labor Day has passed. Check current GORUCK deals, compare Rucker and plate options, and avoid expired offers or discounts on gear that does not fit.
Published: 2026-08-01 / Updated: 2026-09-10
Labor Day fell on September 7 this year. If you arrived here looking for a code or a discounted Rucker, start with the current Deals page. A Labor Day headline in search results does not mean that offer is still available.
This page did not confirm a separate 2026 Labor Day event before the holiday. Our September 10 check establishes what we found afterward; it cannot rule out a short promotion or an email-only offer during the weekend.
## What GORUCK's past Labor Day sales tell us
The independent [All Day Ruckoff sale archive](https://alldayruckoff.com/tag/goruck-sale/page/2/) documents a 2020 Labor Day sale and refers to one in 2017. That archive does not support our earlier claim of only two Labor Day sales in nine years.
For a pack purchase now, compare the model and current price rather than waiting for a holiday that has ended. The [Rucker 5.0 launch analysis](/guides/goruck-rucker-5-0-brings-magnetic-closures-and-lumbar) explains the changes from the 4.0. An older pack is worth considering when its condition, features, price and return terms suit you; a previous-generation label alone does not make it a bargain.
## What to check on the current Deals page
Our September 10 check found markdowns on selected apparel, a GR1 Heritage seconds listing and several bundles. Some listings were sold out, and some apparel markdowns applied only to specific sizes. Inclusion on the Deals page is not enough to establish that your size or color is discounted or available. See the [official listings](https://www.goruck.com/collections/deals) for the current terms.
The four product cards in this guide are options to compare, not a list of confirmed Labor Day discounts. For each purchase, check:
- The price for your selected size, color and model.
- Whether the item is in stock, on preorder, or marked as seconds.
- What a bundle includes and whether you need every item.
- Shipping costs and any return restrictions shown for that offer.
## Compare the Basic Rucker and a first plate
The Basic Rucker and a light plate are entry points into the GORUCK range worth comparing with the Rucker 5.0. Use the retailer options on each card for current pricing.
The Basic Rucker has a dedicated plate pocket. The Rucker 5.0 adds dual elevated plate pockets and a contoured lumbar pad. Choose around the load and training you expect to do, then compare the cost of the complete setup.
A 10 pound Ruck Plate may suit a beginner who is ready for that load, but buying a plate does not mean you need to start at its full weight. Start lighter if 10 pounds changes your gait or posture. Our [ruck weight calculator](/tools/ruck-weight-calculator) gives a planning ceiling rather than a mandatory first load. Confirm that the plate dimensions fit the pocket in your chosen pack before ordering.
## Compare shoes and budget gear after the holiday
If footwear is the gap in your setup, compare shoes on fit, grip and the surface you use most. An expired REI or Amazon Labor Day banner tells you little about today's price or stock. Our [pavement shoes guide](/gear/best-shoes-for-rucking-on-pavement) can help narrow the models before you compare current listings.
The Titan plate is another option to compare with GORUCK's plate sizes and prices. Fit varies by pocket and plate size, so confirm dimensions before ordering. Pairing a compatible plate with a pack you already own is the [budget starter kit](/gear/budget-rucking-starter-kit) approach; you do not need a holiday sale to use it.
## Decide what you need before buying
If your current backpack carries your load comfortably and securely, replacing it may add less than fixing a footwear problem or getting a plate that fits. If you need a new pack, compare the Rucker 5.0 and Basic Rucker for your load, plate storage and budget.
Use the same approach when browsing a sale: identify the item you need, check its regular alternatives, then compare the delivered price. Our [Spring Sweat Sale analysis](/guides/goruck-spring-sweat-sale-normandy-2026-analysis) covers an earlier promotion. Its prices and availability should not be treated as current offers.
## Related reading
- [GORUCK Spring Sweat Sale 2026 analysis](/guides/goruck-spring-sweat-sale-normandy-2026-analysis) - context from an earlier promotion
- [Rucker 5.0 launch analysis](/guides/goruck-rucker-5-0-brings-magnetic-closures-and-lumbar) - what changed from the 4.0
- [Best GORUCK alternatives](/gear/best-goruck-alternatives) - other packs to compare at your budget
- [Budget rucking starter kit](/gear/budget-rucking-starter-kit) - ways to start with equipment you already own
## Frequently asked questions
────────────────────────────────────────────────────────────────────────────────
URL: https://ruckauthority.com/guides/goruck-m26-preorder-analysis-new-pack-rucking-market
Title: GORUCK M26: Preorder Status, Shipping Target & Alternatives
Description: The GORUCK M26 preorder is complete and sold out. Compare the announced sizes and materials, understand the shipping target, and consider alternatives.
Published: 2026-04-24 / Updated: 2026-09-06
**Checked September 6, 2026:** [GORUCK's product page](https://www.goruck.com/products/m26-preorder) lists the M26 preorder as closed. All six variants are unavailable. Shipping targets Q4 2026, with Q1 2027 possible; neither is a guaranteed delivery date. Limited safety stock is planned, but a restock is not assured.
This is a source-based guide to the announced pack, not a hands-on review. For readers choosing a [rucking](/glossary#rucking) pack now, availability and secure weight carry matter more than preorder excitement.
## What GORUCK has announced
[GORUCK](/glossary#goruck) says it developed the M26 from the M23 with community feedback.
The announced design includes a rain-flapped lid pocket, two side pockets whose volume sits inside the pack, extended main-compartment zipper access, and YKK zippers without AquaGuard. Both sizes have laptop compartments described as fitting a 16-inch MacBook.
## Sizes and materials
| Announced option | Sizes |
|---|---|
| 500D CORDURA, Ranger Green/Black or Black | 21L and 26L |
| Heritage waxed canvas, Dark Oak/Coyote Brown | 21L and 26L |
These are the announced choices in the closed preorder. ROBIC nylon appears in the interior; it is not the advertised exterior fabric.
## What remains unverified
The listing does not establish a reliable finished-pack weight or dedicated plate compatibility. Do not infer secure plate retention from laptop fit. Before choosing any pack for weighted training, check the manufacturer's instructions for the specific plate and retention system you intend to use.
Published capacity alone also cannot settle fit. Think about your torso, everyday load, access needs, and whether you will carry a laptop alongside training weight. Those are separate decisions from choosing a color or exterior fabric.
## Treat the images and shipping window carefully
GORUCK labels concept imagery as non-final. The illustrations on this article are editorial images, not evidence of finished-product construction or our use of the pack.
For an existing order, follow the seller's order updates and the terms supplied at purchase. A target quarter is useful for planning, but it is not a promise that the pack will arrive before a trip or event. Ask GORUCK directly about cancellation options for your order.
## The preorder is closed - alternatives to compare
Choose an alternative by the job you need it to do. A training pack and an everyday organizer need not solve the same problem. Our existing comparison of [Mystery Ranch](/gear/best-goruck-alternatives) and other packs can help frame that decision; [5.11](https://www.511tactical.com) is another brand to compare.
| Your priority | Existing guide pick | What to check before buying |
|---|---|---|
| Weighted training | GORUCK Rucker 5.0 | Plate fit, retention and pack fit |
| Tactical organization | 5.11 RUSH 24 | Pocket layout, empty weight and loaded comfort |
| Adjustable fit and organization | Mystery Ranch 2 Day Assault | Harness sizing and access with your normal load |
Compare each pack against the features you need, and check current stock, size and delivery estimates at the retailer. Our [Rucker 5.0 comparison](/gear/goruck-rucker-vs-gr1), [RUSH 24 2.0 listing](/shop), and [Mystery Ranch's 2-Day Assault comparison](/gear/best-goruck-alternatives) provide starting points.
## Decide around your next use
If you need a pack for a scheduled trip or a [rucking community](/guides/how-to-start-a-ruck-club) outing, choose around confirmed availability and your actual load. If your current pack works, a closed preorder is not a reason to replace it.
────────────────────────────────────────────────────────────────────────────────
URL: https://ruckauthority.com/guides/goruck-rucker-5-0-brings-magnetic-closures-and-lumbar
Title: GORUCK Rucker 5.0 Brings Magnetic Closures and Lumbar Redesign After 10-Year Run
Description: Analysis of GORUCK's first major Rucker overhaul in a decade, featuring magnetic closures, new lumbar pad design, and whether the changes address long-standing community feedback.
Published: 2026-05-14
On May 8, 2026, [GORUCK](https://www.goruck.com) released the Rucker 5.0 - the first full overhaul of its flagship rucking pack in roughly a decade. The launch introduces magnetic closures, a completely redesigned lumbar pad, and tighter material choices, in two capacities (20L and 25L) at premium pricing.
According to reporting from [HiConsumption](https://hiconsumption.com/gear/goruck-rucker-5-0-backpack/) and [Gear Patrol](https://www.gearpatrol.com/fitness/goruck-rucker-5/), this fifth iteration targets the specific failure points the rucking community has been flagging since the 4.0 launched. The question worth asking: do these changes actually fix the right problems, or are they solutions looking for problems?
*Analysis based on the manufacturer's published specifications and reporting from HiConsumption and Gear Patrol covering the May 2026 launch.*
## What's new in the Rucker 5.0
The Rucker 5.0 introduces four meaningful changes to the formula:
**Magnetic closures replace interior Velcro pockets.** Recessed magnets give one-handed operation, reduced noise (a real issue at GORUCK events and pre-dawn training), and better resistance to debris than Velcro hook-and-loop, which clogs with sand, lint, and pet hair over time.
**Redesigned lumbar pad.** The new pad uses contoured dual-density foam, 30mm thick, with a recessed center channel shaped to follow the lumbar spine curve and concentrated lateral support along the iliac crests. This replaces the simpler flat pad on the 4.0.
**Refined materials spec.** 1000D CORDURA on the primary panels (same as the 4.0), 210D HT CORDURA on the back panel, and a 3mm built-in frame sheet to maintain pack shape under heavy plate loads.
**Two capacities.** 20L and 25L, where earlier Ruckers came in 20L and 25L sizes but with different internal layouts. The 5.0 standardizes the plate pocket geometry across both sizes.
## The magnetic closure gamble
The interior magnetic closures are the most visible departure from GORUCK's traditional approach. Military-style packs have leaned on Velcro and buckles for decades because they work in extreme conditions and they're cheap to manufacture. Replacing the interior Velcro pockets with magnets is a quality-of-life call, not a structural one - the main pack closure is still a heavy-duty YKK zipper and the shoulder straps still use military-grade buckles.
The real-world case for magnets over Velcro is straightforward: Velcro gets noisy, picks up debris, and slowly loses grip strength over years of cycles. Magnets are silent, one-handed, and unaffected by lint or sand in the hook side. The risk worth tracking is long-term magnet retention - magnets do degrade, just on a different timeline than Velcro.
What this means for ruckers specifically is a meaningful upgrade for anyone who trains pre-dawn (Velcro is loud enough to wake a household), anyone doing GORUCK events where silent gear is an unwritten norm, or anyone whose 4.0 Velcro has gotten gunky over time. For everyone else, it's a refinement rather than a deal-maker.
## Lumbar support evolution
The lumbar pad is the change with the most direct physical impact on how the pack actually carries weight. The 4.0 used a flat pad against the lumbar region - fine for moderate loads but a known pressure-point trigger once you get into the 35-pound-plus range.
The 5.0's pad is contoured, dual-density (firmer perimeter, softer center), 30mm thick, with a recessed center channel that follows the lumbar lordosis instead of pressing flat against it. The lateral edges are firmer to brace against the iliac crest. The geometric idea here is well-trodden in technical hiking packs - Osprey and Mystery Ranch have used variations of this approach for years - but it's new territory for GORUCK.
Whether the pad works as advertised will depend on your spine geometry. A contoured pad designed around a generalized lumbar curve will fit some bodies better than the old flat pad and worse than it fit others. For context, most ruckers start with [15-20 pounds](/guides/how-heavy-should-your-ruck-be) but progress to 35-50 pounds for advanced training - which is exactly the weight range where the redesign should pay off.
## Does it address real problems?
The question every rucker should ask is whether these changes solve actual problems or create new ones.
**The magnetic closures fix a small problem that lots of people had.** Velcro-clog and Velcro-noise are real annoyances, and the fix is a clean one. Not a deal-maker on its own, but a clear quality-of-life win.
**The lumbar redesign targets the right problem.** Pressure-point complaints above 35 pounds were the single most consistent criticism of earlier Ruckers, and a contoured dual-density pad is the standard fix that technical pack makers have used for years. Whether GORUCK executed it well is a fit question that won't be settled until users have a few hundred miles on it.
**The material spec is sensible.** 1000D CORDURA on the main panels keeps the bombproof reputation. The 210D HT back panel sheds weight where weight matters least. The 3mm frame sheet keeps the pack from collapsing around heavy plates.
## Price and availability implications
The [Rucker 5.0](/gear/goruck-rucker-vs-gr1) starts in the mid-$200s for the 20L. The 25L runs higher, and ruck plates are sold separately in the under-$100 range. That puts the 5.0 squarely in GORUCK's premium tier - the same general price neighborhood as the [Rucker 4.0](/gear/goruck-rucker-vs-gr1) before it, and meaningfully above mid-tier rucking-capable packs like the [Mystery Ranch 2 Day Assault](/gear/best-goruck-alternatives) or budget options that work for rucking but aren't purpose-built for it.
What you're paying for is the same thing GORUCK has always charged a premium for: purpose-built rucking geometry, the Scars Lifetime Guarantee, and a closed loop with their ruck plate system. The 5.0's improvements don't change that calculus - they sharpen it.
## Should you upgrade?
The upgrade decision depends on your current pack and specific needs:
**If you're on a Rucker 4.0**: Hold. The 4.0 is still a fully capable pack and the 5.0's improvements are quality-of-life rather than performance-changing. If your 4.0's lumbar pad is genuinely uncomfortable at your typical training weight, the upgrade math gets better. Otherwise, the 4.0 has years left in it.
**If you're on a 2.0 or 3.0**: The case is stronger. You're missing both lumbar padding refinements and the magnetic interior, and the spread between your current pack and the 5.0 is a generational jump rather than a refinement.
**If you're pack shopping for the first time**: Start with a less expensive pack to verify you actually like rucking before dropping premium money on a purpose-built rig. A standard daypack with a hydration sleeve plus a sandbag or weighted plate from your gym works for the first few months. If you're still rucking three months in, then the 5.0 is a defensible upgrade - and the Scars Lifetime Guarantee means it's a once-and-done purchase.
The magnetic closures and the new lumbar pad are the two changes most likely to matter day-to-day. Whether they're worth the upgrade comes down to how often the current Velcro and lumbar quirks actually slow you down in your training.
## Frequently asked questions
────────────────────────────────────────────────────────────────────────────────
URL: https://ruckauthority.com/guides/goruck-spring-sweat-sale-normandy-2026-analysis
Title: GORUCK Spring Sweat Sale 2026: What Hit 55% Off, and When the Next One Lands
Description: Our archived record of GORUCK's 2026 Spring Sweat Sale: what actually reached 55% off, what never discounts, and which GORUCK sale window to wait for next.
Published: 2026-04-28 / Updated: 2026-08-18
GORUCK's next dependable discount windows are Veteran's Day and Black Friday through Cyber Monday. A Labor Day sale is unlikely - see our [Labor Day breakdown](/guides/goruck-labor-day-sale-2026) for the history behind that.
GORUCK's Spring Sweat Sale ran in April 2026 with discounts reaching 55% off across packs, plates, and apparel. The timing wasn't random. The same week, GORUCK announced [Normandy Events 2026](https://www.goruck.com/pages/normandy-events-2026), a D-Day commemorative event series in France. Sale alongside event launch is the classic playbook for building participation ahead of a flagship moment.
For the [rucking community](/guides/how-to-start-a-ruck-club), it was the rare GORUCK markdown that went deeper than the usual 15-20% holiday tier. Most items in their catalog rarely see discounts at all, so a sale reaching 55% is worth understanding rather than forgetting - it tells you what the ceiling looks like when GORUCK does move on price.
That is why this page is still here. The items GORUCK was willing to discount aggressively tell you something about their inventory cycle, and the items that never moved tell you what sells at full price. Both signals outlast the sale, and both are what you want in hand before the next one.
## What's actually on sale and worth picking up
Below are the items from the sale that sit in our catalog with a full review and rating. The CTAs route through Ruck Authority so you land on the product page first.
The [Rucker](/glossary#rucker) 4.0 is GORUCK's flagship [rucking](/glossary#rucking)-purpose pack. The 4.0 generation upgraded the frame sheet, articulated the waist belt for hip-load transfer, and added the molded back panel that sits flush with the plate pocket. The Basic Rucker covers the same use case at a lower price tier without the suspension upgrade. If you've been stuck deciding between the two, the sale narrows the price gap from "you really notice it" to "modest." The 4.0 also carries GORUCK's lifetime build guarantee, which amortises the cost over years of use rather than one season.
GORUCK's Sand Ruck Plates are an underrated entry into ruck weight. The fabric shell sits flush against the back panel without the metal-on-fabric noise that steel plates generate, and the sand fill conforms slightly to your spine instead of pressing back as a flat slab. They drop cleanly into the Rucker line's dedicated plate pocket without the velcro and yoga-block tricks ruckers use to stabilise rectangular plates in non-pocket bags. The sale price brings them within range of generic sandbags, which they outperform on shape, pocket fit, and durability of the shell over hundreds of rucks.
The GR1 is the everyday-carry sibling to the Rucker. Same 1000D Cordura, same bartacked stress points, same lifetime build guarantee. The differences are organisation (laptop sleeve, internal mesh pockets, admin compartment vs the Rucker's stripped interior) and the suspension tuning (the GR1 prioritises pack-shape stability over hip-load transfer because EDC carry rarely involves real weight). If your "ruck" is mostly weighted urban walking with the pack pulling double duty for travel, work, and the occasional 20 lb session, the GR1 is the better long-term buy. If you're rucking 30+ lb consistently, the Rucker is the right tool and the GR1 will leave hot spots.
## The non-GORUCK alternatives that still make sense
GORUCK's sale prices are the lowest we've seen this year, but they still don't beat the budget tier on raw cost. If price is the main constraint, these stay in play.
The [5.11 Rush 12](/shop) is the closest functional analog to a small GORUCK pack at meaningfully lower cost. [MOLLE webbing](/glossary#molle-webbing) instead of GORUCK's clean exterior, more pockets, comparable build for recreational rucking. Where it loses to GORUCK is the suspension under sustained heavy load. Above 25 lb the Rush 12's shoulder-strap padding compresses faster, the back panel doesn't articulate the way the Rucker's frame sheet does, and the lack of a load-bearing waist belt means the weight stays on your shoulders instead of transferring to your hips. For sub-25 lb training rucks it's a defensible value choice. For event prep at 30 lb and up, the Rucker earns the cost gap.
For weight, Rogue's Echo Vest Plates work in any ruck pocket sized for ruck plates. They cost less per pound than GORUCK's branded plates and the only meaningful tradeoff is the lack of GORUCK branding. The Echo plates are sold in pairs sized for plate carriers, which means a 20 lb total cost is two plates at 10 lb each rather than one solid 20 lb piece. For ruckers running a Rucker with a single plate pocket, this is fine when the pocket fits both stacked. Wrap in foam or a microfiber towel for pocket protection and to mute the metal-on-fabric sound.
The Osprey Tempest Velocity 20 is the option for shorter torsos. Unlike GORUCK's unisex packs, it uses a women's-specific harness, an adjustable torso system, and a load-bearing [hip belt](/glossary#hip-belt). It is a different product class from a Rucker—a hiking pack rather than a dedicated rucking pack—but the fit advantage can outweigh that difference for smaller frames. Use a compact, flexible load such as a tightly packed sand bag rather than assuming a rigid plate will fit its external hydration sleeve.
## Why GORUCK is running this sale now
The Normandy 2026 events are GORUCK's most significant international commemoration to date. Event-driven sales serve two purposes for the company. They clear inventory ahead of a marketing push. And they expand the addressable participant pool by lowering the gear-cost barrier for people who might travel to France for a commemorative D-Day event.
For the [rucking community](/pillars/rucking-lifestyle-guide), it's a useful signal. Brands don't run aggressive sales unless they're confident in sustained demand. The 55% tier likely won't repeat outside another major event window. If you've been waiting for a moment to upgrade, this is closer to the bottom than to the start of a markdown cycle.
## What's not in the sale (and what that tells you)
The omissions matter as much as the inclusions. The Basic Rucker, the latest Curved [Ruck Plate](/pillars/rucking-gear-guide) generation, and current-season apparel sit at full price. Translation: those are the items GORUCK trusts to sell at retail. The 55% tier is concentrated on previous-year colorways, accessory inventory ahead of the Normandy push, and product lines getting refreshed.
For ruckers, this means the steepest discounts are on items that work just as well as the new generation. A previous-season Rucker 4.0 colorway uses the same materials and construction as the current one. The visual difference is the patch and the colorway, not the build. Same with ruck plates from prior runs.
## When to buy, when to wait, when to skip
A sale this deep tempts a "buy everything" reflex. Your decision should depend on where you actually are as a rucker.
**Buy now if:**
- You've been rucking consistently for 3+ months with budget gear and feel a fit problem you've validated against multiple sessions (shoulder hot spots, torso length mismatch, plate shifting in a non-pocket bag).
- You're committed to a GORUCK event in 2026 and the gear you'd buy at retail in 6 months is at 40-55% off now.
- You're replacing a worn-out pack and the upgrade tier is in your budget at the sale price.
**Wait if:**
- You started rucking in the last 30 days. Your gear preferences are still forming. Premium gear bought now often gets re-sold or sits unused as you discover what actually matters to you.
- The 55% tier doesn't include the specific item you'd actually buy at retail. A discount on something you wouldn't have bought is not a deal.
**Skip if:**
- You don't ruck regularly enough for premium gear to amortise. A budget setup at 4 sessions per month outperforms a premium setup at 1 session per month, every time.
- The closest item to your need is GORUCK-branded apparel rather than a pack or plate. Apparel discounts are the easiest impulse buy and the lowest-leverage item in a rucker's kit.
## What new ruckers should actually do
The temptation with a sale this deep is to buy the full system at once. We'd push back on that.
The right starter combination depends on body size and intended use, not on the sale. Get one pack that fits, get weight that drops cleanly into it, and start rucking. The pack and weight decisions are paired: a dedicated Rucker accepts weight made for its plate pocket; a 5.11 Rush 12 or hiking pack such as the Tempest Velocity 20 needs a load whose dimensions and shape match the actual compartment.
The accessories the sale doesn't cover (insoles, technical socks, a headlamp for early rucks) are often what determine whether you actually keep rucking. A premium pack with cheap socks is a worse setup than a budget pack with merino socks. Don't stretch the gear budget on a sale-day pack purchase if it leaves nothing for the support items.
## Frequently Asked Questions
────────────────────────────────────────────────────────────────────────────────
URL: https://ruckauthority.com/guides/how-heavy-should-your-ruck-be
Title: How Much Weight Should You Ruck With? Start from Your Baseline
Description: Choose a starting ruck weight from your recent training, with load examples and a calculator to help plan your next session.
Published: 2026-03-10 / Updated: 2026-09-02
## The short answer
There is no body-weight chart that can tell every person the correct ruck load.
Use this starting point:
- **Regular walking is not comfortable:** walk unloaded first.
- **Active walker, new to load:** try 5 to 10 pounds or less.
- **Already rucking:** use a recent load and duration you could repeat with normal gait and stable recovery.
- **Training for a test or event:** build toward the exact current requirement, not a heavier buffer.
The 5 to 10 pound range is a conservative editorial starting point, not a medical threshold. Water is useful first weight because it is measurable and can be poured out.
## Choose from your current baseline
### No recent walking baseline
Use [Couch to Ruck](/guides/couch-to-ruck-program). Its first two weeks are unloaded. Adding a pack does not solve a walking baseline that is not ready yet.
### Active walker, new to load
Use the [First 30 Days plan](/guides/first-30-days-of-rucking). It holds one 5 to 10 pound load for the month while duration changes modestly.
Start below 5 pounds or unloaded when:
- the pack changes your stride
- balance is uncertain
- a recent injury or pain affects walking
- cardiovascular symptoms or another condition make loaded exercise uncertain
### Established rucker
Your baseline is not a label such as intermediate or advanced. It is a session you completed recently.
Record:
- pack load
- time and distance
- route, surface, and elevation
- effort from 1 to 10
- gait or foot changes
- whether the session felt repeatable after recovery
Begin the next block from that session. Do not jump to a chart because your body weight or training age changed categories.
## What body-weight percentages are good for
Percentages can describe a load and place a boundary around an unsupervised calculator. They cannot account for:
- where the load sits
- pack and footwear fit
- distance and pace
- terrain and descent
- heat, cold, or altitude
- recent training
- symptoms, health, or injury history
Military load-carriage research includes occupational loads and conditions that differ from recreational rucking. Higher relative loads are generally more demanding, but the evidence does not establish one percentage that is safe below it and unsafe above it.
This site's public tools stop at 25% of entered body weight. That is a product-scope ceiling, not a recommendation to train at 25%.
## Use the calculator as a planning ceiling
The calculator provides a conservative editorial range based on body weight, experience, and goal. It does not know your current loaded baseline, pack fit, route, symptoms, or official event standard.
**Do not increase to the displayed number when your recent repeatable load is lower.** Use the lower recent load in your actual plan.
## A four-week starting block
Hold pack load for the full block.
| Week | Loaded sessions | Duration | Load |
| --- | --- | --- | --- |
| 1 | 1 primary; optional short easy session | Recent repeatable duration | Hold |
| 2 | Same | Add a small amount of time to the primary session | Hold |
| 3 | Same | Repeat Week 2 | Hold |
| 4 | Same or one fewer | Return toward Week 1 duration | Hold |
The optional loaded session is for someone who already tolerates two loaded days. New ruckers can use one primary ruck and unloaded walking or strength on the other days.
The exact increase is not a safety formula. Route layout may make five minutes practical; another person may need to repeat Week 1.
## How to add load
Add load only when the goal requires it and the current baseline is stable.
1. Choose the smallest measurable increase available.
2. Shorten the familiar route or session.
3. Hold pace, terrain, and grade.
4. Repeat the new load before adding another factor.
5. Return to the earlier load when gait or recovery worsens.
A standard 5 pound plate can be a large step. Use water or smaller adjustable weights when needed.
Do not combine a heavier pack with a longer, faster, or hillier route. The [ruck progression guide](/training/ruck-progression-rules-how-to-safely-increase-weight-and-dis) explains why pound-miles and the 10% rule are not safety guarantees.
## Match load to the goal
| Goal | Load decision |
| --- | --- |
| General fitness | Keep the lightest load that makes the session useful and repeatable |
| Longer distance | Hold load and build time on feet |
| Faster time | Stabilize required load, then add short brisk-walking intervals |
| Higher official load | Test a small load step on a shorter familiar route |
| Strength | Use dedicated strength training; a heavier ruck is not the only tool |
| Weight management | Choose a repeatable routine; more pack weight does not guarantee more fat loss |
For an event, confirm whether the published load includes water, the pack itself, body armor, or other equipment. Do not assume a number from another event applies.
## Pack the weight correctly
A light load can still create problems when it shifts or presses into the back.
- keep dense weight high and close
- secure it so it cannot bounce or slide
- pad hard edges
- tighten straps enough for control without restricting breathing
- walk for two minutes near home before committing to the route
Fix a hot spot or moving load early. Buying a heavier plate is not a solution to poor fit.
## When to repeat or reduce
Hold the current load or reduce it when:
- gait changes
- pace falls while effort rises
- foot damage affects normal walking
- shoulder numbness or tingling appears
- pain persists or worsens
- sleep or ordinary activity deteriorates
- the route or conditions were harder than planned
Do not use soreness timelines as a clearance test. People and tissues do not adapt on one universal calendar.
## When to stop or get help
Stop for:
- sharp pain
- weakness or numbness
- dizziness or fainting
- chest pressure
- unusual shortness of breath
- loss of balance that makes carrying load unsafe
Persistent pain, recurring numbness, swelling, or altered gait needs qualified assessment. Do not assume back pain is merely a form problem or that knee pain can be solved by subtracting exactly 5 pounds.
## Gear after the baseline
You can start with a comfortable backpack and a secured bottle or small bag of weight. A dedicated pack or plate becomes useful when:
- household weight will not stay secure
- the load presses into your back
- an event specifies equipment
- you have confirmed a repeatable load and routine
## Frequently asked questions
### How much weight should a beginner ruck with?
An active walker can use 5 to 10 pounds or less as an editable first exposure. Start unloaded when regular walking is not comfortable or loaded walking is uncertain.
### Is 10% of body weight a safe starting load?
It is a common rule of thumb, not a universal safety threshold. For some people 10% is too much; for others it is below a stable baseline. Use recent walking and loaded experience, route, gait, symptoms, and recovery.
### Is 20% of body weight too heavy?
A percentage alone cannot answer that question. Twenty percent may exceed a recreational need and can be inappropriate depending on the person, duration, pace, terrain, pack, and symptoms. Do not increase to it merely because a chart lists it.
### Should I increase weight or distance first?
Choose the variable the goal requires. For a longer event, build duration while load holds. For a higher-load requirement, shorten the route and test load separately. Do not progress both together.
### Can I start heavier because I lift weights?
Strength can help, but it does not establish foot, skin, gait, and pack tolerance. Use a light first exposure or your own recent loaded baseline.
### Does the backpack's weight count?
Count the total carried load when comparing sessions or official standards unless the organizer explicitly defines it another way. Weigh the loaded pack, not only the added plate.
### How do I weigh a loaded pack?
Use a luggage scale, place the pack on a suitable scale, or weigh yourself holding the pack and subtract your unloaded body weight. Repeat with the same method.
### Is there a maximum recreational ruck weight?
There is no universal maximum in the evidence. This site's unsupervised tools stop at 25% of entered body weight as a scope boundary. Most recreational goals do not require approaching that ceiling.
────────────────────────────────────────────────────────────────────────────────
URL: https://ruckauthority.com/guides/how-to-properly-wash-and-maintain-your-rucksack-a-complete
Title: How to Wash a Rucksack: The Right Method for Ruck Packs
Description: Learn the proper methods to clean and maintain your ruck pack for different materials and conditions. Extend your gear's lifespan with expert washing techniques and storage tips.
Published: 2026-05-31 / Updated: 2026-07-18
Your [rucksack](/gear/best-rucking-backpacks) is built to handle serious abuse - mud, sweat, rain, and thousands of miles of [loaded carry](/glossary#load-carriage). But even the toughest gear needs proper maintenance to perform at its best. Whether you're running a through urban environments or taking a into the backcountry, the wrong cleaning approach can damage expensive gear and void warranties.
## Why proper cleaning matters for rucksacks
Unlike regular backpacks, rucksacks endure constant loaded carry that creates unique wear patterns and contamination. According to [GORUCK](/glossary#goruck)'s official care guidelines, improper washing can damage the laminated back panels and shoulder strap construction that distribute weight effectively.
The materials in quality rucksacks - from Cordura nylon to waterproof membranes - require specific care protocols. Deuter's maintenance documentation emphasizes that different fabrics respond differently to cleaning agents and drying methods.
Regular maintenance prevents three major issues: odor buildup from sweat and bacteria, degradation of water-resistant coatings, and premature wear of high-stress areas like shoulder straps and hip belts.
## Materials and what they need
Modern rucksacks combine multiple materials that each have specific care requirements. Understanding your pack's construction helps avoid damage during cleaning.
**Cordura and ballistic nylon** make up the body of most military-style rucksacks. These synthetic fabrics handle soap and water well but can lose their water-repelling finish with harsh detergents or hot water.
**Ripstop nylon** appears in ultralight packs and requires gentler treatment to preserve its tight weave. Eagle Creek's care guidelines note that aggressive scrubbing can damage the ripstop pattern and reduce tear resistance.
**Canvas and waxed cotton** in heritage-style packs like some Filson models can handle more aggressive cleaning but take significantly longer to dry completely.
## The proper hand-washing method
Hand washing preserves your [rucksack](/glossary#rucksack)'s structural integrity while removing the grime that accumulates during regular use. This method works for all pack types and materials.
For the cleaning solution, use mild soap like Dr. Bronner's or specialized gear cleaners like Nikwax Tech Wash. According to manufacturer guidelines, avoid fabric softeners, bleach, or harsh detergents that can break down synthetic fibers and waterproof coatings.
## Drying techniques that preserve gear integrity
Proper drying prevents mold growth and material degradation while maintaining your pack's structural components. The key is thorough air circulation without direct heat.
**Air drying setup**: Hang your rucksack in a well-ventilated area away from direct sunlight. UV exposure can fade colors and weaken nylon fibers over time. A covered porch or garage with good airflow works well.
**Inside-out drying**: Keep the pack turned inside out until the interior surfaces are completely dry. This prevents moisture from being trapped between layers and reduces the risk of mold growth in hidden areas.
**Frame and panel considerations**: If your pack has an internal frame or foam back panel, ensure these components dry completely. Trapped moisture can cause permanent deformation or create breeding grounds for bacteria.
## Spot cleaning for routine maintenance
Between major washes, spot cleaning addresses localized contamination without subjecting the entire pack to water exposure. This approach preserves DWR coatings and reduces overall wear.
For mud and dirt, let it dry completely then brush off as much as possible before applying any moisture. For organic stains like food or sweat, address them immediately to prevent permanent discoloration.
## Storage and long-term care
Proper storage between uses extends your rucksack's lifespan and prevents damage from environmental factors. Even quality packs can develop problems if stored incorrectly for extended periods.
**Clean before storage**: Never store a dirty or damp pack. Residual moisture creates ideal conditions for mold and mildew growth, while dirt can attract pests and cause fabric degradation.
**Ventilation requirements**: Store in a dry, well-ventilated area. Avoid basements, attics, or anywhere temperature and humidity fluctuate dramatically. A climate-controlled closet or gear room is ideal.
**Structural considerations**: Don't store heavy items inside your pack long-term, as this can compress padding and deform the frame. Stuff lightly with acid-free tissue paper to maintain shape without overstressing seams.
## When to replace vs. repair
Understanding when your rucksack needs professional attention versus replacement helps maximize your gear investment. Quality packs often justify repair costs, while budget options may be more economical to replace.
Many manufacturers offer repair services for their products. GORUCK's SCARS program and Mystery Ranch's repair services can restore damaged packs to like-new condition, often justifying the investment for premium gear. If your pack falls outside a warranty program, a failed zipper, blown seam, or fraying strap is still usually worth fixing rather than replacing - our sister site Stitch Authority explains [how to choose a clothing repair service](https://stitchauthority.com/guides/how-to-choose-a-clothing-repair-service?utm_source=ruckauthority&utm_medium=cross-site) that can handle heavy technical fabrics and hardware. Prefer the DIY route? Their [guide to repairing outdoor gear](https://stitchauthority.com/guides/how-to-repair-outdoor-gear?utm_source=ruckauthority&utm_medium=cross-site) walks through field repairs, patching coated fabrics, and the load-bearing hand stitches that hold up under a loaded pack.
## Common cleaning mistakes to avoid
Even well-intentioned maintenance can damage expensive gear if done incorrectly. These mistakes appear frequently in online forums and can void manufacturer warranties.
**Machine washing and drying**: The concentrated heat and agitation can damage internal components that aren't visible from the outside. GORUCK specifically states that washer/dryer damage voids their lifetime guarantee.
**Harsh chemicals**: Bleach, fabric softener, and aggressive detergents can break down synthetic fibers and waterproof coatings. Stick to mild soaps designed for technical fabrics.
**Incomplete drying**: Rushing the drying process by using heat sources or storing before completely dry creates ideal conditions for mold growth and material degradation.
**Ignoring manufacturer guidelines**: Each pack has specific care requirements based on its materials and construction. Generic advice may not apply to your specific gear.
## Frequently asked questions
────────────────────────────────────────────────────────────────────────────────
URL: https://ruckauthority.com/guides/how-to-start-a-ruck-club
Title: How to Start a Ruck Club: The Community Builder's Guide
Description: A practical guide to choosing a route, setting a schedule, finding members, lending gear, and handling safety for a local ruck club.
Published: 2026-03-28 / Updated: 2026-06-10
## The Short Answer
You can start a ruck club today with just you and one other person. Pick a regular time, a route, a name, and show up. That's it.
A club can start with two people who meet every week. Consistency matters more than size or presentation.
## Why Start a Ruck Club
### The Accountability Effect
[Rucking](/glossary#rucking) with a regular group can improve accountability and make the activity more social.
When you commit to showing up at 6 AM on Tuesday mornings with your club, you show up. When you commit to yourself, life happens. A club gives you a reason that goes beyond your own discipline - you know four other people are waiting for you.
### Community Over Isolation
Rucking builds mental toughness, but it also builds loneliness if you are doing it by yourself week after week. A ruck club turns solitary walks into shared experience. You talk through challenges, celebrate milestones, and create relationships that extend beyond the ruck.
### An informal club can start with little overhead
The informal club described here does not charge a membership fee or employ coaches. Members agree on a public meeting place and ruck together. Local permit, insurance, and legal requirements still depend on where you live and how the group operates.
## How Many People You Need to Start
**Two.**
You and one other person committed to showing up every week for the next 2 months. That is your ruck club.
Do not wait for 8 people. Do not wait for a full roster. Start with your friend, your coworker, your neighbor, or someone you meet online in the [rucking community](/pillars/rucking-lifestyle-guide). If you don't know any ruckers yet, scan the [Ruck Club Finder](/clubs) for clubs near you and reach out - even a nearby club an hour away can connect you with one or two people in your own city looking for the same thing. Find one person and commit to a time.
Growth is not automatic, and it does not need to be fast. Start with the people who attend reliably, then make it easy for them to invite someone else.
A purpose-driven first event helps that growth along. A [Memorial Day ruck](/guides/memorial-day-ruck) gives a new club a built-in story and a reason for strangers to show up - one of the most meaningful ways to kick things off.
## Picking a Time and Route
**Make it the same every week.**
Pick a day and time and keep it consistent. A fixed weekly schedule makes attendance easier and gives the group time to build a habit.
Examples of working time slots:
- Tuesday and Thursday 6 AM before work
- Sunday 9 AM weekend warrior style
- Wednesday 6 PM after work
- Saturday morning long rucks
Your route should be:
- **Repeatable** - the same loop every week so people know what they are signing up for
- **Accessible** - starts and ends at a place with parking
- **Variable** - 3 to 5 miles is a good default range; you can adjust based on how people feel
- **Safe** - well-lit if early morning, good sidewalks or paths, minimal car traffic
Start at a local park or parking lot. Map out your loop on Google Maps. Test it once. Then commit to it.
## Naming Your Club
Pick something that reflects your personality and your place. "Portland Ruck Club" works. "Foggy City Ruckers" works. "Tuesday Morning Trail Warriors" works.
Keep it simple. Avoid inside jokes nobody else will understand. Your name should make sense to a stranger who finds you on Instagram.
## Promote the club online
Create an Instagram account for your club in the first week. People can find the club through city searches, hashtags, and posts shared by current members.
What to post:
- Before and after photos from your weekly rucks
- Route maps and distance markers
- New members joining
- Callouts for upcoming sessions
- Stories from events
Use hashtags: #RuckClub, #YourCity, #RuckersCommunity, #LoadedWalking, #[GoRuck](/glossary#goruck), and local hashtags like #PortlandFitness.
Post once per week minimum. Consistency here matters too. When someone scrolls looking for their local ruck club, they want to see recent activity.
## Growing Through Word of Mouth
Your best marketing is people showing up and loving it. When people experience your club, they tell their friends. Their friends tell other friends.
To accelerate this:
- **Ask people to bring someone new.** Every 2 to 3 weeks, have one member invite a friend.
- **Post in local fitness Facebook groups** - just once, with your club name, time, location, and Instagram handle.
- **Show up at local races and fitness events** - hand out cards with your club details.
- **Connect with CrossFit gyms and running clubs** - people looking for new fitness outlets often cross over.
Do not hard sell. Just show up, be friendly, and let the experience speak for itself.
## Gear Lending for Newcomers
The biggest barrier to people joining is "I don't have a ruck."
Buy 2 to 3 used packs (20-30 lbs capacity) and keep them in your car. Lend them for free. Tell every new person "borrow this for 2 to 3 weeks, see if you like it, then get your own if you want."
Loaner gear removes the need for a newcomer to buy a pack before attending a first ruck.
Good starter packs for lending: GORUCK GR1 (used, $100-150), the [5.11 Tactical RUSH 24](/gear/best-rucking-backpacks), Osprey Rook, or simple 30-liter hiking packs. Capacity matters more than brand.
## Structuring Your Sessions
Keep it simple. Every session follows this pattern:
**Warm-up (5 - 10 minutes)**
- Dynamic stretching, arm circles, walking in place
- Get people talking and loose
**The Ruck (20 - 45 minutes)**
- Follow your route
- Pace should be conversational - people should be able to talk while walking
- No one gets left behind
**Cool-down (5 - 10 minutes)**
- Slow the pace in the last half mile
- Static stretching at the end
- Drink water
**Optional Social (15 - 30 minutes)**
- Coffee, breakfast, or just hanging out
- Time for coffee or conversation
Optional social time can help members get to know one another and return for future rucks.
## Managing Mixed Fitness Levels
Your club will have beginners and veterans. Hobbyists and competitive ruckers. This is healthy.
The rule is simple: **Everyone carries their own weight.**
A beginner carries 15 lbs. A veteran carries 40 lbs. You all walk the same route at the same pace (conversational), but the experienced folks get more stimulus because they are carrying more load. By the end of the ruck, everyone is challenged.
This also means pacing is crucial. [Conversational pace](/glossary#conversational-pace) (3 - 3.5 mph) is slightly slower than normal walking. No one is racing. The ruck club is not a run club.
## Liability Considerations
Treat safety and legal structure as separate questions. Before the first public meetup:
- Walk the route and identify road crossings, poor lighting, water access, and places where someone can leave early.
- Collect an emergency contact and make sure at least one organizer carries a phone and a basic first-aid kit.
- Tell participants the planned distance, pace, terrain, and whether weight is optional. Encourage them to stop if they feel pain, dizziness, or unusual shortness of breath.
- Check whether the park, trail, or private property requires a group permit or advance permission.
Do not assume that an informal group is exempt from every requirement, or that a sentence such as "ruck at your own risk" resolves liability. License, permit, insurance, and waiver rules vary by location and by whether you collect fees, hire coaches, advertise to the public, or host larger events. In the United States, the [Small Business Administration](https://www.sba.gov/counseling/launch-your-business/) directs organizers to check state and local registration, permit, and insurance requirements. Outside the United States, check the equivalent local authority.
If the club collects money, uses paid staff, runs events, or grows beyond a small informal meetup, speak with a local insurer and qualified lawyer about the right structure and participant documents. This guide is practical planning information, not legal advice.
## Connecting With the Bigger Community
You are not alone. The rucking community is bigger than you think.
**List your club on the Ruck Authority directory** - The fastest way to be discoverable is to [add your club](/clubs/submit) to our [Ruck Club Finder](/clubs) - now hundreds of clubs across all 50 US states and 35+ countries. Approval takes a quick review, and once you're in, your club shows up on the global map and in your country/state filter for anyone searching "ruck club near me." This is the single highest-leverage move for growing past your first few members. Once listed, grab the free [club badge](/clubs/badge) for your own site or event page - no scripts, no tracking, and it tells visitors your club is active and verified.
**GORUCK Club Directory** - Also worth submitting at GORUCK.com/clubs. GORUCK promotes member clubs in their email and on their site. Different audience than ours, so list in both.
**Local Ruck Club Meetups** - Use the [Ruck Club Finder](/clubs) to spot other clubs within driving distance and host a joint ruck once or twice a year so nearby groups can meet.
**GORUCK Events** - Encourage your members to attend local GORUCK events (Challenge, Light, Selection series). These events strengthen the community and create bonding moments.
**Online Communities** - Join r/rucking on Reddit and the main GORUCK Facebook group. Tell people about your club. Help others start clubs. This is how networks grow.
---
## Frequently Asked Questions
### How do I know if my club is "working"?
You know your club is working when people show up without being reminded. When they bring friends. When they ask "same time next week?" at the end of a session. When they text you during the week saying they are thinking about the ruck.
Success is consistency, not size. A club with 4 people showing up every week beats a club with 12 people who are flaky.
### What if people stop showing up?
This happens. People move, get injured, discover it is not for them. Do not take it personally.
If at least two people still meet, the club can continue. If not, pause for a month and ask core members whether they want to restart.
Most ruck clubs experience 2 to 3 member cycles per year. That is normal.
### Can I charge a membership fee?
You can, but you probably should not. Fees add accounting, liability, and new member expectations.
Keep it free. Your investment is your time. That is enough.
If you want to cover costs (parking pass, club t-shirts, or group lunches), ask for voluntary contributions. Never mandate payment.
### What if someone gets injured during a ruck?
Stay calm, assess the injury, stop the session if needed, and call 911 if it is serious.
This is extremely rare. Minor aches and pains happen in any physical activity. Most injuries are overuse and happen between sessions, not during.
If someone does get hurt during a club session, be supportive, encourage them to see a doctor, and let them know the club is here when they recover. Do not panic about liability - you are just people exercising together.
### How do I find ruck clubs near me?
Start with our [Ruck Club Finder](/clubs) - it's a global directory with a map view, country and state filters, and clubs across 35+ countries. Search by your city or browse the map. Cross-check GORUCK.com/clubs for any clubs we haven't picked up yet.
If neither directory has one nearby, search Instagram for #YourCity + #RuckClub. Post in local running groups asking if anyone rucks. Ask in CrossFit gyms.
If you still cannot find one after 2 weeks of searching, that is your signal to start one yourself - and then [list it on our directory](/clubs/submit) so the next person searching finds you.
---
## Your next step
---
## Related reading
- [Ruck Club Finder](/clubs) - global directory of rucking clubs across 35+ countries. Search before you start.
- [List your club](/clubs/submit) - already running a club? Submit it so local ruckers can find you.
- [Beginner's guide to rucking](/pillars/beginners-guide-to-rucking) - everything you need to start before joining or founding a club
- [Your first 30 days of rucking](/guides/first-30-days-of-rucking) - what to expect and how to progress safely
- [Rucking for mental health](/guides/rucking-for-mental-health) - why ruck clubs build resilience and community bonds
- [Rucking for families](/guides/rucking-for-families) - bring your family into the club or start a family-focused version
- [Budget rucking starter kit](/gear/budget-rucking-starter-kit) - what to recommend to new members joining your club
────────────────────────────────────────────────────────────────────────────────
URL: https://ruckauthority.com/guides/how-to-track-rucking-on-strava
Title: How to Track Rucking on Strava: Pack Weight, Pace and Calories
Description: Record a ruck as Walk or Hike, keep a useful pack-weight log, edit watch uploads, and understand where Strava's calorie estimate comes from.
Published: 2026-09-10
Record a ruck in Strava as **Walk** or **Hike**, then add the weight you carried to the activity description or private notes. Strava's current sport list has no dedicated Rucking option. A note such as “20 lb pack” gives you a useful training record; it is not a documented input to Strava's calorie calculation.
These instructions were checked against Strava's help documentation on September 10, 2026. They cover phone recording and activities synced from a watch. For apps that accept pack weight directly, see our [rucking apps comparison](/gear/best-rucking-apps).
## Should you choose Walk or Hike?
For a neighborhood or pavement ruck, we suggest **Walk**. For a trail outing, **Hike** is a useful convention. That is our way of organizing a training log, not a Strava rule about where you may use either label.
Choose consistently so you can find comparable sessions later. The same loop with the same starting load tells you more about progress than comparing a flat walk with a steep hike just because both covered three miles.
Both labels appear in [Strava's supported sport types](https://support.strava.com/en-us/articles/15402005-what-sport-types-does-strava-support). Some Strava features are limited to running, riding or swimming, so do not expect every running analysis screen to appear on a Walk or Hike.
## Record a ruck with the Strava phone app
1. Open **Record** in the bottom navigation.
2. Tap the sport icon beside **Start** and select **Walk** or **Hike**. Check this each time: the app can remember your previous sport.
3. Tap **Start** when you begin your session.
4. At the end, tap **Pause**, then **Finish**.
5. Add a title and description, and check who can see the activity. Include your pack weight in your notes.
6. Select **Save Activity** on iOS, or **Save** at the upper right on Android.
This sequence follows [Strava's recording instructions](https://support.strava.com/en-us/articles/15402137-recording-an-activity). Basic recording and sharing are [free](https://support.strava.com/en-us/articles/15402187-is-strava-free); that does not mean every planning or analysis feature is included.
## Where to put your pack weight
The documented workflow has no dedicated pack-weight field. Use the description for a note your activity audience can read, or use **private notes** under **Details** when saving or editing. Strava says private notes are visible only to you; a public activity's description cannot be made private on its own. See its [privacy controls FAQ](https://support.strava.com/en-us/articles/15401776-strava-s-privacy-controls-faq).
Log the **whole pack's starting weight**, including the pack, plate, water and other contents. A 10 lb plate does not mean a 10 lb total load. If you only know the plate weight, label it that way so future comparisons are honest.
Here is an example format to copy into your notes. It is a blank training-log template, not a recorded session:
```text
Ruck: [route or session name]
Starting pack weight: ___ lb / kg
Water included in that weight: ___
Activity type: Walk / Hike
Surface and hills: ___
Distance: ___
Elapsed time, including stops: ___
Effort and comfort notes: ___
```
Use the last line for something you can act on: a heel slipping, a shoulder strap rubbing, or a pace that felt comfortable. Keep elapsed time labeled separately from moving time. If one session includes a long stop, comparing the two as though they used the same clock can mislead you. Our [pace calculator](/tools/pace-calculator) helps convert distance and time into a planning pace.
## If you record with a watch
Record once on the watch, then sync through its supported connection to Strava. Starting a second phone recording as well can leave you with two records of the same outing. Strava's [upload guide](https://support.strava.com/en-us/articles/15402066-how-to-get-your-activities-to-strava) links to device-specific setup instructions.
After a device upload, Strava's mobile **Quick Edit** lets you change the title and description and review visibility. Select **Done** to save those edits, or **Advanced Edit** for the full editor. This shortcut is for device uploads, not activities recorded directly in the phone app. See [Activity Quick Edit](https://support.strava.com/en-us/articles/15401614-what-is-activity-quick-edit).
Check the sport label and load note after the first sync. A watch's Rucking label may not transfer to Strava unchanged, and you should not assume its pack-weight field will appear in the description. Add your own note if it is missing.
### Change the sport on a saved activity
On mobile, open the activity, select the upper-right **three-dot menu**, then **Edit**. Select the current sport, choose its replacement, and save. On the web, open the activity and use the **pencil** on the left, then the **Sport** dropdown and **Save**.
Changing sport can affect analysis and segment matches. It does not establish that an imported calorie figure now accounts for pack weight. These steps come from [Strava's activity-type instructions](https://support.strava.com/en-us/articles/15401975-how-do-i-change-my-activity-type).
## Does Strava calculate rucking calories?
Check where the number came from. Strava displays calories supplied by an upload partner when that data is included. If no calorie value arrives, or you record in the Strava phone app, Strava calculates an estimate for supported activities, including Walk and Hike. A watch or app may use different inputs from Strava.
Strava's [calorie documentation](https://support.strava.com/en-us/articles/15402159-calorie-calculation) does not describe a pack-weight adjustment for its Walk or Hike calculation. Writing the load in your title or notes is therefore a recordkeeping step, not a verified calorie correction. Changing your Strava profile weight will not change a calorie total supplied by an upload partner.
For a separate estimate that accepts load, use our [rucking calorie calculator](/tools/calorie-calculator) and read its [method and limitations](/weight-loss/rucking-calorie-calculator-guide). Keep the source beside any number you log: “watch estimate” and “calculator estimate” are different records. Neither is a direct measurement of your energy use.
## Common questions
────────────────────────────────────────────────────────────────────────────────
URL: https://ruckauthority.com/guides/memorial-day-ruck
Title: Memorial Day Rucks: How to Carry With Purpose
Description: How to plan a respectful Memorial Day ruck, choose a manageable route and load, and keep remembrance more important than workout performance.
Published: 2026-05-21 / Updated: 2026-08-31
Memorial Day is the United States' annual day to mourn and honor service members who died in military service. The holiday grew from post-Civil War Decoration Day observances centered on graves, remembrance, and public ceremony, according to the [National Cemetery Administration](https://www.cem.va.gov/history/Memorial-Day-History.asp).
A memorial ruck is a modern, voluntary way some people mark that day. It is not the origin of Memorial Day, and there is no official national ruck format. The useful question is not how hard you can make the workout. It is whether the route, load, and ritual help you remember someone without creating a preventable emergency or turning the day into a performance stunt.
## What a memorial ruck actually is
There is no certifying body or official distance. In this guide, a memorial ruck means a loaded walk done with the deliberate intent to honor someone who died in service.
The variables you control:
- **Distance.** Use a short familiar loop if you are new. A 26.2-mile event is an endurance undertaking that requires specific preparation, not a symbolic default.
- **Weight.** Carry your established training load or less. If you have never rucked, a light secured load is enough. Do not borrow a military benchmark for a commemorative walk.
- **Time.** Choose a duration that fits your current capacity and the conditions. Starting at sunrise is optional, not a rule.
- **Route.** Local trails, neighborhood loops, formal event courses, or a route that means something specific (a fallen friend's home town, a base, a memorial site).
- **Ritual.** Reading a name. Wearing a specific patch. Carrying a photo. Calling someone afterward. The ritual is what separates a memorial ruck from a Tuesday workout.
## The most common formats
### Solo
The simplest version. Pack up, head out, walk. Bring water. If you're new to rucking, start with 15 to 20 pounds - the physical part isn't the point, but neither is hurting yourself.
What makes it a memorial ruck and not just a walk: pick a person. Bring their name with you. Think about them while you walk. Call their family afterward if you can.
### Group / Community
Some local ruck clubs organize Memorial Day weekend walks. Formats, pace, accessibility, and cost vary, so ask the organizer before treating a group event as beginner-friendly.
Find your nearest one through the [Ruck Authority Club Directory](/clubs).
### GORUCK Tribute events
GORUCK and local GORUCK clubs have hosted commemorative events, but schedules and event names change. Use GORUCK's current event calendar and the specific registration page for the duration, required weight, packing list, and start details. Do not rely on an old article's Light, Basic, Tough, or Heavy description.
### Murph
[Murph](https://www.crossfit.com/heros/murph) is a separate CrossFit Hero workout: a 1-mile run, 100 pull-ups, 200 push-ups, 300 squats, and another 1-mile run. CrossFit lists a 20-pound body armor prescription when available, but scaling is appropriate and the workout is not a ruck. It honors Lt. Michael Murphy and requires a different training base from a loaded walk.
### The Tough Ruck Boston model
The [Tough Ruck 26.2 Boston](/guides/tough-ruck-boston-2026-how-to-train-for-a-26-2-mile-memorial) is an organized 26.2-mile loaded march held in Concord, Massachusetts, the weekend before Marathon Monday. Tough Ruck Nation says the event honors fallen military members and first responders and raises support for their families. It is partnered with the Boston Athletic Association, but it is not run on the Boston Marathon course.
## How to plan one for this Monday
If you're reading this on Memorial Day weekend and you've never done one:
1. **Pick a route.** New ruckers should use a short, familiar loop with an easy exit. Experienced ruckers can use a longer route they have already prepared to cover.
2. **Pick a load.** Use your normal training load or less. A light, secured load in a [regular backpack](/gear/budget-rucking-starter-kit) is enough for a first memorial ruck.
3. **Pick a person.** Someone who served and isn't here. If you don't know anyone personally, the GORUCK community sometimes shares names of recent KIA you can carry for the morning. Or pick from the [Honor the Fallen project](https://www.militarytimes.com/news/honor-the-fallen/).
4. **Pick a time.** Sunrise is traditional. Whatever fits your schedule is fine.
5. **Walk.** Bring water, your phone, and the name. Don't rush the pace. Let the time be uncomfortable in a small way.
6. **Mark the moment.** Take a photo. Call someone. Post about who you carried. The ritual matters more than the route.
## A note on doing this respectfully
The thing that separates a memorial ruck from a Memorial Day workout is the *who*. If you're rucking on Monday and you don't know who you're carrying, take 10 minutes before you head out and pick someone. Find a name. Read about them. Carry them. The physical effort is the easy part - the intentionality is what makes it real.
## If you can't ruck this Memorial Day
Donate to one of the foundations the community supports: the [Travis Manion Foundation](https://www.travismanion.org/), the [Special Operations Warrior Foundation](https://specialops.org/), or one of the nonprofits in [GORUCK's 1% for Those Who Serve program](https://www.goruck.com/pages/one-percent-for-those-who-serve). Volunteer at a local veterans event. Visit a cemetery and clean a headstone. There's no rule that says the day requires miles. It just requires attention.
---
## Related reading
- [Tough Ruck Boston: how to train for the 26.2-mile memorial march](/guides/tough-ruck-boston-2026-how-to-train-for-a-26-2-mile-memorial)
- [How to start a ruck club](/guides/how-to-start-a-ruck-club) - for organizing a Memorial Day weekend community ruck
- [The complete beginner's guide to rucking](/pillars/beginners-guide-to-rucking) - first ruck ever? Start here.
- [Military rucking program](/training/military-rucking-program) - the standard the holiday is built around
- [GORUCK Challenge training](/training/goruck-challenge-training) - if Monday's ruck inspires you to sign up for a Tough
## Frequently asked questions
────────────────────────────────────────────────────────────────────────────────
URL: https://ruckauthority.com/guides/pandolf-equation-rucking
Title: Pandolf Equation: Formula, Worked Example + Free Rucking Calculator
Description: The exact Pandolf equation with every term defined, a worked example you can follow with your own numbers, and a free calculator that runs it for you - no spreadsheet needed.
Published: 2026-05-21 / Updated: 2026-09-25
The [rucking calorie calculator](/tools/calorie-calculator) uses the Pandolf equation to estimate the energy cost of loaded walking from body weight, pack weight, speed, grade, and terrain. The US Army Research Institute of Environmental Medicine published the equation in 1977, and it remains a widely used model in load-carriage research.
This is the explainer page. The formula, the variables, the terrain table, a worked example, and the corrections that came after.
## The formula
The full Pandolf equation predicts metabolic rate (M, in watts) as:
> **M = 1.5W + 2.0(W+L)(L/W)² + η(W+L)[1.5V² + 0.35VG]**
Where:
| Variable | Meaning | Units |
| --- | --- | --- |
| **M** | Metabolic rate | watts |
| **W** | Body weight | kg |
| **L** | Load (pack + plate + contents) | kg |
| **V** | Walking velocity | m/s |
| **G** | Grade (slope) | percent |
| **η** | Terrain coefficient | unitless (see table below) |
The three terms each model a separate component of energy expenditure:
1. **1.5W** - the resting metabolic baseline scaled to body weight (standing, doing nothing)
2. **2.0(W+L)(L/W)²** - the "load penalty" - the extra cost of carrying weight, which scales non-linearly with the load-to-body-weight ratio
3. **η(W+L)[1.5V² + 0.35VG]** - the cost of moving the combined body + load mass through terrain at speed
The load penalty term is the part most people get wrong intuitively. It's not linear. Doubling your load more than doubles the metabolic cost, because the (L/W)² term grows quadratically with the load-to-bodyweight ratio. Because the burn scales with the weight you carry, a known, fixed load is the cleanest way to dial in and progress it - we compare the common options in our [ruck plate guide](/gear/ruck-plate-comparison).
## Terrain coefficients
The η term in the equation accounts for how the surface underfoot changes energy cost. Pandolf et al. didn't measure all terrains in 1977 - the original paper covered blacktop. Subsequent studies (most notably Soule and Goldman 1972, which Pandolf cited) filled in the rest:
| Terrain | η (terrain coefficient) |
| --- | --- |
| **Blacktop / paved road** | 1.0 (baseline) |
| **Dirt road / hard-packed trail** | 1.1 |
| **Light brush / packed grass** | 1.2 |
| **Heavy brush / loose dirt** | 1.5 |
| **Loose sand** | 2.1 |
| **Hard snow** | 1.3 |
| **Soft snow (ankle deep)** | 1.6+ (rises rapidly with depth) |
| **Wet, muddy trail** | 1.5-1.8 (variable) |
This is why the same 30-pound ruck at the same pace burns roughly 70% more calories on a sandy beach than on pavement (about 575 against 330 an hour for a 180-pound person at 3 mph). The terrain coefficient multiplies the entire third term of the equation, so the harder the surface is to move across, the steeper the cost.
## A worked example
Let's run the numbers for a realistic recreational rucker:
- **Body weight (W):** 82 kg (180 lb)
- **Load (L):** 14 kg (30 lb, plate + pack + water)
- **Speed (V):** 1.56 m/s (3.5 mph)
- **Grade (G):** 0% (flat)
- **Terrain (η):** 1.0 (paved road)
Plug into the equation:
> **Term 1 (resting baseline):**
> 1.5 × 82 = 123 W
> **Term 2 (load penalty):**
> 2.0 × (82 + 14) × (14 / 82)²
> = 2.0 × 96 × 0.0291
> = 5.6 W
> **Term 3 (movement cost):**
> 1.0 × (82 + 14) × [1.5 × (1.56)² + 0.35 × 1.56 × 0]
> = 96 × [3.65 + 0]
> = 350 W
> **Total M = 123 + 5.6 + 350 = 478 watts**
Convert watts to calories per hour:
> **478 W × 0.8598 = ~411 kcal/hr**
(The 0.8598 conversion factor accounts for net metabolic cost - subtracting basal metabolic rate from gross expenditure - the form most calorie estimates report. Some sources use a slightly different conversion; values typically land within 5-10% of each other.)
That matches what an honest rucking calorie estimate should show: roughly **400-420 kcal/hr** for a 180-lb rucker with a 30-lb pack at a 3.5 mph pace on pavement. Use [our calculator](/tools/calorie-calculator) if you want to skip the arithmetic.
## What changes when you go uphill
Grade enters through the third term: `1.5V² + 0.35VG`. The grade term scales with both velocity AND grade, so a 10% climb at 3.5 mph adds proportionally more energy cost than a 10% climb at 2.0 mph.
Re-running the worked example above with G = 10% (10% grade, roughly a moderate hill):
> Term 3 becomes 1.0 × 96 × [3.65 + 0.35 × 1.56 × 10]
> = 96 × [3.65 + 5.46]
> = 96 × 9.11
> = 875 W
> Total M = 123 + 5.6 + 875 = **1,003 watts**
That's a **2.1x increase** in metabolic rate from going to a 10% grade. The hill is the most underestimated variable in casual calorie estimates - and the variable Apple Watch handles worst.
## Where the original equation breaks down
Pandolf et al. were honest in 1977 about where their model wouldn't work. The conditions the original equation does NOT handle well:
**1. Downhill grades.** The original Pandolf equation only handled positive grades. Walking downhill *should* require less metabolic cost than flat walking, but the original formula either over-predicts or doesn't account for it at all. **Santee's 2001 correction** added a downhill term that captures the actual eccentric muscle work involved in controlled descent. Modern calculators (including ours) layer Santee's correction onto Pandolf for negative grades.
**2. Very fast walking.** Above about 5 mph (2.24 m/s), most people transition from walking to a march-run or jog. The equation's V² term keeps climbing, but the actual energy cost plateaus differently because of the gait change. Pandolf works cleanly up to a brisk walking pace.
**3. Very heavy loads.** Above ~70 kg (155 lb), the load penalty grows so steep that the equation starts predicting impossible metabolic rates. The original studies didn't validate above this point because most people physically can't sustain that load for long.
**4. Untrained vs trained subjects.** Pandolf's subjects were US Army soldiers. Highly trained ruckers and special operations personnel show measurably better efficiency at the same external work rate, sometimes 10-15% lower than Pandolf predicts. Untrained civilians starting rucking often show 5-10% *higher* costs than Pandolf for the same conditions, mostly due to less efficient gait under load.
The takeaway: **Pandolf is most accurate for recreational rucking in the 15-45 lb load range, 2.5-4.0 mph pace range, on flat-to-uphill terrain.** That's where the model was validated and where it cleanly predicts within 5-10% of measured metabolic cost.
## Apple Watch vs Pandolf - why wrist-based estimates undershoot
Apple Watch, Fitbit, Garmin (in non-rucking modes), and most consumer step-counter wearables do NOT use Pandolf. They use generic walking calorie equations that take heart rate and step count as inputs - and crucially, **they have no field for load weight**.
The implication: if your wearable scores the walk as unloaded (about 365 kcal/hr at 3.5 mph for a 180-lb person) while you're carrying a 30-lb plate, it misses roughly 45-50 kcal/hr on flat ground, **about 12% of the true cost**, and about 80 kcal/hr up a 5% grade.
Garmin watches in their dedicated "Hiking" or "Tactical" modes accept a pack weight input and produce notably more accurate estimates. The [Garmin Instinct 3 Solar](/shop) and the [Forerunner 265](/shop) both expose this field. Apple Watch (as of WatchOS 11) still does not - the rucking community has been requesting it since at least 2022.
The cleanest field-measured estimate combines a chest strap heart rate monitor (which captures actual cardiovascular load regardless of activity type) with Pandolf-grade load-aware software. A [Garmin HRM-Pro Plus](/shop) chest strap is the single biggest accuracy upgrade most ruckers can make.
## The corrections you should know about
Pandolf 1977 is the foundation. Two papers refined it for modern use:
**Santee et al. 2001** added a downhill term to handle negative grades. The original Pandolf equation produced nonsensical results for descents - Santee provided a corrected term that accounts for the eccentric muscle work of controlled descent. Most modern military and academic load-carriage models use Santee-corrected Pandolf.
**Looney et al. 2019** validated and refined the math for both uphill and downhill walking with a larger sample and more recent gait analysis equipment. Looney's updates are most relevant for steep terrain and unusual gait patterns. For typical recreational rucking (flat to moderate hills), Santee-Pandolf is accurate enough.
If a calculator's documentation cites "Pandolf-Santee" or "Looney-Pandolf-Santee," it's using a modern corrected form. Most online calculators either don't disclose their math or use raw Pandolf 1977 - which is fine for flat-terrain estimates but underestimates downhill cost.
## Frequently asked questions
---
## Use the equation
If you want to skip the arithmetic, our [rucking calorie calculator](/tools/calorie-calculator) runs Santee-corrected Pandolf with the terrain coefficient table built in. Plug in body weight, pack weight, pace, distance, and grade - it returns calories per hour and total burn for the session.
For tracking real-world burn against the prediction, a chest-strap heart rate monitor like the Garmin HRM-Pro Plus captures actual cardiovascular load that wrist-based wearables miss under shoulder straps. Our [GPS watch guide](/gear/best-gps-watches-for-rucking) explains when wrist and chest-based measurements are useful. The combination of a load-aware calculator and a chest strap is the strongest practical setup for comparing predicted and observed effort.
---
## Related reading
- [Rucking calorie calculator](/tools/calorie-calculator) - the tool that runs this equation
- [The complete rucking calorie guide](/weight-loss/rucking-calorie-calculator-guide) - field application of the formula
- [Rucking afterburn (EPOC) effect](/weight-loss/rucking-afterburn-effect) - what the equation doesn't capture: post-exercise metabolism
- [Progressive overload for rucking weight loss](/weight-loss/progressive-overload-for-weight-loss-rucking-how-to-keep-bur) - how to manipulate the equation's variables for adaptation
- [Zone 2 rucking guide](/weight-loss/zone-2-rucking-guide) - heart-rate-based intensity tracking
────────────────────────────────────────────────────────────────────────────────
URL: https://ruckauthority.com/guides/pavement-vs-trail-vs-treadmill
Title: Pavement vs Trail vs Treadmill: Where Should You Ruck?
Description: Each surface has trade-offs for rucking. Here's how terrain affects calorie burn, injury risk, and training stimulus - with recommendations by goal.
Published: 2026-03-10 / Updated: 2026-09-25
## The short answer
Start on pavement. Graduate to trails when you're comfortable under load. Use the treadmill when weather or logistics demand it. Mix all three for the best overall training stimulus.
The surface you choose matters more than you'd think. A 30-minute ruck on pavement, trail, or a treadmill at the same pace and load won't produce the same results. Your joints, muscles, and nervous system respond differently to each terrain. The good news is that each surface has a specific role in your training - and the best ruckers rotate between all three.
## Pick your surface by goal
| Goal | Start here | Add later | Avoid at first |
| --- | --- | --- | --- |
| First month of rucking | Pavement | Easy gravel paths | Technical trails under load |
| Weight loss | Pavement for consistency | Trails for higher stimulus | Treadmill-only routines |
| Event prep | The terrain your event uses | Treadmill hill intervals | Random surfaces with no progression |
| Winter or unsafe weather | Treadmill | Cleared pavement | Ice without traction |
| Better balance and foot strength | Easy trails | Hillier trails | Long technical descents before you adapt |
If you are starting from zero, pair this with the [first 30 days of rucking plan](/guides/first-30-days-of-rucking). If your routes are mostly trails, use the [best rucking shoes by terrain](/gear/best-rucking-shoes-by-terrain) guide before increasing distance.
Two pieces of kit decide whether you can rotate across all three surfaces without re-buying gear. A versatile trail-runner that handles pavement-to-trail without complaint, and a watch precise enough to compare treadmill speeds against outdoor pace.
| Role | Pick | Why it handles all three surfaces |
|------|------|-----------------------------------|
| Shoes | Salomon XA Pro 3D | Lugs grip dirt without feeling clunky on pavement. Quicklace makes the swap painless. |
| Watch | Suunto Vertical | Barometric altitude + 100-hr battery. Compares treadmill pace, pavement pace, and trail elevation gain in one log. |
---
## Pavement rucking
### Why it works for beginners
Pavement is the starting point for 90% of new ruckers, and for good reason. The consistent, predictable surface lets you focus on the fundamentals: form, breathing, and load management. You're not thinking about where to place your foot; you're thinking about whether your pack is riding correctly or if your shoulders are back and down.
Roads and sidewalks offer another massive advantage: accurate distance and pace tracking. Your phone's GPS is reliable on open pavement. You can measure exactly what you did and track progress week to week. This feedback loop is motivating and essential for structured training plans.
Pavement is also everywhere. You don't need a car, a gym membership, or a special location. Your daily commute becomes a training opportunity. This accessibility is why so many people build the [rucking](/glossary#rucking) habit on pavement - the barrier to entry is zero.
Finally, ankle safety is significantly better on pavement. Your risk of rolling an ankle is lower on a flat, stable surface, which is important when you're learning how a weighted load changes your movement.
### The downsides
The trade-off is impact. Pavement is unforgiving. Every step transmits force through your joints - knees, hips, ankles, lower back. Over months of repeated pavement rucking, some people develop knee pain, [shin splints](/glossary#shin-splints), or [plantar fasciitis](/glossary#plantar-fasciitis). Your joints are designed to absorb load, but they have a tolerance curve.
Pavement also doesn't challenge your balance or ankle stabilizers the way uneven terrain does. Your ankles are passive. This means you're missing out on proprioceptive training (your body's sense of where it is in space) and the strengthening that comes from navigating varied terrain.
Long pavement rucks can also become mentally monotonous. You're walking the same route, seeing the same scenery. The repetition is great for building habit, but it's not stimulating. In summer, the heat reflectivity of asphalt can also make long rucks significantly hotter.
### Best for
Start here. Pavement is ideal for your first 4-8 weeks of rucking, regardless of your fitness level. It's the best surface for pace-based training programs, speed work, and for urban ruckers who don't have trail access. If you're on a structured plan (like training for a military selection course), pavement lets you dial in exact paces and distances.
---
## Trail rucking
### Why it's the gold standard for experienced ruckers
Once you've built a foundation on pavement, trails become the gold standard. Variable terrain forces your ankle stabilizers, hip abductors, and smaller stabilizing muscles to work constantly. Every uneven section requires micro-adjustments. Your nervous system has to process more information. Over time, this builds ankle strength and proprioception that flat-surface rucking simply cannot develop.
Elevation changes significantly increase training stimulus. In the Pandolf load-carriage model, a 3% grade adds about a third to the hourly energy cost of the same pace and load, and a 5% grade adds more than half. Your glutes, quads, and cardiovascular system are all working harder. Downhill walking engages your [posterior chain](/glossary#posterior-chain) differently, requiring more eccentric muscle control. This variation is exactly what your body needs to continue adapting.
Trails also force you to engage more muscle groups. The lateral stabilizers in your hips, ankles, and core are constantly active. You're not just moving forward; you're managing side-to-side forces and adapting to obstacles. This creates a more comprehensive training effect than pavement can offer.
The mental engagement is significant too. Navigation, scenery changes, and the cognitive demand of watching your footing all combine to make trail rucking more interesting. For many people, the mental health benefit of trail rucking - the nature exposure, the problem-solving of varied terrain - is as valuable as the physical stimulus. Proper footwear matters on technical terrain - grab [trail-specific shoes](/gear/best-rucking-shoes-by-terrain) designed for loaded walking.
### The downsides
The primary risk is ankle injury. Under load, a twisted ankle is both more likely and potentially more serious. If you're carrying 40 pounds and you step on a rock wrong, the force traveling through your ankle is much higher than it would be unloaded. Acute ankle sprains are the most common acute injury in trail rucking, especially for people who jump into trails too early.
Trail terrain makes pace tracking nearly impossible. Tree cover reduces GPS accuracy. Elevation changes and natural obstacles mean you can't move at a consistent speed. If you're training for a pace-specific event, you'll need some pavement work alongside your trail rucking.
Trail rucking also requires more attention. You can't zone out and think about your day. You have to watch footing, navigate, and adjust to obstacles constantly. For some people, this is a feature; for others, it's a drawback. You can't do guided meditation on a technical trail while rucking under load.
Trail access is also location-dependent. If you live in a flat, urban area, finding quality trails might not be realistic. Driving 45 minutes to ruck trails isn't sustainable for most people.
### Best for
Graduate to trail rucking after 4+ weeks on pavement and once you're comfortable moving under load. It's essential for anyone training for outdoor events (military selections, obstacle races, backcountry treks). If your goal is overall fitness variety and mental health benefits, trails are non-negotiable. Trail rucking should make up a significant portion of your training once you've built the foundation. Proper footwear is critical on technical terrain - a do-everything trail-runner like the [Salomon XA Pro 3D V9 GTX](/shop) is the pair most readers settle on for the pavement-to-dirt jump, and our [best rucking shoes by terrain guide](/gear/best-rucking-shoes-by-terrain) covers more terrain-specific options.
---
## Treadmill rucking
### When it makes sense
Treadmill rucking sounds like a compromise - and it is. But there are legitimate scenarios where it's the right tool.
Winter in northern climates makes outdoor rucking dangerous. Ice, extreme cold, and darkness create safety and health risks that aren't worth it. A treadmill session at a controlled pace and incline beats missing the workout entirely.
Bad weather (heavy rain, extreme heat) also justifies treadmill training. If you have access to a gym and the weather is unsafe, a treadmill ruck keeps your training consistent.
Controlled hill training is one of the strongest use cases for treadmill rucking. You can set an exact incline - 6%, 8%, 10% - and hold it for a specific duration. This is nearly impossible to replicate on natural trails, where grade varies. If you're training for a specific event with known elevation profiles, a treadmill lets you prepare precisely.
Recovery rucks are another good use case. Rucking at a very low pace (2.0-2.2 mph) with light load is a legitimate recovery tool. On a treadmill, you can hold exact speeds that might be hard to maintain outdoors (you'd go slightly faster without thinking about it).
Finally, safety concerns make treadmill training valid. If you ruck before sunrise and traffic/darkness is a concern, or if you live in an unsafe area, the gym is a reasonable alternative while you work toward better options.
### The downsides
Treadmill mechanics are fundamentally different from outdoor walking. The belt moves beneath you, which changes how your muscles generate force. You don't have to propel yourself forward; the belt assists your stride. This means your glutes and lower body don't work as hard. The biomechanical difference is real and measurable.
A treadmill is also a perfectly flat, perfectly predictable surface. There's no proprioceptive demand. Your stabilizer muscles barely activate. Your balance isn't challenged. The training stimulus is simpler and less comprehensive than outdoor rucking.
Mentally, treadmill rucking is boring. Even with a TV or podcast, 45 minutes on a treadmill feels longer than 45 minutes outside. Many people find it tedious enough that it erodes their motivation.
The pack also feels different indoors. Without natural wind, without the ground-to-foot feedback of varied terrain, the pack feels heavier and more awkward. Some people report that indoor rucking with a pack is uncomfortable in ways outdoor rucking isn't.
Finally, check your gym's treadmill weight limits. Some machines have a combined limit of 300 pounds (user plus pack). If you're a larger person or you're carrying 60+ pounds, you might exceed the limit. If you'd rather get unloaded indoor walking steps at home than ruck on a treadmill, our sister site Kit Authority's [best walking pads](https://kitauthority.com/fitness/best-walking-pads?utm_source=ruckauthority&utm_medium=crosslink) roundup covers the compact options - just note their weight limits run lower than a gym machine's.
### Making it work
If you're going to ruck on a treadmill, follow these principles to get closer to outdoor stimulus:
Set the incline to 1-3%. A completely flat treadmill doesn't mimic outdoor walking. A 1-3% grade gets closer to the real thing without making it too easy.
Focus on posture relentlessly. On a treadmill, it's easy to lean back, let your shoulders round, and zone out. Check your posture every minute. Engage your core. Stand tall.
Start at 2.5 mph and dial up gradually to find your sustainable pace. This is slower than most people naturally walk unloaded. That's correct. The load and the treadmill mechanics mean slower speeds feel more realistic.
Use a chest strap on your pack to minimize bouncing. The [vertical](/gear/best-gps-watches-for-rucking) bobbing that happens indoors is different from outdoor rucking and can be uncomfortable. A snug chest strap keeps the pack stable.
### Best for
Treadmill rucking is best for winter training in cold climates, controlled hill-work sessions, injury rehabilitation at precise paces, and hotel gym sessions while traveling. It's also a valid backup when weather makes outdoor rucking unsafe. But treadmill training should never dominate your routine. Aim for no more than 20-30% of your weekly volume on a treadmill, and prioritize outdoor work when possible.
---
## Head-to-head comparison
---
## Recommendations by goal
Your goal determines where you should spend most of your rucking time.
**Weight loss and calorie burn**: Mix pavement and trail rucking. Trails burn roughly 15-35% more calories at the same pace (Pandolf terrain factors for gravel and rough trail), making them more efficient for a caloric deficit. But pavement lets you sustain longer distances without the fatigue factor that terrain adds. A 50/50 mix maximizes calorie burn while keeping you fresh enough to maintain intensity; use the [rucking calorie calculator](/tools/rucking-calorie-calculator) to calculate calories by terrain.
**Event preparation**: Ruck the terrain your event will use. Training for a military selection course in mountainous terrain? Trails are non-negotiable. Training for an urban ruck event? Pavement is your foundation. If the event is mixed terrain (most backcountry events), do a 60/40 trail-to-pavement split.
**General fitness and consistency**: Rotate all three surfaces across your week. Pavement keeps your pace consistent and interesting. Trails build strength and proprioception. Treadmill work happens when life gets in the way. This variety prevents adaptation plateau and keeps rucking interesting.
**Injury recovery**: Start on a treadmill at very low speeds (2.0-2.2 mph) with light load. Once pain-free, graduate to pavement at easy paces. Trail training comes last, once you're confident in your recovery. The controlled environment of a treadmill lets you build confidence before reintroducing variability.
**Mental health and sustainability**: Trail rucking wins here. Nature exposure, scenery changes, and the mental engagement of varied terrain all contribute to better mental health outcomes than repetitive pavement rucking. If your primary goal is building a sustainable habit that you enjoy, prioritize trails once you're ready for them.
---
## The ideal weekly mix
Here's how to structure your weekly rucking across surfaces, depending on your experience level.
**Beginner (2 rucks per week)**: Both on pavement. Spend your first 4-8 weeks building a foundation on consistent terrain. Your only goal is adapting to load and getting comfortable with the movement pattern.
**Intermediate (3 rucks per week)**: Two pavement rucks and one trail ruck. This gives you the consistency of pavement while introducing the stimulus variability of trails. Your pace work happens on pavement; your strength and proprioception development happens on trails.
**Advanced (4+ rucks per week)**: One to two pavement rucks, one to two trail rucks, and optionally one treadmill hill session. By this point, you're using each surface strategically. Pavement might be a long, easy ruck or a pace-specific workout. Trails are strength and power work. The treadmill is controlled hill training or weather-based backup work.
The key principle: pavement is your foundation, trails are your progression, and treadmill is your insurance policy. As you advance, the ratio shifts toward more trail work, but pavement never disappears completely.
## Frequently Asked Questions
────────────────────────────────────────────────────────────────────────────────
URL: https://ruckauthority.com/guides/ruck-commuting-guide
Title: Ruck Commuting: How to Walk to Work With Weight
Description: Turn your commute into a workout. Ideal distances, gear, breathability, weight progression, safety, and the math on time savings.
Published: 2026-03-28 / Updated: 2026-09-25
## The Short Answer
[Ruck commuting](/pillars/rucking-lifestyle-guide) is the lowest-friction way to add strength training to your day. You are already walking or taking transit and walking part of it. A weighted backpack transforms that commute into a productive workout - no extra time needed, no gym visit required, and you arrive at work energized instead of sedentary.
The ideal commute distance is 1 to 3 miles. Any longer gets logistically complicated. Any shorter and the calorie expenditure barely justifies the gear investment. Pick a route that is reasonably flat and well-lit, grab a ruck designed for commuting (laptop compartment and breathable back panel), and start with 15 to 20 lbs.
## The commuter ruck kit
Commuting rucks need a different gear profile than training rucks - laptop sleeve, civilian aesthetic, breathable back panel, low-profile reflectivity for road sections. Four items handle 95% of urban commutes.
| Priority | Item | Why this one |
| --- | --- | --- |
| 1 | [Evergoods CPL24](/gear/best-goruck-alternatives) commuter pack | Padded laptop sleeve, clean civilian look, breathable mesh back panel. The pack ruckers reach for when they don't want to look tactical at the office. |
| 2 | Alt pack: [Mystery Ranch 2 Day Assault](/gear/best-goruck-alternatives) | Same crossover role with better load carry, more capacity, and a stronger case for weekend training too. |
| 3 | [Garmin Instinct 3 Solar](/gear/best-gps-watches-for-rucking) | Multi-week battery, tracks Zone 2 - the heart-rate zone where a commute becomes a workout. The watch you'll keep wearing in the office. |
| 4 | [Petzl Actik Core](/gear/best-headlamps-for-rucking) headlamp | Rechargeable, 600 lumen. Dark-morning commute essential. Lives in the pack year-round. |
| 5 | Nalgene Wide-Mouth 32 oz bottle | Fits any pack side pocket; doesn't sweat onto your laptop sleeve. |
## Pack picks for commuting
Three packs handle the commuter use case from three different angles - tactical-leaning, civilian-clean, and crossover. Pick by which trade-off matters most for your office. If budget is the deciding factor, the [RUSH 24 2.0](/shop) gives you a laptop sleeve and real load-carry for around a third of a premium pack's price. If you're shopping for a pack to fly and travel with rather than ruck in, our sister site Kit Authority's roundup of [travel backpacks](https://kitauthority.com/travel/best-travel-backpacks?utm_source=ruckauthority&utm_medium=crosslink) covers carry-on-friendly options built for trips, not loaded walks.
| Pack | Capacity | Laptop Sleeve | Best For | Price tier |
| --- | --- | --- | --- | --- |
| [GORUCK GR1 26L](/gear/goruck-gr1) | 26L | 15" padded, suspended | The buy-once pick. Tactical look but Scars lifetime warranty makes it the longest-term value. | Premium |
| [5.11 RUSH 24 2.0](/gear/best-rucking-backpacks) | 37L | 15" padded | The budget workhorse. More external organization than the GR1, less premium feel, around a third of the price. | Budget |
| [Mystery Ranch 2 Day Assault](/gear/best-goruck-alternatives) | 27L | 15" sleeve | The crossover. Cleaner aesthetic than the RUSH, more load-friendly than most commuter bags, and better for weekend training too. | Mid-range |
## Why Ruck Commuting Works
Ruck commuting wins because it solves the biggest barrier to fitness: time. You do not need to carve out a new hour. You are already moving from point A to point B. The only change is what you carry.
A commute usually lands at dawn or dusk, which means you are walking through the best light of the day. If that tempts you to start carrying a camera, our sister site Aperture Authority's [golden hour](https://apertureauthority.com/learn/golden-hour?utm_source=ruckauthority&utm_medium=cross-site) guide covers how to actually use it.
A [rucker](/glossary#rucker) walking 1.5 miles at a moderate pace burns 80 to 120 additional calories compared to the same walk unloaded - depending on pack weight and body composition. Do that four times per week and you are adding 320 to 480 calories burned per week without any lifestyle change beyond putting on a backpack.
The resistance also builds stabilizer muscles in your core, legs, and back that traditional cardio completely ignores. [Rucking](/glossary#rucking) for six weeks straight produces measurable improvements in posture, lower back strength, and grip strength - adaptations running will not give you.
## The Ideal Commute Distance
Distance determines the viability of your ruck commute. Here is the practical breakdown:
**Under 1 mile:** The time window is too short. The caloric burn is negligible (roughly 20 to 30 extra calories). You also have not hit the neural adaptation window where rucking starts to feel natural. Skip this distance unless you are layering it - ruck to the bus stop, take transit, ruck from the transit center.
**1 to 3 miles:** This is the sweet spot. A 2-mile ruck at a moderate pace takes 35 to 45 minutes, which maps to most reasonable commutes. The caloric burn reaches 100 to 180 calories. The logistics are simple - one change of clothes, one ruck, done.
**3 to 5 miles:** Doable but starts to require serious planning. Shower facilities at work become a hard requirement. Weight selection matters more because fatigue compounds over longer distances. Most people in this range ruck two to three times per week, not daily.
**Over 5 miles:** Unless you have a dedicated shower and changing area at work, this is not practical for daily commuting. Consider splitting it - ruck to transit, take transit partway, ruck the rest.
## What to Carry: The Commuter Ruck Setup
Your ruck needs three things: a laptop compartment, a breathable back panel, and enough capacity to hold a change of clothes without looking like you are packing for a weekend.
**Recommended capacity:** 15L to 27L is the commuter sweet spot. The [Evergoods CPL24](/gear/best-goruck-alternatives) or [Mystery Ranch 2 Day Assault](/gear/best-goruck-alternatives) hit this range cleanly. Anything much larger advertises "this person is rucking" in a way that works for some workplaces and not others. Anything smaller does not fit a laptop and a change of clothes.
**Essentials to pack:**
- Laptop or work device
- Change of shirt (merino wool or synthetic; avoid cotton)
- Deodorant or baby wipes (more on this below)
- Nalgene Wide Mouth 32oz water bottle - stays hydrated all commute without sloshing
- Minimal phone/keys/wallet
Do not pack a full gym bag. The goal is to commute, not to haul everything you own. Keep it under 20 lbs for the first month, then adjust based on how you feel.
## The Sweat Problem (And How to Solve It)
The biggest concern people have about ruck commuting is arriving at work drenched. This is a logistics problem, not a fundamental limitation.
**The pace matters most.** You do not need to ruck fast. A leisurely 3 to 3.5 mph pace is the commuter norm. At this pace, even with a 20-lb pack, your heart rate stays in zone 2, which is the "talking pace" where you do not sweat excessively. Run the numbers: A 180-lb person rucking at 3.5 mph with a 20-lb pack on flat streets burns roughly 395 calories per hour (Pandolf equation), which is moderate intensity.
**Layer strategically.** Avoid cotton entirely. Start with a merino wool or synthetic base layer, add a lightweight breathable outer layer, and you can shed the outer layer halfway through the commute if needed. You regulate temperature, not sweat buckets.
**Keep cleanup supplies at work.** Store fragrance-free baby wipes at your desk and use them to clean your face, neck, and armpits after you arrive. They will not replace a shower, but they can make a short, easy commute more practical.
## Weight Progression for Commuters
Start light. This is non-negotiable. A common mistake is loading up with 30 lbs because you are "already strong." Your stabilizer muscles, tendons, and connective tissue need time to adapt.
**Week 1 to 2:** Bodyweight only or 10 lbs if you are large (over 200 lbs). This is your form baseline. You are learning to ruck without fatigue clouding your movement pattern.
**Week 3 to 4:** Add 5 lbs. Total load: 15 to 20 lbs depending on your starting point. Ruck three to four times per week.
**Week 5+:** Add 5 lbs every two weeks if you feel strong and your joints are not complaining. Plateau at 20 to 30 lbs for most commuters. Heavier rucks are overkill for a commute; you are not doing selection courses.
**Practical load rule:** Never exceed 15 to 20 percent of your body weight for commuting. A 180-lb person maxes out around 30 to 35 lbs. A 150-lb person stops at 25 to 30 lbs. This is the sweet spot where you are getting the strength stimulus without trashing your joints.
## Weather and Safety Considerations
**Cold weather:** Merino wool works. A windproof outer layer helps. Do not overheat - you will sweat and then chill on arrival. Reflective elements on your ruck and clothing are not optional; they are essential.
**Rain:** Waterproof your electronics, not your ruck. A good commuter ruck has water-resistant fabric. Heavy rain is your signal to skip rucking or adjust your pace. Slick pavement and added weight are a slip risk.
**Dark conditions:** Use lights. A [Petzl Actik Core](/gear/best-headlamps-for-rucking) rechargeable headlamp keeps your hands free while illuminating your path, and the compact design tucks easily into your ruck. Reflective vest over your ruck is overkill for urban environments but reasonable for rural routes. The goal is to be seen, not to look cool.
**Route selection:** Flat or gently rolling is ideal. Steep hills compound fatigue and increase injury risk. Major busy roads are not recommended - stick to quieter streets or dedicated paths. One change in a major intersection can derail your commute completely.
## Frequency and Programming
Four days per week is the practical sweet spot for commuters. This gives you:
- Monday: ruck commute (light, moderate pace)
- Wednesday: ruck commute (moderate load, steady pace)
- Friday: ruck commute (lighter day, recovery pace)
- Plus one weekend ruck if you are feeling ambitious (optional)
This [cadence](/glossary#cadence) gives your body enough stimulus to adapt without hitting fatigue or overuse. It is also realistic - missing one day due to weather or scheduling does not derail your whole week.
**Avoid rucking every single day.** Your tendons and ligaments adapt slower than your muscles. Daily loading accelerates wear. You see this especially in people over 40 - they get strong quickly but joint complaints emerge after a few weeks of daily rucking.
## The Money Math: Ruck Commuting vs. Gym Membership
Assume a 2-mile ruck commute, four days per week, 50 weeks per year.
**Annual calorie burn:** 400 to 720 calories per week (depending on load and pace) = 20,000 to 36,000 calories per year. This is equivalent to roughly 6 to 10 lbs of pure fat loss, assuming diet stays constant.
**Cost:** A good commuter ruck runs $150 to $200. Lifespan is 10 years minimum. Annual cost: $15 to $20 per year.
**Gym membership:** $50 to $150 per month = $600 to $1,800 per year.
You are not saving a fortune - but you are getting a legitimate fitness stimulus for essentially free, and you actually stick with it because the friction is zero. There is no "I am too tired to go to the gym." The gym is on your way home.
---
## Frequently asked questions
### How do I avoid sweating through my work clothes?
Use the pace and layering approach. Ruck at 3 to 3.5 mph (the talking pace), not fast. Wear a merino base layer under a breathable outer layer you can shed. Baby wipes plus deodorant at your desk handle the rest. You will have a light sheen, not soaked through clothes.
### Can I ruck commute in winter?
Yes, but adjust your load. Cold makes muscles stiffer and more prone to strain. Start 5 lbs lighter than your summer load. Merino wool under a windproof shell keeps you warm without overheating. Avoid icy or heavily wet routes - your stability matters.
### What if my commute is shorter than 1 mile?
Ruck to the bus stop or train station, then ruck from the transit stop to your final destination. Or combine it with a weekend longer ruck. Or layer it - walk light to a landmark, then add weight for the last half mile. The 1 to 3 mile window is ideal, but you can get creative.
### Should I ruck commute on my heaviest day?
No. Save your heaviest rucking for a separate session where you can control pace and distance perfectly. Commute rucking should be [conversational pace](/glossary#conversational-pace) and planned load. Your one ultra-heavy ruck per week belongs on the weekend where you control the variables.
### How do I handle my laptop during the ruck?
Use a ruck with a dedicated laptop compartment and padded interior. Brands like Evergoods and Peak Design make exactly this. The laptop sits vertically in the main compartment with other gear. As long as you are not bouncing or running, the laptop is fine. This is the reason commuter rucks have structure - they are not floppy.
---
## Your next step
---
## Related reading
- [Best rucking backpacks under $200](/gear/best-rucking-backpacks-under-150) - stealth commuter packs like the 5.11 RUSH 12 that pass as normal office bags
- [Best shoes for rucking on pavement](/gear/best-shoes-for-rucking-on-pavement) - concrete-optimized footwear for daily commutes
- [The complete beginner's guide to rucking](/pillars/beginners-guide-to-rucking) - everything you need to start, from equipment to form
- [How heavy should your ruck be?](/guides/how-heavy-should-your-ruck-be) - weight recommendations by body weight and goal
- [Best rucking gear 2026](/gear/best-rucking-gear-2026) - commuter-focused rucks and gear reviews
- [Rucking vs walking](/guides/rucking-vs-walking) - the difference and why both matter
- [Rucking for weight loss](/pillars/rucking-for-weight-loss) - the full calorie and body composition picture
────────────────────────────────────────────────────────────────────────────────
URL: https://ruckauthority.com/guides/ruck-with-regular-backpack
Title: How to Ruck with a Regular Backpack (No Gear Needed)
Description: Yes, a regular backpack works. Use a padded 20-30L pack, 5-10 lb of wrapped bricks or bagged sand packed high, and upgrade when the load sags.
Published: 2026-03-10 / Updated: 2026-09-26
## The short answer
Yes, absolutely. Any sturdy backpack with two shoulder straps will work for your first few months of rucking. You do not need a purpose-built [rucksack](/glossary#rucksack), a [ruck plate](/pillars/rucking-gear-guide), or any specialized gear to start. The most important thing is that you start - not that you start with perfect equipment.
A school bag and a few books can work for an initial light ruck if the load stays secure and the bag remains comfortable. You can start with what you own and replace it only when fit, shifting weight, or durability becomes a problem. Keep the first load light: 5-10 lb is a sensible start for active walkers, and our [ruck weight guide](/guides/how-heavy-should-your-ruck-be) covers how to build from there.
## If you buy anything, buy these last
| Stage | What to use | Upgrade trigger |
| --- | --- | --- |
| First two weeks | The backpack you already own, wrapped bricks, and normal walking shoes | Only change something if it hurts or shifts |
| First upgrade | [Darn Tough socks](/gear/best-rucking-socks-blister-prevention), [Body Glide](/injuries/rucking-foot-care-blister-prevention), and [Leukotape](/injuries/rucking-foot-care-blister-prevention) | Hot spots, rubbing, or blisters |
| Second upgrade | [Titan Fitness Ruck Plate](/gear/ruck-plate-comparison) | The weight keeps sagging or sliding |
| Later upgrade | [GORUCK GR1](/gear/goruck-gr1) or a dedicated ruck | You are rucking often enough that the pack is the limiting factor |
---
## Choosing the right backpack from what you own
Not every bag is a good rucking bag, but most people already own one that will work. Here is what to look for and what to avoid.
**What makes a good [rucking backpack](/gear/best-rucking-backpacks):** Padded shoulder straps are the minimum requirement. Two straps, some padding, and a main compartment that can hold your weight plus the padding around it. A chest strap is ideal because it prevents the shoulder straps from sliding outward under load. A [hip belt](/glossary#hip-belt) is a bonus - it transfers weight from your shoulders to your hips, which matters more as you go heavier. A rigid or semi-rigid back panel helps distribute the load evenly instead of letting it sag into a ball at the bottom of the bag.
**What to avoid:** Drawstring bags, single-strap messenger bags, and ultra-thin fashion daypacks. Drawstring bags have no structure and the weight bounces with every step. Single-strap bags load one side of your body and create asymmetric stress on your spine. Thin daypacks with no padding will dig into your shoulders within the first half mile.
**The sweet spot:** A school backpack, work commuter bag, or hiking daypack in the 20 to 30 liter range. Brands like JanSport, Osprey daypacks, North Face Borealis, or any basic hiking daypack will handle 10 to 25 lbs without complaint. You almost certainly own something that fits this description.
---
## What to use as weight
You do not need a [ruck plate](/glossary#ruck-plate). Here are four weight options ranked by effectiveness, from best to serviceable.
### Tier 1: Wrapped bricks or paving stones
Bricks are cheap or free, dense, and sold at any hardware store. A standard modular clay brick weighs about 4.2-4.5 lbs, so one or two bricks covers a 5-10 lb first load, and a third takes you to roughly 13 lbs once that feels easy. Wrap each brick in a towel or old t-shirt to protect the inside of your pack and prevent the hard edges from digging into your back. Duct tape the towel in place so it does not unravel mid-ruck.
The downside is that bricks are rigid and rectangular, which creates pressure points if not padded properly. The upside is that they cost next to nothing and last forever.
### Tier 2: Sandbag fillers
Buy a bag of play sand from a hardware store for a few dollars and fill gallon zip-lock bags to your desired weight. Double-bag them to prevent leaks. Use a bathroom scale to dial in the exact weight. Sandbag fillers are moldable, which means they conform to the shape of your pack and sit more comfortably against your back than rigid objects.
If bricks dig into your back, this is the option we'd pick. For well under 15 dollars total, you get adjustable, comfortable weight that works in any backpack.
### Tier 3: Water bottles or a hydration bladder
One liter of water weighs 2.2 lbs. Fill a few water bottles or a [hydration bladder](/glossary#hydration-bladder) to hit your target weight. The advantage is precise adjustability - pour out water to reduce weight mid-ruck if you need to. The disadvantage is sloshing. Water shifts your center of gravity with every step, which makes the pack feel unstable at higher weights. Best for loads under 15 lbs.
### Tier 4: Books or dumbbells
Books work in a pinch, but their awkward shapes create pressure points and dead space in the pack. Dumbbells are dense but round, which means they roll to the bottom of the bag and pull you backward. If you use either of these, wrap them in clothing to pad the edges and fill the empty space around them with towels or shirts so they cannot shift.
---
## How to load the pack properly
Weight placement matters as much as weight amount. A well-loaded 20-lb pack feels better than a poorly loaded 15-lb pack.
**Position the weight high and centered.** The heaviest items should sit between your shoulder blades, pressed flat against the back panel of the pack. This keeps the load's center of gravity close to your spine, which means your core does not have to work overtime to keep you upright.
**Fill dead space.** Stuff towels, rolled-up clothing, or a small pillow around the weight to prevent it from shifting during the ruck. Every time the weight slides to one side, your body compensates by tilting the other direction. Over a two-mile ruck, hundreds of those micro-corrections add up to fatigue and soreness you did not earn.
**Cinch the compression straps** if your pack has them. These are the side straps that tighten the pack's profile. Pulling them snug eliminates bounce and lateral sway.
**Tighten the shoulder straps** until the top of the pack sits at or just below the base of your neck. If the pack hangs down to your lower back, it is too loose. The weight should ride high, not low.
**Use the chest strap** if your pack has one. Clip it across your sternum and tighten it just enough to keep the shoulder straps from sliding outward. It should not restrict your breathing - if it does, loosen it one notch.
---
## Regular backpack vs rucksack: what is the difference?
The table tells the story: a regular backpack is free and perfectly adequate for loads under 20 lbs and distances under three miles. A purpose-built rucksack is better at everything but costs money and is unnecessary until the regular backpack becomes the limiting factor.
---
## When to upgrade
A regular backpack will serve you well for your first one to three months. You will know it is time to upgrade when you consistently hit two or more of these signals:
**You are rucking three or more times per week.** At this frequency, small comfort issues compound. Shoulder hot spots and an unstable load that you tolerated once a week become genuinely annoying at three-plus sessions.
**You are carrying 20-plus lbs and the pack is uncomfortable.** Most daypacks were designed for laptops and textbooks, not dense plates. Once you push past 20 lbs, the lack of a frame sheet and hip belt becomes noticeable. The weight sags, the straps dig, and the pack bounces.
**You are getting hot spots on your shoulders or lower back.** Redness, chafing, or soreness in the same spots after every ruck means the pack is not distributing load properly. It's the most common reason to upgrade. Pain that persists after you've fixed the load, or tingling and numbness in your arms or hands, is worth a clinician's look rather than a new pack.
**You want to go beyond 25 lbs.** At this weight, a frame sheet and hip belt are not luxuries - they are how you protect your shoulders and spine on longer rucks.
When you are ready, see our [rucking gear guide](/pillars/rucking-gear-guide) for recommendations by category and budget tier. If you want to spend as little as possible, our [budget rucking starter kit](/gear/budget-rucking-starter-kit) covers everything you need for under 50 dollars. For a complete setup - pack, plate, shoes, and socks across three budget tiers - see the [beginner starter kit loadout](/loadouts/beginner-starter-kit). The community standard for a dedicated ruck - the pack every other option gets compared to - is the GORUCK GR1.
---
## Start with what you have
Start with what you have. A JanSport and two wrapped bricks is a legitimate ruck. The gear does not make the rucker - consistency does. Upgrade when the pack becomes the limiting factor, not before.
---
## Frequently asked questions
### Will rucking ruin my regular backpack?
Not at beginner weights. Most backpacks can handle 15 to 20 lbs without issue - they were designed to carry textbooks, laptops, and travel gear. At 25-plus lbs with repeated use, you may see accelerated wear on the shoulder strap stitching and the bottom panel. Wrapping your weight in towels protects the pack's interior. If your favorite backpack is irreplaceable, use a different one for rucking.
### Can I use a hydration pack or running vest?
Running vests and hydration packs work for very light rucks - 5 to 10 lbs maximum. They are not designed for heavier loads and will bounce, chafe, and potentially tear at the seams. If you already own one, it is fine for your first few sessions. Transition to a standard backpack once you go above 10 lbs.
### What about a weighted vest instead of a backpack?
Weighted vests distribute load across your torso rather than concentrating it on your back. They are a valid alternative, especially for shorter rucks and people who find shoulder straps uncomfortable. The tradeoffs are no room for water or layers and, on some designs, a snug fit around the ribs that gets harder to breathe in as the load goes up. See our [weighted vest vs rucksack comparison](/training/weighted-vest-vs-rucksack) for the full breakdown.
### How do I stop the weight from bouncing?
Fill all dead space inside the pack with soft items - towels, shirts, a small pillow. The weight should not be able to move in any direction. Cinch the compression straps and tighten the shoulder straps so the pack sits high and snug. If your pack has a chest strap, use it. Bounce is almost always a packing problem, not a pack problem.
---
## Your next step
---
## Related reading
- [The complete beginner's guide to rucking](/pillars/beginners-guide-to-rucking) - the pillar guide this article supports
- [How heavy should your ruck be?](/guides/how-heavy-should-your-ruck-be) - weight recommendations by fitness level and goal
- [Your first 30 days of rucking](/guides/first-30-days-of-rucking) - a day-by-day plan once you have your pack loaded
- [The $50 rucking starter kit](/gear/budget-rucking-starter-kit) - when you are ready to upgrade on a budget
- [Rucking gear guide](/pillars/rucking-gear-guide) - the complete buyer's guide for packs, plates, shoes, and accessories
────────────────────────────────────────────────────────────────────────────────
URL: https://ruckauthority.com/guides/rucking-and-weighted-vests-for-menopause
Title: Weighted Vests and Rucking for Menopause: The Bone and Muscle Guide
Description: What research does and does not show about weighted vests, rucking, bone health, and muscle during the menopause transition.
Published: 2026-07-09
## The short answer
If you are in perimenopause or menopause, regular weight-bearing activity and resistance training can support bone, muscle, balance, and cardiovascular health. A [weighted vest](/glossary#weighted-vest) or [ruck](/glossary#rucking) (a weighted backpack) is one way to add load to walking, but direct evidence for bone-density improvement from loaded walking alone is limited.
Bone loss often accelerates around the menopause transition, and age-related changes in strength and muscle can matter for balance and daily function. Exercise is one part of prevention and care. A vest or pack makes a walk more demanding, but it does not guarantee a change on a DEXA scan or replace a progressive strength program.
Recent vest research found an association between more upright activity in the vest and some bone outcomes. That is not proof that simply walking in a vest builds bone, and the result should not be turned into a universal loading prescription.
## Why menopause changes the math on bone and muscle
For most of adult life, bone and muscle sit in a slow, manageable balance. Menopause tips that balance, and estrogen is the reason.
Estrogen helps keep bone-building activity ahead of bone-removing activity. As estrogen falls in perimenopause and drops sharply after your final period, the bone-removing cells keep working while the bone-building cells slow down. The result is net bone loss - sometimes 1 to 3 percent per year in the first five to eight years after menopause. Over a decade, that adds up to a real difference in fracture risk.
Muscle follows a similar pattern. The hormonal shift accelerates sarcopenia, the age-related loss of muscle mass and strength. Less muscle means less strength, a lower metabolic rate, and worse balance - which itself raises fall and fracture risk.
Because bone loss can accelerate around menopause, weight-bearing activity and resistance training become important parts of a broader bone-health plan. Loaded walking is an optional form of weight-bearing activity, not a stand-alone treatment.
## Why the weighted vest became the trend of 2026
Weighted vests went from niche gear to mainstream fitness advice fast, and the reasons are legitimate, if slightly over-hyped in places.
Weighted vests fit into an existing walking routine and may feel more approachable than learning a new gym program. That convenience explains much of their appeal, but a vest still changes balance, gait, and spinal loading.
The science supports the direction, with one important asterisk.
A vest can make movement more demanding. Whether that is useful depends on the person's health, fit, load, and broader training plan.
## Weighted vest or ruck: which should you choose?
Both add weight-bearing load, but neither is proven to build bone on its own. The practical choice comes down to fit, balance, comfort, and how you plan to use it.
| | Weighted vest | Ruck (weighted backpack) |
|---|---|---|
| Where the load sits | Hugged close to your torso, front and back | On your upper back, against the spine |
| Common use | Short walks and some strength movements | Walks, hikes, and carrying gear |
| Load range | Usually 5 to 20 lbs, fixed or adjustable | Easily 10 to 45+ lbs |
| Feel | Close to the torso; may feel restrictive or increase heat | Load sits behind the torso; pack fit and load placement matter |
| Setup | Fit, balance, and breathing comfort need checking | Fit, load security, and gait need checking |
A vest is compact, while a pack carries water and layers and can be easier to remove or adjust. Try the unloaded walk first, then choose the format that stays secure without changing your gait or causing pressure. We compare the mechanics in [weighted vest vs rucksack](/training/weighted-vest-vs-rucksack).
An adjustable vest is the most flexible starting point because you can add plates in small increments as you get stronger. If you'd rather browse options first, our roundup of the [best weighted vests for rucking](/gear/best-weighted-vests-for-rucking-in-2026) breaks down fit, adjustability, and comfort for women's frames.
## How to begin conservatively
No percentage or weekly schedule can guarantee safety. Use the steps below as decision points, not a prescription.
**First: find an unloaded baseline**
- Walk without added weight on a short, familiar route.
- If walking itself causes pain, unusual shortness of breath, dizziness, balance trouble, pelvic pressure, or leaking, pause and get individual guidance before adding load.
**Then: test a minimal load**
- Use the smallest practical increment your vest or pack allows.
- Keep the route and pace easier than your unloaded baseline.
- Remove the load if it changes your gait, balance, breathing, or pelvic-floor symptoms.
**Progress only after repeatable sessions**
- Change one variable at a time: load, time, distance, pace, hills, or frequency.
- Repeat the same setup until you recover normally and have no persistent symptoms.
There is no universal maintenance percentage. The right ceiling depends on training history, health, balance, symptoms, and goals.
## Other reasons people choose loaded walking
Loaded walking also raises the effort of a familiar route. The effect depends on pace, load, fitness, and health.
Regular activity can support cardiovascular fitness and body-weight management, but a vest does not determine body composition. See [rucking for women](/weight-loss/rucking-for-women) for the broader picture.
A conversation-pace walk may fall in an easy aerobic range, but a heart-rate zone cannot be inferred from the vest alone. Use symptoms, pace, and any clinical guidance that applies to you.
It helps mood and sleep. Regular outdoor walking is one of the better-supported non-drug tools for mood and stress, and better daytime activity tends to support better sleep - both of which take a hit in perimenopause.
It is also easy to schedule in a neighborhood or with a friend. Whether it remains useful over time depends on comfort, symptoms, goals, and the rest of the exercise plan.
---
## Your next step
---
## Related reading
- [Rucking for bone density](/guides/rucking-for-bone-density) - the full science of loaded walking and Wolff's Law
- [Weighted vests and bone density research](/guides/weighted-vests-bone-density-research) - what the current studies do and do not show
- [Weighted vest vs rucksack](/training/weighted-vest-vs-rucksack) - how the two loading tools compare
- [Rucking for women](/weight-loss/rucking-for-women) - weight, fit, and training through the cycle and beyond
- [Rucking for seniors](/training/rucking-for-seniors) - staying strong and independent with loaded walking
## Frequently Asked Questions
────────────────────────────────────────────────────────────────────────────────
URL: https://ruckauthority.com/guides/rucking-benefits
Title: 12 Science-Backed Benefits of Rucking (And Who Benefits Most)
Description: Rucking loads your bones, raises calorie burn (a lot on hills, less on the flat) and trains your posterior chain. What the research shows, with the numbers.
Published: 2026-03-27 / Updated: 2026-09-25
Rucking is walking with weight on your back, and most of what it does for you comes from that weight. It loads your bones, makes your legs and trunk work harder than a plain walk, and raises the energy cost of every mile, especially uphill.
The evidence comes from decades of military load-carriage research, weighted-vest trials in older adults, and a growing body of work on walking and Zone 2 training. Some benefits are well supported; others are borrowed from walking or strength research and deserve a caveat. Below are the 12 benefits, what the studies show for each, and who gains the most.
## Benefits of rucking: where to start
[Rucking](/guides/what-is-rucking-weighted-walking-explained) has a lot of benefits, but the first move depends on why you are starting. The table below turns the research into the next practical step.
| Your main reason | First move | Why |
| --- | --- | --- |
| More calorie burn without running | [Run the calorie calculator](/tools/calorie-calculator), then start with 10-20 lb | The load only helps if you can repeat the session 3-4 days per week. |
| Knee, foot, or back-friendly cardio | [Start with the Longevity Athlete loadout](/loadouts/longevity-athlete) | Shoes, socks, and progressive load matter more than max pack weight. |
| Simple beginner fitness | [Use the Beginner Starter Kit](/loadouts/beginner-starter-kit) | A compatible pack, 20 lb plate, socks, and anti-chafe covers the first month. |
| Bone density or post-40 training | Start with 20-30 minute Zone 2 rucks and increase load slowly | Bone adapts to repeated upright loaded movement, not one heroic heavy day. |
If you are unsure, start with the calculator and the starter kit. The goal is a setup that lets you walk again tomorrow.
---
There's a reason [multiple fitness publications are calling rucking the workout trend of 2026](/guides/rucking-fitness-trend-2026). The science backs it up across nearly every measure of fitness.
## Why rucking is especially useful for men over 40
For men over 40, rucking is valuable because it combines three things that usually get separated into different workouts: Zone 2 cardio, load-bearing strength stimulus, and low-impact fat-loss volume. That matters because the common 40+ fitness problems are not just "need more cardio." They are loss of muscle, slower recovery, higher joint sensitivity, expanding waistline, lower daily activity, and declining aerobic base.
The practical prescription:
| 40+ goal | Rucking target | Why it helps |
| --- | --- | --- |
| Rebuild cardio without running pain | 30-45 min, 3x/week, conversational pace | Builds aerobic base without high-impact pounding |
| Preserve muscle while losing fat | 15-30 lbs, 3-4x/week | Adds loaded-carry stimulus while creating calorie burn |
| Improve posture after desk work | High pack position, upright torso, 20-30 lbs | Trains upper back, trunk, glutes, and gait together |
| Support bone density | Progressive load over 8-12 weeks | Weight-bearing movement gives bones a reason to adapt |
| Reduce stress and improve sleep | Easy evening rucks, Zone 2 effort | Outdoor low-intensity cardio supports recovery |
The 40+ rule is simple: start lighter than your ego wants, then win on consistency. A man who rucks 30 minutes, four days per week with 20 lbs will usually get more long-term benefit than a man who carries 50 lbs twice, gets sore, and stops.
## Cardiovascular Benefits
### 1. Builds Aerobic Capacity Without Destroying Your Joints
Walking is low-impact. Running is high-impact. Rucking splits the difference in a way that surprises most people.
The added weight forces your heart and lungs to work harder without the repetitive pounding of running. A 2022 USARIEM study published in *Applied Ergonomics* ([Looney et al., load carriage cardiorespiratory responses](https://pubmed.ncbi.nlm.nih.gov/35217405/)) measured oxygen uptake, ventilation, and heart rate across loaded walking conditions in both male and female soldiers and found that load carriage substantially elevates cardiorespiratory demand at the same walking speed - confirming what military researchers have observed for decades: you get aerobic adaptation without the joint stress.
Research on loaded marching (military-style rucking) shows significant improvements in VO₂ max - the gold standard measure of aerobic fitness - comparable to moderate-intensity running, but with substantially lower injury rates.
**The practical takeaway:** You can ruck 4-5 days per week without the cumulative joint damage that running at that frequency would cause. It's the "sustainable forever" cardio option.
### 2. Improves Heart Rate Variability and Cardiovascular Resilience
[Heart rate variability](/glossary#hrv) (HRV) - the variation in time between heartbeats - is a proxy for parasympathetic nervous system health and cardiovascular adaptation.
Zone-2 training (the pace where you can talk but not sing) is the scientifically optimal zone for building aerobic base and improving HRV without systemic stress. Rucking naturally falls into zone-2 for most people: it's fast enough to challenge your system, but slow enough that you can maintain a conversation.
Studies on endurance athletes show that zone-2 training improves HRV more effectively than high-intensity interval work, and does so without the cortisol spike and recovery demand of intense exercise.
**The practical takeaway:** Regular rucking builds a resilient cardiovascular system. You'll notice resting heart rate dropping and the ability to recover faster between intense efforts.
---
## Musculoskeletal Benefits
### 3. Builds Bone Density (Critical After 30)
This is the benefit most people miss, but it might be the most important.
[Bone density](/glossary#bone-density) peaks in your early 30s, then declines by roughly 0.3-0.5% per year in adults. By age 70, bone loss becomes clinically significant - especially for women, who face accelerated loss after menopause. Worldwide, about 1 in 3 women and 1 in 5 men over 50 will break a bone because of osteoporosis, according to the International Osteoporosis Foundation.
Mechanical loading - putting weight on your bones - is the primary stimulus for maintaining bone density. Unlike cardio (which doesn't load bones much), rucking applies compressive and shear forces to your skeleton with every step.
The most direct evidence comes from a 5-year randomized controlled trial in postmenopausal women. [Snow and colleagues (2000) - long-term weighted vest exercise prevents hip bone loss](https://pubmed.ncbi.nlm.nih.gov/10995045/) - published in the *Journals of Gerontology* - tracked 18 women who exercised with weighted vests over five years and found that the intervention group preserved hip bone mineral density at the femoral neck and trochanter, while the control group lost bone at both sites. The weighted-vest group ended the study with measurably stronger hips than where they started, which is unusual at that age.
A 2024 NIH-published PET/CT imaging study takes the mechanism even further: [Helge et al. (2024) - loading enhances glucose uptake in muscles, bones, and bone marrow](https://pmc.ncbi.nlm.nih.gov/articles/PMC11570666/) showed that mechanical loading increases glucose uptake not just in muscle but in the bones and bone marrow of the lower extremities. That metabolic activity is the cellular signal driving the bone-remodeling response - the same response Wolff's Law predicts.
The most recent and largest piece of evidence adds an important wrinkle. The Wake Forest INVEST trial - [Beavers et al. (2025) in JAMA Network Open](https://pmc.ncbi.nlm.nih.gov/articles/PMC12181796/) - randomized 150 older adults with obesity to one of three weight-loss arms (diet alone, diet plus weighted vest, diet plus resistance training) and tracked hip bone mineral density over 12 months. The headline result was null: across all three groups, hip BMD dropped by roughly the same amount. Simply owning a weighted vest did not protect bone during weight loss.
The follow-up tells the more useful story. [Fanning et al. (2026) - secondary analysis of INVEST in Frontiers in Aging](https://www.frontiersin.org/journals/aging/articles/10.3389/fragi.2026.1729001/full) re-cut the data by how much time participants actually spent upright in the vest. Among vest wearers, more upright time was associated with preserved hip BMD - the opposite of the weight-loss-only arm, where more standing time paradoxically tracked with greater bone loss. In other words, the vest mattered only when it was carried during real movement, not while sitting at a desk. That is exactly the mechanism rucking delivers by design.
The broadest evidence arrived in 2026. [Wang et al. (2026) in *Osteoporosis International*](https://link.springer.com/article/10.1007/s00198-026-08196-y) pooled nine randomized weighted-vest trials (368 middle-aged and older adults) and found that vest-plus-exercise improved hip and lumbar spine bone density compared with usual activity, and cut about 2.7 kg of body fat. Adding a vest to an existing exercise routine removed a little more fat but showed no confirmed extra bone benefit, and that comparison rests on one trial. We cover the vest-versus-pack question in [weighted vest vs rucksack](/training/weighted-vest-vs-rucksack) and the full year's studies in our [2026 rucking research review](/guides/rucking-research-2026).
**The practical takeaway:** If you're over 30, rucking is one of the best bone-health investments you can make. It's preventative medicine disguised as a walk. If you'd rather load up with a vest than a pack, our sister site Kit Authority's breakdown of [what the research says on weighted vests](https://kitauthority.com/fitness/weighted-vest-benefits?utm_source=ruckauthority&utm_medium=crosslink) covers the general-fitness side of the same evidence.
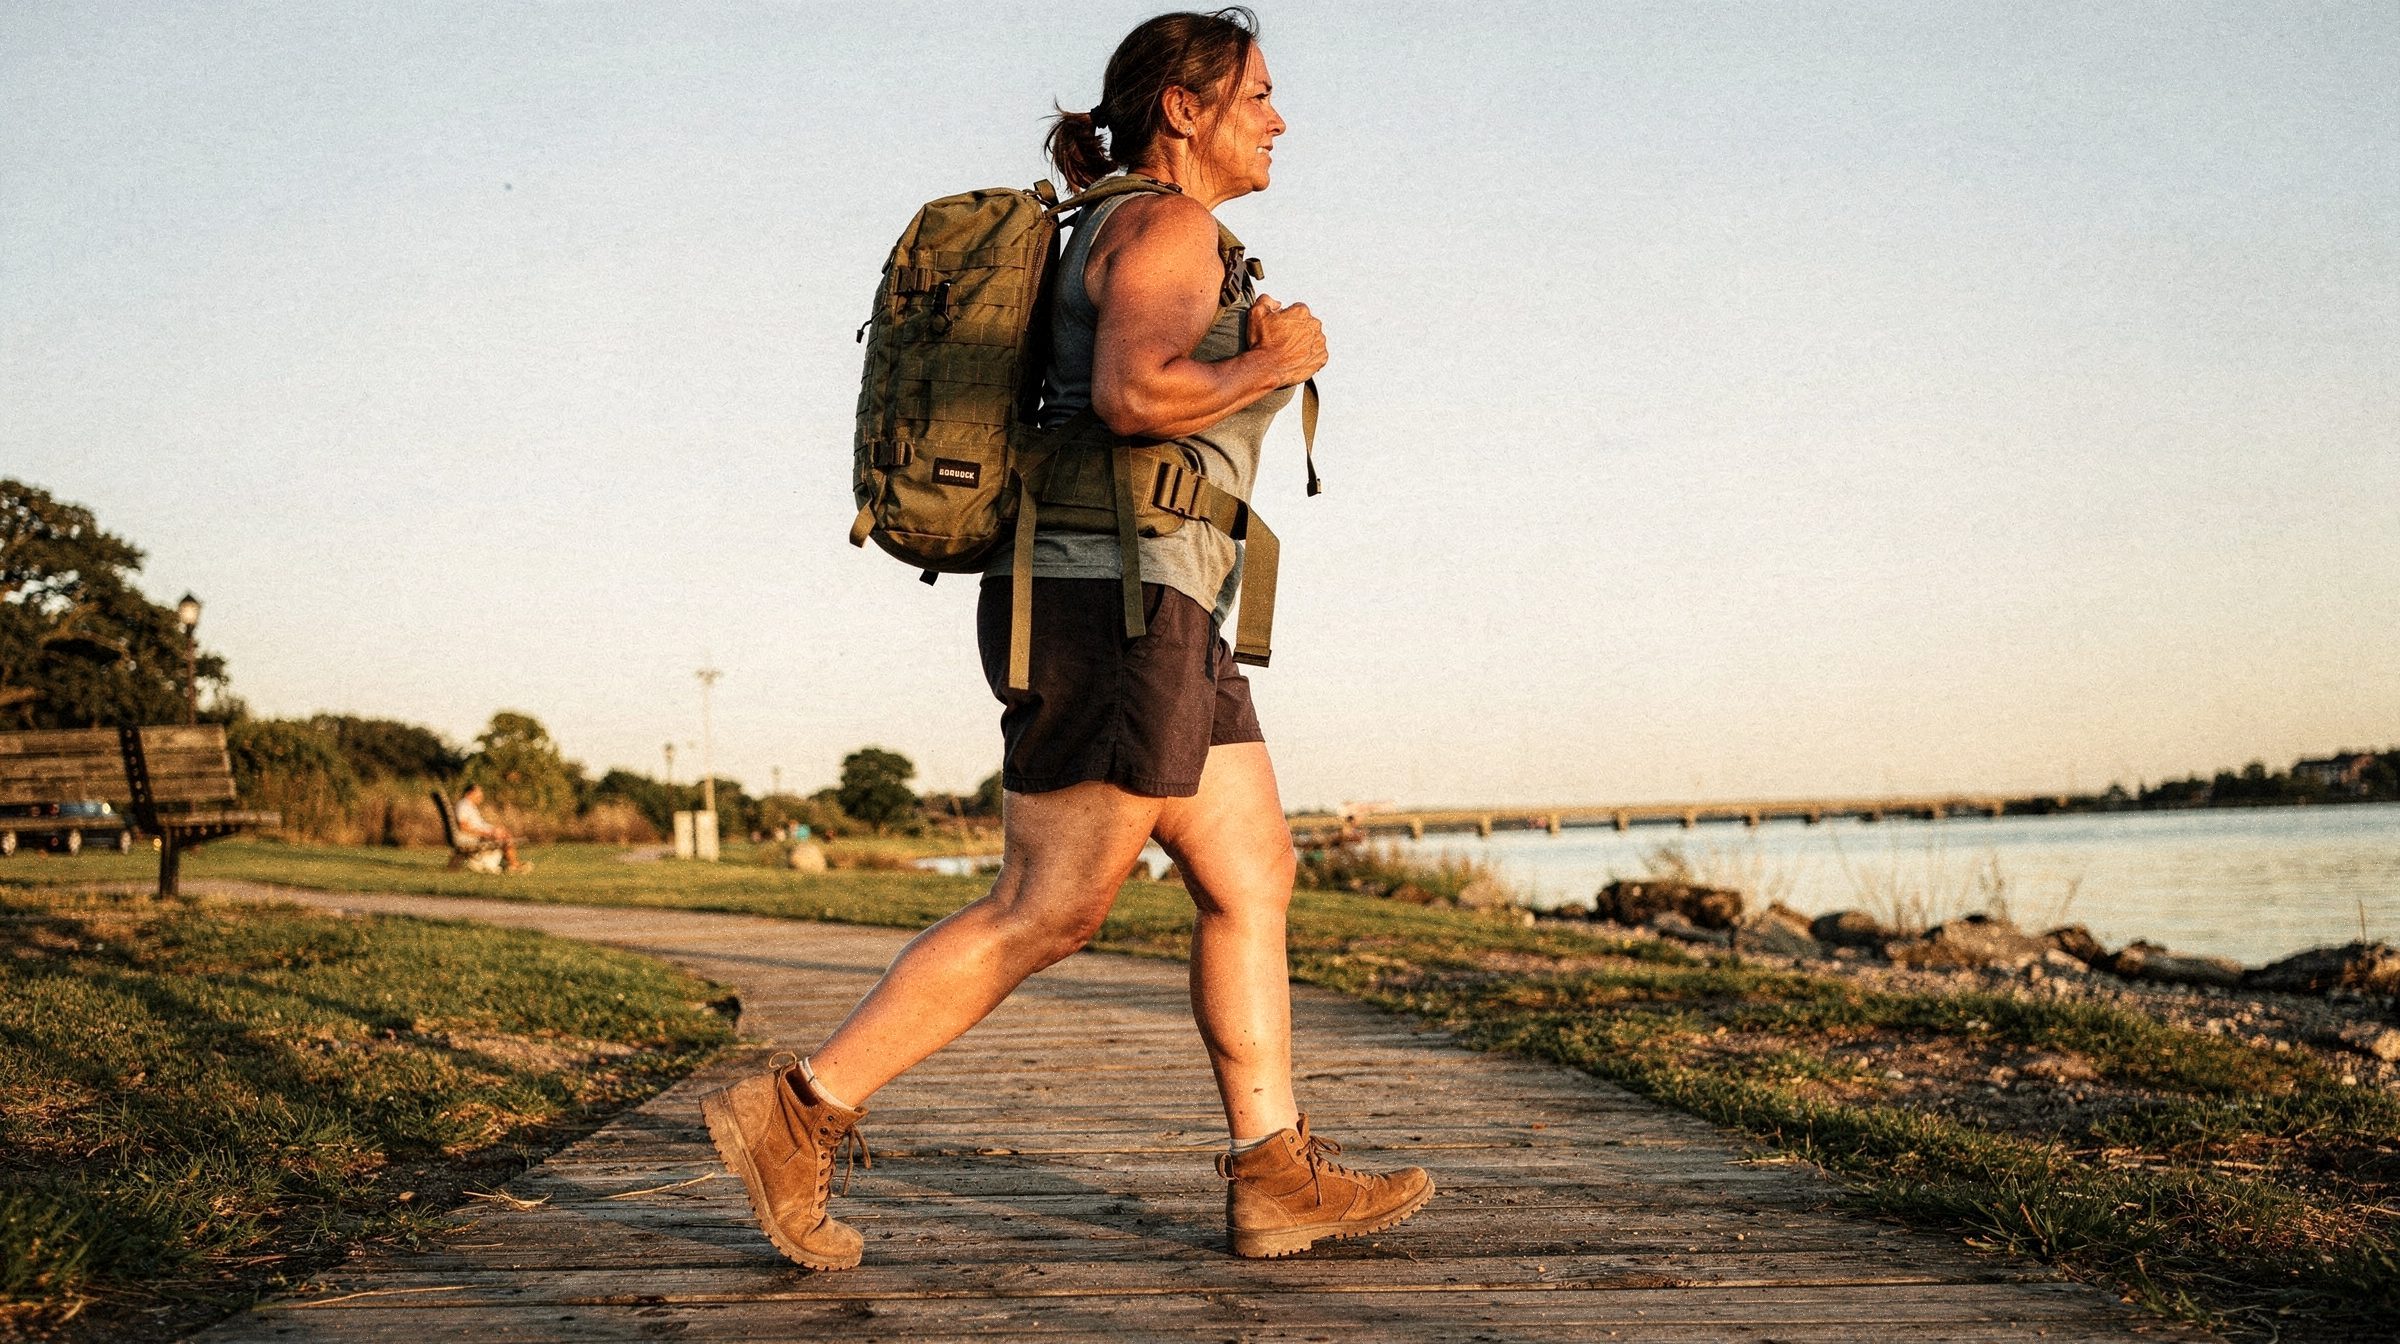
### 4. Strengthens the Posterior Chain (Back, Glutes, Hamstrings)
The modern human is optimized for forward movement: driving, typing, scrolling. We're collectively weak in the [posterior chain](/glossary#posterior-chain) - the muscles on the back side of your body.
Rucking forces your posterior chain to work. Your erector spinae (lower back muscles) contract to stabilize the spine against forward load. Your glutes and hamstrings engage to drive forward against gravity and weight. Your upper back and shoulders stabilize the rucksack.
Unlike isolated exercises (which are valuable), rucking trains these muscles in a functional, integrated way. You're not doing a lat pulldown; you're using your back the way it evolved to be used.
Load-carriage studies consistently find that trunk and hip muscles work harder under a pack than during unloaded walking, and the demand rises with load. It is still walking, so the recovery cost is far lower than a hard run or a heavy lifting session.
**The practical takeaway:** A stronger posterior chain makes everyday lifting and long days on your feet easier. If you already have back pain, start light and short: a pack can help or aggravate it depending on load, fit and posture, and persistent pain deserves a clinician's look.
### 5. Improves Posture and Spinal Stability
Here's a counterintuitive fact: most people assume rucking will make them slouch forward. The opposite is true.
Proper [rucking posture](/guides/rucking-form-guide) requires an engaged core and upright torso. A well-fitted rucksack sits high on your back and forces you to stay tall. If you slouch, the load migrates to your knees and ankles - and the discomfort forces you to correct.
After a few weeks of regular rucking, many people notice they stand taller and tire less on long days. That is a common report rather than a measured trial outcome, and it depends on a pack that fits and a load you can carry upright.
**The practical takeaway:** If you sit at a desk all day, rucking is one of the best posture interventions. It teaches your body what upright posture should feel like.
---
## Metabolic Benefits
### 6. Burns More Calories Than Walking, Especially on Hills
Metabolic cost rises predictably with load. A foundational *Ergonomics* paper, [Quesada et al. (2000)](https://pubmed.ncbi.nlm.nih.gov/10755654/), measured oxygen consumption across backpack loads during simulated marching and found exactly that. The size of the increase is smaller than a lot of rucking content claims on flat ground, and much larger once the route climbs.
The [Pandolf equation](https://pubmed.ncbi.nlm.nih.gov/908672/), the load-carriage model behind our calculator, puts numbers on it for a 180-lb person at 3.5 mph:
| Route | No pack | 30-lb pack | Difference |
|---|---|---|---|
| Flat pavement | about 365 cal/hr | about 410 cal/hr | about 13% more |
| 5% grade | about 555 cal/hr | about 635 cal/hr | about 14% more than the same climb unloaded, roughly 75% more than the flat walk |
On a flat road the pack adds something like 15 to 20 calories an hour for every 10 lb. Grade and terrain do the heavy lifting: a hilly route or a rough trail adds more than an extra plate does. Pandolf also tends to under-predict the cost of heavier loads (Drain et al., 2017, *Journal of Science and Medicine in Sport*), so read these figures as conservative.
Use the [rucking calorie calculator](/tools/rucking-calorie-calculator) to estimate your own burn by body weight, pack weight, pace, terrain and grade.
The real advantage is that this happens at a pace you can hold for an hour while talking. Running burns roughly twice as much per hour, but most beginners can ruck longer, more often, and with less recovery.
**The practical takeaway:** For weight loss, pick a route with hills before you pick a heavier plate. Frequency and route matter more than a few extra pounds.
For a deeper dive, see [Rucking vs Running for Weight Loss](/weight-loss/rucking-vs-running-weight-loss).
### 7. Improves Metabolic Health and Insulin Sensitivity
Walking after meals is scientifically one of the most powerful ways to stabilize blood sugar. Adding load amplifies this effect.
Studies of post-meal walking find that even short, light walks blunt the rise in blood sugar after eating. Nobody has yet run the same trial with a loaded pack, so the case for rucking here is an extension: it is walking with more muscle working, and working muscle takes up glucose.
The mechanism is simple: muscle is a glucose sink. When you strengthen and use your muscles, they become better at pulling glucose from your bloodstream. The 2024 [Helge et al. PET/CT imaging study (PMC11570666)](https://pmc.ncbi.nlm.nih.gov/articles/PMC11570666/) showed this directly - mechanical loading during walking measurably increased glucose uptake in the muscles of the lower extremities, on top of the bone and bone-marrow effects mentioned earlier. Rucking does this while improving bone health and cardiovascular fitness simultaneously - the same act of walking with weight triggers all three adaptations in parallel.
**The practical takeaway:** If you're managing blood sugar, prediabetic, or have a family history of type 2 diabetes, rucking after meals is one of the highest-ROI habit changes you can make.
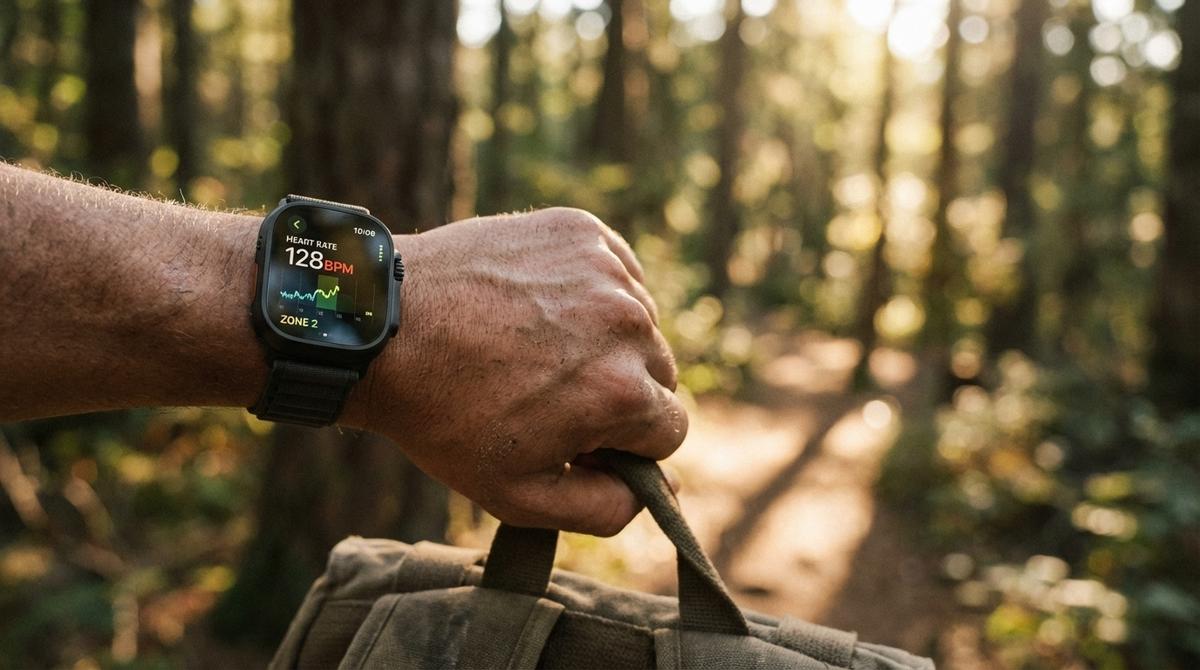
### 8. Supports Sustainable Weight Loss Without Metabolic Adaptation
One of the frustrations with weight loss is metabolic adaptation: after a few weeks of reduced calories, your body adapts and weight loss plateaus.
Rucking doesn't switch that adaptation off. What it does is add a steady, repeatable energy cost and a strength stimulus that helps you keep muscle while you lose fat, which is the part of weight loss that dieting alone does worst. The 2026 weighted-vest meta-analysis above found about 2.7 kg more fat loss with vest-plus-exercise than with usual activity.
**The practical takeaway:** Pair rucking with modest calorie reduction, not aggressive restriction. The combination is more sustainable and more likely to stick long-term.
Want to see exactly how load and pace affect your calorie burn? Run the numbers:
---
## Mental Health and Cognitive Benefits
### 9. May Support Mood and Reduce Anxiety
The direct evidence is about outdoor physical activity, not rucking specifically. A 2021 systematic review of 50 nature-based interventions found improvements in depressive mood, anxiety, positive affect, and negative affect. Sixteen studies were randomized trials; risk of bias was higher in much of the remaining evidence.
Rucking can be one way to perform that activity when walking with a load is comfortable. No trial has shown that adding weight produces a larger mental-health effect than an otherwise similar walk, so the load should serve the training goal rather than be treated as therapy.
**The practical takeaway:** A regular outdoor ruck can be one form of physical activity alongside professional care. The evidence here comes from broader exercise, walking, and nature-exposure research rather than trials showing that rucking treats anxiety or depression.
### 10. May Improve Sleep Quality
Exercise can improve sleep, but the size of the effect varies. A 2026 meta-analysis of 200 randomized trials found better subjective sleep quality and a small improvement in objective sleep efficiency; the authors rated the overall certainty very low. A separate systematic review found that brighter morning light was generally associated with better self-reported sleep and earlier sleep timing.
That supports a reasonable inference: a consistent morning ruck combines exercise with outdoor light exposure. It does not prove that rucking specifically improves deep sleep or REM sleep, because direct rucking sleep trials have not been conducted.
**The practical takeaway:** If morning training fits your schedule, track how consistently you sleep and feel over several weeks. A watch such as the [Instinct 3 Solar](/shop) can show personal trends, but consumer wearables do not measure sleep architecture like a clinical sleep study. Persistent insomnia belongs in a conversation with a clinician, not a gear decision.
### 11. Builds Mental Toughness and Sense of Accomplishment
This benefit is plausible and commonly reported, but it is harder to measure than heart rate or energy expenditure. Completing a planned session under a manageable load can provide a concrete sense of progress and practice at persistence.
Direct trials have not shown that rucking builds resilience or transfers confidence to work and relationships. Treat that as a personal outcome to observe, not a guaranteed psychological adaptation.
**The practical takeaway:** Use a difficult-but-repeatable session as practice at keeping a commitment. The value is in finishing safely and returning next week, not proving how much discomfort you can tolerate.
---
## Practical and Lifestyle Benefits
### 12. Injury Risk Can Be Managed With Conservative Progression
This might be the most underrated benefit of all.
Rucking replaces running's repeated flight-and-landing cycle with walking, but the added load still creates risk. Feet, knees, shins, back, and shoulders can all be irritated by too much weight, distance, pace, or frequency.
[Knapik et al. (2014) - injuries and injury prevention during foot marching](https://pubmed.ncbi.nlm.nih.gov/25399383/) reviewed military foot-march evidence and identified heavier loads, longer distances, lower fitness, and prior injury among important risk factors. Military marching populations and loads are not identical to recreational rucking, but the progression lesson is relevant.
The practical advantage is control: you can shorten the route, slow down, remove weight, or reduce weekly sessions. That makes rucking scalable, not injury-proof.
**The practical takeaway:** Rucking can support long-term consistency when the load stays appropriate to your current capacity. Age alone does not set the load; symptoms, balance, training history, and recovery matter.
---
## Who Benefits Most From Rucking?
Not everyone has the same starting point. Here's who sees the biggest improvements:
**Desk workers:** Rucking adds regular walking and load carriage to an otherwise sedentary week. It does not by itself correct every posture or strength issue.
**People over 40:** Loaded exercise can contribute to a broader bone- and muscle-health plan. The strongest cited trials here involve weighted vests and resistance exercise, not recreational rucking alone.
**People managing weight:** Added load raises the energy cost of walking. The useful plan is the one you can repeat alongside nutrition and recovery. See [Can Rucking Be Your Only Exercise?](/weight-loss/can-rucking-be-your-only-exercise)
**Runners modifying impact:** Walking with a light load can be one option, but an existing injury may still be aggravated and deserves individual guidance.
**People supporting mood or sleep:** An outdoor ruck can be an accessible form of physical activity. It complements, rather than replaces, clinical care when symptoms persist.
**Older adults and people rebuilding capacity:** The load is scalable, but balance, bone health, symptoms, and medical history change the starting point. See [Rucking for Seniors](/training/rucking-for-seniors) and [Rucking Prehab Routine](/injuries/rucking-prehab-routine).
---
## What the research supports
The clearest direct evidence supports higher energy cost and cardiorespiratory demand during loaded walking. Evidence on bone, mood, sleep, and long-term outcomes comes partly from adjacent research on weighted vests, resistance exercise, walking, and outdoor activity. Those findings are useful, but they are not all rucking trials.
Rucking is not universally best. It is a practical option when walking is comfortable, the load can be controlled, and the routine is easier to sustain than another form of training.
**Next steps:**
- Start with [Your First 30 Days of Rucking](/guides/first-30-days-of-rucking)
- Learn [How Heavy Should Your Ruck Be](/guides/how-heavy-should-your-ruck-be)
- Explore [Zone-2 Rucking for Endurance](/weight-loss/zone-2-rucking-guide)
## Frequently asked questions
────────────────────────────────────────────────────────────────────────────────
URL: https://ruckauthority.com/guides/rucking-fitness-trend-2026
Title: Why Rucking Is Being Called 'The Fitness Trend of 2026' (And How to Start)
Description: Why rucking is a 2026 fitness trend, who it works for, why weighted walking is growing, and how beginners can start safely.
Published: 2026-04-15 / Updated: 2026-05-19
The fitness industry has a curious relationship with simplicity. While technology promises increasingly complex solutions, the hottest "new" trend for 2026 is decidedly old-school: [walking with a weighted backpack](/guides/what-is-rucking-weighted-walking-explained).
According to multiple fitness publications, [rucking](/glossary#rucking) - carrying a loaded pack while walking - is positioned to be *the* fitness trend of 2026. [FitNKC calls it "The Backpack Workout Taking Over Fitness in 2026"](https://www.fitnkc.com/blog/the-backpack-workout-taking-over-fitness-in-2026), while [Men's Health UK lists it among "18 Fitness Trends Set to Change How You Train"](https://www.menshealth.com/uk/fitness/cardio-exercise/a69902720/wellness-trends-2026-expert-predictions/) and [Lifemaxx identifies functional fitness movements like rucking as dominant forces](https://www.lifemaxx.com/en/blogs/blog/fitness-trends-2026-whats-changing-and-how-to-resp/) shaping the fitness landscape.
But what's driving this sudden mainstream attention? And more importantly, how can you start rucking safely and effectively?
## Why Rucking Is Having Its Moment
### The Back-to-Basics Movement
According to Josh Snyder at FitNKC, the fitness industry is experiencing a fundamental shift: "People are going back to basics. Walking with weight. Training with purpose. Asking their bodies to do what they were designed to do: push, pull, carry, and move through real space with real resistance."
This aligns with what we're seeing across the fitness landscape. After years of increasingly complex equipment and protocols, there's a growing appreciation for movements that are both effective and accessible.
### Celebrity and Expert Endorsements
The momentum behind rucking isn't just grassroots. High-profile advocates have significantly boosted its visibility:
- **Peter Attia, MD**, the longevity doctor, regularly discusses rucking's benefits on his popular podcast "Drive"
- **Andrew Huberman** was filmed rucking with bowhunter Cameron Hanes, exposing the practice to his massive following
- **Michael Easter's book "The Comfort Crisis"** dedicated an entire chapter to reframing rucking from military requirement to recreational exercise
According to Jason McCarthy, founder of GORUCK, "Influential people read that book and started adopting it. Peter Attia is a great example."
### Measurable Business Growth
The numbers back up the hype. [GQ reports that GORUCK saw a 40% increase in sales in 2023](https://www.gq.com/story/what-is-rucking), and this growth has continued into 2024 and 2025 as mainstream awareness has expanded. Weighted vest sales alone jumped more than 50% to $27 million in the 12 months ending May 2025, per Circana retail data. We track every credible data point on the sport's growth in our [rucking statistics](/guides/rucking-statistics) reference page. If you're weighing the vest side of that boom against a pack, our sister site Kit Authority's [weighted vest vs rucking](https://kitauthority.com/fitness/weighted-vest-vs-rucking?utm_source=ruckauthority&utm_medium=crosslink) breakdown covers which suits a general-fitness routine.
What this means for ruckers specifically is validation that the community is expanding rapidly beyond military and tactical circles into general fitness populations.
## The Science Behind the Hype
### Functional Movement Benefits
Rucking delivers what fitness professionals call "real-world strength." Unlike isolated gym exercises, rucking trains your body to handle loads while moving - exactly what humans have done for millennia.
The movement pattern engages:
- **[Posterior chain](/glossary#posterior-chain) muscles** (glutes, hamstrings, erector spinae)
- **Core stabilizers** working to maintain posture under load
- **Cardiovascular system** through sustained moderate-intensity effort
- **Mental resilience** through discomfort tolerance training
### Longevity and Anti-Aging Benefits
The timing of rucking's mainstream moment coincides with increased interest in longevity and anti-aging protocols. As FitNKC notes, "Researchers are confirming what consistent training actually does at the cellular level. They are measuring how movement changes blood proteins tied to aging."
Rucking specifically addresses several key longevity markers:
- **[Bone density](/glossary#bone-density)** through weight-bearing exercise
- **Cardiovascular health** via [zone 2](/glossary#zone-2) cardio training
- **Functional strength** that translates to daily activities
- **Mental health** benefits from outdoor activity and achievement
## How Rucking Fits the 2026 Fitness Landscape
### Technology Integration Without Dependence
One key trend for 2026 is using technology as a tool rather than the centerpiece. Rucking fits perfectly - you can track metrics with wearables and apps, but the core activity requires nothing more than a pack and your feet.
As Lifemaxx observes: "The best gyms used technology to enhance coaching, not to replace the trainer. Data became the starting point for conversations about recovery, load and progress."
### Accessibility and Inclusivity
Unlike boutique fitness classes or expensive equipment, rucking has an extremely low barrier to entry. You can start with any backpack and household items for weight, making it accessible regardless of income or location.
### Community Building
The social aspect of rucking - whether through organized events, hiking groups, or military veteran communities - addresses the growing desire for fitness activities that build real connections rather than just Instagram content.
## Getting Started: Your First Ruck
### Equipment Essentials
**The Basics:**
- A sturdy backpack (doesn't need to be tactical - a daily-carry option like the [5.11 RUSH 12](/shop) handles 20-30 lbs comfortably)
- Weight (start with books, water bottles, or dedicated [ruck plates](/shop))
- Comfortable walking shoes with good support - a daily-trainer profile like the [Hoka Bondi 9](/shop) handles pavement rucking well for most beginners
**Starting Weights:**
- Beginners: 10-15 pounds
- Intermediate: 20-30 pounds
- Advanced: 35+ pounds
### Your First Month Protocol
**Week 1-2:**
- Distance: 1-2 miles
- Weight: 10-15 pounds
- Frequency: 2-3 times per week
- Pace: Conversational (you should be able to talk while rucking)
**Week 3-4:**
- Distance: 2-3 miles
- Weight: 15-20 pounds
- Frequency: 3 times per week
- Add one longer ruck per week
### Safety Considerations
**Common Mistakes to Avoid:**
- Going too heavy too fast
- Ignoring proper pack fit
- Skipping warmup and cooldown
- Training on concrete exclusively
**Red Flags to Watch For:**
- Sharp pain in feet, knees, or back
- Excessive fatigue that doesn't resolve with rest
- Persistent soreness lasting more than 48 hours
## Why This Trend Has Staying Power
Unlike fitness fads that flame out quickly, rucking has several factors working in its favor for long-term adoption:
### Proven Track Record
Rucking isn't new - it's been a cornerstone of military training for centuries. What's new is civilian recognition of its benefits and adaptation for general fitness use.
### Scalable Difficulty
You can make rucking as easy or as challenging as needed by adjusting weight, distance, terrain, or pace. This scalability means people can progress continuously without hitting arbitrary ceilings.
### Practical Application
The strength and endurance built through rucking directly translates to real-world activities: hiking with gear, carrying groceries, moving furniture, or simply maintaining functional capacity as you age.
### Low Maintenance
Unlike complex fitness systems that require ongoing learning or equipment updates, rucking's simplicity makes it sustainable long-term. Once you understand the basics, you can ruck anywhere, anytime.
## Why the trend may last
The fitness industry's interest in rucking reflects demand for training that is simple, functional, and social. Rucking offers all three without much setup.
Whether you're drawn to rucking by the longevity benefits, the simplicity, or the community aspect, the fundamentals remain the same: start light, progress gradually, and focus on consistency over intensity.
You can start with a backpack, a manageable load, and a walking route. That low barrier may help rucking remain useful after the current wave of attention passes.
See the [complete beginner's guide to rucking](/pillars/beginners-guide-to-rucking) for a starting plan or the [rucking backpack guide](/gear/best-rucking-backpacks) when you are ready to compare gear.
## Frequently Asked Questions
────────────────────────────────────────────────────────────────────────────────
URL: https://ruckauthority.com/guides/rucking-for-bone-density
Title: Rucking for Bone Density 2026: The Snow 2000 Study + How to Replicate It
Description: Why loaded walking is one of the most effective ways to build bone strength - with research, safety guidelines, and a beginner progression plan.
Published: 2026-03-28 / Updated: 2026-09-18
## The Short Answer
[Rucking](/glossary#rucking) is one of the most effective, sustainable ways to build and maintain [bone density](/glossary#bone-density) - especially for women over 40 and seniors. Loaded walking triggers the bone adaptation response (Wolff's Law) without the joint stress of running or jumping. Start with 5 to 10 pounds, walk twice per week, and progress gradually. Most people see measurable improvements in bone density within 6 to 12 months. (Recent research confirms that [weighted vests only build bone density when you're actually moving](/guides/weighted-vests-bone-density-research) - passive loading doesn't cut it. If a vest fits your routine better than a pack, the [CAP Barbell Adjustable Weighted Vest](/gear/cap-barbell-adjustable-weighted-vest) is an affordable starter option, and you can pick up the [Adjustable Weighted Vest](/shop) directly if you want to start this week.)
**Important:** If you have been diagnosed with osteoporosis, osteopenia, or any bone condition, talk to your doctor before starting. This guide is for healthy adults and those with general bone density concerns. A doctor or physical therapist can give you personalized recommendations.
## Why Bone Density Matters (More Than You Think)
One in three women over 50 will have an osteoporosis-related fracture. One in five men will.
These are not minor breaks. A hip fracture often means months of immobility, loss of independence, and chronic pain. A vertebral fracture can cause permanent height loss and posture changes. Many people never regain full function after a serious osteoporotic fracture.
The frustrating part: bone density loss is largely preventable. Your bones respond to loading and stress - that is the foundation of everything in this guide.
## How Weight-Bearing Exercise Builds Bone
Your bones are living tissue. They constantly break down and rebuild. When you stress bone through weight-bearing activity, your body responds by building stronger, denser bone.
This process has a name: **Wolff's Law**. The basic idea is simple: bone adapts to the demands placed on it. If you put mechanical stress on bone, bone becomes stronger. If you are sedentary, bone becomes weaker.
The mechanism works like this:
1. You walk with a load (the ruck).
2. Your skeleton bears weight and movement creates mechanical stress on bone.
3. This stress signals osteoblasts (bone-building cells) to create new bone matrix.
4. Over weeks and months, new mineralized bone accumulates, increasing density.
Walking without load (normal walking) helps, but does not trigger as strong an adaptation. Running triggers stronger adaptation but with higher joint impact. Rucking splits the difference - it loads bone significantly while keeping impact moderate.
## Why Rucking Beats Other Weight-Bearing Options for Most People
### Effective without excessive impact
Rucking is loaded walking, not jumping or sprinting. Your bones get the stimulus they need without the repetitive pounding of running or the joint stress of CrossFit-style box jumps. This matters especially if you have joint concerns or are 50 years or older.
### You can start now, at any age or fitness level
Rucking does not require years of training to begin benefiting from it. You do not need to be able to run five miles or deadlift. You put on a pack with five to ten pounds and walk. That is it. Your bones start adapting immediately.
For women in perimenopause or early menopause, when estrogen drops and bone loss accelerates, starting rucking now can slow or halt that decline.
### It is practical and habit-forming
You can ruck anywhere - around your neighborhood, on a hiking trail, in a park. It does not require equipment beyond a backpack. Most people find it easier to sustain than other bone-building exercise because it does not feel like exercise - it feels like a walk.
## The Hormonal Context: Perimenopause, Menopause, and Bone Loss
Women lose bone density at an accelerated rate during perimenopause (the 5 to 10 years before menopause) and especially in the first 5 to 8 years after menopause.
Why? Estrogen.
Estrogen plays a major role in bone formation and mineralization. As estrogen levels drop, osteoblasts (bone-building cells) become less active, while osteoclasts (bone-resorbing cells) continue their work. The result is net bone loss - sometimes 1 to 3 percent per year in the first years after menopause.
Weight-bearing exercise counteracts this process. Evidence suggests that women who engage in consistent weight-bearing activity during and after menopause maintain significantly higher bone density than sedentary women.
Rucking is not a substitute for hormone therapy if your doctor recommends it. But it is a concrete, controllable action you can take starting today.
## Starting Safely: The Progressive Rucking Plan for Bone Health
If you have never rucked before, do not start with 40 pounds. That is not being cautious - that is being smart.
Bone adapts gradually. Too much load too soon causes injury, not stronger bone.
Here is a beginner progression for bone health:
**Weeks 1 - 2: Assessment**
- Walk 20 to 30 minutes with 5 lbs in a pack.
- Do this twice per week, with at least one rest day between sessions.
- How do you feel? Any pain (sharp, shooting, or localized)? If yes, talk to a doctor before continuing. If no, move to phase two.
- If you don't have a pack yet, our [budget rucking starter kit](/gear/budget-rucking-starter-kit) covers affordable entry options, and the [GORUCK Basic Rucker](/shop) is the no-fuss pick if you'd rather buy one purpose-built pack and be done.
**Weeks 3 - 6: Building baseline**
- Increase to 8 to 10 lbs.
- Maintain two sessions per week, 25 to 35 minutes per session.
- Your goal is consistency, not speed or distance.
**Weeks 7 - 12: Progressive loading**
- Add 2 to 3 lbs every two weeks using [GORUCK ruck plates](/gear/ruck-plate-comparison) or [Titan Fitness plates](/gear/ruck-plate-comparison) for precise increments (so 10 lbs becomes 12, then 15, etc.).
- Keep sessions at two per week.
- You can increase duration to 35 to 45 minutes if you want.
**After 12 weeks and beyond**
- Most people settle into 15 to 25 lbs for maintenance rucking.
- Some continue to progress to 30 lbs or more, depending on fitness and goals.
- Two to three sessions per week maintains and builds bone density.
**Key safety rules:**
- Never add more than 2 to 3 lbs per week.
- If you experience sharp pain, swelling, or discomfort, stop and rest for a few days, then reassess.
- If pain persists, talk to a physical therapist before continuing.
- Proper posture matters - stand tall, avoid slouching, and let the pack sit on your hips and shoulders, not your lower back.
## What the Research Says
Decades of research confirm that weight-bearing exercise increases bone mineral density. Here is what matters for your situation:
The underlying mechanism is consistent: mechanical load drives bone formation. The effect is dose-dependent (more loading generally means more benefit, up to a point). It is durable - consistent activity maintains improvements, while inactivity causes regression.
For you: evidence suggests that starting rucking now, at whatever age, will increase your bone density relative to if you do nothing. The sooner you start, the more time bone has to adapt and strengthen.
## Common Questions and Concerns
### Do I need to run or jump to get bone-building benefits?
No. Rucking alone is sufficient to trigger bone adaptation. High-impact exercise (running, jumping) does create a stronger signal for bone building, but rucking is significantly more sustainable and carries lower injury risk. Consistency beats intensity for long-term bone health.
### What if I have arthritis or joint pain already?
Rucking with light load (5 to 10 lbs) is often gentler on joints than running or high-impact exercise. That said, consult your doctor or physical therapist before starting. They can advise on load and intensity specific to your joints.
### Can I see changes in bone density on a DEXA scan?
Yes, but on a realistic timeline. Bone density changes are measurable on DEXA scans (the standard bone density test) typically after 6 to 12 months of consistent weight-bearing activity. Some people see measurable improvement in 6 months. Others take 12 to 18 months. Consistency matters more than intensity.
### What if menopause has already happened - can I rebuild bone then?
Yes. While bone loss is accelerated in the years right after menopause, weight-bearing exercise remains effective at slowing further loss and sometimes building new bone. Starting sooner is better, but starting later is far better than not starting at all.
### Do I need to add resistance training too?
Rucking alone is sufficient to maintain and build bone density. Adding resistance training (weights, bodyweight exercises) amplifies the effect and provides other benefits (muscle strength, balance, functional fitness), but is not required for bone health specifically.
---
## Your next step
---
## Related reading
- [Rucking research 2026](/guides/rucking-research-2026): every 2026 study on carrying weight, including the vest meta-analysis above, with evidence grades.
- [Complete beginner's guide to rucking](/pillars/beginners-guide-to-rucking) - everything you need to start, from gear to form to pacing
- [How heavy should your ruck be?](/guides/how-heavy-should-your-ruck-be) - weight calculator and personalized recommendations
- [Rucking for women](/weight-loss/rucking-for-women) - weight loss, body composition, and women-specific rucking guidance
- [Rucking for seniors](/training/rucking-for-seniors) - how to stay strong and independent with loaded walking
- [First 30 days of rucking](/guides/first-30-days-of-rucking) - week-by-week progression with common mistakes
## Frequently Asked Questions
────────────────────────────────────────────────────────────────────────────────
URL: https://ruckauthority.com/guides/rucking-for-families
Title: Rucking for Families and Couples: Fitness You Can Do Together
Description: A practical guide to walking and rucking with a partner or children, with age-appropriate safety notes and ideas that keep the outing enjoyable.
Published: 2026-03-28
## The Short Answer
[Rucking](/glossary#rucking) can work as a shared adult workout because each adult chooses a load and pace that fits their current ability. Children can join as walkers without carrying training weight.
The goal is not to make everyone do the same workout. It is to choose a short route the group can finish comfortably and let anyone turn back, remove a pack, or stop when needed.
## Why Rucking Works for Families
### Everyone Can Participate (At Their Level)
This is the biggest reason families stick with rucking. Running? One person is a natural 6-minute-miler, the other person struggles to hold a 9-minute pace - you split up or one person slows to a painful crawl. Cycling requires everyone to have a bike and compatible fitness. Gym classes have schedules that don't work for families.
Rucking works for couples because pack weight is adjustable. One adult may walk without added weight while the other carries a light pack. Choose the pace of the slower person and treat staying together as more important than hitting a training number.
### It leaves room for conversation
Unlike solo running or gym sessions, rucking gives people time to walk next to one another. Couples can use a conversation pace: fast enough to feel challenging, but slow enough to talk in full sentences.
For kids, a short ruck can feel more like an outing than a workout.
### Low Skill Barrier
Rucking is simple, but pack fit, load placement, pace, and terrain still matter. Adults new to it can start with an unloaded walk and add a small, secure load only after the route feels comfortable.
## Rucking by Age and Stage
### Toddlers (Under 5)
Use a framed child carrier only when the child meets every age, development, and weight requirement in the manufacturer's instructions. The child and carrier are already a substantial load, so do not stack a separate training pack on top. Start on a short, familiar, even route and check the child's position, temperature, and comfort often.
If a toddler walks part of the route, plan for a much shorter distance than an adult workout and be ready to stop. A second adult can make carrier transitions and unexpected fatigue easier to manage.
### Young Kids (6 to 10 Years Old)
Young children do not need added training weight. If they want a pack, keep it to light essentials such as a small water bottle, snack, or layer, and be ready to carry it for them. Ask the child's pediatric clinician before turning pack weight into a structured exercise program.
This is where rucking becomes a family habit. A 30-minute walk to the ice cream shop where everyone carries their pack, then you all sit together, is radically different from "we have to go to the gym."
### Tweens and Teens (11-17)
Teens can join the walk, with or without a pack. There is no universal training load for adolescents; growth, sports schedule, pack fit, and health history all matter. If a teen wants to train under load, a parent or guardian should involve their pediatric clinician or a qualified coach and begin conservatively.
A family ruck is not about competition. It is about time together and the casual fitness that happens in the background.
### Partners and Couples
Use a pace where both partners can speak in full sentences. Each adult can choose a different load, including no added weight, while sharing the same route.
Couples rucking is one of the simplest ways to inject fitness into a relationship without it feeling like a negotiation. You are not trying to sync schedules for spin class. You are just walking, which you were going to do anyway. A simple shared kit - a couple of packs like the [5.11 Tactical RUSH 12](/gear/best-rucking-backpacks) for the lighter carrier and the roomier [RUSH 24 2.0](/shop) for the heavier load - keeps the barrier to entry low.
## How to Make Family Rucking Stick
### Start With Destination Rucks
Start with a destination: a coffee shop, park, friend's house, or ice cream shop. Spend 15 minutes there, then walk back.
A destination gives the walk a clear reason beyond exercise. A park, library, or snack stop can be more appealing to a child than a distance target.
### Build in a Reward or Activity
- Ruck to the park, stay 20 minutes, walk back.
- Ruck to a friend's house for a playdate.
- Ruck to a farmer's market, buy snacks together, walk home.
- Ruck to a creek for lunch.
The activity gives the walk a clear purpose.
### Add Gamification
Kids respond to game mechanics:
- **Scavenger hunts:** "Find three things that are green. Find something round. Find something that makes a sound."
- **Geocaching:** Download the app, search for hidden caches along your route, sign the logbook.
- **Pace challenges:** "Can we get to the mailbox in 10 minutes?" (Easier for kids to understand than abstract fitness goals.)
- **Photo hunts:** Take pictures of specific things along the route. If a kid catches the photography bug, our sister site Aperture Authority's [exposure triangle](https://apertureauthority.com/learn/the-exposure-triangle?utm_source=ruckauthority&utm_medium=cross-site) primer is a gentle first lesson in how a camera actually works.
These games keep kids engaged during the walk.
### Keep It Short at First
Choose a short first outing and turn back before anyone is tired. Extend only when the previous route stayed comfortable for everyone.
## Safety Considerations for Kids
### Children Do Not Need Training Weight
There is no well-established rucking dose for children. An unloaded walk provides activity without adding a load prescription. If a child carries a pack, keep it to light essentials, make sure it fits, and remove it at the first sign of discomfort or fatigue.
### Proper Pack Fit Matters
Use a child-size pack and follow its fit instructions. The straps should hold light essentials without pinching, slipping, or changing how the child walks.
### Keep the Route Child-Sized
Do not use an adult distance target for a child. Start with a brief local walk, keep the return route easy, and extend only if the child remains comfortable and interested.
### Watch for Fatigue
Children may not describe fatigue clearly. End the outing if a child becomes unusually quiet, changes gait, reports pain, or no longer wants to continue.
## Building Rucking into Family Routine
A brief outing that fits the family schedule is easier to repeat than an occasional long session.
Start small. Pick a day that fits the schedule, set a simple route, and tell everyone the destination. Keep participation optional, especially for children.
When the current route has stayed comfortable for several outings, adults can change either distance or load in a small step. Children can continue walking without added training weight.
## Rucking and Family Bonding
Family rucking is less about sport training than shared time. A short walk gives the family time to move and talk without phones or other tasks.
Your 10-year-old talks about something at school. Your partner tells you about an idea. You all move together toward a destination. You get a workout in the background.
Those practical and social benefits can make a weekly ruck easier to repeat.
---
## Frequently asked questions
### At what age can kids start rucking?
Children can join an age-appropriate family walk when they are ready, but there is no universal age or weight prescription for youth rucking. Young children do not need added load. Ask a pediatric clinician before starting structured loaded training for a child or teen.
### What if my kid does not want to ruck?
Do not force it. Invite them on a short destination walk and let them opt out or turn back. Scavenger hunts and geocaching can help, but the outing should remain optional.
### Can I ruck with a newborn?
Do not assume a hiking carrier is suitable for a newborn. Follow the carrier manufacturer's minimum age, developmental, size, and weight rules exactly; many framed carriers require independent head and neck control and are not newborn products. The carrier and child are the load. Do not add a separate training pack, and ask the child's clinician if you are unsure whether the carrier is appropriate.
### How do I get my partner interested in rucking?
Start with a destination walk, not a prescribed workout. Pick a coffee shop or park they want to visit, let them choose whether to carry weight, and keep the first route short.
### What if my family has different fitness levels?
Adults can adjust their own pack weight or walk unloaded. Choose a route and pace that work for the least experienced person; children do not need added weight.
---
## Your next step
---
## Related reading
- [The complete beginner's guide to rucking](/pillars/beginners-guide-to-rucking) - everything about getting started, from gear selection to form
- [How heavy should your ruck be?](/guides/how-heavy-should-your-ruck-be) - personalized weight recommendations by fitness level and goal
- [Ruck Club Finder](/clubs) - find a family-friendly local rucking club from our directory across 35+ countries
- [Rucking with your dog](/guides/rucking-with-your-dog) - another way to make family rucking fun
- [Rucking for mental health](/guides/rucking-for-mental-health) - why family time + movement is so good for stress
- [Budget rucking starter kit](/gear/budget-rucking-starter-kit) - affordable gear for getting a whole family started
────────────────────────────────────────────────────────────────────────────────
URL: https://ruckauthority.com/guides/rucking-for-mental-health
Title: Rucking for Mental Health 2026: The Science of Outdoor Loaded Cardio
Description: Research-backed guide to rucking for stress, anxiety, mood, veterans mental health, outdoor movement, and supportive routines.
Published: 2026-03-28 / Updated: 2026-05-19
## The short answer
[Rucking](/glossary#rucking) is not meditation, but it functions like meditation. You move, carry weight, breathe rhythmically, and spend time outside. Multiple studies demonstrate that each of these individually improves mental health. Together, they create a low-barrier entry point into physical activity that actually sticks.
This article is written for people dealing with anxiety, stress, or low mood. It is not a replacement for professional treatment - therapists, psychiatrists, and counselors exist for reasons. But evidence suggests that adding rucking to whatever else you are doing (therapy, medication, lifestyle changes) can meaningfully improve outcomes.
## Why rucking, specifically, for mental health?
Most fitness marketing promises immediate mood boosts. That is toxic positivity. Real life is messier. But evidence does support rucking as a legitimate tool because it combines three separate, research-backed mechanisms.
### Mechanism one: Aerobic exercise is medicine
Exercise is one of the few interventions shown to reduce depression severity on par with medication.
Blumenthal et al. (2007) studied adults with major depressive disorder and found that a structured aerobic exercise program (jogging or brisk walking three times per week for 16 weeks) was as effective as sertraline (a common antidepressant) at reducing depression symptoms. After four months, remission rates were similar.
The mechanism is not mysterious. Exercise increases BDNF (brain-derived neurotrophic factor), improves sleep, reduces inflammation, and regulates neurotransmitters like serotonin and dopamine. Rucking, performed at a steady pace, delivers this benefit reliably.
### Mechanism two: Outdoor time reduces rumination
Rumination - repetitive, negative thought patterns - is a core feature of anxiety and depression. Walking in nature changes how your brain processes information.
Bratman et al. (2015) compared a 90-minute nature walk to a 90-minute urban walk. Both groups walked the same duration. The nature group showed reduced activity in the prefrontal cortex regions associated with rumination, along with improved mood. The urban group saw no similar benefit.
Rucking outside, on trails or through parks, delivers this effect. The pack weight and the attention required to maintain pace and balance further occupy your attention in a grounding way.
### Mechanism three: Rhythmic, load-bearing movement is grounding
The load on your back and the repetitive, rhythmic footfall create what therapists call "proprioceptive input" - feedback from your body about where it is in space. This is why heavy blankets and compression vests help some people with anxiety. The weight itself is soothing.
Additionally, rhythmic movement - walking at a steady pace - synchronizes your breathing and can lower your [heart rate variability](/glossary#hrv) in ways that signal safety to your nervous system. You move, your body feels the load, you breathe in rhythm, and your nervous system downshifts from high alert.
## Rucking for anxiety and stress
Anxiety lives in the future. You worry about things that have not happened. Rucking pulls you into the present.
When you ruck, you feel:
- The pack weight on your shoulders
- Your feet hitting the ground
- Your breathing pace matching your steps
- The air temperature on your skin
- The terrain changing beneath you
This is sensory presence. Therapists call this "grounding" - deliberately engaging your senses to interrupt anxious thinking. Rucking is grounding baked into a walk.
Evidence from exercise science shows that even a single 20-minute walk reduces immediate anxiety symptoms. Rucking at moderate intensity (zone two - conversation-pace walking) is sustainable, repeatable, and builds a habit that compounds over weeks and months.
Unlike high-intensity exercise, which can spike cortisol in anxious individuals, zone two rucking actually reduces cortisol over time while building resilience.
## Rucking for depression
Depression is often characterized as low mood, but it is better understood as low energy and low motivation. The activation barrier is high. Getting off the couch feels impossible.
Rucking works for depression because the barrier to entry is lower than running or CrossFit. You do not need speed or intensity to ruck. You do not need to compete. You do not need to feel good first.
You just walk while carrying weight.
Research on structured exercise programs shows that consistent movement - even at low intensity - reverses depressive symptoms. Rethorst et al. (2009) found that a standardized 30-minute walking program, performed five days per week for 12 weeks, significantly improved depression severity in adults with major depressive disorder.
Rucking extends this benefit by adding the load-bearing element, which provides better proprioceptive grounding and preserves muscle mass during a low-mood period when muscle loss is common.
## The moving meditation angle
Rucking is not meditation. You are not sitting still. You are not emptying your mind.
But rucking creates a meditative state through what researchers call "flow" - a state where your attention is fully absorbed by the present activity. You are not thinking about your to-do list because your brain is occupied with:
- Balancing the load
- Matching your pace
- Breathing
- Navigating the terrain
This is meditation's functional benefit without the spiritual framework. Oppezzo & Schwartz (2014) found that walking - even indoor walking - improved creative thinking and idea generation. Your brain, freed from the distraction of sitting and the anxiety of doing nothing, naturally processes more effectively.
Rucking outside amplifies this effect because of the added environmental stimulation and complexity.
## The community and accountability factor
One of the most underrated mental health tools is social connection. Group rucking builds community without the competitive pressure that keeps people away from fitness spaces.
Unlike running clubs (where pace hierarchies create friction) or CrossFit gyms (where competitive intensity can be unwelcoming), rucking groups operate at a [conversational pace](/glossary#conversational-pace). You can ruck in a group and actually talk. You see the same people weekly. You build friendships around a shared activity.
For people with depression or social anxiety, group rucking is often the first reliable social commitment they make. The activity is low-pressure enough that showing up is possible, even on hard days. And showing up consistently is how connection happens.
The research on social connection and mental health is unambiguous: loneliness is a major risk factor for depression and anxiety. Rucking groups, intentionally or not, address this directly.
## Rucking for veterans mental health
Rucking can support veterans' mental health by combining familiar load-bearing movement, outdoor time, peer connection, and predictable structure. It is not a PTSD treatment, crisis intervention, or substitute for therapy, but it can be a practical bridge back into movement and community.
The clinical evidence for exercise as PTSD support is solid. A 2022 NIH-published review - [Whitworth et al., Exercise to Reduce Posttraumatic Stress Disorder Symptoms in Veterans (PMC9217079)](https://pmc.ncbi.nlm.nih.gov/articles/PMC9217079/) - synthesized randomized trials and found that supervised exercise interventions produced measurable, clinically meaningful reductions in PTSD symptom severity in Veterans, with the strongest effects when exercise was combined with standard care. Aerobic movement at moderate intensity, three to five sessions per week, was the most consistent pattern across the trials reviewed. Rucking is a textbook fit for that prescription.
The setting matters too. A pilot randomized trial in the Pacific Northwest - [Stelzer et al. (2021), nature versus urban hiking for Veterans with PTSD (PMC8461737)](https://pmc.ncbi.nlm.nih.gov/articles/PMC8461737/) - directly compared nature hiking to urban hiking in Veterans diagnosed with PTSD. Both groups walked the same duration; the nature group showed larger improvements in PTSD symptom scores and self-reported mood. This is the same pattern Bratman saw in non-Veteran adults, replicated specifically in the population that needs it most.
Post-traumatic stress, military sexual trauma, moral injury, grief, and the transition out of military service create specific mental health challenges. Rucking helps most when it is framed as **structured movement with people**, not as a toughness test.
| Mental health need | How rucking may help | What rucking cannot do |
| --- | --- | --- |
| Isolation after service | Creates a recurring reason to meet people side by side | Replace therapy, medication, or crisis care |
| Loss of structure | Gives the week a predictable training rhythm | Resolve trauma by itself |
| Anxiety or hypervigilance | Uses rhythmic walking, outdoor attention, and body feedback | Guarantee emotional safety in every group |
| Depression or low motivation | Low barrier: walk, carry light weight, stop when needed | Work if the activation barrier is too high |
| Transition identity | Reclaims load carriage in a non-combat, civilian context | Make military experience easy to talk about |
Groups like Team Red White & Blue and local veteran rucking clubs have built communities around this explicitly. If you are a veteran looking for mental health support, rucking can be useful as a gateway habit: show up, walk at a conversational pace, build trust, then use that stability to support deeper work with a trauma-informed therapist or VA care team.
If you are a Veteran in crisis or concerned about one, the [Veterans Crisis Line](https://www.veteranscrisisline.net/) offers free, confidential support 24/7. Dial **988 then press 1**, chat online, or text **838255**. You do not have to be enrolled in VA benefits or health care to connect.
## What rucking is not
Before continuing, let us be clear about what this article does not claim:
**Rucking is not a replacement for therapy or medication.** If you are struggling with depression or anxiety, see a licensed therapist or psychiatrist. Physical activity is a complement, not a substitute.
**Rucking will not instantly fix your mood.** Mental health improvements show up over weeks and months, not days. You may not feel better after your first ruck. That is normal.
**Rucking will not "fix" you.** Mental health is complex. Rucking improves one variable: physical activity. Other variables - sleep, nutrition, social connection, meaningful work, sense of purpose - matter equally. Treat rucking as one tool in a larger toolkit.
**Not everyone will like rucking.** Some people prefer running, cycling, swimming, or climbing. The best exercise for mental health is the one you will actually do. Rucking is not mystically superior. It is just accessible and effective.
## Getting started: The minimal viable ruck
You do not need expensive gear to ruck for mental health. You do not need a heavy pack.
Start with:
- **A backpack you already own** - ideally structured and comfortable (or check out our [budget rucking starter kit](/gear/budget-rucking-starter-kit) for affordable options)
- **10 to 15 lbs of weight** - water bottles, books, sandbags, or a simple plate pair like the [Signature Fitness 20 lb standard plates](/gear/ruck-plate-comparison)
- **Shoes you can walk in** - no special running shoes required
- **30 minutes** - zone two pace (you can hold a conversation)
- **A local trail or park** - outdoor time matters
That is it. Walk at a sustainable pace. Bring your phone to listen to a podcast or audiobook if that helps with engagement. Or walk in silence. Both work.
Aim for three rucks per week if you can. Two is fine. One is better than zero. Consistency matters more than intensity.
## Frequently Asked Questions
---
## Your next step
---
## Related reading
- [The complete beginner's guide to rucking](/pillars/beginners-guide-to-rucking) - everything you need to start, from gear selection to form
- [Couch to ruck program](/guides/couch-to-ruck-program) - build consistency and confidence over 30 days
- [Rucking form and technique](/guides/rucking-form-guide) - how to ruck injury-free
- [Zone 2 rucking guide](/weight-loss/zone-2-rucking-guide) - the science of sustainable, steady-state movement
- [How heavy should your ruck be?](/guides/how-heavy-should-your-ruck-be) - weight recommendations by fitness level and goal
- [Find a ruck club near you](/clubs) - search the ruck club directory for local community
────────────────────────────────────────────────────────────────────────────────
URL: https://ruckauthority.com/guides/rucking-form-guide
Title: Rucking Form: Posture, Foot Strike & Mistakes
Description: Proper rucking form protects your joints and makes every mile more efficient. Here's exactly how to walk under load - with common mistakes and fixes.
Published: 2026-03-10 / Updated: 2026-05-19
## Why form matters more under load
When you walk without load, your body is incredibly forgiving. Sloppy mechanics, asymmetries, and compromises in your form don't matter much because the forces are low. Your body compensates and recruits muscles in ways that work around bad mechanics.
Add 20-40 pounds and everything changes. Those compensations become injury vectors. A small forward lean from your waist that's invisible when unloaded becomes chronic lower back strain when you're loaded. A slight inward collapse of your knee that barely registers on an easy walk becomes a fast track to patellofemoral pain when you're carrying weight.
Good [rucking](/glossary#rucking) form does three things: it protects you from injury, it makes every mile more efficient (less energy wasted), and it makes rucking comfortable even on long outings. Form matters because you're telling your muscles and joints to do work they're not used to, and you're asking them to do it repeatedly.
The fundamentals are straightforward. Five key elements control 90% of rucking mechanics: posture, [foot strike](/glossary#foot-strike), stride length, arm swing, and breathing. Master these and most form issues solve themselves.
---
## The 5 fundamentals of rucking form
### 1. Posture: tall spine, slight forward lean
Your posture is the foundation of everything else. Stand tall as if someone is pulling the crown of your head toward the ceiling. Your eyes should look forward naturally, not up or down. Your shoulders should sit back and down - not shrugged toward your ears, which is a sign of tension.
Here's the critical part: you should lean slightly forward from the ANKLES, not from the waist. This is the most common misunderstanding. A 3-5 degree forward lean from your ankles puts your center of mass slightly ahead of your base of support, which makes walking feel more natural and efficient. But this lean should come from your ankles and lower legs, not from bending or hinging at your waist.
Your core should be engaged - think "braced, not flexed." You're not doing an isometric crunch; you're tightening your midsection slightly, as if you're about to take a punch. This keeps your spine neutral and protects your lower back.
The most common mistake is hinging at the waist, especially as fatigue sets in. As your legs get tired, your body wants to lean from the waist to reduce the work. Don't let it happen. A waist hinge combined with load is a recipe for lower back pain. Catch this by checking yourself every 5-10 minutes: Can I draw a straight line from the top of my head through my hips to my ankles? If your hips are in front of your ankles, you're hinged.
Cue: "Imagine a string pulling the top of your head toward the sky while your weight stays over your feet."
### 2. Foot strike: heel-to-toe roll
Your foot strike is how your foot contacts the ground. Under load, the most efficient and joint-friendly approach is a heel-to-toe roll: land with a soft heel, roll through your midfoot, and push off from your toes.
This is not the same as running. Runners often use a forefoot strike (landing on the ball of the foot) for efficiency and speed. Rucking is different. A loaded forefoot strike puts excessive stress on your metatarsals (the small bones in the ball of your foot) and your Achilles tendon. Your body isn't designed to absorb heavy load repeatedly on the forefoot while walking.
A proper heel-to-toe roll distributes the force of impact across a longer time period and over more of your foot. Your heel takes initial contact, your arch flexes slightly to absorb shock, your midfoot carries you forward, and your toes provide the final propulsive push. A shoe with a stable heel and a smooth rocker - something like the [Salomon XA Pro 3D V9 GTX](/shop) - makes that roll easier to feel and harder to fight under load.
Keep your feet pointed forward, not splayed outward. Toes out might feel more stable, but it's actually less efficient and can create lateral knee stress over time. Neutral foot position aligns your joints properly.
### 3. Stride length: shorter than you think
Overstriding is the number-one form mistake in rucking. Most new ruckers try to maintain their normal walking stride while under load. This is almost always too long.
Here's what happens with an overstrided gait: your foot lands far in front of your body's center of mass, which creates a braking force with every step. You're essentially pushing the ground backward to slow yourself down. This braking force increases impact on your joints, especially your knees. It also requires more muscular effort to overcome. You're working harder and getting less distance - the opposite of what you want.
Under load, your stride naturally shortens. Let it. A shorter stride under load is more efficient, creates less braking force, increases stability, and reduces stress on your knees. The cue is "Quick feet, not long feet." Think about cadence (steps per minute) rather than stride length. Aim for around 120 steps per minute, which is comfortable and efficient under load.
This is one of those things you won't feel when you're doing it right, but you'll feel it immediately in your knees if you're overstriding. Pay attention to your foot landing under your hips, not in front of them.
### 4. Arm swing: natural and relaxed
Your arms should swing naturally at your sides, helping to balance your motion and maintain rhythm. They're not there for propulsion; they're there for balance and efficiency.
The biggest mistake here is gripping the shoulder straps of your pack. This is a natural instinct - you feel unbalanced or worried the pack will slip, so you grab the straps. But gripping restricts your arm swing, which actually makes you less balanced. It also creates tension in your shoulders and neck, leading to upper back pain. Worse, it restricts blood flow to your hands, which can cause numbness and tingling.
The fix is to loosen your shoulder straps appropriately and adjust your pack so it fits properly. Once it fits right, your arms hang freely at your sides, swinging naturally. This actually improves stability and comfort. A well-fitted pack like the [GORUCK GR1](/gear/goruck-gr1) or [Mystery Ranch 2 Day Assault](/gear/best-goruck-alternatives) with proper strap design makes all the difference for load transfer.
Some people pump their arms aggressively while rucking, thinking it helps them move faster. It doesn't - it just wastes energy. Your arm swing should be relaxed and natural, the same as an unloaded walk. If you find your hands going numb despite loose straps, experiment with pack height and chest strap position. Often, numb hands indicate the pack is riding too high or the straps are pinching a nerve.
### 5. Breathing: conversational pace
Your breathing pattern tells you whether you're working at the right intensity. For steady-state rucking (the kind that makes up most of your training), you should be able to hold a conversation. If you're gasping or breathing hard, you're going too fast for the load, or your load is too heavy for your current fitness.
Nasal breathing is ideal for [Zone 2 rucking](/weight-loss/zone-2-rucking-guide) (the aerobic base-building intensity). Breathing through your nose naturally limits your pace to a sustainable level and engages your diaphragm rather than your chest. Your diaphragm (the muscle under your rib cage) is more efficient for breathing than your intercostal muscles (between your ribs).
Diaphragmatic breathing is the technical name for belly breathing. When you inhale, your belly expands outward; your chest stays relatively still. When you exhale, your belly contracts. This is how efficient breathing works. Many people chest-breathe instead, which is shallower and less efficient.
A practical tip for rhythm: try a 3-step inhale and 2-step exhale pattern. That means you breathe in for three steps, breathe out for two steps. This creates a natural rhythm that syncs with your walking and prevents you from holding your breath or breathing too rapidly.
If you find yourself breathing hard, the fix is simple: slow down or reduce your load. There's no value in pushing through to harder breathing when rucking. You should be able to complete every ruck comfortably, breathing steadily. Hard breathing means you've changed the stimulus - it's no longer rucking, it's speed hiking or training for a different energy system.
---
## The 5 most common rucking form mistakes
These are the mistakes we see repeatedly, and they're all fixable.
## The Ruck Authority form diagnostic
Use this table when something starts to hurt mid-ruck. Most form problems show up as a predictable pain pattern.
| Symptom | Likely form issue | Fast fix |
| --- | --- | --- |
| Low back tightness | Leaning from the waist or pack riding low | Stand tall, lean from ankles, tighten pack higher |
| Knee ache | Overstriding or braking on downhills | Shorten stride, increase cadence, slow descents |
| Neck/upper trap pain | Shoulders shrugged or straps too tight | Drop shoulders, loosen shoulder straps, use sternum strap |
| Numb hands | Gripping straps or nerve compression at shoulder | Let arms swing, adjust strap tension, move chest strap |
| Shin splints | Too much pace, mileage, or heel-slamming | Slow down, shorten stride, roll heel-to-toe |
| Hot spots/blisters | Foot sliding or overstriding | Lock laces, use merino socks like [Darn Tough Light Hiker](/gear/best-rucking-socks-blister-prevention), shorten step length |
Not sure if your pain pattern is form or something else? Run a quick assessment:
### Mistake 1: Leaning too far forward from the waist
**The cause**: A heavy pack creates a backward-pulling force on your body. Instinctively, you counter this by leaning forward from the waist. As fatigue sets in, your core engagement fades and this forward lean gets exaggerated. You also might naturally hinge forward if you're tired or if your pack doesn't fit well.
**The consequence**: Lower back strain. A waist hinge under load creates asymmetrical stress on your lumbar spine. The muscles on one side of your spine overwork while others underwork. This leads to chronic lower back tightness, pain, and potentially acute injury if it gets bad enough.
**The fix**: Tighten your pack's [hip belt](/glossary#hip-belt) and shoulder straps so the load sits closer to your body. A well-fitted pack should feel like an extension of you, not a separate thing pulling you backward. Reduce your load if the pain is acute. Engage your core actively - do core work off the ruck (planks, dead bugs, bird dogs) to build the strength to hold good posture under load. Every 10 minutes during a ruck, do a posture check: eyes forward, shoulders back, slight lean from ankles only.
### Mistake 2: Overstriding
**The cause**: Most ruckers try to maintain their natural unloaded walking pace and stride length. Unloaded, your stride is longer because there's no load pushing down on your joints. Under load, you need to shorten it. Many people either don't realize this or don't want to slow down.
**The consequence**: Knee pain and [shin splints](/glossary#shin-splints). An overstrided gait increases braking forces on your knees with every step. Your knees are designed to absorb some impact, but repeated braking stress exceeds their tolerance. Shin splints (pain along the tibia bone) often result from the increased muscular effort required to overcome braking forces.
**The fix**: Accept that rucking is slower than unloaded walking. Aim for 120 steps per minute (you can count for 15 seconds and multiply by 4 to check). Focus on cadence, not speed. Your pace will naturally be 2.5-3.0 mph, and that's correct. Short, quick steps under load is the right approach. If you're naturally a fast walker, this mental shift takes practice.
### Mistake 3: Rounded shoulders
**The cause**: Heavy shoulder straps create downward pull on your shoulders. Your chest muscles are often tight from modern life (sitting at desks), which pulls your shoulders forward and rounds them. As a ruck gets longer, fatigue causes your posture to collapse into a rounded shoulder position.
**The consequence**: Upper back pain and restricted breathing. Rounded shoulders limit your breathing efficiency and create tension in your upper back and neck. The rhomboid and trapezius muscles (upper back) have to work harder to resist the forward-rounded position, leading to chronic tightness and pain.
**The fix**: Use your pack's chest strap. A snug chest strap prevents shoulder straps from pulling your shoulders forward and down. Do shoulder mobility work off the ruck: band pull-aparts, reverse pec flyes, and upper back strengthening. Check your posture every 5 minutes during a ruck - shoulders back and down. If you find your shoulders still rounding, reduce your load or shorten your ruck distance until your strength catches up.
### Mistake 4: Gripping the straps
**The cause**: Your pack feels heavy and unstable, so your instinct is to grab the shoulder straps and hold on. This makes you feel more in control. It's a natural protective mechanism when dealing with something unfamiliar and heavy.
**The consequence**: Hand numbness and restricted arm swing. Gripping the straps compresses nerves in your hands, reducing blood flow and causing tingling or numbness. It also prevents your arms from swinging, which reduces your natural balance. The pack actually becomes more unstable when you grip it, not less.
**The fix**: Let your arms hang freely. Adjust your pack fit instead. A properly fitted pack sits high on your back with tight hip straps and a snug chest strap. Once it fits right, the pack stays in place without you holding it. Your arms should swing naturally. If you still get hand numbness after adjusting pack fit, try loosening your shoulder straps further or wearing a chest strap higher up.
### Mistake 5: Looking down at your feet
**The cause**: On trails, you watch your feet to avoid obstacles. On pavement, you watch your feet out of habit or self-consciousness. Looking down feels more stable, even though it's not.
**The consequence**: Forward head posture and neck strain. When you look down, your head moves forward of your shoulders, creating a forward head posture. This increases strain on the muscles and joints in your neck. Over time, this becomes chronic neck pain. On trails, looking down also reduces your view of what's coming, making you more likely to miss obstacles and stumble.
**The fix**: Keep your eyes 15-20 feet ahead of you. On trails, scan ahead for obstacles instead of looking down at your immediate feet. Your peripheral vision is better than you think for tracking footing. Your eyes should be level or looking slightly forward. This naturally keeps your head aligned over your shoulders. If you're nervous about trail footing, practice at slower speeds on easier trails before increasing difficulty.
---
## Form checklist: the 60-second self-assessment
Every 10 minutes during a ruck, run through this quick checklist. These seven questions take 60 seconds and will catch 95% of form issues before they become problems.
1. **Am I standing tall?** Crown of head reaching up, eyes forward, not slouching?
2. **Is my lean from my ankles?** Can I draw a straight line from head through hips to ankles? Or am I hinged at the waist?
3. **Are my shoulders down and back?** Not shrugged up toward my ears?
4. **Am I overstriding?** Are my feet landing under my hips or in front of them? Cadence around 120 steps per minute?
5. **Are my hands relaxed?** Not gripping the pack straps? Arms swinging freely?
6. **Can I breathe through my nose?** Can I hold a conversation? Am I breathing at a sustainable rhythm?
7. **Is the pack riding high and stable?** Hip belt snug, shoulder straps secure, chest strap engaged?
If any answer is "no," make the adjustment. The earlier you catch form drift, the easier it is to correct.
---
## How form changes with weight and terrain
Your form isn't static. It changes as load increases and as terrain changes. Understanding these adaptations prevents injury and maximizes efficiency.
**Heavier loads** require shorter strides, slower paces, and slightly more forward lean (but always from the ankles, never the waist). At 60+ pounds, your pace might drop to 2.0-2.5 mph, your stride shortens noticeably, and your core engagement needs to be higher to maintain neutral spine. This is all normal and correct. Don't fight the load. Let your body respond appropriately.
**Uphill walking** calls for a slight lean into the hill (still from the ankles), a further stride shortening, and increased arm swing. Some people find it helpful to use their arm swing to propel themselves uphill - this is one scenario where that's actually useful. Keep your core tight to prevent your hips from pushing backward. Your pace will slow significantly on hills, and that's expected.
**Downhill walking** is where people get injured. Slow down. Your knees absorb a lot of force going downhill, especially under load. Bend your knees slightly rather than locking them straight. Let your quads and glutes do the work of controlling your descent rather than using your knees as brakes. Small, controlled steps are safer than trying to maintain pace on the way down.
**Trail walking** requires eyes up but scanning ahead. Widen your stance slightly for stability - your feet should be hip-width apart rather than in a tight line. Engage your core and stabilizer muscles. Your pace will be slower than pavement because you're managing more variables. Trust your eyes and let your peripheral vision guide your feet placement.
## Frequently asked questions
────────────────────────────────────────────────────────────────────────────────
URL: https://ruckauthority.com/guides/rucking-nutrition-guide
Title: Rucking Nutrition Guide 2026: What to Eat Before, During & After
Description: Your ruck is only as good as your fuel. Here's the science-backed nutrition playbook for pre-ruck meals, mid-ruck hydration, and post-ruck recovery.
Published: 2026-03-27 / Updated: 2026-09-02
## Your Ruck Is Only as Good as Your Fuel
Most people obsess over gear: the right backpack, the perfect weight distribution, which boots to buy. But here's the part nobody talks about: you can have the best ruck in the world and still bonk halfway through because you didn't eat. New to [rucking](/guides/what-is-rucking-weighted-walking-explained) entirely? Get the fundamentals down first, then come back for the fueling plan.
Your body is a machine. [Rucking](/glossary#rucking) asks that machine to move weight over distance - sometimes for 30 minutes, sometimes for 2+ hours. Fuel quality and timing determine whether you're cruising with energy to spare or hitting a wall and walking like you're moving through molasses.
This guide breaks down exactly what and when to eat so you can perform your best, recover faster, and feel good the next day.
## Pre-Ruck Nutrition: Set Yourself Up to Win
Your pre-ruck meal does one job: top off your glycogen stores (muscle and liver carbs) and stabilize your blood sugar so you have steady energy throughout your ruck.
### The Timing Sweet Spot: 2 - 3 Hours Before
Eat a balanced meal 2 - 3 hours before you start. This window gives your body time to digest and convert food into usable energy without leaving you feeling heavy or full.
**What to include:**
- **Carbohydrates (the main fuel):** Rice, pasta, oatmeal, bread, potatoes, or fruit. Aim for 1 - 2 grams per pound of body weight. A 160-lb person would eat roughly 160 - 320g carbs - sounds like a lot, but that's spread across your pre-ruck meal and any snacking you do before.
- **Protein (muscle support):** 20 - 40g from chicken, fish, eggs, Greek yogurt, or tofu. This keeps muscle breakdown minimal during your ruck.
- **Minimal fat and fiber:** Both slow digestion. You want carbs hitting your bloodstream, not stuck in your stomach. Save the olive oil and whole grains for post-ruck.
**Real meal examples:**
- Oatmeal with banana and honey
- Toast with peanut butter and jam
- Rice with grilled chicken and steamed vegetables
- Pasta primavera with white sauce (cream-based, lighter)
- Waffle with maple syrup and a scrambled egg
### If You're Short on Time (30 - 60 Minutes Before)
If your ruck is last-minute or you've just woken up, eat something simple and easy to digest: a banana with honey, a rice cake with jam, or a slice of white bread with jam. Aim for 30 - 60g carbs, minimal protein and fat.
### Foods to Avoid Right Before
- **High fiber** (brown rice, beans, vegetables): Slows digestion and can cause GI distress mid-ruck
- **High fat** (butter, oils, fried food): Delays stomach emptying
- **Alcohol:** Impairs hydration status and coordination
- **Anything unfamiliar:** Only eat food you've tested before. A ruck is not the place to experiment.
## Hydration Strategy: The Numbers That Matter
Hydration is where most people mess up. Too little and you lose performance and hit heat exhaustion. Too much and you're carrying unnecessary weight. There's a math to it.
### The Hydration Math
Aim to drink **16 - 20 fluid ounces per hour of rucking**. Your baseline depends on:
- **Body weight:** Heavier people sweat more
- **Intensity:** Faster pace = higher sweat rate
- **Heat:** Hot weather increases losses by 30 - 50%
- **Load weight:** Heavier rucks elevate core temperature
**Example:** A 180-lb person rucking at moderate pace in 65°F weather needs roughly 16 - 20 oz/hour. In 85°F heat, bump that to 20 - 24 oz/hour. That same person carrying a 50-lb ruck needs closer to 24 oz/hour because the weight raises metabolic heat.
### Water Alone vs. Adding Electrolytes
**Under 60 minutes:** Water is fine. You have enough sodium in your system and you're not sweating enough to become sodium-depleted.
**60 - 90 minutes:** Water is still primary, but consider adding electrolytes (sodium, potassium, magnesium). A sports drink with 4 - 6% carbs and 200 - 300mg sodium per serving helps with fluid absorption and maintains blood sodium levels.
**90+ minutes:** Electrolytes matter. Your sweat rate has depleted your sodium stores. Without electrolytes, you risk hyponatremia (dangerously low blood sodium) if you drink only water. Look for products with at least 200mg sodium and 3 - 5g carbs per 8 oz. LMNT's variety pack is a popular zero-sugar option with 1,000mg sodium per stick - heavy on sodium specifically, which is the electrolyte you actually lose the most of.
### The Weight Penalty
Your ruck already adds weight. Water adds more. A liter of water weighs 2.2 lbs. On a 2-hour ruck, you might carry 4 lbs of water. That's real weight that adds to your load.
**Strategy:** Carry what you need, but don't overdo it. On a 45-minute neighborhood loop, maybe 16 - 20 oz is enough and you drop weight. On a 2-hour trail ruck, you might carry 40 - 48 oz (2.5 - 3 lbs) plus electrolytes in the right backpack with good hydration organization. Plan refill points if you can - lightweight is better than safety-first overhydration. The right pack design (like in our [best rucking backpacks guide](/gear/best-rucking-backpacks)) makes hydration carry natural.
## During-Ruck Fueling: When Do You Actually Need Calories?
This depends on duration.
### Short Rucks (Under 45 Minutes)
No mid-ruck fuel needed. Your pre-ruck meal and glycogen stores are enough. Just water.
### Medium Rucks (45 - 90 Minutes)
You probably don't need calories, but it depends on intensity. If you're moving fast uphill, your glycogen depletes faster. A small snack (banana, handful of dates, or 10 - 15g carbs) keeps your blood sugar stable. Optional but helpful.
### Long Rucks (90+ Minutes)
You need fuel. Your glycogen stores deplete, your body shifts toward fat oxidation (which is slower), and your energy drops. Consume **30 - 60g carbs per hour**, split into small portions so you don't overload your stomach.
**What to carry:**
- **Dates:** 1 date ≈ 7g carbs, minimal fiber, travels well, no packaging
- **Trail mix:** Mix high-carb items (raisins, dried mango) with nuts for variety
- **Energy chews:** Honey Stinger chews or GU gels - designed for easy digestion mid-effort
- **Banana:** Portable, includes potassium, ~27g carbs
- **Granola bar:** Choose low-fiber options (not whole grain)
- **Sports drink:** If you're carrying liquid fuel, combine your hydration and calories
**Practical pacing:** On a 2-hour ruck, eat 15g carbs every 20 - 30 minutes rather than 60g all at once. Small bites every 20 minutes keep energy steady without GI distress.
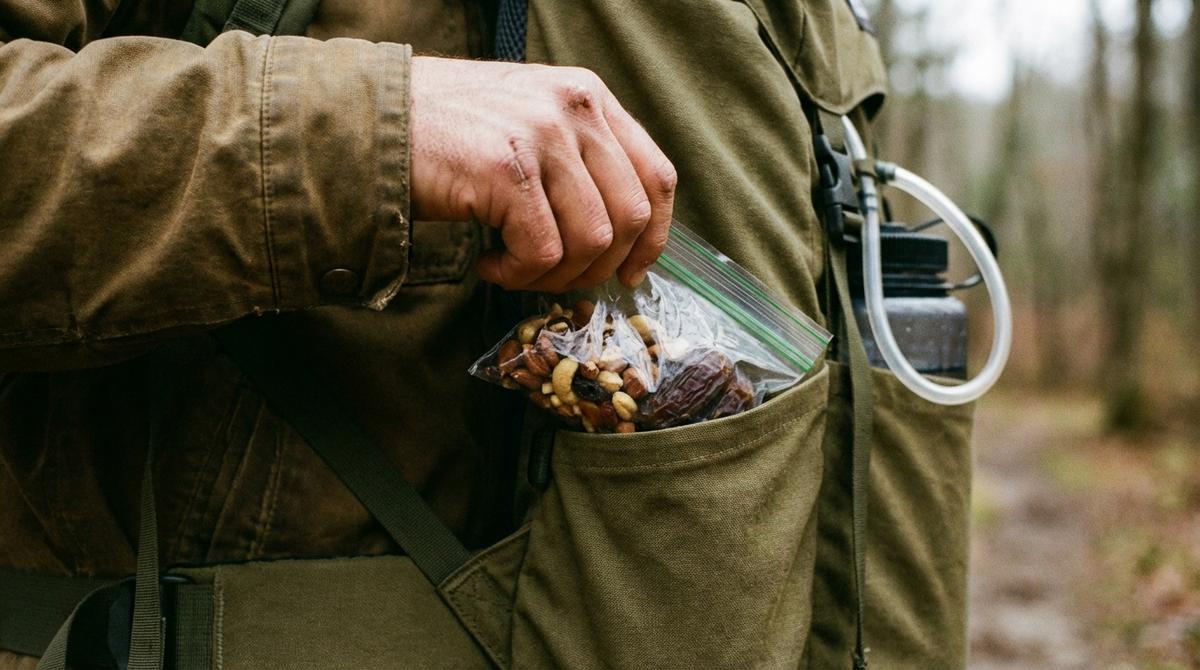
## Post-Ruck Recovery Nutrition: The Critical Window
The 60 minutes immediately after your ruck is when your body is primed to rebuild. Your muscles are broken down, glycogen is depleted, and your systems are signaling for repair.
### What to Eat
Aim for **20 - 40g protein + 40 - 80g carbs** within 60 minutes post-ruck. This ratio supports:
- **Muscle protein synthesis:** Protein (especially leucine-rich sources like whey, chicken, or eggs) triggers the process that rebuilds muscle
- **Glycogen replenishment:** Carbs refill your depleted stores, making you ready for the next session
- **Inflammatory response:** The right nutrients help manage the controlled inflammation that's part of adaptation
### Real Post-Ruck Meals
- **Chocolate milk:** 1 - 2 glasses provides roughly 30g protein, 50g carbs, and is easy to drink when you're tired
- **Turkey sandwich on white bread:** 25g protein, 40g carbs, easy to eat
- **Greek yogurt with granola and fruit:** 30g protein, 50g carbs
- **Grilled chicken with rice:** 35g protein, 60g carbs
- **Protein shake with banana and oats:** 30g protein, 50g carbs, minimal prep
Don't wait until dinner. Even a quick snack in the first 30 minutes (banana with protein powder stirred in, Greek yogurt, or chocolate milk) jumpstarts recovery.
## Nutrition by Ruck Type: Quick Reference
| Ruck Type | Duration | Pre-Ruck | During | Hydration | Post-Ruck |
|-----------|----------|----------|--------|-----------|-----------|
| **Quick Loop** | <45 min | Light meal 2 - 3h before, or snack 30 - 60 min before | None needed | 16 - 20 oz water | Normal eating schedule |
| **Standard Session** | 45 - 90 min | Balanced meal 2 - 3h before | Optional snack if hungry | 16 - 20 oz/hr water | 20 - 40g protein + carbs within 60 min |
| **Long Ruck** | 90+ min | Balanced meal 2 - 3h before | 30 - 60g carbs/hr in small portions | 16 - 20 oz/hr water + electrolytes after 60 min | 30 - 40g protein + 60 - 80g carbs within 60 min |
## Common Nutrition Mistakes (and How to Avoid Them)
**Eating too much right before.** A full meal in your stomach during a ruck feels awful. Stick to 2 - 3 hours and you'll feel fine.
**Ignoring heat.** Rucking in 80°F+ weather increases sweat rate by 30 - 50%. Increase hydration and electrolytes accordingly. Don't assume your normal winter hydration works in summer.
**Relying on electrolytes for hydration alone.** Electrolytes help with fluid absorption and sodium balance, but water is still your primary fluid. A sports drink should be flavored water with electrolytes, not a sugary beverage.
**Thinking beer is "recovery."** One beer after your ruck feels earned, but it's a diuretic - it pulls more fluid out of your system and impairs protein synthesis. Eat first, celebrate later.
**Skipping post-ruck protein.** If you ruck to get stronger or faster, post-ruck nutrition is non-negotiable. Protein triggers muscle repair. Without it, you're leaving gains on the table.
**Experimenting on race day.** Only eat things you've tested before. Your stomach has its own personality. What works for your friend might give you GI grief.
## Putting It All Together
Your nutrition strategy is simple:
1. **Pre-ruck (2 - 3 hours before):** Balanced meal - carbs, protein, minimal fat and fiber
2. **During:** Water for <60 min rucks; add electrolytes and 30 - 60g carbs/hour for longer efforts
3. **Post-ruck (within 60 minutes):** 20 - 40g protein + 40 - 80g carbs to kickstart recovery
The best plan is one you'll actually follow. If chocolate milk tastes better to you than a fancy recovery drink, drink the milk. If you hate dates, don't carry them. Consistency and compliance beat optimization every time.
Your ruck isn't just about the backpack, the distance, or the pace. It's about showing up fueled, staying strong through the session, and recovering ready for the next one. Nail your nutrition and everything else gets easier.
## When a Detailed Food Log Helps
You do not need an app to fuel a normal ruck. A food log becomes more useful when you are changing body weight, comparing intake with training, or trying to see patterns that memory misses. Cronometer puts calories, macros, and micronutrients in the same log. Its free version may be enough for basic tracking, so compare the current plans before paying.
## See Also
- [How Heavy Should Your Ruck Be?](/guides/how-heavy-should-your-ruck-be) - Balance load and nutrition strategy
- [The Benefits of Rucking](/guides/rucking-benefits) - What your effort is building
- [Zone 2 Rucking Guide](/weight-loss/zone-2-rucking-guide) - Fuel your steady-state sessions
- [Rucking Calorie Calculator](/weight-loss/rucking-calorie-calculator-guide) - Track your energy burn
- [Complete Beginner's Guide to Rucking](/pillars/beginners-guide-to-rucking) - Start here
- [Rucking Before and After Timeline](/weight-loss/rucking-results-what-to-expect) - What results to expect at 30, 60, and 90 days
## Frequently Asked Questions
────────────────────────────────────────────────────────────────────────────────
URL: https://ruckauthority.com/guides/rucking-research-2026
Title: Rucking Research 2026: Every New Study on Carrying Weight, Reviewed
Description: The 2026 peer-reviewed research on load carriage and weighted vests, read in full and translated for ruckers. Fifteen papers, what each found, what it means for you, and how strong the evidence is.
Published: 2026-09-18
## Why this page exists
## How we found these studies
We searched Europe PMC, which indexes MEDLINE, on September 18, 2026, for papers first published between January 1 and September 18, 2026, using five searches: "load carriage" with walking or marching, "weighted vest", rucking or "ruck march", backpack with walking and load and energy or injury, and "weighted walking" or "loaded walking". That returned about 120 papers. We kept the ones about humans walking or marching with a carried load or vest where the finding applies to recreational rucking, and dropped exoskeleton studies, rugby papers that matched "ruck", animal models, and rehabilitation work on gait disorders. The result is not a formal systematic review. It is a complete, dated reading of what came out this year, which is more than the topic has had before.
Each study gets an evidence note: what kind of study it was, how many people, and how far we think the result travels from the lab to your route.
## What a ruck does to your strength afterward
The largest new piece of evidence is not about whether rucking works. It is about what you can do after a ruck.
**What to do with it.** If a session has both lifting and rucking in it, lift first. Do not schedule a heavy deadlift or squat day on the afternoon of a long ruck, and if you are a woman rucking at 30% of body weight, expect your strength numbers to be down for the rest of that day. Our [rucking and lifting guide](/training/rucking-and-lifting) already puts strength before the ruck; this is the first direct evidence for the order.
## Does the pack matter?
## Bone and body fat
## Heart rate and the nervous system
## Stress fractures and shin load
## Your back
## Stairs, gait and falls
## Heat
## Testing your fitness under load
## Children and schoolbags
## What 2026 did not settle
- **How much load is safe.** The tibial-load review says the measurements are too inconsistent to prescribe from. Every weekly-load rule, including the 10% rule we use, remains a conservative convention rather than a measured threshold.
- **Whether vest results transfer to a pack.** Every bone and body-fat trial this year used a vest. The load path through hips and spine is similar; nobody has run the pack version.
- **Long-term outcomes.** The longest intervention in this set is one year (the INVEST trial reported last year). There is no multi-year trial of recreational rucking.
- **Women.** One 20-person trial found larger strength loss in women. That is a hypothesis to test, not a result to build a program on, and it is the only sex-specific load-carriage finding of the year.
We will update this page as papers publish. The date at the top is the date of the last full pass.
## Related reading
- [Rucking statistics 2026](/guides/rucking-statistics) for the market and participation numbers that sit alongside this research.
- [The Pandolf equation](/guides/pandolf-equation-rucking), the 1977 load-carriage model behind every rucking calorie calculator, including ours.
- [Rucking for bone density](/guides/rucking-for-bone-density) for the full bone-health evidence, including the trial that cut the other way.
- [Rucking and lifting](/training/rucking-and-lifting) for how to order strength work and rucks in a week.
## Frequently asked questions
────────────────────────────────────────────────────────────────────────────────
URL: https://ruckauthority.com/guides/rucking-statistics
Title: Rucking Statistics 2026: What the Available Data Shows
Description: A sourced review of rucking market signals, calorie estimates, participation trends, and weighted-vest research, with clear limits on what the data can prove.
Published: 2026-06-09 / Updated: 2026-08-31
Rucking went from a military training method to a mainstream fitness trend in about four years. But most of the coverage is vibes: "everyone's doing it," "the hottest trend of 2026." This page is the numbers behind the vibes.
We aggregated every credible data point we could find - retail sales data, event counts, platform trend reports, and peer-reviewed research - into one sourced reference. Every statistic links to where it came from. If you're writing about rucking, citing this page, or just want to know whether the trend is real, this is the dataset.
For the basics of what rucking actually is, start with [what is rucking?](/guides/what-is-rucking-weighted-walking-explained). For the trend analysis behind these numbers, see [why rucking is the fitness trend of 2026](/guides/rucking-fitness-trend-2026).
## Key rucking statistics (editor's picks)
The headline numbers, each covered in detail below:
1. **Weighted vest sales grew more than 50% year over year**, reaching $27 million in the 12 months ending May 2025, according to [Circana retail data reported by Axios](https://www.axios.com/2025/06/26/rucking-weighted-vest-women-fitness-trend).
2. **GORUCK reported a 40% increase in sales**, according to [GQ's reporting on the rucking boom](https://www.gq.com/story/what-is-rucking). That is company growth, not a national participation rate.
3. **At 3.5 mph on flat pavement, the Pandolf model estimates about 363 calories per hour unloaded for a 180-pound person**, about 394 with 20 pounds, and about 420 with 35 pounds.
4. **A 35-pound load raises that modeled example by roughly 16%**, but body weight, speed, grade, terrain, and individual physiology all change the result.
5. **A 12-mile march under 3 hours with a 35-pound load is a common military school and badge benchmark**, not a universal Army fitness standard. See the context in our [rucking pace chart](/training/rucking-pace-chart).
6. **Strava's 2025 report drew on more than 180 million users and survey responses from more than 30,000 people**, and described Gen Z interest in walking, weight training, and multi-sport activity. It did not publish a rucking participation count.
7. **ACSM's number-one fitness trend for 2026 was wearable technology.** Rucking was not a named top-ten category in the official ACSM list, so ACSM should not be cited as direct evidence of rucking growth.
## Growth and market statistics
**Weighted vest and ruck gear sales are the cleanest growth signal we have.** Circana's retail tracking, [reported by Axios in June 2025](https://www.axios.com/2025/06/26/rucking-weighted-vest-women-fitness-trend), showed weighted vest sales up more than 50% year over year to $27 million in the 12 months ending May 2025. That's the kind of growth rate normally reserved for product categories having a moment - because this one is.
**GORUCK's reported 40% sales jump** is one brand-level signal. [GQ reported the increase](https://www.gq.com/story/what-is-rucking), but the article does not provide a category-wide sales denominator or a national participant count. GORUCK maintains a substantial [current event calendar](https://www.goruck.com/pages/goruck-events); this page does not attach a total to it without a dated source that shows the count.
**Media attention is broad, but it is not participation data.** Rucking has appeared in general-interest and fitness coverage, which we break down in our [2026 trend analysis](/guides/rucking-fitness-trend-2026). The official [ACSM 2026 list](https://acsm.org/top-fitness-trends-2026/) names wearable technology as its top trend; it does not list rucking as a standalone top-ten category.
Search interest can be measured in Google Trends, but this page does not publish a trendline because we do not have a saved, reproducible export attached to the current revision. Media coverage alone cannot establish the slope.
## Who is rucking: demographic statistics
**Women are driving the current wave.** Axios's reporting on the Circana data specifically flagged women as the growth engine behind weighted vest sales, motivated heavily by bone-density and longevity messaging around menopause. (The science there is more nuanced than the marketing - see the research section below.)
**Gen Z activity patterns are adjacent to rucking, not a direct rucking count.** [Strava's 2025 Year in Sport report](https://press.strava.com/articles/strava-releases-12th-annual-year-in-sport-trend-report-2025), drawing on more than 180 million users and a survey of more than 30,000 people, highlighted Gen Z interest in walking, weight training, and multi-sport variety. Rucking combines walking and external load, but the report does not say how many Gen Z users ruck.
**The military pipeline still matters.** Rucking's standards, terminology, and a large share of its community come from military training culture. The Army's 12-mile ruck standard (35-lb dry load, sub-3 hours) remains the most commonly cited benchmark in the sport - our [pace chart](/training/rucking-pace-chart) breaks down what that pace actually feels like at every fitness level.
## Calorie burn statistics
These numbers come from the Pandolf load-carriage equation, the military research standard for predicting energy expenditure under load, which powers our [calorie calculator](/tools/calorie-calculator). Full math in our [Pandolf equation guide](/guides/pandolf-equation-rucking).
| Scenario (180-lb person, flat ground) | Calories per hour |
|---|---|
| Walking 3.5 mph, no load | ~363 |
| Rucking 3.5 mph, 20-lb pack | ~394 |
| Rucking 3.5 mph, 35-lb pack | ~420 |
| Rucking with hills, heavier loads, or faster pace | up to ~550 |
The takeaways the table hides:
- **Load alone is a modest multiplier at light weights.** A 20-lb pack adds surprisingly little burn on flat ground. The compounding happens when load combines with pace and grade.
- **There is no honest universal calories-per-hour range.** Body weight, load, speed, terrain, grade, and individual physiology all move the estimate. Use the calculator with your inputs.
- **Running often burns more per minute, but recovery is individual.** Do not assume rucking is automatically easier to recover from at a heavy load or high weekly volume. Full comparison in [rucking vs running for weight loss](/weight-loss/rucking-vs-running-weight-loss).
For what those numbers translate to in body change over 30, 60, and 90 days, see our [rucking before and after timeline](/weight-loss/rucking-results-what-to-expect).
## What the research actually shows
This is where we depart from most trend coverage. The honest read of the 2025 research is mixed, and we think that makes the case for rucking stronger, not weaker - the real benefits don't need inflation.
**Where the evidence is genuinely positive:**
- **Weight-regain pilot signal.** A small 2025 pilot followed 18 older adults with obesity and osteoarthritis. The nine-person vest group regained less weight than the nine-person diet-only group, but the between-group result was not statistically significant. The authors described it as a signal requiring larger studies, not proof of protection. [Read the PubMed abstract](https://pubmed.ncbi.nlm.nih.gov/40348853/).
- **Load progression and injury.** No universal 10% rule has been validated for recreational rucking. Change one variable at a time, monitor symptoms and gait, and use [how heavy should your ruck be](/guides/how-heavy-should-your-ruck-be) for a conservative planning process.
- **Mechanical loading and bone, properly framed.** Adding a vest or pack increases the force through your skeleton by roughly the percentage of body weight added - typically 5-10% for common loads. That's real but modest, which is why study results are mixed. Our deep dive: [weighted vests and bone density research](/guides/weighted-vests-bone-density-research).
## Community and event statistics
- **GORUCK maintains an active calendar of organized challenges and city events.** The calendar establishes breadth, but the current page does not publish the 1,000-per-year and 10,000-lifetime figures previously repeated here.
- **Ruck clubs provide a visible community layer.** Use our [ruck club finder](/clubs) to check actual listings, or read [how to start a ruck club](/guides/how-to-start-a-ruck-club) if your area does not have one. We do not label clubs the fastest-growing layer without a comparative dataset.
- **Memorial and charity rucks are the sport's biggest single-day gatherings**, with events like Boston's Tough Ruck drawing participants who [train for months](/guides/tough-ruck-boston-2026-how-to-train-for-a-26-2-mile-memorial) for a 26.2-mile carry.
## How we compiled these statistics
Ruck Authority aggregates published retail data, platform reports, peer-reviewed research, and primary-source event data. We don't run a gear lab and we don't invent numbers: every claim above traces to a named source, and calorie figures come from the published Pandolf model rather than wearable estimates. We update this page as new data is published - the date at the top reflects the last revision.
Spotted a newer number or a study we missed? Email us at hello@ruckauthority.com and we'll review it for the next update.
## Sources
- [GQ - What Is Rucking?](https://www.gq.com/story/what-is-rucking)
- [Axios - Rucking: Why women are wearing weighted vests (Circana data)](https://www.axios.com/2025/06/26/rucking-weighted-vest-women-fitness-trend)
- [GORUCK - Events](https://www.goruck.com/pages/goruck-events)
- [Strava - 12th Annual Year in Sport Trend Report (2025)](https://press.strava.com/articles/strava-releases-12th-annual-year-in-sport-trend-report-2025)
- [Wake Forest University - weighted vest research](https://news.wfu.edu/2025/10/20/were-putting-weighted-vests-to-the-test-heres-what-our-research-shows/)
- [NPR - Fact-checking the weighted vest trend](https://www.npr.org/2025/08/25/nx-s1-5503969/fitness-bone-muscle-trends-weighted-vest)
- [National Geographic - What is rucking?](https://www.nationalgeographic.com/science/article/what-is-rucking)
- Pandolf, K.B., Givoni, B., & Goldman, R.F. (1977). Predicted energy expenditure for walking with loads. *Journal of Applied Physiology*.
## Frequently asked questions
────────────────────────────────────────────────────────────────────────────────
URL: https://ruckauthority.com/guides/rucking-vs-hiking
Title: Rucking vs Hiking: What's the Real Difference?
Description: Rucking and hiking overlap massively, but they're different in intent. Hiking is destination-focused. Rucking is training-focused.
Published: 2026-03-28 / Updated: 2026-09-25
## The Short Answer
[Rucking](/glossary#rucking) and hiking are not the same activity, even though they look similar and often happen in the same places. The key difference is intent: hiking is about the destination - reaching a viewpoint, summit, or scenic location. Rucking is about the training stimulus - the load, distance, and effort are the workout itself.
**The practical reality:** Many hikers already carry weighted packs without calling it "rucking." Many ruckers would benefit from abandoning the numbers for a day and hiking a trail for the pure joy of it. They're not competitors - they're tools that solve different problems.
## Rucking vs Hiking: Side-by-Side
| Element | Rucking | Hiking |
| --- | --- | --- |
| **Primary goal** | Training stimulus, controlled workload | Destination, scenery, exploration |
| **Pack weight** | Intentional (20-50 lbs typically) | Variable (10-30 lbs, depends on terrain) |
| **Typical terrain** | Roads, paved trails, gentle hills | Varied (trails, elevation gain, technical) |
| **Distance** | 6-15 miles, planned by time/effort | Variable (2-20+ miles, by destination) |
| **Calorie burn** (180-lb person) | About 330-410 cal/hr with 30 lb on flat pavement, much more on hills | About 390 cal/hr unloaded on a rough trail at 3 mph, more with climbing |
| **Pace** | Steady, rhythmic (3-4 mph) | Flexible, often slower on technical sections |
| **Effort tracking** | Heart rate, pace, load intensity | Scenery, summit achievement, exploration |
| **Injury risk** | Low if load-managed properly | Low to moderate (terrain-dependent) |
The calorie figures above are general-population averages. For your specific body weight, load, pace, and terrain, the [rucking calorie calculator](/tools/calorie-calculator) runs the full Pandolf equation (with the Drain 2017 / Looney 2018 correction at modern speeds and loads) and produces a number tuned to your inputs - which is usually 15 to 30 percent higher than what a fitness watch's Walk or Hike mode estimates.
## Why They Overlap (And Why That's Confusing)
If you hike with a 30-lb backpack up a mountain, you've technically rucked. If you ruck on a trail instead of pavement, you've hiked. The activities exist on a spectrum.
The confusion happens because:
1. **Same physical movement** - Both involve walking with load over distance.
2. **Same environments** - Many ruckers choose trails, many hikers carry significant load.
3. **Similar gear** - A hiking backpack and a ruck look nearly identical.
But the training principle is different. A [rucker](/glossary#rucker) chooses a route based on load tolerance and training time. A hiker chooses a route based on what's worth seeing.
### When a Hiker is Actually Rucking
- Carrying a weighted backpack on purpose (not just because they have camping gear)
- Tracking pace, distance, or effort data
- Following a planned route specifically for the training stimulus
- Adding weight because they want to build strength
### When a Rucker is Actually Hiking
- Stopping frequently to enjoy views
- Taking a scenic detour even if it's longer
- Not tracking metrics or pace data
- Choosing the route for the experience, not the training stimulus
Most people do a mix. A weekend trail ruck might become a hike at the summit when you stop to enjoy the view. A leisurely nature hike becomes a ruck when you're tracking splits and pushing pace on a descent.
## Calorie Burn and Effort
On a road, the pack is what raises the burn. On a trail, the terrain does much of the same work, which is why an unloaded hike can match a flat ruck. Hiking also wins on sustainability because it's less relentless.
Hiking on technical terrain (with elevation gain, loose rock, switchbacks) raises the calorie burn without extra load - sometimes matching rucking numbers even unloaded. But this comes at the cost of joint stress from the terrain, not from load.
## The Training Case for Each
### When to Ruck
Rucking is better when you want:
- **Predictable, repeatable load stimulus** - Same pack weight, same pace, same metrics week to week. This builds durability and lets you track progress.
- **Consistency** - You can ruck the same route regardless of weather, season, or terrain conditions. No surprises.
- **Efficiency** - Higher calorie burn in less time because of the load. Useful for fat loss or strength gains on a schedule.
- **Injury prevention through control** - You choose the grade, distance, and load. Variables are yours to manipulate.
### When to Hike
Hiking is better when you want:
- **Variety and engagement** - New terrain, elevation change, technical movement. Your brain is engaged the whole time, not just monitoring pace.
- **Durability building** - Uneven ground, loose rock, elevation gain teach your body to move in non-linear ways. This transfers to real-world movement.
- **Enjoyment first** - Sometimes the goal is not the numbers. It's the view, the air, the sense of accomplishment at a summit.
- **Social activity** - Hiking is easier to do with groups. You can stop, talk, enjoy moments. Rucking is more demanding on sustained effort. Hiking also welcomes a four-legged partner - our sister site House Pet Authority's [guide to hiking with your dog](https://housepetauthority.com/new-owners/hiking-with-your-dog?utm_source=ruckauthority&utm_medium=cross-site) covers conditioning your dog for distance, trail etiquette, and what to pack for the pup.
## The Hybrid Approach
We recommend both.
If you're a rucker, add one trail hike per month into your programming. It breaks up the monotony, builds terrain durability, and reminds you why you got into movement in the first place.
If you're a hiker, try one intentional ruck per week. Start light (15-20 lbs) on a route you know well. You'll gain strength and see how the load changes your effort perception.
Many people who do both report that rucking makes hiking easier (the strength carries over), and hiking keeps rucking interesting (the variety keeps you engaged).
## The Case for "Why Not Both?"
The ideal scenario is a weekly routine that includes:
- **Two to three rucks** (structured load training, predictable stimulus)
- **One trail hike** (durability building, terrain skills, scenery reward)
- **[Active recovery](/glossary#active-recovery)** (unloaded walking or very easy trail, 2-3 miles)
This gives you load conditioning, terrain adaptability, mental engagement, and low injury risk. You're not over-specializing, and you're training the full spectrum of movement.
---
## Frequently asked questions
### Is rucking just hiking with a weighted pack?
Not exactly. Rucking has a training focus - the load, pace, and distance are chosen intentionally for a specific outcome. Hiking focuses on the destination or experience. You can hike with a weighted pack (many do), but that's only "rucking" if the load is intentional for training. The line is blurry, and most people land somewhere in the middle.
### Can I substitute hiking for rucking in my training plan?
Partially. Hiking builds similar aerobic capacity and lower body strength, especially on technical terrain. But unloaded hiking doesn't provide the same load stimulus as rucking, so you won't gain the same [bone density](/glossary#bone-density), muscle, or postural strength benefits. If you're doing a rucking program, occasionally swapping a ruck for a trail hike is fine. But don't replace your rucking volume with hiking and expect the same training outcomes.
### Is hiking or rucking better for fat loss?
On the same route, the ruck burns more because of the load; a hilly hike can burn as much as a flat ruck. Hiking is also sustainable longer (most people can hike 4-5 hours; fewer can ruck that long). For fat loss over months, consistency matters more than peak calorie burn. A sustainable routine of rucking twice a week plus hiking once weekly outperforms sporadic long rucks. Choose what you'll actually do.
### Can I learn to ruck on hiking trails?
Yes, absolutely. Many ruckers start on trails. Start with light load (15-20 lbs), slow pace (3-3.5 mph), and short distance (3-5 miles). This teaches you how load changes your movement on varied terrain. As you adapt, you can add weight, distance, or pace. Just progress slowly - [trail rucking](/guides/pavement-vs-trail-vs-treadmill) is harder on joints than pavement rucking because of the terrain variation. Investing in proper trail footwear is critical - shoes like the [Salomon XA Pro 3D V9 GTX](/shop) handle mixed terrain with load well, and our [best rucking shoes by terrain guide](/gear/best-rucking-shoes-by-terrain) covers the rest of the lineup.
### What's the difference in calorie burn between rucking and hiking the same trail?
A 180-lb person hiking an unloaded trail for 3-4 hours burns roughly 1,000-1,500 calories, more with a lot of climbing. The same person rucking a 30-lb pack on flat pavement for the same time burns roughly 1,000-1,600. Over the same hours the two land close together; terrain and climbing decide which one comes out ahead.
---
## Your next step
---
## Related reading
- [The complete beginner's guide to rucking](/pillars/beginners-guide-to-rucking) - start here if you're new to the activity
- [How heavy should your ruck be?](/guides/how-heavy-should-your-ruck-be) - personalized load recommendations by fitness level
- [Pavement vs trail vs treadmill](/guides/pavement-vs-trail-vs-treadmill) - how terrain choice changes your training stimulus
- [Rucking for weight loss](/pillars/rucking-for-weight-loss) - calorie data and programming if fat loss is your goal
- [Can rucking be your only exercise?](/weight-loss/can-rucking-be-your-only-exercise) - what rucking covers and what to add for a complete program
────────────────────────────────────────────────────────────────────────────────
URL: https://ruckauthority.com/guides/rucking-vs-walking
Title: Rucking vs Walking 2026: Calories, Strength & Bone Density (Calculator)
Description: Rucking vs walking, compared on calorie burn, joint impact, and bone density, with a progression framework for walkers moving into rucking.
Published: 2026-03-28 / Updated: 2026-09-25
## Rucking vs Walking: The Short Answer
[Rucking](/guides/what-is-rucking-weighted-walking-explained) is walking with a weighted backpack. A 180-lb person walking at 3.5 mph on flat pavement burns about 365 calories an hour. Add a 25-lb pack and that rises to about 400, roughly 11 percent more in the same hour. Take the same pack up a 5 percent grade and it is about 620. On the flat, the pack's bigger contribution is strength and bone loading; on hills, it is calories too.
**The real benefit:** Rucking adds strength and [bone density](/glossary#bone-density) gains to cardiovascular work. Walking gives you cardio. Rucking gives you cardio plus resistance training in a single, sustainable activity. If you already walk, rucking is the natural next step.
## What to do if you already walk
If you already walk 30 minutes a few times per week, you do not need a complicated training plan. Add a light load, protect your feet, and keep the pace conversational.
| Situation | Best next step |
| --- | --- |
| You walk for fitness but want more calorie burn | Use the [calorie calculator](/tools/calorie-calculator), then start with 10-20 lb. |
| Your knees or feet get cranky on pavement | Start with the [Longevity Athlete loadout](/loadouts/longevity-athlete) or compare [pavement rucking shoes](/gear/best-shoes-for-rucking-on-pavement). |
| You want one basic setup | Use the [Beginner Starter Kit](/loadouts/beginner-starter-kit): pack, plate, socks, and anti-chafe. |
| You are training for longer events | Start with the [ruck weight guide](/guides/how-heavy-should-your-ruck-be), then build toward the [GORUCK Event Day kit](/loadouts/goruck-event-day). |
The upgrade is intentionally boring: keep walking, add enough weight to matter, and make the setup comfortable enough that you repeat it.
## Calorie Burn Comparison
| Activity | Body Weight | Pace | Pack Weight | Calories per Hour | % Increase |
| --- | --- | --- | --- | --- | --- |
| Walking (unloaded, flat) | 180 lbs | 3.5 mph | None | about 365 | Baseline |
| Rucking (light, flat) | 180 lbs | 3.5 mph | 15 lbs | about 385 | +6% |
| Rucking (moderate, flat) | 180 lbs | 3.5 mph | 25 lbs | about 400 | +11% |
| Rucking (heavy, flat) | 180 lbs | 3.5 mph | 40 lbs | about 430 | +18% |
| Rucking (very heavy, flat) | 180 lbs | 3.5 mph | 60 lbs | about 470 | +29% |
| Rucking (moderate, 5% grade) | 180 lbs | 3.5 mph | 25 lbs | about 620 | +71% |
These numbers come from the Pandolf equation, the load-carriage model behind our calculator. On flat pavement each 10 lb adds roughly 15 to 20 calories an hour, rising slightly as the load gets heavier. Grade is the bigger lever: a 5 percent incline adds more than a 60-lb pack does on the flat. Pandolf tends to under-predict heavy loads, so treat the heavier rows as conservative.
The practical point: you don't walk faster or longer to get more out of the hour. Add a hill, or add load, or both. A flat, snug-fitting plate like the [Titan Fitness Cast Iron Ruck Weight](/shop) is the simplest way to add that load without the shifting and rattle of household objects.
## Why Walkers Should Ruck
### 1. Strength Without Learning New Movement
Walking is already ingrained. Your body knows how to do it. Rucking is not a new skill - it is walking with weight. There is no learning curve, no form breakdown, no "wait, where does my knee go?"
By contrast, switching to running means learning a new movement pattern. Runners have higher injury rates partly because they are doing something their body did not grow up doing. Rucking? Your nervous system already knows.
### 2. Bone Density Stimulus
Walking alone does not strongly stimulate bone density. Rucking does. The loaded stimulus from carrying 20 to 40 lbs triggers bone adaptation - your skeleton gets stronger.
This matters more as you age. Bone density peaks in your 30s and declines thereafter. Rucking at any age builds bone resilience. Walking does not.
### 3. Strength Maintenance
Walking is cardiovascular. Rucking is cardiovascular plus strength. The load creates continuous resistance against gravity - your [posterior chain](/glossary#posterior-chain), core, and legs are all working harder to stabilize and move the pack.
If you are over 40, maintaining muscle mass becomes critical. Walking preserves what you have. Rucking adds to it.
### 4. Time Efficiency
A 60-minute flat walk burns about 365 calories with little strength stimulus. A 60-minute ruck with 25 lbs burns about 400 on the same route and loads your legs, trunk and skeleton. Route it over a hill and the ruck climbs past 600. Same time, more work.
You are not training harder or longer. You are training smarter in the same time.
## How Rucking Is Different From Walking
| Element | Walking | Rucking |
| --- | --- | --- |
| Calorie burn (180 lb, 3.5 mph, flat) | About 365 cal/hr | About 400 cal/hr with 25 lb; about 620 up a 5% grade |
| Strength stimulus | Minimal | Significant |
| Bone density impact | Low | High |
| Joint impact | Very low | Low |
| Barrier to entry | None | Minimal (just add weight) |
| Time investment | Same | Same |
| Skill required | None (already have it) | None (already have it) |
## The Progression: From Walking to Rucking
If you walk regularly, you are ready to ruck. Here is a safe progression:
**Weeks 1 - 3: 15 lb pack**
Walk your normal distance at your normal pace. The weight should feel noticeable but not exhausting. You should be able to hold a conversation. Three times per week is a good baseline. A right-sized starter like the [RUSH 12 2.0](/shop) holds a 15 lb load close to your back without swallowing it in extra space.
**Weeks 4 - 6: 20 lb pack**
Keep the same distance and pace. You may feel it more in your calves and lower back - this is normal and means your stabilizer muscles are activating.
**Weeks 7+: 25 - 30 lb pack**
This is the "sweet spot" for most people - enough load to get strength and bone density benefits without excessive joint stress. Many people stay here indefinitely.
**Optional progression: 35+ lb packs**
Only go here if you have a specific goal (military prep, ultra-endurance, pure strength) and have been rucking consistently for three months or more.
## When Walking Is Actually Better
Walking is the better choice in specific situations:
- **Total beginners to exercise:** If you have not been active in years, start with unloaded walking for 2 - 4 weeks. Let your body adapt to the movement pattern first.
- **[Active recovery](/glossary#active-recovery) days:** Ruck your main days; walk unloaded on recovery days.
- **Joint recovery:** If you are coming back from injury, clear unloaded walking first with your PT before adding load.
- **Social walks:** If you walk with a partner or group who is not interested in rucking, walk unloaded and maintain the social connection.
## Will Rucking Make Walking Uncomfortable?
No. Many people ruck two to four times per week and walk unloaded on other days. Your body adapts quickly. Within two to three weeks, rucking becomes your new baseline - it will not feel strange.
Actually, many ruckers report that unloaded walking feels easier and lighter after getting used to load. Your proprioception improves, your posture strengthens, and walking becomes almost effortless by comparison.
## The Strength Gains Are Real
After six to eight weeks of consistent rucking, people report:
- Improved posture (the load trains upright alignment)
- Stronger calves and legs
- Better core stability
- Less back pain during daily activities
- Feeling "stronger" in everyday life
These are not dramatic strength gains, but they are cumulative and sustainable. Walking does not deliver any of these.
---
## Frequently asked questions
### Rucking vs walking: which is better?
For most people rucking is the better use of the same hour, because it adds load without adding impact. Walking stays the right call if you are returning from injury, carrying a lot of extra body weight, or building the habit itself. The honest answer is that rucking is walking with a progression dial attached, so it is less a competitor to walking than the next setting on it.
### How heavy should my first pack be?
Start at 15 lbs. This feels light and might even seem too easy - that is intentional. Your tendons, ligaments, and connective tissues adapt slower than muscles. Starting light prevents injury and builds a sustainable base for progression. After three weeks at 15 lbs, move to 20. After three more weeks, you can go to 25 or higher.
### Can I ruck every day?
Most people can ruck four to five times per week indefinitely. Some people ruck six days a week without issue. The limiting factor is usually boredom, not injury. We recommend three to four times per week as an optimal baseline that leaves room for unloaded walking, recovery, and other activities.
### Is rucking better than walking for weight loss?
Rucking burns more calories than walking at the same pace and distance, so yes - it is more efficient for fat loss. On flat pavement the difference is modest: about 400 calories an hour with 25 lb against 365 unloaded, for a 180-lb person at 3.5 mph. On hilly routes it grows quickly, to about 620 at a 5% grade. However, the best exercise for weight loss is the one you will actually do consistently. If rucking appeals to you more than walking, the adherence advantage makes rucking better for you personally.
### Will rucking hurt my knees?
Rucking produces far lower impact than running because you are walking, not bouncing. It produces roughly the same impact as unloaded walking, just with external load. For most people with healthy knees, rucking is safer than running. That said, if you have a diagnosed knee condition, consult your physical therapist before adding load. Start light and progress slowly. For more detail, see our [rucking knee pain guide](/injuries/rucking-knee-pain).
### What pack should I use?
Any backpack designed to carry weight will work. Purpose-built packs like the [GORUCK Rucker 5.0](/gear/goruck-rucker-vs-gr1) hold plates high and close to your back if you plan to ruck regularly. Traditional hiking packs work fine too. Avoid messenger bags and other single-strap setups that load one side. We have a detailed [gear guide here](/gear/best-rucking-gear-2026).
### Can I walk and ruck on the same day?
You can, but mixing them is unnecessary. Your 60-minute ruck gives you all the cardio and strength work you need. If you do both in one day, walk unloaded in the morning and ruck in the evening with at least six hours between sessions. Most people find a simple split (ruck on Monday / Wednesday / Friday, walk or rest on other days) works best.
---
## Your next step
---
## Related reading
- [The complete beginner's guide to rucking](/pillars/beginners-guide-to-rucking) - everything you need to start, from form to gear selection
- [How heavy should your ruck be?](/guides/how-heavy-should-your-ruck-be) - personalized weight recommendations by fitness level and goal
- [Rucking for weight loss](/pillars/rucking-for-weight-loss) - the science of loaded cardio and a 12-week fat loss program
- [Best rucking gear for 2026](/gear/best-rucking-gear-2026) - complete equipment guide with product comparisons
- [Zone 2 rucking guide](/weight-loss/zone-2-rucking-guide) - how to optimize rucking for aerobic conditioning and fat loss
- [Rucking knee pain guide](/injuries/rucking-knee-pain) - what causes it and how to prevent it
- Sticking with plain walking? Our sister site Kit Authority covers [the best walking shoes](https://kitauthority.com/fitness/best-walking-shoes?utm_source=ruckauthority&utm_medium=crosslink) and [fitness trackers for walking](https://kitauthority.com/fitness/best-fitness-trackers-for-walking?utm_source=ruckauthority&utm_medium=crosslink)
────────────────────────────────────────────────────────────────────────────────
URL: https://ruckauthority.com/guides/rucking-with-your-dog
Title: Rucking with Your Dog: A Beginner's Guide to Load-Carrying Adventures
Description: Everything you need to safely ruck with your dog, from breed compatibility to heat management and training fundamentals.
Published: 2026-03-28 / Updated: 2026-07-18
## The Short Answer
Yes, you can ruck with your dog - but not every dog, not in every condition, and not without training. The best [rucking](/glossary#rucking) partners are medium to large breeds with athletic builds, moderate to cool climates, and owners willing to start small and progress deliberately.
Your dog needs to learn heel position, match your pace, and handle the mental demands of a longer walk with distractions. You need to understand canine heat tolerance (spoiler: dogs don't sweat), watch for overheating signs, and know when to leave your dog home. You also want sure footing of your own on the mixed trail and grass where your dog will pull and dart - a grippy trail shoe like the [Salomon XA Pro 3D V9 GTX](/shop) keeps you stable when they change direction.
Done right, rucking with your dog builds bond, improves the dog's fitness, and gives you a training partner who's always up for the next adventure.
## Which Dogs Are Great Rucking Partners (and Which Aren't)
Not every breed is suited for loaded walking. Genetics matter more than training here.
### Breed Suitability Guide
| Size Class | Best Breeds | Distance Rec. | Notes |
| --- | --- | --- | --- |
| Small (under 20 lbs) | Not recommended | N/A | Prone to heat stress, difficulty matching pace, can't regulate temperature as effectively |
| Medium (20 - 50 lbs) | Beagles, Brittany Spaniels, Border Collies, Australian Shepherds | 2 - 5 miles | Good endurance, athletic builds, tolerate varied terrain |
| Large (50 - 90 lbs) | Labrador Retrievers, Golden Retrievers, German Shepherds, Weimaraners, Rhodesian Ridgebacks | 3 - 8 miles | Built for distance, excellent pace matching, high drive |
| Giant (90+ lbs) | Great Danes, Bernese Mountain Dogs, Anatolian Shepherds | 2 - 6 miles | Impressive endurance, but watch for joint stress and heat sensitivity in hot weather |
**Why breeds matter:**
Brachycephalic dogs (flat-faced: Bulldogs, Pugs, French Bulldogs) should not ruck. They cannot regulate temperature through panting effectively and overheat quickly.
Toy breeds and small dogs (Chihuahuas, Yorkies, Maltese) lack the frame and metabolic capacity for weighted walks over 2 miles.
Herding dogs (Border Collies, Australian Shepherds) and retrievers are natural rucking partners. They were bred for all-day work and actually get bored without it.
## Distance and Pace Guidelines by Dog Size
**Start with half your target distance.** If you want to ruck 5 miles with your dog, begin at 2.5 miles and add 0.5 miles every one to two weeks.
### Medium Dogs (20 - 50 lbs)
- **Starting point:** 1 to 2 miles at 3.5 mph (easy pace)
- **Build to:** 3 to 5 miles at 3.5 to 4 mph
- **Rest days:** Two to three days between loaded walks
- **Summer cap:** 2 miles maximum on days above 75°F
### Large Dogs (50 - 90 lbs)
- **Starting point:** 2 to 3 miles at 3.5 mph (easy pace)
- **Build to:** 5 to 8 miles at 3.5 to 4 mph
- **Rest days:** One to two days between loaded walks
- **Summer cap:** 4 miles maximum on days above 75°F
### Giant Dogs (90+ lbs)
- **Starting point:** 1.5 to 2 miles at 3 mph (very easy pace)
- **Build to:** 4 to 6 miles at 3 to 3.5 mph
- **Rest days:** Two to three days between loaded walks
- **Note:** Larger dogs are heavier on their joints. Avoid back-to-back loaded walks.
## Hydration - You AND Your Dog
Your dog cannot carry water or access hydration mid-walk the way you can. You carry that responsibility.
### Hydration Protocol
**Before the walk:**
- Give your dog a light drink (not a full bowl) 15 minutes before departure. Too much water immediately before exercise causes gastrointestinal upset.
- Drink your normal pre-ruck amount.
**During the walk (3+ miles):**
- Bring at least 16 to 24 oz of water for your dog in a collapsible bowl or hydration pack with a dog-specific attachment. A 3L bladder like the [Source WXP](/gear/best-hydration-packs-for-rucking) gives you enough capacity for both of you on summer rucks.
- Stop every mile to two miles and let your dog drink. Watch for excessive panting as a sign of dehydration.
- Drink more than usual - your dog's presence increases mental load and you'll sweat more.
**After the walk:**
- Give your dog fresh water within 15 minutes of finishing.
- Wait 30 minutes before offering a meal (rapid eating after exercise can cause bloat).
- Continue drinking for the next two hours.
## Heat and Humidity - Dogs Cannot Sweat
This is critical. Dogs lack sweat glands and regulate temperature almost entirely through panting. Humidity prevents evaporative cooling, which is why a 78°F humid day is more dangerous than an 85°F dry day.
### Heat Stress Warning Signs
Watch for these during and immediately after rucks:
- **Excessive panting** - Faster and heavier than the normal panting from exertion
- **Lagging behind** - Your dog slows or falls 3 to 5 steps behind when usually they match pace
- **Reluctance to continue** - Your dog sits, stops, or ignores forward cues
- **Drooling more than usual** - Thick, ropy saliva (different from normal panting drool)
- **Stumbling or coordination loss** - Your dog's hind legs feel unsteady
- **Bright red gums or tongue** - Sign of heat damage to mucous membranes
- **Glazed expression** - Unfocused eyes, lack of engagement
**If you see any of these:**
1. Stop immediately and find shade.
2. Offer water (small amounts, don't let them gulp).
3. Pour cool (not cold) water on their head, neck, and chest.
4. Do not attempt to cool them rapidly - sudden temperature drops cause shock.
5. Head home or to a vet if the signs don't improve within 5 to 10 minutes.
### Temperature-Based Rucking Calendar
| Temperature | Humidity | Recommendation |
| --- | --- | --- |
| Below 65°F | Any | Ideal rucking conditions |
| 65 - 75°F | Low to moderate | Good - watch for panting |
| 75 - 80°F | Low | Reduced distance - medium dogs max 2 miles, large dogs max 3 miles |
| 75 - 80°F | High | Skip the ruck. Go for an easy, unloaded walk instead |
| Above 80°F | Any | Do not ruck with your dog. Period |
Brachycephalic breeds (flat-faced) should not ruck above 70°F.
## Leash Setup and Hands-Free Options
Rucking with a dog on a traditional hand-held leash is awkward and unsafe. You need both hands for balance, stability, and pack adjustment. Hands-free systems let you keep your dog close without using your hands.
### Hands-Free Leash Systems
**Waist-attached leashes (best for rucking):**
- Ruffwear Front Range Harness with the Ruffwear Direct Attach Harness System
- [GORUCK](/glossary#goruck) Gear Harness (designed specifically for loaded walks)
- EzyDog Zero Shock harness with bungee
These attach to your belt or ruck [hip belt](/glossary#hip-belt), keeping your hands completely free. The leash stays taut but not restrictive. A pack with a real hip belt to clip into makes this far easier - the [GORUCK Basic Rucker](/shop) is a solid starting point if you don't already have one. For the dog's end of the system, our sister site House Pet Authority runs a source-cited [guide to the best dog harnesses](https://housepetauthority.com/gear/best-dog-harnesses?utm_source=ruckauthority&utm_medium=cross-site), including the front-clip and Y-front designs that hold up to a taut waist leash.
**Chest-harness hybrids:**
- Not ideal for rucking because they pull your dog at an angle and affect their gait
**Traditional leash (worst option):**
- Requires one hand
- Shifts balance
- Reduces stability on technical terrain
### Leash Length
Aim for 4 to 6 feet of slack. This gives your dog room to sniff and adjust pace without pulling ahead or falling behind. Too short (under 3 feet) and your dog feels constrained. Too long (over 8 feet) and they can wander into traffic, terrain hazards, or other dogs.
## Training Your Dog to Ruck
A dog that hasn't been trained to heel or match pace will turn a smooth ruck into a constant struggle. Invest two to three weeks in foundation training before attempting loaded walks over 2 miles.
### The Heel Protocol (3 - 4 weeks)
**Week 1 - 2: Stationary heel**
- On flat ground, stand with treats in your left hand.
- Say "heel" and hold treats at your left hip.
- Let your dog walk into position at your left side.
- Take two to three steps, reward, and stop.
- Repeat 10 times, twice per day.
- Goal: Your dog holds position for 30 seconds while standing still.
**Week 3: Moving heel**
- Repeat the above but walk forward in a straight line.
- Your dog should stay at your left hip even as you move.
- Reward every 15 to 20 steps.
- Gradually extend to 50 to 100 steps without stopping.
- Goal: Your dog heels for three to five minutes straight.
**Week 4: Pace consistency**
- During heel walks, vary your speed (slow to moderate).
- Reward your dog for matching each change.
- Your dog learns that they mirror your pace, not vice versa.
### Pace Matching Drills
Once your dog heels reliably, train them to match your specific [rucking pace](/training/rucking-pace-chart) (usually 3.5 mph).
- Walk unloaded at your target pace for 10 to 15 minutes.
- Reward frequently when your dog stays even with you.
- If they pull ahead, slow to a stop and wait (don't drag them back).
- Restart and reward correct positioning.
- Repeat every three to four days for two weeks.
By week six, your dog should understand: "when we ruck, we walk at your pace, not mine."
## Paw and Joint Protection
Before your first loaded ruck, inspect your dog's paws and joints.
### Paw Care
- **Trim nails short** - Long nails cause irregular gait and put stress on joints.
- **Check paw pads** - Soft, tender pads blister easily on rough terrain. Condition them gradually (short walks on varied surfaces).
- **Avoid hot pavement** - On warm days, pavement heats to 120°F +. Stick to trails, grass, or dirt.
- **Watch for limping** - If your dog favors a paw or limps for more than two minutes after a walk, scale back distance for the next week.
### Joint Health
Large and giant breeds are prone to hip dysplasia and elbow dysplasia. Load-bearing exercise can exacerbate pre-existing conditions.
- Ask your vet about baseline joint health before starting loaded walks.
- Supplement with glucosamine and chondroitin if your vet recommends.
- Avoid repetitive jumping or sharp directional changes on rocky terrain.
## Safety Checklist Before Your First Loaded Ruck
- [ ] Vet clearance - Your dog is healthy enough to ruck
- [ ] Breed assessment - Your dog's breed is suited for distance and climate
- [ ] Baseline fitness - Your dog walks unloaded 2 to 3 miles without fatigue
- [ ] Heel training - Your dog heels reliably for 5+ minutes
- [ ] Hands-free leash tested - On an unloaded walk on flat ground
- [ ] Hydration kit packed - Collapsible bowl and at least 16 oz of water
- [ ] No heat risk - Temperature is below 75°F
- [ ] Route checked - Terrain is dog-safe (no sharp rocks, broken glass, or steep drop-offs)
---
## Frequently Asked Questions
### What if my dog isn't interested in rucking or gets tired quickly?
Not every dog enjoys rucking. Some dogs are homebodies and prefer short, familiar walks. If your dog lags behind, sits frequently, or avoids heel position, they're telling you they're not interested or not ready.
Respect that. Rucking should be enjoyable for both of you. Continue with unloaded walks and low-pressure exercise instead. A reluctant dog under load is unsafe and will resent the activity.
If your dog is young (under one year), is overweight, or has low baseline fitness, build their aerobic capacity with unloaded walks first. A six-month training cycle is not unusual.
### Can I carry my dog in my ruck if they get tired?
Not recommended. A 40 to 50 lb dog adds significant load and throws off your balance, especially on technical terrain. If your dog is getting tired, shorten future rucks instead.
If you need to carry a small dog (under 15 lbs) as a backup plan, use a dog carrier backpack like the Kurgo Backpack Carrier, not your main ruck. Your ruck is optimized for human load distribution.
### How often should I ruck with my dog?
Two to three times per week is ideal. This gives your dog adequate recovery time (especially if they're large and at risk for joint stress) and prevents rucking from becoming monotonous.
On non-rucking days, offer easy unloaded walks (30 to 45 minutes at a casual pace) for [active recovery](/glossary#active-recovery).
### Can I ruck with a puppy or senior dog?
**Puppies (under 12 months):** Wait. Their growth plates aren't closed, and load-bearing exercise on developing joints causes permanent damage. Start rucking after their one-year growth milestone, and only after vet clearance.
**Senior dogs (over 8 years):** Possible, but require shorter distances, slower paces, and more frequent breaks. Start with one-mile unloaded walks and add load gradually only if the vet approves. Many seniors do better with consistent, easy walking than loaded exercise.
### My dog pulls constantly on the leash. Can we still ruck?
Not yet. A dog that pulls is not ready for loaded walks. Leash pulling on loaded walks can injure both of you - your shoulder, their neck, your balance.
Spend two to four weeks on loose-leash training and heel work before attempting loaded distance. Reward pulling prevention aggressively. If pulling doesn't improve with training, consider a front-clip harness (like the Ruffwear Front Range) that redirects pulling force sideways rather than forward. Our sister site House Pet Authority has a full training walkthrough on [how to stop a dog pulling on the leash](https://housepetauthority.com/behavior/how-to-stop-a-dog-pulling-on-the-leash?utm_source=ruckauthority&utm_medium=cross-site), built on the same reward-based protocol.
---
## Your Next Step
---
## Related Reading
- [The complete beginner's guide to rucking](/guides/first-30-days-of-rucking) - A three-week progression for humans (apply the same principles to your dog's training)
- [How heavy should your ruck be?](/guides/how-heavy-should-your-ruck-be) - Once you and your dog are trained, determine the right load for your body
- [Best rucking gear for beginners](/gear/best-rucking-gear-2026) - Hands-free leash systems and hydration packs built for rucking
- [Rucking for weight loss](/guides/pavement-vs-trail-vs-treadmill) - Your dog's presence adds mental and emotional load - recovery matters
────────────────────────────────────────────────────────────────────────────────
URL: https://ruckauthority.com/guides/starbucks-weighted-vest-rucking
Title: Starbucks Just Launched a Weighted Vest. Here's What Ruckers Should Actually Buy.
Description: Starbucks released a low-priced limited-edition weighted vest tied to its new RTD Coffee & Protein and a Strava challenge. A rucker's read on what's real, what's marketing, and which vests actually hold up.
Published: 2026-05-22 / Updated: 2026-08-26
On May 21, 2026, Starbucks did something the rucking community has been quietly waiting for: it shipped a weighted vest. Not a tumbler. Not a tote bag. A 5-pound, fashion-forward vest priced in the low twenties, with a pocket sized to hold the brand's new ready-to-drink Coffee & Protein bottle - launched alongside a [month-long Strava challenge](https://strava.com/) that effectively turns morning walks into a brand activation. The launch was covered in mainstream press the same afternoon - [USA Today's writeup](https://www.usatoday.com/story/life/health-wellness/2026/05/21/starbucks-selling-five-pound-weighted-vests/90195979007/) hit at 1:58 p.m. ET, hours before the 3 p.m. ET drop.
If you ruck, you've watched weighted walking go from a military-coded fitness habit to a TikTok lifestyle category over the last 18 months. Starbucks dropping a vest is the unmistakable signal that the mainstream catch-up is here. So the question isn't whether weighted vests are having a moment. They are. The question is: what is the [Starbucks vest](https://about.starbucks.com/stories/2026/starbucks-rtd-coffee-protein-uplevels-morning-routines-with-new-weighted-vest-and-strava-challenge/) actually for, who should buy one, and if you want something that lasts past the summer marketing window - what should you reach for instead?
## What Starbucks Just Launched
The launch has three pieces, and they're tightly coupled:
- **RTD Starbucks Coffee & Protein** - a new ready-to-drink line developed through the [North American Coffee Partnership](https://www.pepsico.com/newsroom/press-releases/2026/starbucks-protein) (the joint venture between Starbucks and PepsiCo). 22 grams of complete protein, 5 grams of prebiotic fiber, 5 vitamins and minerals, 2 grams of sugar. Two flavors: Classic Caffe and Caffe Mocha. Available in grocery and convenience stores nationwide.
- **The Starbucks Weighted Vest** - a limited-edition 5-pound vest designed in partnership with **Kahlana Barfield Brown**, founder of KBB by Kahlana. Beige with green trim. Customizable weights. A dedicated mesh pocket sized to hold the RTD bottle. Its low-twenties launch price nodded to the 22 grams of protein per bottle. It went on sale at [KBBweightedvest.com](https://kbbweightedvest.com/) on May 21 at 12pm PT / 3pm ET, while supplies lasted.
- **The Coffee & Protein Level Up Strava Challenge** - May 21 through June 18. Walk or run 22 minutes a day for 10 or more days. Participants who opt in via the [Strava app](https://strava.com/) and complete the challenge are entered to win a limited-edition Starbucks Weighted Vest. No purchase necessary. 18+, U.S. only. Official rules at starbucksproteinlevelup.com.
The framing from Starbucks itself was clear about who this is for. Brian Smith, senior director of brand marketing at the North American Coffee Partnership, said in the launch: *"People are looking to simplify their morning routines, not complicate them. This partnership is about making the most of familiar morning habits."* Kahlana Barfield Brown was even more direct: *"Weighted vests are having a major moment, but most weren't designed to be both functional and fashionable."*
That last line is the whole tell. This is a fashion vest first, a training tool second.
## Why Starbucks Cares About Weighted Vests Now
Three numbers explain why a coffee brand decided to ship a piece of fitness equipment.
The first comes from Starbucks's own cited research - the [Time magazine writeup](https://time.com/7314181/weighted-vest-benefits-workout/) the press release links as the social-proof footnote. Weighted vests went from a niche CrossFit accessory to a category that Time was running explainers on. Search volume for "weighted vest" roughly tripled across 2024-2025. Sales [grew over 50%](https://www.axios.com/2025/06/26/rucking-weighted-vest-women-fitness-trend) to 27 million dollars in the twelve months ending May 2025, with the market on track to clear 300 million dollars by 2031.
The second is demographic. The fastest-growing rucking and weighted-walking cohort is women over 35 - the exact same cohort that overlaps with Starbucks's loyalty base and with mainstream beverage marketing. When Kahlana Barfield Brown - a fashion and lifestyle voice, not a fitness one - is the design partner, that's a signal about the audience. [USA Today's health-and-wellness desk](https://www.usatoday.com/story/life/health-wellness/2026/05/21/starbucks-selling-five-pound-weighted-vests/90195979007/) ran the launch as a health story, not a coffee story - more evidence the framing is fitness-first, beverage-second.
The third is the protein convergence. The "ready-to-drink protein coffee" category was the fastest-growing RTD beverage segment of 2025. Starbucks didn't invent it - they're catching up to brands like Super Coffee and Slate. Pairing the launch with a weighted vest builds a narrative bridge to fitness without forcing Starbucks to position itself as a fitness brand. The vest is a Trojan horse for the bottle.
## How to Join the Strava Challenge
This is the part of the launch most readers will actually want to act on - because it's free and the prize is the vest itself.
The challenge runs from **May 21 through June 18, 2026**. Mechanics:
1. Open the [Strava app](https://strava.com/) (free account works fine - the challenge doesn't require Strava Premium).
2. Find the **Starbucks Coffee & Protein Level Up Challenge** in the Challenges tab.
3. Tap **Join Challenge** to opt in.
4. Walk or run **22 minutes a day** (any pace, any route - Strava only needs the activity recorded). Hit that for **10 days or more** within the window.
5. Completing the challenge enters you for a chance to win the limited-edition Starbucks Weighted Vest. Full rules at starbucksproteinlevelup.com. Open to U.S. residents, 18+, no purchase necessary.
If you're brand new to weighted walking and you're using the challenge as your reason to start: don't wear weight for the full 22 minutes on day one. Build into it. Two weeks of unweighted brisk walking establishes the cardiovascular base. Then add 10-15 pounds for short sections and progress from there. The [beginner's guide to rucking](/pillars/beginners-guide-to-rucking) has the longer version of this progression.
## What the Limited-Edition Vest Gets You (And Where It Falls Short)
Credit where it's due: despite its low-twenties launch price, this is a real piece of equipment, not a costume. The vest carries 5 pounds of customizable resistance, the silhouette is genuinely well-designed (a fashion lens applied to a category that mostly looks like surplus tactical gear), and the bottle pocket is a clever bit of product design. If you've been put off weighted vests because every option on Amazon looks like a SWAT trainer's hand-me-down, this is the most aesthetically considered vest at any price point.
Five pounds is at the low end of useful resistance. The American College of Sports Medicine's general guidance and common rucking recommendations put **10% of body weight as the entry-level weight for adaptation**. For a 150-pound adult, that is 15 pounds. The Starbucks vest tops out at 5 pounds, so a consistent trainee may outgrow it within a month.
The other thing to know: this is the [Hyperwear Hyper Vest PRO](/shop) school of design - a low-profile, fashion-aware, capped-weight vest. That category has its uses (morning walks, casual aesthetic, comfortable for extended wear) and its limits (can't progress past beginner-intermediate loads). It is not, and is not trying to be, the kind of vest you'd take to a [GORUCK event](/guides/tough-ruck-boston-2026-how-to-train-for-a-26-2-mile-memorial) or a structured ruck program.
If the question is *"will the Starbucks vest get me started?"* - yes, genuinely. If the question is *"is this the only vest I'll need?"* - no. Plan accordingly.
## What to Buy If You're Serious
Three vests we'd recommend across price tiers, ordered by where most readers should actually start.
### Budget pick - inexpensive, adjustable training weight
The [Cap Barbell Adjustable Weighted Vest](/shop) is the answer to nearly every "first vest" question in our inbox. Sand-pocket adjustable design, 20-150 pound range depending on model, and a low torso fit rather than the chest-high fit of a plate carrier. It is usually a budget option, but check the current listing before buying. The build is budget-tier and the silhouette is utilitarian - this is not the vest you wear for the aesthetic - but the value-to-load ratio is unmatched. If you're new and you only want to spend money once, this is it.
### Best for daily walks - the mobility-first pick
The Mir Short Weighted Vest is the closest spiritual cousin to what Starbucks shipped: a low-profile, short-cut, compact design that prioritizes range of motion. The trade-off is a narrower weight range than the Cap Barbell, but for the morning-walk-and-coffee use case the Starbucks campaign is actually targeting, this is a more honest piece of equipment. It sits comfortably for 45+ minutes of walking and doesn't restrict arm swing; check the current listing for price.
### Premium pick - the fashion-aware long-term choice
The Hyperwear Hyper Vest PRO is the closest thing to the Starbucks vest's design language at fitness-industry build quality. Compression fabric, low-profile silhouette, well-engineered weight distribution, comfortable enough for extended wear. The catch is the same as the Starbucks vest's - it caps at 30 pounds (Large), which means strong intermediate ruckers will hit the ceiling. But for the audience that wanted the Starbucks vest for the *look* as much as the function and wants to invest in something that lasts more than a season, this is the natural upgrade.
## Vest vs Ruck: A Quick Note for the Strava Crowd
Weighted vests and rucksacks aren't interchangeable - they're complementary tools, and the rucking community treats them differently for good reasons.
A vest distributes load across the torso. A ruck concentrates it high on the back. The vest is easier to put on and easier to forget you're wearing; the ruck loads the posterior chain more aggressively and trains the postural patterns that carry over to actual load-bearing work (kids, backpacks, sandbags, careers in jobs that require carrying things). For a 22-minute Strava walk, a vest is fine. For building genuine load-carrying capacity, a ruck is the more transferable tool.
And if the vest lane is where you're staying - no pack, just loaded walks - our sister site Kit Authority's [weighted vest walking for beginners](https://kitauthority.com/fitness/weighted-vest-walking-for-beginners?utm_source=ruckauthority&utm_medium=crosslink) guide is built for exactly that reader.
If you've gotten through the Strava challenge and the vest has hooked you, the natural next step is a real rucksack with adjustable plate weights. The current [GORUCK Rucker 5.0](/shop) is the community default for a reason - true plate-bearer construction, lifetime warranty, and a weight progression that scales with your training.
## What This Means for Rucking
Whether or not you buy the Starbucks vest is almost beside the point. The signal that matters is this: a 94-billion-dollar coffee company decided that weighted walking was a credible enough cultural moment to attach to a beverage launch. That doesn't happen until a trend has crossed from subculture into something a brand-marketing team can defend in a quarterly review.
What follows is predictable. More mainstream weighted-vest releases. More gym-chain weighted-walking classes (Equinox already added one). More research coverage in publications that previously ignored the category. And - the thing the rucking community should pay attention to - more buyers showing up to forums, subreddits, and gear sites with the same beginner questions we've been answering for years.
The Starbucks vest isn't the destination. It's the on-ramp. The rucking community gets to decide whether we treat it as a gateway worth welcoming - or a marketing stunt worth dismissing. Our read: welcome it. The people who pick up a 5-pound vest because their morning latte came with one are the same people who, six months from now, are asking [what plate to buy](/gear/ruck-plate-comparison) and [how heavy to load](/guides/how-heavy-should-your-ruck-be) and whether [walking 30 minutes at lunch counts](/guides/ruck-commuting-guide). They become ruckers. We just have to be ready when they show up.
## Frequently asked questions
### Where can I buy the Starbucks weighted vest?
The limited-edition Starbucks Weighted Vest was sold at [KBBweightedvest.com](https://kbbweightedvest.com/), not in Starbucks stores. It went on sale May 21, 2026 at 12pm PT / 3pm ET and was offered while supplies lasted. Its low-twenties launch price nodded to the 22 grams of complete protein in each bottle of RTD Starbucks Coffee & Protein.
### Is the Starbucks vest a real weighted vest or just merch?
It's a real weighted vest. The press release confirms 5 pounds of customizable weight, a bespoke silhouette designed by Kahlana Barfield Brown, and standard weighted-vest construction. The limitation is the capped 5-pound load - that's enough for entry-level adaptation but well below the 10-15+ pound range most ruckers and lifters progress to within a few weeks of consistent use.
### How do I join the Starbucks Strava challenge?
Open the Strava app, navigate to the Challenges tab, and search for the Starbucks Coffee & Protein Level Up Challenge. Tap Join Challenge to opt in. Then walk or run for 22 minutes a day for 10 or more days between May 21 and June 18, 2026. Completing the challenge enters you for a chance to win the limited-edition Starbucks Weighted Vest. No purchase necessary. Open to U.S. residents 18 and older. Full rules at starbucksproteinlevelup.com.
### Is 5 pounds enough weight to see results?
For complete beginners, yes - a 5-pound vest worn during regular walking will measurably increase heart rate, improve postural endurance, and contribute to caloric expenditure. The general guidance from sports medicine and the rucking community is that meaningful strength and bone-loading adaptation kicks in around 10 percent of body weight. For a 150-pound adult, that's 15 pounds. The Starbucks vest will get you started; it won't take you the whole way.
### Should I buy the Starbucks vest or a real ruck?
If the question is which one to buy first, the honest answer is: it depends on what you actually plan to do. If you want a low-friction way to add load to existing morning walks and the aesthetic matters to you, the Starbucks vest was a reasonable low-cost on-ramp while it was available. If you want a tool you'll still be using in two years, buy a [proper rucksack](/gear/best-rucking-backpacks) and adjustable plates - the cost is higher upfront but the progression range is open-ended and the build lasts.
### Does the Starbucks vest fit men?
The vest is designed unisex but the silhouette is cut closer to typical women's athletic apparel proportions. Sizing details have not been published in full on the KBB site at launch. Men with broader chests or shoulders may find it tight - check the sizing chart on [KBBweightedvest.com](https://kbbweightedvest.com/) before ordering. Returns on limited-edition launches are often restricted.
### Can I use the Starbucks vest for rucking events?
Not always. Check the rules for the specific event: many organized rucking events call for a rucksack and a defined load rather than a weighted vest. For that format, use a purpose-built pack such as the [GORUCK Rucker 5.0](/gear/goruck-rucker-vs-gr1) or another pack that securely carries the required weight.
────────────────────────────────────────────────────────────────────────────────
URL: https://ruckauthority.com/guides/the-science-behind-why-longevity-doctors-call-rucking-the
Title: The Science Behind Why Longevity Doctors Call Rucking the Most Efficient Anti-Aging Exercise
Description: How rucking supports longevity markers like VO2 max, bone density, zone 2 cardio, grip strength, and metabolic health in one simple protocol.
Published: 2026-05-01 / Updated: 2026-08-26
Longevity medicine doctors like Peter Attia have a problem with how most people exercise. They're not optimizing for the metrics that actually predict how long - and how well - you'll live.
According to [Attia's recent appearance on 60 Minutes](https://www.cbsnews.com/news/dr-peter-attia-exercise-longevity-60-minutes/), "When you look at cardiorespiratory fitness, muscle mass, and strength, they have a much higher association [with longevity] than things like even cholesterol and blood pressure." The data are clear: exercise trumps everything else for healthy aging.
But not all exercise is created equal. While most fitness trends focus on short-term aesthetics or performance, longevity doctors are increasingly pointing to one activity that efficiently targets multiple aging biomarkers simultaneously: rucking.
In a [June 2024 podcast discussion with author Michael Easter](https://www.youtube.com/watch?v=NvZ_n2hftOE), Attia breaks down why loaded walking hits the sweet spot for longevity-focused training. Here's what the science actually shows about rucking as an anti-aging protocol.
## The longevity metrics that matter most
Before diving into why rucking works, it's crucial to understand what longevity medicine actually measures. According to research cited by Attia and other longevity physicians, several key biomarkers predict both lifespan and healthspan:
**VO2 max** stands above all others. Attia and other longevity-focused physicians repeatedly point to VO2 max - your body's maximum oxygen uptake capacity during intense exercise - as one of the strongest single predictors of all-cause mortality, ahead of metrics like cholesterol or blood pressure that get more attention in primary care.
**Zone 2 cardiorespiratory fitness** represents your body's ability to burn fat efficiently during sustained, moderate-intensity exercise. This metabolic flexibility becomes increasingly important as we age and our mitochondrial function naturally declines.
**Bone mineral density** determines fracture risk and physical resilience. As covered in our [research on rucking for bone density](https://ruckauthority.com/guides/rucking-for-bone-density), bone strength peaks in early adulthood and gradually declines from there - a process that accelerates in postmenopausal women and makes weight-bearing exercise increasingly important with age.
**Muscular strength and power** predict functional capacity in later years. The ability to carry, lift, and move under load directly translates to independence and fall prevention as we age.
Traditional exercise approaches typically target one or two of these markers. Running improves VO2 max but doesn't build significant [bone density](/glossary#bone-density). Weight lifting builds strength but may not optimize cardiovascular efficiency. Rucking, however, addresses all four simultaneously.
## Why rucking hits the longevity sweet spot
The physiological mechanisms that make rucking effective for anti-aging align perfectly with what longevity research identifies as most important for healthy aging.
**Zone 2 cardio optimization**: When you add 20-40 pounds to your back and walk at a [conversational pace](/glossary#conversational-pace), your heart rate naturally elevates into the Zone 2 range (60-70% of maximum heart rate). This is the same training zone longevity doctors like Attia consistently recommend as the bulk of any well-designed cardio program.
As detailed in our [Zone 2 rucking guide](https://ruckauthority.com/weight-loss/zone-2-rucking-guide), this intensity maximizes fat oxidation and mitochondrial density - both critical for metabolic health as we age. The key advantage over traditional Zone 2 activities like cycling or swimming is that rucking simultaneously loads your musculoskeletal system.
**Bone density stimulus**: The axial loading pattern of rucking - weight compressing down through your spine, hips, and legs - provides exactly the mechanical stress that stimulates bone formation. Unlike running, which provides brief impact forces, rucking delivers sustained compressive loading throughout the entire movement.
This loading pattern is particularly beneficial for the spine and hips, the areas most susceptible to osteoporotic fractures in later life. Weight-bearing exercise that produces meaningful axial load - where weight compresses through the skeleton rather than just hanging from it - is what stimulates bone formation, and a loaded ruck delivers that stimulus on every step.
**VO2 max development**: The combination of cardiovascular demand from the weighted load and the muscular work required for [load carriage](/glossary#load-carriage) creates a unique training stimulus. Your body must deliver oxygen to working muscles while simultaneously managing the metabolic cost of carrying additional weight.
The military's long-standing use of load carriage as conditioning is built on this exact effect - weight under your pack pushes oxygen demand up the same way a faster pace would, but at a walking gait. The practical beauty of rucking is that you can modulate intensity by adjusting weight, pace, or terrain rather than running complex interval protocols.
## The efficiency factor that longevity doctors love
What makes rucking particularly appealing to time-constrained individuals is its efficiency. Rather than needing separate sessions for cardio, strength, and bone health, rucking addresses multiple systems simultaneously.
According to a [Fortune profile of his exercise routine](https://fortune.com/well/2023/06/23/longevity-expert-peter-attia-exercise-routine-walking-workout/), Attia walks hills around his neighborhood with a heavily loaded backpack as a regular part of his weekly training. This single activity provides:
- Cardiovascular conditioning through sustained elevated heart rate
- Lower body strength development from load carriage
- Core stabilization from maintaining posture under load
- Bone density stimulus from axial compression
- Balance and proprioceptive training from uneven terrain
The time efficiency becomes even more apparent when you consider that achieving similar adaptations through separate modalities would require distinct training sessions for each system. A typical week might need 3-4 cardio sessions, 2-3 strength sessions, and specific balance work - potentially 8-10 hours of exercise.
With rucking, 3-4 sessions of 45-60 minutes each can address all these systems while providing a more sustainable, lower-impact alternative to high-intensity protocols that become harder to recover from as we age.
## The practical longevity advantage
Beyond the physiological benefits, rucking offers practical advantages that matter for lifelong exercise adherence - a critical factor that longevity doctors emphasize.
**Low skill barrier**: Unlike complex movement patterns that require coaching or practice, walking with weight requires minimal learning curve. This accessibility means you can start immediately and maintain consistency without scheduling around classes or facilities.
**Minimal equipment needs**: You can start with a well-fitting pack you already own and a stable load. If you later want dedicated hardware, a pack such as the [GORUCK Rucker 5.0](/gear/goruck-rucker-vs-gr1) pairs elevated plate pockets with a lifetime guarantee. That is an equipment choice, not a requirement for receiving the training stimulus.
**Scalable intensity**: As fitness improves or declines with age, you can easily adjust weight, distance, or terrain to maintain appropriate stimulus without needing entirely different exercise modalities.
**Social compatibility**: The conversational pace makes rucking inherently social, supporting the mental health and community connections that longevity research shows are crucial for healthy aging.
**Weather independence**: While outdoor rucking is ideal, you can maintain training consistency using treadmills or stair climbers when conditions don't cooperate.
## What the research shows about weighted walking and aging
Long-form longevity studies on rucking specifically are limited - the activity has only become a mainstream fitness conversation in the last few years. But research on [weighted walking](/glossary#rucking) and load carriage points consistently toward the same mechanisms longevity doctors prioritize: aerobic capacity, bone-loading stimulus, and lower-body strength under sustainable, low-impact conditions.
The general training parameters that show up in this research - 3-4 sessions per week, weight in the range of 10-20% of body weight, conversational pace - are also the parameters experienced ruckers and coaches recommend for steady, long-term progression. The community rule of thumb and the research direction line up.
The military's use of load carriage as a long-running conditioning method is another data point worth borrowing from. Loaded walking has been part of soldier preparation for decades because it builds aerobic and musculoskeletal capacity together at a lower joint-impact cost than running - exactly the trade-off longevity-focused exercise prioritizes.
For women specifically, [Zone 2 rucking](https://ruckauthority.com/weight-loss/rucking-for-women) offers the additional appeal of staying out of the high-cortisol, high-stress training zone that can be counterproductive for hormonal balance. The conversational pace keeps the nervous system in a recovery-friendly state while still delivering bone-loading and cardio benefits.
## Starting a longevity-focused rucking protocol
The progression below is our synthesis of the principles longevity doctors emphasize - gradual loading, mostly Zone 2, prioritizing consistency over intensity - applied to rucking. It's not a protocol prescribed by any single physician; treat it as a sensible default to adjust to your own training history and recovery.
**Week 1-4: Foundation phase**
- Weight: 10-15% of body weight
- Duration: 20-30 minutes
- Frequency: 3x per week
- Intensity: Conversational pace (able to speak in full sentences)
**Week 5-12: Development phase**
- Weight: 15-20% of body weight
- Duration: 30-45 minutes
- Frequency: 3-4x per week
- Intensity: 80% Zone 2, 20% higher intensity hills/intervals
**Week 13+: Maintenance phase**
- Weight: 20-25% of body weight for experienced ruckers
- Duration: 45-90 minutes
- Frequency: 3-4x per week
- Intensity: Primarily Zone 2 with periodic challenging sessions
The key principle from longevity medicine is gradual progression that allows adaptation without excessive stress or injury risk. As Attia emphasizes, the goal is sustainable improvement over decades, not rapid short-term gains that can't be maintained.
For equipment, focus on a properly fitted pack that distributes weight evenly across your back rather than pulling on your shoulders. Our [rucking backpacks roundup](/gear/best-rucking-backpacks) covers picks for every budget, from entry-level day packs to purpose-built rucksacks designed for sustained loaded walking.
## The longevity doctor verdict on rucking
When longevity doctors like Peter Attia advocate for rucking, they're not following fitness trends - they're following data. The convergence of cardiovascular, musculoskeletal, and metabolic benefits in a single, sustainable activity makes rucking uniquely suited for lifelong health optimization.
A point Attia and others have made repeatedly: rucking is closer to what the human body is actually built to do well - carry loads over distance at a sustainable pace - than most modern exercise modalities. That evolutionary compatibility, combined with the multi-system training benefits, explains why longevity medicine is taking notice.
The science is clear that exercise is the most powerful longevity intervention available. What's becoming equally clear is that rucking may be the most efficient way to deliver the specific exercise adaptations that predict healthy aging. For anyone interested in optimizing their healthspan, not just their lifespan, the evidence strongly supports adding loaded walking to your longevity protocol.
If a backpack feels like a bigger step than you're ready for, the gentler on-ramp is a weighted vest on your normal walk - our sister site Kit Authority's [weighted vest walking for beginners](https://kitauthority.com/fitness/weighted-vest-walking-for-beginners?utm_source=ruckauthority&utm_medium=crosslink) guide starts there.
## Frequently asked questions
────────────────────────────────────────────────────────────────────────────────
URL: https://ruckauthority.com/guides/tick-prevention-for-rucking
Title: Tick Prevention for Rucking: A Layered Defense for the 2026 Season
Description: How to keep ticks off you during long rucks - the four-layer system that combines treated clothing, picaridin on skin, mechanical barriers, and a post-ruck protocol.
Published: 2026-05-03
## The Short Answer
Tick prevention while rucking isn't one product, it's a system. Treat your clothes with permethrin, repel exposed skin with picaridin, seal the ankle attack zone with treated socks, and run a post-ruck check protocol within two hours of finishing. Skip any one layer and the system leaks at that point.
The good news: the whole system costs about $50 to set up, takes 20 minutes once a season, and protects you for months. The bad news: 2026 is forecast as a heavy tick year across the eastern US and Midwest, and a casual "spray some bug stuff before I go" approach won't cut it for ruckers spending two-plus hours in tick habitat.
This guide walks the four layers in order from highest-leverage to lowest, with the specific products that work for [rucking](/glossary#rucking) - not generic hiking advice.
## Why Ruckers Face Higher Tick Risk Than Casual Hikers
Three things stack against you when you're rucking through tick habitat:
**Pack rub clears topical repellent fast.** A standard DEET application on your shoulders and upper back gets ground off by the pack straps within the first mile. By hour two of a loaded ruck, those zones are unprotected even though you remembered to spray.
**Sweat dilutes skin repellents.** A loaded 45-minute walk produces dramatically more sweat than the same distance hiked unloaded. DEET and picaridin both lose effectiveness as they get diluted - that's why community feedback from long-distance hikers consistently emphasizes layered defenses over relying on a single topical application.
**Time-on-feet in habitat compounds exposure.** Most casual hikers spend 30-60 minutes in tick habitat per outing. A serious rucker doing a 6-mile loop or training for a [GORUCK event](/glossary#goruck) is in habitat for two to four hours. The probability of tick contact scales with time, and every brush against tall grass or low brush is another opportunity for attachment.
The defense system below addresses each of these directly. Permethrin doesn't sweat off because it's bonded to the fabric. Picaridin doesn't damage your synthetic gear the way DEET does. Treated socks cover the ankle zone where pack-strap rub doesn't matter. The post-ruck protocol catches anything that got past the chemical layers.
## The Four-Layer Defense System
Each layer addresses a specific failure mode:
| Layer | What it does | Where it fails on its own |
| --- | --- | --- |
| 1. Permethrin-treat clothing | Kills ticks on contact with treated fabric | Doesn't cover exposed skin (face, hands, neck gap) |
| 2. Picaridin on exposed skin | Repels ticks from any skin not under treated clothing | Sweats off over hours; doesn't help below the boot line if pants ride up |
| 3. Mechanical barrier socks | Seals the ankle attack zone (where ticks climb up from grass contact) | Only protects feet/ankles; depends on tucking pants in |
| 4. Post-ruck protocol | Catches any tick that hitched a ride home before it attaches | Reactive, not preventative - relies on actually doing it |
Build all four. Skipping any one of them creates a predictable gap.
## Layer 1: Permethrin-Treat Your Ruck Clothes
This is the single highest-leverage move in tick prevention. Permethrin bonds to fabric fibers when sprayed on, lasts 6 weeks or 6 wash cycles per treatment, and kills ticks on contact when they touch the treated fabric. Used by the US military for over a decade, registered with the EPA, recommended by the CDC.
The category-defining product is Sawyer's [Premium Permethrin Clothing, Gear & Tents Trigger Spray (24oz)](/shop). One bottle treats 2-3 full outfits. Spray the outside of your ruck pants, shirt, hat, and socks until damp. Hang to dry for 2-4 hours. You're done for six weeks.
The why-this-matters: permethrin is the only tick prevention layer that doesn't degrade during the ruck itself. Sweat doesn't wash it off. Pack-strap rub doesn't clear it. Sun doesn't break it down at any meaningful rate inside a 6-week window. You apply once, then forget about it until the season ends or you've washed the gear six times.
A few application rules from the technical literature:
- **Spray outside, not in your bedroom.** Permethrin is toxic to cats during the wet drying phase (it's safe once dry). Apply outdoors or in a garage with the cat elsewhere.
- **Treat socks separately from boots.** Sock treatment is core to the ankle defense; boot treatment is optional and harder to redo.
- **Don't waste it on synthetics that won't bond well.** Cotton, wool, synthetic blends, polyester all bond fine. Avoid leather and rubber - the treatment slides off rather than bonding.
- **Apply 2-4 hours before you'll wear the clothing.** Wet permethrin is irritating to skin and toxic to cats; dry permethrin is neither.
## Layer 2: Picaridin on Exposed Skin
Wherever your treated clothing has gaps - wrists, neck, lower face, hands, the strip of ankle between sock and pant cuff - you need a topical repellent. The historical answer was DEET. The current answer for ruckers is picaridin.
The advantage isn't effectiveness. CDC guidance treats 20% picaridin and 30% DEET as equivalent against ticks. The advantage is what picaridin doesn't do: it doesn't dissolve synthetic pack straps, it doesn't damage hydration hose bite valves, it doesn't wreck watch bands or sunglasses lenses. DEET does all of that.
The lotion form (vs. spray) matters for ruckers specifically. Heavy sweat dilutes spray-applied repellent faster than lotion-applied, which absorbs into the skin's outer layer and clings better through hours of sweating. That's why the [20% Picaridin Insect Repellent (Lotion, Twin Pack)](/shop) is the format we reach for - and the combo pairs a 4 oz lotion with a 4 oz pump spray. Pack both in checked luggage for travel events: at 4 fl oz each they sit above the TSA 3.4 fl oz carry-on limit, so they get pulled at security.
Application strategy:
- **Apply 5-10 minutes before you put on your ruck.** Lotion needs time to absorb. Sprayed-on-then-immediately-pack means most of it ends up on the inside of your shirt, not protecting skin.
- **The lotion holds up to 14 hours and the spray up to 12, so one morning application covers most rucks. Reapply sooner if you are sweating hard or swimming.** Carry a 4oz bottle in an external pack pocket. The 14-hour duration claim is for low-sweat conditions; loaded rucking cuts that significantly.
- **Skip the face, hit the neck.** Picaridin can sting if it gets near eyes during sweat. Apply to neck, behind ears, jawline, but not to the forehead.
- **Hands matter more than you think.** When you brush against vegetation, your hands often make first contact. Hit the back of the hands and wrists.
## Layer 3: Mechanical Barriers - The Ankle Attack Zone
Ticks don't drop from trees. They climb. Most attachment happens at or below the calf, with the ankle being the single highest-risk attachment point on a rucker's body. The defense is a tall-cuff sock with permethrin treatment, with your pant cuff tucked into the sock to seal the entry path.
There are two ways to get a permethrin-treated tall sock for ruck use, and the right answer depends on how you want to spend your time and money.
### Path A: DIY-Treat a Merino Sock You Already Own
If you're already running merino socks for your rucks (and most serious ruckers are), the better path is to treat your existing socks with the Sawyer Permethrin from Layer 1. Merino's moisture management is significantly better than the synthetic blends used in most factory-treated socks - especially over multi-hour loaded movement.
The Darn Tough Hiker Boot Full Cushion is the rucker pick for this path: taller crew height to fully cover the ankle zone, heavier cushion that holds up at 30+ lb loads, and a lifetime no-receipt warranty so you're not afraid to treat it aggressively.
Treatment is the same as for clothing: spray the outside of the sock until damp, hang to dry for 2-4 hours, treat both pairs in a rotation so you can wash one while wearing the other. You get all the benefits of merino moisture management with the tick-killing protection of permethrin, at lower cost-per-pair than factory-treated alternatives.
### Path B: Buy a Factory-Treated Sock
If you don't want to DIY-treat, or you need treated socks NOW with no time to spray-and-dry, factory-treated synthetic socks are the convenient alternative. The Insect Shield Midweight Hiking Sock is the pick here - the permethrin is bonded at manufacture, lasts 70 wash cycles (vs. 6 for DIY treatment), and works straight out of the package.
The trade-off: synthetic blends don't manage moisture as well as merino during long rucks, and the cushion isn't on par with dedicated hiking socks. For short rucks (under 90 minutes) it's a reasonable convenience pick. For multi-hour training, the DIY-treated merino path wins on comfort.
**Either way, tuck your pants into the sock cuff.** This isn't optional - it's the whole point of the tall-cuff design. Ticks crawl up. If your pant cuff is loose around the ankle, ticks have a clear path past the sock barrier and onto your unprotected calf.
## Layer 4: The Post-Ruck Protocol
The chemical and mechanical layers reduce contact and attachment risk, but no system is 100%. Layer 4 catches whatever got through. It's reactive, not preventive - and it depends entirely on you actually doing it.
The protocol, in order, within 2 hours of finishing your ruck:
1. **Strip your clothing immediately when you get home.** Don't sit on the couch first. Don't unpack your ruck. Strip down where you can put the clothes directly into the dryer.
2. **Run the clothes through a dryer on high heat for 10 minutes** before washing. Heat kills ticks; water alone doesn't. Wash afterward as normal.
3. **Shower within 2 hours of finishing.** This both reduces the window for tick attachment and gives you the chance to feel anything walking on you.
4. **Do a full-body tick check.** Feel-and-see. The high-risk zones in order: behind the knees, groin/inseam, armpits, around the waistband, behind the ears, scalp. A handheld mirror helps for the hard-to-see spots. Have a partner check your back if possible.
5. **Check your gear.** Ticks can hide in pack straps, hat brims, and shoe laces. Don't leave the unchecked pack on your bedroom floor.
The 2-hour window matters because attached-tick disease transmission risk is roughly proportional to attachment time. Lyme transmission generally requires 24-36 hours of attachment. If you find and remove a tick within 4 hours of attachment, your transmission risk approaches zero. The protocol is designed to find them before they attach at all.
## What to Do If You Find a Tick Attached
This is where the sub-$10 product earns its place in your kit. Don't try to remove an attached tick with your fingernails, tweezers from your pocket knife, or any of the folk remedies (matches, petroleum jelly, fingernail polish). All of those increase the chance the tick regurgitates pathogens into the wound, which is the worst possible outcome.
The right tool is a tick remover or precision-tip tweezers, used to grip the tick at skin level and pull straight up with steady pressure. A pocketable [Premium Tick Remover Kit](/shop) lives in your pack for the one time you actually need it.
The kit format is worth the extra few dollars over a single Tick Key card because you get both: the lever-style remover handles engorged ticks safely, while the precision tweezers work better on tiny nymph-stage ticks (which are the size of a poppy seed and the most likely to transmit Lyme because people don't see them and don't remove them in time).
Removal protocol:
1. **Grip at skin level, not on the body of the tick.** Squeezing the tick's body increases pathogen-injection risk.
2. **Pull straight up with steady, even pressure.** Don't twist. Don't jerk.
3. **Save the tick.** Put it in a sealed bag or container. If you develop symptoms in the following weeks, your doctor may want to test the tick for pathogens. The TickCheck kit's ID card helps you identify the species, which determines disease risk.
4. **Clean the bite site with rubbing alcohol or soap and water.**
5. **Note the date.** Lyme symptoms can take 3-30 days to appear; other tick-borne diseases have different windows. You'll want the bite date if you need to talk to a doctor later.
## When to See a Doctor
Most tick bites don't transmit disease, especially if the tick was attached for less than 24 hours. But the following are reasons to call your doctor or urgent care:
- **An expanding red rash at the bite site** (especially the classic bullseye pattern of erythema migrans) - this is the most reliable early sign of Lyme disease and warrants antibiotic treatment within days.
- **Flu-like symptoms** (fever, chills, muscle aches, headache) appearing 3-30 days after a known bite - early Lyme often presents this way without the rash.
- **The tick was attached longer than 24 hours** - some doctors prescribe a single prophylactic dose of doxycycline if known attachment exceeded 36 hours and you're in a Lyme-endemic area.
- **You can't fully remove the tick** - if the head breaks off and stays embedded, your doctor can extract it under sterile conditions.
- **Any unusual delayed reaction**, especially a sudden onset of red-meat allergy weeks after a bite (alpha-gal syndrome, transmitted by Lone Star ticks).
The expanding bullseye rash specifically is treated as diagnostic for Lyme even without a confirmed bite history - if you see one, get to a doctor.
## Regional Risk for the 2026 Rucking Season
Tick activity isn't uniform across North America. The highest-risk regions for serious ruckers in 2026:
- **Northeast (CT, MA, NY, NJ, PA, MD, DE, RI, VT, NH, ME)** - Highest Lyme density in the country. Both blacklegged ticks (Lyme) and Lone Star ticks (alpha-gal, ehrlichiosis) active May through October. Permethrin treatment is non-negotiable here.
- **Upper Midwest (WI, MN, MI, parts of IA and IN)** - Second-highest Lyme density. Heavy blacklegged tick population, with peak activity June-August matching prime rucking season.
- **Mid-Atlantic and Appalachian regions (VA, WV, NC, KY, TN)** - Lone Star tick is dominant here, with rising rates of alpha-gal syndrome (red-meat allergy) being reported. Don't underestimate this region just because Lyme is less common.
- **Pacific Northwest (WA, OR, northern CA)** - Lower density than the Northeast but Western blacklegged tick is present. The full system applies, just expect to find fewer ticks per ruck.
- **Lower risk: Desert Southwest, high-elevation Mountain West, Northern Plains** - Tick-borne disease is uncommon. The chemical layers can be relaxed; the post-ruck check is still good hygiene.
If you're traveling for a ruck event - especially anything in the Northeast, Mid-Atlantic, or Upper Midwest between May and September - run the full system regardless of your home region's risk level.
## Frequently Asked Questions
### Does permethrin actually work, or is this overhyped?
Permethrin has been studied since the 1970s, used by the US military since the early 1990s, and is registered with the EPA specifically for tick prevention on clothing. Aggregated community feedback from long-distance hikers, hunters, and military personnel consistently supports its effectiveness. The mechanism (kills ticks on contact with the treated fabric, before they can attach to skin) is well documented. It's not overhyped.
### Is permethrin safe to handle?
Once dry on fabric, yes. During application and the wet drying phase (2-4 hours), the formulation is moderately toxic to cats and mildly irritating to human skin. Apply outdoors, keep cats away until dry, wash hands after application. Once dry, the bonded permethrin is essentially inert from a human-contact standpoint - it only kills insects when they walk on it.
### Can I just use DEET instead of all this?
You can, but the trade-offs hurt for ruckers specifically. DEET damages synthetic pack straps over time, dissolves bite valves on hydration hoses, and can ruin watch bands and sunglasses lenses. It also sweats off faster during loaded movement. Picaridin handles the same job without the gear damage.
### How often do I need to retreat my clothes with permethrin?
Sawyer's spec is 6 weeks or 6 wash cycles, whichever comes first. In practice, most ruckers re-treat at the start of the season (May), again at peak (mid-July), and let the treatment lapse after first hard frost. If you wash your ruck clothes after every session (which you should), expect to re-treat roughly monthly during heavy training.
### Will permethrin damage technical fabrics?
No. It bonds to nylon, polyester, cotton, wool, merino, and synthetic blends without affecting fabric performance, color, or hand-feel. The exception is leather and rubber - permethrin doesn't bond well to either, so don't bother spraying boots or rubber-coated items. (For boots, the heat-on-high dryer protocol after each ruck handles tick removal.)
### What about insect-repellent rucking clothing - is the factory-treated apparel worth it?
Pre-treated apparel (Insect Shield, ExOfficio BugsAway, etc.) lasts longer per treatment (70+ washes vs. 6) but costs more upfront and locks you into specific garments. The cost-per-protected-hour math usually favors DIY-treating your existing rucker clothes with Sawyer permethrin. The exception: socks, where the factory-treatment convenience makes the math closer to break-even.
### Are gaiters useful for tick prevention?
Yes, especially for ruckers training in tall grass or dense brush. A treated sock plus a gaiter creates a double mechanical barrier from ankle to mid-calf. Snake gaiters do double duty here. The trade-off is added weight and heat retention, which makes them less practical for hot-weather summer rucks where most tick exposure happens.
### What if I have pets that come on rucks?
Dogs need their own tick prevention - topical treatments (Frontline, K9 Advantix), oral medications (NexGard, Bravecto), or treated collars (Seresto). Permethrin spray is safe for dogs once dry but is highly toxic to cats. After dog-rucks, brush the dog out thoroughly before letting them inside, and check the dog as carefully as you check yourself. See our [rucking with your dog guide](/guides/rucking-with-your-dog) for more.
### Do tick-repellent essential oils (cedar, lemon eucalyptus, etc.) work?
Lemon eucalyptus oil (specifically the active ingredient PMD) has CDC-recognized effectiveness against ticks for 2-6 hours per application - significantly shorter than picaridin or DEET. Other essential oils (cedar, lavender, peppermint) have minimal evidence of tick-prevention efficacy despite marketing claims. For ruck-length protection, stick with EPA-registered products.
### How worried should I actually be about Lyme disease?
Worried enough to run the system, not so worried it stops you from rucking. Lyme is treatable with antibiotics if caught early (usually within the first month), and the post-ruck protocol catches almost all attached ticks before they can transmit pathogens. Long-term Lyme complications happen primarily when bites go undetected for weeks. The four-layer system is specifically designed to make undetected bites extremely unlikely.
## Building Your Kit
The total setup cost for the four-layer system runs about $50:
- Sawyer Permethrin trigger spray (1 bottle, lasts a season): $20
- Sawyer Picaridin twin pack: $15
- Tall-cuff treated sock (DIY-treat your existing merino, or buy Insect Shield): $0-$25
- TickCheck remover kit (one-time purchase): $10
Treat your kit at the start of May, carry the picaridin and tick remover in your pack from May through September, run the post-ruck protocol every time, and you've taken serious tick risk down to a manageable inconvenience. The system rewards consistency more than perfection - you don't need to optimize each layer; you need to actually use all four.
For the rest of the summer rucking system, see our [summer rucking gear guide](/guides/) for hydration, sun protection, and heat management - the other prevention systems that matter once temperatures climb.
────────────────────────────────────────────────────────────────────────────────
URL: https://ruckauthority.com/guides/tough-ruck-boston-2026-how-to-train-for-a-26-2-mile-memorial
Title: Tough Ruck Boston: How to Train for the 26.2-Mile Memorial Ruck March
Description: Tough Ruck Boston training guide for 26.2 loaded miles, with pacing, long rucks, gear, recovery, and event-day preparation.
Published: 2026-04-21 / Updated: 2026-08-31
[Tough Ruck Boston](https://toughruck.org/) is an annual 26.2-mile memorial ruck in Concord, Massachusetts, held the day before Boston Marathon Monday. It honors fallen military members and first responders and raises money for the Military Friends Foundation. The event is partnered with the Boston Athletic Association, but it uses its own Concord-area course rather than the Boston Marathon route.
According to the [official 2026 race brief](https://toughruck.org/tough-ruck-2026-race-day-brief/), finishers received the official Boston Marathon medallion. The same brief is the source of truth for divisions, weigh-ins, uniform rules, timing, parking, and race-day logistics; those details can change each year.
## What Makes Tough Ruck Boston Different
Unlike typical ruck events focused solely on fitness challenges, Tough Ruck Boston carries profound memorial significance. The event was started in the wake of the 2013 Boston Marathon bombing and has honored fallen military and first responders every year since - [see the official history on ToughRuck.org](https://toughruck.org/) for the full background.
The 2026 registration announcement described a field of up to 1,000 military members, first responders, and civilians. Every participant had to choose a weight division: **Light (minimum 15 lb), Heavy (minimum 35 lb), or Extreme (minimum 55 lb)**. Only weight inside the rucksack counted. Weighted vests did not count, and the ruck was weighed before the start and again at the finish.
What this means for ruckers specifically is that you're not just training for a distance challenge - you're preparing to carry emotional weight alongside physical weight for over six hours of continuous movement.
## Training Timeline: 16-Week Preparation Plan
Training for a 26.2-mile ruck requires an existing walking base, progressive loaded volume, and enough recovery to keep feet and joints healthy. Choose the division before building the plan: training for 15 pounds is materially different from preparing to finish with 55.
### When to Start
A 16-week cycle for an April event begins around mid-December. Before Week 1, you should be able to walk for an hour without pain. If you cannot, build that baseline first and choose a later event rather than compressing the plan.
### Weeks 1-4: Base Building Phase
Use two or three rucks per week. Keep most sessions short and easy, and extend one long session from roughly four to seven miles over the month. Begin below your division minimum if needed; do not let the load change your gait or create lingering joint pain.
### Weeks 5-8: Volume Increase
Extend the long ruck toward 10-12 miles while keeping the other sessions easy. Approach your chosen division minimum gradually and practice with the exact pack, socks, footwear, hydration, and secured load you expect to use.
### Weeks 9-12: Peak Training
Alternate longer build weeks with reduced weeks instead of stacking a 15-, 18-, and 20-mile effort on consecutive weekends. Work toward a 14-18-mile rehearsal if your recovery supports it. Heavy and Extreme participants should get experienced coaching rather than simply adding 20 or 40 pounds to a Light-division plan.
### Weeks 13-16: Taper and Peak
Complete the final long rehearsal early in this block, then reduce volume. Keep a few short sessions at the required division weight, practice race-day food and hydration, and arrive with healthy feet rather than one last fitness test.
## Weight Requirements and Gear Selection
For 2026, the official minimums were 15 pounds for Light, 35 for Heavy, and 55 for Extreme. The required weight had to remain inside the ruck for the entire course; food and water consumption could not leave the pack below the division minimum at the finish. Weighted vests did not count. Verify the next race brief before training to a future standard.
Your pack must hold the required minimum plus water, food, layers, and event items without unstable stacking or pressure points. No model is built specifically for this event, and a familiar pack with a proven fit is more valuable than a last-minute upgrade.
| Role | Pick | Why it earns event-day status |
|------|------|-------------------------------|
| Event pack | GORUCK GR2 34L | Structured pack with enough room for a secured plate, water, fuel, and layers. Confirm torso fit under your full division load. |
| Pack alt | Mystery Ranch 2 Day Assault | Adjustable yoke and hip belt for ruckers who prefer a hiking-style load transfer. |
| Event weight | GORUCK Ruck Plates | Flat plate geometry that can be secured high and close in a compatible pocket. |
| Training weight | Titan Fitness Ruck Plate | Lower-cost fixed plate option; confirm dimensions against the chosen pack. |
| Boots | Salomon Quest 4 GORE-TEX | Supportive waterproof boot option, but only if it is already broken in and proven on long rucks. |
### Essential Gear Checklist
**[Rucksack](/glossary#rucksack) Selection:**
- [GORUCK GR2 34L](/gear/goruck-gr1-vs-gr2-which-ruck-should-ruckers-buy-in-2026) for maximum durability
- [GORUCK GR2 40L](/gear/goruck-gr1-vs-gr2-which-ruck-should-ruckers-buy-in-2026) if you want the larger travel-ruck format
- [Mystery Ranch 2 Day Assault Pack](/gear/best-goruck-alternatives) for military-style carrying
**Weight Plates:**
- [GORUCK Ruck Plates](/gear/ruck-plate-comparison) for secure, flat loading in a compatible elevated pocket
- [Titan Fitness Ruck Plate](/gear/ruck-plate-comparison) as a lower-cost fixed plate when its dimensions fit the pack
**Footwear:**
- [Salomon Quest 4 GORE-TEX](/gear/best-rucking-boots-for-beginners-2026) as one supportive boot option
- Danner Tachyon 8" for lightweight military-style boots
### Weight Distribution Strategy
The broad load-carriage evidence supports keeping dense weight close to the body and preventing movement inside the pack. Focus on:
- Keeping weight close to your back
- Using a [hip belt](/glossary#hip-belt) when the pack and your fit allow useful load transfer
- Securing all items to prevent shifting
## Race Day Logistics and Strategy
In 2026, race-day bib pickup opened at 5:00 AM and the opening ceremony began at 6:50 AM at the Fenn School in Concord. There was no participant parking at Fenn on race day and no hydration at the start. Confirm the current year's timing, shuttles, and start-area rules on the [official race brief](https://toughruck.org/tough-ruck-2026-race-day-brief/).
### Nutrition and Hydration Protocol
Fueling and hydration need to be practiced, not invented on race morning. Carry enough fluid to reach the first supported station, know which foods your stomach tolerates under load, and account for the fact that consuming water or food cannot drop the ruck below your division minimum.
### Pacing Strategy
Official timing ended after nine hours in 2026. That is an average of about 20:36 per mile including stops. Build a pacing plan from your long rehearsals, start conservatively, and budget time for aid stations, bathroom stops, and the finish weigh-in rather than borrowing another participant's pace.
## Mental Preparation for Memorial Significance
What sets Tough Ruck Boston apart from other endurance events is its memorial purpose. Participants often carry specific fallen heroes' names, adding emotional weight that requires mental preparation.
Participants carry memorial ribbons naming fallen service members and first responders. The official event provided options to make or select ribbons before the start. Learn the story behind the name you carry and follow the event's ribbon instructions.
## Recovery and Injury Prevention
A 16-week training cycle demands careful attention to recovery to avoid overuse injuries common in [ruck training](/pillars/rucking-training-programs):
### Weekly Recovery Protocol
- One complete rest day per week
- Include 10-15 minutes of foot care after each ruck
- Perform hip flexor and calf stretches daily
- Consider monthly sports massage or self-massage sessions
### Common Ruck Training Injuries
According to military medicine research, the most frequent ruck training injuries are:
1. [Plantar fasciitis](/glossary#plantar-fasciitis) (foot pain)
2. IT band syndrome (knee pain)
3. Lower back strain
4. Shoulder impingement
Prevention focuses on gradual load progression, proper footwear, and addressing muscle imbalances through targeted strength work.
## Registration and Community Connection
Registration for each year's Tough Ruck Boston is available through [ToughRuck.org](https://toughruck.org/). The organization maintains active communities on [Facebook](https://www.facebook.com/ToughRuck) and [Instagram](https://www.instagram.com/toughruck/) where participants share training updates and connect with fellow ruckers.
The event supports the Military Friends Foundation, which assists Massachusetts-based military and first responder families. This charitable component adds meaning to your training investment beyond personal achievement.
What makes this event particularly compelling for serious ruckers is the combination of physical challenge, historical significance, and community connection. You're not just completing 26.2 miles - you're participating in a living memorial that honors those who made the ultimate sacrifice.
## Frequently Asked Questions
────────────────────────────────────────────────────────────────────────────────
URL: https://ruckauthority.com/guides/travel-rucking-guide
Title: Travel Rucking: The Ultimate Workout for Vacation
Description: Learn how to ruck while traveling, pack TSA-safe ruck gear, and explore new cities without skipping training.
Published: 2026-03-28 / Updated: 2026-09-25
## The Short Answer
[Travel rucking](/pillars/rucking-lifestyle-guide) turns a walk around a new place into a training session. Use the backpack you already packed, then add a [ruck plate](/pillars/rucking-gear-guide), water, or another load that you can secure. A 2 to 4-mile city route lets you explore and train without adding another piece of luggage.
**The reality:** Most travelers either skip training or grind through hotel room workouts. [Rucking](/glossary#rucking) gives you a third option: explore the destination while training.
## Why Rucking Is Perfect for Travel
### You Already Have the Backpack
Every traveler carries a backpack or carry-on. That is your ruck. Loading it with weight you were already packing (shoes, books, water) turns your sightseeing into a training session. No specialized luggage needed. No gym membership hunt. No "I'll work out when I get back" excuses. If you want one pack that doubles as your daily carry and your training ruck, a compact, plate-friendly option like the [RUSH 12 2.0](/shop) slides into an overhead bin and still carries weight properly.
### You See the City Like a Local
Running means staying near the hotel. Rucking with a map and curiosity means hitting neighborhoods most tourists miss. You move slow enough to actually notice architecture, street food, local markets. You move fast enough to make it a real workout. Three hours of city rucking gives you cardio, exploration, and cultural immersion in one.
If you're carrying a camera to capture the trip, our sister site Aperture Authority's [travel photography](https://apertureauthority.com/genres/travel-photography?utm_source=ruckauthority&utm_medium=cross-site) guide covers shooting a new city on foot - and its Rules-by-Location summaries tell you where you're actually allowed to shoot (and where a permit or drone ban applies) before you set up.
### Lower Injury Risk Away From Your Normal Routine
Travel workouts often fail because people push hard in unfamiliar environments - new elevation, different footing, jet lag, dehydration. Rucking's built-in pacing (3 to 4 mph) keeps intensity moderate and injury risk low. Your joints stay safe even on unfamiliar terrain.
## How to Pack Your Ruck Plate (TSA Rules)
Steel [ruck plates](/gear/ruck-plate-comparison) are **legal in checked baggage** - TSA classifies them as sporting equipment. No special declaration needed. Just throw it in your checked bag and go.
**If you must travel carry-on:** Steel plates do not pass security. Instead:
- **Water bladder option:** Pack an empty [hydration bladder](/glossary#hydration-bladder), fill it at your destination (free water + weight). Dump it before flying home.
- **Sandbag option:** Bring a tough drawstring bag filled with sand, gravel, or soil once you land. Costs nothing, weighs 20-40 lbs.
- **Dumbbell weights (if your hotel gym has them):** Skip the pack-weight and ruck bodyweight instead for 2 to 3 miles.
## City Rucking Routes and Pacing
### Finding Safe Routes
Use these tools to scout your destination:
- **Google Maps:** Search "hiking trails" or "walking routes" around your hotel. Filter by distance (2 to 4 miles is perfect for travel).
- **Alltrails:** Shows running and walking trails globally. User reviews and elevation profiles included.
- **Local running club forums (Strava, Nike Run Club):** City-specific route recommendations from people who live there.
- **Ask hotel staff:** They know safe neighborhoods, pedestrian streets, and quiet areas that feel good to ruck.
### The Ideal Travel Ruck
- **Distance:** 2 to 4 miles (45-90 minutes). Long enough for a real workout, short enough to do early morning before activities.
- **Pace:** 3 to 3.5 mph. Brisk walk, no running. Lets you actually look around and stay present.
- **Weight:** 20 to 35 lbs depending on your fitness. Travel means lighter weight is fine - you are exploring, not pushing peak performance.
- **Terrain:** Mix of flat city streets and any hills available. Cobblestones and uneven sidewalks count as a core workout.
## Hotel Alternatives When Weather Fails
Not every travel day is ruck weather. Rain, extreme heat, ice - you need backup plans.
### Stairwell Workouts with Your Pack
Hotel stairwells turn into a brutal training tool. Load your backpack with the same weight and:
- **Up and down repeats:** 10 to 15-minute blocks, walking up (30 seconds), down (60 seconds). Rest 90 seconds between sets.
- **Single climb:** Find a tall stairwell (six flights minimum). Walk up slow and controlled with full weight, walk down unloaded. Repeat 5 to 8 times.
This is not fun. It is extremely effective. A 15-minute stairwell session feels like 30 minutes of outdoor rucking.
### Parking Garage Circuits
If your hotel or nearby parking structure is accessible, the sloped ramps are perfect:
- **Ramp repeats:** Walk up ramps, down ramps, rest between. Six to eight repeats burns 200+ calories.
- **Full circuit:** Walk every level of a large parking structure for 20 to 30 minutes. Mix speeds - walk one level fast, one level slow.
Parking garages are often cooler than outside, usually safe, and traffic-free for early morning sessions.
## Packing Your Ruck Gear Efficiently
Four items make travel rucking work without ruining your suitcase weight allowance - a plate that lives in checked baggage, hydration that packs flat empty and fills wherever you land, electrolytes for new-climate sweat rates, and a watch that handles jet-lagged route navigation.
| Role | Pick | Why it earns a packing slot |
|------|------|------------------------------|
| Weight | GORUCK Ruck Plate | 20-30 lb steel, fits any plate-pocket pack. Goes in checked luggage every time. |
| Hydration | Nalgene 32oz Wide-Mouth | Packs flat-ish when empty, BPA-free, no leak even in compressed luggage. |
| Electrolytes | LMNT Variety Pack | Packets fit in any pocket. Counters new-climate sweat rates and dehydrated cabin air. |
| Watch | Garmin Instinct Solar | Route tracking, ABC sensors, weeks of battery so you don't pack another charger. |
### What Goes in Your Ruck
- **[Ruck plate](/glossary#ruck-plate) or weight:** Steel plate (checked) or water bladder (carry-on)
- **Minimal water:** Travel with a collapsible bottle - something like the [Stow Collapsible 1L Bottle](/shop) flattens to nothing in your bag and fills once you land to save luggage space.
- **Phone and map:** Your route reference and emergency contact.
- **Light snack:** Granola bar or fruit for energy. Eat something small before starting.
- **Sun protection:** Sunscreen, hat, or sunglasses depending on destination.
Everything else stays in your main luggage.
### Pack Weight by Travel Day
- **Days 1-2 (jet lag, early arrival):** 15-20 lbs. Short 1 to 2-mile city ruck. Focus on exploring and recovering. Bring LMNT Electrolyte Variety Pack to rehydrate faster in a new climate and time zone.
- **Days 3-5 (acclimated):** 25-35 lbs. Full 2 to 4-mile rucks. This is your peak training window before travel fatigue kicks in. Carry a Nalgene Wide Mouth 32oz bottle filled with local water - refillable and weighs exactly the same whether empty or full.
- **Days 6-7 (travel day coming):** 15-20 lbs. Recovery distance. Light and easy, no heavy training 24 hours before flying.
## International Travel Considerations
### Before You Leave
- **Check destination terrain:** Hilly cities (San Francisco, Barcelona) might call for lighter loads. Flat cities (Amsterdam, Austin) let you load heavier.
- **Research safety:** Know which neighborhoods to avoid. Hotel staff or local running groups can advise.
- **Water access:** Understand tap water safety. Some destinations need bottled water. Pack or buy accordingly.
- **Elevation changes:** Travel to higher elevation? Reduce weight by 30 percent and take extra rest days.
### Time Zone and Training Timing
Rucking early morning (6 to 8 AM) helps combat jet lag - sunlight exposure + movement + exploring gets your circadian rhythm back on track faster than sleeping in.
---
## Frequently asked questions
### Can I ruck every day while traveling?
Yes, if you keep weight light and distances moderate. Travel already stresses your body - jet lag, new foods, walking sightseeing. Light rucking (15-20 lbs, 1 to 2 miles) every day is sustainable and actually aids recovery through low-intensity movement. Heavier loading (30+ lbs) should be 3 to 4 times per week even while traveling.
### Will a ruck plate get flagged by TSA?
No. Steel ruck plates are explicitly legal in checked baggage under TSA sporting equipment rules. Place it on top or bottom of your checked bag so it is easy to spot if they open it (reduces inspection time). Never put it in carry-on - it will be caught at security and removed.
### Should I ruck on the same day as flying?
No. Skip heavy rucking 24 hours before flying and the entire travel day. Your legs already carry your body, luggage, and backpack through airports. Add a 35-lb weight and you arrive depleted. Light bodyweight walking around terminals is fine. Save rucking for days 2-5 of your trip when you are settled.
### What if my hotel has no good outdoor routes?
Use your hotel stairwell (much harder than you think) or find a parking garage. If neither exists, indoor hotel hallway walks with full pack work for 20 to 30 minutes. Not ideal, but 10 to 15 minutes of stairwell repeats with weight beats skipping training. On vacation, something beats nothing.
### Can I ruck if I have never rucked before?
Yes - travel is actually a great time to start. Lighter loads (15-20 lbs), moderate distance (1 to 2 miles), and slower pace (3 mph) with built-in recovery days make travel rucking beginner-friendly. You are not racing. You are exploring while moving. That is rucking.
---
## Your next step
---
## Related reading
- [The complete beginner's guide to rucking](/pillars/beginners-guide-to-rucking) - everything you need to start rucking, gear to form
- [How heavy should your ruck be?](/guides/how-heavy-should-your-ruck-be) - weight recommendations by fitness level and goal
- [Budget rucking starter kit](/gear/budget-rucking-starter-kit) - build your first ruck for under $50
- [Best rucking shoes by terrain](/gear/best-rucking-shoes-by-terrain) - footwear for city streets, trails, and mixed surfaces
- [Rucking benefits](/guides/rucking-benefits) - the full list of physical and mental [benefits of rucking](/guides/rucking-benefits)
────────────────────────────────────────────────────────────────────────────────
URL: https://ruckauthority.com/guides/weighted-vests-bone-density-research
Title: Do Weighted Vests Build Bone Density? What the Research Actually Says (2026)
Description: What weighted-vest studies show about bone density, where the evidence is limited, and what to discuss with a clinician before adding load.
Published: 2026-04-15 / Updated: 2026-06-02
Weighted vests have become common advice for women in midlife. The usual claim is simple: add a vest to a walk to protect bone through menopause.
The studies do not support that simple promise. Here is what they show, what they cannot establish, and what to consider before using a [weighted vest](/glossary#weighted-vest).
## The short answer
A weighted vest adds external load, but direct evidence that vest walking improves [bone density](/glossary#bone-density) is limited and mixed. The strongest positive study paired vests with jumping and resistance-style exercise, not casual walking. A recent study found an association between upright vest time and some bone outcomes, while a related weight-loss trial found that vests did not reliably prevent hip bone loss.
Treat a vest as optional equipment, not a bone-health treatment by itself.
## Why everyone is talking about weighted vests for bone density
The appeal is easy to understand:
- **Bone loss accelerates around menopause.** Estrogen protects bone; as it falls in perimenopause and menopause, women can lose bone density quickly, raising the long-term risk of osteoporosis and fractures.
- **Bone responds to mechanical loading.** The size and direction of the response depend on the exercise, skeletal site, health, medication, and many other factors. Adding a vest does not guarantee bone gain.
- **It fits into an ordinary walk.** That makes the equipment convenient, though the added load can still affect gait, balance, joints, and the spine.
Weight-bearing and resistance exercise matter for bone health. The open question is what a vest adds beyond the exercise program around it.
## What the research actually shows
Here is the part the trend usually skips. The evidence base for weighted vests *specifically* is thin, and it is mixed.
**Snow 2000.** [Snow et al. (2000)](https://pubmed.ncbi.nlm.nih.gov/10995045/) followed postmenopausal women over five years. The exercise group used weighted vests as part of a program that included jumping and resistance-style exercise and had better hip bone-density outcomes than the control group. Because the intervention combined several elements, the study does not show what a vest or ordinary vest walking would do on its own.
**The recent reality check: Wake Forest.** More recent work from Wake Forest's NIH-funded research program complicates the easy story.
Two findings matter. First, a [Frontiers in Aging analysis](https://www.frontiersin.org/journals/aging/articles/10.3389/fragi.2026.1729001/full) reported an association between more time upright in the vest and some bone-density outcomes. An association does not prove that upright vest time caused the difference. Second, [a related Wake Forest trial](https://ctsi.wakehealth.edu/announcements/2025/06/weighted-vests-might-help-older-adults) found that during intentional weight loss, weighted vests and resistance training did not reliably prevent hip bone loss.
**The practical reading.** There are not many high-quality weighted-vest studies, and the existing work does not support a guarantee. Bone-health plans may include weight-bearing activity, resistance training, nutrition, medication, and fall prevention, depending on the person. A clinician can help identify what applies.
## Four common claims, checked
| The claim | What the evidence says |
| --- | --- |
| "Wearing a weighted vest builds bone density." | Not established. One study found an association with upright vest time, while the strongest long-term trial combined the vest with other exercise. |
| "Heavier is better for bones." | Not established. Added load can also change gait, balance, joint stress, and spinal loading. |
| "A vest alone replaces strength training for bone." | No. The strongest result (Snow) included jumping/resistance work; recent trials show a vest alone is not sufficient, especially during weight loss. |
| "It will reverse osteoporosis." | Unsupported. Exercise can be part of osteoporosis care, but it is not a cure. Diagnosed low bone density needs an individual medical plan. |
## Do weighted vests work for women in perimenopause and menopause?
Weight-bearing activity and resistance training can be useful parts of bone-health care during and after menopause. A vest is one way to add load, but the Snow trial in postmenopausal women tested a combined exercise program, not vest walking alone.
The rest of the plan matters: suitable weight-bearing activity, progressive resistance training, nutrition, medication when prescribed, and fall-risk management. Needs for protein, vitamin D, and calcium vary; use clinical advice rather than a generic checklist.
## What a broader bone-health plan may include
Depending on medical history and bone status, a plan may include:
1. **Weight-bearing activity.** Walking, stairs, and hiking are examples; loaded walking is optional.
2. **Progressive resistance training.** The movements, frequency, and load should match ability and clinical needs.
3. **Impact or dynamic loading, when appropriate.** This is not suitable for everyone, particularly without guidance when fracture risk is elevated.
4. **Adequate nutrition.** A clinician or dietitian can assess protein, calcium, and vitamin D needs.
5. **A weight-loss plan that accounts for bone health.** Intentional weight loss can affect bone, especially in older adults.
A vest can be one tool within the activity portion of that plan.
## How to use a weighted vest for bone health, sensibly
If a vest is appropriate for you:
- **Establish an unloaded baseline.** Begin with walking that does not cause pain, dizziness, balance changes, unusual shortness of breath, or pelvic-floor symptoms.
- **Use the smallest practical increment.** There is no universal percentage that guarantees an appropriate starting load.
- **Change one variable at a time.** Hold pace, route, and duration easier while testing load.
- **Do not treat wearing time as a dose.** The upright-time finding was observational and does not create a proven prescription.
- **Choose an adjustable vest** if you need small load changes and a secure fit.
## Weighted vest or rucking for bone density?
Both add load to walking. Research has not established that either format produces a superior bone-density outcome. The practical differences are:
- **A vest** distributes weight close to the torso. It can feel secure but may restrict breathing or increase heat if the fit is poor.
- **A rucking pack** carries load behind the torso and can hold water and layers. Pack fit and load placement affect comfort and gait.
Choose the format that stays secure and can be removed or adjusted easily. We discuss rucking-specific evidence and limitations in our [rucking for bone density guide](/guides/rucking-for-bone-density).
Not a rucker at all - just want a vest for daily walks? Our sister site Kit Authority covers [the best weighted vests for walking](https://kitauthority.com/fitness/best-weighted-vests-for-walking?utm_source=ruckauthority&utm_medium=crosslink) and has a [vest sizing calculator](https://kitauthority.com/tools/vest-calculator?utm_source=ruckauthority&utm_medium=crosslink) that starts you at the right weight for your body.
## What the evidence supports
The evidence does not justify promising that a weighted vest will build or preserve bone density. It may be useful as adjustable load inside a broader exercise plan, but the combined program, health history, and clinical care matter more than the object. If bone density is already low, involve the clinician managing it before adding load.
## Frequently Asked Questions
────────────────────────────────────────────────────────────────────────────────
URL: https://ruckauthority.com/guides/what-is-rucking-weighted-walking-explained
Title: What Is Rucking in 2026? The Weighted Walking Trend Explained
Description: Rucking is walking with weight. Learn why people do it, how to choose a starting load, and how to begin safely with basic gear.
Published: 2024-12-19 / Updated: 2026-08-26
[Rucking](/glossary#rucking) is walking with weight in a backpack.
You do not need military experience, special gear, or much jargon to start. Use a backpack, a light load, and a safe place to walk.
Choose a starting load with the [ruck weight guide](/guides/how-heavy-should-your-ruck-be) or [ruck weight calculator](/tools/ruck-weight-calculator). Then follow the [first 30 days of rucking](/guides/first-30-days-of-rucking). Use a [regular backpack](/guides/ruck-with-regular-backpack) until you know you will keep going. Dedicated gear can come later.
Rucking offers a hard workout without complex moves or a gym membership. [Cleveland Clinic sports medicine physician Matthew Kampert, DO, (2024)](https://health.clevelandclinic.org/what-is-rucking) says it combines resistance work and cardio with little skill needed. Many ruckers say it feels easier to approach than running and more engaging than a regular walk.
## What rucking is
Rucking means walking with a loaded pack for exercise. The weight raises your heart rate. At a steady pace, many ruckers train in "[Zone 2](/glossary#zone-2)," an aerobic effort that still lets you hold a conversation.
The term comes from "[rucksack](/glossary#rucksack)," the military word for backpack. Soldiers have carried heavy loads for centuries as part of training and daily work. People have carried tools, food, and children for far longer. The fitness trend is new; walking with weight is not.
To estimate your own session instead of using broad ranges, use the [rucking calorie calculator](/tools/rucking-calorie-calculator).
Adding weight makes the walk harder on your heart and muscles without adding a new movement skill.
## Why people are choosing rucking over other workouts
The appeal goes beyond just burning calories. Rucking stands out for several practical reasons:
**A walking stride, with added load**: Walking usually has lower impact per step than running because it does not use the same aerial landing phase. A backpack still raises ground-reaction forces and changes gait compared with unloaded walking. Those biomechanical differences do not establish that recreational rucking has a lower injury rate than running; direct injury-incidence data are limited. [A systematic review of backpack walking describes the added load and gait changes.](https://pubmed.ncbi.nlm.nih.gov/27705050/)
**Short learning curve**: You do not need to master a new movement. If you can walk, you can ruck.
**Works in many places**: You can ruck in a neighborhood, park, hiking trail, shopping center, or on a treadmill. You do not need a gym membership.
**Works with a group**: A moderate pace leaves room for conversation. Each person can change pack weight to match their fitness level.
**Mental health benefits**: Reddit users often report less stress and clearer thinking after an outdoor ruck. Research on exercise in natural settings also points to benefits for mood and thinking.
## Basic gear for your first ruck
You can start with a backpack you already own. A purpose-built [ruck pack](/gear/best-rucking-backpacks) can wait until you know you will keep training.
### Your backpack options
**Start with what you have**: Any backpack that sits comfortably can work for your first few rucks. School backpacks, hiking packs, and large computer bags can carry 10-20 pounds for short distances.
**If you are buying new**: Look for padded shoulder straps, enough structure to hold the weight close, and a fit that matches your torso. The Osprey Tempest Velocity 20 Women's suits a smaller frame and can handle light rucking. For heavier use, a plate-friendly pack like the [RUSH 24 2.0](/shop) holds weight flat against your back better than most daypacks.
| Beginner fit | Good first pick | Why |
| --- | --- | --- |
| Hiking-pack fit | [Osprey Tempest 20 Women's](/gear/best-rucking-backpacks-for-women) | More trail-oriented carry and an adjustable harness for lighter loads. |
| Plate-friendly tactical fit | [5.11 RUSH 24 2.0](/gear/best-rucking-backpacks) | Better long-term choice once you know rucking will stick and want a flatter plate carry. |
A weighted vest is another way to keep the load close to your body. Our sister site Kit Authority reviews the [MiR Air Flow weighted vest](https://kitauthority.com/fitness/mir-air-flow-weighted-vest-review?utm_source=ruckauthority&utm_medium=crosslink), its most breathable pick for hot weather.
### Weight options
**Household items**: Books, water bottles, canned goods, or bags of rice work for a first ruck. Wrap them in towels to stop shifting and noise.
**Ruck plates**: A purpose-made plate spreads the load and does not rattle like loose items. A [Titan Fitness cast iron ruck plate](/gear/ruck-plate-comparison) is a basic option when you are ready to upgrade.
## How to start safely
The most common beginner mistake is doing too much too soon. Your breathing may feel fine while your feet, shoulders, and back still need time to adapt.
### Your first month progression
**Week 1-2**: 15-20 minutes with light weight (10% body weight) on familiar routes
**Week 3-4**: Extend to 30 minutes, same weight
**Month 2**: Gradually increase either weight OR distance, but not both at once
### Basic form guidelines
- Keep your shoulders relaxed and avoid hunching forward
- Keep your normal walking stride and avoid long steps
- Land on your midfoot rather than heel-striking aggressively
- Brace your core to support the load
Aim for a challenging pace you can sustain.
### Starter kit at a glance
Three items are enough to start. Use what you already own when it fits, and skip the rest for the first month.
The pack carries the load. The plate keeps it steady. The socks help prevent blisters. Add water and anti-chafe gear as your sessions get longer. A GPS watch, headlamp, or trekking poles can wait.
## Common beginner questions
**"Will I look odd?"** Maybe, but weighted backpacks are more common than they used to be. Most people will not pay much attention.
**"Is it safe for my back?"** That depends on your current symptoms, health, pack fit, and training load. A pack increases demand on the trunk and back, so start with a short, light session only if ordinary walking is comfortable. Stop if pain builds or changes your gait. Severe or persistent pain, pain after trauma, pain that travels down a leg, numbness, or weakness needs medical assessment. New bowel or bladder control changes or numbness around the groin needs urgent care. See [is rucking bad for your back?](/training/is-rucking-bad-for-your-back) for a fuller safety guide.
**"Do I need to join a group?"** No. Many people prefer to ruck alone. To find a group, check local Facebook pages or Meetup for nearby ruck clubs.
**"What if I have knee problems?"** Walking usually has lower impact per step than running, but a pack adds load and may change gait. That does not establish that rucking is safe for a specific knee condition. Discuss an existing injury or persistent pain with a healthcare professional before adding weight.
## How to make rucking part of your routine
Some people make rucking part of a normal day. They walk to a coffee shop, use the pack for errands, or ruck while they think through a problem.
A 30-minute neighborhood ruck needs little setup and can fit before work, during lunch, or in the evening.
## What to try after the basics
After the first month, you can use rucking to train for an overnight hike. You can also join a ruck event or race. The carrying strength may help with other sports.
These options are not required. Plenty of people ruck 2-3 times per week for years. Rucking can stay simple or support harder outdoor goals.
## Frequently asked questions
────────────────────────────────────────────────────────────────────────────────
URL: https://ruckauthority.com/guides/why-ceos-are-rucking-during-meetings-the-executive-s-guide
Title: Why Some Executives Ruck During Meetings - And When It Actually Works
Description: Documented examples, walking-creativity research, and a practical guide to taking low-stakes work calls while rucking without compromising the meeting.
Published: 2026-05-08 / Updated: 2026-08-31
Rucking meetings are a real practice, but the evidence supports a useful niche rather than a sweeping C-suite trend. Author and rucking researcher Michael Easter has described taking work calls under load since the pandemic and published the practical lessons he learned. Momentous CEO Jeff Byers has also discussed rucking as part of his routine in business-media coverage.
The straightforward appeal is time: a routine phone call can become a walk instead of another seated hour. That does not make every meeting better, and adding weight has not been shown to improve business performance. The best case is narrower - a light, familiar ruck during a low-stakes call that does not require a screen, notes, confidentiality, or perfectly quiet audio. See Easter's firsthand account of [rucking meetings](https://www.twopct.com/p/rucking-meetings-work-miracles-1ac).
## Why executives are choosing rucking over traditional fitness
Rucking does not replace a complete strength or cardio program, but it can convert a block of sitting into loaded walking. The best candidates are routine one-to-one calls, status updates, and conversations where listening matters more than looking at a document.
Keep the effort low enough that your breathing never becomes part of the call. If the other person can hear the workout, the load, pace, route, or meeting choice is wrong.
## The multitasking advantage of walking meetings
Walking meetings are not new. A 2014 Stanford study by Oppezzo and Schwartz found that walking improved divergent idea generation compared with sitting, but it did not improve focused, convergent thinking. The study tested walking, not rucking, so it cannot tell us that adding weight creates a larger cognitive effect. Read the [Stanford study](https://aaalab.stanford.edu/assets/papers/2014/Give_your_ideas_some_legs.pdf).
Time zone, weather, privacy, and route safety all matter more than job title. Use the window that lets you stay attentive and audible.
## Equipment recommendations for executive rucking
The key is familiar, quiet gear that does not demand attention during the call. Four items cover a clean-looking pack, an adjustable alternative, a secured plate, and shoes that work on pavement.
| Role | Pick | Why it fits the executive context |
|------|------|------------------------------------|
| Pack | GORUCK GR1 26L | Black-on-black silhouette. Reads as business luggage, not tactical kit. |
| Pack alt | Osprey Tempest 20 Women's | Adjustable hiking-style harness for people who prefer more fit range and a hip belt. |
| Plates | GORUCK Ruck Plates | Steel, flat, silent. Won't rattle on a Teams call mid-walk. |
| Shoes | Hoka Transport | Low-profile cushion built for urban walking. Reads as dress-casual, performs under load. |
**Backpacks**: The [GORUCK GR1](/gear/goruck-gr1) has a restrained exterior and keeps dense weight close to the back. The [Osprey Tempest 20 Women's](/gear/best-rucking-backpacks-for-women) offers an adjustable hiking-style harness for people who prefer more fit tuning.
**Weight plates**: Avoid loose weights that shift during calls. The [GORUCK Ruck Plates](/gear/ruck-plate-comparison) are designed specifically for this purpose and won't rattle during important conversations.
**Footwear**: Business-appropriate walking shoes matter when you're going from a ruck straight into the office. The [Hoka Transport](/gear/best-shoes-for-rucking-on-pavement) is built specifically for everyday urban walking with a low-profile silhouette that reads more dress-casual than running shoe, while still offering Hoka's signature cushion under load. The [Transport](/shop) is the same shoe we point urban ruckers to when they want one pair for both the ruck and the office.
## Programming rucking into executive schedules
Build the activity into calls that already suit walking. These are practical options, not proven productivity formulas:
**Routine audio calls**: Use a one-to-one check-in or informal planning call after confirming the route and reception on your own time.
**Commute replacement**: For executives who drive to work, parking farther away and rucking the final distance provides built-in training time.
**Walking desk integration**: A slow treadmill can remove traffic noise and weather, but test camera movement and microphone noise first. External load is optional indoors.
**Solo thinking time**: A walk can suit brainstorming before a meeting. Record notes only after stopping somewhere safe.
## What the practice can and cannot promise
The defensible benefit is increased movement during time that might otherwise be sedentary. Walking may help divergent thinking; a familiar ruck can add training load. Claims about leadership, resilience, decision quality, or executive performance have not been established by rucking research.
The meeting still comes first. If route finding, traffic, breath, weather, or pack discomfort divides your attention, take off the load or sit down.
## Common mistakes to avoid
**Starting too heavy**: Executives often push too hard initially, leading to fatigue that impacts work performance. Begin with lighter loads and build gradually.
**Ignoring form**: Poor posture during calls can cause back pain. Maintain upright posture and engage core muscles throughout the session.
**Inappropriate timing**: Save challenging topics for seated meetings. Rucking works best for routine updates, planning sessions, and one-on-one conversations.
**Weather dependence**: Have indoor alternatives ready. A treadmill desk or mall walking option ensures consistency regardless of conditions.
Rucking meetings are one practical way to replace sitting when the call, route, and load are all uncomplicated. They are not a status symbol or a productivity requirement. Start with walking; add a light pack only when it leaves the conversation untouched. For the rest of the active-lifestyle kit - walking shoes, trackers, travel gear - our sister site [Kit Authority](https://kitauthority.com/fitness?utm_source=ruckauthority&utm_medium=crosslink) covers what we don't.
## Frequently asked questions
────────────────────────────────────────────────────────────────────────────────
URL: https://ruckauthority.com/guides/why-guy-fieri-and-other-celebrities-are-trading-gyms-for-ruc
Title: Why Guy Fieri and Other Celebrities Are Trading Gyms for Rucksacks
Description: How celebrity weighted-walking trends connect to rucking, weight loss, weighted vests, mainstream fitness, and safer beginner starts.
Published: 2026-04-21 / Updated: 2026-09-25
The fitness world loves its celebrity endorsements, but most A-list workout trends require personal trainers, expensive equipment, or questionable supplements. [Weighted walking](/glossary#rucking) - carrying extra load while walking, whether with a rucksack (rucking), a [weighted vest](/glossary#weighted-vest), or both - is different. It's accessible, practical, and increasingly, it's catching the attention of high-profile figures who are discovering what the military and rucking communities have known for decades.
A quick note on terminology before we go further: **rucking specifically means walking with a weighted pack on your back**. Weighted-vest training is a close cousin - same physiological demand, different kit - and a lot of the celebrity coverage uses both tools interchangeably. This piece covers the broader weighted-walking trend, with rucking as the most structured version and the one most ruckers will recognize as "the real thing."
## Guy Fieri's 30-Pound Transformation
According to [Business Insider's report](https://www.businessinsider.com/guy-fieri-weight-loss-healthy-aging-fat-burning-rucking-workouts-2024-5), Guy Fieri has lost more than 30 pounds over the past few years, crediting a combination of intermittent fasting, high-intensity interval training, and weighted-walking workouts. The Food Network star, now 56, has described a routine that includes hiking uphill with a [weighted vest](/gear/cap-barbell-adjustable-weighted-vest) - not strictly rucking in the rucksack-on-back sense, but a variant that sits on the same spectrum of load-bearing walking.
What makes Fieri's approach interesting from a rucking perspective is the emphasis on functional, sustainable fitness rather than extreme measures. Moderation was reportedly key to his success - a principle that aligns with rucking's philosophy of [progressive overload](/glossary#progressive-overload) and consistent, low-impact training. Whether the load sits on your back or your torso, the underlying habit - walk more, carry something while you do it - is the move that's quietly reshaping how a lot of people over 50 are training.
## The Celebrity Rucking Movement Beyond Guy Fieri
Fieri isn't alone in adopting weighted walking. Most of the celebrity examples in mainstream fitness coverage use weighted vests rather than rucksacks - the vest is easier to slip on for a quick hike, and less visually associated with military training, which matters to talent who'd rather not be photographed in "tactical" gear. The underlying activity is the same: walking with added load.
The appeal for high-profile individuals makes sense from a practical standpoint. Unlike gym-dependent workouts that require specific locations and equipment, load-carrying walks happen anywhere - hiking trails in Malibu, Central Park loops, a hotel treadmill with a vest on. For celebrities with unpredictable schedules and constant travel, this flexibility is invaluable.
## Why Celebrities Are Choosing Rucking Over Traditional Gym Workouts
The shift toward rucking among high-profile figures reflects several practical advantages that align with celebrity lifestyles:
### Time Efficiency
Exercise science consistently shows weighted walking burns substantially more calories than unloaded walking at the same pace - community-cited estimates typically land in the 30-45% range depending on load, terrain, and pace. For celebrities juggling demanding schedules, that efficiency matters: a 45-minute weighted walk can deliver cardiovascular and strength stimuli that might otherwise require separate cardio and weight training sessions.
### Privacy and Accessibility
Unlike gym workouts that require public spaces or home installations, rucking offers privacy. Celebrities can train on private property, secluded trails, or even urban environments without the equipment requirements that make other fitness routines impractical while traveling.
### Low Injury Risk
Widespread feedback from rucking forums and available sports medicine research both point to weighted walking - rucking and vest training alike - as significantly lower-impact than running or CrossFit-style training. For celebrities whose physical appearance and mobility directly impact their earning potential, that reduced risk profile is attractive.
### Functional Fitness
The military origins of rucking emphasize real-world strength and endurance rather than gym-specific movements. This translates to better performance in daily activities and on-set physical demands.
## The Science Behind Celebrity Rucking Success
What celebrities like Guy Fieri are discovering aligns with established exercise physiology. Loaded walking - whether via [ruck pack](/gear/best-rucking-backpacks) or weighted vest - produces a distinctive set of adaptations well-documented in exercise science literature:
- **Enhanced metabolic efficiency**: Weighted walking improves both aerobic and anaerobic capacity
- **Improved [bone density](/glossary#bone-density)**: Axial loading under load stimulates bone formation - one of the better-supported findings and the reason weighted-vest protocols show up in osteoporosis research
- **Better posture and core strength**: Carrying load engages stabilizing muscles throughout the body
- **Cardiovascular benefits**: Heart rate response to weighted walking delivers meaningful cardio stimulus at walking-pace intensity
For anyone over 50 focused on longevity rather than appearance, these benefits are particularly appealing. The evidence suggests regular weighted walking helps maintain functional capacity well into later decades, both for performers who need to remain physically capable for their careers and for other older adults.
## What Celebrity Adoption Means for Mainstream Rucking
The visibility of celebrities like Guy Fieri incorporating weighted walking into their routines serves as powerful social proof for the practice - and pulls mainstream attention toward rucking as the more structured, community-anchored version. Celebrity endorsement, even implicit endorsement through lifestyle coverage, significantly influences mainstream adoption of exercise trends.
This mainstream attention brings both opportunities and challenges for the [rucking community](/guides/how-to-start-a-ruck-club):
### Opportunities
- **Increased accessibility**: More retailers are stocking [rucking backpacks](/gear/goruck-rucker-vs-gr1) and [weighted vest](/gear/cap-barbell-adjustable-weighted-vest)
- **Better resources**: Growing demand drives development of [beginner-friendly programs](/guides/couch-to-ruck-program) and educational content
- **Community growth**: New participants bring fresh perspectives and energy to local rucking groups
### Potential Challenges
- **Commercialization**: Risk of essential simplicity being lost to marketing complexity
- **Safety concerns**: New participants may skip proper progression and injury prevention protocols
- **Equipment inflation**: Celebrity association could drive up prices for basic gear
## Getting Started: Learning from Celebrity Approaches
If you want to mirror what Guy Fieri and others are actually using, two pieces of kit cover both ends of the celebrity approach. A vest for the hike-with-load variant (Fieri's style) - an [Adjustable Weighted Vest](/shop) is the lowest-friction way to add load to walks you already take - and a proper ruck pack for the traditional version.
| Use case | Pick | Why it earns the slot |
|----------|------|------------------------|
| Hike-with-load (Fieri-style) | CAP Barbell Adjustable Weighted Vest | 20-150 lb adjustable. The lowest-friction way to add load to walks you already take. |
| Purpose-built ruck pack | GORUCK Rucker 5.0 | Dual elevated plate pockets and a training-first layout for regular loaded miles. |
The celebrity approach to rucking offers several lessons for beginners:
### Start With What You Have
Guy Fieri's success came from consistency and moderation, not from having the perfect setup or following an extreme program. This aligns with our core recommendation: [start with whatever pack you have](/gear/best-rucking-backpacks) and focus on building the habit before optimizing equipment.
### Integrate with Existing Activities
Many celebrities incorporate weighted movement into activities they already enjoy - hiking, walking, even sightseeing while traveling. This integration approach makes rucking sustainable rather than adding another item to an already packed schedule.
### Focus on Progressive Loading
The celebrity emphasis on gradual, sustainable changes mirrors proper rucking progression. Whether you're following Guy Fieri's example or developing your own routine, the key is consistent, gradual increases in weight and distance.
## The Future of Celebrity Fitness and Rucking
The adoption of rucking by mainstream figures like Guy Fieri represents a broader shift in celebrity fitness culture - away from extreme, unsustainable practices toward functional, long-term health strategies. This trend benefits everyone by normalizing realistic, accessible approaches to fitness.
As more public figures discover rucking's benefits, we can expect:
- Increased mainstream media coverage of proper techniques and safety protocols
- Better availability of quality entry-level equipment
- Growing recognition of rucking as a legitimate fitness modality alongside traditional gym workouts
The military community that pioneered rucking and the civilian enthusiasts who've sustained its growth should welcome this mainstream attention while maintaining the core principles that make rucking effective: simplicity, progression, and consistency.
Celebrity endorsement validates what the [rucking community](/pillars/rucking-lifestyle-guide) has always known - that walking with weight is one of the most practical, sustainable, and effective forms of exercise available. Whether you're inspired by Guy Fieri's transformation or simply looking for a fitness approach that fits your life, rucking offers a proven path forward. And if your fitness curiosity runs wider than the loaded walk, our sister site [Kit Authority](https://kitauthority.com/fitness?utm_source=ruckauthority&utm_medium=crosslink) covers the rest of the active-lifestyle kit.
## Frequently Asked Questions
────────────────────────────────────────────────────────────────────────────────
URL: https://ruckauthority.com/guides/why-yoga-studios-are-adding-rucking-classes-and-how-it
Title: A Yoga Studio Added a Rucking Group - Here Is What Others Can Learn
Description: Tulsa yogaQuest offers a real beginner rucking group. Here is what the program gets right and how any wellness studio can evaluate loaded walking safely.
Published: 2026-05-01 / Updated: 2026-08-31
Tulsa yogaQuest has done something unusual and concrete: it added a recurring hiking and rucking group to its community events. The published sessions begin with a short introduction, use a one-to-two-mile loop, make weight optional, and tell first-timers to start below 10 pounds. See the studio's current [events listing](https://www.tulsayogaquest.com/events).
That is evidence of one real yoga studio program, not proof of a nationwide studio trend. It is still worth studying because the format removes several beginner barriers without pretending rucking and yoga are the same practice.
## The mindful movement connection
Yoga can give a beginner useful awareness of posture, breathing, and the difference between effort and pain. Those skills can carry into a ruck, even though loaded walking has its own fit, gait, and progression demands.
A simple cue works better than a forced breathing count: keep the pace and load easy enough to speak in full sentences. If breath becomes strained, reduce one of them.
## Why the format can fit a wellness community
A walking group gives an indoor community an outdoor, social option with a low equipment threshold. Water in a backpack can provide a small removable load, and anyone can walk without added weight.
The tradeoff is that an outdoor group is not automatically easier to supervise. Route crossings, weather, pace differences, medical events, and participants bringing unsafe loads all require a plan. Smaller groups and a loop that lets people stop after one lap are sensible design choices.
## A beginner session format that holds up
There is no standard yoga-rucking class format. Based on the published yogaQuest event and ordinary group-walk safety, a credible beginner session can be simple:
- **Five-minute briefing:** Explain pack fit, route, turnaround points, and stop signals.
- **Optional load:** Let first-timers walk unweighted or carry less than 10 pounds.
- **One-to-two-mile loop:** Keep the first lap together at conversation pace.
- **Clear exit:** Let participants finish after one loop without pressure.
- **Short check-out:** Ask about hot spots, numbness, pain, and pack movement before recommending another session.
A familiar yoga warm-up or cool-down can be included, but it is not what makes the load safe. Load control, route choice, pack fit, and supervision do.
## Equipment and safety considerations
Studios implementing rucking classes face unique equipment and safety challenges. Unlike yoga, which requires minimal gear, rucking demands proper weight distribution and pack selection.
Loaner packs can lower the barrier, but a studio does not need a gear fleet to test demand. A normal backpack with secured water can work for a first light session. Do not hand a new participant a fixed 20-pound plate simply because that is what the studio owns. If someone wants a dedicated pack, the [5.11 Tactical RUSH 12](/gear/best-rucking-backpacks) is one compact option, but fit it before loading it.
Choose a flat, well-maintained loop with bathrooms, water access, reliable cell service, and few road crossings. Publish a weather and cancellation policy before taking registrations.
## The operational case for studios
The clearest first test is a free or low-cost community event, not an equipment purchase or a new membership tier. yogaQuest's event is open to everyone, uses participant-supplied water or optional weight, and lets people leave after one loop. That is a low-friction way to learn whether the community wants more.
Before charging for a recurring program, a studio should confirm instructor competence, insurance coverage, route permissions, emergency procedures, equipment inspection, and an honest participant-to-leader ratio. Those details matter more than inventing a yoga-rucking brand name.
## What can be measured honestly
There is no published outcome dataset for yoga-studio rucking groups. A studio can still learn from attendance, return rate, completed distance, participant-reported exertion, pain or hot spots, and whether people choose to add load over time.
Avoid promising posture correction, stress treatment, or strength gains from a single group walk. The first success is simpler: people finish safely, understand how to load a pack, and know whether they want to return.
## Challenges and limitations
Class sizing is a real consideration. A walking group stretches out, pace differences grow, and road crossings can split participants. Weather dependence adds scheduling complexity.
Teaching safe [rucking technique](/guides/rucking-form-guide) calls for different expertise than teaching yoga. A studio should train the leader for load carriage and group route safety or partner with someone who already has that experience.
Insurance and liability are worth checking before launch. Outdoor classes carrying equipment can create exposures that studio-based yoga does not.
## What this example actually shows
One yoga studio has built a recurring rucking group around conservative beginner choices. Other wellness operators, including Big Cedar Lodge, also list dedicated rucking sessions alongside broader wellness programming. That shows the format can live in a wellness setting; it does not establish a national yoga-industry movement. See Big Cedar's [three-mile rucking class](https://bigcedar.com/activity/5k-rucking-class/).
For yoga practitioners curious about rucking, a familiar community can make the first walk less intimidating. Qualification still matters: a yoga credential alone does not establish load-carriage expertise. And if your fitness interests run broader than loaded walking, our sister site [Kit Authority](https://kitauthority.com/fitness?utm_source=ruckauthority&utm_medium=crosslink) covers gear for everything outside.
## Frequently asked questions
## GEAR HUB (44 articles)
────────────────────────────────────────────────────────────────────────────────
URL: https://ruckauthority.com/gear/5-11-tactical-base-layer-collection
Title: 5.11 Tactical Base Layer Collection: Community Review & Analysis
Description: 5.11 Tactical base layers reviewed for rucking: synthetic vs merino options, moisture control, layering fit, durability, and value.
Published: 2026-04-29
# 5.11 Tactical Base Layer Collection: What Ruckers Are Saying
5.11 Tactical sits in an interesting spot for ruckers shopping the base-layer aisle. The brand is tactical-coded by design, but the people actually wearing these shirts under a loaded pack run the gamut from new ruckers building a budget kit to long-haul backpackers and ultralight commuters. Based on aggregated feedback from Reddit, outdoor forums, Amazon reviews, and gear-enthusiast sites, 5.11's base layers generate both enthusiastic defenders and pointed critics. The truth, as usual, lands somewhere in the middle.
After analyzing reviews from r/tacticalgear, r/backpacking, outdoor forum threads, and retailer reviews, we've compiled what ruckers are actually saying about 5.11's moisture-wicking shirts and how they perform under sustained load.
## Overview
The 5.11 Tactical base layer collection includes both synthetic and merino wool options, designed around the brand's heritage of duty-cut apparel. The lineup features crew necks, v-necks, and full-coverage long-sleeve options.
What sets 5.11's approach apart from typical athletic base layers is the cut. The shirts are patterned to sit flat under a [plate carrier](/gear/best-plate-carrier-weight-vests-for-rucking-military-style-t) or [weighted vest](/glossary#weighted-vest) without bunching, with reinforcement at the shoulders and chest where pack straps and harness webbing typically wear through fabric first. For ruckers who carry weighted vests or run rigid-frame packs with sternum straps, that detail matters more than it does for someone in a lightweight [daypack](/glossary#daypack).
## Key Specs
**Synthetic Options:**
- Materials: Polyester/elastane blend with moisture-wicking treatment
- Weight: Lightweight (approximately 4-5 oz)
- Features: Antimicrobial treatment, flatlock seams, tagless design
- Price band: Under $50
**Merino Options:**
- Materials: Merino wool blend (typically 80/20 merino/synthetic)
- Weight: Mid-weight base layer
- Features: Natural odor resistance, temperature regulation
- Price band: $45 to $75
**Construction Details:**
- Flatlock seaming to reduce chafing under pack straps
- Reinforced shoulder and chest panels
- Athletic fit cut wider through the shoulders
- Subdued color options (black, coyote, ranger green) for ruckers who want low-visibility kit
## What Ruckers Are Saying
### The Positive Feedback
Reddit ruckers in r/tacticalgear consistently praise 5.11's base layers for durability. One frequently cited comment: "I've had the same 5.11 synthetic base layer for three years of regular wear, and it's held up better than my Smartwool."
Forum discussions highlight that the cut works well under plate carriers without bunching, and the reinforced areas align with common pack-strap wear points. Ruckers running [weighted vests](/gear/best-weighted-vests-for-rucking-in-2026) for training appreciate that the shoulder seams sit outside the vest's contact zones rather than directly under them.
Amazon reviewers give the synthetic options an average of 4.2/5 stars, with consistent mentions of:
- Moisture-wicking that holds up during high-output efforts
- Durability through repeated wash cycles
- Solid value compared to premium outdoor brands
### The Critical Voices
The community's criticism centers on the gap between marketing and substance. Some forum users critique what they describe as a "tacticool aesthetic over performance" pattern, arguing the brand leans on its visual identity more than its fabric tech actually justifies.
Specific performance complaints from community threads include:
- Synthetic options retaining odor faster than the antimicrobial claims suggest
- Merino blends pilling more quickly than higher-percentage merino alternatives
- Inconsistent fit between different style lines within the collection
One detailed Amazon review captured a common sentiment: "Works fine for short loops and light use, but when I'm [rucking](/glossary#rucking) long distance, I reach for my Icebreaker or Smartwool instead."
### Field Notes on Value
The recurring theme across review platforms is that 5.11 base layers represent solid "good enough" performance at a competitive price. They aren't the absolute best in any one category, but they deliver reliable function without the premium tier's price.
Ruckers frequently recommend 5.11 base layers as starter gear for new ruckers building a kit, or as backup pieces for experienced ruckers who don't want to wear out their expensive merino on training days.
## Who It's Best For
**Strong Match:**
- Budget-conscious ruckers building their first kit
- Ruckers who layer under plate carriers or weighted vests where standard athletic cuts bunch
- Anyone who prioritizes durability over premium hand-feel
- Ruckers who want multiple base layers in rotation without spending merino prices on every piece
**Consider Alternatives If:**
- You're sensitive to synthetic fabrics directly against skin
- Odor control is your top priority for multi-day backcountry use
- You need best-in-class moisture management for extreme heat or extreme cold
- Premium feel and refined construction details matter more to you than value
## Comparison to Alternatives
**vs. Premium Merino (Icebreaker, Smartwool):**
- 5.11: Better value, cut sits flatter under load-bearing harnesses
- Premium: Superior odor control, softer hand-feel, better temperature regulation across wider conditions
**vs. Synthetic Competition (Under Armour, Patagonia Capilene):**
- 5.11: More durable, reinforcement panels at high-wear zones, lower price
- Competition: Better moisture management, more refined fit, wider style and color range
**vs. Budget Options (Hanes, Fruit of the Loom):**
- 5.11: Substantially better moisture-wicking, better durability, purpose-built cut
- Budget: Lower price point, easier to find on a quick trip
The sweet spot for most ruckers seems to be running 5.11 as the training and rotation base layer, with one or two premium merino pieces reserved for longer events or trips where odor control and temperature range matter most.
## Bottom Line
5.11 Tactical base layers occupy a defensible spot in the market: a cut that works well under load-bearing harnesses, a competitive price, and durability strong enough for regular rotation. Community feedback suggests they aren't the best or worst option in any one dimension, but they're a practical pick for ruckers who want reliable performance without spending premium money on every piece.
The synthetic options offer the strongest value proposition. The merino blends have a harder time justifying their price against specialized outdoor brands that put a higher percentage of merino into the same fabric weight. For ruckers building a first kit or stocking multiple base layers for rotation, 5.11 lays a reasonable foundation.
The brand's polarizing reputation should not pull focus from the useful part: these base layers work. They may not be the choice of ultralight backpackers chasing every gram, but for the bulk of ruckers, they handle moisture and stand up to repeated wear well enough for regular training.
Treat 5.11 base layers as workhorse pieces rather than premium kit, and they'll likely meet or exceed expectations.
## Frequently Asked Questions
────────────────────────────────────────────────────────────────────────────────
URL: https://ruckauthority.com/gear/5-11-tactical-tactec-plate-carrier
Title: '5.11 Tactical TacTec Plate Carrier Review: When Ruckers Choose Plates Over Packs'
Description: '5.11 TacTec Plate Carrier review for rucking: fit, comfort, plate compatibility, durability, alternatives, and when a plate carrier beats a ruck pack.'
Published: 2026-04-20 / Updated: 2026-08-26
When should you use a plate carrier instead of a backpack? The 5.11 TacTec sits between fitness-only weighted vests and lighter minimalist carriers, with padded shoulders, an adjustable cummerbund, MOLLE attachment points, and room for standard training or armor plates.
This is a specification-led editorial review. Ruck Authority has not completed an evidence-recorded field test of this carrier, so comfort, heat, and durability judgments are framed as fit considerations rather than firsthand results.
## 5.11 TacTec Plate Carrier review: fast answer
The 5.11 TacTec Plate Carrier is worth considering if your weighted walking looks more like plate-carrier conditioning than long-distance backpack work. It carries compatible rigid plates on the front and rear of the torso and provides padded shoulders, airflow panels, and a MOLLE platform.
It is not the best first purchase for normal rucking. For 60-plus minute sessions, a [rucking backpack](/gear/best-rucking-backpacks) or [GORUCK Rucker](/gear/goruck-rucker-vs-gr1) carries water, layers, and food while moving more load to the hips. If you want the full category comparison, see our [plate carrier-style weighted vest guide](/gear/best-plate-carrier-weight-vests-for-rucking-military-style-t).
## TacTec verdict
The TacTec is a strong candidate when you specifically want a configurable plate carrier for balanced torso loading. It is a weaker fit when the job is distance rucking, carrying water and layers, or meeting an event list that explicitly calls for a rucksack.
| Dimension | What the current evidence supports |
|-----------|------------------------------------|
| Rucking fit | Front-and-rear plate carry without backpack cargo or hip-belt transfer. |
| Adjustment | Padded yoke, adjustable shoulder straps, and stretch waistband listed for S-XL. |
| Construction | 500D nylon, airflow panels, MOLLE, quick release, and grab-drag handle. |
| Total cost | Carrier plus compatible plates and any hydration or storage pouches. |
**Buy it if:** you need plate-carrier geometry, compatible rigid plates, MOLLE, and a product that can serve fitness and professional equipment roles.
**Skip it if:** you ruck primarily for distance, need a pack rather than a plate carrier, or want fitness-only kit. A purpose-built weighted vest or a [GORUCK Rucker 5.0](/gear/goruck-rucker-vs-gr1) is the more direct tool for those jobs.
## When a plate carrier beats a ruck pack
This is the question most ruckers searching "5.11 TacTec review" are actually trying to answer. Use this decision logic:
| Your training is mostly | Better tool | Why |
|-------------------------|-------------|-----|
| Short conditioning with balanced torso plates | Plate carrier (TacTec works) | Front and rear pockets distribute compatible plates around the torso. |
| Distance with water, layers, and food | Ruck pack, optionally with a hip belt | Integrated cargo and optional load transfer fit the job better. |
| Training that specifically requires carrier geometry or MOLLE | Plate carrier | The TacTec is designed around front/rear plates and modular attachments. |
| GORUCK event preparation | The rucksack named on the event list | Train with the pack and load you must use at the event. |
| Pure fitness (weight loss, cardio, general strength) | Weighted vest (purpose-built) | Cooler than a carrier, cheaper than tactical, no plates to source. |
If most of your training is distance rucking, start with a rucksack. If plate-carrier movement is the actual goal, the TacTec's current feature set deserves comparison with fitness vests and other carriers in your price range.
## Overview
The 5.11 TacTec plate carrier occupies a unique position in the rucking gear ecosystem. Unlike traditional [weighted vests](/gear/best-weighted-vests-for-rucking-in-2026) or [rucking backpacks](/gear/best-rucking-backpacks), it's designed primarily as tactical equipment that some fitness enthusiasts have adopted for training.
5.11 positions it for both professional plate-carrier use and weighted fitness. The official specification is more capable than the old version of this article implied: it includes a padded yoke, airflow panels, adjustable shoulder straps and waistband, a one-handed quick-release cable, laser-cut and web MOLLE, and compatibility with medium and large ESAPI plates plus Rogue weight-vest plates.
## Key Specs
Based on 5.11 Tactical specifications and retailer listings:
**Construction & Materials:**
- 500D nylon construction
- Front and rear padded panels with airflow channels
- Laser-cut loop MOLLE and web MOLLE platform
- One-handed quick-release cable and extendable grab-drag handle
**Sizing & Fit:**
- Adjustable shoulder straps with a padded back yoke
- Adjustable skeletonized waistband with stretch, listed for S-XL
- 52-57 inch listed cummerbund circumference
**Plate compatibility:**
- Medium ESAPI: 12.5 x 9.5 x 2 inches
- Large ESAPI: 13.25 x 10.25 x 2.25 inches
- Compatible with Rogue weight-vest plates according to 5.11
- Side panels are available separately
**Storage:**
- Top admin pocket with hook-and-loop closure
- [MOLLE attachment](/glossary#molle-webbing) points for optional pouches
- No backpack-style cargo compartment for water, food, or layers
## What the specifications do and do not tell you
The TacTec gives you a front-and-rear plate platform with shoulder padding, airflow channels, adjustment, MOLLE, and a quick release. That makes it a credible candidate for balanced torso loading, short conditioning sessions, and users who also need a configurable plate carrier.
It does not give you a ruck's cargo capacity or hip-belt load transfer. Any water, food, layers, or first-aid supplies require attached pouches or a separate system. The product page also does not publish a universal fitness-load ceiling, so choose only compatible plates, secure them with both the internal strap and external closure flap as 5.11 instructs, and follow 5.11's safety guidance.
## Who It's Best For
The TacTec makes the most sense for someone who specifically wants balanced front-and-rear plates, a MOLLE platform, and a plate carrier that can serve fitness and non-fitness roles.
It makes less sense for a beginner who simply wants to walk farther with weight. A ruck is easier to load gradually, carries water and layers without extra pouches, and can move some load toward the hips. A fitness vest is simpler when the only job is short weighted exercise.
## Comparison to Alternatives
### Versus Quality Weighted Vests
[Weighted vests](/gear/best-weighted-vests-for-rucking-in-2026) are usually simpler for fitness: the weight system is the point of the product, adjustment is designed around movement, and there is less modular gear to configure. The TacTec is preferable when compatible rigid plates, MOLLE, and carrier geometry are part of the requirement.
### Versus Rucking Backpacks
Traditional [rucking backpacks](/gear/best-rucking-backpacks) offer cargo capacity and, on some models, a hip belt. They are the more direct choice for distance, hydration, layers, food, and events whose official list calls for a rucksack.
The TacTec only wins in specific scenarios where front-loaded weight distribution is specifically desired or where tactical movement patterns are being practiced.
### Versus Premium Plate Carriers
Premium carriers may offer different plate cuts, cummerbund systems, weight, ventilation, modularity, and professional features. Compare the exact requirement rather than assuming price alone maps to comfort or durability.
## Bottom Line
The 5.11 TacTec is a feature-rich plate carrier with a clear fitness use case, but it is not a backpack substitute. The official specs correct several errors that previously appeared on this page: it does have a quick release, adjustable shoulder and waist systems, airflow panels, and compatibility with medium/large ESAPI and Rogue weight-vest plates.
If your training mix is mostly long-distance rucking, this is the wrong purchase regardless of the carrier's strengths. Get a [Rucker 5.0](/gear/goruck-rucker-vs-gr1) or a purpose-built weighted vest instead.
Choose it when plate-carrier geometry and modularity are the point. Choose a Rucker or another compliant rucksack when you are preparing for a GORUCK event, and verify the event's official gear list rather than treating a plate carrier as interchangeable.
## Frequently Asked Questions
────────────────────────────────────────────────────────────────────────────────
URL: https://ruckauthority.com/gear/amazon-prime-day-rucking-deals-2026
Title: Prime Big Deal Days 2026 Rucking Deals (Oct 6-7): What's Worth Buying
Description: Our watchlist for Amazon's October Prime Big Deal Days: the rucking watches, shoes, packs, plates and lights worth buying on sale, what to skip, and how to check a discount. Plus what actually dropped in June.
Published: 2026-06-09 / Updated: 2026-09-25
Amazon's second Prime event of the year, Prime Big Deal Days, runs **Tuesday, October 6 and Wednesday, October 7, 2026**. It's the last big sale before Black Friday, and it lands just as rucking season picks up again: cooler mornings, shorter days, and the gear people put off buying all summer.
This page is our watchlist. It covers the rucking categories where October discounts are usually real, the specific products we'd buy if they drop, and the purchases worth making somewhere else.
## When is Prime Big Deal Days 2026?
**October 6-7, 2026.** Deals start at 12:01 a.m. Pacific on October 6 and run through the end of October 7. The sale is for Prime members, and Amazon says early deals are already live in some categories.
Two Amazon tools make this easier than it used to be. The **Price History** panel on a product page shows up to a year of prices, so you can see whether the "sale" price is actually low. **Deal Alerts** let you set a target price and get a notification when a saved product drops to it.
## What to watch in October
### GPS watches: the most reliable category
Garmin and COROS discount prior-generation watches in almost every major sale, and watches are easy to compare because the model numbers are exact. The Instinct 3 Solar is our rucking pick for battery life and toughness; the COROS PACE 3 is the budget choice that still tracks heart rate, pace and elevation properly.
If you also run, the Garmin Forerunner 265 is worth watching for its brighter display.
### Shoes: good odds, especially on last season's colors
Trail and walking shoes are one of the best-discounted categories in Amazon sales, usually through older colorways rather than the newest release. Size availability is the catch, so check your size before you get excited about the price.
Read [the best shoes for rucking on pavement](/gear/best-shoes-for-rucking-on-pavement) first if most of your miles are on roads; the right shoe depends more on surface than on price.
### Packs: the Amazon-side plays
The 5.11 RUSH 24 is the plate-friendly pack our readers buy most on Amazon, and 5.11 has taken part in past Prime events. The Mystery Ranch 2 Day Assault is the premium alternative with a better harness, and the Polyfit PL8 is the budget pack built around a plate.
### Weight: buy it when you need it
Steel and cast iron rarely go on meaningful sale, because the margins are thin. If you need a plate now, the Yes4All 10 lb pair is our budget pick: two plates that give you 20 lb, and you can start with one.
### Lights and small stuff
With sunrise getting later every week, a headlamp is the most useful thing on this list for most people. Headlamps are also one of the categories that discount most consistently. The Black Diamond Spot 400 is the one we'd buy.
Smaller items worth watching: the Source WXP 3L hydration bladder, Darn Tough Light Hiker socks, and Body Glide for chafe-prone spots.
## GORUCK isn't part of this sale
GORUCK sells direct, so its prices don't move with Amazon's events. It runs its own sales, usually around holidays, and those are the ones to wait for. If you're deciding on a Rucker, read [our hands-on Rucker 5.0 review](/gear/goruck-rucker-5-0-review) and check the current lineup on [our GORUCK guide](/goruck).
## How to tell a real deal from a fake one
Sale events are notorious for inflated list prices. Three checks before you buy:
1. **Check the price history.** Use the Price History panel on the Amazon product page, or an independent tracker such as CamelCamelCamel, to see whether the sale price is lower than what the product sold for three weeks ago.
2. **Prior generation versus current.** The deepest real discounts are usually on last-generation models. For rucking, that's almost always the right buy: a prior-generation Garmin or last season's shoe colorway performs the same under load.
3. **Check the seller.** Look-alike listings spike during big sales. If a branded product ships from an unfamiliar third-party seller at a price that seems too good, skip it.
## What to skip
- **GORUCK packs and plates on Amazon.** They're rarely listed and never meaningfully discounted there. Wait for GORUCK's own sales.
- **No-name weighted vests.** Big sales surface a flood of very cheap vests with unverifiable weight ratings and stitching that fails under real load. Our [weighted vest roundup](/gear/best-weighted-vests-for-rucking-in-2026) covers the ones that hold up.
- **Anything you haven't researched.** The countdown timer is a sales tactic. Read the guide for the category, then buy the discount.
## What dropped in June's Prime Day
Prime Day 2026 ran June 23-26. These were the discounts we observed during that event, kept here as a guide to what tends to move. They are not current prices.
- **GPS watches were the standout.** The Garmin Instinct 3 Solar and Fenix 8 AMOLED were both about 25% off, the Forerunner 265 about 22%, and the COROS PACE 3 about 13%.
- **The Polyfit PL8 weighted backpack had the deepest discount on our board, about 43% off.**
- **A Lifepro percussion massage gun was about 30% off,** the best of the recovery gear.
- **Not meaningfully discounted:** GORUCK packs, the 5.11 RUSH 24, ruck plates, and most trail shoes stayed near their usual prices.
The pattern matched earlier Prime events, which is why watches, footwear and headlamps lead the October watchlist above.
| Category | Sale discount likelihood | Notes |
|---|---|---|
| Trail and walking shoes | High | Prior-season colorways from Hoka, Salomon and Saucony drop most |
| Socks | Medium | Darn Tough rarely drops; multi-packs do |
| Headlamps | High | Petzl and Black Diamond reliably discount |
| GPS watches | High | Garmin discounts prior-generation models heavily |
| Tactical packs | Medium | 5.11 and Maxpedition see modest drops |
| Ruck plates | Low | Steel is steel; discounts are rare |
| GORUCK | Very low on Amazon | Shop GORUCK's own sales |
## Related reading
- [Our hands-on Rucker 5.0 review](/gear/goruck-rucker-5-0-review) - a week of loaded miles with GORUCK's current Rucker
- [Best rucking gear 2026](/gear/best-rucking-gear-2026) - the full category-by-category picks
- [Budget rucking starter kit](/gear/budget-rucking-starter-kit) - the under-$50 DIY route, deals or no deals
- [Best headlamps for rucking](/gear/best-headlamps-for-rucking) - how to choose a beam for dark mornings
- [Rucking starter kit loadout](/loadouts/beginner-starter-kit) - the complete setup with exact links for each item
## Frequently asked questions
────────────────────────────────────────────────────────────────────────────────
URL: https://ruckauthority.com/gear/best-cold-weather-gloves-for-rucking-in-2026
Title: Best Cold Weather Gloves for Rucking in 2026
Description: Compare cold-weather rucking gloves by warmth, grip, dexterity, and moisture control.
Published: 2026-05-31
## Best Cold Weather Gloves for Rucking
### Choose Gloves for Cold-Weather Rucking
Standard winter gloves fail during cold weather rucking because they prioritize warmth over grip control. Reddit users consistently report losing pack strap security and struggling with buckle adjustments when temperatures drop below freezing. The result is dangerous fumbling with gear or removing gloves entirely, exposing hands to frostbite risk.
We analyzed community feedback from winter rucking forums and cold weather gear reviews to identify gloves that maintain dexterity for pack handling while providing adequate warmth protection. These three picks balance thermal protection with the grip control essential for safe winter ruck sessions.
### Quick picks
- **Best Overall:** Kinco 901 Pigskin Gloves ($53.99)
- **Best Value:** REI Co-op Flash Power Wool Gloves ($49.95)
- **Best for Dexterity:** The North Face Denali Etip Gloves ($60)
### Budget and use-case tiers
- **Tier 1: Insulated leather ($53.99):** A durable insulated leather glove for freezing conditions and repeated pack-strap handling.
- **Tier 2: Technical fleece and wool ($49.95-$60):** Lighter gloves that prioritize touchscreen use and dexterity in moderate cold.
- **Tier 3: DIY (Under $25):** Repurpose existing wool socks or basic work gloves you already own as emergency backup gloves.
### Comparison table
product: The North Face Denali Etip Gloves; price: $60; rating: 7/10; material: Synthetic fleece; bestFor: Touchscreen + moderate cold
product: REI Co-op Flash Power Wool Gloves; price: $49.95; rating: 7.5/10; material: Merino wool blend; bestFor: Budget winter activities
product: Kinco 901 Pigskin Gloves; price: $53.99; rating: 7.9/10; material: Pigskin leather; bestFor: Grip + dexterity focus
### Temperature Zones and Insulation Requirements
Cold weather rucking demands gloves engineered for specific temperature ranges rather than one-size-fits-all solutions. Community feedback consistently shows that most ruckers encounter three distinct thermal zones during winter training sessions. The mild cold zone (35-45°F) requires basic wind resistance with minimal insulation since body heat generation keeps hands warm during active movement. The moderate cold zone (20-35°F) necessitates proper insulation materials like merino wool or synthetic fills while maintaining breathability for sweat management.
The severe cold zone (below 20°F) presents the greatest challenge for glove selection. Reviewers report that standard insulated gloves often fail in these conditions, leading many to adopt mitt-style designs or chemical hand warmers as backup heat sources. However, mitts compromise the precise grip control needed for pack strap adjustments and gear access. The sweet spot lies in heavily insulated gloves with windproof shells that preserve individual finger movement for critical tasks like compass navigation or emergency gear deployment.
Understanding your local climate patterns helps narrow glove choices before winter hits. Reddit users in Minnesota consistently recommend different solutions than those in Colorado due to humidity differences and wind exposure factors. Dry cold allows for lighter insulation with better breathability, while humid cold requires moisture-wicking linings and water-resistant outer shells to prevent heat loss through evaporative cooling.
### Grip Technology and Pack Strap Control
Pack strap control separates rucking gloves from general winter gloves designed for skiing or casual outdoor use. Aggregated reviews show that smooth-palmed gloves create dangerous slip scenarios when adjusting loaded pack straps during movement. The repetitive gripping motion of maintaining pack stability demands specialized palm materials that maintain friction even when wet from snow or condensation.
Pigskin leather emerges as the gold standard for palm construction based on community consensus. Unlike cowhide or synthetic alternatives, pigskin provides natural tackiness that improves with use rather than becoming slippery over time. Work glove manufacturers have perfected pigskin treatments that resist cracking in cold temperatures while maintaining flexibility for finger articulation. The natural grain structure creates microscopic grip points that engage with webbing materials and metal hardware effectively.
Synthetic grip technologies offer alternatives for users seeking vegan options or enhanced durability. Rubberized palm overlays provide excellent initial grip but Reddit users report degradation after extended use against rough pack materials. Textured synthetic leather compounds strike a middle ground with good longevity and grip performance, though they require more break-in time compared to natural leather options.
Finger and thumb grip zones deserve equal attention to palm materials. Reviewers consistently note that pack strap adjustments involve pinching and pulling motions that stress fingertip areas. Quality cold weather rucking gloves incorporate reinforced fingertip materials or specialized grip patches that prevent wear-through during heavy use seasons. The index finger and thumb receive particular stress during buckle manipulation and zipper operation under load.
### Breathability and Moisture Management Systems
Cold weather glove moisture management presents a complex engineering challenge that separates premium options from budget alternatives. Active rucking generates significant hand heat that must escape to prevent sweat accumulation, yet the glove must retain enough insulation to protect against external cold. Community feedback shows that most glove failures occur due to moisture buildup rather than insufficient initial warmth.
Merino wool linings provide the foundation for effective moisture transport based on aggregated user experiences. Unlike synthetic insulation materials that trap moisture against the skin, merino wool actively wicks perspiration away from hands while maintaining insulation properties even when damp. Quality gloves incorporate graduated wool densities with thicker insulation on the back of hands where wind exposure is highest and thinner wool on palms where dexterity matters most.
Membrane technologies like Gore-Tex and proprietary waterproof-breathable fabrics create a middle layer that blocks external moisture while allowing internal vapor transfer. However, reviewers consistently report that these membranes reduce overall breathability compared to non-waterproof designs. The trade-off becomes worthwhile only in wet snow conditions or freezing rain scenarios where external moisture protection outweighs breathability concerns.
Ventilation features provide mechanical moisture management when membrane technologies fall short. Quality designs incorporate strategic venting zones between fingers or along the back of the hand that open during high-exertion periods. Some models feature removable liner systems that allow for field drying when conditions permit glove removal. These systems prove particularly valuable during multi-day winter ruck events where daily moisture reset becomes crucial for hand health.
### Dexterity Preservation for Essential Tasks
Maintaining finger dexterity while preserving warmth represents the core engineering challenge in cold weather glove design. Rucking demands frequent micro-adjustments to pack systems, navigation tool operation, and emergency response capabilities that become impossible with oversized or stiff glove construction. Community consensus shows that even minor dexterity compromises can escalate into safety issues during challenging winter conditions.
Pre-curved finger construction allows gloves to match natural hand positioning during grip tasks rather than forcing fingers to work against glove structure. Quality manufacturers use heat-forming processes to create permanent finger curves that reduce fatigue during extended ruck sessions. The curve angles must balance closed-fist gripping for pack straps with open-hand positioning for map reading and gear manipulation.
Articulated knuckle zones prevent material bunching that interferes with finger flexion under load. Reviewers consistently prefer gloves with individual knuckle panels over straight-cut designs that create pressure points during repetitive gripping motions. These articulation zones require reinforcement to prevent premature wear while maintaining flexibility throughout temperature cycling from indoor storage to outdoor use.
Touchscreen compatibility has evolved from novelty feature to essential functionality for winter rucking. GPS navigation and emergency communication devices require direct finger contact that traditional gloves block completely. Modern solutions incorporate conductive materials in fingertip areas that maintain electrical contact while preserving insulation properties. However, Reddit users report that touchscreen function often degrades with use as conductive treatments wear away from repeated contact with rough pack materials.
### Bottom line
You don't need premium technical gloves to start winter rucking safely. The REI Co-op Flash delivers reliable warmth and grip for most conditions without stretching your budget. Upgrade to the Kinco 901 when you're rucking regularly in sub-freezing temperatures and need maximum durability for pack strap handling.
### Frequently asked questions
**What are the best cold weather gloves for outdoor activities?**
The North Face Denali Etip Gloves offer excellent touchscreen compatibility and warmth for most conditions. REI Co-op Flash Power Wool Gloves provide natural temperature regulation with merino wool. Kinco 901 Pigskin Gloves deliver superior durability and grip for heavy work at an affordable price point.
**What's the most affordable cold weather glove option?**
The REI Co-op Flash Power Wool Gloves are the lowest-priced product in this guide. Kinco's 901 usually costs slightly more and trades touchscreen use for insulated leather durability and grip.
**Are there good alternatives to expensive winter gloves?**
REI Co-op Flash Power Wool Gloves offer premium features at mid-range pricing. They use merino wool for natural odor resistance and temperature regulation. Reddit users frequently recommend them as alternatives to higher-priced options, noting their balance of warmth, breathability, and value.
**What should I prioritize when choosing cold weather gloves?**
Consider your primary use case first. For smartphone use, prioritize touchscreen compatibility like the Denali Etip. For heavy outdoor work, focus on durability and grip like the Kinco 901. For extended wear, natural materials like merino wool in the REI Flash Power provide better comfort and odor control.
Winter rucking requires gloves that keep your hands warm without making buckles, zippers, and pack straps hard to use. Thick ski gloves may be warm enough but clumsy under load. Thin liners preserve dexterity but may not provide enough protection when the temperature drops.
The practical choice balances four things: warmth, grip, dexterity, and moisture control. The right balance depends on the temperature, wind, precipitation, and how hard you expect to work.
*This guide compares manufacturer specifications with recurring fit and durability comments in owner reviews. For clothing and layering guidance, see our [winter rucking guide](/training/winter-rucking-cold-weather).*
## Temperature Zones and Insulation Requirements
Start with the conditions you actually train in. In mild cold (35-45°F), wind resistance and light insulation may be enough once you are moving. Moderate cold (20-35°F) usually calls for more insulation while still allowing sweat to escape.
Below 20°F, warmth and dexterity become harder to balance. Mittens retain heat well but make strap adjustments and navigation harder. An insulated, wind-resistant glove with room for a thin liner is often the more flexible setup. Carrying a dry backup pair or hand warmers adds a margin of safety on remote routes.
Wind and moisture matter as much as the temperature reading. Dry cold can favor lighter, more breathable gloves. Wet snow, freezing rain, or strong wind calls for better weather protection, even if that reduces breathability.
## Grip Technology and Pack Strap Control
Check the palm before buying. A smooth shell can make wet webbing and metal hardware harder to hold. Textured leather, synthetic leather, or rubberized panels give you more control when tightening straps or opening buckles.
Pigskin is common in cold-weather work gloves because it is flexible and provides useful grip. Treated leather also tends to soften with use. It still needs time to dry after wet sessions, and care requirements vary by manufacturer.
Synthetic options are lighter and easier to care for. Rubberized overlays can grip well, though repeated contact with rough webbing may wear them down. Textured synthetic leather offers another useful middle ground.
Look for reinforcement on the index finger and thumb as well as the palm. Those areas take most of the wear from buckles, zippers, and strap adjustments.
## Breathability and Moisture Management Systems
Overinsulated gloves can become wet from the inside. That moisture feels cold when your pace slows or you stop. Choose enough insulation for the conditions, but leave room for heat and sweat to escape.
Merino wool linings manage odor well and can remain comfortable when damp. Synthetic insulation often dries faster. Either can work; fit and insulation level matter more than the fiber name alone.
Waterproof-breathable membranes help in wet snow and freezing rain, but they usually feel less breathable than gloves without a membrane. That tradeoff makes more sense in wet conditions than in dry cold.
Removable liners are useful when gloves need to dry overnight. On hard climbs, loosening the cuff or briefly removing a glove can also release heat before sweat builds up.
## Dexterity Preservation for Essential Tasks
You should be able to operate a buckle, zipper, phone, and navigation device without removing your gloves. If you cannot complete those basic tasks, the glove is too bulky for the route or needs to be paired with a thinner liner system.
Pre-curved fingers reduce bunching when you close your hand around a strap. Try the gloves with a pack if possible; the label cannot tell you whether the finger length and palm shape fit your hand.
Articulated knuckles can also improve movement, especially in insulated gloves. Check that the seams do not press against your fingers when you grip a strap.
Touchscreen fingertips are helpful for quick checks, but they are rarely as precise as bare fingers and may wear over time. Physical buttons remain easier to use in heavy gloves.
## Frequently asked questions
────────────────────────────────────────────────────────────────────────────────
URL: https://ruckauthority.com/gear/best-compression-gear-for-rucking
Title: Best Compression Gear for Rucking: Socks, Sleeves & Recovery
Description: The best compression socks, knee sleeves, calf sleeves, and recovery gear for ruckers. What the research actually says, plus our top picks at every price point.
Published: 2026-03-28 / Updated: 2026-08-23
## 7 Recovery Tools That Actually Help Between Rucks
### Which Recovery Tools Help
Compression gear marketing is intense: faster recovery, reduced fatigue, injury prevention, magical performance gains. The reality? Compression gear is useful - but not for the reasons most marketing copy suggests.
Some people report that compression garments feel supportive or reduce perceived soreness, while evidence for performance and recovery outcomes is mixed. This guide compares product type, pressure rating, fit, and published claims without treating compression as an injury treatment.
### Quick picks
- **Best Overall:** CEP Allday Merino ($50)
- **Best Firm-Fit Sock:** Swiftwick ASPIRE Crew ($20)
- **Best Knee Support:** Incrediwear Knee Sleeve ($60)
- **Best Recovery:** OOFOS OOriginal ($50-65)
- **Best Foam Roller:** TriggerPoint GRID ($28.99)
- **Best Massage Gun:** LifePro Sonic ($51)
### Budget and use-case tiers
- **Sock Options ($20-$50) ($20-$50):** CEP provides graduated post-ruck compression; Swiftwick ASPIRE Crew and Darn Tough are close-fitting performance socks for use during training.
- **Full Recovery Stack ($200-$250) ($200-$250):** A group of optional recovery products: compression socks, foam roller, sandals, knee sleeve, and massage gun. Buy only the tools you already know you will use; lifespan varies.
### What the Research Says About Compression
Compression garments show consistent evidence for perceived recovery and reduced delayed-onset muscle soreness (DOMS), particularly in the 24-48 hour window post-activity. Performance benefits during activity are less supported.
There is no universal compression pressure for rucking. Medical graduated compression has indications and contraindications, so ask a clinician about pressure and wear time if you have circulation, skin, nerve, swelling, or clotting concerns. A close-fitting performance sock is not the same product.
### When to Actually Wear Compression
A firm-fitting performance sock can feel supportive during a ruck, but it is not medical graduated compression and is not proven to improve performance. For post-exercise compression, follow the product instructions and any clinical guidance rather than a universal pressure or wear-time rule.
### The Recovery Stack That Works
For ruckers training 2-3x per week: compression socks for 2-4 hours post-ruck, foam roller 3-4x per week for 90 seconds per muscle group, recovery sandals for 30-60 minutes immediately post-ruck, massage gun for 1-2 minutes per leg (optional), and a knee sleeve if you have pain or instability. Total investment is around $200-245 and lasts 2-3 years.
### Prevention Beats Recovery
The best recovery is one you don't need. Before investing in compression and massage guns, make sure you're wearing good rucking shoes, building foot and ankle strength, programming smart progressions, and fixing movement quality. Compression socks won't fix bad form. Massage guns won't replace sleep.
Start with the fundamentals: [Best Rucking Shoes by Terrain](/gear/best-rucking-shoes-by-terrain)
### Bottom line
Compression gear works best for recovery, not performance. The CEP Allday Merino is the best graduated-compression sock for serious ruckers. The lower-priced Swiftwick ASPIRE Crew is a firm-fit performance sock for the ruck itself, not a medical recovery sock. For the full recovery stack - rated compression socks, foam roller, recovery sandals, knee sleeve, and massage gun - budget about $200-250.
### Frequently asked questions
**Does compression actually help with rucking?**
For recovery, yes. Wearing 20-30 mmHg compression socks for 2-4 hours after rucking consistently reduces perceived soreness. For performance during the ruck, the evidence is much weaker.
**When should I wear compression socks?**
Immediately after rucking for 2-4 hours is the most evidence-supported approach. Many ruckers also wear them all day on recovery days.
**What compression level should I get?**
20-30 mmHg for recovery. Below 15 mmHg provides minimal benefit. Above 40 mmHg requires medical fitting.
**Are recovery sandals worth it?**
If you get foot soreness after rucks, yes. OOFOS provides 37% more impact absorption than standard foam. Wear them for 30-60 minutes immediately post-ruck.
**Foam roller or massage gun?**
Both serve different purposes. A foam roller is better for broad muscle release (calves, shins). A massage gun is better for targeted knots and quicker sessions. If you can only buy one, start with the foam roller.
You've probably seen compression gear at every running store, CrossFit gym, and endurance sports subreddit on the internet. The marketing is *intense*: faster recovery, reduced fatigue, injury prevention, better blood flow, magical performance gains.
The reality? Compression gear is useful - but not for the reasons most marketing copy suggests. If you're [rucking](/glossary#rucking) regularly, especially longer distances or heavier loads, compression socks and sleeves can genuinely help with recovery and reduce certain types of discomfort. But the performance benefits are... mixed at best.
Here's what actually works for ruckers, what the science says, and which products are worth your money.
## Quick picks
| Product | Price | Type | Compression | Best For |
|---------|-------|------|-------------|----------|
| CEP Allday Merino | $25-50 | Socks | 20-30 mmHg | Best overall; medical-grade |
| Swiftwick ASPIRE Crew | Under $25 | Performance socks | Firm compression fit (not medical-grade) | Best value; USA-made |
| Darn Tough Light Hiker | $25-50 | Socks | Moderate (athletic) | Dual-purpose; hiking + rucking |
| Incrediwear Knee Sleeve | $50-150 | Knee Sleeve | No compression | Best knee support; heat-activated |
| OOFOS OOriginal | $50-150 | Recovery Sandals | N/A | Post-ruck recovery |
| TriggerPoint GRID | $25-50 | Foam Roller | N/A | Calf/shin release |
| LifePro Sonic Massage Gun | $50-150 | Massage Gun | N/A | Best budget option |
## What the research actually says about compression
Before we get into product recommendations, let's talk about what compression actually does (and doesn't do) based on the research.
**The performance claim:** Does wearing compression during activity make you faster, stronger, or more powerful? The evidence is *equivocal*. Some research points to tiny improvements in specific measures (like lactate clearance), but others show nothing. If there is a performance benefit, it's modest - not the game-changer marketing suggests.
**The recovery claim:** This is where compression shows more consistent evidence. Wearing compression after activity correlates with faster perception of recovery, reduced muscle soreness (especially 24-48 hours post-activity), and modestly improved blood flow. This is why you see endurance athletes in compression gear after races, not necessarily during them.
**The best compression range for rucking:** Most research points to 20-30 mmHg (millimeters of mercury - the unit measuring pressure) as the sweet spot. Below 15 mmHg is mostly fashion. Above 40 mmHg (medical compression for serious circulation issues) is overkill for fitness and requires a professional fitting.
**The honest take:** Compression gear works best for recovery, not performance. Wear it after rucks and during long rest days, not just to feel like a serious athlete during the ruck itself. If the use case is long flights or road trips rather than rucking recovery, our sister site Kit Authority's guide to [compression socks for travel](https://kitauthority.com/travel/best-compression-socks-for-travel?utm_source=ruckauthority&utm_medium=crosslink) covers the picks built for sitting still rather than walking under load.
## The best compression socks for rucking
**CEP Allday Merino**
If you're doing back-to-back rucks, long distances (10+ miles), or heavy loads (60+ lbs), these are worth the investment. The Merino wool means you can wear them without washing every single day, and they hold up to machine washing, making them a genuine daily-wear recovery tool rather than just performance theater.
Typical price band: $25-50 per pair
**Swiftwick ASPIRE Crew Cycling Socks**
These are USA-made cycling socks with a firm compression fit and moisture-wicking synthetic construction. They work as close-fitting performance socks during a ruck; they are not medical graduated-compression socks and should not be presented as a post-ruck recovery substitute.
Typical price band: Under $25 per pair
**Darn Tough Light Hiker**
If you're combining rucking with trail hiking, these blur the line between "compression sock" and "good hiking sock" - and the lifetime warranty is genuinely no-questions-asked. The Merino construction provides athletic support while the weight works well for loaded walks on any surface.
Typical price band: $25-50 per pair
## Calf sleeves: when you want compression without the sock
If you run hot or your feet sweat a lot, calf sleeves are worth a look. You get the compression benefit on the muscle belly where most rucking fatigue accumulates - without the warmth of a full compression sock on your foot.
They're also useful for layering. Wear your preferred rucking socks underneath and add graduated compression on the calves on top. Some ruckers prefer this setup for multi-day events where they want to switch socks but keep the compression going.
**The trade-off:** You lose the arch and ankle support that a full compression sock provides. If you're dealing with [plantar fasciitis](/glossary#plantar-fasciitis) or ankle instability, stick with full socks.
**Good options at a glance:** CEP makes calf sleeves that match their sock lineup at 20-30 mmHg - consistent quality, same sizing logic as their socks. For budget-conscious ruckers, Physix Gear Sport makes a lower-priced option for casual use. The fit principle is identical to socks: measure your calf circumference at the widest point, not your shoe size.
**Calf sleeves for [shin splints](/glossary#shin-splints):** This is where they really earn their keep. Calf sleeves cover the tibialis anterior (the muscle along your shin) and reduce vibration during impact-heavy terrain. If you're dealing with early-stage shin splints, wearing a calf sleeve during the ruck and a full compression sock afterward is a reasonable approach while you work on the underlying cause.
## Knee and calf support: beyond socks
**Incrediwear Knee Sleeve**
If you have shaky knees or a history of knee pain, this is worth trying before jumping to heavy compression or orthotics - the sleeve stays in place during activity and works well under jeans for post-ruck wear. Many ruckers report feeling more stable on descents with this on, and unlike traditional compression, the heat-activated mineral weave actually engages during use.
Typical price band: $50-150
## Recovery gear worth your money
Compression socks are great, but recovery is more than compression. Here's what else works.
**OOFOS OOriginal**
These are post-ruck *only* - not something you ruck in - but slipping them on right after you finish and wearing them for 30 minutes to an hour genuinely helps with immediate post-ruck soreness. The arch support and cushioning are especially helpful if you're dealing with plantar fasciitis or general foot fatigue.
Typical price band: $50-150
**TriggerPoint GRID**
If your shins or calves are wrecked after rucking, a foam roller is non-negotiable recovery gear - and the GRID is the gold standard for reaching deep muscle tissue with its textured design. Roll your calves and shins for 90 seconds per leg, 3-4x per week on ruck days or the day after for genuinely helpful prevention of chronic shin pain.
Typical price band: $25-50
**LifePro Sonic Massage Gun**
Use this on calves and quads 1-2 minutes per muscle group after rucking - it's not a replacement for mobility work, but it genuinely helps with muscle activation and soreness perception. The lifetime warranty means you're not gambling on a motor dying in 6 months, giving you legitimate recovery infrastructure for the price.
Typical price band: $50-150
## Sizing and fit: get this wrong and it doesn't work
Compression gear that doesn't fit right is worse than no compression at all. Too loose and you get no therapeutic benefit. Too tight and you can actually restrict circulation - the opposite of what you want.
**For compression socks:** Measure your calf circumference at the widest point (usually 4-6 inches below the knee). Not your shoe size - your calf. Most quality brands publish calf circumference charts and that number is what actually matters. A size "M" in CEP might not be a size "M" in Swiftwick.
**The fit check:** After putting on compression socks, you should feel firm, even pressure from ankle to knee, no constriction at the top band (this cuts off circulation), and slight resistance when putting them on - they should require some effort to pull up.
**Red flags:** If your leg goes numb or tingly during the ruck, they're too tight. If they slide down on their own, they're too loose or the wrong size - and they've lost their compression rating.
**Washing:** Machine wash cold, lay flat or hang to dry. Heat degrades the elastic fibers that create compression. After 80-100 washes or if they start sliding during rucks, replace them. At that point they're just regular socks with branding.
## When to actually wear compression
Here's where most people get it wrong.
**During the ruck:** A firm-fitting performance sock can feel supportive, but it is not the same product category as rated medical graduated compression and is not proven to improve performance.
**Immediately after the ruck:** This is where compression shines. Put on your compression socks (or better yet, medical-grade 20-30 mmHg) immediately after finishing. Wear them for at least 2-3 hours. This is when the recovery benefits - reduced soreness, faster perceived recovery - are strongest.
**The next day / recovery days:** Keep them on. Many ruckers wear compression socks all day on recovery days or the day after a long ruck. This is legitimate evidence-based recovery practice, not just comfort theater.
**How long:** There's no magic number, but studies on DOMS and soreness show the 24-48 hour window is where compression matters most. After that, you're wearing them more for comfort than recovery.
## Compression for shin splints specifically
Shin splints are one of the most common [rucking injuries](/pillars/rucking-injury-prevention), especially when people increase mileage or load too fast. Compression doesn't fix shin splints - but it can reduce discomfort while you're addressing the root cause.
For shin splints, the approach looks like this: during the ruck, a calf sleeve reduces vibration on the tibialis anterior and provides some support on the muscle that's taking the beating. After the ruck, full compression socks at 20-30 mmHg help with blood flow and soreness reduction. Roll your shins and calves with the TriggerPoint GRID for 90 seconds per leg before you put the socks on.
That's the support stack. The actual fix is strength work for the tibialis anterior and calves, combined with sensible load progression - no more than 10% increase in weekly mileage or ruck weight at a time. See the [rucking injury prevention guide](/pillars/rucking-injury-prevention) for the full protocol.
Compression is a management tool while you fix the cause. If you're relying on it every single ruck, that's a signal something upstream needs attention.
## The recovery stack that actually works
If you're doing rucks 2-3x per week or pushing longer distances, here's the full stack:
1. **Graduated compression socks** (CEP Allday Merino, typically $25-50) - wear for 2-4 hours post-ruck; use the Swiftwick ASPIRE Crew during training as a firm-fit performance sock, not as a recovery substitute
2. **Foam roller** (TriggerPoint GRID) - 3-4x per week, 90 seconds per muscle group
3. **Recovery sandals** (OOFOS) - 30-60 minutes immediately post-ruck
4. **Massage gun** (LifePro or similar) - 1-2 minutes per leg, optional but useful
5. **Knee/calf sleeve** (Incrediwear) - if you have pain or instability
Total cost is around $200-250 all-in. It's a one-time investment that'll last 2-3 years with normal care, and every item on that list has a legitimate use case - nothing is here just to fill a list.
────────────────────────────────────────────────────────────────────────────────
URL: https://ruckauthority.com/gear/best-follow-drones-for-rucking
Title: Best Follow Drones for Rucking in 2026
Description: The DJI Neo 2 is a compact follow drone for solo ruckers - palm-launch, AI subject tracking, and sub-250g. Here's how it compares to the HoverAir X1 Pro and DJI Mini 5 Pro, with real trail footage.
Published: 2026-05-14 / Updated: 2026-07-06
If you ruck alone, you've had this moment: you're on a ridgeline at golden hour, the load feels right, and there's no one to film it. Your phone on a tripod catches a slice. A handheld pan catches less. The thing you actually want - the wide, moving shot of you on the trail with weight on your back - is the one shot you can't get without a camera op.
That gap is what a follow drone fills. And until late 2025, the cheapest drone that could track a moving subject on a trail was around $700. The DJI Neo 2 changed that pricing overnight.
This isn't a "best drones overall" article. We're picking three, all built around one job: filming a solo rucker.
## Why a drone is rucking-adjacent gear now
For most of drone history, "follow me" mode was a marketing claim that lost the subject the moment they turned around a tree. The math wasn't there. Then three things shifted:
1. **Sub-250g drones became real cameras.** The FAA's recreational rule exempts anything under 250 grams from registration - so a 150g drone is a tool, not a regulatory project.
2. **Onboard AI subject tracking actually works.** The newest tracking models hold a moving subject through occlusion, brief loss of line-of-sight, and changes of direction. Not perfect, but useful.
3. **Palm-launch killed the controller bottleneck.** If you have to stop your ruck, deploy a controller, set up a flight plan, and recover, you won't film anything. If you toss the drone off your palm and it follows you, you might.
Combined, you can now film yourself rucking with one hand for less than most full camera-drone kits. That's the article.
## The three picks
| Drone | Price | Weight | Camera | Flight time | Why pick it |
|----------|-------|--------|--------|-------------|-------------|
| DJI Neo 2 | $150-300 | 151g | 4K/60, 1/2-inch sensor | 11-12 min real-world | Compact follow drone that tracks a moving rucker. Palm launch. |
| HoverAir X1 Pro | $300-500 | 191g | 4K/60, 104 FOV | ~16 min | The pioneer. Foldable cage, mature AI tracking. |
| DJI Mini 5 Pro | $500-1,000 | 249g | 4K/100, 1-inch sensor | ~35 min | Upgrade path. Bigger sensor, longer flights, controller required. |
## DJI Neo 2 - the rucking pick
The Neo 2 is the answer to a question most solo ruckers had stopped asking: can I film myself on the trail without a friend, a tripod, or a $700 drone? At 151 grams it's lighter than a Snickers bar, palm-launches off your hand, and tracks you down the trail without a controller. The 4K/60fps camera is real - not a "4K with caveats" spec - and the 2-axis gimbal keeps shots cleaner than the original Neo.
What it gets right for rucking specifically: the integrated propeller guards are the difference between ruining a $1,000 camera and shaking off a bump from a low branch. Palm-landing recovery is the same story - if you don't have a clean LZ in the woods, you catch it. That's the whole point.
What it gets wrong: rated flight time is 17 minutes, but founder Joel Kelly has recorded closer to 11-12 minutes per battery in his use. That is enough for a few short clips, not continuous coverage of a long ruck. Wind resistance is rated Level 4 (19 mph), so exposed terrain needs more caution than a sheltered route. Audio is recorded by your phone through the DJI Fly app, not by the drone itself, so wind noise still matters.
The use case it's built for: solo overnight rucks where you set up at camp, palm-launch the Neo 2, and have it film while you do everything else. Subject-lock for the length of a battery is the shot that used to require a film crew.
### Specs that matter
- **Weight**: 151g (no FAA registration for recreational use under §44809)
- **Camera**: 4K/60fps, 1/2-inch CMOS sensor, 2-axis gimbal
- **Tracking**: AI subject tracking, multiple follow modes (lead, follow, orbit)
- **Launch**: Palm launch / app launch / DJI RC-N3 controller
- **Flight time**: ~11-12 min real-world per battery (17 min rated)
- **Wind resistance**: Level 4 (up to 19 mph)
- **Transmission**: ~10 km with the RC-N3 controller (most ruckers won't need this)
### What we'd buy with it
- **Spare battery** (you will run out at the worst time)
- **DJI RC-N3 controller** if you want manual control for B-roll between follow shots
- **A 64GB microSD V30** card minimum - 4K/60 eats storage fast
## HoverAir X1 Pro - the pioneer
The HoverAir X1 Pro shipped before DJI joined this category, and it's still the build-quality benchmark. The foldable cage is a real practical advantage - it collapses flat enough to slip into a ruck pocket. The camera holds up against the Neo 2 spec-for-spec, and the AI tracking is mature enough that it predates DJI's.
The reason it's not our top pick: roughly double the Neo 2. The marginal improvements (build quality, fold-flat form factor) don't justify the gap for a rucker who's just getting started with drone B-roll. If you'd already decided you want this category before DJI made it cheap, the X1 Pro is the more refined product. If the Neo 2 is your first drone, save the difference for a backup battery and a spare microSD.
Where it likely wins: cold-weather rucking. Owner reviews report the X1 Pro's battery handles 30 F starts better than the Neo 2's, which matters if you ruck through Wisconsin winters. Same goes for altitude - if you're in the Rockies, the more powerful motors hold up better in thinner air.
## DJI Mini 5 Pro - the upgrade path
The Mini 5 Pro is what you buy when you've outgrown follow-mode. At 249g it just barely stays under FAA registration, but everything else is professional-grade: a 1-inch sensor (the same size as most pro mirrorless cameras), 4K at 100fps, 35+ minutes of flight time, ActiveTrack 360 (track from any angle, not just behind), omnidirectional obstacle sensing, and O4+ transmission to 20 km.
What you lose: palm-launch. The Mini 5 Pro needs the RC 2 controller. You can't take off mid-ruck the way you can with a Neo 2. The workflow is plan, set up, fly, film, recover - which is closer to a photo expedition than to "drone in pocket, drone in air, drone in pocket again." If your rucks have a planned cinematography window built in (sunrise over a ridge, golden-hour at a vista), the Mini 5 Pro is the move. If your rucks are training-first and you want spontaneous footage, stay with the Neo 2.
Worth knowing: the Mini 5 Pro sits in the $500-1,000 tier before higher-priced bundles, so you're in a different conversation. This isn't an impulse buy that came with your trail shoes. Most ruckers will never need this level of camera. But if you're building a rucking channel, shooting trip-report YouTube, or you already shoot photography seriously, the Mini 5 Pro's image quality is a meaningful step up.
## What about safety and visibility use cases?
We considered framing this article around "drones for trail safety" - the pitch being that a small drone could scout a trail ahead, check ridgeline weather, or locate a group. We mostly killed that angle. Here's why:
**For solo trail scouting**, line-of-sight rules make it impractical. FAA recreational rules require visual line-of-sight at all times. You can't fly your drone around a bend to check what's coming - that's a violation.
**For group locating or signal**, a drone is wildly inferior to a Garmin inReach, a PLB, or even cellular. Don't buy a drone for safety. Buy a PLB and a satellite messenger for safety. Buy a drone for content.
**For situational awareness on lit suburban routes**, a 19-mph-wind-rated 150g drone isn't going to add anything a streetlight doesn't already give you.
This is filming gear, not safety equipment. Treat follow mode as a recreational camera feature.
## How we built this guide
Founder Joel Kelly filmed the Neo 2 footage on this page during a May 2026 Wisconsin ruck. Joel owns and flies that model. The HoverAir X1 Pro and DJI Mini 5 Pro recommendations are based on published specifications, owner reviews, and coverage from creators who use them; Ruck Authority has not flown those two models.
## Frequently asked questions
### Do I need to register a sub-250g drone with the FAA?
For recreational use under §44809 (the recreational exception), no. Anything under 250g flown for recreational purposes does not require FAA Part 107 registration. The moment you fly it commercially - paid content, sponsorship deliverables, or anything monetized directly - you need a Part 107 certificate regardless of weight. Not sure which bucket you're in? Drone Authority's [license wizard](https://droneauthority.org/tools/do-i-need-a-license?utm_source=ruckauthority&utm_medium=cross-site) walks you through it in about a minute - and if you do need the cert, their [Part 107 study hub](https://droneauthority.org/training/study?utm_source=ruckauthority&utm_medium=cross-site) (practice exams, sectional charts, ACS cheat sheet) is how you pass it.
### Can I fly a drone in a state or national park?
National parks: almost always no, drones are prohibited. State parks: depends on the state and often the specific park - check before you go. Most BLM land, national forests, and county/local parks allow drones with restrictions. When in doubt, call the ranger station before you ruck in - or check Drone Authority's [drone laws by state](https://droneauthority.org/laws?utm_source=ruckauthority&utm_medium=cross-site) for the current rules where you ruck.
### Will a follow drone keep up with a moving rucker?
On flat or rolling terrain, yes. The Neo 2's tracking is tuned for pedestrian speeds (3-5 mph), which is exactly rucking pace. Steep technical trail with switchbacks is harder - based on the published tracking spec and creator demos, expect occasional re-acquisition pauses when you pass behind a tree or boulder.
### How loud is a follow drone on a trail?
Quieter than you'd expect from a thing with four propellers, louder than zero. Comparable to a household appliance at conversational distance. Audible but not jarring at normal flight altitude. Don't fly it at face level near other people.
### What about high winds or rain?
None of these drones should be treated as rain-safe. If rain starts, land according to the manufacturer's instructions. Wind limits differ by model, and terrain can create gusts that exceed a published rating; check the current manual and conditions before launch.
### Is the Neo 2 worth it if I already have a phone with a stabilizer?
A follow drone can capture moving aerial angles that a handheld phone cannot. A phone remains simpler for narration, close shots, and places where drone flight is not permitted. The useful choice may be one or both, depending on the footage you need.
## Which follow drone should you choose?
If you ruck alone and want moving footage, the DJI Neo 2 is the least expensive option here. It offers palm launch, subject tracking, a sub-250g body, and 4K recording in the $150-300 tier.
The HoverAir X1 Pro costs more and has a fold-flat design. Owner reports suggest better cold-weather battery performance than the Neo 2, but Ruck Authority has not tested that comparison. The DJI Mini 5 Pro adds a larger camera system, longer flight time, and a controller at a much higher price. Most casual trail filming does not require it.
For most people, start with the Neo 2, add a spare battery, and learn its follow mode on a familiar trail before taking it somewhere remote.
Once you've got the drone, you'll want to think about [carrying it without crushing it](/gear/best-rucking-backpacks-under-150) - a structured pack with a dedicated top pocket protects propellers from getting bent. And if you're shooting trail content seriously, our [winter rucking guide](/training/winter-rucking-cold-weather) covers the cold-weather battery management that makes or breaks a sub-freezing shoot.
Going from footage to a real shot is a different craft. If you want the stills to match the aerials, our sister site Aperture Authority breaks down [drone photography and video](https://apertureauthority.com/gear/drone-photography-and-video?utm_source=ruckauthority&utm_medium=cross-site) and the [landscape photography](https://apertureauthority.com/genres/landscape-photography?utm_source=ruckauthority&utm_medium=cross-site) techniques that turn trail B-roll into a frame worth printing.
────────────────────────────────────────────────────────────────────────────────
URL: https://ruckauthority.com/gear/best-goruck-alternatives
Title: 5 Best GORUCK Alternatives 2026: GR1 Quality Without the Price Tag
Description: 5 GORUCK alternatives that match GR1 build quality without the premium price. Real durability data from Mystery Ranch, 5.11, Direct Action, and Evergoods, plus which one I'd buy first.
Published: 2026-03-10 / Updated: 2026-09-03
## Top GORUCK Alternatives Compared
### Why Look for an Alternative?
GORUCK backpacks are designed for heavy loads and sit in the premium price tier. That cost can be difficult to justify for a beginner.
The good news is that you do not need a GORUCK pack to start rucking. Several excellent alternatives offer strong durability, comfortable harness systems, and lower prices. In this guide we compare the best GORUCK alternatives based on durability, load carry, comfort, and value.
Disclosure: Wolf Tactical pays Ruck Authority a higher commission on its own gear through Amazon's Creator Connections program, which is why it appears in this guide. We have not tested it - the specs below come from the manufacturer's listing, and each entry says so.
### Quick picks
- **Best Overall:** Mystery Ranch 2 Day Assault Pack ($180–$220)
- **Best Tactical Mid-Range:** 5.11 Tactical RUSH 24 2.0 ($140)
- **Best Premium:** Evergoods CPL24 ($249–$290)
- **Best Durable Budget:** Direct Action Dragon Egg Mk II ($180–$220)
### Budget and use-case tiers
- **Tier 1: Premium ($300+):** Compete directly with GORUCK on construction and durability. Built to last decades.
- **Tier 2: Mid-Range ($180–$280):** Best entry point. Strong durability and carry mechanics at 50–60% of GORUCK pricing.
- **Tier 3: Budget ($120–$180):** Functional packs that handle moderate loads. Good for anyone new to rucking who wants to try it before committing.
- **Tier 4: Entry (Under $120):** Use what you own or buy cheap. Any 30L+ pack works to find out if rucking is for you.
### Comparison table
pack: GORUCK GR1; price: $335–$405; capacity: 21L / 26L; durability: 10/10; warranty: Lifetime; ruckOptimized: Yes
pack: Mystery Ranch 2 Day; price: $180–$220; capacity: 27L; durability: 9/10; warranty: Lifetime; ruckOptimized: Partial
pack: 5.11 RUSH 24 2.0; price: $140; capacity: 37L; durability: 8.5/10; warranty: Limited; ruckOptimized: Partial
pack: Direct Action Dragon Egg; price: $180–$220; capacity: 25L; durability: 9/10; warranty: Limited; ruckOptimized: Partial
### Most people leaving the GR1 price tag should buy the Mystery Ranch 2 Day Assault.
It matches the GR1 on durability and lifetime warranty, carries weight better on long miles thanks to the yoke and internal frame, and costs a good deal less. The tracked GORUCK link further down is for the readers who decide the GR1 is the right tool after all.
### Which GORUCK Alternative Should You Buy?
People leave the GORUCK price tag for different reasons, and the right alternative depends on which reason is yours. Match the pack to the job you were hiring the GR1 for.
- **Choose the Mystery Ranch 2 Day Assault:** if comfort and crossover matter most. The Futura yoke and internal frame carry load better than anything else at this price, and it doubles as a legitimate hiking and travel pack. The best overall alternative for most people.
- **Choose the 5.11 RUSH 24 2.0:** if you want the most pack for the least money. Tactical organization, real durability, and enough structure for plate carry at roughly a third of GR1 pricing. The value pick our readers actually buy.
- **Choose the Evergoods CPL24:** if the tactical look is the problem. Clean civilian styling, a padded laptop sleeve, and build quality in GR1 territory - the pack for rucking to work without looking like you ruck to work.
- **Choose the Direct Action Dragon Egg Mk II:** if abrasion resistance and MOLLE-everything matter and you want change back from GR1 money. The most gear-forward option here.
- **Buy the GR1 anyway:** if you are training for GORUCK events, need the dedicated plate pocket geometry, or want the SCARS lifetime warranty. Some jobs still only have one right tool, and pretending otherwise would make every other recommendation here less trustworthy.
### What Makes a Real GR1 Alternative
A GR1 alternative is not any backpack that costs less than $400. It is a pack that survives the same abuse. Four things separate a real alternative from a daypack that will fail under load.
- **Fabric and construction:** The GR1 benchmark is 1000D Cordura with heavy stitching at every stress point. Alternatives get away with 500D-class fabrics in the body, but strap anchors and the top handle need reinforcement - that is where cheap packs die first under repeated 30 lb carries.
- **Load transfer, not just padding:** Thick straps are marketing; structure is what saves your shoulders. A frame sheet, an internal frame, or a yoke system moves weight onto your torso. This is the single biggest comfort difference at mile four.
- **A plan for the plate:** Only dedicated rucks have true plate pockets. In a crossover pack, the plate rides in the laptop sleeve - workable, but check the sleeve sits high and tight against the back panel. A plate sagging at the bottom of a pack pulls you backward and ruins the carry.
- **Warranty against your mileage:** GORUCK's SCARS lifetime repair policy is a real part of its price. Mystery Ranch and 5.11 back their packs well; budget brands often do not. Divide price by expected years, not by features.
### Mystery Ranch 2 Day Assault vs GORUCK GR1
The Mystery Ranch 2 Day Assault is the better GORUCK GR1 alternative for ruckers who want comfort, hiking crossover, and a lower price. The GR1 is the better choice if the pack also has to be your laptop bag, airport bag, and long-term GORUCK ecosystem purchase.
- **Pick Mystery Ranch 2 Day Assault:** Choose it for trail-to-commute comfort under $250, better hiking crossover, and a harness that feels more natural on uneven terrain.
- **Pick GORUCK GR1:** Choose it for the cleaner office/travel profile, heavier 1000D Cordura, SCARS lifetime repair, and better fit inside the GORUCK plate ecosystem.
- **Dedicated training caveat:** If the question is pure rucking instead of daily carry, compare the current GORUCK Rucker 5.0 before buying either. The Rucker's elevated plate pockets are the better heavy-training geometry.
For the dedicated GORUCK training-pack comparison, read: [GORUCK Rucker vs GR1](/gear/goruck-rucker-vs-gr1)
### Why Look for an Alternative?
GORUCK makes excellent rucksacks. They're also premium-priced, which is a genuine barrier to entry for people who want to try rucking without committing several hundred dollars to a single piece of gear.
The good news: you don't need a GORUCK to ruck effectively. We've compared and reviewed dozens of alternatives across four budget tiers. Whether you're cost-conscious or just exploring the sport, you'll find excellent options below.
The best GORUCK alternative depends on what you are trying to replace. If you want GR1-style durability without the same price, start with Mystery Ranch. If you want a cheaper tactical pack that still handles weight, look at the 5.11 Rush 24. If you only need a beginner pack for short rucks, a budget tactical or hiking pack is enough.
For most beginners, the right move is not "buy the closest thing to a GR1." It is "buy enough structure to train safely, then upgrade once you know what bothers you." Shoulder strap shape, torso length, plate placement, and pocket layout matter more after you have 10-20 rucks behind you.
### What You Actually Give Up
The honest version: most alternatives carry a 30 pound load down a road perfectly well, and the gap shows up in the details around the pack rather than in the walking. Know which of these you care about before you spend the difference.
- **Warranty terms:** GORUCK's guarantee is a large part of what the price buys. Most alternatives carry a limited warranty measured in years rather than in lifetimes, which matters more the harder you use the pack.
- **Plate-specific geometry:** GORUCK packs are built around a plate riding high and flat against your spine. General-purpose packs hold a plate, but often lower and looser, and a load that sags pulls at your shoulders over long sessions.
- **Resale value:** Used GORUCK packs hold price unusually well. A cheaper pack that you replace, or cannot resell, can close much of the gap it opened.
- **Event durability:** Repeated abrasion, submersion, and dragging is a narrow use case, and it is the one where heavier fabric and bar-tacked stress points earn their cost.
### Make the Plate Fit Before You Buy
The most common mistake when leaving the GORUCK ecosystem is buying the pack first and discovering the plate situation second. Ruck plates come in different footprints, and a plate that slides around inside a general-purpose laptop sleeve is both uncomfortable and noisy.
1. **Decide the plate standard first:** Generic 10x12 fitness plates are cheap and widely available. GORUCK's own plates are sized to their packs. Pick the standard, then pick a pack that holds it snugly.
2. **Measure the sleeve, not the pack:** Interior laptop compartment dimensions are what actually constrain you, and they are frequently missing from the listing. Ask, or find a photo with the plate in place.
3. **Plan how it will be secured:** A sleeve with a compression strap or a hook-and-loop closure keeps the plate high and still. Without one, a folded towel above the plate is the low-tech fix that works.
4. **Load it and walk before you commit:** Ten minutes at full weight tells you more about a pack than any spec sheet. Shoulder strap padding and the height the load rides at are what you are testing.
### When the GORUCK Is Actually Worth It
There is a real case for paying full price, and it is narrower than the brand's fans suggest and wider than the skeptics allow. Buy the GORUCK if you are signing up for events, if you expect this pack to be the only one you own for years, or if you have already worn out something cheaper. In those cases the warranty and the plate geometry are the product, not the logo.
Buy an alternative if you are still deciding whether rucking sticks, if your miles are road miles under 30 pounds, or if the money is better spent on footwear. Boots and shoes fail sooner than packs and affect comfort more, so a beginner with a fixed budget is usually better served by a cheaper pack and better shoes than the reverse.
Not sure the GR1 is the right GORUCK for you? The Rucker 5.0 is the better pure-training bag and the Basic Rucker the cheaper one. Our chooser walks the whole lineup: [Which GORUCK Should You Buy?](/goruck)
### Bottom line
You do not need a GORUCK to ruck. Start with Tier 2 if budget allows. The Mystery Ranch 2 Day Assault or Direct Action Dragon Egg give you serious durability without the GORUCK price. If you want a premium non-tactical option, the Evergoods CPL24 is one of the best-feeling packs available. And if you are just getting into rucking for the first time, any sturdy backpack you already own will get the job done.
### Frequently asked questions
**Do you need a GORUCK to start rucking?**
No. Any backpack that holds 30L or more with a waist strap will work for beginner rucks. Start with what you have. If you enjoy rucking, you can upgrade later.
**What is the best GORUCK alternative overall?**
The Mystery Ranch 2 Day Assault Pack is the best overall alternative. It offers comparable durability, a lifetime warranty, and strong load carry at roughly half the price of a GORUCK GR1.
**What is the best GORUCK GR1 alternative?**
The Mystery Ranch 2 Day Assault is the closest GORUCK GR1 alternative for most ruckers. It matches the GR1 on durability and lifetime warranty, carries weight well with an internal frame and Futura yoke, and costs hundreds less. If you want a premium non-tactical GR1 alternative, the Evergoods CPL24 is the best-feeling option. For a cheaper tactical GR1 alternative, the 5.11 RUSH 24 2.0 gets you most of the way for substantially less.
**Is there a cheaper alternative to GORUCK?**
Yes. You do not need to spend $300 or more to start rucking. The 5.11 RUSH 24 2.0 is the best value alternative to GORUCK, and the CONDOR 3-Day Assault Pack gives you enough structure to test rucking before committing. Any sturdy 30L pack you already own also works for your first month. Once you know rucking is for you, upgrade to a premium pack like the Mystery Ranch 2 Day Assault or a GORUCK.
**Mystery Ranch 2 Day Assault vs GORUCK GR1 - which is better for rucking?**
They win on different things. The Mystery Ranch 2 Day Assault is usually hundreds less than a GR1 and has a Futura yoke, internal frame, and three-ZIP opening that make it easier to carry and organize mixed gear. The GORUCK GR1 wins on 1000D Cordura, a purpose-built plate pocket, and event compatibility. For plate-only training under 35 lb, the GR1 is the cleaner dedicated ruck. For hiking crossover, kit-heavy carries, or buyers who want premium build without GR1 pricing, the 2 Day Assault is the better value.
**Does the Mystery Ranch 2 Day Assault have a plate pocket like the GORUCK GR1?**
Not a purpose-built one. The 2 Day Assault has an internal hydration sleeve that fits a standard 10x12 ruck plate, but it's not a structured padded pocket like the GR1's. Plates ride slightly lower in the 2DA and have a small amount of float in the sleeve. For training that doesn't involve a plate (sandbag, books, gear-weight rucks), the 2DA is fine. For dedicated plate training, the GR1 has the better setup.
**Can you use a regular backpack for rucking?**
Yes, for short rucks of one to five miles. Standard hiking packs are not designed for sustained heavy loads, and you will feel the difference in comfort after a few miles with significant weight.
**What makes a backpack good for rucking specifically?**
The best rucking packs include a frame sheet or internal structure, padded hip belt, sternum strap, durable materials like 500D or 1000D Cordura, and a design that keeps the load close to your back.
## Why Look for an Alternative?
[GORUCK](/glossary#goruck) makes excellent rucksacks. They're also $200 - $400 per pack, which is a genuine barrier to entry for people who want to try [rucking](/glossary#rucking) without committing several hundred dollars to a single piece of gear.
The good news: you don't need a GORUCK to ruck effectively. We've compared and reviewed dozens of alternatives across four budget tiers. Whether you're cost-conscious or just exploring the sport, you'll find excellent options below.
The best GORUCK alternative depends on what you are trying to replace. If you want GR1-style durability without the same price, start with Mystery Ranch. If you want a cheaper tactical pack that still handles weight, look at the 5.11 Rush 24. If you only need a beginner pack for short rucks, a budget tactical or hiking pack is enough.
| If you want... | Best direction | Why |
| --- | --- | --- |
| Closest premium GR1 alternative | Mystery Ranch 2 Day Assault | Durable build, adjustable harness, better organization, strong warranty |
| Best value GORUCK alternative | 5.11 Tactical Rush 24 2.0 | Big capacity, common retailer availability, lower price |
| Cheapest usable rucking pack | CONDOR 3-Day Assault Pack | Enough structure to test rucking before spending more |
| Lowest-risk first month | A pack you already own | Lets you learn load, pace, and fit before buying |
For most beginners, the right move is not "buy the closest thing to a GR1." It is "buy enough structure to train safely, then upgrade once you know what bothers you." Shoulder strap shape, torso length, plate placement, and pocket layout matter more after you have 10-20 rucks behind you.
## The Benchmark: GORUCK GR1
Every pack on this page is measured against the GR1. It is not an "alternative" - it is the standard. We include it so you can see exactly what you're paying for at the top of the market, and decide whether the premium is worth it for your situation.
The GR1 earns its reputation through 1000D Cordura construction, the SCARS lifetime guarantee, and a design specifically engineered for weighted carries. The question is not whether it is good - it is whether you need a pack in the $300-500 tier to start rucking. For most people, the answer is no.
If the GORUCK you are weighing is the dedicated training ruck rather than the GR1, start with [our hands-on Rucker 5.0 review](/gear/goruck-rucker-5-0-review): a week of loaded miles, with video.
## The Four Budget Tiers
## Price vs Performance Matrix
| Pack | Price | Capacity | Durability | Warranty | Ruck-Optimized |
| --- | --- | --- | --- | --- | --- |
| GORUCK GR1 | $300-500 | 26L | 10/10 | Lifetime | 9/10 |
| Mystery Ranch 2 Day Assault | $150-300 | 27L | 9/10 | Lifetime | 8/10 |
| 5.11 Rush 24 | $50-150 | 37L | 8.5/10 | 1 year | 7.5/10 |
| CONDOR 3-Day | $50-150 | 50L | 7.5/10 | 6 months | 6/10 |
## Head-to-Head: Top Alternatives
### Mystery Ranch 2 Day Assault - Best Overall
The closest practical competitor to the GR1. It gives you a 27L layout, 500D Cordura, a lifetime warranty, and an adjustable harness that carries better than most tactical-style packs in this price range.
What sets it apart: the three-ZIP design gives you access options that no other pack on this list matches. The Futura yoke and internal frame help transfer load better than a simple frameless daypack, which matters once your ruck weight creeps past casual-walk territory.
The tradeoff: it does not have a purpose-built elevated plate pocket like the GR1. Use a flexible weight, a wrapped plate, or a plate insert if you want the load to ride higher and stay quiet.
### 5.11 Tactical RUSH 24 2.0 - Best Value
Built for military and law enforcement professionals. Water-resistant 1050D nylon, excellent [MOLLE webbing](/glossary#molle-webbing), professional organization. Perfect hybrid for rucking and tactical use.
Where it shines compared to the GR1: you get water-resistant 1050D nylon and excellent MOLLE-based organization at less than half the price. It's widely stocked at REI and major retailers so you can try it on before buying.
The tradeoff: at 37L, heavy loads ride higher than in the GR1's purpose-built plate pocket. The tactical aesthetic is also more pronounced, which matters if you ruck through urban areas.
### CONDOR 3-Day Assault Pack - Best Budget
Affordable tactical pack that gets the job done. 50L capacity gives you room to grow. Great for beginners who want to test rucking without a big investment.
What you get: functional 600D polyester construction that handles regular use, full MOLLE coverage for customization, and enough structure to hold a [ruck plate](/pillars/rucking-gear-guide) securely. It won't last as long as a GORUCK, but it is an excellent starter pack.
The honest tradeoff: 600D material wears faster, the 6-month warranty is short, and the oversized 50L capacity can cause load distribution issues at heavier weights.
## The Honest Bottom Line
────────────────────────────────────────────────────────────────────────────────
URL: https://ruckauthority.com/gear/best-gps-watches-for-rucking
Title: Best GPS Watches for Rucking in 2026
Description: The 6 best GPS watches for rucking, from lightweight value picks to premium navigation watches. Real specs, honest battery-life caveats, and which one is actually worth your money.
Published: 2026-03-28 / Updated: 2026-08-26
## 6 GPS Watches Ranked for Rucking
### What a GPS Watch Adds
A GPS watch turns a ruck into a training record. It can capture distance, pace, elevation, and heart-rate trends so you can compare sessions over time. Calorie figures remain estimates, especially when the watch does not account for pack weight.
The GPS watch market is crowded, and most buying guides are written for runners. We focused on the details that matter under a loaded pack: battery in the selected GPS mode, track quality under cover, controls, durability, navigation, and weight on the wrist during long carries.
Shopping a watch for general trail and hiking use rather than loaded carries? Our sister site Kit Authority's [GPS watches for hiking](https://kitauthority.com/hike/best-gps-watches?utm_source=ruckauthority&utm_medium=crosslink) guide covers that side.
### Quick picks
- **Best Overall:** Garmin Instinct 3 Solar ($400)
- **Best Value:** COROS PACE 4 ($249)
- **Premium Pick:** Garmin Fenix 8 AMOLED ($1,000)
- **Best for Fitness:** Garmin Forerunner 265 ($450)
- **Best Battery:** Suunto Vertical 2 ($699)
- **Best for iPhone:** Apple Watch Ultra 3 ($799)
### Budget and use-case tiers
- **Entry Level ($249):** Accurate dual-frequency GPS, long battery, lightweight design. Everything you need to track rucks without the Garmin price tag.
- **Mid-Range ($400-$450):** Rugged build, solar charging or AMOLED display, multi-band GPS, and ecosystem depth. The sweet spot for most ruckers.
- **Premium ($699-$1,000):** Offline topo maps, extreme battery life, premium materials. For trail navigators, ultra-distance events, and gear enthusiasts.
### Which GPS Watch Should You Buy for Rucking?
Six watches, six different answers depending on what your rucking actually looks like. The short version: match the watch to your longest regular session and the phone in your pocket, not to the spec sheet.
- **Choose the Garmin Instinct 3 Solar:** if you want one watch that survives everything. Multi-week battery, real buttons that work with gloves, and enough accuracy under tree cover for any training plan. This is the default answer for most ruckers.
- **Choose the COROS PACE 4:** if you want an ultralight AMOLED watch with dual-frequency GPS and 41 hours of standard GPS tracking. It gives up offline maps and some ruggedness, not measurement quality. The right first GPS watch.
- **Choose the Garmin Forerunner 265:** if rucking is one part of a broader training week. Training load, recovery guidance, and structured workouts are its actual job; rucking benefits from all of it.
- **Choose the Suunto Vertical 2:** if your sessions run long and remote. Battery is the headline, and the build matches multi-hour carries in real weather.
- **Choose the Apple Watch Ultra 3:** if you live on iPhone and want one watch for everything. Its screen and app ecosystem are the draw; compare its GPS-mode endurance with the length of your usual rucks.
- **Choose the Garmin Fenix 8 AMOLED:** if you want maps on the wrist, premium materials, and a broad outdoor feature set. The Instinct covers the core rucking job for less; the Fenix earns its price through navigation and extras.
### What to Look For in a GPS Watch for Rucking
Rucking asks different questions of a watch than running does. Sessions run longer, they happen under load, and a lot of them go through terrain that punishes both the GPS antenna and the case.
- **GPS battery under continuous tracking:** Use the manufacturer's estimate for the exact satellite and display mode you plan to run, not the smartwatch-mode headline. Leave enough margin for navigation, sensors, temperature, display use, and a session that runs long.
- **Multi-band (dual-frequency) GPS:** Multi-band reception can improve tracks under tree cover and beside tall buildings, but it also uses more battery. Prioritize it for difficult terrain and dense urban routes; it is less important for open-sky loops.
- **Buttons over touchscreen:** Sweat, rain, and gloves defeat touchscreens. Physical buttons are why field-focused watches keep them. If you ruck year-round, this is a bigger daily annoyance than any spec.
- **Weight and case comfort under a strap:** A heavy steel case rides differently when your arm is swinging with 30 lb on your back. Lighter polymer cases like the Instinct's are more comfortable at hour three than premium metal.
- **Honest calorie expectations:** A watch can estimate effort from your profile, movement, heart rate, and activity type, but pack weight is not consistently included in the calorie calculation. Use the watch for trends and cross-check calories with a load-aware tool such as our rucking calorie calculator.
### How We Picked These Watches
This is a spec-based buyer's guide, not a lab test. We compared current manufacturer specifications and support documents, exact product availability, navigation and control options, and clearly labeled external evidence.
Rucking puts different demands on a GPS watch than running or cycling. We gave extra weight to battery in active GPS modes, track quality under cover, physical controls, durability, comfort, and useful navigation.
### What actually matters in a rucking GPS watch
Before we get into individual watches, here's what to prioritize. The feature list that matters for rucking is different from running or cycling.
- **GPS battery life under load:** Official battery numbers vary by display behavior, satellite mode, navigation, connected sensors, temperature, and other settings. Start with the estimate for the mode you will actually use, then leave margin beyond your longest planned session.
- **Multi-band / dual-frequency GPS:** Dual-frequency reception can improve tracks under tree cover and between tall buildings, with a battery cost. It is worth prioritizing for difficult terrain and dense urban routes, but it is not mandatory for an open-sky training loop.
- **Durability:** You're sweating, you're carrying weight, your wrist is flexing under load. The watch needs to handle moisture, impact, and temperature swings. Look for 10 ATM water resistance (good for rain and sweat), metal or reinforced bezels, and scratch-resistant glass (sapphire is best, Gorilla Glass is fine).
- **Weight:** A heavy watch becomes noticeable over a 2-hour ruck. The difference between the COROS PACE 4 at 32g with a nylon band and the Suunto Vertical 2 at 74g is real when your wrist is swinging under load for an hour.
- **Heart rate under load:** Wrist-based optical HR sensors can struggle when your wrist muscles are flexed, your band is loose, or your watch is bouncing on a sweaty wrist. If HR precision matters to you for calories or zone training, pair the watch with a chest strap instead of treating wrist HR as perfect.
Don't pay for features you won't use. If you ruck the same three or four routes and do not need offline maps, the COROS PACE 4 gives you dual-frequency GPS and breadcrumb navigation without moving into the premium tier. Full maps and advanced navigation matter most on unfamiliar trails.
### Battery Math for Long Rucks and Events
Manufacturers publish several battery estimates. Use the number for the exact GPS, display, and navigation mode you plan to run, then leave margin for sensors, temperature, and a session that runs longer than expected.
- **Budget by hours, not miles:** At a 17 minute per mile pace a 12 mile ruck is over three hours. A GORUCK event can run twelve or more. Match the watch to your longest planned day, not your average one.
- **Multi-band GPS costs you:** Dual-frequency tracking is meaningfully more accurate under tree cover and between buildings, and it drains the battery faster than standard GPS. Most watches let you switch per activity, so save it for the sessions where the track matters.
- **Cold cuts it further:** Lithium cells lose capacity in the cold. A winter ruck can return well under the rated GPS hours, which is worth knowing before a long day in freezing weather rather than at mile nine.
- **Solar helps, slowly:** Solar charging extends runtime on long, genuinely sunny days. It is a buffer on a big effort, not a reason to skip charging the night before.
### Getting Load-Aware Numbers Out of a Watch
Garmin offers a native Rucking activity on supported watches, with availability depending on the exact device and software version. Garmin also notes that recording pack weight on most devices does not change calories, training load, or other metrics, so the load field is useful context rather than a guarantee of load-aware calorie math.
- **Use the rucking profile if you have one:** Record the actual pack weight for context, but do not assume that entering it changes the watch's calorie or training-load calculation.
- **Otherwise record it as a hike:** A hike profile keeps the route, pace, elevation, and heart-rate record together. Treat its calorie number as an estimate rather than an exact load-aware result.
- **Add a compatible chest strap when precision matters:** Motion, fit, temperature, and wrist position can affect optical heart-rate readings. A chest strap is useful for sessions where heart-rate precision matters, but it is not required for every ruck.
- **Cross-check the burn separately:** Load-aware equations account for what a wrist estimate cannot see. Treat the watch as your pace and route record, and get the calorie figure somewhere that knows about the pack.
For a load-aware burn estimate built on the Pandolf equation rather than a wrist sensor, [use the calorie calculator](/tools/rucking-calorie-calculator)
### Bottom line
The Garmin Instinct 3 Solar is the best GPS watch for most ruckers because it combines a rugged build, physical controls, a flashlight, and long GPS endurance without entering the premium tier. The COROS PACE 4 is the lower-cost, lighter alternative with an AMOLED screen, dual-frequency GPS, and 41 hours of all-systems tracking. Move up to the Fenix 8 or Suunto Vertical 2 when maps, premium materials, or longer remote sessions justify the cost. Choose the Apple Watch Ultra 3 when iPhone integration matters as much as outdoor tracking.
### Frequently asked questions
**Do I need a GPS watch for rucking?**
No. Your phone with a free app like Strava tracks distance and route just fine. A GPS watch is a convenience upgrade - glanceable data, better accuracy, no phone battery drain. It becomes more valuable once you're training with specific pace or heart rate targets.
**Which GPS watch has a dedicated rucking mode?**
Garmin offers a native Rucking activity on supported watches. Availability can change by device and software version, so check Garmin's compatibility information for the exact model. Garmin says pack weight recorded on most devices does not change calories, training load, or other metrics.
**Is wrist heart rate accurate during rucking?**
Wrist readings can be useful for trends, but motion, fit, skin contact, temperature, and gripping poles can affect them. Follow the manufacturer's fit guidance and use a compatible chest strap when heart-rate precision matters. A consumer watch is not a clinical device.
**How much GPS battery do I actually need?**
Match the estimate for your chosen satellite and display mode to your longest planned session, then leave margin. Around 20 hours can comfortably cover regular 1-3 hour rucks; longer events call for more headroom. Navigation, multi-band GPS, connected sensors, cold, and display settings can all reduce runtime.
**Garmin Instinct 3 Solar vs COROS PACE 4 - which should I buy?**
If ruggedness and solar charging matter: Instinct 3 Solar. If budget and weight matter: COROS PACE 4. The COROS actually has longer GPS battery (41 vs 35 hours) and is lighter (40g vs 53g), with an AMOLED screen. The Instinct wins on durability, flashlight, and 10 ATM water resistance.
**Is the Garmin Fenix 8 worth the premium?**
It can be if you will use offline maps, premium materials, and its broader outdoor feature set. If you ruck familiar routes and mainly need pace, distance, heart rate, and long battery life, the Instinct 3 Solar covers the core job for less.
You can ruck without a GPS watch. Plenty of people do. But if you want to track distance, pace, elevation, heart rate, and calories burned under load - and you want that data to actually be accurate - a GPS watch changes the game.
The problem is the GPS watch market is overwhelming. Garmin alone makes roughly 47 models. COROS, Suunto, Apple, and Polar all want your money too. Most reviews are written by runners who've never worn a loaded pack. Features that matter for [rucking](/glossary#rucking) - battery life under GPS load, accuracy under tree cover, durability when you're sweating through a 3-hour carry - get glossed over.
This is a spec-based buyer's guide, not a lab test. We prioritized the traits that matter under a loaded pack: GPS battery life, multi-band accuracy, durability, weight, navigation, and whether the watch still makes sense when your rucks get longer than a normal run.
## Quick picks
| Watch | Price | GPS Battery | Weight | Best for |
|-------|-------|-------------|--------|----------|
| Garmin Instinct 3 Solar | $300-500 | 35+ hrs | 53g | Overall best, rugged rucking |
| COROS PACE 4 | $150-300 | 41 hrs | 32g nylon / 40g silicone | Best value, lightweight |
| Garmin Fenix 8 AMOLED | $500-1000 | 48 hrs | 73g | Premium, maps, trail nav |
| Garmin Forerunner 265 | $300-500 | 20 hrs | 47g | Fitness tracking, AMOLED |
| Suunto Vertical 2 | $500-1000 | Multi-day | 74g | Ultra-distance, multi-day |
| Apple Watch Ultra 3 | $500-1000 | 42 hrs normal use | 61.6g | iPhone users, daily wear |
## What actually matters in a rucking GPS watch
Before we get into individual watches, here's what to prioritize. The feature list that matters for rucking is different from running or cycling.
**GPS battery life in the mode you will actually use.** Manufacturer estimates depend on display, satellite mode, navigation, sensors, temperature, and power settings. Compare the official number for the exact activity mode, then leave margin for navigation and battery aging. A 20-hour GPS estimate can be plenty for normal training but leaves little room for a long event once maps, alerts, and power-hungry modes are enabled.
**Multi-band / dual-frequency GPS.** Multi-band reception can improve tracks in difficult terrain and around tall buildings, but it also uses more power. It is worth prioritizing for trail navigation and dense urban routes; it is not mandatory for a simple open-sky neighborhood loop.
**Durability.** You're sweating, you're carrying weight, your wrist is flexing under load. The watch needs to handle moisture, impact, and temperature swings. Look for 10 ATM water resistance (good for rain and sweat), metal or reinforced bezels, and scratch-resistant glass (sapphire is best, Gorilla Glass is fine).
**Weight.** A heavy watch becomes noticeable over a 2-hour ruck. The difference between 32g with a nylon band (COROS PACE 4) and 74g (Suunto Vertical 2) is real when your wrist is swinging under load for an hour.
**Heart rate under load.** Wrist-based optical HR sensors can struggle when your wrist muscles are flexed, your band is loose, or your watch is bouncing on a sweaty wrist. If HR precision matters to you for calories or zone training, pair the watch with a chest strap instead of treating wrist HR as perfect.
---
## 1. Garmin Instinct 3 Solar (45mm) - best overall
The Instinct 3 Solar is the watch we'd recommend to most ruckers. It nails the fundamentals - rugged build, exceptional battery life, accurate GPS - without the premium price of the Fenix line.
**What makes it the top pick:** Solar charging. In smartwatch mode with 3 hours of daily sunlight exposure, the battery is effectively unlimited. You never think about charging. In GPS mode, you get 35+ hours (and more with solar gain during outdoor rucks). That's enough for any single-day event and most multi-day challenges.
The built-in flashlight is genuinely useful for pre-dawn rucks. Not a gimmick - a real white LED with a red-light mode that preserves night vision. The metal-reinforced bezel is also the right kind of design choice for a watch that may get scraped against rocks, pavement, or gym equipment.
**Key specs:**
- Multi-band GPS with SatIQ (automatically switches GPS modes to save battery)
- 53g with a comfortable silicone band
- ABC sensors: altimeter, barometer, compass
- 10 ATM water resistance
- Breadcrumb navigation (not full maps)
**What it doesn't have:** An AMOLED display. The MIP (memory-in-pixel) screen is always on and readable in sunlight, but it looks dated compared to the Fenix 8 or Forerunner 265. No touchscreen either - it's button-only navigation. And no offline topo maps - you get breadcrumb route following, which works for retracing your steps but won't help you navigate a new trail.
**Who should buy it:** Ruckers who want a set-it-and-forget-it GPS watch. Charge it once a month (or never, with solar), strap it on, go ruck. The Instinct 3 doesn't try to be a smartwatch. It's a rugged outdoor GPS tool that happens to sit on your wrist.
**Who should skip it:** If you want a pretty display, offline maps, or a watch that doubles as a daily smartwatch with music and app notifications, look at the Fenix 8 or Forerunner 265.
Price: $300-500
---
## 2. COROS PACE 4 - best value
The PACE 4 is the current value pick. It combines dual-frequency GPS, a bright 1.2-inch AMOLED touchscreen, and 41 hours of all-systems GPS tracking without moving into premium-watch pricing.
**What makes it special:** It weighs 32g with the nylon band and 40g with silicone, so it stays unobtrusive during long carries. The redesigned heart-rate sensor, dual-frequency receiver, breadcrumb navigation, and physical controls cover the measurements most ruckers actually use.
**Key specs:**
- Dual-frequency GPS
- 32g with nylon band / 40g with silicone
- 41 hours all-systems GPS / up to 19 days daily use
- 1.2-inch AMOLED touchscreen, digital dial, and action button
- Heart rate, SpO2, training load analysis
- Breadcrumb navigation
- 5 ATM water resistance
**The tradeoff:** It is not as rugged as the Instinct 3. The 5 ATM rating is a step down from the Garmin's 10 ATM rating, and it uses breadcrumb navigation rather than full offline maps.
**Who should buy it:** Ruckers who want strong GPS tracking without premium-watch pricing. It is also a sensible first GPS watch before deciding whether you need the maps and materials of the $500-1000 tier.
**Who should skip it:** If you ruck in extreme conditions (deep mud, river crossings, heavy rain), the 5 ATM rating and lighter build may not hold up.
Price: $150-300
---
## 3. Garmin Fenix 8 AMOLED (47mm) - premium pick
The Fenix 8 is the watch you buy when you want the best of everything and don't mind paying for it. It's objectively the most capable GPS watch available for outdoor use.
**What justifies the price:** Offline topo maps with turn-by-turn navigation. If you ruck unfamiliar trails, this feature alone is worth the upgrade. Load a route on the watch, and it guides you with on-wrist turn-by-turn directions - no phone needed. The AMOLED display is stunning and makes reading pace, heart rate, and elevation data effortless mid-ruck.
**Key specs:**
- 1.4" AMOLED touchscreen + buttons
- Multi-band GPS with SatIQ
- Full offline topo maps with navigation
- LED flashlight (white + red)
- 48 hours GPS / 29 days smartwatch
- 10 ATM water resistance, dive-rated
- Speaker and microphone for calls
**The reality check:** At 73g, it is noticeably heavier than the Instinct 3 (53g) or PACE 4 (32g with nylon). Many of its features, including diving, golf, and speaker calls, are irrelevant to rucking.
**Who should buy it:** Trail ruckers who navigate new routes regularly. Ruckers who want one premium watch for everything - daily wear, rucking, running, swimming. People who appreciate beautiful hardware and can absorb the price.
**Who should skip it:** Road ruckers on familiar routes, budget-conscious buyers, and anyone whose pack or footwear needs the money more than advanced watch features.
Price: $500-1000
---
## 4. Garmin Forerunner 265 - best for fitness tracking
The Forerunner 265 isn't marketed as a rucking watch. It's a running watch. But if rucking is part of a broader fitness routine - you also run, lift, cycle, or do CrossFit - the 265 tracks all of it better than any other watch under $500.
**What makes it great for cross-training ruckers:** Training Readiness score. Every morning, the watch tells you how ready your body is to train based on sleep, HRV, and recent training load. After a heavy ruck day, it'll tell you to take it easy. After a rest day, it'll tell you you're primed. This matters when rucking is one piece of a larger training program.
**Key specs:**
- 1.3" AMOLED touchscreen
- Multi-band GPS with SatIQ
- 20 hours GPS / 13 days smartwatch
- Training Readiness, HRV Status, Body Battery
- Onboard music (Spotify, Amazon Music offline)
- 5 ATM water resistance
**The limitation:** 20 hours of GPS. For most ruckers doing 1-3 hour sessions, this is plenty. For GORUCK events or anything over 6 hours, it's cutting it close. And it's not as tough as the Instinct 3 - no metal bezel, no flashlight, no 10 ATM rating.
**Who should buy it:** Ruckers who also run, cycle, swim, or lift and want one watch that tracks everything with detailed metrics. It is especially useful with a structured training plan; compare the current sale price with the PACE 4 before buying.
**Who should skip it:** Ruckers who only ruck. The training metrics are the whole point. If you just want GPS distance and do not care about HRV or Training Readiness, get the Instinct 3 or COROS PACE 4.
Price band: premium mid-range
---
## 5. Suunto Vertical 2 - best for multi-day navigation
The Vertical 2 is Suunto's expedition-oriented option. It pairs multi-day GPS modes with full offline maps, dual-frequency positioning, a 1.5-inch AMOLED display, and a built-in white-and-red flashlight.
**When multi-day battery matters:** Very long [GORUCK events](https://www.goruck.com/pages/find-an-event), multi-day navigation, backpacking rucks, and ultra-distance challenges where charging is inconvenient. For normal one-to-three-hour sessions, that reserve is useful but not necessary.
**Key specs:**
- 1.5" AMOLED display
- Dual-frequency GPS, all 5 satellite systems
- Full offline topo maps with route navigation
- Multi-day GPS modes for expedition use
- Built-in white-and-red LED flashlight
- 100m water resistance with sapphire crystal option
**The tradeoff:** At 74g, it is one of the heaviest watches on this list. Suunto's app ecosystem is smaller than Garmin Connect, and its premium price puts it against watches with deeper smart features.
**Who should buy it:** Ultra-distance event ruckers. Multi-day event participants. Anyone who has ever had a GPS watch die mid-event and sworn it would never happen again.
**Who should skip it:** Most ruckers. If your sessions stay under six hours and you do not need offline maps, the Instinct 3 Solar costs less and covers the core job.
Price: $500-1000
---
## 6. Apple Watch Ultra 3 - best for iPhone users
The Apple Watch Ultra 3 is the strongest choice here for someone who wants an iPhone companion first and a GPS watch second. Its tradeoff is not capability; it is battery management compared with dedicated outdoor watches.
**What it does well:** Everything a smartwatch should do. Calls, texts, Apple Pay, Siri, music streaming, app ecosystem, health tracking - all seamless if you have an iPhone. The titanium build is genuinely rugged (MIL-STD 810H tested). The display is the brightest of any smartwatch. And the Action Button lets you start a workout with one press.
**Key specs:**
- 1.9" OLED display (brightest available)
- Dual-frequency L1+L5 GPS
- Up to 42 hours normal use / 72 hours in Low Power Mode
- Cellular connectivity
- 49mm titanium case, sapphire crystal
- 100m water resistance
**The long-event tradeoff:** Apple publishes up to 42 hours of normal use and 72 hours in Low Power Mode, not a comparable continuous-GPS figure for every workout setting. That is enough for ordinary sessions, but a dedicated Garmin, COROS, or Suunto is easier to plan around for an all-day or multi-day event.
**What changed:** Ultra 3 adds satellite messaging, 5G, a larger LTPO3 display, and longer normal-use battery life. Those are meaningful safety and daily-use improvements, but they do not turn it into the battery leader in this comparison.
**Who should buy it:** iPhone users who want calls, messages, health features, payments, and ruck tracking in one device and who do not need expedition-style battery certainty.
**Who should skip it:** Android users, multi-day event participants, and ruckers who want a dedicated sport watch rather than a smartwatch that also tracks workouts.
Price: $500-1000 (frequently discounted)
---
## GPS watch FAQ for ruckers
**Can I just use my phone for GPS tracking?**
You can. Apps like Strava, AllTrails, and Apple Health track distance and route with your phone's GPS. But a phone in your pocket or pack is less accurate than a wrist-mounted GPS (body shielding degrades signal), it drains your phone battery, and you can't glance at pace or heart rate mid-ruck without pulling it out. A GPS watch is a convenience upgrade, not a necessity.
**Do GPS watches count rucking calories accurately?**
Better than nothing, worse than perfect. GPS watches estimate calorie burn based on heart rate, movement, weight, and activity type. Most watches have a "hiking" or "walking" mode that's close enough for rucking. The Garmin Tactix 8 is the only watch with a dedicated rucking mode where you enter pack weight. For all others, use "hiking" mode and know the calorie count is an approximation - probably within 15-20% of actual burn.
**Is wrist heart rate accurate during rucking?**
Wrist readings can be useful for trends, but motion, fit, skin contact, temperature, and gripping poles can all affect them. Wear the watch according to the manufacturer's fit guidance. Pair a compatible chest strap when heart-rate precision matters to the session, and do not treat any consumer watch as a clinical device.
**Do I need offline maps for rucking?**
Only if you ruck unfamiliar trails. If you ruck the same routes - your neighborhood, a local park, a familiar trail system - breadcrumb navigation (available on all watches here) is more than enough. Offline topo maps matter for backcountry navigation, [trail rucking](/guides/pavement-vs-trail-vs-treadmill) in new areas, and event rucking with navigation components (like GORUCK Star Course).
**Which watch has the most accurate GPS?**
For rucking, the bigger jump is from old single-band GPS to modern multi-band GPS. Garmin, COROS, and Suunto all make strong multi-band watches. The bigger real-world variable is usually the route - tree cover, urban canyons, weather, and whether the watch has a clear view of the sky.
**Will a GPS watch help me ruck faster?**
Indirectly, yes. Tracking your pace, distance, and heart rate over time lets you see progression. You'll notice when your 3-mile pace drops from 18:00/mile to 16:30/mile at the same weight. That feedback loop is motivating and helps you structure training. You'll also catch overtraining - if your heart rate at the same pace is 10+ BPM higher than normal, your body is telling you to recover.
---
## Which GPS watch should you choose?
For most ruckers, the **Garmin Instinct 3 Solar** is the right watch. It is rugged, has long GPS life, and avoids the highest price tier. If value and low weight matter more, the **COROS PACE 4** delivers dual-frequency GPS, 41 hours of tracking, and an AMOLED screen in a lighter package.
The Fenix 8 and Suunto Vertical 2 are for specific use cases: premium Garmin navigation and multi-day outdoor use. The Forerunner 265 is for cross-training athletes who want detailed metrics across multiple sports. The Apple Watch Ultra 3 is for iPhone users who want a smartwatch first and a GPS watch second.
Choose the watch with the navigation, battery life, and training features you will use. A less expensive watch is enough if you only need pace, distance, and heart rate.
────────────────────────────────────────────────────────────────────────────────
URL: https://ruckauthority.com/gear/best-headlamps-for-rucking
Title: Best Headlamps for Rucking in 2026
Description: The 6 best headlamps for early morning and night rucks, compared on lumens, battery life, price tier, and comfort under a loaded pack.
Published: 2026-03-28 / Updated: 2026-09-14
## 6 Headlamps Ranked for Early Morning and Night Rucks
### Choose a Headlamp for Loaded Walking
If your usual after-work ruck now ends in the dark, choose a light for that route. A lit sidewalk, an unlit park and a rocky trail ask different things of a headlamp. Start with the beam, battery runtime and fit you need before paying for more output.
This guide compares published specifications and features. Try a lamp with your hat and check its runtime at the brightness you will use; the brightest mode is not always the setting you can sustain for the whole walk.
For shorter days, pair your light with our [cold-weather layering guide](/training/winter-rucking-cold-weather). If the outdoor route no longer fits your schedule, use the [four-week indoor rucking plan](/training/indoor-rucking-plan-a-4-week-treadmill-program-for-year).
The [National Park Service](https://www.nps.gov/articles/idsw2019.htm) recommends learning a trail in daylight before walking it at night. Check park opening hours too; a headlamp does not make a closed route available.
Need a headlamp for camp and general trail use rather than dark-mile training? Our sister site Kit Authority's [headlamp guide](https://kitauthority.com/hike/best-headlamps?utm_source=ruckauthority&utm_medium=crosslink) covers the broader use case.
### Quick picks
- **Best Overall:** Petzl Actik Core ($87.95)
- **Best Budget:** Nitecore NU27 ($38)
- **Best Premium:** Petzl Swift RL ($134.95)
- **Best No-Bounce:** BioLite HeadLamp 800 Pro ($149.95)
- **Best Replaceable Battery:** Black Diamond Spot 400 ($59.95)
- **Best Tactical:** Fenix HM65R V2.0 ($99.95)
### Budget and use-case tiers
- **Budget ($38-$59.95):** Capable lights without premium pricing. The Nitecore NU27 prioritizes output-to-weight value; the dual-fuel Spot 400 prioritizes replaceable-battery reliability.
- **Mid-Range ($87.95-$99.95):** The sweet spot for most ruckers: USB-C charging, useful battery flexibility, and enough output for mixed terrain.
- **Premium ($134.95-$149.95):** High-output lights with specialized beam control, balance, and endurance features for serious night rucking.
### Before Your First After-Work Ruck This Fall
Check sunset and park closing times before using your usual summer route. Pick a loop you already know in daylight, and shorten it if the return leg would take you onto unfamiliar ground in the dark.
Try your lamp with the hat you will wear. Check that you can tilt the beam, change modes and read the battery indicator without taking everything off. Compare runtime at your intended setting, not just maximum lumens. Keep a backup light where you can reach it.
Before buying, check the lamp you already own. If it fits, lights the route clearly and has enough runtime for the outing, shorter days alone are not a reason to replace it.
### How Many Lumens Do You Need?
Road rucking under streetlights: 200-300 lumens. Mixed terrain: 400-600 lumens. Trail rucking at night: 600-900 lumens. Ultra distance or mountains: 900+ lumens. Resist the temptation to always use maximum output - an over-bright headlamp in a group ruck is annoying, and a 450-lumen lamp on a lit street wastes battery.
### Cold Weather and Battery Life
Cold reduces the usable capacity of rechargeable batteries. In winter, keep a spare battery close to your body and bring backup AAA cells when your lamp supports them. Charging-port type does not make a battery more cold-resistant; plan conservatively and test runtime before a long night ruck.
### Bottom line
The Petzl Actik Core is the best fit for most ruckers: 625 lumens, 88 grams, USB-C charging, and AAA backup. The Nitecore NU27 is the budget pick. The 1200-lumen Swift RL is for serious trail rucking, the dual-fuel Spot 400 favors replaceable-battery reliability, the Fenix HM65R V2.0 suits rugged use, and the balanced BioLite 800 Pro is built for long overnight efforts.
### Frequently asked questions
**How many lumens do I need for rucking?**
About 200-400 lumens is enough for lit roads, 400-600 works for mixed terrain, and 600+ is useful on dark or technical trails. Beam shape, runtime, and fit matter as much as maximum output.
**Rechargeable or AA batteries?**
Rechargeable USB-C for convenience and long-term savings. AA for travel and reliability when charging isn't available. Most morning ruckers are best served by rechargeable.
**Does red light mode matter?**
Yes, for group rucks. A bright white light destroys night vision for everyone around you. Red light mode lets you navigate without blinding your crew, and it burns less battery.
**Will cold weather kill my headlamp battery?**
Cold can reduce usable battery capacity, but the effect depends on the battery, temperature and light setting. Follow the lamp manual, check runtime before a long night ruck and carry a backup light. The charging connector alone does not tell you how a battery performs in cold weather.
If you're [rucking](/glossary#rucking) before sunrise or under streetlights, a headlamp isn't optional - it's essential. Most ruckers train early (beating the heat and the day job) or in the evening, and once you're carrying 20 - 40 pounds, your hands need to stay free and your pack needs to stay balanced. A flashlight in your hand? That's a mobility problem waiting to happen.
The right headlamp lights your path without draining your battery halfway through, sits comfortably under a hat or beanie, and weighs just enough that you barely notice it. The wrong one bounces with every step, blinds oncoming runners, or dies on the third morning.
Let's find you the right one.
## Before your first after-work ruck this fall
Check sunset and park closing times before using your usual summer route. Pick a loop you already know in daylight, and shorten it if the return leg would take you onto unfamiliar ground in the dark. The [National Park Service's night-hiking guidance](https://www.nps.gov/articles/idsw2019.htm) recommends learning a route in daylight before walking it at night.
Try your lamp with the hat you will wear. Check that you can tilt the beam, change modes and read the battery indicator without taking everything off. Compare runtime at your intended setting, not just maximum lumens. Keep a backup light where you can reach it.
If darkness comes with cold rain, use the [layering guide](/training/winter-rucking-cold-weather). If the route no longer works for your schedule, the [indoor rucking plan](/training/indoor-rucking-plan-a-4-week-treadmill-program-for-year) gives you a session to use instead.
## Quick picks
| Headlamp | Price | Lumens | Weight | Battery | Best For |
|----------|-------|--------|--------|---------|----------|
| Petzl Actik Core | $50-150 | 625 | 88g | USB-C CORE or 3 AAA | Overall balance of power and weight |
| Nitecore NU27 | $25-50 | 600 | 56g | USB-C rechargeable | Budget-conscious ruckers |
| Petzl Swift RL | $50-150 | 1200 | 92g | USB-C rechargeable | [Trail rucking](/guides/pavement-vs-trail-vs-treadmill) and longer distances |
| BioLite HeadLamp 800 Pro | $50-150 | 800 burst / 500 high | 150g | Micro-USB rechargeable | Long overnight efforts, pass-through charging |
| Black Diamond Spot 400 | $50-150 | 400 | 86g with batteries | 3 AAA or BD 1500 | Simplicity and replaceable power |
| Fenix HM65R V2.0 | $50-150 | 2200 | 144g (battery and headband included) | USB-C rechargeable | Dedicated red light and IP68 durability |
## Which headlamp should you choose?
| Ruck scenario | What matters most | Best fit |
| --- | --- | --- |
| Lit sidewalks before work | Low bounce, simple beam, enough visibility for curbs and traffic | Nitecore NU27 or Petzl Actik Core |
| Unlit parks and gravel paths | Wider beam, better water resistance, reliable battery indicator | Petzl Actik Core |
| Technical trail rucking | Higher output, stable strap, weather resistance, backup power plan | Petzl Swift RL or BioLite HeadLamp 800 Pro |
| Winter rucking | Cold-weather battery behavior and glove-friendly controls | Black Diamond Spot 400 or Petzl Actik Core |
| Group rucks | Red light or quick dimming so you do not blind people near you | Fenix HM65R V2.0 |
For winter visibility planning, pair this guide with our [cold-weather rucking safety guide](/training/winter-rucking-cold-weather). For terrain-specific footwear and traction, use the [best rucking shoes by terrain](/gear/best-rucking-shoes-by-terrain) guide after you choose your light.
## What actually matters in a headlamp
**Lumens and your route.** Road rucking under streetlights? 200 - 300 lumens is enough. Trail rucking, open space, or running fast? Jump to 400 - 600. Anything above 800 lumens is overkill for most ruckers (and annoys other people).
**Weight and comfort under load.** A loaded ruck already pulls your shoulders down. Your headlamp should feel invisible. Anything under 120g works fine; over 200g and you'll feel it after mile 3. Also - does it sit comfortably under your favorite beanie or hat? Try it on before you buy.
**Battery type.** Rechargeable USB headlamps (especially USB-C) are convenient and cheaper long-term. AA batteries are instantly replaceable anywhere and don't require planning. We lean rechargeable for rucking since most morning rucks are predictable.
**Water resistance.** IPX4 minimum (splash-proof). IPX7 - IPX8 means you can submerge it briefly. Rucking in rain? Go for IPX7+.
**Red light mode.** This is underrated. When you're rucking with a group, a bright white light blinds everyone. Red light mode lets you navigate without destroying night vision for your crew. It also burns less battery.
## The headlamps worth your money
**Petzl Actik Core**
The Actik Core is the sweet spot for most ruckers. It's not the lightest, not the brightest, but it's the one that works. 625 lumens lights a road or easy trail without burning through battery or cooking your eyes. There is no reactive mode here, that belongs to the Swift RL below, but the mixed beam and the red lighting cover what most rucks ask for. At 88g, you won't feel it after two miles. USB-C charging is standard now, and the runtime is solid. IPX4 is "splash-proof" only - heavy rain might push water into the lens - but for most morning rucks, it's more than adequate. This is the gateway headlamp. It doesn't ask too much of you and it delivers every time.
**Nitecore NU27**
The NU27 replaced the NU25 and improved on every spec. 600 lumens, three selectable color temperatures (warm, neutral, cool white), USB-C charging, IP66 waterproofing, and just 56 grams - making it the lightest headlamp on this list. The multiple color temperatures are genuinely useful: warm light (3000K) preserves night vision better for early morning rucks, while cool white (6500K) gives you maximum visibility on dark trails. Runtime is up to 57 hours on the lowest setting. In the $25-50 tier, it is still firmly in "no-risk experiment" territory, but the performance punches well above its price. If you're testing whether you need a headlamp, start here. You might not need to upgrade.
**Petzl Swift RL**
The Swift RL is for people who do serious trail rucking. 1200 lumens lights technical terrain at speed. The reactive lighting system is top-tier - it reads the environment and adjusts so you're not blinded by reflective gear or slowed by dim light. IPX7 means it can handle heavy rain or a quick stream crossing. The trade-off is shorter runtime on full brightness - but if you're pushing hard, that's probably not your priority anyway. Buy this if you're doing long trail rucks, predawn starts in remote areas, or if you value reactive lighting enough to pay for it. Otherwise, the Actik Core handles 90% of ruck scenarios for less.
**BioLite HeadLamp 800 Pro**
BioLite's current high-output lamp runs 500 lumens on high with an 800-lumen burst, which is real trail brightness. The design choice that matters is the rear battery: it balances the load and keeps the front housing low-profile, and it supports pass-through charging, so you can run it off a power bank through an overnight effort. At 150g it is the heaviest lamp here, so this is not the ultralight pick, and there is no reactive mode. BioLite builds camping stoves and solar chargers, so they understand power management. Choose it for long nights where topping up matters more than grams.
**Black Diamond Spot 400**
Black Diamond is known for climbing and mountaineering gear, so this lamp is built like an actual tool. 400 lumens is exactly right for road rucking or moderate trails. The genius move here is three standard AAA batteries - you can replace them at any gas station, anywhere. If you forget to charge your USB lamp mid-trip or on vacation, you're stuck. With AAAs, you're never stuck, and a BD 1500 rechargeable pack drops in when you would rather not buy cells. It runs 86g with batteries in, it keeps a red light for night vision, and IPX8 means it survives more than a shower. This is the headlamp for people who travel, camp, or want maximum reliability. It's heavier, but you gain independence from charging infrastructure.
**Fenix HM65R V2.0**
The Fenix HM65R V2.0 is the "professional-grade" option. Its 2200-lumen maximum is genuinely excessive for most rucking, but the real value is the dedicated red light and IP68 dust and water protection. At 144g including the battery and headband, it is a serious piece of kit rather than an ultralight option. The red light is excellent for preserving night vision in a group. Pick this if you specifically want the dedicated red light or professional durability. For standard rucking, the Actik Core does the job for less and will not annoy your training crew with unnecessary brightness.
## How many lumens do you actually need?
**Road rucking (lit streets, daytime before sunrise):** 200 - 300 lumens. You're not in total darkness; you just need to see your feet and be visible. The Nitecore NU27 or Black Diamond Spot 400 are enough.
**Mixed terrain (some pavement, some light trail):** 400 - 600 lumens. This is the sweet spot. Petzl Actik Core or BioLite HeadLamp 800 Pro work perfectly here.
**Trail rucking (unlit, technical, night):** 600 - 900 lumens. You need to see rocks, roots, and drop-offs. Petzl Swift RL or BioLite HeadLamp 800 Pro are the right calls.
**Ultra distance or mountainous terrain:** 900+ lumens. Fenix HM65R V2.0 if you want the brightness, or Petzl Swift RL if you prefer reactive lighting.
The temptation is to always go brighter. Resist it. A 2200-lumen headlamp in a group ruck is annoying (you'll get told about it). A 450-lumen lamp lighting a lit street is wasteful battery and unnecessary weight.
## Cold weather and battery life
Cold can reduce usable battery capacity, but the effect depends on the battery, temperature and light setting. The charging connector alone does not tell you how a battery performs in cold weather.
Follow the lamp manual and check runtime before a long night ruck. Carry a backup light and, if your lamp accepts replacements, the correct spare batteries. Check the [cold-weather rucking guide](/training/winter-rucking-cold-weather) when planning the rest of your kit.
## Next steps
Grab whichever headlamp fits your ruck style and budget. If you're not sure, start with the **Nitecore NU27** in the $25-50 tier - it's a low-risk way to learn whether you prefer road rucking or trail work. Once you know your preference, upgrade to the **Petzl Actik Core** in the $50-150 tier and you're set for years.
Once your headlamp is sorted, load up your pack with the right [gear for your first rucks](/guides/first-30-days-of-rucking), and figure out your [ideal ruck weight](/guides/how-heavy-should-your-ruck-be) for early morning training.
Happy rucking - and watch your footing out there.
────────────────────────────────────────────────────────────────────────────────
URL: https://ruckauthority.com/gear/best-hydration-bladders-for-rucking-in-2026
Title: Best Hydration Bladders for Rucking in 2026
Description: Best hydration bladders for rucking in 2026. Durable, leak-proof bladders that handle weighted movement and heavy breathing during long ruck marches.
Published: 2026-04-22
## Best Hydration Bladders for Rucking Compared
### Compare Bladders by Fit and Maintenance
Most hydration packs force you into their ecosystem - specific capacity, fixed pocket layout, limited MOLLE compatibility. Ruckers consistently report preferring separate bladders that drop into their chosen pack. This approach lets you optimize pack selection for weight distribution and organization while still getting hands-free hydration during long movements.
We analyzed bladders specifically for weighted movement demands - reinforced construction that won't fail under load, bite valves that deliver consistent flow during heavy breathing, and leak-proof sealing when bouncing with serious weight. These four options represent the community consensus across different budget tiers and capacity needs.
### Quick picks
- **Best Overall:** Source Tactical WXP 3L Storm Valve ($27.95)
- **Best Value:** Platypus Big Zip EVO 3L ($59.95)
- **Best for Easy Refills:** CamelBak Crux 2L ($40)
- **Ultralight Pick:** HydraPak Contour 3L ($49)
### Budget and use-case tiers
- **Tier 1: Premium ($27.95-49):** Feature-rich bladders with advanced materials and specialized valves for serious backcountry use.
- **Tier 2: Mid-Range ($30-60):** Proven designs with solid durability and user-friendly features for regular outdoor activities.
- **Tier 3: Starter ($40):** A proven 2L reservoir with an ergonomic refill handle, an on/off bite valve, and broad pack compatibility.
- **Tier 4: DIY ($5-15):** Repurpose wide-mouth bottles with aftermarket tube kits or use collapsible water containers you already own.
### Comparison table
product: HydraPak Contour 3L; capacity: 3L; price: $49; rating: 8.5/10; bestFor: Easy cleaning, low-profile fit
product: Platypus Big Zip EVO 3L; capacity: 3L; price: $59.95; rating: 8.2/10; bestFor: Mold resistance, reliability
product: Source Tactical WXP 3L Storm Valve; capacity: 3L; price: $27.95; rating: 9.0/10; bestFor: GORUCK, loaded packs
product: CamelBak Crux 2L; capacity: 2L; price: $40; rating: 8.2/10; bestFor: Easy refills, universal fit
### How Much Water to Carry
For most ruckers, 2 liters covers 60 to 90 minutes in moderate weather. Move to 3 liters when the route runs longer than two hours, the temperature climbs above 75F, or the pack weight pushes past 30 pounds. Heavy loads raise breathing rate and sweat rate, so a bladder that feels oversized on a normal walk can be exactly right once you add plates.
A full 3 liter bladder weighs about 6.6 pounds. Treat that as part of your training load, not a separate accessory. If your plan calls for a 30 pound ruck and you start with 3 liters of water, the pack can leave the house closer to 36 or 37 pounds. That is fine when intentional, but it can surprise beginners who already loaded the pack with plates.
### Fit and Hose Routing
- **Use the sleeve if your pack has one:** A bladder should sit flat against the frame sheet or laptop sleeve, not loose in the main compartment. Loose bladders slump as they drain and can create pressure points against a hard plate.
- **Keep the hose on your dominant side:** Route the hose over the shoulder you naturally reach toward, then secure it with the pack's sternum strap, elastic keeper, or a small webbing clip. A swinging bite valve gets annoying fast.
- **Check plate clearance:** In a GORUCK-style pack, keep the bladder above or behind the plate pocket when possible. If the plate edge presses into the reservoir, add a thin foam pad or switch to a tougher tactical bladder.
### Leak Prevention and Cleaning
The failure point is usually not the reservoir wall. It is the cap seal, quick-disconnect, or bite valve. Before every long ruck, fill the bladder, turn it upside down, squeeze it hard over the sink, and check the connection points. Finding a slow drip at home is boring. Finding it after it soaked your socks and phone is expensive.
After sugary drink mixes, rinse immediately and hang the bladder open. Slide-seal designs like the Platypus Big Zip and reversible HydraPak Contour are easier to clean and dry than narrow screw-cap reservoirs. If you only use water, a full clean every few uses is usually enough, but never store it sealed while damp.
### Bottom line
The Source WXP is the lowest-priced 3L option here and the strongest fit for loaded tactical packs. The Platypus Big Zip EVO prioritizes a wide opening and proven reliability, the CamelBak Crux 2L pairs an ergonomic refill handle with an on/off bite valve and broad pack compatibility, and the HydraPak Contour combines a low-profile shape with a reversible, easy-clean design.
### Frequently asked questions
**What's the best hydration bladder for backpacking?**
The HydraPak Contour 3L is a strong backpacking option because it turns inside out for cleaning, uses Shape-Loc baffles to stay low-profile, and combines a 3D bottom with a side-exit port for a better fit in varied pack sleeves.
**What's the best starter hydration bladder?**
The CamelBak Crux 2L is a straightforward starter reservoir. Its ergonomic handle makes one-handed refills easier, the bite valve has a shutoff lever for transport, and the 2L format fits most hydration sleeves. It needs regular cleaning and may be too small for long, hot rucks.
**Can I use a Camelbak alternative that's just as good?**
The Platypus Big Zip EVO 3L serves as an excellent Camelbak alternative. Its zippered opening provides easier access than traditional screw caps, while the taste-free materials and leak-proof design match premium performance. Reviewers consistently note comparable durability at a more accessible price point.
**How do I choose between 2L and 3L hydration bladders?**
Choose 2L for shorter outings or smaller hydration sleeves. Go with 3L for long efforts, hot conditions, or routes with limited refill access. The CamelBak Crux 2L is a dependable shorter-outing option with an easy-fill handle, while the HydraPak Contour 3L adds capacity without giving up an easy-clean design.
────────────────────────────────────────────────────────────────────────────────
URL: https://ruckauthority.com/gear/best-hydration-packs-for-rucking
Title: Best Hydration Packs for Rucking in 2026: 5 Setups
Description: Source WXP 3L is our pick for GORUCK-style rucks, CamelBak Crux 2L for budgets, and the M.U.L.E. 12 when you want a standalone pack. 5 setups compared.
Published: 2026-03-28 / Updated: 2026-09-26
## 5 Bladders & Packs Ranked for Hands-Free Hydration
### Hydration for Loaded Walking
A pack adds effort, and more effort usually means more sweat. A bottle takes two hands to grab, open, and drink; a bladder with a bite valve lets you drink while staying loaded and moving. On rucks past an hour, especially in heat, that makes it easier to keep drinking before you're parched.
This guide covers the best hydration bladders and packs for rucking, from reservoir inserts to a standalone hydration pack. We compared bite valve design, pack compatibility, cleaning ease, listed weight, and capacity for typical ruck distances. The four reservoirs sit in a similar price band, so the choice comes down to features rather than cost.
If you're shopping hydration for unloaded day hikes rather than loaded carries, our sister site Kit Authority compares [hydration bladders](https://kitauthority.com/hike/best-hydration-bladders?utm_source=ruckauthority&utm_medium=crosslink) and breaks down [vests vs packs](https://kitauthority.com/hike/hydration-vest-vs-hydration-pack?utm_source=ruckauthority&utm_medium=crosslink) for that use case.
### Quick picks
- **Best Overall:** Source WXP 3L ($25-50)
- **Best Budget:** CamelBak Crux 2L ($25-50)
- **Best Ultralight:** HydraPak Contour 3L ($25-50)
- **Best Standalone:** CamelBak M.U.L.E. 12L ($50-150)
- **Best for Heat:** Nathan 1.6L Insulated ($25-50)
### Budget and use-case tiers
- **Reservoirs ($25-50):** Reservoirs that fit inside an existing pack, from a durable tactical bladder to insulated and ultralight designs.
- **Standalone Pack ($50-150):** A complete hydration pack for lighter efforts when you do not need a full ruck: about 9L of gear space plus a 3L reservoir, at 1 lb 4 oz.
### Bladder vs. Bottles for Rucking
For most rucks longer than an hour, a bladder beats bottles. A bottle requires you to stop, reach back, grab, open, drink, close, and put it back. A bladder lets you bite the tube without interrupting momentum. It sits in a dedicated sleeve, stays put, and keeps weight centered.
Because a sip takes almost no effort, it's easier to drink small amounts regularly instead of gulping at planned stops. The one caveat: bladders require more planning for refills. For short urban rucks with known water stops, bottles are fine. For anything over an hour or 5K, use a bladder.
### How Much Water Do You Need?
Sweat rates vary widely, from roughly 0.5 to 2 liters per hour depending on the person, the effort, and the weather, according to the American College of Sports Medicine's 2007 fluid replacement position stand. As a starting point: up to 5K, 1.5-2L. 5K-10K, 2-3L. 10K-20K, 3L minimum with a refill planned midway. 20K+, multiple bladders or a dedicated pack with scheduled water stops. For a personal number, weigh yourself before and after a typical ruck: each kilogram lost is roughly a liter of sweat you didn't replace.
### Pack Compatibility
Most GORUCK packs (GR1, GR2 and similar) have an internal hydration sleeve. GORUCK sells the Source WXP 3L as its own bladder, which makes it the safest fit; most standard 2-3L reservoirs also work. Mystery Ranch and 5.11 packs vary by model, so check your specific sleeve dimensions and hose routing. If using a pack without a dedicated sleeve, orient the bladder vertically with the tube at the top.
### Keeping Your Bladder Clean
Empty immediately after use. Rinse with hot (not boiling) water. Use a cleaning brush for narrow openings. Dry completely before storage: stuff with a paper towel and leave the opening open. Never store sealed. Deep clean monthly with a commercial cleaning tablet. If your valve slows down, soak it in white vinegar for 15-20 minutes to clear mineral deposits.
### Bottom line
Every reservoir here can last for years if you clean and dry it properly, and the four reservoirs sit in a similar price band, so buy for fit and features. The Source WXP 3L is the best overall for GORUCK pack owners. The CamelBak Crux 2L is the simple budget choice. The HydraPak Contour 3L wins for weight-conscious ruckers who want an easy-cleaning design. For hot weather, the Nathan Insulated solves a specific problem well. The M.U.L.E. 12L is for lightweight standalone hydration when your main ruck stays home.
### Frequently asked questions
**Can I use a hydration bladder in any rucking pack?**
Most rucking packs (GORUCK, Mystery Ranch, 5.11) have dedicated bladder sleeves. Standard 2-3L bladders fit most sleeves. Check your pack's internal dimensions if unsure. You can also use a bladder in a pack without a sleeve by orienting it vertically.
**How often should I clean my hydration bladder?**
Rinse after every use, dry thoroughly, and deep clean with a cleaning tablet monthly. Never store a sealed bladder; moisture left inside can grow mold quickly.
**Bladder or bottles for rucking?**
Bladders for any ruck over an hour or 5K. Drinking without stopping makes it easier to take small, regular sips under load. Bottles work for short urban rucks where water stops are obvious.
**How much water should I carry for a ruck?**
Sweat rates run roughly 0.5-2 L per hour, so 2L covers most rucks under an hour. Up to 5K: 1.5-2L. 5K-10K: 2-3L. 10K-20K: 3L minimum with a refill plan. 20K+: multiple bladders or a dedicated pack. Adjust for temperature and load weight.
You're two miles into a ruck with 20 pounds on your back. Your hands are gripping straps, adjusting weight distribution, maybe swinging your arms to recover from that hill. Your mouth is dry. Your heart rate is climbing.
Now imagine: you sip water without stopping. Without adjusting anything. Without letting go.
That's the case for hydration bladders in [rucking](/glossary#rucking). A bottle takes two hands to grab, open, and drink; a bladder with a bite valve lets you drink while staying loaded and moving. On rucks past an hour, especially in heat, that makes it easier to keep drinking before you're parched.
This guide covers the best hydration bladders and packs for rucking, from budget options to specialized rucking gear.
## Quick picks
| Bladder | Capacity | Listed weight | Best For |
|---------|----------|---------------|----------|
| Source WXP 3L | 3L (100 oz) | About 240 g (full system) | [GORUCK](/glossary#goruck) packs, antimicrobial liner |
| [CamelBak Crux](/gear/best-hydration-bladders-for-rucking-in-2026) | 2L (70 oz) | About 7 oz (210 g) | Budget-conscious ruckers |
| HydraPak Contour | 3L (100 oz) | About 155 g | Ultralight, easy cleaning |
| CamelBak M.U.L.E. 12 | 3L reservoir + about 9L gear | 1 lb 4 oz (580 g) | Standalone hydration pack |
| Nathan Insulated | 1.6L (54 oz) | Not listed | Hot weather, cooler water |
## What to look for in a hydration setup
Before we dive into specific products, let's talk about what separates a good [hydration bladder](/glossary#hydration-bladder) from one that frustrates you mile after mile.
**Bite valve quality.** A sluggish or leaky valve turns hydration into a chore. You want something that flows freely when you bite it but doesn't weep when you don't. Poor valve design = either not drinking enough or wet gear.
**Cleaning ease.** A bladder that's a nightmare to clean gets... not cleaned. Bacteria, mold, and mineral deposits accumulate. You want a bladder with a wide opening or one that turns inside-out for thorough drying.
**Pack compatibility.** Most rucking packs (GORUCK, Mystery Ranch, 5.11) have bladder sleeves designed for specific dimensions. A bladder that doesn't fit snugly sloshes around, shifts weight, and ruins your balance. Fit matters.
**Capacity for your distance.** A 1.5L bladder is fine for a 5K ruck. For a 10-miler in warm weather, it usually isn't enough without a refill. We'll break this down later, but capacity, weather, and your route need to align.
**Weight.** Every ounce counts when you're rucking. A well-designed bladder should be lightweight without compromising durability.
## The bladders and packs worth your money
**Source WXP 3L Storm Valve**
The default for GORUCK owners, and for good reason: GORUCK sells this same WXP 3L Storm system as its own hydration bladder and describes it as compatible with its rucksacks. The Storm valve is a push-pull design with a built-in shut-off, so it doesn't need a bite to flow and doesn't weep when closed. The liner uses Source's smooth "Glass-Like" film with antimicrobial treatment, which Source says resists taste and grime buildup. At about 240 g for the full system, it's heavier than the HydraPak Contour. If you own a GR1, GR2, or similar GORUCK bag, this is the plug-and-play choice.
**CamelBak Crux 2L**
CamelBak's no-nonsense offering that just works. The bite valve is smooth and responsive, and the on/off lever (a small toggle) makes it easy to stop flow without removing the tube from your mouth - useful if you're mid-ruck and want to drink deliberately. At 2L, it covers most rucks up to about an hour and a half in mild weather, or works as a spare in a dedicated hydration pack. The valve has more parts than minimalist competitors, which means more to clean, but the on/off lever is the feature owners mention most.
**[HydraPak Contour 3L](/gear/best-hydration-bladders-for-rucking-in-2026)**
The Contour turns completely inside out for cleaning, which makes it easier to wash and dry. It holds 3L, and its wide opening is easier to refill from a tap than a narrow-necked bladder. Inverting it takes some practice if you want to avoid spilling water. The bite valve is simpler than the Source or CamelBak options, with fewer parts to clean.
**CamelBak M.U.L.E. 12L**
This isn't just a bladder - it's a hydration pack with cargo space. The M.U.L.E. 12 is a mountain-bike pack: CamelBak lists a 3L Crux reservoir plus about 9L of gear capacity, at 1 lb 4 oz. That works for lightweight trail rucks, tempo rucks, or sessions where you're working out a hydration strategy without a heavy pack. It carries water, food, a rain shell, and navigation without a separate larger pack. It isn't built for heavy GORUCK-style loads of 20+ lbs, and the gear space gets tight on long days.
**Nathan 1.6L Insulated**
When temperatures spike, water in a standard bladder warms up against your back, and warm water is less appealing to drink. Nathan's insulated bladder targets that specific problem: Nathan says it keeps water cooler 38% longer than uninsulated bladders, and the hourglass shape reduces sloshing. If you're doing summer rucks, cooler water is easier to keep drinking. Capacity is limited at 1.6L, so plan refill access for anything over an hour in heat.
## Bladder vs. bottles: which setup wins?
For most rucks longer than an hour, a bladder beats bottles. Here's why.
**Hands-free access.** With a bottle, you stop, reach back, grab the bottle, open it, drink, close it, put it back. With a bladder, you bite the tube. Walking, rucking, no interruption to momentum or rhythm.
**Pack integration.** A bottle rattles around in a pack's exterior pocket, creates asymmetrical weight distribution, and often falls out. A bladder sits in a dedicated sleeve, stays put, and keeps weight centered.
**Drink frequency.** Because a sip takes almost no effort, it's easier to drink small amounts regularly instead of gulping at planned stops.
**One caveat:** Bladders require more planning than bottles. You can't just grab any water source and fill a bladder - you need a tap, a fill opening, or a dedicated filter system. For shorter urban rucks with known water stops, bottles are fine. For longer routes or remote areas, a bladder that you can plan refills around is better.
**Conclusion:** Use a bladder if you're doing any ruck over an hour or any distance over 5K. Use a bottle if you're doing short, fast rucks in urban areas where water stops are obvious.
## How much water do you actually need?
Sweat rates vary widely, from roughly 0.5 to 2 liters per hour depending on the person, the effort, and the weather, according to the American College of Sports Medicine's 2007 fluid replacement position stand. Its practical target is to avoid losing more than about 2% of body weight to sweat. Use these ranges as a starting point for capacity:
- **Up to 5K (3 miles):** 1.5L - 2L is sufficient. You're likely under an hour, and you can refill at the turnaround or endpoint.
- **5K - 10K (3-6 miles):** 2L - 3L recommended. Depending on temperature and pace, you might finish without refilling, but the buffer is useful.
- **10K - 20K (6-12 miles):** 3L minimum, preferably 3.5L+. At this distance, you'll likely need to plan a refill midway, or carry multiple bladders/a dedicated pack.
- **20K+ (12+ miles):** Multiple bladders, a dedicated hydration pack with refill strategy, or scheduled water stops. A single 3L bladder isn't enough.
Remember: these are approximations. Temperature, pace, individual sweat rate, and pack weight all affect water needs, and a hot day with a heavy pack can push you to the top of that sweat range. If you want a personal number, weigh yourself before and after a typical ruck: each kilogram lost is roughly a liter of sweat you didn't replace.
## Will it fit your pack?
**GORUCK packs** (GR1, GR2 and similar): Most have an internal hydration sleeve. GORUCK sells the Source WXP 3L as its own bladder, which makes it the safest fit; most standard 2-3L reservoirs also work. Check the sleeve dimensions for your specific model and size.
**Mystery Ranch packs** (Scree, Terraframe, etc.): Most have bladder sleeves compatible with 2-3L bladders. Check your specific model's dimensions - Mystery Ranch is less standardized than GORUCK.
**5.11 packs** (Rush series and others): Similar to Mystery Ranch - check your model. Most accommodate 2-3L bladders, but sleeve position and hose routing vary.
**Standalone sizing:** If you're using a pack without a dedicated bladder sleeve, orient your bladder vertically (tube at the top, bulk at the bottom) for easiest access and best weight distribution.
## Keeping your bladder from getting gross
A bladder only stays good if you actually clean it. Here's the process:
1. **Empty immediately after use.** Don't let water sit in the bladder - it's a bacterial incubator.
2. **Rinse with hot water.** Fill the bladder halfway with hot (not boiling) water, seal it, and shake vigorously for 30 seconds.
3. **Use a cleaning brush if needed.** If your bladder has a narrow opening, a soft brush cleans the interior walls. Don't scrub aggressively - you can damage antimicrobial coatings.
4. **Dry completely before storage.** Either use a drying rack (bladders often have a small loop for hanging), or stuff it with a paper towel and leave the opening open. Moisture in a sealed bladder can grow mold quickly.
5. **Store open.** Never store a sealed bladder. Leave the opening slightly ajar so any residual moisture can evaporate.
6. **Deep clean monthly.** If you're using the bladder frequently, use a commercial cleaning tablet (like those made for water bottles) once a month.
## Bottom line
Hydration affects your energy, your concentration, and your safety on longer rucks, particularly in heat. Every reservoir here can last for years if you clean and dry it properly, so buy for fit and features rather than the lowest price.
The choice between Source, CamelBak, HydraPak, and Nathan depends on your priorities: pack compatibility (Source), budget (CamelBak Crux), weight obsession (HydraPak), temperature management (Nathan), or pure standalone capacity (M.U.L.E.).
Pick one, learn its quirks, clean it well, and you'll stay hydrated for every ruck from here forward.
────────────────────────────────────────────────────────────────────────────────
URL: https://ruckauthority.com/gear/best-plate-carrier-weight-vests-for-rucking-military-style-t
Title: Best Plate Carrier-Style Weighted Vests for Rucking in 2026
Description: Plate carrier-style vests and ruck plate carriers distribute load front-and-back the way a real ruck does. Compare the 4 carriers worth owning in 2026 and what plates fit each.
Published: 2026-04-29 / Updated: 2026-08-27
## Best Plate Carrier-Style Weighted Vests for Rucking in 2026
### Four Plate Carriers and the Plates They Use
Most weighted vests are built for boot camp HIIT classes - stretch-fit panels that hug the torso and concentrate mass around the sternum. That works for kettlebell circuits but is a poor analog for rucking, where the load sits high on the shoulders and splits front-to-back. Plate carrier-style vests close that gap with flat plate pockets that mirror real pack carry geometry.
The category just opened up. GORUCK released the Ruck Plate Carrier 3.0 - a skin-direct carrier with 1000D Cordura construction that undercuts 5.11 by $135. Polyfit's Rucking Backpack 2.0 brought an Amazon-fulfilled budget option down to roughly a third of GORUCK Basic Rucker pricing. Four picks are worth owning in 2026 instead of the two from a year ago, with Wolf Tactical, Rogue Echo Vest, and 5.11 TacTec Trainer still under evaluation.
Methodology: every score is the Ruck Authority composite (30% Rucking Fit, 25% Community Reception, 25% Build Quality, 20% Value). Pricing is reported in price bands per our Amazon Associates compliance. Compatibility matrix below lists exactly which plate format fits each carrier - this is the trap nobody warns you about.
### Quick picks
- **Best Skin-Direct:** GORUCK Ruck Plate Carrier 3.0 ($115)
- **Best Premium:** 5.11 Tactical TacTec Plate Carrier ($250)
- **Best Budget Plate-Carrying Setup:** Polyfit Rucking Backpack 2.0 ($60)
- **Cheapest Credible Entry:** Condor Sentry Plate Carrier ($64)
### Budget and use-case tiers
- **Tier 1: Premium ($200+) ($200-300):** Real shoulder yoke padding, MOLLE field, quick-release. The carrier you don't have to think about again past month six.
- **Tier 2: GORUCK ($100-150) ($100-150):** 1000D Cordura primary, 210D HT skin-side, 20mm EVA lumbar. The new value benchmark - premium construction at a $135 discount to 5.11.
- **Tier 3: Budget Backpack-Style ($60):** Not a true chest-and-back carrier - a backpack with a side-loading plate slot. Cheapest credible plate-carrying setup that accepts standard 10x12 plates.
- **Tier 4: Cheapest Entry ($60-70):** Basic hook-and-loop cummerbund, thin shoulder padding. Fine to test the format for 30-90 days, outgrown by anyone training consistently.
### Comparison table
product: GORUCK Ruck Plate Carrier 3.0 (Standard); price: $115; plateFormat: GORUCK Ruck Plate (9.75 x 11.75); maxLoad: 30 lb; notes: Long and Heavy variants exist for larger torsos. Plates sold separately.
product: 5.11 Tactical TacTec; price: $250; plateFormat: ESAPI / 10x12 fitness; maxLoad: 40 lb; notes: Generous pocket; standard 10x12 plates fit with room to spare.
product: Polyfit Rucking Backpack 2.0; price: $60; plateFormat: 10x12 generic OR Polyfit pair; maxLoad: 40 lb; notes: Backpack form factor with side-loading plate slot. Budget-tier nylon.
product: Condor Sentry; price: $64; plateFormat: 10x12 generic; maxLoad: ~30 lb; notes: Hook-and-loop cummerbund only. Plates may shift during running.
### Why a plate carrier-style vest beats a torso-hugging vest for rucking carryover
A traditional weighted vest centers mass around the trunk. The load presses inward and down, distributed across the ribs and lumbar. That's biomechanically fine, but it's not what a ruck does to you. A loaded pack pulls your shoulders back and down while your front stays unloaded, and your spine has to stack against an asymmetric pull all session.
A plate carrier-style vest splits the load front-to-back across two flat panels, with the bulk of the weight transferred through padded shoulder straps. The asymmetry is reduced - you have load on the front to balance the back panel - but the pull on your shoulders and the high-on-the-trunk weight position closely matches what you feel under a real pack. Community threads on r/rucking and r/CrossFit consistently report better step-up and uphill carryover from plate carrier-style training compared to traditional vests of equivalent weight.
There's a second benefit ruckers care about: progressive loading. A 30-pound stretch-fit vest is a 30-pound stretch-fit vest. With plates, you can run a 10-pound front and 10-pound rear today, swap to 15-and-15 next month, then 20-and-20 the month after - mirroring exactly the kind of monthly weight bumps you'd run on your actual ruck. That granularity matters a lot when you're trying to push aerobic load without inviting a hot spot or a stress injury.
It's not a perfect substitute. A pack still moves differently than rigid plates, and there's no hip belt to transfer load to your skeleton the way a real ruck does. But for cross-training - especially when you want to keep getting time under load on days you can't get a full ruck in - the format is the right tool for the job. If your goal is general fitness loading rather than ruck carryover, the torso-hugging format still has its place - our sister site Kit Authority's roundup of adjustable weighted vests covers that side of the market.
### Plates - the other half of the equation
Buying a carrier without budgeting for plates is one of the most common mistakes in this category. The carrier itself is roughly half the total cost of a working setup. There are three plate types that work for fitness loading:
- **GORUCK-format Ruck Plates:** Required for the GORUCK RPC 3.0 Standard. 10, 20, and 30 lb sizes. These will not fit every 10x12 generic carrier - they're a different shape. Match plate dimensions to the current GORUCK carrier or Rucker 5.0 pocket before buying.
- **Steel 10x12 fitness plates:** The closest analog to "real" plate weight for generic carriers. Durable, last forever, give the carrier the right rigidity and feel. They're heavy and not cheap - a pair will run a meaningful fraction of the carrier price. Pair best with the TacTec and the Polyfit. Typical pair weights run from 8 pounds up to 20+ pounds per plate.
- **Foam or rubber-coated 10x12 plates:** Lighter and easier on the carrier and on your body if you tip over. They run smaller weights - typical pair weights from about 2 pounds to 8 pounds per plate - which makes them ideal for beginners and for the smaller weight increments that make sense for early progression. The trade-off is they're bulkier per pound.
- **Sand or shot-filled inserts:** The cheapest option for 10x12 carriers. Some carriers accept generic weight-shaped inserts that you fill yourself. The trade-off is they shift inside the pocket more than rigid plates, which changes the feel and the carryover to ruck-specific work. Acceptable as a budget bridge, not as a long-term answer.
Whatever you pick, get a pair, not a single plate. Loading only the front or only the rear creates exactly the kind of asymmetric pull this format is supposed to avoid. (The Polyfit is the exception - it's a backpack, so a single rear plate is the format.)
### Sizing and fit
The fit principle is the same as a backpack: shoulder straps carry the load, cummerbund stabilizes it. Set the carrier so the front panel sits roughly mid-sternum at the top edge, with the bottom edge near the bottom of your ribs. The rear panel should mirror it. If the panel is riding up to your throat or sagging onto your belly, your shoulder straps need adjustment.
GORUCK RPC 3.0: Three variants - Standard, Long, Heavy. Pick by torso length and intended max load, not by chest size. Long is for larger guys with long torsos; Heavy carries two plates for advanced training. 5.11 TacTec: S/M/L by chest circumference. The cummerbund and strap adjustability covers most fit variation - a standard size works for most people in the 5'6" to 6'2" range. Polyfit Rucking Backpack 2.0: One Size Fits Most (XS-L). The shoulder strap range is wide enough to handle most adult torsos, though larger frames may feel the strap span at the edges. One size with hook-and-loop adjustability. Works for most adult builds but offers less precision than the TacTec's elastic tensioning.
A fit-check before you buy plates: load the empty carrier, snug the straps, and walk around the house for 20 minutes. If hot spots show up under load with no weight, they will get worse under weight. The most common offender is the shoulder strap edge cutting into the trapezius. The RPC's and the TacTec's yoke design largely solve this; on the Polyfit and the Sentry, you may want to add a thin neoprene pad strip if it bothers you.
### Building a progression - the safety part
A few rules that apply double when the load is on your chest instead of in a pack:
- **Get individual guidance when health history matters:** A chest-worn load can change breathing, balance, and movement. Ask a clinician before adding it if you are returning from injury or have cardiovascular, respiratory, balance, or other relevant health concerns.
- **Begin with the smallest practical load:** There is no universal starting weight or progression interval. Keep the first route short, change one variable at a time, and remove the load if gait, breathing, balance, pain, or other symptoms change.
- **Watch the cumulative load:** Plate carrier-style work counts toward the same overall training stress that your rucks do. If you're already doing four heavy rucks a week, replacing one of them with plate work is fine; adding plate work on top of an unchanged ruck schedule is how nagging injuries show up.
- **Pay attention to upper-body restriction:** The vest changes how you breathe and how you reach overhead. If you're combining plate work with overhead pressing or pull-ups, the cummerbund tension may need to come down. Tight cummerbund + overhead movement is a recipe for a pinched lat.
- **Budget for recovery:** Loaded carries are heavier on the central nervous system than they feel during the session. The day after a long plate session, prioritize sleep, hydration, and a real meal.
### Care and maintenance
Plate carrier fabric is robust by design but doesn't love sustained sweat exposure. After a session, pull plates out, hang the carrier somewhere ventilated, and let it dry fully before stowing. Don't leave a wet carrier in a gym bag overnight - it's how mildew starts on the inside of the cummerbund where you can't see it.
Cleaning is straightforward: wipe down with a damp cloth and mild soap, spot-treat the inside of the shoulder pads, and air dry. Don't run a plate carrier through a washing machine, regardless of what the tag says. The agitator beats up the MOLLE webbing and the hook-and-loop loses bite over a few cycles.
Inspect the stitching at the shoulder strap attachment points and the cummerbund anchor points every couple of months. These are the two failure points that show up first in heavy-use feedback. The TacTec and the RPC both use bar-tacked stitching at these joints and back it with their respective warranties. The Polyfit and the Sentry use simpler construction - bar tacks can pull over time, especially on the cheaper carrier. If you see fraying, retire the carrier - this is not the place to push your luck.
### Bottom line
The four picks cover the spread. GORUCK Ruck Plate Carrier 3.0 is the new value benchmark - premium 1000D Cordura construction, skin-direct comfort, and the Training Sternum Strap in the box. 5.11 TacTec is the carrier you don't have to think about again - real yoke padding, real adjustability, real quick-release. Polyfit Rucking Backpack 2.0 is the cheapest credible plate-carrying setup - backpack form factor with side-loading geometry that accepts standard 10x12 plates. Condor Sentry is the bare-floor entry point - fine for short sessions, outgrown within a couple months. Budget for plates separately and check the matrix above so you buy a plate that actually fits your carrier.
### Frequently asked questions
**Is a plate carrier-style weighted vest better than a regular weighted vest for rucking carryover?**
For ruck-specific training, yes - the load split front-to-back with the bulk of weight transferred through padded shoulder straps closely matches the biomechanics of a loaded pack. Traditional weighted vests concentrate mass around the trunk, which is fine for general conditioning but doesn't build the same shoulder and postural endurance you need under a real ruck. The exception: if you're doing pure HIIT or kettlebell work, a stretch-fit vest is more comfortable and gets out of the way better.
**What's the right starting weight for plate carrier training if I already ruck regularly?**
Around 10-15 pounds total - meaning 5 to 7.5 pounds per plate, front and rear. This is well below what you probably ruck with, and that's intentional. Chest-loaded carry feels different on the cardiovascular system and the postural muscles, and the asymmetric pull of a pack you're used to isn't there. Add 5 pounds total every two to three weeks if everything feels good. Loading 30+ pounds on day one is the most common way people quit this format inside the first month.
**What's the difference between the GORUCK Ruck Plate Carrier 3.0 and the 5.11 TacTec?**
The RPC 3.0 is a plate-only harness designed around the GORUCK Ruck Plate shape (9.75" x 11.75") and worn skin-direct. The TacTec is a generic 10x12 plate carrier with a more substantial yoke, real cummerbund tensioning, and a quick-release pull. Practically: the RPC carries one plate type (GORUCK's) and is the more comfortable carrier per dollar. The TacTec carries any 10x12 fitness plate and is the more adjustable carrier with extras (MOLLE field, quick-release) that matter at the premium tier. Most ruckers will be best served by the RPC unless they already own 10x12 plates or want the TacTec's full feature set.
**Can I use generic 10x12 plates in the GORUCK Ruck Plate Carrier 3.0?**
No - the Standard RPC 3.0 pocket is sized for the GORUCK Ruck Plate (9.75" x 11.75" x 1.5"), which is a different shape from generic 10x12 fitness plates. A 10x12 plate won't fit the pocket geometry. If you already own 10x12 plates, look at the 5.11 TacTec, the Polyfit Rucking Backpack 2.0, or the Condor Sentry instead. The matrix above covers what fits what.
**Do I need special fitness plates, or can I use any 10x12 plate?**
Standard 10x12 fitness plates fit the 5.11 TacTec, the Polyfit Rucking Backpack 2.0, and the Condor Sentry without modification. The GORUCK RPC 3.0 needs GORUCK's own Ruck Plates - a different format. For 10x12 carriers you can choose between steel plates (durable, heavier, more expensive), foam or rubber-coated plates (lighter, easier on the body and the carrier, ideal for beginners), or sand/shot inserts (cheapest, but they shift more during movement). Always buy plates in pairs for true chest-and-back carriers - loading only the front or only the rear defeats the whole point of the format. The Polyfit is the exception, since it's a backpack with a single rear plate slot.
**Can I run with a plate carrier weighted vest on?**
You can, but there's nuance. Walking and steady-state hiking - no problem. Short jogs and step-ups - fine with proper cummerbund tension. True running, especially over rough terrain, increases the impact load on your spine and joints meaningfully, and the bouncing of plates can chew up the inside of cheaper carriers over time. The TacTec and the RPC 3.0 handle running better than the Sentry and the Polyfit thanks to more secure tensioning (TacTec) or a fitted sternum strap (RPC). If running with load is a regular goal, you're probably better served by an actual running vest with a smaller load than a plate carrier with full weight.
**How does a plate carrier-style vest compare to just adding more weight to my ruck?**
They train different things. Adding weight to your ruck loads your spine asymmetrically - back-only - and recruits the posterior chain heavily through the hip belt and shoulder pull-down. A plate carrier loads front-and-back and runs the load through the shoulders without a hip belt, which makes the upper traps and core do more stabilizing work. Most people running both formats use plate carrier sessions on shorter, more intense workouts (step-ups, hill repeats, weighted complexes) and save the longer aerobic work for actual ruck distance under their pack.
**Is a plate carrier weighted vest legal to own and train with in public?**
In every U.S. state, yes - civilian ownership of empty plate carriers and fitness plates is unrestricted. International rules vary by country, so check local regulations before ordering across borders. For training in public spaces - parks, trails, gym parking lots - the practical concern isn't legality but optics. A plate carrier in a tactical color worn alone reads differently than one worn over a t-shirt with a fitness plate visible. Most outdoor ruckers wearing plate carrier-style vests in public just wear them as obvious fitness equipment, the same way a weighted backpack reads.
# Best Plate Carrier-Style Weighted Vests for Rucking in 2026
Most weighted vests are built for boot camp HIIT classes - stretch-fit panels that hug the torso and concentrate mass right around your sternum and lower back. That works fine for kettlebell circuits. It's a poor analog for rucking, where the load you actually train for is split front-to-back and lives high on your shoulders.
Plate carrier-style vests use front and rear pockets for flat plates. The load stays close to the torso, and you can change it by swapping plates. The fit and movement are different from a backpack, but the format is useful when you want front-and-back loading without carrying cargo.
The category just expanded. GORUCK's Ruck Plate Carrier 3.0 put a midrange skin-direct carrier into the gap between cheap import gear and premium tactical equipment. Polyfit's Rucking Backpack 2.0 added a budget Amazon-fulfilled option that actually takes standard plates. The result: four carriers worth owning in 2026 instead of the two we had a year ago - with the rest of the market (Wolf Tactical, Rogue Echo Vest, 5.11 TacTec Trainer, Condor MOPC) still under evaluation for a fuller comparison later this year.
*Analysis based on rucking forums, r/Fitness and r/weightlifting threads on weighted-vest carryover, GORUCK Tribe community feedback, and manufacturer specifications. Pricing is reported in price bands per our Amazon Associates compliance.*
## Quick picks
**Best skin-direct carrier:** GORUCK Ruck Plate Carrier 3.0 - 1000D Cordura outside, 210D HT Cordura against your skin, 20mm EVA lumbar, includes the Training Sternum Strap. It delivers premium GORUCK construction at a midrange price, well below the TacTec tier.
**Best premium all-rounder:** [5.11 Tactical TacTec Plate Carrier](/gear/5-11-tactical-tactec-plate-carrier) - The carrier that keeps showing up in long-term-use posts. Padded yoke, real adjustability, big MOLLE field if you want to hang accessories. Premium tier pricing, but it's the one ruckers stop tinkering with. Read the full [5.11 TacTec plate carrier review](/gear/5-11-tactical-tactec-plate-carrier) for the rating breakdown and when a plate carrier beats a ruck pack.
**Best budget plate-carrying setup:** [Polyfit Rucking Backpack 2.0](/gear/best-weighted-backpacks-for-rucking) - Budget-tier pricing and compatibility with standard 10x12 plates or Polyfit's own pair. It is not a true chest-and-back carrier, but it gets people into structured loading without paying premium-carrier prices. Check the current price before buying.
**Cheapest credible entry:** Condor Sentry Plate Carrier - The cheapest credible plate carrier-style vest for fitness use. Basic harness, decent plate retention, no frills. Good entry point if you want to see whether you actually like vest training before spending real money.
## Why a plate carrier-style vest beats a torso-hugging vest for rucking carryover
A traditional [weighted vest](/glossary#weighted-vest) centers mass around the trunk. The load presses inward and down, distributed across the ribs and lumbar. That's biomechanically fine, but it's not what a ruck does to you. A loaded pack pulls your shoulders back and down while your front stays unloaded, and your spine has to stack against an asymmetric pull all session.
A plate carrier-style vest splits the load front-to-back across two flat panels, with the bulk of the weight transferred through padded shoulder straps. The asymmetry is reduced - you have load on the front to balance the back panel - but the pull on your shoulders and the high-on-the-trunk weight position closely matches what you feel under a real pack. Community threads on r/rucking and r/CrossFit consistently report better step-up and uphill carryover from plate carrier-style training compared to traditional vests of equivalent weight.
There's a second benefit ruckers care about: progressive loading. A 30-pound stretch-fit vest is a 30-pound stretch-fit vest. With plates, you can run a 10-pound front and 10-pound rear today, swap to 15-and-15 next month, then 20-and-20 the month after - mirroring exactly the kind of monthly weight bumps you'd run on your actual ruck. That granularity matters a lot when you're trying to push aerobic load without inviting a hot spot or a stress injury.
It's not a perfect substitute. A pack still moves differently than rigid plates, and there's no [hip belt](/glossary#hip-belt) to transfer load to your skeleton the way a real ruck does. But for cross-training - especially when you want to keep getting time under load on days you can't get a full ruck in - the format is the right tool for the job. If your goal is general fitness loading rather than ruck carryover, the torso-hugging format still has its place - our sister site Kit Authority's roundup of [adjustable weighted vests](https://kitauthority.com/fitness/best-adjustable-weighted-vests?utm_source=ruckauthority&utm_medium=crosslink) covers that side of the market.
## Plate compatibility matrix
Plate carriers are *not* interchangeable. A 10x12 fitness plate won't fit a GORUCK pocket. A GORUCK plate won't fit an Olympic-plate carrier. Use the matrix below before you buy a plate to make sure it actually fits your carrier.
| Carrier | Plate format | Max load | Plates sold separately? | Notes |
|---|---|---:|---|---|
| GORUCK Ruck Plate Carrier 3.0 (Standard) | GORUCK Ruck Plate, 9.75" x 11.75" | 30 lb | Yes | Standard variant. Long and Heavy variants exist for larger torsos and heavier loads. |
| 5.11 Tactical TacTec | ESAPI / 10x12 fitness | 40 lb (typical) | Yes | Generous pocket fits standard 10x12 with room to spare. |
| Polyfit Rucking Backpack 2.0 | 10x12 generic OR Polyfit pair | 40 lb | Yes | Backpack form factor with side-loading plate slot. |
| Condor Sentry | 10x12 generic | ~30 lb | Yes | Hook-and-loop only cummerbund; plates may shift during running. |
Standard GORUCK plates (the curved 9 x 11.5 x 1.38 "Ruck Plate" shape) do **not** fit 10x12 carriers. Generic 10x12 fitness plates do **not** fit GORUCK pockets. Olympic plates fit only carriers explicitly designed for them - this article doesn't cover the Olympic-plate format. The Polyfit PL8 is the one mainstream option in that niche, covered separately.
## The picks
### GORUCK Ruck Plate Carrier 3.0 - best skin-direct pick
The RPC 3.0 is GORUCK's purpose-built plate carrier (not a backpack). It holds a GORUCK Ruck Plate high and tight between the shoulder blades, with no non-plate storage. What sets it apart from 10x12 fitness carriers is the materials hierarchy: 1000D Cordura primary shell, 1050D Ballistic Cordura bottom panel, and a 210D HT Cordura interior soft enough to wear skin-direct without chafe.
For ruckers, the features that matter:
- **The plate ride.** The pocket is positioned high enough that the plate sits between your shoulder blades, not on the lumbar. This is the most stable plate carry geometry GORUCK ships, and it's the structural reason the RPC outperforms generic 10x12 carriers under aerobic load.
- **Skin-direct compatibility.** The 210D HT Cordura against your back is intentionally non-abrasive. You can wear this without a shirt for hot-weather training without ending up with friction burns.
- **20mm EVA lumbar.** The same lumbar padding as the Rucker 4.0 pack - it's why the carrier still feels good 60+ minutes into a session.
- **Includes the Training Sternum Strap.** The carrier ships with the sternum strap that holds it in place during running and dynamic movement. No upsell on the in-box price.
What's worth knowing before you buy:
- **No waist belt.** This is a shoulder-and-sternum carry only. The full load goes through your traps and clavicles for the duration. Heavier loads (30 lb plus) get uncomfortable past the 90-minute mark in a way a hip-belted pack doesn't.
- **GORUCK plates only on Standard.** The Standard variant fits the GORUCK Ruck Plate (9.75" x 11.75"). It does not fit 10x12 generic fitness plates. Plates are sold separately at GORUCK direct.
- **Long-torso buyers need the Long variant.** GORUCK ships three RPC variants: Standard, Long, and Heavy. Larger frames should look at the Long; the Standard's plate pocket geometry is sized for an average male torso.
- **Plate-only storage.** Bring water, snacks, and layers in something else - the RPC has zero non-plate volume.
The RPC 3.0 is the new value benchmark in this category. It is not the cheapest carrier in the article, but its midrange price is well below what 5.11 charges for arguably comparable construction. Until Wolf, Rogue, and 5.11's Trainer carriers get the same forum-tested scrutiny, this is the carrier we're recommending for anyone serious about plate training without spending TacTec money. Check GORUCK for the current price.
### 5.11 Tactical TacTec Plate Carrier - premium all-rounder
The TacTec is built for police and government training programs that put serious cumulative hours on the gear, which means construction tolerances and material quality that hold up to fitness use without complaint. The carrier that's still in regular rotation at month six tends to be this one or one of its even-pricier siblings. For ruckers, the features that matter:
- **The shoulder yoke.** This is the single thing that separates fitness-friendly carriers from kit-grade carriers. The TacTec's yoke is genuinely padded across the trapezius, with mesh-lined contact surfaces. After 45-60 minutes of [loaded carry](/glossary#load-carriage), this is what you'll be glad you paid for.
- **Real adjustability.** Cummerbund and shoulder strap adjustments at both length and elastic-tension axes. You can tune fit for a base layer in summer or a midweight in winter without the carrier riding up or sagging.
- **Quick-release pull.** A single-pull shed system at the front. Most fitness sessions will not require it, but it makes the carrier easier to remove quickly when needed.
- **MOLLE coverage.** Generous front and rear webbing, which matters less for vest training and more if you ever load the carrier with a hydration insert or want to add a small admin pouch for keys and cards on a longer outdoor session.
What community feedback flags as worth knowing:
- The TacTec runs slightly long in the torso. Smaller-framed users report needing to size down on cummerbund and shoulder strap to keep the panel from riding above the navel.
- Plate fitment is generous - it accepts standard 10x12 fitness plates with room to spare. Some users add a thin foam shim to keep plates from shifting when running.
- Color options matter for one specific reason: dark colors get hot in direct sun. If you train outdoors in summer, sand or ranger green wins over black.
The TacTec lives at the premium end of the plate carrier-style vest market. It's not cheap. But the carriers that consistently still get used at month six are this one and a small number of even-pricier alternatives - which means the value calculation works out if you're going to actually use the format. The TacTec earns the long-haul pick by being the one you stop tinkering with.
### Polyfit Rucking Backpack 2.0 - best budget plate-carrying setup
The Polyfit is a backpack with a side-loading plate slot, not a true chest-and-back plate carrier. It is included because its budget-tier price makes it the least expensive setup here for carrying a flat plate, and the side opening makes plate changes faster than a top-loading ruck. It accepts standard 10x12 plates and suits people who want to start without paying premium-carrier prices.
What works for ruck training:
- **Standard 10x12 compatibility.** It accepts cast-iron plates from any home gym, GORUCK 10x12 vest plates, or Polyfit's own plate pair. That cross-compatibility is rare in this price tier.
- **Side-loading.** Swap plates without unloading the main compartment. A small thing that becomes large when you're running a session that wants 10 lb steps up to 30 lb.
- **40 lb cap.** Covers the 20-40 lb training tier that most ruckers progress through over their first year.
- **Five colors, including civilian colorways.** Black Camo and Tan don't read tactical the way Ranger Green or military patterns do - relevant if you're training in public spaces and want to look like you're carrying a backpack.
Where it gives ground vs the premium picks:
- **Budget-tier nylon, not Cordura.** Won't survive log PT or sandbag drills the way 1000D Cordura does. Fitness use only.
- **Pack body is built for plates, not storage.** Tight on volume if you also want water, a layer, and event kit. This is the trade-off of using a thin-bodied plate ruck.
- **No bladder sleeve or hose port.** Hydration has to live in the main compartment with whatever else you brought.
- **Smaller community sample size.** Polyfit is newer than GORUCK or 5.11 - the long-term durability data is still building.
If you already own 10x12 plates or want to test plate-carrying training on a budget, the Polyfit is the right answer. It is not the carrier you'll use forever, but at an entry-level price it does not need to be. Check the current price before buying.
### Condor Sentry Plate Carrier - cheapest credible entry
The Sentry is what you buy when you want to know whether you'll like plate carrier-style training before you commit to a TacTec or an RPC. It's a basic carrier - simple shoulder straps, hook-and-loop cummerbund, modest MOLLE field - but the construction is solid enough to take fitness use without falling apart. Reddit threads on r/rucking and r/Fitness consistently mention the Sentry as the "good enough to get started" pick.
For ruckers, what works:
- **It accepts standard 10x12 fitness plates without modification.** No need to hunt down a specific plate size to fit it.
- **The cummerbund tightens enough to keep plates from shifting** during step-ups, weighted lunges, and steady-state walking. It will move during running. Plan accordingly.
- **It's cheap enough to be a non-decision.** If plate carrier-style training doesn't end up being your thing, you've not made a real financial commitment.
What's missing compared to the TacTec or the RPC:
- The shoulder strap padding is thin. After 30-40 minutes of loaded carry, you'll feel it.
- Adjustability is more limited - the cummerbund is hook-and-loop only, with no fine-tune elastic.
- No quick-release. Getting out of the vest takes a minute and some shoulder rolling.
The Sentry is the right answer if you want to test the format without spending real money, or if your training is going to live in 20-30 minute sessions where the comfort gap matters less. If you're building it into longer aerobic work, you'll outgrow it within a couple of months and move up to the RPC 3.0 or the TacTec.
## Plates - the other half of the equation
Buying a carrier without budgeting for plates is one of the most common mistakes in this category. The carrier itself is roughly half the total cost of a working setup. There are three plate types that work for fitness loading:
**GORUCK-format Ruck Plates.** Required for the GORUCK RPC 3.0 Standard. 10, 20, and 30 lb sizes. These will not fit any 10x12 generic carrier - they're a different shape. Compatibility still depends on the exact GORUCK plate pocket: the RPC, Rucker 5.0, older Ruckers, and GR1 do not accept every GORUCK plate format interchangeably. Match the plate dimensions to the exact pocket before buying.
**Steel 10x12 fitness plates.** The closest analog to "real" plate weight for generic carriers. Durable, last forever, give the carrier the right rigidity and feel. They're heavy and not cheap - a pair will run a meaningful fraction of the carrier price. Pair best with the TacTec and the Polyfit. Typical pair weights run from 8 pounds up to 20+ pounds per plate.
**Foam or rubber-coated 10x12 plates.** Lighter and easier on the carrier and on your body if you tip over. They run smaller weights - typical pair weights from about 2 pounds to 8 pounds per plate - which makes them ideal for beginners and for the smaller weight increments that make sense for early progression. The trade-off is they're bulkier per pound.
**Sand or shot-filled inserts.** The cheapest option for 10x12 carriers. Some carriers accept generic weight-shaped inserts that you fill yourself. The trade-off is they shift inside the pocket more than rigid plates, which changes the feel and the carryover to ruck-specific work. Acceptable as a budget bridge, not as a long-term answer.
Whatever you pick, get a pair, not a single plate. Loading only the front or only the rear creates exactly the kind of asymmetric pull this format is supposed to *avoid*. (The Polyfit is the exception - it's a backpack, so a single rear plate is the format.)
## Sizing and fit
The fit principle is the same as a backpack: shoulder straps carry the load, cummerbund stabilizes it. Set the carrier so the front panel sits roughly mid-sternum at the top edge, with the bottom edge near the bottom of your ribs. The rear panel should mirror it. If the panel is riding up to your throat or sagging onto your belly, your shoulder straps need adjustment.
These four carriers use different sizing systems:
- **GORUCK RPC 3.0:** Three variants - Standard, Long, Heavy. Pick by torso length and intended max load, not by chest size. Long is for larger guys with long torsos; Heavy carries two plates for advanced training.
- **5.11 TacTec:** S/M/L by chest circumference. The cummerbund and strap adjustability covers most fit variation - a standard size works for most people in the 5'6" to 6'2" range.
- **Polyfit Rucking Backpack 2.0:** One Size Fits Most (XS-L). The shoulder strap range is wide enough to handle most adult torsos, though larger frames may feel the strap span at the edges.
- **Condor Sentry:** One size with hook-and-loop adjustability. Works for most adult builds but offers less precision than the TacTec's elastic tensioning.
A fit-check before you buy plates: load the empty carrier, snug the straps, and walk around the house for 20 minutes. If hot spots show up under load with no weight, they will get worse under weight. The most common offender is the shoulder strap edge cutting into the trapezius. The RPC's and the TacTec's yoke design largely solve this; on the Polyfit and the Sentry, you may want to add a thin neoprene pad strip if it bothers you.
## Building a progression - the safety part
A few rules that apply double when the load is on your chest instead of in a pack:
**Get medical clearance if you're new to weighted exercise.** Loaded chest carry adds a static respiratory load that can stress the cardiovascular system in ways unloaded walking doesn't. If you're returning from injury, have a heart history, or are over 50 and starting fresh, talk to your doctor first. This applies to any weighted training, but it's worth saying clearly here.
**Start light. Lighter than you think.** A reasonable starting load for someone already ruck-trained is 10-15 pounds total - 5 to 7.5 pounds per plate. Add 5 pounds total at most every two to three weeks if everything feels good. The temptation to load 30+ pounds on day one is strong and almost always ends in lower-back stiffness or a pulled trap.
**Watch the cumulative load.** Plate carrier-style work counts toward the same overall training stress that your rucks do. If you're already doing four heavy rucks a week, replacing one of them with plate work is fine; *adding* plate work on top of an unchanged ruck schedule is how nagging injuries show up.
**Pay attention to upper-body restriction.** The vest changes how you breathe and how you reach overhead. If you're combining plate work with overhead pressing or pull-ups, the cummerbund tension may need to come down. Tight cummerbund + overhead movement is a recipe for a pinched lat.
**Budget for recovery.** Loaded carries are heavier on the central nervous system than they feel during the session. The day after a long plate session, prioritize sleep, hydration, and a real meal.
## Care and maintenance
Plate carrier fabric is robust by design but doesn't love sustained sweat exposure. After a session, pull plates out, hang the carrier somewhere ventilated, and let it dry fully before stowing. Don't leave a wet carrier in a gym bag overnight - it's how mildew starts on the inside of the cummerbund where you can't see it.
Cleaning is straightforward: wipe down with a damp cloth and mild soap, spot-treat the inside of the shoulder pads, and air dry. Don't run a plate carrier through a washing machine, regardless of what the tag says. The agitator beats up the [MOLLE webbing](/glossary#molle-webbing) and the hook-and-loop loses bite over a few cycles.
Inspect the stitching at the shoulder strap attachment points and the cummerbund anchor points every couple of months. These are the two failure points that show up first in heavy-use feedback. The TacTec and the RPC both use bar-tacked stitching at these joints and back it with their respective warranties. The Polyfit and the Sentry use simpler construction - bar tacks can pull over time, especially on the cheaper carrier. If you see fraying, retire the carrier - this is not the place to push your luck.
## Which carrier should you choose?
If you want vest training that actually carries over to rucking - and not just generic weighted-cardio noise - a plate carrier-style vest is the right format. The four picks above cover the spread:
- **GORUCK Ruck Plate Carrier 3.0** is the midrange value benchmark in this category - premium construction, skin-direct comfort, and a sternum strap in the box.
- **5.11 TacTec** is the premium carrier you don't have to think about again - real yoke padding, real adjustability, real quick-release.
- **Polyfit Rucking Backpack 2.0** is the budget pick - backpack form factor with side-loading geometry.
- **Condor Sentry** is the bare-floor entry point - fine for short sessions, outgrown within a couple of months.
Either way, budget for plates separately (and check the matrix above so you buy a plate that actually fits your carrier), start lighter than your ego wants, and remember that the asymmetric pull a ruck puts on your spine is *part* of what a real ruck trains. A plate vest is a complement to [ruck training](/pillars/rucking-training-programs), not a replacement for it.
## Frequently asked questions
────────────────────────────────────────────────────────────────────────────────
URL: https://ruckauthority.com/gear/best-rucking-apps
Title: Best Rucking Apps 2026: Track Weight, Pace, and Calories Accurately
Description: The best rucking apps and how to set up your Apple Watch or Garmin to track loaded walks - including why generic fitness apps undercount your calories.
Published: 2026-07-09 / Updated: 2026-09-10
## Quick picks
If you just want the answer:
- **Best dedicated rucking app for most people:** RUCKR. It tracks load, pace, route, terrain, and calories, and it is available on iPhone, Apple Watch, and Android.
- **Best Apple-only option for navigation and recovery:** RuckWell. It combines load-aware tracking with GPX navigation and recovery guidance on iPhone and Apple Watch.
- **Free general-purpose option:** Strava, for activity history and community. Log pack weight in your notes and check whether the calorie estimate came from Strava or an upload partner.
- **Best if you own a compatible Garmin:** Garmin's native Rucking activity, with your pack weight entered before the session.
The rest of this guide explains why weight matters, breaks down each app, and walks through setting up your Apple Watch or Garmin.
## Download the apps
| App | Best for | Platforms | Direct download |
|---|---|---|---|
| **RUCKR** | Best overall dedicated tracker | iPhone, Apple Watch, Android | [App Store](https://apps.apple.com/us/app/ruckr/id6760586070) / [Google Play](https://play.google.com/store/apps/details?id=com.ruckr.ruckr) |
| **RuckWell** | Navigation and recovery | iPhone, Apple Watch | [App Store](https://apps.apple.com/us/app/ruckwell/id6503015969) |
| **Rucker** | Route replay and trail markers | iPhone | [App Store](https://apps.apple.com/us/app/rucker-the-rucking-app/id6742251218) |
| **Strava** | Social tracking and route history | iPhone, Apple Watch, Android | [App Store](https://apps.apple.com/us/app/strava-run-bike-walk/id426826309) / [Google Play](https://play.google.com/store/apps/details?id=com.strava) |
Store availability and features were verified on August 31, 2026. App pricing and feature tiers can change.
## Why a rucking-specific app matters
Here's the problem with tracking a ruck in a normal running or walking app: it has no idea you're carrying weight.
Calorie burn during loaded walking changes with the weight you carry. But apps such as the default Apple Fitness walk workout and many general step trackers do not accept pack weight as a direct input. Heart rate may capture some of the added effort, but the estimate is not explicitly load-aware.
Heart-rate-based estimates may capture part of the added demand, but wrist readings and calorie algorithms have their own error. A load-aware model gives you a more relevant input set, not guaranteed accuracy. If you want to understand the calorie side in depth, our [rucking calorie calculator guide](/weight-loss/rucking-calorie-calculator-guide) breaks down the formula and its limits.
## The best dedicated rucking apps
These are built for loaded walking, so they ask for your weight and do the math properly.
### RUCKR - best overall and best cross-platform option
**Download:** [iPhone and Apple Watch](https://apps.apple.com/us/app/ruckr/id6760586070) / [Android](https://play.google.com/store/apps/details?id=com.ruckr.ruckr) / [official website](https://ruckr.app/)
RUCKR records your ruck with GPS route, pace, elevation, terrain, and pack weight, then calculates calorie burn using the load rather than treating the session like an unloaded walk. It can pull in sessions from Apple Health and Garmin Connect, so your history can live in one place even when the watch recorded the workout.
The key change since our original review: **RUCKR is no longer iOS-only.** Its Android release makes it the easiest dedicated recommendation for mixed-device groups and Android ruckers who previously had to settle for a general walking app.
RUCKR's live tracking screen keeps load, pace, distance, elevation, and calories visible during the ruck. Image: official Google Play listing.
### RuckWell - best for navigation and recovery
**Download:** [iPhone and Apple Watch](https://apps.apple.com/us/app/ruckwell/id6503015969) / [official website](https://ruckwell.com/pages/app)
RuckWell leans into navigation and recovery. It imports GPX routes and provides breadcrumb navigation on iPhone and Apple Watch, which is useful for unfamiliar trails and planned events. It tracks ruck weight for power, pace, and load, then adds a Recovery Score using overnight HRV, resting heart rate, and related signals.
### Rucker - best simple iPhone option for route replay
**Download:** [iPhone](https://apps.apple.com/us/app/rucker-the-rucking-app/id6742251218)
Rucker is a lighter-weight iPhone option built around recording a ruck, reviewing the route, and saving trail markers. It is a better fit for someone who wants a purpose-built rucking log without the broader recovery system in RuckWell.
## The best general apps that track rucks
If you'd rather use an app you already know, or you want the social side, these all track rucks well - just know they won't weight-adjust calories on their own.
**Strava** is useful for a shared activity history and route tracking. Record a ruck as Walk or Hike and put the carried weight in your description or private notes. Strava may show calories supplied by your watch or recording app; writing pack weight in the description is not a documented calorie adjustment. Our [Strava rucking setup guide](/guides/how-to-track-rucking-on-strava) covers recording, editing watch uploads, logging load and checking the calorie source. [Download for iPhone](https://apps.apple.com/us/app/strava-run-bike-walk/id426826309) or [Android](https://play.google.com/store/apps/details?id=com.strava).
**MapMyRun** (Under Armour) tracks stride length, cadence, pace, elevation gain, and calories, and logs from your phone, Apple Watch, Garmin, or other trackers. It is a solid broad-support option, though its calorie model is not load-aware. [Download for iPhone](https://apps.apple.com/us/app/map-my-run-by-under-armour/id291890420) or [Android](https://play.google.com/store/apps/details?id=com.mapmyrun.android2).
**ASICS Runkeeper** is a simple, reliable tracker that syncs with Apple Watch, Garmin, Fitbit, and more. It is good if you want clean history without much fuss. [Download for iPhone](https://apps.apple.com/us/app/asics-runkeeper-run-tracker/id300235330) or [Android](https://play.google.com/store/apps/details?id=com.fitnesskeeper.runkeeper.pro).
The move a lot of ruckers make: track the session on a general app for the route and history, and use a weight-aware app or calculator for the calorie number.
## Setting up your Apple Watch for rucking
The Apple Watch is a great ruck tracker once you get past the default workout's blind spot on weight.
Your best option is to install a rucking app's Apple Watch companion (RUCKR and RuckWell both have one) and start the ruck from there. You get GPS, heart rate, and weight-aware metrics in one place.
If you'd rather stay native, start an **Outdoor Walk** or **Hike** workout, or build a **Custom Workout** for repeatable structure. You will get route, pace, and heart-rate data, but the calorie figure is not explicitly adjusted for pack weight. If you want a load-aware estimate, import the session into a compatible app afterward or compare it with our [calorie calculator guide](/weight-loss/rucking-calorie-calculator-guide).
## Setting up your Garmin for rucking
Garmin has a native **Rucking** activity profile on compatible watches. Before your session, select Rucking, enter your pack weight, and set any pace, distance, or time targets you want. That keeps rucks separate from unloaded walks and stores the load in the activity record.
Garmin lists support on newer families including the Fenix, Enduro, Instinct, tactix, Forerunner, quatix, and Venu lines. Model support changes through software updates, so use Garmin's [official Rucking activity compatibility page](https://support.garmin.com/en-MY/?faq=x1tfykiBdG6rr3JxydZd1A) for the current list.
If your watch does not have the profile, record the session as **Walk** or **Hike** and add the pack weight in Garmin Connect after syncing. You can also import the session into RUCKR for its load-aware history and calorie model.
## Which GPS watch should you buy?
The app is only as good as the watch feeding it data. If you're shopping, here are three that pair especially well with a rucking setup. For the full breakdown, see our [best GPS watches for rucking](/gear/best-gps-watches-for-rucking) roundup.
The **COROS PACE 4** is the value pick - light, long battery life, accurate GPS, and a fraction of the price of the flagships. Ideal if you want great data without overspending.
The **Garmin Instinct 3 Solar** is the rugged, long-battery choice. Solar charging and a nearly indestructible build make it the set-and-forget option for people who ruck outdoors constantly.
The **Apple Watch Ultra 2** is the pick if you're in the Apple ecosystem and want the best rucking-app experience - the dedicated apps' watch companions run beautifully on it, with big battery and precise GPS.
## How to choose
Cut through it like this:
- **You want load-aware ruck data and you're on iPhone:** RUCKR (or RuckWell for navigation and recovery), paired with an Apple Watch or a synced Garmin.
- **You are on Android:** RUCKR is the direct dedicated option; Strava is the simpler general-purpose fallback.
- **You want a free activity log and community:** Strava, recorded on your phone or synced from a supported watch.
- **You have a compatible Garmin:** use Garmin's native Rucking profile and enter your pack weight before you start.
- **You have an older Garmin or Coros:** record a Walk or Hike, note the load, and optionally import the workout into RUCKR.
- **You're just starting and overthinking it:** open Strava, log your weight in the notes, and go. You can upgrade later. Consistency beats the perfect app every time.
---
## Your next step
---
## Related reading
- [Best GPS watches for rucking](/gear/best-gps-watches-for-rucking) - the full watch roundup with picks for every budget
- [Rucking calorie calculator guide](/weight-loss/rucking-calorie-calculator-guide) - how load changes your real calorie burn
- [Rucking pace chart](/training/rucking-pace-chart) - target paces by weight and distance
- [How heavy should your ruck be?](/guides/how-heavy-should-your-ruck-be) - find your right starting load
- [Complete beginner's guide to rucking](/pillars/beginners-guide-to-rucking) - everything you need to start
## Frequently Asked Questions
────────────────────────────────────────────────────────────────────────────────
URL: https://ruckauthority.com/gear/best-rucking-backpacks-for-women
Title: Best Rucking Backpacks for Women 2026: Short-Torso Picks
Description: Women's rucking backpacks and rucksacks compared by torso fit: Osprey Tempest Velocity 20 and 30, Mystery Ranch Coulee 20, and the right GORUCK size.
Published: 2026-04-18 / Updated: 2026-09-26
## Best Rucking Backpacks for Women (2026)
### How Women's Rucking Backpacks Fit
Pack fit depends on measured torso length, shoulder shape, chest clearance, and hip-belt position. Women's-specific packs often use shorter torso ranges and different strap geometry, but the label does not predict fit for every body.
A pack that is too long or has the wrong strap shape may shift or create pressure points. Measure first, then try the pack with a light, secure load before deciding whether a women's-specific or unisex design fits better.
None of the women's-specific picks has a rigid plate pocket. If you want one, GORUCK's plate-pocket packs are unisex, so choose by bag height: the Basic Rucker 14L is 16 inches tall and holds one Standard plate up to 30 lb, and the Rucker 5.0 20L is 18 inches tall with two plate pockets.
### Quick picks
- **Best Compact Fit:** Osprey Tempest Velocity 20 ($150-300)
- **Best Long-Ruck Fit:** Osprey Tempest Velocity 30 ($150-300)
- **Best Value:** Mystery Ranch Women's Coulee 20 ($150-300)
- **Plate Add-On:** Hyperwear FlexLoad ($50-150)
- **Plate-Pocket Option:** GORUCK Basic Rucker 14L ($150-300)
### Budget and use-case tiers
- **Best Value ($150-300):** Mystery Ranch's genuine women's-specific 20L daypack has an adjustable trail yoke, supportive hip belt, and 3-ZIP access. No plate pocket; pair it with a Hyperwear FlexLoad for flexible weight.
- **Hybrid Mid-Range ($150-300):** Hiking-pack pedigree adapted for rucking. Women's-specific torso (XS/S or S/M), built-in hip belts, hydration-bladder ready. Holds a plate but doesn't optimize for it.
- **Flexible Weight Add-On ($50-150):** The Tempest and Coulee are not rigid-plate carriers. Hyperwear FlexLoad conforms to the pack instead of concentrating pressure at the lower edge.
- **Plate-Pocket Option (Unisex) ($150-300):** GORUCK's packs are unisex, so choose by bag height and plate format. The Basic Rucker 14L is 16 inches tall with one Standard plate pocket rated to 30 lb; the Rucker 5.0 20L is 18 inches tall with separate Standard and Long plate pockets.
### Comparison table
pack: Osprey Tempest Velocity 20; price: $150-300; torso: About 4 in adjust.; capacity: 18-20L; platePocket: None; warranty: Lifetime
pack: Osprey Tempest Velocity 30; price: $150-300; torso: About 14-17" (XS/S); capacity: 30L; platePocket: None; warranty: Lifetime
pack: Mystery Ranch Women's Coulee 20; price: $150-300; torso: About 13-18" (XS/S); capacity: 20L; platePocket: None; warranty: Manufacturer
pack: GORUCK Basic Rucker 14L; price: $150-300; torso: Unisex; 16" bag height; capacity: 14L; platePocket: One Standard, up to 30 lb; warranty: SCARS lifetime
pack: GORUCK Rucker 5.0 20L; price: $150-300; torso: Unisex; 18" bag height; capacity: 20L; platePocket: Two (Standard + Long); warranty: SCARS lifetime
### How to Measure Your Torso
1. **Find C7:** Tilt your head forward. Find the bony bump at the base of your neck (C7 vertebra).
2. **Find your iliac crest:** Put your hands on your hip bones with thumbs pointing back. The line between your thumbs crosses your iliac crest.
3. **Measure:** Measure the distance between C7 and the iliac-crest line along the spine, then use that number with the manufacturer's current size chart. Do not infer pack fit from height or gender label alone.
### Fit Tips for Rucking as a Woman
- **If the pack feels too long:** Try a smaller size or a women's-specific torso. A pack that extends below your hip crest puts the weight on your lumbar instead of your hips.
- **If the shoulder straps dig in narrow:** The shoulder yoke is angled for broader shoulders. Try a women's-specific pack or adjust load-lifter straps to pull the pack closer to your shoulder blades.
- **If the sternum strap sits uncomfortably:** It's positioned for a flatter chest. Move it higher if the pack allows. If the strap is fixed, a women's-fit pack is worth the investment.
- **If the hip belt presses into soft tissue:** The belt may be shaped for narrower hips. Women's-specific hip belts are usually curved and angled differently. If no belt feels comfortable, shorter, lighter rucks can work without one; keep the load high and secure against your back.
### What About Tactical Packs Marketed as 'Unisex'?
Many tactical packs (5.11 RUSH, Mystery Ranch, Direct Action) are sized with longer torsos in mind. They fit plenty of women fine, especially taller women or those with longer torsos. But 'unisex' describes who the pack is sold to, not how it's shaped. If you've already tried a unisex pack and it doesn't fit, the problem is the pack, not you. Move to a women's-specific design or a shorter bag.
### Want a Plate Pocket? Pick the GORUCK Size by Bag Height
The Tempest and Coulee are the better-fitting harnesses for many women, but none of them has a rigid plate pocket. If you'd rather carry a ruck plate in a dedicated pocket, GORUCK's plate-pocket packs are unisex, so the variable that matters is how tall the bag is on your back.
- **GORUCK Basic Rucker 14L:** 16 inches tall, with one elevated pocket for a Standard plate up to 30 lb. GORUCK suggests the 14L for anyone 5 ft 10 in or shorter. The 17L body is 18 inches tall with the same pocket and limit.
- **GORUCK Rucker 5.0 20L:** 18 inches tall, with two elevated plate pockets (Standard and Long) and four padded handles. The 25L is 20 inches tall. Choose it when the second pocket or handles solve a real need, not because a second plate requires the bigger bag.
- **Check the plate format:** GORUCK Standard plates have a 9 by 11.5 inch footprint and Long plates 9.5 by 15 inches. A 30 lb plate can be either, so check the dimensions of the plate you own before ordering.
For how the Rucker 5.0 carries over a week of loaded miles, read [our hands-on Rucker 5.0 review](/gear/goruck-rucker-5-0-review)
Compare every plate-pocket option in the full roundup: [Best Rucking Backpacks](/gear/best-rucking-backpacks)
### Related Guides
More budget options across the unisex catalog: [Best Rucking Backpacks Under $200](/gear/best-rucking-backpacks-under-150)
Understand GORUCK's lineup before committing: [GORUCK Rucker vs GR1](/gear/goruck-rucker-vs-gr1)
### Bottom line
Measure your torso and compare the maker's current size chart. The Osprey Tempest Velocity 20 offers a compact adjustable fit, the 30L version adds capacity, and the Mystery Ranch Women's Coulee 20 provides an adjustable-yoke alternative. None has a plate pocket, so pair them with flexible weight. If you want a dedicated plate pocket, GORUCK's unisex Basic Rucker 14L is 16 inches tall and holds one Standard plate up to 30 lb.
### Frequently asked questions
**Do I really need a women's-specific rucking pack?**
Not necessarily. Measure your torso, use the manufacturer's size chart, and check shoulder, chest, and hip-belt comfort with a light load. A women's-specific pack is one fit option, not a requirement.
**Can I fit a ruck plate in the Tempest or Coulee?**
Neither has a dedicated rigid-plate pocket. A flexible load such as Hyperwear FlexLoad conforms better to these packs. If you want a rigid plate, choose a pack built for one: GORUCK's unisex Basic Rucker 14L is 16 inches tall and holds one Standard plate up to 30 lb, and the Rucker 5.0 20L is 18 inches tall with two plate pockets.
**Which Tempest size should I choose?**
Choose the Tempest Velocity 20 for compact day loads and the 30L for longer outings or extra layers. In both cases, measure your torso and select the Osprey harness size from that measurement rather than height alone.
**Can I use a regular daypack to start rucking?**
Yes, for unloaded or very light walks if it fits comfortably and the load can be secured close to the back. Do not force a rigid plate into an incompatible hydration sleeve.
**How much weight should women start with for rucking?**
There is no universal sex-specific percentage. Begin unloaded, then use the smallest practical increment that stays secure and does not change gait, balance, or comfort. Training history, health, and symptoms matter more than a body-weight formula.
**Are there rucking packs built for women with larger chests?**
Yes. Adjustable sternum-strap height is the key variable. The Osprey Tempest and Mystery Ranch Women's Coulee let you position the strap above breast tissue; wider sports-bra straps can also reduce rub at the shoulder-chest interface.
**Can a teenage girl use these packs?**
A teen can use a pack that fits, but there is no universal youth rucking load. For ordinary outings, carry only needed gear. A parent or guardian should involve a pediatric clinician or qualified coach before starting structured loaded training.
────────────────────────────────────────────────────────────────────────────────
URL: https://ruckauthority.com/gear/best-rucking-backpacks-under-150
Title: Best Rucking Backpacks Under $200 (2026)
Description: The best rucking backpacks under $200, compared by load comfort, durability, and plate compatibility, plus the point where saving for a purpose-built ruck makes more sense.
Published: 2026-04-18 / Updated: 2026-09-03
## Best Rucking Backpacks Under $200 (2026)
### How We Chose Backpacks Under $200
**Looking for the best rucksack for rucking under $200 in 2026?** You want a real rucking backpack at that budget and you're not ready to pay premium GORUCK pricing for a Rucker or GR1 before you know the sport sticks. Good news: the $100-$200 tier has legitimate, durable options that hold up past the trial period.
This guide was originally written at the under-$150 tier (the URL still reflects that). As of mid-2026, we've widened the analysis to under-$200 because the Mystery Ranch 2 Day Assault near the top of that range is the single best pack-for-the-money in the entire budget category, and excluding it for a $50 slug technicality was the wrong editorial call.
Every pick below was researched against five criteria: strap and yoke durability at 30+ lb loads over 500+ miles of typical use; plate compatibility (dedicated pocket, sleeve that works, or carrier insert needed); warranty length; fabric grade; and whether the pack still makes sense when compared against saving up for a GORUCK Rucker 5.0.
The under-$200 decision is not just 'what is cheapest?' It is whether you should buy a 5.11 RUSH now, catch a Mystery Ranch sale, or skip the budget tier and save for a purpose-built ruck.
Disclosure: Wolf Tactical pays Ruck Authority a higher commission on its own gear through Amazon's Creator Connections program, which is why it appears in this guide. We have not tested it - the specs below come from the manufacturer's listing, and the entry says so.
### Quick picks
- **Best Overall Under $200:** 5.11 RUSH 24 2.0 ($140)
- **Best Stealth Option:** 5.11 RUSH 12 2.0 ($110)
- **Best Budget:** CONDOR 3-Day Assault Pack ($107)
- **Best Carry Upgrade:** Mystery Ranch 2 Day Assault ($199)
- **European Tactical:** Direct Action Dragon Egg Mk II ($120-160 on sale)
### Budget and use-case tiers
- **Sub-$110 Starter ($107–$110):** The 'try rucking cheap' tier. CONDOR holds up 18–24 months at moderate use; the RUSH 12 is a meaningful upgrade in durability and warranty for a small premium.
- **$140–$200 Sweet Spot ($140–$199):** The category benchmark range. 5.11 owns the tactical value tier; Mystery Ranch becomes interesting when sale pricing drops near $200. This is where budget stops feeling disposable.
- **Sale-Watch Premium ($120–$199):** Direct Action sometimes drops into the near-budget tier on Amazon sales, while Mystery Ranch's 2 Day Assault is the pack to stretch for when the budget can reach the top of the under-$200 range.
### Comparison table
pack: 5.11 RUSH 24 2.0; price: $140; platePocket: No plate pocket; recommendation: Use Hyperwear FlexLoad or plate carrier insert
pack: Wolf Tactical Bundle; price: $137; platePocket: Plate sleeve, 8.75 lb pair included; recommendation: The only pack here that arrives with weight in the box
pack: 5.11 RUSH 12 2.0; price: $110; platePocket: No plate pocket; recommendation: Use Hyperwear FlexLoad (20 lb max)
pack: CONDOR 3-Day; price: $107; platePocket: No plate pocket; recommendation: Use any plate, wrap in towel for padding
pack: Mystery Ranch 2 Day Assault; price: $199; platePocket: Fits plate in main compartment; recommendation: Best carry mechanics near $200, use flexible weight or insert
pack: Direct Action Dragon Egg Mk II; price: $120–$220; platePocket: No plate pocket; recommendation: Use Hyperwear FlexLoad
### The Plate-Compatibility Reality
Most picks at this tier do not have a dedicated plate pocket. The Hyperwear FlexLoad is a flexible, conforming ruck weight that works in any pack without one. If you're buying at the under-$150 tier, budget for flexible weights separately and skip the rigid plate entirely. That solves the 'which rigid plate fits this pack' problem that drives most first-year returns.
### The Under-$200 Decision
If your ceiling is truly $150, buy the 5.11 RUSH 24 2.0 and use a flexible weight or plate insert. If you can reach $200, the decision gets more interesting: the Mystery Ranch 2 Day Assault carries better for long walks and hiking crossover, while the RUSH 24 remains the better tactical-style value. If you already know you'll ruck weekly with 30+ lbs, skip the halfway tier and save for a GORUCK Rucker 5.0.
### When to Upgrade (and When Not to)
If you're already rucking weekly and hitting 30+ lb loads consistently, consider upgrading to the GORUCK Rucker 5.0. Its elevated plate pockets are the single biggest comfort improvement GORUCK makes for heavy rucks — the weight sits against your upper back instead of your lumbar, which you feel in your posture the next morning. If you're still in the 'do I even like this' phase, a RUSH 12 or CONDOR is the correct call. You can always sell them on /r/GearSwap later.
For a head-to-head between the GORUCK Rucker and GR1: [GORUCK Rucker vs GR1](/gear/goruck-rucker-vs-gr1)
### Bottom line
For a first rucking pack, you do not need to spend more than $200. The 5.11 RUSH 24 is the default Best Overall because it handles real weight at a fair price. The CONDOR is the cheapest pack that actually works. The RUSH 12 is the stealth-civilian-look option for commute rucking. The Mystery Ranch 2 Day Assault is the best near-$200 upgrade when carry comfort matters more than tactical organization.
### Frequently asked questions
**What is the best rucksack for rucking under $200?**
The 5.11 RUSH 24 2.0 is the best overall rucking pack under $200 for most beginners because it has durable fabric, a stable harness, useful capacity, and enough structure for 20–35 lb rucks. If you want better hiking-style carry mechanics near $200, the Mystery Ranch 2 Day Assault is the upgrade pick.
**What is the cheapest pack that actually works for rucking?**
The CONDOR 3-Day Assault Pack. It's 600D polyester (softer than 1000D Cordura) and the warranty is only 6 months, but 18–24 months of moderate rucking use is well-documented in owner reports. The 5.11 RUSH 12 2.0 is a meaningful upgrade in durability and warranty for a modest premium.
**Do I need a plate pocket to ruck?**
No. A plate pocket is convenient — it holds the plate flat against your back in a predictable spot — but ruckers have used non-plate-pocket packs for years. Two workarounds: an inexpensive plate carrier insert holds the plate rigidly inside any pack, or flexible weights like the Hyperwear FlexLoad conform to the pack's interior and don't need a pocket at all. Rigid plates without a pocket will shift against your back while you walk.
**Is 37L too big for a first pack?**
Potentially. 37L (the RUSH 24) holds more than you need for most daily rucks. For 20–30 lb loads and 3–6 mile rucks, a 24L pack like the RUSH 12 is enough. The argument for going bigger: you can use it for weekend hiking, overnight travel, and commuting. The argument against: a too-large pack tempts you to pack too much. For most beginners, 24L is the sweet spot.
**How long will a $100–$200 pack last?**
5.11 RUSH series: 5–7 years of weekly rucking before significant wear. CONDOR 3-Day: 18–24 months at moderate use, less if you push heavy loads daily. Mystery Ranch 2 Day Assault: lifetime warranty and better carry mechanics near $200. Direct Action Dragon Egg: 5+ years at heavy use. A lower-priced RUSH can still be the better first-pack decision than a premium GR1, even if the GR1 lasts much longer.
**What if I can spend a bit more than $150?**
The next meaningful tier is the current GORUCK Rucker 5.0. Elevated plate-pocket geometry and the SCARS lifetime warranty justify the jump if you already know rucking is your sport. The Mystery Ranch 2 Day Assault is another solid upgrade near the top of the under-$200 range — lifetime warranty, three-ZIP access, better carry mechanics than any pack on this page, but no dedicated plate pocket.
────────────────────────────────────────────────────────────────────────────────
URL: https://ruckauthority.com/gear/best-rucking-backpacks
Title: Best Rucking Backpacks 2026: What to Buy First
Description: Compare eight rucking backpacks by plate retention, cargo space, materials, and everyday usefulness, including the current GORUCK Rucker 5.0 and Basic Rucker.
Published: 2026-03-27 / Updated: 2026-09-14
## Best Rucking Backpacks 2026: What to Buy First
### How to Choose a Rucking Backpack
For a bag used mainly for loaded walks, choose the GORUCK Basic Rucker if one Standard plate up to 30 lb is enough; choose the Rucker 5.0 for two plate pockets and training handles. Pay for a GR1 when you also need its laptop compartment. A bigger tactical pack buys cargo room, but leaves plate retention to you.
Check two things before ordering: the height of the bag on your back and the dimensions of the plate you already own. A 30 lb Standard plate and a 30 lb Long plate weigh the same but require different pockets.
Every pack here is judged for carrying weight. If you want an unloaded hiking daypack, see Kit Authority's [daypack guide](https://kitauthority.com/hike/best-daypacks-for-hiking?utm_source=ruckauthority&utm_medium=crosslink).
Dimensions and pocket specifications checked September 14, 2026 against [GORUCK Rucker](https://www.goruck.com/products/rucker), [Basic Rucker](https://www.goruck.com/products/basic-rucker), [GR1](https://www.goruck.com/products/gr1-usa), and [5.11 RUSH 24](https://www.511tactical.com/rush24-2-0-backpack.html). These buying recommendations do not represent a completed comparative field test.
### Quick picks
- **Dedicated training:** GORUCK Rucker 5.0 ($150-300)
- **Smaller GORUCK:** GORUCK Basic Rucker ($150-300)
- **More cargo for less:** 5.11 RUSH 24 2.0 ($50-150)
- **Work and travel:** GORUCK GR1 26L ($300-500)
- **Structured alternative:** Direct Action Dragon Egg Mk II ($150-300)
- **Plate-prioritized budget:** Polyfit Rucking Backpack 2.0 ($50-150)
- **Compact tactical:** 5.11 RUSH 12 2.0 ($50-150)
### Budget and use-case tiers
- **Lower-Cost Options ($50-300):** Polyfit prioritizes plate carry with limited cargo room, the Basic Rucker is GORUCK's smaller training pack, and the RUSH packs trade an elevated plate pocket for more general-purpose cargo space.
- **Dedicated and Structured Packs ($150-300):** The Rucker 5.0 is built around plate-loaded training. The Direct Action Dragon Egg Mk II is a 25L general-purpose tactical pack with a 500D Cordura shell, an internal frame, and hydration support.
- **Premium Crossovers ($300-1000):** GR1 is the smaller ruck, work, and travel crossover. GR2 adds travel volume for people who will use the extra space.
### Comparison table
pack: GORUCK Rucker 5.0; platePocket: Two elevated pockets: Standard and Long; capacity: 20L / 25L; tradeoff: No dedicated laptop compartment
pack: GORUCK Basic Rucker; platePocket: One elevated Standard pocket, up to 30 lb; capacity: 14L / 17L; tradeoff: One plate pocket; 30 lb plate limit
pack: 5.11 RUSH 24 2.0; platePocket: No dedicated pocket; capacity: 37L; tradeoff: 37L is excess bulk for weight and a bottle
pack: GORUCK GR1 26L; platePocket: Open elastic sleeve; extra restraint needed; capacity: 26L; tradeoff: Laptop storage costs more; no closed training plate pocket
pack: Direct Action Dragon Egg Mk II; platePocket: No dedicated pocket; capacity: 25L; tradeoff: You must add plate restraint
pack: Polyfit Rucking Backpack 2.0; platePocket: Side-load 10x12 slot; capacity: Limited cargo; tradeoff: Limited room for extra clothing
pack: 5.11 RUSH 12 2.0; platePocket: No dedicated pocket; capacity: 24L; tradeoff: No dedicated plate retention
pack: GORUCK GR2 40L; platePocket: Internal pocket; verify plate fit; capacity: 40L; tradeoff: 40L is more bag than most training walks need
### Buy the Rucker 5.0 if the backpack is mainly for rucking.
The second plate pocket and four handles earn their place when you train beyond a single Standard plate or include loaded carries. If you only need one plate and water, the smaller Basic Rucker may cover the whole job.
### Which Rucking Backpack Should You Buy?
The extra money should buy something you will use on the next walk.
- **One plate, water and a light layer:** Start with the Basic Rucker. Its 14L body is 16 inches tall; the 17L is 18 inches tall. Try the shorter body if the larger bag reaches your beltline. Both have the same Standard plate format and 30 lb limit.
- **More training options:** Choose the Rucker 5.0 for its second plate pocket and four padded handles. The 20L is 18 inches tall; the 25L is 20 inches tall and has more room for bulky layers. Choose by torso fit and cargo, not the assumption that 25L is needed for a second plate.
- **A laptop during the week:** The GR1 26L has separate laptop storage and an open-flat packing layout. Its internal elastic sleeve is not a closed Rucker plate pocket. Plan the restraint before carrying a rigid plate.
- **More cargo on a smaller budget:** The 37L RUSH 24 makes sense for extra clothing and equipment. Its hydration compartment is intended for a bladder, not a promise that a metal plate will be secured. If you cannot restrain the load, choose a purpose-built plate pack instead.
### What to Look For in a Rucking Backpack
Measure the plate and check the pack with the clothing you expect to wear.
- **Pocket opening and closure:** The plate must pass through the opening and allow the flap or closure to close fully. External bag dimensions do not tell you the usable size of its sleeve.
- **Standard versus Long:** GORUCK Standard plates have a 9 by 11.5 inch footprint. Long plates use 9.5 by 15 inches. The Basic Rucker takes Standard; the Rucker 5.0 has separate short and long pockets. A plate being 30 lb does not establish which format it is.
- **Layers and water:** Pack your bottle or bladder and rolled-up outer layer beside the plate. A bag that fits indoors over a T-shirt can sit differently over a jacket. Leave usable room without buying a large travel pack solely for a short training loop.
- **Load movement:** With the closure secured, lean forward and take a few steps. If the plate can lift out, tip or swing, the setup needs a different restraint or a different plate. Padding fills gaps; it does not replace a closure.
- **Contact fabric:** Check the exact colorway as well as the model. The Rucker uses 210D material against the body; the current GR1 listing specifies different back-panel fabrics by color. Do not assume every GORUCK feels the same against clothing.
### GORUCK Rucker 5.0 vs GR1: Dedicated Ruck or Crossover Pack?
The Rucker earns its space with closed, elevated plate pockets. The GR1 earns its space with a laptop compartment and daily-carry organization. Owning a GORUCK plate does not give the GR1 the Rucker’s retention system.
GORUCK lists the GR1 26L internal elastic pocket at 11.5 inches wide by 11 inches high. A plate can protrude above an open sleeve; that is different from being enclosed. For walking, restrain it separately. For movements that invert the pack, use a system designed to retain the full load.
Compare the two layouts in more detail. [GORUCK Rucker vs GR1](/gear/goruck-rucker-vs-gr1)
Considering a vest instead of cargo space? [Which GORUCK Should You Buy?](/goruck)
### GORUCK GR1 vs Direct Action Dragon Egg Mk II
These packs solve different problems. The Dragon Egg Mk II is a 25L tactical pack with a 500D Cordura shell, an internal frame, and hydration support. The GR1 is a 26L work-and-travel crossover with a clamshell opening, a padded laptop compartment, and a 1000D Cordura primary shell. Neither has the Rucker 5.0's dual elevated plate pockets.
Choose the GR1 when work, laptop carry, and travel matter. Choose the Dragon Egg when you want an internal frame, hydration support, and a smaller tactical layout at a lower price band. For either pack, verify the exact weight dimensions and decide how you will restrain the load before buying.
For more non-GORUCK options and the tradeoffs against GR1: [Best GORUCK alternatives](/gear/best-goruck-alternatives)
### How We Pick
We compare the job each pack is built for, its published dimensions, its plate retention and the compromises in daily use. Existing product reviews distinguish hands-on evidence from research. This roundup does not claim that we have field-tested all eight packs side by side.
For the non-GORUCK options and their setup requirements: [Best GORUCK Alternatives](/gear/best-goruck-alternatives)
### Bottom line
For one Standard plate up to 30 lb, start with the Basic Rucker. Buy the Rucker 5.0 when its second pocket, handles or extra cargo room solve a real need. Choose the GR1 for laptop and travel use; choose a tactical pack when you need its cargo space and can secure the weight yourself. Check the bag height and plate format before choosing a color.
### Frequently asked questions
**What is the best rucking backpack in 2026?**
Our dedicated training pick is the GORUCK Rucker 5.0 because its dual elevated plate pockets keep compatible weight high and stable. The Basic Rucker is the smaller GORUCK option for loads up to 30 lb. The 5.11 RUSH 24 offers more cargo space, but it has no dedicated plate pocket.
**Can you ruck with a regular hiking backpack?**
Yes, if the pack is sturdy enough and the load can be secured close to the back panel. Start with a manageable weight, take a short test walk, and stop if the load shifts or the pack shows damage. A dedicated rucker becomes useful when you want an elevated plate pocket and more stable retention.
**Should you start cheap and upgrade later?**
A sturdy backpack you already own is enough to try rucking. Secure the weight, keep the first loads manageable, and learn what bothers you about the setup. Buy a dedicated pack when you know which size, plate format, and cargo capacity you need.
**How much weight should you ruck?**
Start with 10–20 lbs and build gradually. Add 5 lbs only after your current weight feels comfortable for your typical distance. For full progression guidance, see our ruck weight guide.
**Do you need a hip belt?**
Not always. A hip belt can stabilize heavier loads and move some pressure away from the shoulders, but fit and preference vary. Check whether the exact pack includes one or sells it separately.
**Is GORUCK the only good rucking pack brand?**
No. GORUCK makes the clearest purpose-built training options in this comparison. Direct Action and 5.11 make useful general-purpose tactical packs, but neither uses the Rucker's elevated plate-pocket system. Our GORUCK Alternatives guide covers those tradeoffs.
# Best Rucking Backpacks 2026: What to Buy First
For a bag used mainly for loaded walks, choose the GORUCK Basic Rucker if one Standard plate up to 30 lb is enough; choose the Rucker 5.0 for two plate pockets and training handles. Pay for a GR1 when you also need its laptop compartment. A bigger tactical pack buys cargo room, but leaves plate retention to you.
Check two things before ordering: the height of the bag on your back and the dimensions of the plate you already own. A 30 lb Standard plate and a 30 lb Long plate weigh the same but require different pockets.
Every pack here is judged for carrying weight. If you want an unloaded hiking daypack, see Kit Authority's [daypack guide](https://kitauthority.com/hike/best-daypacks-for-hiking?utm_source=ruckauthority&utm_medium=crosslink).
Dimensions and pocket specifications checked September 14, 2026 against [GORUCK Rucker](https://www.goruck.com/products/rucker), [Basic Rucker](https://www.goruck.com/products/basic-rucker), [GR1](https://www.goruck.com/products/gr1-usa), and [5.11 RUSH 24](https://www.511tactical.com/rush24-2-0-backpack.html). These buying recommendations do not represent a completed comparative field test.
## Quick picks
- Dedicated training: GORUCK Rucker 5.0 ([our hands-on review](/gear/goruck-rucker-5-0-review)).
- Smaller GORUCK: GORUCK Basic Rucker.
- More cargo for less: 5.11 RUSH 24 2.0.
- Work and travel: GORUCK GR1 26L.
- Structured alternative: Direct Action Dragon Egg Mk II.
- Plate-prioritized budget: Polyfit Rucking Backpack 2.0.
- Compact tactical: 5.11 RUSH 12 2.0.
## Comparison table
| Pack | Cargo volume | How the weight is held | Reason to pass |
| --- | --- | --- | --- |
| GORUCK Rucker 5.0 | 20L / 25L | Two elevated pockets: Standard and Long | No dedicated laptop compartment |
| GORUCK Basic Rucker | 14L / 17L | One elevated Standard pocket, up to 30 lb | One plate pocket; 30 lb plate limit |
| 5.11 RUSH 24 2.0 | 37L | No dedicated pocket | 37L is excess bulk for weight and a bottle |
| GORUCK GR1 26L | 26L | Open elastic sleeve; extra restraint needed | Laptop storage costs more; no closed training plate pocket |
| Direct Action Dragon Egg Mk II | 25L | No dedicated pocket | You must add plate restraint |
| Polyfit Rucking Backpack 2.0 | Limited cargo | Side-load 10x12 slot | Limited room for extra clothing |
| 5.11 RUSH 12 2.0 | 24L | No dedicated pocket | No dedicated plate retention |
| GORUCK GR2 40L | 40L | Internal pocket; verify plate fit | 40L is more bag than most training walks need |
## Which Rucking Backpack Should You Buy?
The extra money should buy something you will use on the next walk.
- **One plate, water and a light layer:** Start with the Basic Rucker. Its 14L body is 16 inches tall; the 17L is 18 inches tall. Try the shorter body if the larger bag reaches your beltline. Both have the same Standard plate format and 30 lb limit.
- **More training options:** Choose the Rucker 5.0 for its second plate pocket and four padded handles. The 20L is 18 inches tall; the 25L is 20 inches tall and has more room for bulky layers. Choose by torso fit and cargo, not the assumption that 25L is needed for a second plate.
- **A laptop during the week:** The GR1 26L has separate laptop storage and an open-flat packing layout. Its internal elastic sleeve is not a closed Rucker plate pocket. Plan the restraint before carrying a rigid plate.
- **More cargo on a smaller budget:** The 37L RUSH 24 makes sense for extra clothing and equipment. Its hydration compartment is intended for a bladder, not a promise that a metal plate will be secured. If you cannot restrain the load, choose a purpose-built plate pack instead.
## What to Look For in a Rucking Backpack
Measure the plate and check the pack with the clothing you expect to wear.
- **Pocket opening and closure:** The plate must pass through the opening and allow the flap or closure to close fully. External bag dimensions do not tell you the usable size of its sleeve.
- **Standard versus Long:** GORUCK Standard plates have a 9 by 11.5 inch footprint. Long plates use 9.5 by 15 inches. The Basic Rucker takes Standard; the Rucker 5.0 has separate short and long pockets. A plate being 30 lb does not establish which format it is.
- **Layers and water:** Pack your bottle or bladder and rolled-up outer layer beside the plate. A bag that fits indoors over a T-shirt can sit differently over a jacket. Leave usable room without buying a large travel pack solely for a short training loop.
- **Load movement:** With the closure secured, lean forward and take a few steps. If the plate can lift out, tip or swing, the setup needs a different restraint or a different plate. Padding fills gaps; it does not replace a closure.
- **Contact fabric:** Check the exact colorway as well as the model. The Rucker uses 210D material against the body; the current GR1 listing specifies different back-panel fabrics by color. Do not assume every GORUCK feels the same against clothing.
## GORUCK Rucker 5.0 vs GR1: Dedicated Ruck or Crossover Pack?
The Rucker earns its space with closed, elevated plate pockets. The GR1 earns its space with a laptop compartment and daily-carry organization. Owning a GORUCK plate does not give the GR1 the Rucker’s retention system.
GORUCK lists the GR1 26L internal elastic pocket at 11.5 inches wide by 11 inches high. A plate can protrude above an open sleeve; that is different from being enclosed. For walking, restrain it separately. For movements that invert the pack, use a system designed to retain the full load.
Compare the two layouts in more detail. [GORUCK Rucker vs GR1](/gear/goruck-rucker-vs-gr1). For how the Rucker 5.0 carries over a week of loaded miles, read [our hands-on Rucker 5.0 review](/gear/goruck-rucker-5-0-review).
Considering a vest instead of cargo space? [Which GORUCK Should You Buy?](/goruck).
## GORUCK GR1 vs Direct Action Dragon Egg Mk II
These packs solve different problems. The Dragon Egg Mk II is a 25L tactical pack with a 500D Cordura shell, an internal frame, and hydration support. The GR1 is a 26L work-and-travel crossover with a clamshell opening, a padded laptop compartment, and a 1000D Cordura primary shell. Neither has the Rucker 5.0's dual elevated plate pockets.
Choose the GR1 when work, laptop carry, and travel matter. Choose the Dragon Egg when you want an internal frame, hydration support, and a smaller tactical layout at a lower price band. For either pack, verify the exact weight dimensions and decide how you will restrain the load before buying.
For more non-GORUCK options and the tradeoffs against GR1: [Best GORUCK alternatives](/gear/best-goruck-alternatives).
## How We Pick
We compare the job each pack is built for, its published dimensions, its plate retention and the compromises in daily use. Existing product reviews distinguish hands-on evidence from research. This roundup does not claim that we have field-tested all eight packs side by side.
For the non-GORUCK options and their setup requirements: [Best GORUCK Alternatives](/gear/best-goruck-alternatives).
## Which should you buy?
For one Standard plate up to 30 lb, start with the Basic Rucker. Buy the Rucker 5.0 when its second pocket, handles or extra cargo room solve a real need. Choose the GR1 for laptop and travel use; choose a tactical pack when you need its cargo space and can secure the weight yourself. Check the bag height and plate format before choosing a color.
## Frequently asked questions
### What is the best rucking backpack in 2026?
Our dedicated training pick is the GORUCK Rucker 5.0 because its dual elevated plate pockets keep compatible weight high and stable. The Basic Rucker is the smaller GORUCK option for loads up to 30 lb. The 5.11 RUSH 24 offers more cargo space, but it has no dedicated plate pocket.
### Can you ruck with a regular hiking backpack?
Yes, if the pack is sturdy enough and the load can be secured close to the back panel. Start with a manageable weight, take a short test walk, and stop if the load shifts or the pack shows damage. A dedicated rucker becomes useful when you want an elevated plate pocket and more stable retention.
### Should you start cheap and upgrade later?
A sturdy backpack you already own is enough to try rucking. Secure the weight, keep the first loads manageable, and learn what bothers you about the setup. Buy a dedicated pack when you know which size, plate format, and cargo capacity you need.
### How much weight should you ruck?
Start with 10–20 lbs and build gradually. Add 5 lbs only after your current weight feels comfortable for your typical distance. For full progression guidance, see our ruck weight guide.
### Do you need a hip belt?
Not always. A hip belt can stabilize heavier loads and move some pressure away from the shoulders, but fit and preference vary. Check whether the exact pack includes one or sells it separately.
### Is GORUCK the only good rucking pack brand?
No. GORUCK makes the clearest purpose-built training options in this comparison. Direct Action and 5.11 make useful general-purpose tactical packs, but neither uses the Rucker's elevated plate-pocket system. Our GORUCK Alternatives guide covers those tradeoffs.
────────────────────────────────────────────────────────────────────────────────
URL: https://ruckauthority.com/gear/best-rucking-boots-for-beginners-2026
Title: Best Rucking Boots for Beginners 2026
Description: Compare Garmont T8 Bifida, Salomon Quest 5 and LOWA Zephyr GTX boots for beginner rucking: fit, waterproofing, terrain and what to check before buying.
Published: 2026-05-03 / Updated: 2026-09-14
## Best Rucking Boots for Beginners 2026
### Choose for the ground you actually walk
If your current walking shoes fit well on your usual route, try those first. A heavier pack does not create a universal cutoff at which you need boots. These three are worth comparing when you want more coverage, a firmer platform on rough ground, or waterproofing.
The Garmont T8 Bifida is the non-waterproof option here. The Salomon Quest 5 GORE-TEX is built for hiking and backpacking; the LOWA Zephyr GTX Mid TF offers a mid-cut waterproof alternative. Fit and weather separate them more usefully than an overall score.
This is a research-based comparison, not a hands-on boot test. We checked the specifications linked below. We have not measured break-in time or service life for these pairs.
If your miles are unloaded trail hikes rather than weighted carries, our sister site Kit Authority's [hiking boots guide](https://kitauthority.com/hike/best-hiking-boots?utm_source=ruckauthority&utm_medium=crosslink) covers that decision.
### Quick picks
- **Non-waterproof tactical option:** Garmont T8 Bifida
- **For rocky hiking routes:** Salomon Quest 5 GORE-TEX
- **Mid-cut waterproof option:** Lowa Zephyr GTX Mid TF
### Budget and use-case tiers
- **Start with the fit, then choose the features (Compare your size):** Try your existing footwear first. If you need a new pair, compare the final price and return terms in your size. A waterproof lining and taller cuff are useful only when they suit your routes.
### Comparison table
product: Garmont T8 Bifida; waterproof: No membrane; construction: Suede and textile; 8-inch shaft; Vibram Bifida sole; tradeoff: For non-waterproof coverage; a tall shaft means more lacing
product: Salomon Quest 5 GORE-TEX; waterproof: GORE-TEX; construction: Leather/synthetic upper; 4D Advanced Chassis; 12 mm drop; tradeoff: Backpacking design for rocky terrain; more boot than many paved routes need
product: Lowa Zephyr GTX Mid TF; waterproof: GORE-TEX; construction: Split leather/textile; MONOWRAP frame; mid-cut shaft; tradeoff: Waterproof mid-cut option; distinguish the original TF from the MK2
### What to check while trying them on
- **Heel hold:** Walk up stairs or a store ramp. The heel should feel secure without having to crush the front of your foot with the laces.
- **Toe clearance:** Try a downhill slope if available. Your toes should not hit the front. Use the socks you plan to wear, and check both feet.
- **Flex and cuff pressure:** Walk, bend and crouch. Notice where the sole flexes and whether the cuff presses into your leg. A taller boot is not automatically a better fit.
### Do not buy a break-in problem
Do not accept numb toes, persistent heel rubbing or a cramped forefoot on the promise that the boot will stretch. Materials can soften, but extra miles do not guarantee a fit correction. Check return terms before wearing a new pair outdoors.
### Boots or shoes for your route?
For sidewalks and smooth paths, a comfortable walking or trail shoe may be all you need. Rough ground, brush and wet weather can make a boot worth trying. Pack weight alone cannot tell you which footwear will fit or perform best.
For road routes, compare shoes before committing to boots. [See the pavement shoe guide](/gear/best-shoes-for-rucking-on-pavement)
### Try them before a long ruck
1. **Start indoors:** Wear your usual socks and adjust the laces. Check heel movement, toe clearance and pressure around the ankle while the pair is still returnable.
2. **Take a short local walk:** Once the fit is right, start with an easy route close to home. Stop and inspect rubbing rather than waiting for it to become a blister.
3. **Add your pack gradually:** Keep the first loaded walks short. Increase distance or load after comfortable outings. There is no verified five-mile or thirty-mile break-in requirement for these boots.
### Inspect the pair you already own
Look for a separating sole, worn tread, damaged lacing hardware or a lining that rubs through. If comfort or traction has changed, compare it with a sound pair before planning a long route.
### Product sources and model checks
Specifications checked September 14, 2026. Check the exact Garmont T8 variant when shopping. LOWA specifications below refer to the original Zephyr GTX Mid TF; the MK2 is a different model.
Garmont standard T8 specifications: [Garmont T8 Bifida at Galls](https://www.galls.com/garmont-t8-bifida-boot-ocp-coyote)
Salomon manufacturer specifications: [Salomon Quest 5 GORE-TEX](https://www.salomon.com/en-us/product/quest-5-gore-tex-li8737/L49138400)
LOWA original TF specifications: [LOWA Zephyr GTX Mid TF](https://www.lowaboots.com.au/products/zephyr-gtx%C2%AE-mid-tf-black)
### Bottom line
Keep a comfortable pair you already own if it works on your route. For a new boot, shortlist the T8 Bifida when you do not want a waterproof membrane, the Quest 5 for its backpacking construction, and the Zephyr GTX Mid TF for a waterproof mid-cut option. Choose the pair that holds your heel without crowding your toes.
### Frequently asked questions
**Are boots or shoes better for rucking beginners?**
Choose for fit and terrain. Comfortable walking or trail shoes may suit paved routes. Boots offer more coverage and can provide a firmer platform, but there is no universal pack-weight threshold that requires them.
**How long do rucking boots take to break in?**
There is no verified mileage requirement for these three models. Check the fit indoors, then take short walks before adding your normal pack. Persistent rubbing or cramped toes deserve a fit adjustment, not a fixed number of extra miles.
**Can I ruck in hiking boots I already own?**
Yes, if they fit comfortably and the soles, tread and lacing are sound. Start with a short familiar route to see how they feel with your pack.
**How much should I spend on my first rucking boot?**
You may not need a new pair. If you do, compare the price and return terms for your exact size. Paying more for waterproofing or a taller shaft makes sense only if you need those features.
**Do I need waterproof boots for rucking?**
GORE-TEX is useful for wet grass, rain and shallow puddles below the cuff. It cannot keep water out when it enters over the top. The Quest 5 and Zephyr GTX have waterproof membranes; the standard T8 Bifida does not.
# Best Rucking Boots for Beginners 2026
Start with the route you walk most often. These three boots offer different combinations of coverage, underfoot structure and waterproofing. None is automatically the right purchase just because you have started carrying a pack.
## Do Beginners Actually Need Boots? (The Honest Answer)
Not always. Comfortable walking or trail shoes can suit roads and smooth paths. Boots are worth considering for rough ground, brush or wet weather. There is no universal pack-weight cutoff that requires a boot, and a taller cuff is not a guarantee against ankle injury.
## How We Evaluated These Boots
This is a research-based comparison, not a hands-on test. We compared documented materials, waterproofing and intended use. We have not measured break-in mileage, long-term durability or comfort under a particular load for these pairs.
[Garmont T8 Bifida · Galls](https://www.galls.com/garmont-t8-bifida-boot-ocp-coyote) · [Salomon Quest 5 GORE-TEX](https://www.salomon.com/en-us/product/quest-5-gore-tex-li8737/L49138400) · [LOWA Zephyr GTX Mid TF](https://www.lowaboots.com.au/products/zephyr-gtx%C2%AE-mid-tf-black).
## The 3 Best Rucking Boots for Beginners
Use the following models as a shortlist to try on. The best choice depends on how they fit your feet, not a shared score or a broad price band.
### Garmont T8 Bifida - Best Overall for Beginners
The standard T8 Bifida is an 8-inch tactical boot with a suede/textile upper and Vibram Bifida outsole. It has no waterproof membrane. Consider it when you want coverage without a waterproof lining; expect more lacing than with a low shoe. Garmont sells different production variants, so check the exact label.
### Salomon Quest 5 GORE-TEX - Best for Heavy Loads
Salomon describes the Quest 5 as a hiking and backpacking boot for rocky, technical terrain. It combines a leather/synthetic upper, GORE-TEX membrane and 4D Advanced Chassis. The manufacturer lists a 12 mm drop and 1 lb 5 oz per boot. Compare it if you want a structured waterproof hiking boot; it may be more boot than you need for sidewalks. No specific pack weight makes it mandatory.
### Lowa Zephyr GTX Mid TF - Best Premium Pick
The original Zephyr GTX Mid TF uses a split-leather/textile upper, GORE-TEX lining and LOWA MONOWRAP frame. It is a waterproof mid-cut option to compare with the taller T8. Check that a retailer is showing the original TF rather than the MK2; their specifications are not interchangeable.
## Comparison Table
| Boot | Waterproofing | Main distinction |
|---|---|---|
| Garmont T8 Bifida | No membrane | 8-inch tactical shaft; Vibram Bifida sole |
| Salomon Quest 5 GORE-TEX | GORE-TEX | Backpacking construction; 4D Advanced Chassis |
| LOWA Zephyr GTX Mid TF | GORE-TEX | Mid-cut shaft; MONOWRAP frame |
## The Beginner's Boot Decision Framework
First, check whether your current footwear already works. Then decide whether you need a waterproof lining and how much coverage you want. Try the shortlist with your actual socks. Walk uphill and downhill if the store has a ramp: your heel should stay secure and your toes should not hit the front. Compare the final price and return terms in your size.
## Common Beginner Boot Mistakes
Do not buy cramped toes or persistent heel rubbing on the promise that the leather will stretch. Do not confuse water-resistant materials with a waterproof membrane. Even a waterproof boot can fill when water enters above its cuff. Check the model, width and return policy before wearing a new pair outside.
## Break-In Protocol for Rucking Boots
Start indoors, then take a short local walk. If the fit stays comfortable, add your pack on another short outing before increasing distance. Stop and adjust when rubbing starts. There is no verified five-mile or thirty-mile break-in rule for these three models; softening materials does not guarantee that a poorly fitting boot will become comfortable.
## Best Socks to Pair With Rucking Boots
Wear the sock thickness you intend to use when trying on boots. Check for bunching, seams that rub and enough cuff height to cover the boot's contact points. Carrying a dry spare pair can be useful on wet outings, but no sock guarantees blister prevention.
## Frequently Asked Questions
These answers focus on the purchase decision. Individual fit matters more than a fixed load or mileage rule.
### Are boots or shoes better for rucking beginners?
Choose for fit and terrain. Comfortable shoes may suit paved routes, while boots can provide more coverage on rough ground. A heavier pack alone does not decide the answer.
### How long do rucking boots take to break in?
There is no verified mileage requirement for these models. Start with short walks and address persistent pressure or rubbing before taking a longer route.
### Can I ruck in hiking boots I already own?
Yes, if they fit comfortably and the tread, sole and lacing are sound. Try a short familiar route with your pack before planning a long day.
### How much should I spend on my first rucking boot?
You may not need a new pair. When buying, compare current prices and return terms in your size. Pay for waterproofing or a taller shaft only when those features suit your routes.
### Do I need waterproof boots for rucking?
A waterproof membrane can help with rain, wet grass and shallow puddles below the cuff. The Quest 5 and Zephyr GTX have one; the standard T8 Bifida does not. Water entering over the top remains a limitation.
### Are GORUCK boots worth it for beginners?
They are another option to compare for fit and intended use. We have not tested GORUCK boots firsthand and cannot promise that they will fit better or last longer than the models here.
────────────────────────────────────────────────────────────────────────────────
URL: https://ruckauthority.com/gear/best-rucking-gear-2026
Title: Best Rucking Gear 2026: Top Picks by Category
Description: The best rucking packs, plates, shoes, and accessories in 2026 - researched, compared, and updated monthly. One page with our top pick in every category.
Published: 2026-03-10 / Updated: 2026-07-06
## Best Rucking Gear in 2026: Top Picks Across Every Category
### The Best Gear in Each Category
Most gear roundups hand you a list of products and call it a day. This one works differently. Every category covered here has a dedicated guide: packs, plates, shoes, socks, and budget alternatives. Picks update monthly when prices change or better options emerge. The goal is a single article you can bookmark and trust.
Each pick below is what we'd recommend after cross-referencing specs, user reviews, and community feedback. We link to dedicated deep-dive guides for anyone who wants the full comparison. Start here for a fast answer, go deeper when you need one.
### Quick picks
- **Best Pack:** GORUCK GR1 ($335)
- **Best Plate:** Rogue Echo Weight Vest Plates ($65–$153)
- **Best Trail Shoes:** Salomon XA Pro 3D V9 GTX ($170)
- **Best Socks:** Darn Tough Light Hiker Micro Crew ($27)
- **Best Budget Kit:** The $50 Starter Setup (~$50)
- **Best Women's Pick:** Osprey Tempest Velocity 20 Women's ($195)
### Budget and use-case tiers
- **Start for Free ($0) ($0):** Use a pack you already own. Fill gallon zip-lock bags with play sand to your target weight. Grab whatever sturdy shoes you have. This is a fully valid setup for the first month of rucking.
- **Smart Starter ($50–$80) ($50–$80):** The first gear worth buying: a real ruck plate and a pair of Darn Tough socks. The plate replaces shifting sand bags. The socks eliminate blisters immediately. Everything else stays DIY.
- **Dedicated Kit ($200–$300) ($200–$300):** A proper rucking setup without committing to premium pricing. Entry-level dedicated pack, a quality plate, and Salomon or equivalent trail shoes. Good for ruckers past the first month who know the sport will stick.
- **Full Premium Kit ($500+) ($500+):** Best-in-class across every category. Buy once, use for a decade. For ruckers who train consistently and want gear that won't limit performance.
### The $50 Starter Kit
If you want to buy two things, consider a secure load and socks that fit your feet. A plate can reduce shifting compared with loose weight, and technical socks may improve moisture management. Neither purchase is required to start.
- **Yes4All Cast Iron Rucking Weight:** Solid cast iron, accurate weight, fits most packs. The single best upgrade over DIY sand bags.
- **Darn Tough Light Hiker Socks:** A merino blend and lifetime warranty. No sock prevents every blister, so confirm fit before buying several pairs.
- **Pack ($0):** Use a pack you already own if it fits comfortably and can hold a light load securely close to your back.
For the full breakdown of budget alternatives across every category, see our dedicated guide. [Budget Rucking Starter Kit](/gear/budget-rucking-starter-kit)
### Best Women's Rucking Gear
Women-specific fit matters more than gender-specific marketing. The main differences are torso length, shoulder strap angle, and hip belt position. These affect comfort noticeably at loads over 20 lbs.
- **Best Women's Pack: Osprey Tempest Velocity 20:** A genuine women's-specific harness, adjustable torso, and built-in hip belt make the fit difference most noticeable on shorter frames. The 18–20L capacity is best for lighter loaded miles rather than rigid-plate work.
- **Plates: Same options as men's:** Ruck plates are gender-neutral. Weight is weight. GORUCK plates for GORUCK packs, Yes4All for everything else on a budget. No women's-specific version needed.
- **Shoes: La Sportiva, Salomon, Altra:** These brands offer women's versions built on different lasts rather than simply scaled-down men's sizing. For trail rucking, the Salomon XA Pro 3D V9 GTX Women's is our top pick, same as the men's version. Altra Lone Peak 9 Waterproof is the best option for wider feet.
See the full women's gear guide for complete pack, shoe, and accessory recommendations. [Best Rucking Gear for Women](/gear/best-rucking-gear-for-women)
### How We Pick Gear
We're not a gear lab - we don't have a warehouse full of ruck plates on a test bench. Every recommendation here comes from cross-referencing manufacturer specs, long-term user reviews, Reddit and forum discussions, and real-world feedback from the rucking community.
Some retailer links on this page are affiliate links, which means Ruck Authority may earn a commission if you buy through them at no extra cost to you. Recommendations do not change based on commission rate, and we call out weak fits even when they are commissionable.
- **Packs:** Compared on load comfort, strap stability, hip belt transfer, build quality, and long-term durability reports. Key sources: manufacturer specs, verified buyer reviews, and rucking community feedback across terrain types.
- **Plates:** Compared on weight accuracy, coating durability, edge comfort, rattle, and fit across multiple pack models. Sourced from manufacturer data and aggregated user reports.
- **Shoes:** Compared on grip, waterproofing (for GTX models), midfoot support under load, and fit stability. Sourced from long-term user reviews on the shoe's rated terrain type.
- **Socks:** Compared on fit reports, cushion thickness, materials, moisture management, and durability feedback.
### What's New in March 2026
We update this page monthly when prices change or new gear warrants a ranking change.
- **Salomon XA Pro 3D V9 GTX:** Still our top trail shoe pick. No newer version has been released.
- **Rogue Echo plates: now sold as pairs:** Important note: Rogue now sells Echo plates as pairs rather than singles. The 20LB pair (two 10LB plates) can cost more than GORUCK for equivalent weight. Best for ruckers who also train with a weight vest.
- **5.11 RUSH 24 3.0: announced:** Not yet widely available. We'll update this page once reviews start coming in. Until then, the RUSH 24 2.0 remains our mid-range pack recommendation.
### Bottom line
Start with the gear you already own and a pair of Darn Tough socks. If you're ready to invest, the GORUCK GR1 is the benchmark rucking pack, the Rogue Echo plate is the most versatile for ruck and vest work, and the verified 20 lb Yes4All cast-iron rucking weight is the lower-cost rigid option when its dimensions fit your pack. The Salomon XA Pro 3D V9 GTX handles varied trail terrain. For women ruckers: use the same decision process, choosing the women's fit where available. If you're unsure where to start, match your spend to the budget tiers above.
### Frequently asked questions
**What gear do I need to start rucking?**
You need three things: a backpack with two shoulder straps (any pack you own works), weight to carry (20 lbs of sand in zip-lock bags is free), and sturdy shoes. That's the entire requirement. Everything else is an upgrade after you confirm rucking will stick.
**What is the most important gear upgrade for a new rucker?**
Fix the part of your current setup that causes a real problem. That may be a pack that cannot secure the load, shoes that do not fit, or socks that hold moisture or slip. No single purchase is the right first upgrade for everyone.
**Do I need a GORUCK pack to start rucking?**
No. The GORUCK GR1 is the best rucking pack available, but you don't need it to start. Use what you own for the first month. If rucking sticks, the GR1 is worth the premium. If it doesn't, you haven't sunk premium-pack money into a hobby you tried twice.
**How much should I budget for a complete rucking kit?**
$0 to start with gear you own. $50–80 for a real plate and quality socks. $300–400 for a dedicated mid-range kit. $500+ for premium across every category. The minimum viable kit is zero dollars. The most common mistake is buying premium gear before knowing if rucking will stick.
**Do I need a ruck plate specifically, or can I use other weight?**
Other weight works fine for the first several weeks. Sand bags, books, and dumbbells all simulate the training effect. Plates are more comfortable and consistent, but they're a convenience upgrade, not a requirement. Buy a plate once you've done 15–20 rucks and know the sport is yours.
**How often is this page updated?**
Monthly, when prices change, new gear launches, or rankings shift based on new information. We note major changes in the 'What's New' section above.
This is our master list: the single best pick in every [rucking](/glossary#rucking) gear category, updated monthly. We dig through specs, community reviews, Reddit threads, and real-world feedback so you don't have to. Each pick links to its full guide where we break down alternatives and runners-up.
Last updated: **July 6, 2026**
## If you are buying today, start here
| Priority | Buy first | Best move | Why it matters |
| --- | --- | --- | --- |
| 1 | Socks and foot care | [Darn Tough Light Hiker](/gear/best-rucking-socks-blister-prevention), [Leukotape](/injuries/rucking-foot-care-blister-prevention), and [Body Glide](/injuries/rucking-foot-care-blister-prevention) | The cheapest gear upgrades prevent the problems that stop beginners first. |
| 2 | Stable load | [Titan Fitness Ruck Plate](/gear/ruck-plate-comparison) for budget setups; [GORUCK Ruck Plate](/gear/ruck-plate-comparison) for GORUCK packs | Precise weight beats loose books or dumbbells once you know you will keep rucking. |
| 3 | Pack | [GORUCK GR1](/gear/goruck-gr1) if you want the benchmark; [5.11 RUSH 24](/gear/best-rucking-backpacks) if value matters more | A pack upgrade only matters after the load is stable and your feet are handled. |
| 4 | Terrain and conditions | [Salomon XA Pro](/gear/best-rucking-shoes-by-terrain), [Source WXP 3L](/gear/best-hydration-packs-for-rucking), and [Petzl Actik Core](/gear/best-headlamps-for-rucking) | Shoes, water, and light become urgent when you leave easy pavement. |
---
## Best rucking backpack: GORUCK GR1
The [GORUCK GR1](/gear/goruck-gr1) keeps showing up as the consensus top pick across rucking communities, and for good reason. Built in the USA with 1000D Cordura, a flat back panel designed for ruck plates, and a lifetime SCARS warranty. The 26L fits most body types. It's expensive, but the thing is basically indestructible.
**Price tier:** Premium | **Our rating:** 9.2/10
**Best for:** Ruckers who want one pack for rucking, work, and travel and accept premium pricing. If the GR1 is too expensive, the [5.11 RUSH 24 2.0](/gear/best-goruck-alternatives) is the stronger value route. If you only need a pack for rucking, the Rucker 5.0 is GORUCK's dedicated training option; we carried one for a week in [our hands-on review](/gear/goruck-rucker-5-0-review).
For the full comparison of rucking packs, see our [GORUCK Alternatives guide](/gear/best-goruck-alternatives).
---
## Best ruck plate: Rogue Echo Ruck Plate
The [Rogue Echo Ruck Plate](/gear/best-weighted-vests-for-rucking-in-2026) gets the nod for versatility: it works in both ruck packs and weight vests. The E-Coat finish is durable, the stated weight is accurate, and the format fits more than the GORUCK ecosystem. Important caveat: Rogue sells these as pairs, which can make a comparable total load cost more than one GORUCK plate.
**Price:** $65 - $153 (sold as pairs) | **Our rating:** 9.0/10
**Best for:** Ruckers who also train with a weight vest. If you only ruck, GORUCK or Titan plates are better value.
For the full plate comparison, see our [Ruck Plate Showdown](/gear/ruck-plate-comparison).
---
## Best rucking shoes (trail): Salomon XA Pro 3D V9 GTX
The [Salomon XA Pro 3D V9 GTX](/gear/best-rucking-shoes-by-terrain) brings aggressive grip, Gore-Tex waterproofing, and a chassis built for loaded walking on loose terrain. The Contagrip outsole gets consistently high marks for wet rock and muddy trails. Runs true to size with enough toe box room for swollen feet on long rucks.
**Price tier:** Premium trail shoe | **Our rating:** 9.1/10
**Best for:** Trail ruckers who deal with wet, technical, or mixed terrain. For pavement-only rucking, a regular walking shoe or trail runner will do the job.
For terrain-specific shoe recommendations, see our [Best Rucking Shoes by Terrain](/gear/best-rucking-shoes-by-terrain) guide.
---
## Best rucking socks: Darn Tough Light Hiker Micro Crew
The [Darn Tough Light Hiker Micro Crew](/gear/best-rucking-socks-blister-prevention) is a merino wool blend with a lifetime warranty (they literally replace them free, forever), and a reputation for blister prevention that's hard to argue with. The Light Hiker weight hits the sweet spot for rucking: thick enough for cushion, thin enough that your shoes still fit right.
**Price tier:** Midrange sock | **Our rating:** 9.0/10
**Best for:** Everyone. Socks are the single most impactful gear upgrade for new ruckers. Grab two pairs minimum: one to wear, one to dry.
---
## Best budget setup: use the pack you already own
Your first-month shopping list is short: add a secure [ruck plate](/pillars/rucking-gear-guide) and good socks to a pack you already own. That is enough to learn whether rucking fits your routine; everything else is an upgrade for later.
**Total cost:** $35-50 | **Full breakdown:** [Budget Rucking Starter Kit](/gear/budget-rucking-starter-kit)
---
## Best women's rucking gear
Women-specific picks across packs, load systems, and shoes. The [Osprey Tempest Velocity 20 Women's](/gear/best-rucking-backpacks-for-women) is the compact fit, and the 30L version adds room for longer outings without giving up the women's-specific harness.
For the full women's gear guide, see [Best Rucking Gear for Women](/gear/best-rucking-gear-for-women).
---
## How we pick gear
Let's be upfront: we're not a gear lab. We don't have a warehouse full of ruck plates on a test bench. What we do is spend a lot of time reading so you don't have to. Every recommendation here comes from cross-referencing manufacturer specs, long-term user reviews, Reddit and forum discussions, and feedback from the [rucking community](/guides/how-to-start-a-ruck-club).
Some retailer links on this page are affiliate links, which means Ruck Authority may earn a commission if you buy through them at no extra cost to you. Recommendations do not change based on commission rate, and weak fits stay weak fits even when they are commissionable.
---
## What's new in July 2026
- **[COROS PACE 4](/gear/best-gps-watches-for-rucking)** is the light value pick for route tracking, heart-rate work, and everyday training when you do not need offline maps.
- **[Garmin Instinct 3 Solar](/gear/best-gps-watches-for-rucking)** remains the battery-first choice for long outdoor use and solar-assisted charging.
- **[CEP Allday](/gear/best-compression-gear-for-rucking) Merino socks** are the compression-specific option; most ruckers should still start with a conventional merino hiking sock.
- **GORUCK GR1** pricing varies by size, material, and country of manufacture. Use the direct product card for the current configuration.
- **[Darn Tough Light Hiker Micro Crew](/gear/best-rucking-socks-blister-prevention)** remains our top all-around sock pick.
- **Rogue Echo plates** are sold as pairs, so compare the total load and pair price with single-plate options before buying.
- **[5.11 RUSH 24 2.0](/gear/best-rucking-backpacks)** remains current. No 3.0 release announced.
We update this page monthly. Bookmark it or [subscribe to our newsletter](/newsletter) to get notified when picks change.
────────────────────────────────────────────────────────────────────────────────
URL: https://ruckauthority.com/gear/best-rucking-gear-for-women
Title: Best Rucking Gear for Women: Packs, Vests, Shoes
Description: Rucking gear for shorter torsos and different strap geometry, compared by fit range, load stability, adjustability, and current availability.
Published: 2026-03-10 / Updated: 2026-06-29
## Rucking Gear Built for Women
### Fit and Load Matter More Than Labels
If you came here ready to buy, start with fit, feet, and load control. A pack that sits correctly fixes the biggest comfort problem, merino socks protect the part of the body that takes every step, and a measured plate makes your training repeatable.
Most women can use the same gear as men - fit and sizing matter more than gender. The shoulder strap angle, torso length, hip belt placement, and waist belt padding all change based on body type. A pack that fits one person will ride wrong on another, and you'll feel it in your neck and lower back within a few miles.
The pack comparison still starts with torso and harness fit, but a women's setup is not only a backpack decision. GORUCK's Spy Ruck now gives us a women-specific weighted option, while its Ballistic Trainer and Rough Runner each have separate women's product listings.
This guide covers packs, vests, shoes, socks, and load control. Products we have not used are listed as specification-researched rather than field tested. If you want a weighted vest for plain walking or general fitness rather than loaded rucking, our sister site Kit Authority's [weighted vests for women](https://kitauthority.com/fitness/best-weighted-vests-for-women?utm_source=ruckauthority&utm_medium=crosslink) covers that fit question.
### Quick picks
- **Best Premium:** Osprey Tempest Velocity 30 ($215)
- **Best Starter:** Osprey Tempest Velocity 20 ($195)
- **Best Tactical:** 5.11 Tactical RUSH 24 2.0 ($140)
### Budget and use-case tiers
- **Premium Hybrid ($215):** A genuine women's-specific 30L fit with an adjustable torso, integrated hip belt, and room for longer outings. Best for women who want one pack for rucking and day hiking.
- **Mid-Range ($125–$175) ($140):** Full-featured tactical pack with strong construction. Fits well on smaller frames with proper strap adjustment. Good option for women who also want a pack for everyday carry.
- **Starter Hybrid ($195):** Women's-specific torso sizing, contoured shoulder straps, and a built-in hip belt. Designed for day-hike loads but holds 20L of rucking weight comfortably for shorter-torso ruckers. Good first pack before committing to a premium tier.
### Comparison table
situation: Petite frame or short torso; pick: Osprey Tempest Velocity 20; why: Adjustable women's fit, lighter carry, and less strap bulk for beginner loads
situation: One tougher pack for rucking and travel; pick: 5.11 RUSH 24 2.0; why: More capacity and durability without jumping straight to premium GORUCK pricing
situation: Standard packs always fit badly; pick: Osprey Tempest Velocity 30; why: Women's-specific adjustable torso, contoured harness, and integrated hip belt
situation: Blisters stop you before cardio does; pick: Darn Tough Light Hiker; why: The cheapest upgrade that can extend weekly volume
### Most new women ruckers should start with the Osprey Tempest Velocity 20.
It solves the fit problem without requiring a $300+ first purchase. Move to the 30L Tempest Velocity when you need more room for longer outings.
### How to Fit a Rucksack to a Female Body
Getting fit right is the difference between a comfortable pack and shoulder or back pain after three miles. Here's the process.
A well-fitted pack: sits high on the back with weight close to the spine, straps that don't compress the chest, and no pulling on the lower back. These apply to any rucker regardless of size.
1. **Measure your torso.:** Stand upright and have someone measure from the base of your neck (C7 vertebra, the bony bump when you bend forward) straight down to the top of your hip bones (iliac crest). Most shorter frames fall in the 15–19 inch range.
2. **Match to pack size.:** Small packs fit 15–17 inch torsos. Medium fits 17–19 inches. Large fits 19–21 inches. When in doubt, measure the pack's suspended back panel from the top of the shoulder yoke to where the hip belt sits.
3. **Adjust shoulder straps for width.:** The straps should wrap smoothly over your shoulders with no gaps. If there's a gap, the pack is too wide. If the strap presses the inside of your shoulder joint, it's too narrow. The top of each strap should angle slightly inward.
4. **Position the hip belt correctly.:** The hip belt should sit on your hip bones, not above or below. This is where load transfer happens. When loaded properly, 60–80% of the weight should transfer to your hips, not your shoulders.
5. **Check load lifter straps.:** If your pack has load lifters, they should angle about 45 degrees from shoulder to pack top. Too steep and they'll pull the pack into your neck. Too shallow and they don't cinch properly.
6. **Position the sternum strap.:** This strap crosses your chest horizontally. It shouldn't be tight, just tight enough to prevent shoulder straps from sliding off. For narrower shoulders and improved chest clearance, this strap is crucial for stability.
See our full roundup of rucking packs across all body types and budgets. [Best Rucking Backpacks](/gear/best-rucking-backpacks)
### Weighted Vests as an Alternative
Not all women prefer rucksacks. Weighted vests distribute weight symmetrically across the torso instead of on the back. This is a legitimate alternative worth considering.
GORUCK's Spy Ruck is the women-specific vest in its current catalog. It comes in fixed-load versions and has no cargo storage, so compare it as a close-to-body training tool rather than a smaller backpack. We list it from current manufacturer specifications and have not field-tested it yet.
Pros:
- Weight is evenly distributed front and back, reducing lower back stress
- Adjust weight in small 1–2 lb increments for precise training
- Most vests fit women's frames naturally without complex adjustment
- No learning curve for fit. It's on or off.
Cons:
- No storage. Can't carry water, gear, or extra clothing.
- Can restrict breathing if too tight, especially at high intensity
- More heat retention because they cover more of your torso
- Not compatible with GORUCK events or most group rucking formats
The choice comes down to your goals. If you're training for strength and calorie burn, a vest is efficient. If you want the full rucking experience (community, events, carrying real gear), a pack is the way to go. Many women use both depending on the session.
### Shoes for Women Ruckers
Narrower midfoot, higher arch, and a smaller heel cup are common fit differences that affect shoe performance under load. When weight is added, feet work harder and need better support. Salomon, La Sportiva, and Altra offer versions built on different lasts rather than simply scaling down sizing.
GORUCK now gives the Ballistic Trainer and Rough Runner separate women's product pages. Compare the firmer Ballistic Trainer for gym work and shorter loaded sessions; compare the road-oriented Rough Runner for longer pavement mileage. Neither model has been field-tested by Ruck Authority yet, so the shop cards use manufacturer specifications without an editorial score.
For women ruckers specifically: look for a firm midfoot, moderate heel drop (8–10mm), solid arch support, and a heel cup that doesn't slip. Your feet are absorbing extra impact from the load, so stability matters more than maximum cushioning.
For the full breakdown by terrain type, see our shoe comparison. [Best Rucking Shoes by Terrain](/gear/best-rucking-shoes-by-terrain)
Building a full kit on a budget? See the starter kit guide. [Budget Rucking Starter Kit](/gear/budget-rucking-starter-kit)
### Accessories and Apparel
- **Sports bra:** This matters more for rucking than for regular walking because the loaded pack creates vertical bounce. You want high-impact support. Look for encapsulation (cups that separate, not compress) and wide straps that won't slip inward under load. Brands like Freya, Panache, and Enell are built for high-impact activity. Budget $60–90 for a quality bra.
- **Socks:** Merino wool blend is the standard. Merino regulates temperature, wicks moisture, resists odor, and reduces blister risk. Cotton holds moisture and causes blisters under load. Go crew or mid-calf height to prevent chafe where the shoe collar contacts your ankle. Darn Tough Light Hiker Micro Crews come with a lifetime warranty. Budget $20–27 per pair.
- **Anti-chafe:** Rucking packs create friction where straps contact your shoulders, across your chest at the sternum strap, and along your hip belt. Body Glide, 2Toms SportShield, or Squirrel's Nut Butter applied to these zones before you ruck prevents irritation. Some women also use a thin base layer to reduce direct strap contact on skin.
- **Reflective gear:** Research shows women are statistically more likely to ruck during early morning or evening hours. A reflective vest, clip-on lights, or reflective strips on your pack dramatically improve visibility. An inexpensive reflective running vest is genuinely worth it.
### The Women's Starter Kit
- **Minimal budget (~$50):** Use a backpack you already own, fill it with DIY weight (play sand in zip-lock bags), grab two pairs of merino wool socks, and get a high-support sports bra if you don't already have one. That's everything you need to ruck hard for the first month.
- **Mid-range ($195+):** Invest in a shorter-torso rucksack (Osprey Tempest Velocity 20 or 5.11 RUSH 24), add weight that the pack can hold securely, upgrade to quality trail runners with a good fit for your foot shape, and add the sock and sports bra combination. This setup will carry you through the first 3–6 months of regular rucking.
- **Premium ($215+):** Osprey Tempest Velocity 30, a flexible load that the pack can secure safely, dedicated rucking shoes (Salomon Quest 5 or La Sportiva Bushido III), anti-chafe products, and reflective gear. Use a plate-native loadout instead when rigid-plate training is the goal.
### Bottom line
For most beginners, the Osprey Tempest Velocity 20 is the strongest starting point because its women's-specific harness and adjustable torso are real product features. Choose the 30L Tempest Velocity for longer outings, or the RUSH 24 if you specifically want a tactical pack and its unisex fit works for your torso.
### Frequently asked questions
**Do women need a different pack for rucking?**
Not always, but fit matters more as you go heavier and longer. Women's-specific packs have shorter torso lengths, inward-angled shoulder straps, and contoured hip belts. These differences are noticeable at loads over 20 lbs, especially on rucks longer than an hour.
**What weight should women start rucking with?**
There is no universal sex-specific starting weight. Begin unloaded, then test the smallest practical added load if it stays secure and does not change gait, balance, or comfort.
**Can women use men's rucking packs?**
Yes, many do. The fit won't be ideal on standard sizing, but packs with adjustable torso lengths work well across body types. If you're between sizes, size down rather than up for better load transfer to the hips.
**Is rucking good for women specifically?**
Rucking is one form of loaded walking. It can raise the effort of a walk, but evidence does not support promising that it builds bone density or outperforms other exercise for every woman. Bone-health plans may include weight-bearing activity, resistance training, nutrition, medication, and individual clinical guidance.
## Why women need different gear
Rucking gear designed for male bodies doesn't work well for female bodies - and that's not opinion, that's biomechanics. The average female torso measures 15-17 inches from the base of the neck to the hip bone, compared to 17-20 inches for men. That's a meaningful difference that affects how a pack sits on your spine, how weight transfers to your hips, and where straps naturally contact your shoulders.
Beyond torso length, women tend to have narrower shoulders and wider hips relative to torso length. Standard [rucksack](/glossary#rucksack) straps that slot perfectly on a man's 18-inch-wide shoulders will slip inward on a woman's 16-inch frame, creating lateral pressure on the neck and chafe. Hip belts designed to sit above a narrower hip structure end up pressing into the wrong anatomical landmarks, reducing load transfer efficiency and comfort.
Most rucksacks on the market are designed first for male bodies, then shrunk down - which doesn't solve the proportional issues. The good news: there are now purpose-built options designed from the ground up for women's anthropometry. They exist, they work, and you shouldn't have to suffer through a pack that was never meant for your body.
---
## Best rucksacks for women
**Osprey Tempest Velocity 30 Women's Hiking Backpack**
**5.11 RUSH 24 (37L)**
5.11 designed this as gender-neutral, but the proportions work well for many women. At 37L, it offers more capacity than the Tempest Velocity 30 and is the lower-cost option at current list pricing. The torso adjustment is more generous than some options, and women with torsos in the 15-17 inch range may find it fits well. The hip belt is adjustable and distributes weight effectively.
What we loved: Adjustability. The torso panel slides 2 inches, so fine-tuning fit is possible. Great value for the build quality.
What we didn't: It's still designed with a unisex silhouette, so it won't fit quite as snugly as a purpose-built women's pack. Shoulder straps are a bit wide if you're on the petite end.
Best for: Budget-conscious women with average-to-shorter torsos who appreciate adjustability and want a solid pack that works for multiple purposes.
**Osprey Tempest Velocity 20 Women's Pack**
---
## How to fit a rucksack to a female body
Getting fit right is the difference between a comfortable pack and shoulder/back pain. Here's the step-by-step process:
**Measure your torso.** Stand upright and have someone measure from the base of your neck (C7 vertebra - it's the bony bump at the base of your neck when you bend forward) straight down to the top of your hip bones (iliac crest). This number determines your pack size. Most women fall into the 15-19 inch range.
**Match to pack size.** Small packs: 15-17 inches. Medium: 17-19 inches. Large: 19-21 inches. Some packs offer exact measurements; others give size letters. When in doubt, measure the pack's suspended back panel from the top of the shoulder yoke to where the hip belt sits.
**Adjust shoulder straps for width.** Put the pack on and look in a mirror. The straps should wrap smoothly over your shoulders with no gaps between the strap and your shoulder. If there's a finger-width gap, the pack is too wide. If the strap presses the inside of your shoulder joint, it's too narrow. The top of each strap should angle slightly inward as it goes up (not [vertical](/gear/best-gps-watches-for-rucking) or outward).
**Position the hip belt correctly.** The hip belt should sit ON your hip bones (the part you can feel sticking out at the sides), not above them and not below. This is where load transfer happens. If the belt sits too high, weight pulls on your lower back. Too low, and your hips don't share the load. When loaded properly, 60-80% of the weight should transfer to your hips, not your shoulders.
**Check load lifter straps.** If your pack has load lifters (small straps angling from the top of the pack down to your shoulders), they should angle about 45 degrees from shoulder to pack top. Too steep and they'll pull the pack into your neck. Too shallow and they don't cinch properly. Adjust until the load feels like it's riding directly over your hips.
**Position the [sternum strap](/glossary#sternum-strap).** This strap crosses your chest horizontally. It shouldn't be tight - just tight enough to prevent the shoulder straps from sliding off your shoulders. Especially for women with narrower shoulders, this strap is crucial for stability.
---
## Weighted vests as an alternative
Not all women prefer rucksacks. Some prefer weighted vests, which distribute weight symmetrically across the torso instead of on the back. This is a legitimate alternative worth considering.
**Advantages of vests:** Weight is evenly distributed front and back, reducing lower back stress. You can adjust weight in small 1-2 lb increments, perfect for precise training. Most vests fit women's frames naturally without requiring adjustments. There's no learning curve for getting fit right - it's on or off. Vests also don't interfere with arm movement the way a back-heavy pack can.
**Disadvantages of vests:** You can't carry water, gear, or extra clothing - it's weight and nothing else. Vests can restrict breathing if too tight, especially for high-intensity work. They create more heat retention than packs because they cover more of your torso. And frankly, if you're part of the [rucking community](/guides/how-to-start-a-ruck-club), a vest signals you're training differently, which some people embrace and others don't.
The choice comes down to your goals. If you're training for strength, conditioning, and calorie burn, a vest is efficient and comfortable. If you want the full rucking experience - the community, the events, the practical reality of moving weight over distance - a pack is the way to go. Many women use both depending on the session. If a vest for everyday fitness rather than rucking is what you're after, our sister site Kit Authority's guide to [weighted vests for women](https://kitauthority.com/fitness/best-weighted-vests-for-women?utm_source=ruckauthority&utm_medium=crosslink) covers fit and picks for that use case.
---
## Shoes for women ruckers
Your feet are different from men's feet in ways that matter for rucking. Women's feet tend to be narrower in the midfoot and heel, with a higher average arch. When loaded with weight, your feet work harder and need better support. Generic advice to "just wear your regular hiking shoes" doesn't account for this.
The best approach: look for shoes with a women's-specific last (the form that shapes the shoe). Most good trail runners and hiking shoes come in women's versions now, shaped specifically for women's foot geometry. Brands like Salomon, La Sportiva, and Altra design women's shoes from the ground up instead of scaling down men's sizes. See our [shoe comparison by terrain](/gear/best-rucking-shoes-by-terrain) for the full breakdown.
For women ruckers specifically, look for: a firm midfoot (not mushy cushioning), moderate heel drop (8-10mm), good arch support, and a heel cup that doesn't slip. Your feet are getting impacted with extra weight, so stability matters more than maximum cushioning.
Top three women's rucking shoes:
For a full guide on shoe selection by terrain, see our [Best Rucking Shoes by Terrain](/gear/best-rucking-shoes-by-terrain) article.
---
## Accessories and apparel
**Sports bra.** This matters more for rucking than for regular walking because the loaded pack creates vertical bounce. You want high-impact support - the same level you'd wear for running. Look for encapsulation (cups that separate, not compress) and wide straps that won't slip inward under load. Brands like Freya, Panache, and Enell are built for high-impact activity and for larger cup sizes. Budget $60-90 for a quality bra.
**Socks.** Merino wool blend (80% merino, 20% nylon) is the standard. Merino regulates temperature, wicks moisture, resists odor, and has natural anti-blister properties. Cotton holds moisture and causes blisters under load - don't use it. Go for crew or mid-calf height to prevent chafe where the shoe collar sits. We recommend - they come with a lifetime warranty. Budget $20-27 per pair.
**Anti-chafe.** Rucking packs create friction where straps contact your shoulders, across your chest (sternum strap), and along your hip belt. In warm weather especially, this causes raw spots. Body Glide, 2Toms SportShield, or Squirrel's Nut Butter applied to these zones before you ruck prevents irritation. Some women also use a thin base layer shirt to reduce direct strap contact.
**Reflective gear.** Studies show women are statistically more likely to ruck during early morning or evening hours (before/after work, or for safety reasons). A reflective vest, clip-on lights, or reflective strips on your pack dramatically improve visibility. Even an inexpensive reflective running vest is genuinely useful.
---
## The women's starter kit
**Minimal budget ($40-60):** Use a backpack you already own, fill it with DIY weight (play sand in zip-lock bags), grab two pairs of , and get a high-support sports bra if you don't have one. That's everything you need to ruck hard for the first month.
**Mid-range budget ($125-175):** Put the money into pack fit first. Compare the women-specific with the roomier , then choose by torso length and strap placement rather than a fixed price. Add a dedicated , trail shoes, and the sock-and-bra combination as your training progresses.
────────────────────────────────────────────────────────────────────────────────
URL: https://ruckauthority.com/gear/best-rucking-shoes-by-terrain
Title: Best Rucking Shoes by Terrain: Pavement, Trail, Mixed
Description: Salomon XA Pro 3D V9 GTX is our one-shoe default. Bondi 9 or Adrenaline GTS 25 for pavement, Bushido III for rock, Quest 5 for heavy trail loads.
Published: 2026-03-10 / Updated: 2026-09-26
## Best Rucking Shoes by Terrain
### Match the Shoe to the Terrain
If you want one shoe for mixed routes, start with the Salomon XA Pro 3D V9 GTX. If your routes are mostly one surface, the better pick changes: a road shoe for sidewalks, a grippier trail shoe for rock, a boot for heavy loads on rough ground.
We matched five rucking shoes to the terrain where each one makes the most sense. Traction, waterproofing, platform stability and fit all shift with where you ruck, and body weight and pack load matter as much as surface. Start with your terrain and load, then pick your shoe.
GORUCK's current footwear line covers four different jobs: Ballistic Trainers for gym crossover, Rough Runners for road mileage, Mackall 45 shoes for trails, and MACV-2 boots for rougher ground. Those entries are based on current manufacturer specifications, not Ruck Authority field testing. The two low-cut lines have separate men's and women's product pages.
And if you're weighing footwear for unloaded hiking, our sister site Kit Authority settles the [hiking boots vs trail runners](https://kitauthority.com/hike/hiking-boots-vs-trail-runners?utm_source=ruckauthority&utm_medium=crosslink) question without the pack weight variable.
### Quick picks
- **Best All-Around:** Salomon XA Pro 3D V9 GTX ($150-300)
- **Best Value:** Saucony Peregrine 16 ($150-300)
- **Best Technical Trail:** La Sportiva Bushido III ($150-300)
- **Best for Wide Feet:** Altra Lone Peak 9 Waterproof ($150-300)
- **Best Heavy Load:** Salomon Quest 5 GORE-TEX ($150-300)
### Budget and use-case tiers
- **Technical Trail & Mountain ($150-300):** Built for elevation, rock and uneven ground. Sticky rubber, a locked-down fit, and in the Quest 5's case a high-cut boot for heavy loads on rough terrain.
- **All-Terrain & Mixed Surface ($150-300):** Works on both pavement and trail. Best choice if your rucks move between road and dirt and you want one shoe that handles both well.
- **Trail Running Crossover ($150-300):** Lighter trail shoes that handle moderate loads and varied terrain without the bulk of a hiking boot. Good for ruckers who prioritize pace over max load.
- **Entry Level ($50-150):** Use what you have for your first 10 rucks. Any sturdy trail runner or hiking shoe will work. If rucking sticks, upgrade to something with dedicated load support.
### Where GORUCK Footwear Fits
GORUCK sells four footwear families for different routes and training days. These positions come from current manufacturer specifications, not new Ruck Authority field tests.
- **Ballistic Trainers:** The firm gym and short-ruck crossover. Start here when lifting stability matters as much as loaded walking.
- **Rough Runners:** The road-oriented option for longer pavement sessions. Men's and women's versions have separate product pages.
- **Mackall 45:** The lower-cut trail option for dirt, gravel, and mixed routes.
- **MACV-2:** The mid-height boot for rougher terrain and people who prefer more coverage. It is not the default choice for ordinary pavement miles.
Specs and availability may vary by retailer and version. Always confirm drop, weight, and waterproofing directly with the retailer before purchasing.
### What to look for in a rucking shoe
Rucking shoes are not running shoes. When you're moving 25-30 lbs at walking speed, your feet need a stable platform more than they need the rebound a runner is after.
- **A note on terrain categories:** The buckets in this guide are a starting heuristic, not a hard rule. Body weight and pack load drive shoe choice more than terrain does. A 190 lb person carrying 50 lbs on pavement stresses a shoe harder than a 140 lb rucker with a 20 lb pack on a rocky trail, and a supportive trail shoe is usually supportive on pavement too. If you're a seasoned rucker who already knows what works for your foot, weight, and typical load, trust that history over our category system. The terrain framing is most useful for first-time buyers who need a decision shortcut.
- **A stable platform:** The midsole, the foam between your foot and the ground, shouldn't let a loaded foot roll inward or outward. That's about geometry as much as softness: a wide, well-built max-cushion shoe like the Hoka Bondi 9 can feel steady on pavement, while a narrow, soft trainer can wobble under the same pack. Cushion level is a preference; stability under load isn't optional.
- **Heel-to-toe drop you're adapted to:** Drop is the height difference between the heel and forefoot. The picks here run from zero (Altra) to 12mm (Salomon Quest 5), and none of those numbers is correct for everyone. What matters is change: moving from a 10-12mm shoe to a low or zero-drop shoe shifts more work to your calves and Achilles, so make that switch at light loads and short distances first.
- **Supportive upper:** The upper is the part of the shoe that wraps your foot. Look for reinforced sidewalls and midfoot overlays that keep your foot centered on the platform under load. This matters more if you have flat or high arches.
- **Good traction for your terrain:** Pavement shoes need grip but not aggressive lugs. Trail shoes need deeper tread. Mixed-terrain shoes find a middle ground. Rubber compound matters as much as lug shape: a good outdoor compound grips wet rock better than cheap rubber with bigger lugs.
- **Comfortable at combined weight:** This one requires trying. Walk in the shoes with a loaded pack if the store allows it. At minimum, try them later in the day when your feet are slightly swollen, which is closer to how they'll be mid-ruck.
- **What to avoid:** Minimalist shoes (too little structure for most loaded walking), racing flats (no support), narrow soft trainers that roll under load, dress shoes or basketball shoes (wrong geometry), and anything that lets your heel lift.
### Pick by terrain and load: the 3 x 3 matrix
The right shoe depends on two variables: what surface you're on, and how heavy your pack is. Here are the nine common combinations, each mapped to a single named pick.
- **Pavement:** Under 20 lb: Hoka Bondi 9 for plush cushioning. 20-35 lb: Salomon XA Pro 3D V9 GTX, a waterproof daily driver with a firm chassis. 35+ lb: Brooks Adrenaline GTS 25, whose GuideRails support helps when load and pavement push your foot inward.
- **Mixed:** Under 20 lb: Hoka Transport 2, a walking-focused commuter for path and pavement crossover. 20-35 lb: Salomon XA Pro 3D V9 GTX again; the outsole bites enough dirt for fire roads. 35+ lb: Altra Lone Peak 9 Waterproof, whose wide toe box keeps the foot centered when a heavy load changes your stride.
- **Trail:** Under 20 lb: Saucony Peregrine 16, light and nimble for light-load trail rucks. 20-35 lb: La Sportiva Bushido III, with sticky rubber and a low, locked-down fit. 35+ lb: Salomon Quest 5 GORE-TEX, a high-cut backpacking boot for heavy mountain rucks.
The Salomon XA Pro 3D V9 GTX appears twice for a reason: it's the most versatile shoe in the catalog and the one most ruckers can wear day to day. The other picks nudge specific load and terrain combinations onto a better-fit option.
For road-only routes, compare the Hoka Bondi 9, Brooks Adrenaline GTS 25 and Hoka Transport 2 in our pavement guide. [Best Shoes for Rucking on Pavement](/gear/best-shoes-for-rucking-on-pavement)
### Best shoes for mixed terrain
- **Altra Lone Peak 9:** The non-waterproof version of the Lone Peak 9 Waterproof Low trades water protection for less weight and better breathability. The wide toe box, moderate cushioning and decent tread work on pavement and trail, and it's more capable off-road than a road shoe. The zero drop takes adjustment, and if you hit mud or water crossings regularly, the lack of a membrane gets old. Best for ruckers who split pavement and trail, want one shoe, and either have wide feet or want to try zero drop.
- **Saucony Excursion TR18:** The current version of Saucony's budget trail shoe sits between pavement and trail, with enough grip for dirt paths without feeling odd on concrete. Saucony lists an 8mm drop and 9.8 oz for the men's shoe, and there's a GORE-TEX version if you need one. It isn't optimized for either terrain, and a budget outsole won't match premium rubber for wear. Best for mixed-terrain beginners who want a simple shoe that works.
### Boots vs shoes for rucking
The military carries ruckers in boots. Modern rucking, fitness-focused rather than tactical, mostly happens in shoes.
If you specifically want the best rucking boots for beginners, start with a lightweight hiking boot or mid-height hiking shoe with a firm midsole, secure heel, and enough room for merino socks. Do not start with stiff combat boots unless you are training for a military requirement. Beginner ruckers need predictable support more than ankle armor.
For most beginners, a shoe like the Salomon XA Pro 3D is enough. If you want a true boot feel, the Salomon Quest 5 GORE-TEX is the heavier-load option already covered in this guide. Salomon lists it at a 12 mm drop and about 595 g per boot.
- **Where boots help:** Boots add coverage, a stiffer upper, and protection from rocks and debris. That can be useful for duty-specific training, rough terrain, cold or wet conditions, and heavier loads. A boot does not prevent every ankle injury, and a poor fit can create its own problems.
- **Where shoes help:** Shoes are lighter, usually breathe better, and are easier to wear for everyday training. They make sense for pavement, maintained trails, warm weather, and moderate loads when you do not need the coverage of a boot.
- **How to choose:** Start with the terrain and the footwear that fits your foot. Shoes work for many fitness rucks, including moderate loads. Boots become more useful as the terrain gets rougher, the weather gets colder or wetter, or the training must match duty footwear. Increase load gradually in either option.
For general fitness rucking on pavement or maintained trails, start with a stable shoe that fits well. Choose a boot when the route, weather, or training requirement gives you a specific reason to need one.
### How to fit shoes for rucking
- **Shop when your feet are swollen:** Your feet swell as the day goes on. Shopping in the afternoon or evening means the fit you get is closer to how they'll feel during an actual ruck.
- **Wear your rucking socks:** Thick merino socks change fit noticeably compared with thin cotton socks. Don't try shoes in thin socks and expect them to fit the same in thick ones.
- **Try them with a loaded pack if possible:** Some outdoor stores let you walk around outside. Take advantage. Load a pack with 15-20 lbs and walk for 10 minutes. It's the most honest fit check you can do before buying.
- **Size for your foot, not a formula:** Many people end up a half size above their casual shoe once thicker socks and swelling are accounted for, but sizing varies by model and foot shape, so there's no reliable universal half-size rule. Let the fit checks decide.
- **Check three fit points:** Thumb-width of space at the toe box (you should be able to fit your thumb between your longest toe and the shoe's end when standing). Heel shouldn't slip when you walk (try heel-toe walking to test). No lateral play: the shoe shouldn't roll your foot inward or outward.
### When to replace your rucking shoes
Loaded walking compresses midsoles faster than the same miles unloaded. Podiatrists commonly cite 300-500 miles for running and walking shoes, and body weight moves that number a lot. Add a pack and expect to land toward the low end.
- **Signs it's time to replace:** You can see midsole compression (the foam looks flattened or creased from the side). Tread is worn smooth in the heel or ball of the foot. You notice new aches, such as ankle instability, knee pain, or shin splints that didn't exist before. The shoe twists easily when you wring it from forefoot to heel.
- **How to calculate:** At 300-500 miles, a shoe lasts roughly 7-12 months if you ruck 10 miles per week, or about 3-6 months at 20 miles per week.
- **Rotation:** Alternating two pairs gives each one time to dry out between sessions and spreads the wear, which is useful if you ruck most days.
Pain that persists after a shoe change needs a clinician's assessment, not another pair of shoes.
The shoe you already own might be good enough. If you have a sturdy trail runner or hiking shoe with a firm sole and decent support, try rucking in it before buying something new. Most people overthink footwear and underthink socks, so get good merino wool socks first.
### Bottom line
Terrain and fit drive the decision more than price. Compare the La Sportiva Bushido III or Salomon Quest 5 for steeper trail use, the Salomon XA Pro for mixed surfaces, the Altra for a wide toe box and zero-drop preference, and the Saucony Peregrine for recreational trails. Recurring foot pain needs assessment rather than a shoe-only fix.
### Frequently asked questions
**Can you ruck in regular running shoes?**
Yes, especially on pavement with a light to moderate pack. What matters is a stable platform that doesn't let a loaded foot roll inward or outward. A wide, well-built road shoe can feel steady under a pack, while a narrow, soft trainer can wobble. For uneven trail or heavier loads, a firmer trail shoe or boot usually feels more secure.
**What heel drop is best for rucking?**
There isn't one correct drop. The picks here run from zero (Altra) to 12mm (Salomon Quest 5). What matters is the change from what you wear now: moving from a 10-12mm shoe to a low or zero-drop shoe shifts more work to your calves and Achilles, so make that switch at light loads and short distances first.
**Do you need waterproof shoes for rucking?**
Depends on your climate. GORE-TEX keeps feet dry but adds weight and reduces breathability. If you ruck year-round in wet conditions, waterproofing is worth the tradeoff. For dry climates, skip it and get better ventilation.
**How long do rucking shoes last?**
Podiatrists commonly cite 300-500 miles for running and walking shoes, and body weight moves that number a lot. Add a pack and expect to land toward the low end. Replace them when the midsole looks flattened, the tread is worn smooth, or new aches appear. Pain that persists after a shoe change needs a clinician's assessment.
## What to look for in a rucking shoe
Rucking shoes are not running shoes. When you're moving 25-30 lbs at walking speed, your feet need a stable platform more than they need the rebound a runner is after.
**A note on terrain categories.** The buckets in this guide are a starting heuristic, not a hard rule. Body weight and pack load drive shoe choice more than terrain does. A 190 lb person carrying 50 lbs on pavement stresses a shoe harder than a 140 lb rucker with a 20 lb pack on a rocky trail, and a supportive trail shoe is usually supportive on pavement too. If you're a seasoned rucker who already knows what works for your foot, weight, and typical load, trust that history over our category system. The terrain framing is most useful for first-time buyers who need a decision shortcut.
**A stable platform.** The midsole, the foam between your foot and the ground, shouldn't let a loaded foot roll inward or outward. That's about geometry as much as softness: a wide, well-built max-cushion shoe like the Hoka Bondi 9 can feel steady on pavement, while a narrow, soft trainer can wobble under the same pack. Cushion level is a preference; stability under load isn't optional.
**[Heel-to-toe drop](/glossary#heel-to-toe-drop) you're adapted to.** Drop is the height difference between the heel and forefoot. The picks here run from zero (Altra) to 12mm (Salomon Quest 5), and none of those numbers is correct for everyone. What matters is change: moving from a 10-12mm shoe to a low or zero-drop shoe shifts more work to your calves and Achilles, so make that switch at light loads and short distances first.
**Supportive upper.** The upper is the part of the shoe that wraps your foot. Look for reinforced sidewalls and midfoot overlays that keep your foot centered on the platform under load. This matters more if you have flat or high arches.
**Good traction for your terrain.** Pavement shoes need grip but not aggressive lugs. Trail shoes need deeper tread. Mixed-terrain shoes find a middle ground. Rubber compound matters as much as lug shape: a good outdoor compound grips wet rock better than cheap rubber with bigger lugs.
**Comfortable at combined weight.** This one requires trying. Walk in the shoes with a loaded pack if the store allows it. At minimum, try them later in the day when your feet are slightly swollen, which is closer to how they'll be mid-ruck.
**What to avoid:** Minimalist shoes (too little structure for most loaded walking), racing flats (no support), narrow soft trainers that roll under load, dress shoes or basketball shoes (wrong geometry), and anything that lets your heel lift.
---
## Default pick if you want one rucking shoe
If you don't know your terrain yet, buy the Salomon XA Pro 3D V9 GTX first. It isn't the softest pavement shoe or the most aggressive trail shoe, but it's the safest all-around choice for loaded walking: the chassis is firm, the heel locks down, and the outsole still works when a normal road shoe starts sliding.
## Pick by terrain and load - the 3 x 3 matrix
The right shoe depends on two variables: what surface you're on, and how heavy your pack is. The matrix below maps the nine common combinations to a single named pick - read across the row for your terrain, down the column for your load.
| | Under 20 lb | 20 - 35 lb | 35+ lb |
| --- | --- | --- | --- |
| **Pavement** | [Hoka Bondi 9](/gear/best-shoes-for-rucking-on-pavement) - plush cushioning for lighter road loads. | Salomon XA Pro 3D V9 GTX - daily driver, waterproof, firm chassis under load. | [Brooks Adrenaline GTS 25](/gear/best-shoes-for-rucking-on-pavement) - GuideRails support when load and pavement push your foot inward. |
| **Mixed** | [Hoka Transport 2](/gear/best-shoes-for-rucking-on-pavement) - walking-focused commuter for path and pavement crossover. | Salomon XA Pro 3D V9 GTX - the same shoe scales up here. Outsole bites enough dirt for fire roads. | Altra Lone Peak 9 Waterproof - wide toe box keeps the foot centered when a heavy load changes your stride. |
| **Trail** | Saucony Peregrine 16 - light and nimble for light-load trail rucks. | La Sportiva Bushido III - sticky rubber and a low, locked-down fit for real trail grip. | [Salomon Quest 5 GORE-TEX](/gear/best-rucking-boots-for-beginners-2026) - a high-cut backpacking boot for heavy mountain rucks. |
The Salomon XA Pro 3D V9 GTX appears in two cells for a reason - it's the most versatile shoe in the catalog and the one most ruckers can wear day to day. The other cells nudge specific load and terrain combinations onto a better-fit option.
## Best shoes for pavement rucking
**Salomon XA Pro 3D V9 GTX**
A trail shoe that's comfortable on roads. The chassis is firmer than most trail runners, the 11mm drop suits people coming from conventional trainers, and the tread grips concrete as well as dirt. At about 13 oz it's the heaviest of the low-cut picks, but it doesn't feel flimsy under a pack. The GORE-TEX membrane earns its weight in rain and wet grass.
What stands out: A secure heel and a platform that stays composed under load, in a shoe that also shrugs off rain.
The tradeoff: It sits in the premium tier, the narrow heel won't suit wider feet, and some owners report a stiff upper for the first several outings. In dry heat, the membrane runs warm.
Who it's best for: Ruckers who split time between pavement and light trail, want one reliable shoe, and have average-to-narrow feet. Also a good fit for heavier loads (25+ lbs) because the firm chassis resists collapsing.
Price tier: Premium
**Saucony Peregrine 16**
Positioned as a trail shoe, the Peregrine handles pavement better than its lugs suggest. The Peregrine 16 moved to a Vibram Megagrip outsole with shallower 4mm lugs, which makes it more at home on gravel roads and easy trail. The 4mm drop is lower than most of this list, so ease into it if you're coming from a 10-12mm shoe. Men's and women's versions are both available.
What stands out: Value. It combines a capable outsole and a secure upper without moving into the highest price tier. The fit is fairly accommodating, though sizing still needs checking against your foot shape.
The tradeoff: The upper doesn't wrap as tightly as some shoes, so dial in the lacing to prevent heel slip. The low drop won't suit everyone under a heavy pack.
Who it's best for: Budget-conscious ruckers, those with wider feet, and anyone splitting time between terrain types. A good starter shoe if you're trying rucking before committing to premium gear.
Price tier: Midrange
**Pavement-first alternatives**
If almost all of your miles are on sidewalks and roads, a road shoe is the better tool than either trail pick above. Our [pavement rucking shoe guide](/gear/best-shoes-for-rucking-on-pavement) compares the Hoka Bondi 9 (plush cushioning, regular, wide and extra-wide options), the Brooks Adrenaline GTS 25 (structured GuideRails support, 10mm drop) and the Hoka Transport 2 (a walking-focused commuter). Start there if dirt isn't part of your route.
---
## Best shoes for trail rucking
**La Sportiva Bushido III**
A purpose-built technical trail shoe. The platform is firm and low, the drop is 6mm, and La Sportiva's FriXion XT 2.0 outsole pairs 4mm lugs with a stickier compound in the center. The upper locks your midfoot down, which is what you want when a loaded pack tries to push your foot around on a side slope. This shoe climbs.
What stands out: Traction and foot control on steep, rocky terrain. Reviewers consistently praise its grip and precision, and La Sportiva offers a wide version.
The tradeoff: It isn't cheap, the standard fit is narrow, and the firm, low platform is more shoe than you need on maintained trails.
Who it's best for: Trail ruckers doing technical terrain, elevation gain, and rocky conditions.
Price tier: Premium trail shoe
**Altra Lone Peak 9 Waterproof Low**
Unique in the category: Altra uses a zero-drop platform, which takes adjustment but feels natural to many people. The wide, foot-shaped toe box lets your toes spread. The midsole is moderately cushioned and the tread is trail-ready without being aggressive. The waterproof membrane makes it heavier than the standard Lone Peak 9.
What stands out: The toe box. For [trail rucking](/guides/pavement-vs-trail-vs-treadmill), the extra width gives many people a stable, comfortable base that narrow shoes don't match, and people who get pressure on the sides of their feet in conventional shoes often like it.
The tradeoff: Zero drop asks more of your calves and Achilles than a conventional 8-12mm shoe. If that's new to you, start with short, lightly loaded walks and build up. Some people never get along with it.
Who it's best for: Trail ruckers who value toe room and comfort over aggressive traction, and people with wide feet. If you have existing heel or arch pain, such as [plantar fasciitis](/glossary#plantar-fasciitis), get a clinician's view before switching to zero drop.
Price tier: Premium trail shoe
**[Salomon Quest 5 GORE-TEX](/gear/best-rucking-boots-for-beginners-2026)**
This is the heavy-duty option: a high-cut backpacking boot for loaded trail rucking. The supportive chassis, leather-and-synthetic upper, GORE-TEX lining, and aggressive outsole are built for rough terrain. Salomon lists a 12 mm drop and 1 lb 5 oz (about 595 g) per boot, which makes it substantially more boot than trail runner.
What stands out: load support, weather protection, and a higher collar for rough, uneven terrain.
The tradeoff: At roughly 595 g per boot, it's heavy. It's also stiffer and bulkier than a trail shoe, and overkill for straightforward paths or lighter fitness rucks. Fit and break-in needs vary, so try it with the socks and load you plan to use.
Who it's best for: Heavier loads, technical terrain, and ruckers who want a backpacking boot rather than a trail shoe.
Price tier: Premium hiking boot
---
## Best shoes for mixed terrain
**Altra Lone Peak 9**
The non-waterproof version of the Lone Peak 9 Waterproof Low trades water protection for less weight and better breathability. It's the all-rounder for people who don't know their terrain in advance: the wide toe box, moderate cushioning, and decent tread work on pavement and trail. The zero drop takes adjustment.
What stands out: Versatility. It moves between surfaces without complaint, it's lighter than the waterproof version, and it's more capable off-road than a road shoe.
The tradeoff: The same zero-drop adaptation period. And if you hit mud or water crossings regularly, the lack of a membrane gets old.
Who it's best for: Ruckers who do 50/50 pavement and trail, want one shoe, and either have wide feet or want to try zero drop.
Price tier: Midrange
**Saucony Excursion TR18**
The current version of Saucony's budget trail shoe sits between pavement and trail. The tread is moderate, enough grip for dirt paths without feeling odd on concrete. Saucony lists an 8mm drop and 9.8 oz for the men's shoe, and there's a GORE-TEX version if you need one.
What stands out: It feels neutral across surfaces and costs less than the premium picks.
The tradeoff: It isn't optimized for either terrain, so technical-trail ruckers will want more grip and pavement-focused ruckers may prefer a road shoe. A budget outsole won't match premium rubber for wear.
Who it's best for: Mixed-terrain ruckers, beginners who don't know their preference yet, and anyone wanting a simple shoe that just works.
Price tier: Budget to midrange
---
## Boots vs shoes for rucking
The military carries ruckers in boots. Modern rucking - fitness-focused, not tactical - mostly happens in shoes. This isn't a limitation; it's an evolution.
If you specifically want the best rucking boots for beginners, start with a lightweight hiking boot or mid-height hiking shoe with a firm midsole, secure heel, and enough room for merino socks. Do not start with stiff combat boots unless you are training for a military requirement. Beginner ruckers need predictable support more than ankle armor.
| Beginner boot type | Best for | Avoid if |
| --- | --- | --- |
| Mid-height hiking shoe | First rucks on trail, mixed terrain, ankle confidence | You need maximum breathability |
| Lightweight hiking boot | Wet trails, colder weather, 25-35 lb packs | You mostly ruck pavement |
| Heavy leather boot | Military prep, rough terrain, 40+ lb loads | You are new to rucking |
| Tactical boot | Duty-specific training | You only need fitness rucking |
For most beginners, a shoe like the Salomon XA Pro 3D is enough. If you want a true boot feel, the Salomon Quest 5 GORE-TEX is the heavier-load option already covered in this guide.
**Where boots help:** Boots add coverage, a stiffer upper, and protection from rocks and debris. That can be useful for duty-specific training, rough terrain, cold or wet conditions, and heavier loads. A boot does not prevent every ankle injury, and a poor fit can create its own problems.
**Where shoes help:** Shoes are lighter, usually breathe better, and are easier to wear for everyday training. They make sense for pavement, maintained trails, warm weather, and moderate loads when you do not need the coverage of a boot.
**How to choose:** Start with the terrain and the footwear that fits your foot. Shoes work for many fitness rucks, including moderate loads. Boots become more useful as the terrain gets rougher, the weather gets colder or wetter, or the training must match duty footwear. Increase load gradually in either option.
For general fitness rucking on pavement or maintained trails, start with a stable shoe that fits well. Choose a boot when the route, weather, or training requirement gives you a specific reason to need one.
---
## How to fit shoes for rucking
**Shop when your feet are swollen.** Your feet swell as the day goes on. Shopping in the afternoon or evening means the fit you get is closer to how they'll feel during an actual ruck.
**Wear your rucking socks.** Thick merino socks change fit noticeably compared with thin cotton socks. Don't try shoes in thin socks and expect them to fit the same in thick ones.
**Try them with a loaded pack if possible.** Some outdoor stores let you walk around outside. Take advantage. Load a pack with 15-20 lbs and walk for 10 minutes. It's the most honest fit check you can do before buying.
**Size for your foot, not a formula.** Many people end up a half size above their casual shoe once thicker socks and swelling are accounted for, but sizing varies by model and foot shape, so there's no reliable universal half-size rule. Let the fit checks below decide.
**Check three fit points:** Thumb-width of space at the toe box (you should be able to fit your thumb between your longest toe and the shoe's end when standing). Heel shouldn't slip when you walk (try heel-toe walking to test). No lateral play - the shoe shouldn't roll your foot inward or outward.
---
## When to replace your rucking shoes
Loaded walking compresses midsoles faster than the same miles unloaded. Podiatrists commonly cite 300-500 miles for running and walking shoes, and body weight moves that number a lot. Add a pack and expect to land toward the low end.
**Signs it's time to replace:** You can see midsole compression (the foam looks flattened or creased from the side). Tread is worn smooth in the heel or ball of the foot. You notice new aches - ankle instability, knee pain, or [shin splints](/glossary#shin-splints) that didn't exist before. The shoe twists easily when you wring it from forefoot to heel.
**How to calculate:** At 300-500 miles, a shoe lasts roughly 7-12 months if you ruck 10 miles per week, or about 3-6 months at 20 miles per week.
**Rotation:** Alternating two pairs gives each one time to dry out between sessions and spreads the wear, which is useful if you ruck most days.
Pain that persists after a shoe change needs a clinician's assessment, not another pair of shoes.
## Related reading
- [Best shoes for rucking on pavement](/gear/best-shoes-for-rucking-on-pavement) - road-specific picks (Hoka Bondi 9, Brooks Adrenaline GTS 25, Hoka Transport 2) for routes that stay on pavement
- [Best rucking socks: blister prevention under load](/gear/best-rucking-socks-blister-prevention) - merino wool picks and the two-sock system
- [Rucking foot care and blister prevention](/injuries/rucking-foot-care-blister-prevention) - preventing blisters before they start
- [Rucking plantar fasciitis](/injuries/rucking-plantar-fasciitis) - if you have existing heel or arch pain
────────────────────────────────────────────────────────────────────────────────
URL: https://ruckauthority.com/gear/best-rucking-socks-blister-prevention
Title: Best Rucking Socks (2026): Blister Prevention Under Load
Description: Our default rucking sock is the Darn Tough Light Hiker. Then match height, cushion, toe socks or a liner to where your blisters start. Six picks.
Published: 2026-04-18 / Updated: 2026-09-26
## Best Rucking Socks (2026): Blister Prevention Under Load
### How Merino Helps Prevent Blisters
Moisture and friction both contribute to blisters. Cotton tends to hold moisture, while merino blends can manage moisture and temperature across changing conditions. Fiber choice matters, but fit, shoes, distance, heat, and foot care matter too.
These picks include merino blends and synthetic socks, compared by fit, cushioning, durability, and owner feedback. No sock guarantees blister prevention, and the best option depends on where your own hot spots develop.
Scope note: these picks are tuned for loaded rucking miles. Hiking without a loaded pack? Our sister site Kit Authority's [hiking socks guide](https://kitauthority.com/hike/best-hiking-socks?utm_source=ruckauthority&utm_medium=crosslink) owns that lane.
### Quick picks
- **Best Overall:** Darn Tough Light Hiker Micro Crew ($25-50)
- **Best for Boots:** Darn Tough Hiker Boot Full Cushion ($25-50)
- **Alternative Default:** Smartwool Hike Full Cushion Crew ($25-50)
- **Best for Compression Fans:** Feetures Elite Max Cushion (Under $25)
- **Made in USA:** Swiftwick Pursuit Seven Crew (Under $25)
- **Best for Blister-Prone Feet:** Injinji Trail Midweight Toesock (Under $25)
### Budget and use-case tiers
- **The Daily Driver (Under $50):** Single-sock options for everyday training. Start with one pair to confirm fit before buying more for rotation.
- **Boot & Tall-Cuff (Under $50):** Over-the-ankle height for boot rucking, so the cuff sits above the boot collar. Choose full cushion if you want more padding under heavier loads, or the thinner Swiftwick if you run warm.
- **Toe-Sock & Two-Sock System (Under $50):** Toe-sock and two-sock options for people who develop friction between the toes or prefer a liner system. Results vary by fit and footwear.
### Comparison table
sock: Darn Tough Light Hiker; price: $25-50; merino: 43% merino blend; cushion: Light; height: Micro-crew; bestFor: Default daily driver for low shoes
sock: Darn Tough Hiker Boot; price: $25-50; merino: 66% merino blend; cushion: Full; height: Boot; bestFor: Boot rucking, heavier loads
sock: Smartwool Hike Crew; price: $25-50; merino: Merino-majority blend; cushion: Full; height: Crew; bestFor: Fuller cushion in a crew height
sock: Feetures Elite Max; price: Under $25; merino: Synthetic, no merino; cushion: Max; height: Mini-crew; bestFor: Runners, compression preference
sock: Swiftwick Pursuit Seven; price: Under $25; merino: 62% merino blend; cushion: Medium; height: 7" cuff; bestFor: USA-made, thinner cushion preference
sock: Injinji Trail Midweight; price: Under $25; merino: Synthetic, no merino; cushion: Medium; height: Crew; bestFor: Inter-toe blisters, two-sock systems
### What to Look For in a Rucking Sock
- **A merino or technical synthetic blend:** Pure merino wears through quickly, so good hiking socks blend it with nylon and elastane for durability. Our default pick is 43% merino; a higher percentage is not automatically better, and well-made synthetics also keep cotton's moisture problem off your feet.
- **Cushion at heel and ball of foot:** Concentrated cushion (not uniform across the sock) absorbs impact where it matters.
- **Reinforced toe and heel:** These wear first, so reinforcement there is where durability is won or lost.
- **Elastic arch support:** Keeps the sock from sliding inside the shoe. A sock that slips can create hot spots.
- **Appropriate height:** Crew for low shoes, over-ankle for boots. The cuff should sit a couple of inches above the top of the shoe.
- **Seamless or flat-seam toe:** Inverted toe seams cause blisters. Modern technical socks have moved past this; check the label.
### What to Avoid
- **Moisture-holding cotton blends:** Cotton can stay wet and increase friction for some people on longer walks. Test sock fit and fabric on a short route.
- **Ultra-thick socks:** Compress under load, lose cushion, pack out fast.
- **Tube socks:** No heel-ball orientation. Slide around inside the shoe.
- **Compression socks without arch support:** Designed for circulation, not for rucking. Fit poorly under load.
- **Novelty socks:** Fine for lounge. Not for miles under load.
### The Two-Sock System (For Events)
A thin liner under an outer sock can move some friction between the layers instead of against the skin. Some people prefer this on long events, while others find the extra layer too warm or tight. Test the full shoe-and-sock setup before an event; it does not eliminate every blister.
### Sock Care for Longevity
- **Wash cold, inside-out:** Preserves merino fibers and elastic.
- **Air dry:** Tumble drying breaks down elastic faster.
- **Rotate if useful:** Extra pairs allow drying between wet or sweaty sessions, but there is no fixed lifespan multiplier.
- **Replace when worn:** Flattened cushion, holes, slipping, or a changed fit are more useful signals than a universal mileage number.
- **Use the warranty:** Darn Tough's unconditional lifetime guarantee covers worn-out pairs. Check the current terms before you submit a claim.
### Bottom line
The Darn Tough Light Hiker is our general-purpose pick because it combines a 43% merino blend, light cushioning, and an unconditional lifetime guarantee. Confirm fit with one pair before buying more, and use your own hot-spot pattern to decide whether a different height, cushion, or toe design works better. Blisters that keep coming back, or foot pain that persists after a sock and shoe change, deserve a clinician's look.
### Frequently asked questions
**Can I wear regular athletic socks for rucking?**
Yes, if they fit well, stay in place, and manage moisture on your route. Cotton blends may stay wet longer for some people, but no fabric predicts exactly when a blister will form. Test the setup on a short ruck first.
**Are expensive merino socks actually worth it over cheap Amazon merino?**
Often, but the merino percentage is not the reason. Our default pick is 43% merino, and several good performers here are fully synthetic. What you pay for with Darn Tough and Smartwool is knit quality, reinforcement where socks wear first, a consistent fit, and in Darn Tough's case an unconditional lifetime guarantee. A cheaper sock that fits well and stays put can work fine; judge it on a short ruck before trusting it with long miles.
**Do I need toe socks or is that overkill?**
Toe socks are optional. They may help someone who repeatedly develops friction between the toes, but fit and comfort vary. Test them on a short route before relying on them for a long event.
**How often should I replace my rucking socks?**
Replace them when cushioning flattens, holes appear, elastic no longer holds, or the fit changes. Mileage varies with fabric, care, footwear, gait, and conditions.
**Can I wear sock liners without the outer sock?**
Most liners are designed to sit beneath an outer sock and may feel too thin alone. Follow the product's intended use and test the combination inside your shoes before a long ruck.
**What sock height is right for trail runners vs hiking boots?**
Trail runners (Saucony Peregrine, Salomon XA Pro, Hoka Speedgoat): crew or micro-crew (Darn Tough Light Hiker). Over-ankle hiking shoes (Merrell Moab Mid, Salomon X Ultra 4 Mid, KEEN Targhee): crew or over-ankle (Darn Tough Hiker Boot or Swiftwick Pursuit Seven). The cuff should sit a couple of inches above the top of the shoe to prevent sock-top rub.
**Will sock brand affect my shoe size?**
It can. A thick full-cushion sock takes up more room than a light one, so a shoe that fits in thin socks may feel snug in thick ones. Try shoes on with the socks you plan to ruck in, ideally later in the day when your feet have swollen a little. Sizing varies by model and foot shape, so there is no reliable universal half-size rule; let the fit decide.
**When should I see someone about blisters or foot pain?**
If blisters keep returning in the same spot despite changes to socks, shoes and lacing, or if foot pain persists, see a clinician such as a podiatrist or physical therapist. This guide is general information about gear, not medical advice.
────────────────────────────────────────────────────────────────────────────────
URL: https://ruckauthority.com/gear/best-shoes-for-rucking-on-pavement
Title: Best Shoes for Rucking on Pavement: 5 Picks for 2026
Description: Compare five pavement rucking shoes by cushion, support, width and wet-weather use. Find your fit in Hoka Bondi 9, Brooks Adrenaline GTS 25 or Transport 2.
Published: 2026-04-18 / Updated: 2026-09-14
## Best Shoes for Rucking on Pavement: 5 Picks for 2026
### Choose Pavement Shoes by Fit and Cushioning
For dry sidewalks and roads, start with the [Hoka Bondi 9](#hoka-bondi-9) if you like plush cushioning, or the [Brooks Adrenaline GTS 25](#brooks-adrenaline-gts-24) if you already prefer structured support. Both have width options. For a daily commute, compare the walking-focused [Hoka Transport 2](#hoka-transport).
The [Saucony Peregrine 16](#saucony-peregrine-16) and [Salomon XA Pro 3D V9 GTX](#salomon-xa-pro-3d-v9-gtx) earn their place when your route includes trails or wet ground. A trail outsole is not needed for every paved walk. If dirt makes up most of your route, use our [rucking shoes by terrain guide](/gear/best-rucking-shoes-by-terrain).
These are research-based selections, not a hands-on shoe test. Manufacturer specifications were checked September 10, 2026. Choose by foot shape, comfort and prior shoe experience; recurring pain needs individual assessment. Our [what is rucking](/guides/what-is-rucking-weighted-walking-explained) explainer covers the activity itself.
GORUCK's Rough Runner is its road-oriented option. The firmer Ballistic Trainer makes more sense when the same shoe also needs to handle lifting and gym work. We list the separate men's and women's product pages from current manufacturer specifications; neither line has a Ruck Authority field-test score yet.
Specs and width options: [HOKA Bondi 9](https://www.hoka.com/en/us/mens-everyday-running-shoes/bondi-9/1162011.html), [Brooks Adrenaline GTS 25](https://www.brooksrunning.com/en_us/mens/shoes/road-running-shoes/adrenaline-gts-25/110454.html), [Saucony Peregrine 16](https://www.saucony.com/en/peregrine-16/60848M.html), [Salomon XA Pro 3D V9 GTX](https://www.salomon.com/en-us/product/xa-pro-3d-v9-gore-tex-li3151/L47817500), and [HOKA Transport 2 specifications at REI](https://www.rei.com/product/C01697/hoka-transport-2-shoes-mens). Width and color stock varies by country and retailer. Weights below are published men's figures from manufacturers, except Transport 2, which uses REI's listing. They are not measurements from our own testing.
Walking the same pavement without a loaded pack? Our sister site Kit Authority's [walking shoes guide](https://kitauthority.com/fitness/best-walking-shoes?utm_source=ruckauthority&utm_medium=crosslink) is built for exactly that.
### Quick picks
- **Best Overall for Pavement:** Hoka Bondi 9 ($170)
- **Best Stability:** Brooks Adrenaline GTS 25 ($145)
- **Best Hybrid (Pavement + Light Trail):** Saucony Peregrine 16 ($150)
- **Best Tactical Crossover:** Salomon XA Pro 3D V9 GTX ($170)
- **Best for Commute Rucking:** Hoka Transport 2 ($155)
### Budget and use-case tiers
- **Cushion-First ($145–$170):** Cushion-first pavement options. Hoka emphasizes plush cushioning; Brooks adds structured GuideRails support.
- **Trail Crossover ($150–$170):** When pavement is only part of your route. Saucony has 4mm trail lugs; Salomon adds a waterproof membrane.
- **Lifestyle Crossover ($160):** Hoka cushion in a commuter silhouette. The pick for ruckers on daily commute routines who want a shoe that doesn't shout 'running shoe' on the train.
### Comparison table
shoe: Hoka Bondi 9; price: $170; drop: 5mm; weight: 10.5 oz; cushion: Max; bestFor: Pavement, max-cushion preference
shoe: Brooks Adrenaline GTS 25; price: $145; drop: 10mm; weight: 10.6 oz; cushion: Balanced; bestFor: Roads, structured-support preference
shoe: Saucony Peregrine 16; price: $150; drop: 4mm; weight: 9.5 oz; cushion: Firm; bestFor: Mixed terrain
shoe: Salomon XA Pro 3D V9 GTX; price: $170; drop: 11mm; weight: 13.0 oz; cushion: Firm; bestFor: Wet mixed terrain
shoe: Hoka Transport 2; price: $155; drop: 5mm; weight: 11.3 oz (REI); cushion: Balanced; bestFor: Urban / commute rucking
### Start with the Bondi 9 if you prefer plush road cushioning.
Compare regular, wide and extra-wide versions before buying. Choose Brooks for familiar structured support, Transport 2 for commuting, or a trail option when the route calls for it.
### Where GORUCK's Shoes Fit: Rough Runner, Ballistic Trainer, Mackall 45
The Rough Runner is GORUCK's road-mileage shoe. The Ballistic Trainer uses a firmer platform for training days that combine lifting with shorter loaded walks.
Both lines have separate men's and women's product pages. We include them as current options from the manufacturer catalog, not as field-tested winners.
The Mackall 45 is the GORUCK shoe most people are asking about now. It is not a pavement-first shoe: GORUCK launched it on August 26 as a low-cut mixed-terrain shoe with a pigskin nubuck suede upper, a 13 mm drop, a firm support platform and an aggressive triple-compound outsole, at $165. On paper that makes it the pick for ruckers whose routes leave the sidewalk for gravel, dirt and park paths, and a heavier, stiffer choice than the Bondi or Adrenaline for pure road miles. We have not field-tested it yet; a review unit is on the way and the first-look page below tracks what is confirmed versus what is still a launch claim.
How the Fog pair did on a loaded outing, and how I'd break them in: [My GORUCK Mackall 45 review](/gear/goruck-mackall-45-first-look)
### Best Shoes for Rucking on Pavement: Fast Answer
For pavement rucking, look for a walking or running shoe that fits securely and stays comfortable under your actual load. The Hoka Bondi 9 is our max-cushion pick, the Brooks Adrenaline GTS 25 is the stability option, and the Saucony Peregrine 16 suits routes that mix roads with gravel or park trails.
A hard, consistent surface makes shoe fit and cushioning easy to notice over distance. Avoid changing footwear style and training load at the same time; test new shoes on shorter, lighter walks first.
If your route is not mostly road or sidewalk, compare the terrain-specific picks instead. [Best rucking shoes by terrain](/gear/best-rucking-shoes-by-terrain)
### Decision Shortcuts
- **Mostly concrete sidewalks:** Compare the Hoka Bondi 9 if you prefer max cushion and do not need aggressive tread.
- **Already prefer stability shoes:** Compare the Brooks Adrenaline GTS 25. Do not use a shoe recommendation to self-diagnose gait or recurring pain.
- **Pavement plus park paths:** Compare Saucony Peregrine 16 when your route includes trail sections. Its 4mm lugs serve that terrain; dry sidewalks alone do not call for trail tread.
- **Rain, events, and all-weather routes:** Compare Salomon XA Pro 3D V9 GTX when you need a waterproof shoe for mixed terrain. Check the event route and requirements instead of assuming every event needs waterproof footwear.
### If Knee Pain Appears After Pavement Rucks
Knee pain can have many causes, and this guide cannot identify one from timing alone. Stop increasing the load or distance, and get individual assessment when pain recurs, changes gait, or limits normal activity.
- **Check shoe fit:** Compare heel hold, toe room, width, and comfort on an unloaded walk before blaming or replacing the cushioning.
- **Reduce training stress:** Return to the last load and distance that did not provoke symptoms rather than trying to finish a planned progression.
- **Get recurring pain assessed:** A clinician or physical therapist can evaluate the specific location, history, and movement pattern.
If knee pain is already recurring, use the injury guide before buying another shoe. [Rucking knee pain guide](/injuries/rucking-knee-pain)
### Rucker-Specific Fit Tips
- **Allow toe room:** Feet can swell during longer walks, especially in heat. Try shoes with the socks you plan to wear and use fit, not a universal half-size rule.
- **Wider toe box matters:** HOKA lists Bondi 9 in regular, wide and extra-wide; Brooks lists Adrenaline GTS 25 in narrow through extra-wide. Saucony offers a separate Peregrine 16 Wide. Width labels are not interchangeable across brands, so check toe room and heel hold with your usual socks.
- **Change one variable at a time:** If minimalist or zero-drop shoes are new to you, do not introduce them at the same time as added pack weight. There is no universal heel-to-toe drop for rucking.
- **Rotate if it helps:** A second pair can help shoes dry between wet or sweaty sessions, but it does not guarantee a specific increase in lifespan.
### Related Guides
Pair your shoes with a pack that matches your budget. [Best Rucking Backpacks Under $200](/gear/best-rucking-backpacks-under-150)
Foot care matters alongside shoe fit. [Rucking Foot Care & Blister Prevention](/injuries/rucking-foot-care-blister-prevention)
### Bottom line
The Hoka Bondi 9 is our max-cushion pavement pick. Compare the Brooks Adrenaline if you already prefer stability shoes, the Saucony Peregrine for mixed road and light trail, and the Salomon XA Pro for a heavier waterproof crossover. Fit on your foot matters more than the ranking.
### Frequently asked questions
**Can I use regular running shoes for rucking?**
Yes, if they fit securely and remain comfortable under your current load and route. Test them on a shorter, lighter walk first. Do not combine a major footwear change with a large increase in load or distance.
**Should rucking shoes be waterproof?**
Dry pavement alone does not call for waterproof shoes. The Salomon XA Pro 3D V9 GTX has a GORE-TEX membrane for wet routes; the standard Transport 2 has a water-repellent treatment, which is different from waterproof construction. Check the exact version and expected conditions, including an event's route requirements.
**What about zero-drop or barefoot shoes (Altra, Vibram)?**
They may suit people already adapted to them, but do not introduce zero-drop footwear and a new loaded-walking program at the same time. Test one change at a time and reduce load or distance if gait or symptoms change.
**How many miles before I replace my rucking shoes?**
There is no reliable rucking mileage for every shoe or person. Check outsole wear, midsole feel, upper damage, fit, and whether the shoe still feels stable and comfortable. Recurring pain needs assessment rather than an automatic shoe replacement.
**What if I ruck on concrete sidewalks, not asphalt roads?**
Use the same fit test and try the shoe on your actual route. A max-cushion model may feel better to some people on concrete, while others prefer a firmer platform. The surface alone does not identify the right shoe or insole.
**Are these shoes good for running too?**
The Brooks Adrenaline, Saucony Peregrine, and Hoka Bondi are running-shoe models; the Salomon XA Pro is a heavier trail crossover. Whether one pair works for both activities depends on fit, pace, terrain, and preference.
────────────────────────────────────────────────────────────────────────────────
URL: https://ruckauthority.com/gear/best-trekking-poles-for-rucking
Title: Best Trekking Poles for Rucking in 2026
Description: The 5 best trekking poles for rucking - why aluminum beats carbon fiber under load, and which poles are worth the weight across budget and premium tiers.
Published: 2026-03-28 / Updated: 2026-06-19
## 5 Poles Compared: Why Aluminum Beats Carbon Under Load
### When Trekking Poles Help
Most people think of trekking poles as optional hiking accessories. But when you're walking with 30+ pounds on your back, they become legitimate joint preservation tools. Research shows poles reduce knee joint stress by up to 22% on descents.
Poles aren't essential for every ruck. Flat road marches? Skip them. But hill rucks and heavy loads? They're nearly as important as good shoes. We researched aluminum and carbon options to find what actually holds up under rucking weight.
### Quick picks
- **Best Overall:** Leki Makalu Cork Lite ($170)
- **Best Budget:** Black Diamond Trail ($130)
- **Best Packable:** BD Distance Carbon Z ($240)
- **Best Compact Carbon:** REI Flash Carbon Compact ($189)
- **Budget Entry:** Cascade Mountain Tech ($52)
### Budget and use-case tiers
- **Budget ($52-$130):** Functional poles for testing whether poles work for your rucking style. Aluminum construction handles heavy loads.
- **Performance ($170-$240):** Premium materials, cork grips, lever-lock mechanisms, and the weight savings or durability that serious ruckers need.
### Aluminum vs. Carbon Fiber
Carbon fiber is lighter (10-15 oz per pair vs 17-20 oz for aluminum). But when you're pushing hard on a descent with a heavy pack, you're applying lateral force. Carbon under lateral stress snaps. Aluminum bends - which means you can often straighten it and keep going.
Our rule: aluminum for rucks over 25 lbs. Carbon if your load is under 20 lbs total or if packability is non-negotiable for multi-day missions. For most ruckers carrying 30-40 lbs, aluminum is the right choice.
### How to Size Poles for Rucking
Standard formula: Height x 0.68 = pole length. But adjust for your pack - a heavy rucksack shifts posture forward, so some ruckers go 1-2 inches shorter than the formula. Test with adjustable poles first. Too short means hunching, too long means shoulder fatigue.
### Tips and Terrain
Carbide tips bite into rock and roots - non-negotiable for trail rucking. Rubber tips are quieter on pavement but wear faster. On technical terrain requiring both hands, stow poles on your pack with carabiners. Adjust wrist straps so your hand sits lightly in the grip - the strap, not your grip, should support the pole's weight.
### Bottom line
If you're doing light, flat road rucks, poles are extra weight. If you're climbing hills with 30+ pounds, they're joint preservation. The Leki Makalu Cork Lite is the best overall - aluminum, cork grip, reliable lock. The Black Diamond Trail is the smart budget choice. Carbon poles (BD Distance Carbon Z, REI Flash Carbon Compact) are for loads under 25 lbs where packability matters. Start with the lower-priced Cascade Mountain Tech to test whether poles work for you before investing.
### Frequently asked questions
**Do I actually need trekking poles for rucking?**
For flat pavement rucks under 30 minutes, no. For hill rucks, heavy loads (30+ lbs), or multi-hour trail sessions, poles reduce knee stress by up to 22% and improve stability.
**Aluminum or carbon fiber?**
Aluminum for rucks over 25 lbs. Carbon snaps under lateral stress; aluminum bends. The extra 6 oz per pair is worth it for durability under heavy loads.
**How do I size poles for rucking?**
Height x 0.68 = pole length. Go 1-2 inches shorter than the formula if you carry heavy packs. Use adjustable poles and test for 15 minutes before your first ruck.
**Can I use hiking poles for rucking?**
Yes. Any quality trekking pole works for rucking. The main difference is load handling - choose aluminum for heavy rucks, and make sure the lock mechanism is reliable.
Trekking poles are optional on flat pavement. They become more useful on steep descents, uneven trails, and heavier rucks, where they add stability and share some of the work with your upper body.
Choose poles by terrain, load, durability, and how small they need to pack. Aluminum is heavier but more forgiving under lateral force. Carbon is lighter and easier to carry when the poles are not in use.
## Quick picks
| Pole | Price | Material | Weight (pair) | Collapsed | Best for |
|------|-------|----------|---------------|-----------|----------|
| **Leki Makalu Cork Lite** | $150-300 | Aluminum | 18 oz | 28" | All-around [rucking](/glossary#rucking), loads 25-40 lbs |
| **Black Diamond Trail** | $50-150 | Aluminum | 17.1 oz | 22" | Budget-conscious, durability priority |
| **Black Diamond Distance Carbon Z** | $150-300 | Carbon | 10.2 oz | 13" | Long rucks, packability obsessives |
| **REI Co-op Flash Carbon** | $150-300 | Carbon | 14.6 oz | 14.5" | Carbon quality on value budget |
| **Cascade Mountain Tech** | $50-150 | Carbon | 14.7 oz | 20" | First-time ruckers, flat terrain |
## Do poles actually help under load?
Yes, but with nuance.
Multiple studies find trekking poles reduce impact on your knees by up to 22% on descents - and when you're carrying a heavy load, that's significant. Your knees absorb roughly 1.5x your body weight with each step unloaded. Add 30 pounds and you're looking at forces your ligaments never evolved to handle repeatedly.
Poles also increase calorie burn by 5-10% (you're engaging more upper body muscles), improve stability on loose terrain, and reduce fatigue in your legs on long distances.
**When you DON'T need poles:** Flat pavement rucks under 30 minutes. Bodyweight-only training. Road marathons. If your route is predictable and level, poles are extra weight you don't need.
**When poles become essential:** Hill repeats, mountain terrain, anything over 35 lbs, trail rucks, and multi-hour sessions on uneven ground.
## Aluminum vs. carbon fiber: the material showdown
This is the decision that separates rucking-specific poles from generic hiking gear.
**Carbon fiber is lighter.** A pair of carbon poles weighs 10-15 oz. Aluminum pairs run 17-20 oz. For ultralight backpacking, that matters. For rucking under 35 lbs? You won't notice.
**But here's what matters: Load handling.**
When you're pushing hard on a descent with a heavy pack, you're applying lateral force to the pole - you're not just compressing them straight down. Carbon fiber under lateral stress snaps. Aluminum bends, which means you can often straighten it and keep going. We've seen ruckers blow out carbon poles on technical terrain, then spend $200 replacing them.
**Our rule:** Aluminum for rucks over 25 lbs. Carbon if you're doing lightweight trail work under 20 lbs total pack weight, or if packability is non-negotiable (like multi-day missions where every ounce matters).
For most ruckers carrying 30-40 lbs, aluminum is the right choice. The extra 6 ounces per pair is an investment in durability.
## The poles worth your money
**Leki Makalu Cork Lite - Best Overall ($150-300)**
The Leki Makalu has become the standard for serious ruckers because it was literally designed for mountain guides carrying heavy loads. The cork grip doesn't fatigue your hand on long sessions, and the Speed Lock+ lever-lock mechanism is intuitive and reliable under load. This is the pick if you're doing hill rucks regularly with 25+ lbs.
**Black Diamond Trail - Best Budget ($50-150)**
These aluminum workhorses usually cost less than the Leki. The FlickLock mechanism is slightly less smooth than Leki's lever system, but it's more than adequate, and the carbide tips grip terrain without wearing down quickly. If you're doing mixed terrain rucks on a budget, this is the move.
**Black Diamond Distance Carbon Z - Best Packable ($150-300)**
At 10.2 oz per pair and collapsing to just 13 inches, these are genuinely impressive for packability. The high-modulus carbon is legitimate quality, not sketchy budget carbon. These work for rucking if your load is under 25 lbs - they're really designed for ultralight backpacking, but the packability is genuinely useful if you're doing multi-day events where you'll stow poles sometimes and deploy them for tough terrain.
**REI Co-op Flash Carbon - Best Value Carbon ($150-300)**
REI's house brand offers legitimate carbon pole quality without the Black Diamond or Leki markup. At 14.6 oz per pair they're slightly heavier than the Distance Carbon Z but notably cheaper, and REI's 60-day return policy is genuinely useful if these don't feel right. These hit a sweet spot for ruckers who want carbon's weight savings but don't want to risk a heavy-load failure.
**Cascade Mountain Tech - Best Budget Entry ($50-150)**
In the $50-150 tier, these are a lower-cost way to try poles on light trail rucks. The quick-lock mechanism is plastic and will eventually wear, so don't expect them to last five years of heavy use. But as an experiment before buying premium poles? Smart play.
## How to size poles for rucking
Standard hiking pole sizing: Height × 0.68 = pole length.
If you're 5'10" (70 inches), that's 47.6 inches - round to 48" or look for adjustable poles (all modern poles are adjustable).
**But adjust for your pack:**
A heavy [rucksack](/glossary#rucksack) shifts your posture forward slightly. Your arms work harder. Some ruckers go 1-2 inches shorter than the standard formula to reduce strain. Test with adjustable poles first - you'll quickly find your sweet spot.
Also: If your poles are too short, you'll end up hunching. Too long and your shoulders fatigue. Spend 15 minutes adjusting before your first ruck.
## Tips and terrain
**Carbide vs. rubber tips:** Carbide (hard metal points) bite into rock and roots. Rubber barely grabs. For [trail rucking](/guides/pavement-vs-trail-vs-treadmill), carbide is non-negotiable. For pavement, rubber is quieter but wears faster. Consider replacement tip sets - they're cheap insurance.
**Stowing poles:** On technical terrain that requires both hands, clip poles to your pack using carabiners or trekking pole sleeves. On easier sections, use them. Don't be a hero trying to navigate a scramble with poles in hand.
**Wrist straps:** Adjust them so your hand sits lightly in the grip. Tight straps = hand fatigue. Your wrist strap, not your grip, should support the pole's weight.
## Related articles
Poles are part of a bigger picture. Check out our guides on [best rucking shoes by terrain](/gear/best-rucking-shoes-by-terrain) for footwear pairing, [rucking knee pain](/injuries/rucking-knee-pain) for joint health, and [hill ruck training](/training/hill-ruck-training) for how to use poles in structured workouts. Shopping poles for unloaded hiking instead? Our sister site Kit Authority's [trekking pole guide](https://kitauthority.com/hike/best-trekking-poles?utm_source=ruckauthority&utm_medium=crosslink) covers that use case.
## Bottom line
If you're doing light, flat road rucks, poles are extra weight. If you're climbing hills with 30+ pounds, they're joint preservation. Pick aluminum for durability, carbon only if your load is light and packability is critical. Start with poles in training - your knees (and future self) will thank you.
────────────────────────────────────────────────────────────────────────────────
URL: https://ruckauthority.com/gear/best-weighted-backpacks-for-rucking
Title: Best Weighted Backpacks for Rucking in 2026
Description: Compare four rucking backpacks for dedicated plate training, beginner loads, extra cargo, and everyday organization.
Published: 2026-05-13 / Updated: 2026-08-25
## Best Weighted Backpacks for Rucking in 2026
### Weighted Backpacks Have Cargo Space
A weighted backpack carries useful cargo along with the training load. A dedicated rucking pack uses a plate pocket; a general-purpose pack requires the weight to be restrained inside the main compartment. This guide is the weighted-backpack slice of our main [rucking backpacks](/gear/best-rucking-backpacks) roundup.
The current shortlist covers four different needs. The GORUCK Rucker 5.0 is built around regular plate-loaded training, while the smaller Basic Rucker is the less expensive entry to the same plate system. The 5.11 RUSH 24 gives you more cargo room in a lower price band. The GORUCK GR1 adds a clamshell opening and laptop compartment for people who also need the pack for work or travel. In either general-purpose pack, verify the exact weight dimensions and retention setup before use.
The Polyfit Rucking Backpack 2.0 and PL8 prioritize plate carry and leave less room for cargo than the four packs here. Check their exact capacity and hydration setup before treating either as a general-purpose backpack. We cover both in the plate-carrier guide.
### Quick picks
- **Dedicated training:** GORUCK Rucker 5.0 ($150-300)
- **Beginner GORUCK:** GORUCK Basic Rucker ($150-300)
- **More cargo for less:** 5.11 Tactical RUSH 24 ($50-150)
- **Work and travel:** GORUCK GR1 26L ($300-500)
### Budget and use-case tiers
- **Dedicated Rucking Pack ($150-300):** The Rucker 5.0 is built around training: dual elevated plate pockets, a 1000D Cordura primary shell, four carry handles, and a SCARS lifetime guarantee. It gives up laptop storage and some everyday organization to stay focused on loaded miles and PT.
- **Beginner GORUCK ($150-300):** The Basic Rucker comes in 14L and 17L sizes and carries a 10, 20, or 30 lb GORUCK plate in an elevated pocket. Its lighter 420D Robic body and lower load ceiling are the main tradeoffs against the full Rucker.
- **Cargo-First Tactical Packs ($50-150):** The 37L RUSH 24 has MOLLE, a sternum strap, and a hydration sleeve. It does not have a dedicated elevated plate pocket, so verify the exact weight dimensions and secure the load high against the back panel.
- **Work and Travel GORUCK ($300-500):** The GR1 26L has a 1000D Cordura primary shell, a clamshell opening, a padded laptop compartment, and an internal elastic pocket. It does not use the Rucker's dual elevated plate pockets, so verify the exact plate and pocket dimensions before training.
### Comparison table
product: GORUCK Rucker 5.0; price: $150-300; cargo: 20 / 25 L; plateSetup: Two elevated GORUCK plate pockets - up to 75 lb combined; bestFor: Regular rucking and event training
product: GORUCK Basic Rucker; price: $150-300; cargo: 14 / 17 L; plateSetup: One elevated GORUCK plate pocket - 30 lb ceiling; bestFor: Lighter beginner loads
product: 5.11 RUSH 24; price: $50-150; cargo: 37 L; plateSetup: Compatible flat plate secured in main compartment; verify dimensions; bestFor: Cargo space on a lower budget
product: GORUCK GR1 26L; price: $300-500; cargo: 26 L; plateSetup: Internal elastic pocket; verify exact plate fit and retention; bestFor: Rucking, work, and travel
### What Counts as a Weighted Backpack (and What Doesn't)
- **Weighted backpack:** A backpack that carries useful cargo along with a secured training load. Dedicated rucking packs use a plate pocket; general-purpose packs require the weight to be restrained inside the main compartment.
- **Plate carrier:** A harness that prioritizes close plate carry instead of general cargo space. The GORUCK Ruck Plate Carrier 3.0 and 5.11 TacTec are examples. The Polyfit Rucking Backpack 2.0 and PL8 also prioritize the load over everyday storage.
- **Generic tactical pack:** A sturdy backpack can work for a trial, but a loose plate may sit lower or shift. Secure the weight close to the back panel before walking.
If you want plate-only carriers (no cargo) instead, see the dedicated guide. [Best plate-carrier-style weighted vests](/gear/best-plate-carrier-weight-vests-for-rucking-military-style-t)
### GORUCK Plate vs 10x12 Plate Compatibility
GORUCK Rucker pockets are sized around GORUCK Standard and Long Ruck Plates. Pocket dimensions and accepted weights vary by pack and pocket, so confirm the exact combination before ordering. The 5.11 RUSH 24 and GORUCK GR1 do not use the Rucker's elevated plate-pocket system; verify the exact weight and pocket dimensions, then secure the load high against the back panel.
- **GORUCK ecosystem:** The Rucker 5.0 short pocket accepts 10, 20, or 30 lb Standard plates. Its long pocket accepts 30 or 45 lb Long plates and also holds Standard plates; combined published capacity is 75 lb. The Basic Rucker accepts compatible Standard plates up to 30 lb.
- **General-purpose packs:** The RUSH 24 and GR1 can carry training weight, but neither guarantees that every plate fits its internal pocket or main compartment. Confirm the exact dimensions and decide how you will prevent the load from sliding before use.
### How to Build the Setup
1. **Start with a manageable load.:** Ten to 15 pounds is a manageable starting range for many new ruckers. Add weight only after the current load and usual distance feel comfortable.
2. **Match the plate to the pack.:** Check the compatibility matrix before buying a plate. For a general-purpose pack, confirm both the dimensions and how you will keep the weight from moving.
3. **Plan for hydration.:** Plan where the water will go before buying. A bottle may work for a short walk; longer sessions may call for a compatible bladder when the pack supports one.
### Weighted Backpack vs Other Carry Options
- **Need cargo:** Choose a weighted backpack when you need water, layers, or food alongside the training load.
- **Plate-only setup:** Choose a plate carrier when you want the load close to the body and do not need cargo.
- **Movement-heavy workout:** Choose an integrated weighted vest when freedom of movement matters more than storage.
- **Event preparation:** Choose a pack that matches the event rules and has room for the required hydration and gear.
### Care and Maintenance
- **Dry it out:** Pull the plate after sweaty sessions and let the pack dry fully before storage.
- **Inspect load points:** Check shoulder strap attachment points, plate-pocket seams, buckles, and zippers for fraying, distortion, or loose hardware.
- **Follow the care label:** Use the maker's cleaning instructions. GORUCK recommends hand washing its packs with mild soap and letting them air dry.
### Bottom line
The Rucker 5.0 is the training-first option when elevated plate pockets, PT handles, and room to progress matter most. The smaller Basic Rucker keeps one elevated GORUCK pocket and stops at a 30 lb plate. The 5.11 RUSH 24 offers more cargo space in a lower price band. The GR1 adds a laptop compartment and work-and-travel layout at a higher price. For the RUSH 24 or GR1, verify the exact weight dimensions and secure the load yourself. If you do not need cargo, use the plate-carrier guide instead.
### Frequently asked questions
**What is the difference between a weighted backpack and a plate carrier?**
A weighted backpack carries useful cargo along with a secured training load. A plate carrier prioritizes close plate carry and has much less room for water, food, or layers. Choose based on what the session requires rather than an arbitrary time cutoff.
**Can I use a regular backpack for rucking?**
Yes. A sturdy backpack can work for a trial, but a loose plate may sit lower or shift. Secure the weight close to the back panel, start light, and check the pack for damage before each walk. A dedicated rucker becomes useful when you want an elevated plate pocket and more stable carry.
**Will a GORUCK plate fit a 5.11 RUSH 24?**
A GORUCK plate may physically fit inside the RUSH 24, but the pack has no dedicated GORUCK plate pocket. The GR1 also lacks the Rucker's elevated plate-pocket system. For either general-purpose pack, verify the exact plate and pocket dimensions and secure the load high against the back panel. For the Rucker 5.0 or Basic Rucker, match the plate to the exact pocket listed for that model.
**What plate weight should I start with?**
Ten to 15 pounds is a manageable starting range for many new ruckers. Add weight only after the current load and usual distance feel comfortable. The Basic Rucker accepts compatible plates up to 30 lb, while the Rucker 5.0 has a published combined pocket capacity of 75 lb. Those product limits are not recommended starting loads. In the RUSH 24 or GR1, the usable load also depends on fit, retention, and the condition of the pack.
**Is the 5.11 RUSH 24 really a credible alternative to a GORUCK?**
Yes, for readers who value cargo space and lower cost over a dedicated plate pocket. The RUSH 24 has 37L of room, MOLLE webbing, a sternum strap, a hydration sleeve, and a main compartment that can hold a compatible flat plate. The tradeoff is that you have to secure the plate yourself, it tends to ride lower than it does in a Rucker, and the warranty is different.
**What about the Polyfit Rucking Backpack 2.0 and PL8?**
The Polyfit Rucking Backpack 2.0 and PL8 prioritize plate carry and leave less room for cargo than the four packs here. Check their exact capacity and hydration setup before treating either as a general-purpose backpack. We cover both in the plate-carrier guide.
# Best Weighted Backpacks for Rucking in 2026
A weighted backpack carries water, snacks, and a layer along with the training load. Some are built around elevated plate pockets. Others are regular tactical packs that can carry weight only after it is secured inside the main compartment. That difference matters more than the number of exterior pockets.
GORUCK now has two clear training options: the 20L/25L Rucker 5.0 and the smaller 14L/17L Basic Rucker. The 5.11 RUSH 24 offers more cargo space in a lower price band. The GR1 adds a clamshell opening and laptop compartment for people who also need the pack for work or travel.
This guide compares those four approaches and explains what each one asks you to give up. Check the compatibility notes before buying any plate. A pack that can physically hold a plate is not automatically designed to restrain it during a ruck.
*Analysis is based on current manufacturer specifications and Ruck Authority's catalog review. Prices are shown in broad bands because they change.*
## Quick picks
**Dedicated training:** [GORUCK Rucker 5.0](/gear/goruck-rucker-5-0-review) - 20L or 25L, two elevated plate pockets, a 1000D Cordura primary shell, four carry handles, and a SCARS lifetime guarantee.
**Beginner GORUCK:** GORUCK Basic Rucker - 14L or 17L, an elevated plate pocket, a lighter 420D Robic body, and a 30 lb plate ceiling.
**More cargo:** 5.11 Tactical RUSH 24 - 37L of space, a hydration sleeve, MOLLE, and room to secure a compatible flat plate inside the main compartment.
**Work and travel crossover:** GORUCK GR1 26L - 1000D Cordura primary shell, clamshell access, a padded laptop compartment, and an internal elastic pocket. Verify the exact plate and pocket dimensions before using it for training weight.
## What "weighted backpack" actually means
The category has three definitions that get confused all the time. Sort them out before buying:
**Dedicated rucking backpack:** A pack with cargo space and a plate pocket designed to keep compatible weight high and close to the back. The two GORUCK picks below fit this definition.
**Plate carrier:** A harness designed to hold a plate (or plates) against the body with little or no room for general cargo. The GORUCK Ruck Plate Carrier 3.0 and the 5.11 TacTec are plate carriers. They suit workouts where cargo is not needed. Our [plate-carrier guide](/gear/best-plate-carrier-weight-vests-for-rucking-military-style-t) covers the format, and the [5.11 TacTec plate carrier review](/gear/5-11-tactical-tactec-plate-carrier) goes deeper on that model.
**General-purpose pack without an elevated plate pocket:** A pack such as the 5.11 RUSH 24 or GORUCK GR1. It can carry weight, but the exact plate and pocket dimensions need to be checked and the load must be restrained high against the back panel.
Choose a backpack when the session also requires water, food, or a layer. Choose a plate carrier when you want the load held tightly against the body and do not need cargo. A sturdy pack you already own is also a reasonable way to try rucking before buying dedicated gear, provided the weight is secured.
## Plate compatibility matrix
Plate fit is easy to get wrong. GORUCK uses Standard and Long Ruck Plate formats, and the accepted size and weight depend on the exact pocket. General-purpose packs do not have a dedicated plate pocket at all. Confirm the plate dimensions, pocket dimensions, and retention method before ordering, then compare the [best ruck plates for GORUCK-style rucking](/gear/ruck-plate-comparison).
| Pack | Plate format | Max plate | Cargo capacity | Notes |
|---|---|---:|---:|---|
| GORUCK Rucker 5.0 | GORUCK Standard and Long Ruck Plates | 75 lb across two pockets | 20 / 25 L | Dual elevated pockets. 1000D Cordura primary shell. SCARS lifetime. |
| GORUCK Basic Rucker | GORUCK Standard 10 / 20 / 30 lb Ruck Plate | 30 lb | 14 / 17 L | One elevated pocket. 420D Robic body. SCARS lifetime. |
| 5.11 Tactical RUSH 24 | Compatible flat plate secured in main compartment | Depends on fit and secure carry | 37 L | No dedicated plate pocket. MOLLE, sternum strap, and hydration sleeve. |
| GORUCK GR1 26L | Internal elastic pocket; verify exact plate fit and retention | Depends on fit and secure carry | 26 L | No Rucker-style elevated plate pocket. Clamshell opening and laptop compartment. |
Do not assume every GORUCK plate fits every GORUCK pocket. The Rucker 5.0 has separate Standard and Long pockets, while the Basic Rucker is built for compatible Standard 10, 20, or 30 lb plates. For the RUSH 24 and GR1, verify the exact plate and pocket dimensions and decide how you will stop the weight from sliding before you walk with it.
## The picks
### GORUCK Rucker 5.0 - dedicated training pick
The Rucker 5.0 is GORUCK's current dedicated training pack. Its two elevated pockets keep compatible plates close to the upper back, and the 20L and 25L sizes leave room for water and a layer. It makes more sense for regular plate-loaded training than for work or laptop carry.
For ruckers, what matters:
- **Two elevated plate pockets.** The short pocket accepts 10, 20, or 30 lb Standard plates. The long pocket accepts 30 or 45 lb Long plates and also holds Standard plates. Combined published capacity is 75 lb.
- **1000D Cordura primary shell.** The skin-contact back panel and underside of the straps use smoother 210D HT Cordura.
- **Training hardware.** Four padded handles, a frame sheet, side MOLLE, drainage holes, and an included sternum strap support loaded carries and ground work.
- **20L / 25L sizing.** The 20L is the smaller general-training choice; the 25L adds cargo room and a longer body.
- **SCARS lifetime guarantee.** Coverage is a meaningful part of the higher price, subject to GORUCK's current terms.
Where it gives ground vs the Basic Rucker:
- **Higher price tier.** Both current GORUCK packs sit in the $150-300 band, but the Rucker 5.0 costs more than the Basic Rucker before plates.
- **Training-first layout.** There is no dedicated laptop compartment, and the organization is simpler than a work or travel pack.
- **More pack than many beginners need.** The second plate pocket and 75 lb capacity matter only if your training will use them.
Choose the Rucker 5.0 when rucking is already part of your week and you want one pack that can handle regular miles, heavier progression, and event-style PT.
### GORUCK Basic Rucker - smaller and simpler
The Basic Rucker is GORUCK's smaller, simpler training pack. It comes in 14L and 17L sizes, uses a lighter 420D Robic body, and carries a Standard 10, 20, or 30 lb Ruck Plate in one elevated pocket. Choose it when that 30 lb published limit and the smaller cargo capacity match your training.
What works:
- **Elevated plate pocket.** A compatible GORUCK plate sits high against the back instead of loose at the bottom of the pack.
- **20mm lumbar padding.** The Basic uses 20mm raised lumbar support; the Rucker 5.0 uses 30mm.
- **SCARS lifetime guarantee.** The pack carries the same published guarantee as other GORUCK-built gear, subject to the current policy.
- **Side bottle pockets, hydration port, internal D-ring, and reflective strip.** The essentials for normal training are present.
What's worth knowing:
- **Different materials and hardware.** The Basic uses a 420D Robic body and 840D bottom; the Rucker 5.0 uses a 1000D Cordura primary shell and adds four padded PT handles.
- **14L and 17L only.** Both sizes are compact. They leave less room for bulky layers, work gear, or multi-day travel.
- **30 lb plate ceiling.** Training beyond that requires the full Rucker, another compatible carrier, or a different load plan.
For first-time GORUCK buyers who expect to train at 30 lb or less, the Basic Rucker is the more direct starting point. Choose the Rucker 5.0 instead if you already know you need more cargo space or room for heavier plates.
### 5.11 Tactical RUSH 24 - cargo-first alternative
The RUSH 24 is a 37L tactical pack with room for training weight and the rest of the gear you need during the day. It has MOLLE, a sternum strap, and a hydration sleeve, but no dedicated plate pocket. A compatible flat plate must be padded and secured high against the back panel.
What works:
- **37L of cargo space.** It has far more room than either GORUCK training pack for work gear, layers, or travel.
- **Hydration support.** The sleeve and hose routing make longer sessions easier to set up.
- **MOLLE and a sternum strap.** The pack has useful attachment points and a way to stabilize the shoulder straps.
- **Lower price band.** It generally sits below the two dedicated GORUCK options, though prices change.
What gives ground vs the GORUCK picks:
- **No dedicated plate pocket.** The weight can ride lower or move unless you secure it yourself.
- **Less training-specific hardware.** It does not have the Rucker 5.0's elevated dual pockets or four padded PT handles.
- **Bulkier carry.** The extra space is useful, but a loosely packed 37L bag can feel less stable during loaded walking.
Choose the RUSH 24 when cargo space and price matter more than a dedicated plate system. A Rucker requires less improvised retention when the primary job is regular plate-loaded training.
### GORUCK GR1 26L - work and travel crossover
The GR1 26L is a work-and-travel pack with a 1000D Cordura primary shell, a clamshell opening, a padded laptop compartment, and an internal elastic pocket. It has enough structure for loaded walking, but it does not use the Rucker 5.0's dual elevated plate-pocket system.
What works:
- **26L of cargo space.** It sits between the compact Basic Rucker and the larger RUSH 24.
- **Clamshell opening.** The main compartment opens flat for packing and access.
- **Laptop compartment.** A separate padded compartment keeps work carry out of the main cargo area.
- **1000D Cordura primary shell.** The primary fabric matches the material class used on the Rucker 5.0 shell.
What gives ground:
- **No Rucker-style elevated plate pockets.** Verify the exact plate and pocket dimensions, then restrain the weight so it cannot slide.
- **Higher price band.** The GR1 sits above the RUSH 24 and both current Rucker models in this comparison's broad price bands.
- **Less training-specific hardware.** It lacks the Rucker 5.0's four padded carry handles and dual-pocket layout.
Choose the GR1 when the same bag needs to cover rucking, a laptop, work, and travel. Choose a dedicated Rucker when the plate system and PT handles matter more than everyday carry.
## How weighted backpacks compare to other rucking carry options
The carry formats solve different jobs. A general-purpose backpack carries cargo but requires you to secure the training weight. A dedicated Rucker adds elevated plate pockets. A plate carrier holds the load close to the body with little room for cargo.
- **Sessions where you need water and a layer:** weighted backpack
- **Training without cargo:** plate carrier
- **Mobility-heavy training, bodyweight circuits:** weighted vest
- **Organized [GORUCK events](https://www.goruck.com/collections/events):** weighted backpack with a hydration setup suited to the event and conditions
You do not need more than one format to start. Use a backpack when the session needs cargo, a plate carrier when it does not, and a vest when freedom of movement matters more than storage.
## Sizing and fit
Weighted backpack sizing differs from plate carrier sizing:
- **GORUCK Rucker 5.0:** 20L and 25L. Use GORUCK's belt test: the bottom of the pack should sit above the beltline for normal shoulder carry. The 25L has a longer body and more cargo room.
- **GORUCK Basic Rucker:** 14L and 17L. The smaller bodies suit shorter torsos and lighter loads; larger users should compare them against the Rucker 5.0 rather than assuming one size fits everyone.
- **5.11 Tactical RUSH 24:** 37L. Its larger body favors cargo room; secure any training weight high against the back panel before assessing fit.
- **GORUCK GR1 26L:** The 26L body is 20 inches tall. Verify the exact plate and internal-pocket dimensions before choosing training weight.
Before a longer ruck, take a short walk with a light, secured load. Stop if the plate shifts or the straps create a hot spot. The weight should stay close to the back instead of falling to the bottom of the bag.
## Building a progression
Weighted backpack progression follows the same rules as any other rucking format:
**Start with a manageable load.** Ten to 15 pounds is a reasonable range for many people who are new to rucking. Add weight only after the current load and distance feel comfortable.
**Match the plate to the pack.** Check the compatibility matrix before buying a plate. For a general-purpose pack, confirm both the dimensions and how you will keep the weight from moving.
**Watch total cumulative load.** Weighted backpack sessions add to the same training stress as your other loaded walks and strength work. Add volume or weight gradually rather than changing both at once.
**Plan for hydration.** A bottle may be enough for a short walk; longer sessions may call for a compatible bladder. Check the current hydration setup for the exact pack and size before buying.
## Care and maintenance
Sweat and trapped moisture can shorten the life of a pack. After a session:
- Pull the plate out and let the pack dry fully before stowing. Don't leave a wet pack in a gym bag overnight.
- Follow the maker's cleaning instructions. GORUCK recommends hand washing with mild soap and air drying its packs.
- Inspect the shoulder strap attachment points, plate-pocket seams, buckles, and zippers for fraying, distortion, or loose hardware.
- If you see fraying, a loose buckle, or damage around a load-bearing seam, stop using the pack with weight until it has been repaired or replaced.
The GORUCK SCARS lifetime guarantee is worth factoring into the comparison. It covers GORUCK-built gear under the company's current terms, which can reduce the risk of paying more up front. Read the policy before assuming a particular kind of damage will be repaired or replaced.
## Which weighted backpack should you choose?
Choose based on the job the pack needs to do:
- **GORUCK Rucker 5.0** is the dedicated training pick when you need two plate pockets, 20L or 25L of space, and room for heavier progression.
- **GORUCK Basic Rucker** is the smaller GORUCK entry for 30 lb-and-under training in a 14L or 17L pack.
- **5.11 Tactical RUSH 24** is the cargo-first option when you are willing to secure compatible weight inside the main compartment.
- **GORUCK GR1 26L** is the work-and-travel option for people who want a laptop compartment and can verify and secure their training weight.
Check the plate and retention setup before checkout. If you want a plate-only format instead of a backpack, our [plate-carrier guide](/gear/best-plate-carrier-weight-vests-for-rucking-military-style-t) covers the GORUCK Ruck Plate Carrier 3.0, 5.11 TacTec, and Condor Sentry.
────────────────────────────────────────────────────────────────────────────────
URL: https://ruckauthority.com/gear/best-weighted-vests-for-rucking-in-2026
Title: Best Weighted Vests for Rucking 2026: GORUCK, CAP Barbell & Hyperwear Compared
Description: Weighted vest for rucking? Compare GORUCK's three new vests against CAP Barbell, Hyperwear, RUNmax, Cross101, Mir, and plate-carrier picks by fit, comfort, durability, and value.
Published: 2026-04-18 / Updated: 2026-09-03
## Best Weighted Vests for Rucking in 2026
### Choose the Right Weighted-Vest Format
If you're searching for a weighted vest for rucking, the short answer is this: most beginners should start with an adjustable integrated vest like the CAP Barbell, while ruckers doing heavier or event-style training should look at plate carriers or a real rucksack. The right pick depends less on brand hype and more on load stability, heat, torso fit, and whether you need to carry water or gear.
Mainstream weighted-vest demand is up roughly 50% over the last 12 months according to Axios's reporting on the $27M U.S. weighted-vest market, fueled by women, bone-density training, and longevity audiences. The category has gotten bigger, and so has the spread between the right vest and the wrong one for rucking. A stretch-fit fitness vest is not the same product as a plate carrier, and neither is the same as a women's-cut walking vest.
This guide compares six integrated-weight vests and one plate carrier, separates the formats so you don't accidentally buy the wrong one, and points at the women's-fit and budget-Amazon picks worth tracking before they get full reviews. Plate carriers get their own dedicated comparison in our [plate-carrier guide](/gear/best-plate-carrier-weight-vests-for-rucking-military-style-t) - the 5.11 TacTec, GORUCK Ruck Plate Carrier 3.0, and Polyfit Rucking Backpack 2.0 are covered there in plate-carrier-specific depth. One scope note: this page covers rucking-specific vests. If you want a vest for plain walking or general fitness, our sister site Kit Authority's [walking-vest guide](https://kitauthority.com/fitness/best-weighted-vests-for-walking?utm_source=ruckauthority&utm_medium=crosslink) owns that question.
Methodology: every score is the Ruck Authority composite (30% Rucking Fit, 25% Community Reception, 25% Build Quality, 20% Value). We analyzed community feedback across Reddit fitness forums, r/rucking, Amazon reviews, GORUCK Tribe threads, and longevity-and-bone-density coverage at outlets like Fitt Insider, then weighted manufacturer specifications against community-reported failure modes.
Disclosure: Wolf Tactical pays Ruck Authority a higher commission on its own gear through Amazon's Creator Connections program, which is why it appears in this guide. We have not tested it - the specs below come from the manufacturer's listing, and each entry says so.
### Quick picks
- **Best for Rucking:** GORUCK Rucking Weighted Vest
- **Best Fixed-Weight:** GORUCK Achilles Weighted Vest
- **Best Women's Fit:** GORUCK Spy Ruck
- **Best Overall:** CAP Barbell Adjustable Weighted Vest
- **Best Low-Profile:** Hyperwear Hyper Vest PRO
- **Best Plate-Carrier Crossover:** 5.11 Tactical TacTec Plate Carrier
- **Best for Mobility:** Mir Short Weighted Vest
- **Best Heavy-Capacity Amazon Pick:** RUNmax Pro Weighted Vest
- **Best Beginner Budget:** Cross101 Adjustable Weighted Vest
### Budget and use-case tiers
- **Rucking-Specific Vests - GORUCK ($79-$195):** GORUCK's three vests, built by a rucking company rather than a fitness-equipment brand. The Rucking Weighted Vest is the one designed around the problem: curved plates with a cutout that keeps load off your diaphragm on long efforts. The Achilles is a sewn-in 20 lb for benchmark work, and the Spy Ruck is cut on a women's pattern. All carry the SCARS lifetime guarantee.
- **Integrated Vests - Premium ($150+):** Thin-profile vests with sewn-in weight pockets and fine-grained progression. Best for low-bounce running and crossover fitness use. Capacity is capped by size (the Hyper Vest PRO holds 20, 25, 30 or 40 lb in S, M, L or XL), so this is not where you progress to heavy loads.
- **Integrated Vests - Budget ($40-$100):** Adjustable sand-pocket and shot-bag vests with broad weight ranges. The category most ruckers actually buy. Bulkier than premium thin-profile vests but cover the 10-60 lb training spread cheaper than anything else in the article.
- **Plate Carriers ($60-$250):** Front-and-back plate carriers and plate-carrying rucks. Different format from integrated vests - load split front-to-back rather than around the trunk. Covered in depth in our dedicated plate carrier guide.
- **DIY / Bridge ($10-$25):** Repurpose a sturdy backpack with weight plates, sand bags, or water bottles. Fine as a 30-day trial before committing. Outgrown by anyone training consistently past month two.
### Comparison table
product: CAP Barbell Adjustable Weighted Vest; price: $50-150; rating: 7.7/10; profile: Adjustable weight pockets; bestFor: Everyday rucking, full progression
product: Hyperwear Hyper Vest PRO; price: $300-500; rating: 7.2/10; profile: Thin steel-packet; bestFor: Low-profile / running crossover
product: 5.11 Tactical TacTec Plate Carrier; price: $250; rating: 7.5/10; profile: Plate carrier; bestFor: Short heavy ruck training
product: Mir Short Weighted Vest; price: $99; rating: 7.0/10; profile: Short adjustable; bestFor: Mobility-heavy training
product: RUNmax Pro Weighted Vest; price: $37.43; rating: 7.0/10; profile: High-capacity adjustable; bestFor: Heavy-load Amazon pick
product: Cross101 Adjustable Weighted Vest; price: $64; rating: 6.8/10; profile: Basic adjustable; bestFor: Beginner / 30-day trial
### Vest Types: Integrated vs Plate Carrier
Weighted vests split into two structurally different products that get confused all the time. Buying the wrong one wastes money and trains the wrong thing.
Integrated-weight vests have weight sewn or packed into the vest body itself. Sand bags (CAP Barbell 40-80 lb, RUNmax, Cross101, Mir), steel-shot packets (CAP Barbell 20 lb), cast iron bars (CAP Barbell 100-150 lb), or small steel weights (Hyperwear Hyper Vest PRO). The weight wraps around your trunk in a torso-conforming shape. Adjustment happens by removing or adding the integrated weights, which means the vest gets lighter on the body but the format itself doesn't change. Best for everyday rucking, mobility-heavy training, and crossover use.
Plate carriers hold a separate plate (or plates) front-and-back. The plate is rigid - usually steel, foam-coated, or a dedicated ruck plate - and the carrier is essentially a harness sized to hold the plate against your chest and back. Adjustment happens by swapping plates. Best for short heavy training, GORUCK-style work, and anyone who wants the asymmetric-load shape that mimics a real pack.
For most ruckers starting out, an integrated vest is the right answer. Plate carriers add purchase complexity (plates sold separately, plate-to-carrier compatibility matters) and a higher floor on starting weight. We cover plate carriers separately in the dedicated plate-carrier guide for the readers who specifically want that format.
Plate carrier comparison with the GORUCK RPC 3.0, 5.11 TacTec, Polyfit Rucking Backpack 2.0, and Condor Sentry. [Best plate carrier-style vests for rucking](/gear/best-plate-carrier-weight-vests-for-rucking-military-style-t)
### When a Vest Beats a Pack
A weighted vest makes sense when you want load without cargo. Short neighborhood rucks, hill repeats, stair sessions, and bodyweight circuits all benefit from the closer center of gravity. The weight does not pull backward the way a pack can, and your hands stay free.
A rucksack still wins for long sessions, hot weather, and event training because it carries water, layers, food, and blister supplies. If your goal is GORUCK-style preparation, use a pack for most long work and a vest as a secondary tool. The vest is a complement to a pack, not a replacement.
There's also a heat trade-off worth knowing: integrated vests trap more body heat than packs in summer. The torso-wrapping shape that makes them better for load distribution is the same shape that makes them hotter in 85-degree direct sun. If most of your rucking happens in summer, a pack is going to be more comfortable than a vest at equivalent weight.
For the dedicated budget-vest deep dive, read the single-product review. [CAP Barbell Adjustable Weighted Vest review](/gear/cap-barbell-adjustable-weighted-vest)
### Women's-Fit Considerations
The weighted-vest category boomed in 2025 partly on women, bone-density, and longevity audiences - Fitt Insider tracked the trend toward women-specific vest design directly to ruck clubs, gym programming, and menopause-era bone-density training. Most of the vests in this article are unisex, but fit and chest accommodation differ. A few category notes:
Hyperwear ships a Hyper Vest FIT specifically for women's-cut sizing - shorter front panel, narrower shoulder spacing, lighter starting weight (5 lb default). Currently tracked-only in our catalog (full review pending) but worth searching for if the standard PRO sits wrong on a shorter torso.
GORUCK's Spy Ruck is the women's-cut vest in its lineup, designed by co-founder Emily McCarthy on a women's pattern rather than scaled down from the men's. It is now fully reviewed below. The detail that matters is the pair of sliding sternum straps: they adjust around the chest instead of across it, which is the specific failure that makes a unisex vest unwearable on many women.
Polyfit's Fortify and Warrior vests are unisex but the sizing skews smaller than the CAP Barbell. They're tracked-only right now (full reviews pending) but if budget-Amazon vests fit poorly, they're worth looking at as the next tier up.
Practical advice: regardless of brand, check the front panel length against your torso before loading. The vest should sit between mid-sternum and the bottom of the ribs - if it's pressing on the throat or rolling onto the belly, the panel is wrong for your frame. Most return policies cover unloaded fit testing if you ship plates separately.
### Budget Amazon Vests Under $100
If you're buying on Amazon under $100, the field narrows to three credible picks - CAP Barbell, RUNmax Pro, and Cross101 - plus a layer of generic re-brands that aren't worth scoring (Sportneer, ZELUS, generic adjustable vests). The credible three differ on weight range and adjustability granularity, not on fundamental quality.
CAP Barbell is the field leader on value - the line's 20-150 lb range covers what most ruckers will ever load, and the integrated weight pockets (steel shot on the 20 lb, sand bags on 40-80 lb, cast iron bars on 100-150 lb) sit closer to the torso than thicker plate-carrier-style vests. The trade-off is bulk: at full load it's a chunkier silhouette than the Hyperwear PRO.
RUNmax Pro is the heavy-capacity Amazon pick. The Pro line ships up to 60 lb in the standard configuration and reaches 140 lb in the heavy variant. It's the right pick if you know you want to progress past 40 lb and don't want to step up to plate carriers or stack multiple vests.
Cross101 is the beginner-budget pick. It's the cheapest credible vest in the article and it works fine for the first 30-90 days of training. Most regular users outgrow the comfort and the adjustability before the vest fails - it's a trial-then-upgrade product more than a long-term answer.
What to skip: any vest that doesn't disclose weight ranges (sloppy product listings on Amazon often hide whether the listed weight includes the bags or just the empty vest), any vest with reviews concentrated in the last 30 days (suggesting a re-brand or drop-ship), and any vest below $40 - the sand bags themselves cost more than that to produce honestly.
### Starting Weight and Progression
Vest training is harder on the cardiovascular system per pound than pack training because the weight is closer to the diaphragm. A reasonable starting load is 10 to 15 pounds, regardless of what you ruck with. Add 5 pounds every two to three weeks if everything feels good.
Total cumulative load matters. If you're already doing four heavy rucks a week, replacing one with vest work is fine; adding vest work on top of an unchanged ruck schedule is how nagging injuries show up. Treat the vest as a training mode that counts toward the same recovery budget as your pack sessions.
Medical clearance is worth flagging here: weighted-vest training adds static respiratory load that affects cardiovascular work differently than unloaded walking. If you're over 50, returning from injury, or have a heart history, get clearance before loading past 15 pounds.
### Bottom line
For everyday rucking, the CAP Barbell Adjustable is the honest Best Overall pick - its 20-150 lb range covers the full progression and its Ruck Authority Score (7.7) leads the field on value without sacrificing rucking fit. The Hyperwear Hyper Vest PRO is the low-profile specialist for lighter rucks and crossover use, but its size-dependent cap (20, 25, 30 or 40 lb for S, M, L or XL) and premium price rule it out as a universal pick. The 5.11 TacTec is the plate-carrier crossover for ruckers who specifically want the front-and-back load shape (and is covered in more depth in our plate-carrier guide). For mobility-heavy training, the Mir Short fits the gap. For heavier loads on an Amazon budget, RUNmax Pro pushes past where CAP Barbell tops out. Cross101 works as a beginner budget option but you'll likely outgrow it within three months. Women's-fit and budget-Amazon details are covered in the dedicated sections above.
### Frequently asked questions
**What's the best weighted vest for beginners?**
The CAP Barbell Adjustable Weighted Vest stands out for newcomers due to its affordable price point and gradual weight adjustment system. Community feedback shows it's comfortable for basic workouts and allows users to start light and progressively add weight as they build strength. The Cross101 is the cheaper alternative if budget is tight, but plan to upgrade within 90 days.
**Are expensive weighted vests worth the extra cost?**
Higher-end options like the Hyperwear Hyper Vest PRO offer superior weight distribution, premium materials, and better long-term durability. Reddit users report the investment pays off for frequent use in running and crossover applications, but budget models like the CAP Barbell or RUNmax provide solid value for ruck-specific training. The premium tier is mostly about thin profile and adjustment granularity, not raw rucking performance.
**Can I use a plate carrier instead of a weighted vest?**
Yes, but they train different things. A plate carrier loads front-and-back with the bulk of weight transferred through the shoulders - closer to how a real pack feels. An integrated vest wraps weight around the trunk evenly. For rucking carryover, plate carriers like the GORUCK Ruck Plate Carrier 3.0 or the 5.11 TacTec are arguably better; for everyday training and mobility, integrated vests are more practical. Our dedicated plate-carrier guide compares the four plate carriers we recommend.
**How do I choose the right weighted vest weight capacity?**
Start with 10-20% of your body weight maximum capacity. The CAP Barbell and RUNmax Pro offer higher weight limits for advanced users, while the Hyperwear PRO holds 20, 25, 30 or 40 lb depending on size (S, M, L or XL). Match the vest's ceiling to your expected training range over the next 12-18 months - buying a vest that caps where you'll be in three months means buying a second vest in six.
**What's a good weighted vest for women?**
GORUCK's Spy Ruck is our pick, and it is reviewed in full in this article: it is built on a women's pattern with dual sliding sternum straps that adjust around the chest rather than compressing it, and owners consistently report it staying put instead of bouncing. Weight is fixed per vest across 8, 12, and 16 lb versions, so buy the load you expect to train at. Hyperwear's Hyper Vest FIT is the other purpose-built women's option and remains tracked-only. For unisex picks that fit smaller frames well, the Mir Short Weighted Vest is the most accommodating on shorter torsos, and the CAP Barbell at its lighter weight settings works for most women starting out.
**Will a weighted vest help with bone density?**
Weighted vest walking is well-supported in the bone-density and menopause-era training literature - the 2025 Axios coverage of the category traces a big chunk of growth specifically to longevity and bone-density audiences. The protocol most commonly cited is 10-15% of body weight worn during walking sessions, with progression based on tolerance. Talk to a doctor before adding weight if you have an osteoporosis diagnosis, joint replacements, or cardiovascular history.
**Can weighted vests replace a rucking pack completely for training?**
Vests handle weight distribution better for short sessions but can't carry water, phone, or extra layers. For pure weight training they work great; longer rucks requiring gear storage still need a pack. Most serious ruckers use both - vest sessions for shorter intense training and pack sessions for longer distance work.
## GORUCK's vest lineup, and which one is actually for rucking
GORUCK spent a decade building rucksacks and only recently started building vests, and it now sells three of them. They are not variations on one product, and picking the wrong one is an expensive mistake.
The **Rucking Weighted Vest** is the one built for this sport. Its curved plates carry a cutout over the diaphragm, which sounds like a detail until you are an hour into a loaded walk and notice you are breathing normally. Owners rate it above the 5.11 plate carrier on comfort, and it carries the same SCARS lifetime guarantee as the packs. The catch is real: the vest ships empty at 1.5 lbs, the curved plates are a separate purchase, and a working 14 to 20 lb setup lands near the top of this roundup's price range rather than at the shelf price. Sizing also runs high on larger frames, and more than one owner has found the cummerbund velcro too short to cinch fully.
The **Achilles** is a fixed 20 lb vest for people whose training already lives at 20 lbs. For Murph prep, stair intervals, and benchmark work where the load should never be the variable, a sewn-in weight is a feature: nothing shifts, nothing rattles, and there is nothing to adjust before you start. It is also the wrong first vest for almost everyone, because you cannot start lighter and you cannot progress heavier. It carries the best rating in this roundup on the smallest sample, so treat that score as an early signal.
The **Spy Ruck** is cut on a women's pattern rather than sized down from a men's one, and the dual sliding sternum straps are the reason it works: they adjust around the chest instead of compressing it, which is the specific failure that makes women abandon unisex vests. It is the most accessible price here. Weight is fixed per vest across 8, 12, and 16 lb versions, so buy the load you expect to train at for the next few months rather than the lightest one.
If you are choosing between them: buy the Rucking Weighted Vest if you ruck and want the breathing room, the Achilles if 20 lbs is already your number, and the Spy Ruck if fit has been the thing stopping you.
────────────────────────────────────────────────────────────────────────────────
URL: https://ruckauthority.com/gear/budget-rucking-starter-kit
Title: A Complete Rucking Starter Kit for Under $50
Description: You don't need expensive gear to start rucking. Here's a complete kit for under $50 - researched and recommended for your first 30 days and beyond.
Published: 2026-03-10 / Updated: 2026-04-12
## Budget Rucking Starter Kit
### A Complete Starter Kit
You do not need perfect gear to start. Consistency matters more than equipment. Free start option: use any backpack you already own, fill it with books or water, and you're rucking. Budget starter kit (~$75–$150): entry-level pack, budget plate, and a pair of merino wool socks.
If you don't own a backpack, hit Goodwill or a thrift store and find one for $5–10. A bag of play sand costs $8. That is more than enough to get started and gives you everything needed for quality rucking sessions.
### Quick picks
- **Ultra-Budget Pack:** CONDOR 3-Day Assault Pack ($100–$120)
- **Best Budget Plate:** Yes4All Cast Iron Rucking Weight 20 lb ($35–$45)
- **Best Socks:** Darn Tough Light Hiker Micro Crew ($26–$28)
### Budget and use-case tiers
- **Start for Free ($0) ($0):** Use the backpack you already own. Fill a gallon zip-lock bag with play sand or dry rice, seal it double, and put it in the main compartment. 20 lbs of sand weighs 20 lbs, same effect as a plate. Wrap it in a t-shirt to pad sharp edges. Start here.
- **The Smart $60 Kit ($55–$75) ($55–$75):** Upgrade from sand to a real plate. The Yes4All Cast Iron plate is the best per-dollar spend in rucking gear. Add a pair of Darn Tough socks with their lifetime warranty. Combined with a pack you own, this is a complete working kit.
- **Dedicated Entry Kit ($90+) ($90–$120):** An ultra-budget option to try rucking with a dedicated pack. The Condor 3-Day fits plates and gear and holds up for initial training. Better alternatives for most ruckers: the 5.11 RUSH 12 or a used REI/Osprey hiking pack. Upgrade to a quality rucksack once rucking sticks.
### The Backpack
You don't need a tactical rucksack costing $300. Use what you have: a school backpack, work bag, old hiking daypack, or gym bag. Requirements are two shoulder straps, somewhat padded straps, and structural integrity (it shouldn't be falling apart).
- **Jansport or similar school backpack ($5–8 thrifted):** Surprisingly durable for rucking. Designed to carry heavy textbooks, so 20–25 lbs is no problem. Straps are padded and most have a chest strap. Not water-resistant, but fine for fitness rucking.
- **Old REI or hiking daypack ($5–10 thrifted):** These occasionally show up at Goodwill. If you find a 20–30L hiking pack from REI, Arc'teryx, or Osprey, you've found something built for real loads that will last years.
- **Amazon Basics 20L backpack:** Not luxurious, but has everything you need: padded straps, decent capacity, and a functional hip belt. Solid choice if you want to buy new at minimum cost.
- **5.11 RUSH 12 2.0:** A step up from ultra-budget options. Better construction, proper load panel, and comfortable straps. A simple and effective starter setup if you want to buy a dedicated rucking pack from day one.
For a detailed selection guide when you're ready to upgrade, see our backpack roundup. [Best Rucking Backpacks](/gear/best-rucking-backpacks)
### DIY Weight: What to Use Instead of a Plate
A ruck plate is a convenience, not a requirement. The most important factor is that the weight stays high and close to your back - not the brand of plate. Here are the best DIY weight options.
- **Play sand in zip-lock bags:** Buy a 50 lb bag at any hardware store for $5–8. Fill two gallon zip-lock bags to your target weight, double-seal them, wrap in an old t-shirt. 20 lbs of sand weighs exactly 20 lbs. Downside: it shifts more than a flat plate.
- **Dry rice or dry beans:** Same principle as sand, even cheaper if you already have it. Use a heavy-duty freezer bag and double-bag it. Works fine for regular training.
- **Textbooks or hardcovers:** A stack of hardcovers in a flat plastic container sits flush against your back and doesn't shift. Free if you have them. Library sale books work just as well.
- **Dumbbells wrapped in towels:** A 20 lb dumbbell wrapped in a folded towel fits into most packs. Awkward shape means it won't sit flat, but it works for shorter rucks. Better for figuring out your target weight than long-term training.
Once you've done 15–20 rucks and want something cleaner, that is the right time to consider the verified Yes4All 20 lb cast-iron plate. Until then, a securely packed flexible load gets the job done.
Compare exact plate options and pack fit before buying. [Compare Ruck Plates](/gear/ruck-plate-comparison)
### Hydration
Any reusable water bottle between 20–32 oz works. You don't need a specialized hydration pack yet. A Nalgene ($8), a metal bottle from your kitchen ($0), or a built-in hydration bladder if your pack has one are all fine.
Hydration rule: drink 12–16 oz every 30 minutes of rucking. For a one-hour ruck, you need 24–32 oz. A single bottle is enough. In hot weather, carry two or plan a refill stop. Cold weather: one bottle is plenty for a 45-minute ruck.
### What You Don't Need Yet
Beginners frequently overbuy before knowing if rucking will stick. Here's what to skip for the first month.
- **Ruck plate:** Sand-filled bags work identically for fitness purposes. Skip it until you've done 20 or more rucks. By then you'll know if rucking is your thing and whether a plate is worth the upgrade.
- **GPS watch:** Your phone with free Strava or MapMyRun has GPS accurate enough for rucking. Expensive watches add almost nothing for fitness rucking.
- **Special shoes:** Your current walking or hiking shoes are probably fine to start. Don't buy new shoes until you know your feet hurt in them after a ruck. One note: avoid overly soft running shoes if carrying 30+ lbs - they can feel unstable under load.
- **Compression gear, gloves, hydration packs, chest monitors:** All nice-to-haves after you've confirmed rucking is your thing. Every one of them is optional for the first month.
### When to Upgrade (and What to Upgrade First)
This setup is designed to get you started. If you stick with rucking, upgrading your pack and footwear will make a significant difference. When you're ready, here's the priority order.
- **1. Pack (once you're rucking regularly):** When your current bag starts feeling unstable or doesn't distribute weight well, upgrade to a purpose-built pack. A 5.11 RUSH 24 or women's-specific Osprey Tempest Velocity 20 is a good next step. This matters most for heavier loads and longer rucks.
- **2. Shoes (once you're rucking 3+ times per week):** If your current shoes cause foot pain, blisters, or ankle discomfort during rucks, upgrade to a proper trail runner or hiking shoe. Budget $120–160 for a quality pair.
- **3. Ruck plate (once you want structured weight):** A 20 or 30 lb ruck plate ($30–60) sits flatter and more securely than bags. It's a comfort and durability upgrade. Your rucks will work fine with DIY weight for as long as you want.
- **4. HR monitor or GPS watch (once you're training specifically):** Once you want to track heart rate zones or precise pace, invest in a watch or chest strap. Until then, your phone is enough.
For shoe recommendations once you're ready to upgrade footwear, see our full comparison. [Best Rucking Shoes by Terrain](/gear/best-rucking-shoes-by-terrain)
New to rucking? Start with the fundamentals. [Beginner's Guide to Rucking](/pillars/beginners-guide-to-rucking)
### Bottom line
Start with the pack you own and a securely sealed, padded load. The first useful upgrade is a quality pair of merino socks. When you've done enough rucks to justify dedicated weight, the verified Yes4All 20 lb plate gets you off DIY load without premium pricing, and the Condor 3-Day is one possible budget tactical pack.
### Frequently asked questions
**Can I ruck with any backpack?**
Yes. You need a pack that fits securely, has a waist or sternum strap to stabilize the load, and can hold 20–30 lbs without the seams giving out. Daypacks, hiking packs, and old military surplus bags all work. The main thing to avoid is shoulder bags or anything without a proper back panel.
**Do I need a ruck plate to start?**
No. Sand, dry rice, or a heavy book wrapped in a towel all work for your first several weeks. The advantage of a real plate is consistent weight, no shifting, and a flatter profile that rides closer to your back. But none of that matters until you've done enough rucks to know the activity will stick.
**What weight should I start with?**
10–15 lbs for the first two to four weeks. Your lower back, hips, and feet need time to adapt to loaded movement even if your cardio is already strong. The standard progression is 10% of body weight to start, then add weight every two to three weeks as it starts to feel manageable.
**How much do I need to spend to ruck?**
Nothing if you already own a sound backpack and can secure a household load safely. If you invest in one thing, start with quality socks. A dedicated 20 lb Yes4All plate plus socks is roughly a $60–80 upgrade; a dedicated pack can wait until you know you will train consistently.
## The complete kit
You can start rucking tomorrow for under $50. Here's the breakdown:
**Backpack:** One you already own (no added cost)
**Weight:** Play sand in gallon zip-lock bags ($8-12)
**Socks:** Two pairs of merino wool hiking socks ($15-20)
**Water bottle:** Reusable 20-32 oz bottle ($8-10)
**Total: $35-45**
If you don't own a backpack, hit Goodwill or a thrift store and find one for $5-10. That brings the total to under $50 and gives you everything needed for quality rucking sessions.
---
## The backpack
You don't need a tactical [rucksack](/glossary#rucksack) costing $300+. Not yet. Use what you have - a school backpack, work bag, old hiking daypack, or gym bag.
Requirements: Two shoulder straps (not a single sling), somewhat padded straps, and structural integrity (it shouldn't be falling apart). That's it.
Bonus features: A chest strap that distributes strap tension, a rigid back panel that keeps load centered, and 20+ liter capacity for water and small items.
If you're buying used, look for these specific options at thrift stores:
**Jansport or similar school backpack ($5-8):** These are surprisingly durable for rucking. They're designed to carry heavy textbooks, so 20-25 lbs is no problem. The straps are padded, and many have a chest strap. The only downside: they're not water-resistant, but that's fine for fitness rucking.
**Old REI or hiking daypack ($5-10):** These occasionally show up at Goodwill. If you find a 20-30L hiking daypack from REI, Arc'teryx, or Osprey, you've hit the jackpot. These are built for real loads and will last you years.
If you're buying new and watching budget, the Amazon Basics 20L backpack ($20-25) is actually decent. It's not luxurious, but it has everything you need: padded straps, decent capacity, and a [hip belt](/glossary#hip-belt) that functions.
For a detailed selection guide on picking the right pack for rucking, see our [Best GoRuck Alternatives](/gear/best-goruck-alternatives) guide.
---
## The weight
The best budget weight option is play sand in double-bagged gallon zip-lock bags. Here's why: it's cheap, adjustable, and safe.
**How to get it:** Head to any hardware store, Walmart, Home Depot, or similar. Buy a bag of play sand (50 lbs costs $4-5). Take it home.
**How to fill:** Use a bathroom scale to fill gallon zip-lock bags to your target weight. For a 20 lb ruck, that's two 10 lb bags (one gallon zip-lock holds about 15 lbs of sand compressed). For 30 lbs, use three 10 lb bags.
**Safety:** Double-bag every weight bag. Sand is fine, but if a bag tears, sand dumps everywhere. Double-bagging prevents this. Some people add duct tape along the seal for extra security - not necessary but doesn't hurt.
**Placement:** Wrap the bags in a towel (prevents sand dust and adds comfort). Place them high in your pack, centered against the back panel. This positioning keeps weight close to your spine and your center of gravity, which is how a loaded ruck should feel.
**The cost:** One small bag of play sand will cover months of progression because you only use part of it initially. Heavy-duty freezer bags are inexpensive, but double-bag each load and inspect the seams before every ruck.
**Alternative DIY weight:** Bricks you already own, wrapped in towels. They are less comfortable than sand but functional. Stack them high in the pack and immobilize them so they cannot jostle.
When you're ready to upgrade: sandbag filler kits ($15-20) provide a more structured shape and last longer, but they're not necessary to start.
---
## The socks
This is where we recommend NOT skimping, because bad socks cause blisters, and blisters are the #1 reason beginners quit rucking.
Merino wool blend socks (typically 80% merino, 20% nylon) are the standard. Here's why:
- **Moisture-wicking:** Merino pulls sweat away from your skin, keeping feet dry. Cotton holds moisture and creates friction - the enemy.
- **Temperature regulation:** Merino keeps feet comfortable from 40°F to 80°F+. It naturally regulates.
- **Blister resistance:** Merino fibers have anti-friction properties, reducing hot spots and blisters.
- **Durability:** Good merino socks last 100+ rucks. Cotton socks start thinning after 20 washes.
- **Odor resistance:** Merino naturally resists bacteria, so socks don't stink even after multiple wears between washes.
**Budget merino options:**
**[Darn Tough Light Hiker](/gear/best-rucking-socks-blister-prevention):** Made in Vermont with Darn Tough's published lifetime guarantee. This is the practical buy-once option.
**REI Co-op Merino ($15-18):** Quality is solid, sizing is true, and you have the option to return or exchange easily. Good alternative if you prefer to buy local or want to see them in person.
**Amazon Alvada or Merino Wool Socks ($12-15):** Chinese-made, hit-or-miss quality, but many people have great experiences. If you order a pair and they're comfortable, keep them. Warranty is limited, so this is more of a gamble, but the price is right.
**Never cotton.** Never.
**Quantity:** Buy two pairs so you can rotate. One pair is wet and drying while the other is clean and ready. This also means you always have dry socks, which improves comfort immensely.
**Fit:** Trail-weight or midweight socks (usually labeled "hiker" or "midweight"). Ultralight socks are meant for running, not rucking. Heavyweight socks (wool thickness 700+ grams per liter) are excessive for most people and make shoes fit tight.
---
## Hydration
Any reusable water bottle between 20-32 oz works. You don't need a specialized hydration pack yet.
**Options:**
**Nalgene:** A simple, durable bottle that works well in packs with a compatible side pocket.
**Metal bottle from your kitchen:** A stainless steel water bottle you already own is perfectly functional. Fill it and ruck.
**[Hydration bladder](/glossary#hydration-bladder) if you own one:** Some backpacks have built-in hydration reservoirs. If yours does, use it.
**Hydration rule:** Drink 12-16 oz every 30 minutes of rucking. For a one-hour ruck, you need 24-32 oz. A single water bottle is enough.
In hot weather, carry two bottles (or refill mid-ruck). In cold weather, one bottle might be too much if you're only going out for 45 minutes. Start with 20 oz and adjust based on your pace and climate.
---
## What you don't need yet
**[Ruck plate](/pillars/rucking-gear-guide):** A structured metal weight plate ($40-60) is nice but unnecessary. Your sand-filled bags work identically for fitness purposes. Skip it until you've done 20+ rucks. By then, you'll know if rucking is your thing and if a plate is worth the upgrade.
**GPS watch:** Your phone (with free Strava or MapMyRun app) has a GPS that's accurate enough. Expensive watches add almost nothing for fitness rucking. Skip it.
**Special shoes:** Your current walking or hiking shoes are probably fine to start. Don't buy new shoes until you know your feet hurt in them after a ruck. Most people overthink footwear. Get rucking first, then optimize shoes.
**Gloves, gaiters, hydration pack, chest heart rate monitor:** These are nice-to-haves after you've confirmed rucking is your thing. All are optional for the first month.
**Compression gear or rucking-specific clothing:** Unnecessary. Wear whatever you'd wear for a normal hike. The ruck will work fine.
---
## When to upgrade (and what to upgrade first)
You don't need to upgrade anything to be successful, but when you do, here's the priority order:
**First upgrade: Shoes** (once you're rucking 3+ times per week)
If your current shoes cause foot pain, blisters, or ankle discomfort during rucks, upgrade to a proper trail runner or hiking shoe. This is the single highest-impact upgrade for comfort. Budget: $120-160 for a quality pair.
**Second upgrade: Rucksack** (once you're rucking over 20 lbs regularly)
When sand bags start feeling unstable or your current pack doesn't distribute weight well, upgrade to a purpose-built pack. A [5.11 RUSH 24](/gear/best-rucking-backpacks) or women's-specific is a good next step. This matters more for heavier loads and longer rucks.
**Third upgrade: [Ruck plate](/glossary#ruck-plate)** (once you want structured weight)
A 20 or 30 lb ruck plate ($30-60) sits flatter and more securely than bags. It's purely a comfort and durability upgrade - your rucks will work fine with sand bags for as long as you want.
**Fourth upgrade: HR monitor or GPS watch** (once you're training specifically)
Once you want to track heart rate zones or pace precisely, invest in a watch or chest strap. Until then, your phone is enough.
For more detailed gear recommendations across all budgets, see our full [Best Rucking Gear 2026](/gear/best-rucking-gear-2026) guide.
## Related reading
- [Rucking for weight loss gear guide](/gear/rucking-for-weight-loss-gear-guide) - step-by-step kits for budget, recommended, and premium setups
- [Best rucking backpacks under $200](/gear/best-rucking-backpacks-under-150) - five packs at the starter tier with honest durability trade-offs
- [Best rucking socks: blister prevention under load](/gear/best-rucking-socks-blister-prevention) - the seven merino picks that actually hold up at 30+ lb
- [Shop every rucking category →](/shop)
────────────────────────────────────────────────────────────────────────────────
URL: https://ruckauthority.com/gear/cap-barbell-adjustable-weighted-vest
Title: CAP Barbell Weighted Vest Review: A Good Cheap First Vest
Description: A weighted vest for walks and bodyweight work, not long rucks: our 7.7/10 CAP Barbell verdict and how it compares with GORUCK and Hyperwear vests.
Published: 2026-04-15 / Updated: 2026-09-26
CAP Barbell makes one of the cheapest credible adjustable [weighted vests](/glossary#weighted-vest) you can buy, which is why it keeps turning up at the top of "weighted vest" searches. The price is real. So are the trade-offs, and they matter more the longer you wear it.
## How it compares with the other vests we cover
| Vest | Score | Where it wins | Where it loses |
| --- | --- | --- | --- |
| CAP Barbell Adjustable | 7.7 | Lowest cost of entry; 20-150 lb versions | Loose-fill weights shift; basic padding |
| GORUCK Rucking Weighted Vest | 7.5 | Curved plates built for rucking | Plates are a separate purchase |
| Hyperwear Hyper Vest PRO | 7.2 | Thin, low-bounce profile | Premium price; 40 lb ceiling on the XL |
| 5.11 TacTec Plate Carrier | 7.5 | Front-and-back plate stability | Costs more; plates bought separately |
The short version: CAP is a test-the-format vest. Buy it to find out whether weighted-vest walking fits your routine without spending premium money. It isn't the long-term answer for ruckers who already know they want progressive load, steadier plates (a dedicated carrier like the [5.11 TacTec](/gear/5-11-tactical-tactec-plate-carrier) holds the load far steadier) and longer sessions. Those readers should also look at the [plate carrier weighted vest guide](/gear/best-plate-carrier-weight-vests-for-rucking-military-style-t).
The buying rule is simple: use CAP if the purchase needs to stay cheap and experimental. Skip it if you already ruck more than twice a week or plan to build toward long Zone 2 sessions. Pocket weights can work for calisthenics and short walks, but the shifting becomes more noticeable as distance increases. Plate-based systems cost more up front, yet they usually feel calmer under load and are easier to progress with purpose. That stability matters once walking time, sweat and shoulder fatigue start stacking up.
## CAP Barbell verdict by rucking use case
| Use case | Verdict | Better next read |
| --- | --- | --- |
| Testing weighted vest walking | Good enough for short sessions while you learn whether the format fits your routine. | [Best weighted vests for rucking](/gear/best-weighted-vests-for-rucking-in-2026) |
| Long Zone 2 rucks | Not ideal. The pocket weight can shift once sweat, stride length, and time under load stack up. | [Weighted vest vs rucksack](/training/weighted-vest-vs-rucksack) |
| Event-style ruck training | Skip it. Use a rucksack or plate carrier setup that holds load stable under fatigue. | [Rucking gear guide](/pillars/rucking-gear-guide) |
| Budget home-gym crossover | Reasonable if you mostly want calisthenics, short walks, and low-risk experimentation. | [Budget rucking starter kit](/gear/budget-rucking-starter-kit) |
## What the Community Says
### Comfort
Reddit users in r/GarageGym consistently note that CAP Barbell vests offer decent functionality at rock-bottom prices. The lighter models (20-40 lb) work reasonably well for neighborhood walks and light [ruck training](/pillars/rucking-training-programs), especially for beginners testing the waters. The ability to remove weight incrementally appeals to users who want to progress gradually, and Amazon reviewers frequently mention it as an advantage over fixed-weight vests.
Comfort problems show up on longer sessions. Owners report pressure points, and the neoprene padding is often described as thin. The longer the session, the more any shift in the weight makes itself felt.
### Durability
Durability reviews are mixed rather than uniformly bad. Some owners report months of regular walking with no trouble; the failures that do appear follow a pattern: stitching giving way at the shoulders, sand bags leaking and buckles breaking, sometimes within the first few months of heavier use.
### Performance
CAP uses different weights at different capacities. The 20 lb vest takes steel-shot packets of about 0.75 lb each, the 40-80 lb versions use sand bags, and the 100-150 lb versions use cast iron bars. The loose-fill packets in the lighter vests tend to shift during walking, which creates an uneven load that can change your gait and grows more annoying over distance. The vest also lacks features serious ruckers value: no [MOLLE attachment](/glossary#molle-webbing) points, no hydration compatibility and simpler load distribution than purpose-built alternatives. It does have reflective strips, which help on early-morning and evening walks.
For short bodyweight workouts and light neighborhood walks, the vest does the job. For anything resembling serious ruck training, the weight shifting becomes a real problem.
## Who It's Best For
Before you buy any vest, get your starting weight right. Our sister site Kit Authority's [vest sizing calculator](https://kitauthority.com/tools/vest-calculator?utm_source=ruckauthority&utm_medium=crosslink) does the math from body weight and goal.
**Good fit:**
- Complete beginners who want to test weighted vest training without a major investment
- Light, short workouts of around 30 minutes or less
- Home gym users doing bodyweight exercises with added resistance
- Budget-conscious buyers who accept the durability trade-off
**Poor fit:**
- Serious ruckers planning regular 60+ minute sessions
- Anyone who wants a vest that will last for years of frequent use
- Users who prioritize comfort during extended wear
- Ruckers who need MOLLE, hydration or advanced load distribution
## How It Compares
**vs. Plate-loaded vests:** Plate-loaded designs keep the weight stable during movement, and community feedback favors them over sand-filled adjustable vests for walking. GORUCK's Rucking Weighted Vest goes further, with curved plates and a cutout that keeps weight off the diaphragm, though the plates cost extra. It's the rucking-specific pick in our [weighted vest roundup](/gear/best-weighted-vests-for-rucking-in-2026).
**vs. Premium options:** The price gap is large, and so is the difference in feel. If you want the best comfort and a thin, low-bounce profile, the [Hyperwear Hyper Vest PRO](/gear/hyperwear-hyper-vest-pro) is the premium alternative, though it has its own durability questions at several times the price.
**vs. A [rucksack](/glossary#rucksack):** Many experienced community members recommend a regular backpack with weight plates until you can afford something better. A dedicated rucksack carries water and layers, and often distributes load better than a budget vest. See our [weighted vest vs rucksack comparison](/training/weighted-vest-vs-rucksack) for the full breakdown.
## Bottom Line
## Frequently Asked Questions
────────────────────────────────────────────────────────────────────────────────
URL: https://ruckauthority.com/gear/goruck-basic-rucker
Title: GORUCK Basic Rucker Review (2026): 12 Days, 7 Parks, One Pack
Description: GORUCK Basic Rucker review after 12 days carrying a 10 lb plate across 7 Wisconsin state parks, updated with the current 14L and 17L sizes and elevated plate-pocket specifications.
Published: 2026-05-21 / Updated: 2026-08-25
*This review combines first-person field observations from a 12-day Wisconsin trip (May 7 - 19, 2026) with aggregated community feedback from [Gear Patrol](https://www.gearpatrol.com/outdoors/goruck-basic-rucker/), [HiConsumption](https://hiconsumption.com/gear/goruck-basic-rucker-17l-backpack/), [Thad Forester](https://www.thadforester.com/goruck-basic-rucker/), [Ruck Gear Reviews](https://ruckgearreviews.com/goruck-basic-rucker/), and verified Amazon purchase reviews.*
## At-a-glance specs
| | GORUCK Basic Rucker |
| --- | --- |
| **Capacity** | 14L or 17L |
| **Empty weight** | 2 lbs 2 oz |
| **Body material** | 420D Robic nylon |
| **Bottom panel** | 840D Robic nylon |
| **Back panel** | 210D Cordura |
| **Plate pocket** | One elevated pocket for a GORUCK Standard Ruck Plate |
| **Max plate** | 30 lb |
| **Lumbar pad** | 20 mm (same as Rucker 4.0) |
| **Warranty** | SCARS; repair or replacement is handled at GORUCK's discretion |
| **Made in** | USA |
| **Typical current price** | $145-170; check GORUCK for the live price |
## The field test: 12 days, 7 parks, one pack
I bought the Basic Rucker on April 9, 2026, threw a 10 lb [GORUCK Ruck Plate](/gear/ruck-plate-comparison) in it, and a month later took it on a 12-day Wisconsin loop - from Kettle Moraine and Lake Michigan up through the Apostle Islands and back. Seven state parks, a family cabin layover for drone work, and the kind of mixed-use a real travel rucker actually does.
The plate weight stayed at 10 lbs the entire trip. The pack lived through light rain on the Kohler-Andrae boardwalk, Lake Michigan spray, the Madeline Island ferry, and multiple toss-it-in-the-dirt sessions to grab a drone.
This is what I noticed - and what I didn't.
## What held up over 12 days
**The pack never made me think about it.** That sounds like a backhanded compliment, but for an entry-level rucksack on a 12-day, four-leg trip, it's the strongest possible review. No hot spots. No strap re-adjustments after Day 3. No "the lumbar is killing me" moment at the end of a long park day. The 20 mm lumbar pad - the same component GORUCK uses on the [Rucker 4.0](/gear/goruck-rucker-vs-gr1) - did its job under a 10 lb load without drawing attention to itself.
**Quick on and off was a real win.** At Clear Lake (Day 6 of the trip) I was tossing the pack down repeatedly to grab the DJI Neo 2 drone for shots. Threw it in dirt, in wet soil, in dewy morning grass. Picked it up and put it back on without fussing with strap adjustments each time. The 420D Robic body shed all of it - no staining, no fraying, no abrasion concerns.
**Light rain and lake spray rolled off.** The pack is rated water-resistant, not waterproof, and that distinction matters. But across light rain at Kohler-Andrae and Lake Michigan spray on the boardwalk, contents stayed dry. Gear Patrol and HiConsumption both frame the pack as fine for normal conditions and wrong for sustained downpours - the trip confirmed both halves of that read.
**The side pockets actually solved something.** GORUCK's lineup has historically been criticized for not having external water bottle access - you had to dig into the main compartment. The Basic Rucker fixed that with one elastic side pocket and one sheath pocket. I used the elastic side for a water bottle on travel days and the sheath for phone and keys. It's small but it changes the daily ergonomics noticeably.
**The smaller zipper concern didn't materialize.** The most common community flag against the Basic Rucker is that its main zipper is smaller than the Rucker 4.0's, which raises long-term durability questions. Over 12 days of opening, closing, packing, unpacking, drone-grabbing, leash-stuffing, and one tight-fit moment where I crammed in the DJI Neo 2 plus a retractable dog leash plus a water bottle - the zipper held without protest. Twelve days cannot predict five-year durability. It does give us a real short-term field data point.
## Where the Basic Rucker pulls its punches
These are the limitations baked into the design. Most of them are intentional - GORUCK explicitly built the Basic Rucker to be the minimalist entry pack, not a do-everything bag.
**The 30 lb plate ceiling is a real wall.** This is not the pack you grow into 40 lb training with. At 10-20 lbs the Standard plate sits securely in the elevated pocket and the lumbar pad handles the load. The limitation is simple: the Basic Rucker has one pocket rated for one Standard plate up to 30 lb. If your training is heading toward heavier loads, start with the [Rucker 5.0](/gear/goruck-rucker-5-0-review), which has two plate pockets and supports heavier combinations.
**Single main compartment, no admin pockets.** No laptop sleeve. No interior dividers. Nothing that makes it a viable daily-carry or travel pack for someone who needs organization. If you want a single GORUCK pack that handles rucking plus commuting plus travel, the GR1 is the design that does that - in a higher price tier.
**420D Robic is lighter than 1000D Cordura.** This is the deliberate price-point trade. The Robic fabric is soft, quiet, and stays comfortable, but it doesn't have the brick-wall feel of the heavier Cordura on premium GORUCK packs. Twelve days of normal use showed no wear on mine, but the long-term abrasion-resistance ceiling is genuinely lower than the Rucker 4.0's.
**The 17L review unit is tight if you carry stuff inside.** With the drone (in case), a retractable dog leash, and a water bottle, the pack was full. The current 14L option is smaller still. For a typical sub-30-minute neighborhood ruck that can be enough. For a multi-hour park day with a jacket, snacks, and a small medkit, expect to use the external webbing or choose a larger Rucker.
## What rounded out the kit
The Basic Rucker carries the load. A few small picks made the 12 days easier - and most of them are the kind of essentials that don't get talked about until you're standing at a trailhead realizing you forgot them.
**Tick season was the real Wisconsin variable.** May is peak nymph season for blacklegged ticks, and most of the trip ran through tall marsh grass at Kohler-Andrae, oak savanna at High Cliff, and hardwood forest at Castle Mound. The two-layer approach is the standard: permethrin on clothing and gear (it binds to fibers for about six weeks or six washes), picaridin or DEET on exposed skin, and a remover kit ready for the inevitable find. Picked zero ticks off gear or clothing across the trip.
**The rest is multi-day comfort.** A 32 oz insulated bottle in the side pocket means you stop drinking warm water by noon. A headlamp earns its weight on dusk rucks where the pack's reflective strip helps cars see you but doesn't help you see the trail. And athletic tape is the most useful blister-prevention item to keep in a 17L pack.
The Basic Rucker has enough room for the essentials and not much more - which is the right shape for what the pack is designed to do.
## Basic Rucker vs Rucker 5.0 vs GR1
The Basic Rucker is the lower-cost training pack. The current Rucker 5.0 adds a second plate pocket, 20L and 25L capacities, a 1000D Cordura body, and support for heavier Standard and Long plate combinations. The GR1 is the work-and-travel option with a padded laptop compartment.
| | Basic Rucker | Rucker 5.0 | GR1 |
| --- | --- | --- | --- |
| **Typical price tier** | $145-170 | Check current price | Check current price |
| **Capacity** | 14L / 17L | 20L / 25L | 21L / 26L |
| **Body material** | 420D Robic; 840D bottom | 1000D Cordura | Check the current material option |
| **Plate pocket** | One elevated Standard pocket | Two elevated Standard / Long pockets | Laptop compartment; no locked training pocket |
| **Supported load** | One Standard plate up to 30 lb | Standard and Long combinations up to 75 lb | Not specified as a dedicated plate-training system |
| **Lumbar pad** | Yes | Yes | None |
| **Admin pockets** | None | None | Multiple |
| **Laptop sleeve** | No | No | Yes |
| **Best for** | First GORUCK pack and loads up to 30 lb | Dedicated training and heavier plate work | Work, travel, and occasional rucking |
| **Warranty** | SCARS | SCARS | SCARS |
The Basic Rucker uses lighter materials, costs less, and caps the plate at 30 lb. The Rucker 5.0 is the better fit for heavier training or anyone who wants two plate pockets. See the [current GORUCK lineup guide](/goruck) for the complete decision path.
## What other reviewers are saying
Community feedback across [Gear Patrol](https://www.gearpatrol.com/outdoors/goruck-basic-rucker/), [HiConsumption](https://hiconsumption.com/gear/goruck-basic-rucker-17l-backpack/), [Thad Forester](https://www.thadforester.com/goruck-basic-rucker/), and verified Amazon reviews splits along consistent lines.
**The praise consistently lands on:**
- The lifetime SCARS warranty at the lowest price point GORUCK has ever offered it. Multiple reviewers frame this as the real value proposition rather than the spec sheet.
- The side pockets fixing a long-standing GORUCK complaint about water bottle access.
- The 20 mm lumbar pad shared with the Rucker 4.0 - reviewers call out this as a real comfort feature at the price point.
- 2-inch reflective strip for low-light visibility, a small detail that matters more than it sounds for early-morning or dusk ruckers.
**The criticism consistently lands on:**
- The 30 lb plate ceiling limits long-term training progression.
- The 17L capacity feels tight for anything beyond a focused ruck.
- The 2.5" shoulder straps are narrower than premium GORUCK models and may feel insufficient at the upper weight ceiling.
- Smaller zippers than the Rucker 4.0 raise long-term durability questions, though no reviewers report actual zipper failures yet.
## Who should buy the Basic Rucker
**You should buy this pack if any of these match:**
- You're starting rucking and want a purpose-built plate pocket backed by GORUCK's current SCARS terms
- You're rucking with 10-20 lb plates and don't have plans to go significantly heavier
- You want a minimalist, purpose-built rucking pack for shorter sessions and don't need admin pockets or laptop storage
- You want the least expensive current GORUCK training pack and understand its limits next to the Rucker 5.0
## Who should skip it
**Get a different pack if any of these match:**
- You're already rucking with 30+ lb plates regularly or expect to be within 6 months - go straight to the [Rucker 5.0](/gear/goruck-rucker-5-0-review) for its two-pocket load system
- You want one pack that handles rucking, commuting, and travel - that's the GR1's design brief, not the Basic Rucker's
- Your pack budget is below the $145-170 tier - [budget rucking packs under $200](/gear/best-rucking-backpacks-under-150) covers lower-cost alternatives
- You ruck in sustained wet conditions where water-resistant isn't enough
## The honest take after Wisconsin
The strongest argument for the Basic Rucker is what didn't happen on the trip. No hot spots after Day 3 at High Cliff. No zipper failures despite cramming the DJI Neo 2 plus a retractable leash plus a water bottle. No fabric damage despite tossing the pack in dirt, wet grass, and morning dew at Clear Lake. No internal water ingress through light rain and Lake Michigan spray. No moment where I thought "I should have brought a different pack."
The review headline is deliberately uneventful. The Basic Rucker did its job for 12 days and disappeared into the trip, which is what good gear is supposed to do.
The price tells the rest of the story. Our April review unit cost $120; the current Basic Rucker usually sits in the $145-170 tier. The 30 lb ceiling and single-compartment design remain real limits. If you understand those limits, the Basic Rucker is a sensible first pack without the cost of a GR1 built for work and travel.
If your training is heading toward heavier loads, choose the [Rucker 5.0](/gear/goruck-rucker-5-0-review). If one bag also needs to handle a laptop and travel, choose the [GR1](/gear/goruck-gr1). For 10 to 20 lb training and short to medium sessions, the Basic Rucker earns its place.
## Frequently asked questions
---
## Related
- [Which GORUCK Should You Buy?](/goruck)
- [Best Rucking Backpacks Under $200 (2026)](/gear/best-rucking-backpacks-under-150)
- [GORUCK Plate Compatibility Guide](/gear/ruck-plate-comparison)
- [My GORUCK GR1 review](/gear/goruck-gr1)
- [Best GORUCK Alternatives (2026)](/gear/best-goruck-alternatives)
────────────────────────────────────────────────────────────────────────────────
URL: https://ruckauthority.com/gear/goruck-gr1-vs-gr2-which-ruck-should-ruckers-buy-in-2026
Title: GORUCK GR1 vs GR2: Which Ruck Should Ruckers Buy in 2026?
Description: GORUCK GR1 vs GR2 for ruckers. Which compartment design, capacity, and use case wins, plus a 5-question buyer's framework and FAQ.
Published: 2026-05-03 / Updated: 2026-09-29
## GORUCK GR1 vs GR2: Head-to-Head for Ruckers
### Choose the GR1 or GR2 for Your Use
Most GORUCK GR1 vs GR2 comparisons online were written by one-bag travelers, not ruckers. The decision looks different when you actually load the bag with a 30 lb plate and walk 12 miles. The GR1's single-compartment, lower-profile build favors agility, balance under load, and event-day movement. The GR2's dual-compartment layout and added depth favor multi-day capacity, organized packing, and gear-heavy training cycles.
Both packs share GORUCK's bombproof construction (1000D Cordura, YKK zippers, Scars Lifetime Guarantee) - the choice is rarely about quality, almost always about use case.
### Quick picks
- **Best for Most Ruckers:** GORUCK GR1 USA ($300+)
- **Best for Multi-Day & Travel:** GORUCK GR2 ($300+)
### Budget and use-case tiers
- **Tier 1: Maximum Capacity ($300+):** GORUCK's larger dual-compartment build for multi-day events, gear-heavy training, and one-bag travel where organization matters as much as volume.
- **Tier 2: Daily Carry & Event Pack ($300+):** GORUCK's flagship single-compartment pack. Lower profile, better balance under load, and the right choice for most ruckers' first GORUCK.
- **Tier 3: Proven Budget Alternatives ($50-150):** If GORUCK's price is out of reach, the 5.11 RUSH 24 2.0 is the most-recommended sub-$200 alternative for rucking. Military surplus ALICE and MOLLE II packs also work for shorter loads.
### Comparison table
product: GORUCK GR1 USA; price: $300+; rating: 9/10; capacity: Single compartment, 21L or 26L; bestFor: Daily carry, ruck events, balance under load
product: GORUCK GR2; price: $300+; rating: 9/10; capacity: Dual compartment, 26L / 34L / 40L; bestFor: Multi-day, one-bag travel, organized packing
### What the GR1 Is
The GR1 USA is GORUCK's flagship single-compartment ruck. One main space. A laptop sleeve against the back panel. A small admin pocket up top. That's it.
For ruckers, the upside of single-compartment design is that the load sits in one place against your back, with no front pocket pulling the bag's weight outward. Loaded with a 30 lb plate, the GR1 stays close to your spine and stable on the move. The downside is packing decisions: everything goes in one space, so you'll either learn to use packing cubes or accept that you'll dig.
The GR1 currently ships in two liter sizes (a 21L compact build and a 26L standard). The 21L works well for shorter torsos, daily carry, and event-only use. The 26L is the most common GR1 sold and the one community consensus considers the right "first GORUCK."
### What the GR2 Is
The GR2 is the dual-compartment evolution. It adds a front zippered compartment for organized quick-access (admin, tech, charger pouch) on top of the main compartment, and gains depth across the body to fit airline-friendly multi-day capacity.
For ruckers, the GR2's added structure has tradeoffs. The dual-compartment layout is excellent if you regularly travel one-bag, pack tech that needs separation from gear, or train multi-day where access matters. It's less ideal for event-day rucking because the added depth pushes the load slightly farther from your back, and the front compartment isn't useful when the only thing in the bag is a ruck plate.
The GR2 ships in three liter sizes (26L, 34L, 40L). The 26L is the closest GR1 comparison and the one most often cross-shopped. The 34L is GORUCK's one-bag travel sweet spot. The 40L is a true checked-bag-replacement build and overkill for almost any rucker.
### Compartment Structure: The Real Decision
The single most repeated finding across long-term GR1 vs GR2 reviews is that compartment structure matters more than liter rating.
A GR1 26L is one open space. A GR2 26L of the same nominal volume splits that space into a front compartment plus a main compartment, and the front compartment eats into the depth of the main. That means you cannot pack the GR2 26L the way you'd pack the GR1 26L, even though the labels match.
The practical consequence: if you're choosing between the GR1 26L and the GR2 26L, you're not choosing "more or less space." You're choosing "one packing decision or two." That's the question to answer first.
### How They Carry Under Load
The GR1's lower-profile build keeps weight closer to your back, which most ruckers prefer for events and any session involving running cadence or stair work. The GR2's added depth is more noticeable when loaded heavy. It's not unstable, but the load sits slightly farther off your spine. Both bags use the same shoulder strap geometry and back-panel padding, and both work well with a sternum strap. Neither ships with a hip belt as standard; GORUCK sells one as an accessory if you regularly carry over 35 lb.
For most ruckers training in the 20-45 lb range, both are comfortable. For ruckers training above 45 lb regularly, the hip belt accessory matters more than the GR1 vs GR2 choice.
### Build Quality and Materials
Both bags share GORUCK's standard construction package: 1000D Cordura exterior, YKK zippers throughout, MOLLE webbing across the front, reinforced stress points, and a stiff frame sheet against the back panel. GORUCK also offers select limited runs in lighter Ripstop Robic and other materials, but the standard production line is 1000D Cordura.
This is also where GORUCK's Scars Lifetime Guarantee matters. The policy covers repair or replacement of any GORUCK gear at any time for any reason - including normal wear. It's one of the strongest warranties in the tactical-pack category and is a meaningful piece of the long-term value calculation for both bags.
### Use Case Verdicts
Daily carry plus occasional rucking - GR1 26L Event-day rucking, ruck challenges, GORUCK events - GR1 26L Hybrid EDC + weekend overnight - GR2 26L One-bag business travel (2-4 days) - GR2 34L One-bag extended travel (7+ days), gear-heavy training - GR2 40L Compact build, shorter torso, urban EDC - GR1 21L Budget-constrained alternative - 5.11 RUSH 24 2.0 (covered below)
### Bottom line
Buy the GR1 if this is your first GORUCK and you're focused on rucking events, daily carry, or anything under 12 hours. The lower-profile build moves better under load and the single compartment removes packing decisions. Buy the GR2 when you need true multi-day capacity, regularly travel one-bag, or pack gear that benefits from a separate quick-access compartment. Both bags share the same construction and Scars Lifetime Guarantee, so the choice is about how you use the bag, not which is built better.
### Frequently asked questions
**Is the GR1 or GR2 better for rucking?**
For most ruckers, the GR1. Its single-compartment, lower-profile build keeps the load closer to your back and easier to balance during weighted miles. The GR2's added depth and dual compartments are designed for travel and multi-day capacity, not event-pace rucking. Pick the GR2 if your rucking is regularly multi-day or gear-heavy.
**What's the real difference between the GR1 and GR2?**
Compartment structure, not just volume. The GR1 is a single-compartment bag with a laptop sleeve - one main space, simple to pack. The GR2 adds a separate front compartment for quick-access organization, plus extra depth. Both come in multiple liter sizes, but the structural difference is what most buyers actually feel day to day.
**Are GR1 26L and GR2 26L really the same usable space?**
No - this is the most consistent finding across long-term reviews. Liter ratings measure total volume, but the GR2 26L's front compartment eats into the depth of the main compartment, so usable capacity for a single large item (laptop, packing cube, ruck plate) is smaller than the GR1 26L despite the matching label. Choose by use case, not by liter number.
**How long does GORUCK's lifetime warranty actually last?**
GORUCK calls their warranty the Scars Lifetime Guarantee. They repair or replace any GORUCK gear at any time for any reason - normal wear, hardware failure, or even misuse. It's one of the strongest reasons buyers justify the price, especially compared to tactical packs with limited or pro-rated warranties.
**Is there a budget alternative to GORUCK for rucking?**
The most-recommended sub-$200 alternative for rucking is the 5.11 RUSH 24 2.0. It uses 1050D ballistic nylon, full MOLLE coverage, and survives loaded carries well. It doesn't match GORUCK's lifetime warranty or finish quality, but it's the right call when budget rules out a GR1 or GR2.
# GORUCK GR1 vs GR2: Which Ruck Should Ruckers Buy in 2026?
The GORUCK GR1 and GR2 are the two flagship rucks from the same brand, built in the same Bozeman factory from the same materials. Yet they answer different questions. The GR1 is a single-compartment, lower-profile bag built around event-day rucking and daily carry. The GR2 is a dual-compartment, deeper bag built around organized travel and multi-day capacity.
Most online comparisons treat both as "GORUCK travel packs" and gloss over the difference that ruckers actually feel: how the bag carries when it's loaded with a 30 lb plate. This guide is the rucker's version of that comparison.
*Claims here are drawn from GORUCK's published product specs, GORUCK Tribe and Reddit community feedback aggregated across multiple long-term reviews, and the brand's stated Scars Lifetime Guarantee policy. We've avoided publishing specific dimensions or weight figures we couldn't verify against current GORUCK spec sheets.*
**Update, September 2026:** I've now carried both with a 20 lb plate: the green 26L GR1 at Otter Lake and the black 34L GR2 at Round Lake in the Chequamegon-Nicolet National Forest. My full write-ups are the [GR1 review](/gear/goruck-gr1) and the [GR2 review](/gear/goruck-gr2-review). The short version: for carrying real gear, the GR2's second compartment wins; the GR1 is the smaller, everyday option; and for pure rucking with a plate, I'd still pick the [Rucker 5.0](/gear/goruck-rucker-5-0-review). Neither of my bags had a sternum strap fitted.
### What I found carrying both (and the Rucker 5.0)
Each column is my own use of that bag with a 20 lb plate, not a side-by-side lab test. Anything I haven't checked says so.
| | GR1 (26L) | GR2 (34L) | Rucker 5.0 (25L) |
|---|---|---|---|
| Plate holder | Open elastic sleeve with a couple of straps | Open elastic sleeve with a couple of straps | Two dedicated plate pockets that hold the plate up high |
| Lumbar pad | None; I missed one | None; I missed one | Big lumbar pad that felt supportive |
| Chest strap on my bag | None | None | Yes, removable |
| Organization | One big room plus small top pockets; small things get buried | Two full compartments that open flat; the front one kept my drone kit reachable | Room for camera gear beside the plate; internal pockets handy for keys |
| How 20 lb carried | A solid ruck; the straps felt stiff out of the box, then broke in | Lower back a little numb after about 90 minutes of non-stop use | Stable on rough, hilly ground; my traps were sore afterward |
| Best for | Everything in between: an everyday bag that also rucks | Carrying gear you need to reach, and travel | Pure plate rucking |
## What the GR1 Is
The GR1 USA is GORUCK's flagship single-compartment ruck. One main space. A laptop sleeve against the back panel. A small admin pocket up top. That's it.
For ruckers, the upside of single-compartment design is that the load sits in one place against your back, with no front pocket pulling the bag's weight outward. Loaded with a 30 lb plate, the GR1 stays close to your spine and stable on the move. The downside is packing decisions: everything goes in one space, so you'll either learn to use packing cubes or accept that you'll dig.
The GR1 currently comes in 21L and 26L sizes. The 21L suits shorter torsos, daily carry, and event use. The 26L provides more room without moving up to the deeper GR2 layout.
## What the GR2 Is
The GR2 is the dual-compartment evolution. It adds a front zippered compartment for organized quick-access (admin, tech, charger pouch) on top of the main compartment, and gains depth across the body to fit airline-friendly multi-day capacity.
For ruckers, the GR2's added structure has tradeoffs. The dual-compartment layout is excellent if you regularly travel one-bag, pack tech that needs separation from gear, or train multi-day where access matters. It's less ideal for event-day rucking because the added depth pushes the load slightly farther from your back, and the front compartment isn't useful when the only thing in the bag is a ruck plate.
The GR2 ships in three liter sizes (26L, 34L, 40L). The 26L is the closest GR1 comparison and the one most often cross-shopped. The 34L is GORUCK's one-bag travel sweet spot. The 40L is a true checked-bag-replacement build and overkill for almost any rucker.
## Compartment Structure: The Real Decision
The single most repeated finding across long-term GR1 vs GR2 reviews is that compartment structure matters more than liter rating.
A GR1 26L is one open space. A GR2 26L of the same nominal volume splits that space into a front compartment plus a main compartment, and the front compartment eats into the depth of the main. That means you cannot pack the GR2 26L the way you'd pack the GR1 26L, even though the labels match.
The practical consequence: if you're choosing between the GR1 26L and the GR2 26L, you're not choosing "more or less space." You're choosing "one packing decision or two." That's the question to answer first.
## How They Carry Under Load
Community feedback is consistent on a few points:
- The GR1's lower-profile build keeps weight closer to your back, which most ruckers prefer for events and any session involving running cadence or stair work.
- The GR2's added depth is more noticeable when loaded heavy. It's not unstable, but the load sits slightly farther off your spine.
- Both bags use the same shoulder strap geometry and back-panel padding. Neither of the bags I tested had a sternum strap fitted.
- Neither ships with a hip belt as standard; GORUCK sells one as an accessory if you regularly carry over 35 lb.
For most ruckers training in the 20-45 lb range, both are comfortable. For ruckers training above 45 lb regularly, the hip belt accessory matters more than the GR1 vs GR2 choice.
## Build Quality and Materials
Both bags share GORUCK's standard construction package: 1000D Cordura exterior, YKK zippers throughout, MOLLE webbing across the front, reinforced stress points, and a stiff frame sheet against the back panel. GORUCK also offers select limited runs in lighter Ripstop Robic and other materials, but the standard production line is 1000D Cordura.
This is also where GORUCK's Scars Lifetime Guarantee matters. The policy covers repair or replacement of any GORUCK gear at any time for any reason - including normal wear. It's one of the strongest warranties in the tactical-pack category and is a meaningful piece of the long-term value calculation for both bags.
## Use Case Verdicts
Here's the rucker-focused buying matrix:
- **Daily carry plus occasional rucking** - GR1 26L
- **Event-day rucking, ruck challenges, GORUCK events** - GR1 26L
- **Hybrid EDC + weekend overnight** - GR2 26L
- **One-bag business travel (2-4 days)** - GR2 34L
- **One-bag extended travel (7+ days), gear-heavy training** - GR2 40L
- **Compact build, shorter torso, urban EDC** - GR1 21L
- **Budget-constrained alternative** - 5.11 RUSH 24 2.0 (covered below)
## The Budget Alternative: 5.11 RUSH 24 2.0
If the GR1 or GR2 price is out of reach, the most-recommended sub-$200 alternative for rucking is the 5.11 RUSH 24 2.0. It uses 1050D ballistic nylon (heavier-duty than GORUCK's 1000D Cordura on paper), full MOLLE coverage, and survives weighted carries well. It doesn't match GORUCK's lifetime warranty or finish quality, and its hardware feels chunkier, but it's the right call when the GORUCK price doesn't fit. We cover it in our [GORUCK Alternatives](/gear/best-goruck-alternatives) guide.
## Which Should You Buy?
Most ruckers should buy the GR1 USA in 26L. It's the right first GORUCK for daily carry, ruck events, and anything under one overnight bag's worth of gear. The single-compartment design is a feature, not a limitation, once you've adapted to it.
Buy the GR2 only if your honest answer to "do I travel one-bag, multi-day, or pack gear that benefits from organized separation" is yes. If you're not sure, you don't.
Both bags will outlast almost anything else in your rucking kit. The Scars Lifetime Guarantee makes either bag a long-horizon purchase rather than a recurring one.
## Frequently Asked Questions
### Is the GR1 or GR2 better for rucking?
For most ruckers, the GR1. Its single-compartment, lower-profile build keeps the load closer to your back and easier to balance during weighted miles. The GR2's added depth and dual compartments are designed for travel and multi-day capacity, not event-pace rucking. Pick the GR2 if your rucking is regularly multi-day or gear-heavy.
### What's the real difference between the GR1 and GR2?
Compartment structure, not just volume. The GR1 is a single-compartment bag with a laptop sleeve - one main space, simple to pack. The GR2 adds a separate front compartment for quick-access organization, plus extra depth. Both come in multiple liter sizes, but the structural difference is what most buyers actually feel day to day.
### Are GR1 26L and GR2 26L really the same usable space?
No - this is the most consistent finding across long-term reviews. Liter ratings measure total volume, but the GR2 26L's front compartment eats into the depth of the main compartment, so usable capacity for a single large item (laptop, packing cube, ruck plate) is smaller than the GR1 26L despite the matching label. Choose by use case, not by liter number.
### How long does GORUCK's lifetime warranty actually last?
GORUCK calls their warranty the Scars Lifetime Guarantee. They repair or replace any GORUCK gear at any time for any reason - normal wear, hardware failure, or even misuse. It's one of the strongest reasons buyers justify the price, especially compared to tactical packs with limited or pro-rated warranties.
### Is there a budget alternative to GORUCK for rucking?
The most-recommended sub-$200 alternative for rucking is the 5.11 RUSH 24 2.0. It uses 1050D ballistic nylon, full MOLLE coverage, and survives loaded carries well. It doesn't match GORUCK's lifetime warranty or finish quality, but it's the right call when budget rules out a GR1 or GR2.
### Does the GR2 work as a daily carry bag?
It can, but it's overbuilt for most daily-carry needs. The GR2's depth and dual-compartment design make it excel at multi-day travel and organized gear hauling. For pure daily carry - laptop, charger, lunch, gym kit - the GR1 is more proportionate to the use case and carries lighter.
### Do I need a hip belt for either bag?
Not for loads under about 30 lb. Both bags carry comfortably on the shoulder straps up to that range. Above 35-45 lb, GORUCK's optional hip belt accessory makes a meaningful difference and is worth adding regardless of which bag you choose.
────────────────────────────────────────────────────────────────────────────────
URL: https://ruckauthority.com/gear/goruck-gr1
Title: GORUCK GR1 Review: Two Weeks With the 26L
Description: Two weeks with a green 26L GORUCK GR1: a 20 lb plate on a lake trail, how the plate sleeve and fit held up, and how it compares to the Rucker 5.0 and GR2.
Published: 2026-04-25 / Updated: 2026-09-29
The GR1 is the bag GORUCK built its name on: one pack meant to ruck, travel and carry every day. That's a lot of jobs for one bag. After about two weeks with a green 26L, I think it does all of them well, and that range is the reason to buy it.
GORUCK sent me this GR1 for review. I used it through most of September, including a loaded outing on a lake trail in northern Wisconsin with my dog, Jase.
## How I used it
| Review detail | My setup |
|---|---|
| Pack | GR1, 26L, Ranger Green. The sewn label on mine reads Vietnam |
| My height | 6 feet 2 inches |
| Plate | 20 lb, in the interior elastic plate sleeve |
| Inside | My drone in its case, a water bottle and a first aid kit, all in the main compartment |
| Top pocket | My keys |
| Outside | Jase's leash and his dog bowl, hung from the bag |
| Also along | Bear spray, in case we met anything in the forest |
| Sternum strap and hip belt | Neither fitted |
| When and where | About two weeks of use in September 2026, including an outing at Otter Lake Recreation Area near Gleason, Wisconsin, on September 23 |
The 20 lb is the plate weight, not the total. I didn't weigh the full load.
A note on versions: GORUCK sells the GR1 as a USA-made bag on its own site, and it moved some pack production overseas in 2019. Mine says Vietnam on the label. This review covers the GR1 I actually carried, and the specifications further down come from GORUCK's listing.
## Fit and straps
It's a tall bag, and it feels it. I'm 6'2", so it works for me, and there's a lot of room in it. If you're shorter, the 21L is about two inches shorter. GORUCK's rule of thumb is that the bottom of the bag should sit above your belt line.
That rule is really about torso length, not overall height. A bag that hangs past your belt line tends to ride on your backside and swing with each step instead of sitting on your back. If you're between sizes, load the bag, check the bottom edge in a mirror, and go with the 21L if it lands at or below your belt.
Out of the box, the shoulder straps felt a bit stiff. They broke in quickly once I'd put some use on them. That's normal for dense padding under heavy fabric, which needs a few loaded walks to shape itself to your shoulders, so don't judge the fit on the first afternoon.
## One big room that opens flat
The GR1 is basically one big compartment, and it opens all the way flat, so packing it is like packing a suitcase rather than digging in a sack. On the Otter Lake outing, the plate, the drone case, the water bottle and the first aid kit all went into that one chamber, and I never needed the [MOLLE webbing](/glossary#molle-webbing) for anything. The closest the webbing came to earning its keep was holding a leash and a dog bowl.
There are a couple of smaller pockets up top and a front pouch. My keys went in a top pocket, which was genuinely convenient. Inside the lid you also get three pockets: a big elastic one, a zippered mesh one and a smaller Cordura one.
Beyond that, it's one big room, which suits a plate and a hard case perfectly. Small things stay easy to reach if you pack in layers. Heavy, rarely needed things go in first, against the back panel and as high as they'll sit, which keeps the weight close to your spine where it pulls on you least. Anything you'll want on the trail belongs in the lid pockets, the top pocket or the front pouch, and a couple of small pouches let you lift things out rather than excavate.
## The plate sleeve works, but it isn't the Rucker's pocket
My 20 lb plate rode in the elastic sleeve against my back, and it carried well. It's an open sleeve with a couple of Velcro straps rather than the Rucker 5.0's dedicated pocket, so the plate sits a little lower than it does in the Rucker.
General rucking advice is to carry the load high and tight, roughly between the shoulder blades, so the easy win is keeping the plate up there. The sleeve takes any of GORUCK's plates up to the 45 lb Long plate, which GORUCK limits to upright rucking rather than ruck PT. GORUCK recommends the 30 lb Standard for this bag, since it's thicker and fills the sleeve. With a 20, a rolled towel underneath keeps the plate sitting high. That's my go-to fix, and if you've got a better one, I'd like to hear it. The towel fills the dead space below a thinner plate so it can't settle, and the Velcro straps hold it once it's up there. For more on sizes, see our [ruck plate guide](/gear/ruck-plate-comparison).
The Rucker 5.0 has two plate pockets, takes up to 75 lb and holds the plate still enough for workouts. GORUCK's own help center makes the same distinction: the GR1 is fine for casual rucking, and the Rucker is the one it recommends for longer distances and PT. That's the difference.
## No chest strap, no hip belt, no lumbar pad
There's no chest strap and no hip belt in the box. That's on purpose. GORUCK built the GR1 to ride high on your back and stay stable without a waist belt, and you can buy both separately if you decide you want them. I expected to miss them.
I didn't miss the chest strap. Without one, the straps pulled my shoulders back a little. My posture is a work in progress, so it actually felt like it was helping. That's how it felt on me with 20 lb.
The likely reason is geometry. A sternum strap pulls the shoulder straps toward each other across your chest. Without one, they sit a little wider and the load pulls back along their whole length, which nudges your shoulders back instead of letting them round forward. As the weight climbs, that same pull presses harder into the front of the shoulders, and that's generally when a sternum strap earns its place. A hip belt does a different job, moving some weight onto your hips and cutting sway. If you add plates over time, add either one when you start noticing pressure or numbness in your shoulders or hands. Our guides on [ruck weight](/guides/how-heavy-should-your-ruck-be) and [numb hands while rucking](/injuries/rucksack-palsy-numb-hands) cover those limits.
I did miss the lumbar support. The Rucker 5.0 has a massive lumbar pad; the GR1 has a frame sheet and a flat back panel. If you miss the support too, keep the heaviest item high and tight and the straps snug enough that the bag doesn't sag. The [rucking form guide](/guides/rucking-form-guide) covers posture under load.
## Water resistance
GORUCK calls the GR1 highly water resistant. I haven't tested the water resistance on mine yet. Zippers are generally where water gets into any pack first, so for wet-weather rucks I'd put a phone, a drone or spare batteries in a dry bag inside the main compartment.
## The everyday side
This is where the GR1 earns its place over a dedicated ruck. There's a padded laptop compartment against your back, separate from the main compartment, and GORUCK says the 26L takes most 16-inch laptops. Behind it sits a removable frame sheet that gives the bag its shape. The bag is carry-on size, so it doubles as a one-bag travel option.
It also looks the part. In Ranger Green, it's the best-looking bag I own.
That everyday side is the real argument for the GR1 over a Rucker. If you'd otherwise own a work bag, a travel bag and a ruck, the GR1 can replace two of them, and the plate sleeve lets you ruck on the way home without swapping bags. It's a commuter and travel bag that rucks well, rather than a ruck that happens to commute.
## Price and the guarantee
The buy box at the top of this review shows the current price. The GR2 costs about the same, so between those two, size is the tiebreaker.
For that money, you get a bag GORUCK will repair or replace under its SCARS lifetime guarantee. That's a guarantee I'm glad to have, and it tells you the company takes care of its products. The GR1 also has a long track record and holds its value well on the used market.
## GORUCK's listed specifications
These come from GORUCK's GR1 listing, checked September 29, 2026. They're the manufacturer's figures, not my measurements.
| Specification | GR1 26L | GR1 21L |
|---|---|---|
| Dimensions | 12" W x 20" H x 6.75" D | 11.5" W x 18" H x 5.5" D |
| Weight | 3.1 lb | 2.8 lb |
| Body fabric | 1000D Cordura | 1000D Cordura |
| Laptop compartment | Fits most 16" laptops | Fits most 15" laptops |
| Internal pockets | Elastic, mesh and Cordura | Elastic, mesh and Cordura |
| Warranty | SCARS lifetime guarantee | SCARS lifetime guarantee |
The back panel fabric varies by color on GORUCK's listing. GORUCK also describes the bag as TSA compliant; that's the brand's wording, not a guarantee from every airline.
## GR1 vs Rucker 5.0 vs GR2
**Against the Rucker 5.0.** The Rucker is the better ruck. It has the big lumbar pad, two plate pockets that hold a plate high and still, and a sternum strap in the box. It has no laptop compartment and doesn't try to be a work bag. If most of your miles carry a plate, my [Rucker 5.0 review](/gear/goruck-rucker-5-0-review) and our [Rucker vs GR1 comparison](/gear/goruck-rucker-vs-gr1) go further.
**Against the GR2.** I carried the GR2 over the same stretch, and its second compartment was genuinely useful with more gear: plate, drone case and first aid in the main chamber, and the drone, controller and batteries up front. The GR1 is smaller and lighter, and for my load it didn't need that extra room. The GR2 isn't a newer GR1, by the way; they're parallel models. Our [GR1 vs GR2 guide](/gear/goruck-gr1-vs-gr2-which-ruck-should-ruckers-buy-in-2026) covers the choice.
### What I found across the three GORUCK bags I've carried
| | GR1 (26L) | GR2 (34L) | Rucker 5.0 (25L) |
|---|---|---|---|
| Plate holder | Open elastic sleeve with a couple of Velcro straps | Open elastic sleeve with straps | Two dedicated plate pockets that hold the plate high |
| Lumbar pad | None; flat back panel over a frame sheet | None | Big lumbar pad that felt supportive |
| Chest strap on my bag | None | None | Removable sternum strap included |
| Organization | One big room, three lid pockets, a top pocket and a front pouch | Main compartment plus a front compartment that held my drone, controller and batteries | Main compartment with internal pockets; my keys went in one |
| How 20 lb carried | Solid, with the weight sitting a little lower; I missed the lumbar support | Lower back a little numb after about 90 minutes | Stable on rough, hilly ground; my traps were sore afterward |
| Best for | Everything in between: rucking, everyday carry and travel | Carrying a lot of gear | Pure rucking |
Each column reflects my own use of that bag with a 20 lb plate, not a side-by-side lab test. My full [GR2 review](/gear/goruck-gr2-review) covers that bag in detail.
**Outside GORUCK.** If you mainly want a durable pack and don't need GORUCK's design, the 5.11 RUSH series in our [best rucking backpacks](/gear/best-rucking-backpacks) guide and the Mystery Ranch 2 Day Assault in our [GORUCK alternatives](/gear/best-goruck-alternatives) roundup are the obvious places to look.
## Should you buy the GR1?
**Buy it if:**
- You want one bag that can ruck, carry a laptop to work and travel as a carry-on.
- Your load is a plate and a few larger items, like a hard case, that suit one big compartment.
- You'd rather not wear a chest strap, or you like a bag that pulls your shoulders back.
- You want a bag GORUCK rates as highly water resistant, backed by its SCARS lifetime guarantee.
**Skip it if:**
- You mostly ruck with plates or do ruck workouts. The [Rucker 5.0](/gear/goruck-rucker-5-0-review) holds the plate higher and adds the lumbar pad I missed.
- You carry a lot of separate gear. The [GR2](/gear/goruck-gr2-review) adds a second compartment that keeps it organized.
- You want a simpler, lower-cost plate bag. GORUCK's [Basic Rucker](/gear/goruck-basic-rucker) is the pared-down option, and our [best rucking backpacks](/gear/best-rucking-backpacks) guide covers packs at more price points.
## Frequently asked questions
────────────────────────────────────────────────────────────────────────────────
URL: https://ruckauthority.com/gear/goruck-gr2-review
Title: GORUCK GR2 Review: The 34L for Rucking With Real Gear
Description: Two weeks with the black GORUCK GR2 34L: a 20 lb plate and drone kit at Round Lake, and why the front compartment makes it the bag for carrying gear.
Published: 2026-09-29
The GORUCK GR2 is GORUCK's premium travel bag, and it feels it. It's built like the GR1, with a second full compartment up front so your gear doesn't get buried under everything else. When I took it rucking, that organization was the best part. The second compartment turns out to be the whole story.
It isn't the GR1 version 2, either. The GR2 is a separate bag with different features for different needs, not an update of the GR1. I understand the confusion after GORUCK went from the Rucker 4.0 to the 5.0, but these two are parallel models. Mine is the 34L in black, and I've had it for about two weeks. GORUCK sent it to me for review; they didn't tell me what to say and didn't sign off on the review. We may earn a commission if you buy through links on this page.
## How I used it
I've used the GR2 for about two weeks. The main loaded outing was on September 24 at Round Lake in the Chequamegon-Nicolet National Forest, around the Round Lake Logging Dam, with my dog Jase. We were out for a couple of hours on forest trail, a leafy two-track and the lake shore, where Jase went straight into the water.
| Review detail | My setup |
|---|---|
| Bag | GR2, 34L, black |
| My height | 6 feet 2 inches |
| Plate | 20 lb, in the interior elastic sleeve |
| Main compartment | Plate, drone case and first aid kit |
| Front compartment | Drone, controller and batteries |
| Outside, on the MOLLE | Water bottle holder, bear spray and Jase's leash |
| Also carried | A dog bottle and other safety equipment |
| Sternum strap and hip belt | Neither |
The 20 lb figure is the plate alone. Everything else added to the total.
## The front compartment is the reason to buy it
Both compartments unzip and open flat, which makes packing a mixed load quick. The main compartment took the plate, my drone case and a first aid kit. The front compartment took the drone itself, the controller and the batteries. GORUCK lists three pockets in the main compartment and three more in the front, plus a built-in field pocket, so smaller things have somewhere to live instead of sliding to the bottom.
I kept the drone in the front for easy access, along with its batteries and controller. When I wanted to fly, I opened one zipper and everything I needed was there. I didn't have to dig past the 20 lb plate, or around the larger compartment, to find a battery.
A single-compartment ruck is simple and slim, but everything shares one space with the plate. The GR2 lets you decide what's heavy and buried and what's light and reachable, and the layout still works once the bag is full.
There's a quieter benefit, too. Keeping the plate's compartment zipped means the load likely stays where you packed it at the trailhead. If you stop often for a drone, a camera or first aid, that's the practical case for the GR2 over one big room. Just remember the front compartment sits farthest from your spine: it's for light things you reach for often, not anything heavy.
## The outside carried what I wanted fast
The MOLLE webbing on the outside held my water bottle holder, bear spray and Jase's leash. Bear spray is only useful if you can reach it, so it went on the outside with the things I'd want in a hurry. The leash is the same story, with a wetter dog on the other end of it.
The same rule applies outside: keep it light. Anything on the webbing sits even farther from your back than the front compartment, so a heavy pouch there can likely tug the bag backward with each step. Cinch attachments so they can't swing, and split them between the sides so the bag doesn't lean.
## The plate sleeve, and my lower back
This is where the GR2 shows it was designed for travel first. After using it non-stop for about an hour and a half, I noticed my lower back felt a little numb. Nothing dramatic. I also missed the Rucker 5.0's big lumbar pad, which the GR2 doesn't have.
My best guess is the plate sleeve. Like the GR1's, it's an open sleeve with a couple of straps, so in a bag this tall a 20 lb plate can sit a bit lower than you'd like, and that's where I felt it.
The fix follows from basic rucking physics: a plate held high and snug against the back panel presses down through your shoulders and spine, and likely has less leverage on your lower back than one riding low.
GORUCK's own advice is to keep a ruck riding high on your back; its [gear tips](https://blog.goruck.com/rucking-training/rucking-gear-tips/) name a low-slung bag as the most common beginner mistake. The company doesn't list plate sizes or a maximum load for the GR2 on its [ruck plates page](https://www.goruck.com/products/ruck-plates). My 20 lb plate fit the sleeve fine.
My suggestion is an easy one: strap the plate as high as you can using the internal MOLLE webbing, then put a rolled towel underneath it. If you ruck with a GR2 and have a better way to keep the plate high, I'd like to hear it.
A few more setup habits follow from the same logic:
- **Fill the empty space.** A jacket or other soft gear around the plate gives it nowhere to settle.
- **Cinch the shoulder straps so the bag rides high.** GORUCK's rule of thumb is that the bottom of the bag should sit above your belt line.
- **Think about a hip belt as the weight goes up.** At 20 lb I went without. Heavier plates are where a belt likely earns its place, shifting some load to your hips; GORUCK pitches its padded belt for longer, heavier rucks.
Our [rucking form guide](/guides/rucking-form-guide) covers posture and pack position in more detail, and our [ruck plate guide](/gear/ruck-plate-comparison) covers plate sizes.
If numbness ever hangs around, spreads or comes with any leg weakness, see a doctor.
## No sternum strap, and I didn't miss it
Just like the GR1, the GR2 doesn't have a sternum strap, and there's no hip belt in the box. As with the GR1, I didn't miss the chest strap. Without it, the shoulder straps pulled my shoulders back a little, and my posture, which isn't great, seemed to appreciate the help.
That likely comes from where the straps sit. With no sternum strap tying them together, the harness rides a little wider on the chest and tends to draw the shoulders back rather than rounding them forward. If your straps start sliding toward the outside of your shoulders, or you move up to heavier plates, an add-on sternum strap is the fix.
That's consistent with how GORUCK describes the design. Its founder has written that the [GR2 rides high on the back](https://blog.goruck.com/travel/gr2-travels-explained-by-jason/), which is part of why it stays stable without a waist belt. If you want more, the webbing on the shoulder straps takes an add-on sternum strap, and GORUCK sells a padded hip belt separately. I didn't use either.
## Built for travel first
GORUCK built the GR2 for one-bag travel and sizes it as a carry-on. Both compartments open flat, and there's a separate laptop compartment against your back, with a removable plastic frame sheet that gives the bag its structure. The shoulder straps and top handle are padded. The shell is 1000D Cordura, the YKK zippers have cord pulls you can find with gloves on, and there's webbing inside and out, plus a patch you can swap. The back panel fabric varies by color: GORUCK's listing shows 1000D for the black 34L, while some other colors use a lighter 210D. GORUCK's lifetime guarantee is behind all of it.
That laptop compartment is what lets the GR2 switch between a convenient travel bag and a ruck. I wouldn't carry a laptop and a weight plate in it at the same time, though. I don't trust a plate pressed up against a laptop, so for me it's one job or the other.
The laptop compartment sits against your back, which is exactly where the plate wants to be. Put both in and the laptop takes the best spot for the weight, while the plate rides right behind a screen for every step. Travel day, pack the laptop; ruck day, leave it home. Like GORUCK's other bags, it's rated highly water resistant, though I haven't put that to the test on mine.
Height-wise, it's only about half an inch taller than the GR1. The extra space is depth: about 9 inches, against roughly 7 for the GR1, and that's where the second compartment lives. Keep the heavy things against the back panel and the light things up front. GORUCK lists the 34L at 12.5 inches wide, 20.5 inches tall and 9 inches deep, and 4.1 lb empty.
At 34 liters, there's room for a full day's kit. The separate compartments keep that room under control, since each is smaller than one 34L space and gives the load less room to slide. Pack it snug, and if your day is only a plate and water, the Rucker 5.0 or the GR1 is the tidier fit.
## GR2 vs Rucker 5.0 vs GR1
**For pure rucking, the Rucker 5.0.** It has a high, snug plate pocket, a big lumbar pad and a sternum strap. In my [Rucker 5.0 review](/gear/goruck-rucker-5-0-review), it stayed solid on rough ground with the same 20 lb plate. If your load is a plate, water and keys, it's the better tool.
**For carrying gear, the GR2.** When the plate shares the bag with a drone kit, a first aid kit and things you actually need to reach, the second compartment earns its bulk. That's the job the Rucker isn't built for.
**For a slimmer everyday bag, look at the [GR1](/gear/goruck-gr1).** It's the GR2's single-compartment sibling: less depth, one main space, the same family of materials. If you're weighing those two specifically, our [GR1 vs GR2 comparison](/gear/goruck-gr1-vs-gr2-which-ruck-should-ruckers-buy-in-2026) walks through the sizes and use cases side by side.
### What I found across the three GORUCK bags I've carried
I've carried all three with a 20 lb plate. This table sticks to what I found on my own bags; anything I haven't checked says so.
| | GR1 (26L) | GR2 (34L) | Rucker 5.0 (25L) |
|---|---|---|---|
| Plate holder | Open elastic sleeve with a couple of straps | Open elastic sleeve with a couple of straps | Two dedicated plate pockets that hold the plate up high |
| Lumbar pad | None; I missed one | None; I missed one | Big lumbar pad that felt supportive |
| Chest strap on my bag | None | None | Yes, removable |
| Organization | One big room plus small top pockets; small things get buried | Two full compartments that open flat; the front one kept my drone kit reachable | Room for camera gear beside the plate; internal pockets handy for keys |
| How 20 lb carried | A solid ruck; the straps felt stiff out of the box, then broke in | Lower back a little numb after about 90 minutes of non-stop use | Stable on rough, hilly ground; my traps were sore afterward |
| Best for | Everything in between: an everyday bag that also rucks | Carrying gear you need to reach, and travel | Pure plate rucking |
The GR2 is at its best as a gear hauler that rucks well once the plate is packed high.
## Should you buy the GR2?
**Buy it if:**
- You ruck with gear you need to reach on the move, like a drone or camera kit.
- You want one bag that can be a travel bag one day and a ruck the next.
- You like your load organized: two full compartments that open flat, with pockets in both.
- You'll take a minute to strap the plate high instead of dropping it in and zipping up.
**Skip it if:**
- Your load is mostly a plate and water. The [Rucker 5.0](/gear/goruck-rucker-5-0-review) holds the plate higher and has the lumbar pad I missed.
- You want a smaller everyday bag. The [GR1](/gear/goruck-gr1) is slimmer, with one main compartment.
- You want something outside GORUCK's lineup or at a different budget. Our [best rucking backpacks](/gear/best-rucking-backpacks) guide covers the other options.
## Frequently asked questions
────────────────────────────────────────────────────────────────────────────────
URL: https://ruckauthority.com/gear/goruck-loyalty-discount-math
Title: What 10 Years of GORUCK Actually Costs Compared to a Budget Pack
Description: Compare the long-term cost of a current GORUCK Rucker with a budget pack, including SCARS coverage, replacement cycles, resale, and Tribe membership.
Published: 2026-05-15 / Updated: 2026-08-26
## Why the sticker-price comparison is the wrong comparison
Almost every GORUCK review eventually answers the same question: is the pack worth the premium? The comparison often stops at year zero: one current Rucker versus one cheaper pack, with the checkout-page difference treated as the whole decision.
That framing misses the part that actually decides the call. Packs do not last forever. Budget packs especially do not last forever. The right comparison is 10-year ownership cost, not year-zero cost. And once you do that math, the answer looks completely different.
A GORUCK Rucker has a lifetime guarantee that covers wear and damage under the published terms. If a strap rips at year 7 or a buckle fails at year 9, the pack may qualify for repair or replacement. No receipt is required. A budget pack that fails outside its warranty is usually replaced out of pocket. That replacement cycle is the part the sticker-price comparison ignores.
The argument is not "GORUCK is always worth it." It is: the math depends on how long you actually keep the pack. For ruckers who commit, the 10-year cost of GORUCK ownership is often lower than budget alternatives. For ruckers who flip gear or never put serious miles on a pack, GORUCK is overpriced.
Below is the actual spreadsheet, plus the conditions where each call is right.
## The GORUCK warranty model: what SCARS actually covers
The SCARS Lifetime Guarantee is GORUCK's marquee value proposition. The terms on goruck.com (verified May 2026) are unusually generous compared to most outdoor brands.
What is covered:
- Gear that is "worn out or damaged through use." Not just defects. Actual wear.
- "Defect in workmanship or materials, we'll fix or replace it (at our discretion), free of charge."
- No proof of purchase required. The products are identifiable. This effectively means SCARS transfers when a bag is sold used.
What is NOT covered:
- **Footwear** has a narrower policy. Boots and shoes are covered for "manufacturing defects in materials or workmanship" only. Normal wear from use is excluded. If your GORUCK boots' soles wear down at 800 miles, that is normal. If a seam delaminates from a manufacturing defect at 100 miles, that is covered.
What is not explicit in the published terms:
- Repair turnaround time. Customer reports on r/goruck suggest 2-6 weeks is typical depending on volume.
- Whether GORUCK pays return shipping for warranty claims. Check current policy at order time.
## The base math: current Rucker vs budget pack over 10 years
Here is the worked example, with conservative assumptions for both sides.
The table uses a **$265 Rucker 5.0 midpoint** inside the current catalog range. The budget-pack example starts at **$150**. These are worked assumptions, not live retailer quotes; check the product pages before buying.
**GORUCK Rucker 5.0, kept 10 years with SCARS claims as needed:**
| Year | Out-of-pocket | Cumulative |
|---|---|---|
| Year 0 | $265 (illustrative pack price) | $265 |
| Years 1-5 | No assumed repair charge under qualifying SCARS claims | $265 |
| Years 6-10 | No assumed repair charge under qualifying SCARS claims | $265 |
| **Net 10-year cost** | | **$265** |
| Illustrative resale value in year 10 | $130-160 (SCARS does not require proof of purchase) | |
| **Illustrative 10-year ownership cost** | | **$105-135** |
**Illustrative $150 budget rucking pack, replaced every 3 years:**
| Year | Out-of-pocket | Cumulative |
|---|---|---|
| Year 0 | $150 (pack) | $150 |
| Year 3 | $150 (replacement) | $300 |
| Year 6 | $150 (replacement) | $450 |
| Year 9 | $150 (replacement) | $600 |
| **Net 10-year cost** | | **$600** |
| Resale value year 10 | $20-40 | |
| **True 10-year cost** | | **$560-580** |
Two notes on these assumptions. First, the 3-year budget-pack lifespan is conservative for high-mileage ruckers and generous for low-mileage ruckers. If you ruck 3+ times per week, budget packs often die in 18-24 months, which makes the GORUCK math even better. If you ruck once a week, a budget pack can stretch to 5-6 years, which makes the budget math better. Run the numbers against your actual volume.
Second, the resale-value gap (GORUCK packs hold value, budget packs don't) is the part most analyses miss. A used GR1 with the SCARS warranty intact often sells for 50-60 percent of new retail on r/goruck and eBay even years later. A used budget pack is yard-sale pricing.
## GORUCK Tribe: $20/month, free shipping, is it worth it?
GORUCK Tribe is a paid membership program priced at $20 per month (verified May 2026). It is a subscription, not a one-time purchase. The headline benefits:
- Free GORUCK shipping on USA lower-48 orders
- Monthly themed patch
- Monthly workout card
That is the published value prop. The math on whether it earns out is simple: how often do you order GORUCK gear?
GORUCK ships from Florida. Standard shipping on a typical $50-100 order is roughly $10-15. Free shipping saves you roughly that much per order.
- 1 order per year → annual shipping savings ~$12, annual Tribe cost $240, net loss of $228
- 4 orders per year → savings ~$48, Tribe cost $240, net loss of $192
- 12 orders per year → savings ~$144, Tribe cost $240, net loss of $96
In pure dollars, Tribe almost never earns out on shipping alone. The math improves substantially if GORUCK runs Tribe-member-only sale prices or early access to limited gear, which they do periodically. The patch and workout are not monetizable benefits. If you care about them, you care about them. If not, do not count them in the math.
**Honest read:** Tribe is a community membership with shipping perks, not a cost-savings program. Join it if you want the community side. Skip it if you are looking for a discount mechanism. The numbers do not support the discount framing.
## The hidden costs nobody mentions
Three downsides of the GORUCK ownership model that get glossed over.
**Repair turnaround.** When you send a pack back for SCARS service, it is gone for 2-6 weeks based on community reports. If GORUCK is your only pack, you are pack-less for that window. The workaround is owning two packs, which most ruckers do not.
**Specialty SKUs depreciate.** The SCARS-keeps-value rule applies to popular models (Rucker, GR1 21L, GR2 in the standard colorways). Limited-run colors, retired models, and specialty packs depreciate more like normal outdoor gear. If you collect rare GORUCK pieces hoping they will appreciate, you are mostly wrong. Resale value lives in the top three SKUs.
**GORUCK creep.** Owning one piece of GORUCK can pull you toward owning more: plates, shoes, vests, and patches. That broader ecosystem has a real budget impact that a one-pack comparison ignores.
## When GORUCK loyalty is NOT worth it
Three reader profiles where the budget alternative is the correct call.
**The 1-2x per week fitness rucker.** If you ruck twice a week for cardio and have no event ambitions, a $100-150 Mystery Ranch or Osprey daypack will serve you fine for 5-7 years. The GORUCK premium pays for build quality and warranty coverage you are not stressing the pack hard enough to use. See our [best rucking backpacks roundup](/gear/best-rucking-backpacks) for budget alternatives that hold up.
**The someday-rucker.** If you have bought rucking gear before, used it for a few months, and let it gather dust, do not buy GORUCK. The premium is wasted on someone who will not put miles on the pack. Buy used or buy budget until you have proven to yourself that you will keep rucking. Then upgrade.
**The budget-first rucker.** If one premium pack would consume the whole gear budget, GORUCK does not fit. A serviceable budget pack plus secure weight and good socks is a more complete starter setup than an expensive empty pack. Rank your spend by upgrade impact: shoes > secure weight > socks > pack. See our [under-$200 backpacks roundup](/gear/best-rucking-backpacks-under-150) for the budget picks that actually work.
## The one-bag-for-life math
For the rucker who genuinely commits, this is where GORUCK ownership gets cheap on a per-use basis.
A Rucker used three times per week for 10 years reaches roughly 1,560 sessions. Under the illustrative purchase-and-resale assumptions above, the pack costs well under a quarter per use.
Under the repeated-replacement example, the budget pack remains inexpensive per use but costs several times more across the decade. Your result changes with actual pack life, repair eligibility, and resale value.
This math only works for ruckers who actually stay rucking for a decade. If that is you, the GORUCK premium is one of the better dollars-per-use deals in fitness gear. If you might not stay rucking, the math collapses immediately because you cannot amortize the upfront cost across enough sessions.
## How to maximize your GORUCK savings (practical playbook)
If you have decided GORUCK is right for your situation, a few practical moves to keep the math in your favor.
1. **Buy established SKUs.** Rucker 5.0, GR1, and GR2 in standard colors generally have a broader secondhand audience than specialty packs.
2. **Skip Tribe unless you want the community.** The published monthly fee is difficult to recover through ordinary shipping savings alone. If you value the patches and workout content, that is the reason to join.
3. **Use SCARS aggressively.** Worn webbing, frayed seams, broken buckles - send it in. The lifetime guarantee is the entire value prop. If you do not use it, you are paying for a benefit you discarded.
4. **Buy used for expansion gear.** Once you own one piece of GORUCK, the next piece (vest, second pack, larger ruck plates) can come from r/goruck or GORUCK's official trade-in market. The warranty transfers. The discount is real.
5. **Confirm current pricing before purchase.** Tribe pricing and SCARS terms can evolve. Always verify on goruck.com before relying on any third-party math for a purchase decision.
## How this fits with the rest of our gear coverage
This article is the cost-math companion to two existing pieces. The [Rucker vs GR1 head-to-head](/gear/goruck-rucker-vs-gr1) settles which GORUCK pack you should buy if you have decided to buy one. The [under-$150 backpacks roundup](/gear/best-rucking-backpacks-under-150) covers the budget alternatives this article references. The [best rucking backpacks roundup](/gear/best-rucking-backpacks) is the broader catalog if you want to see the full ranking.
If you decide GORUCK is not for you and you want to build ruck weight from what you already own, the [DIY weight calculator](/tools/diy-ruck-weight-calculator) converts water jugs, books, bricks, and dumbbells into target ruck loads using sourced reference weights.
## Frequently Asked Questions
### Is the GORUCK SCARS warranty actually unlimited?
Yes, with one carve-out. On packs, bags, and apparel, SCARS covers "wear and damage through use" for life, with no proof of purchase required. On footwear, the coverage is narrower: only manufacturing defects, not normal wear. Always confirm current terms at goruck.com before relying on this for a purchase decision.
### Does the SCARS warranty transfer to a second owner?
In practice, yes. GORUCK's policy states proof of purchase is not required because "our products are identifiable." That effectively makes the warranty transferable. This is the structural reason used GORUCK packs hold resale value far better than other outdoor gear.
### How much is GORUCK Tribe and what does it include?
As of May 2026, Tribe is $20 per month. The published benefits are free shipping on USA lower-48 orders, a monthly themed patch, and a monthly workout card. Confirm current terms at goruck.com - subscription programs evolve.
### Does GORUCK offer a military or first-responder discount?
GORUCK has historically offered discounts in this category. Specific percentages and stackability rules can change. Check at point of purchase rather than relying on third-party reporting.
### How long does a SCARS warranty repair typically take?
GORUCK does not publish an official turnaround. Community reports on r/goruck suggest 2-6 weeks is typical, depending on the complexity of the repair and current queue depth. Plan accordingly if it is your only pack.
### Is the Rucker or GR1 the better long-term value?
For the 10-year cost math above, both work similarly. Choose based on use case. The Rucker has plate-friendly internal sleeves and is purpose-built for rucking. The GR1 is the original GORUCK pack with broader daily-use appeal. Our [Rucker vs GR1 head-to-head](/gear/goruck-rucker-vs-gr1) breaks the choice down feature by feature.
### Should I buy used GORUCK gear?
Yes, especially for the popular SKUs (Rucker, GR1 21L). The SCARS warranty transfers in practice because GORUCK does not require proof of purchase. A used Rucker at 50-60 percent of retail with the warranty intact is one of the better used-gear deals in the outdoor space.
## Related Articles
- [GORUCK Rucker vs GR1: which should you buy?](/gear/goruck-rucker-vs-gr1)
- [Best rucking backpacks under $200](/gear/best-rucking-backpacks-under-150)
- [Best rucking backpacks roundup](/gear/best-rucking-backpacks)
- [GORUCK Tough packing list](/gear/goruck-tough-packing-list)
- [DIY ruck weight calculator](/tools/diy-ruck-weight-calculator)
────────────────────────────────────────────────────────────────────────────────
URL: https://ruckauthority.com/gear/goruck-mackall-45-first-look
Title: GORUCK Mackall 45 Review: Dense, Supportive and Sharp in Fog Suede
Description: I wore the GORUCK Mackall 45 in Fog with a loaded GR1: a dense, supportive sole, tread that bites on rough ground and a suede upper that works with jeans.
Published: 2026-08-29 / Updated: 2026-09-29
The GORUCK Mackall 45 is a shoe built for rucking that still looks normal with jeans. The 45 is for 1945 and Camp Mackall's wartime history, and you can see the old trainer shape in it. After a loaded outing in them, the part I'd lead with is underneath: the bottom of the shoe is great. Plenty of support, and it feels like standing on a dense memory foam mattress.
GORUCK sent me this pair in the Fog colorway, men's size 12, which is my usual shoe size. GORUCK didn't approve what I say here or ask for specific coverage. Links to GORUCK on this page may earn us a commission.
## How I wore them
| Review detail | My setup |
|---|---|
| Shoe | Mackall 45, Fog, men's size 12 |
| Date and place | September 23, 2026, Otter Lake Recreation Area near Gleason, Wisconsin |
| Load | The [GR1](/gear/goruck-gr1) with a 20 lb plate |
| Use | One loaded outing on trail |
| Distance | I didn't track it |
This review covers that outing, so it's about fit, feel and grip; long-term durability and wet weather are still ahead of them.
## What I liked underfoot
The sole is the highlight. It has plenty of support for a low-cut shoe, and with the GR1 and a plate on my back it still felt like that dense memory foam mattress.
There's a likely reason a dense sole suits a pack. Soft foam feels lovely in the store, but add a plate and it keeps compressing, so your feet and ankles work harder to steady themselves. A denser EVA midsole over a dual-density insert likely compresses less under the added weight. That's the "dense" half of my mattress comparison: it gives, then it holds.
On rougher terrain, the texture on the bottom was enough to dig in and give me stability. I felt comfortable climbing rough ground because I knew I wasn't going to lose my footing. The lugs bite like a trail shoe's, and there's a good amount of grip.
That grip comes from an outsole built for more than one job. The lugs are deep enough to dig into dirt and loose ground, on a shoe GORUCK still designed to go from the trail to errands. Three rubber compounds generally let a maker put grippier rubber where traction matters and tougher rubber where the sole wears fastest.
Here's what GORUCK lists for the Fog version:
| Spec | Mackall 45, Fog |
|---|---|
| **Upper** | Pigskin nubuck suede with a full-grain leather spearhead |
| **Reinforcement** | Double-stitched toe and heel areas; perforations across the forefoot |
| **Lining** | Synthetic suede, with padding around the heel |
| **Midsole** | EVA foam |
| **Insert** | Removable, dual density |
| **Outsole** | Three rubber compounds |
| **Heel-to-toe drop** | 13 mm |
| **Last** | Neutral, with a wide toe box by GORUCK's description |
| **Listed weight** | 12.6 oz per shoe in men's size 9 (I didn't weigh my 12s) |
| **Made in** | Vietnam |
Source: [GORUCK's Mackall 45 Fog product page](https://www.goruck.com/products/mackall-45-fog), checked September 25, 2026.
The 13 mm drop puts your heel higher than your toes, which likely helps under a pack. A higher drop shifts some work away from your calves and Achilles tendon. Walkers land heel first, especially under a pack, and a raised, thicker heel softens that landing and asks the lower leg to stretch a little less on each step.
### The Fog suede
It's a really good-looking shoe. The pigskin suede upper, the leather spearhead on the side and the reinforced double stitching at the toe and heel give it that older trainer character. I'm a big fan of the gray with the orange accents. That may be a millennial thing; it's roughly how I've accented my house.
Suede is sanded leather, which is where the soft nap comes from, and it generally softens to your foot with wear. Fog is the lighter colorway, so a suede brush is worth keeping by the door after a dusty trail. If you'd rather not think about it, Black + Gum hides dirt.
## Heel fit: the part to get right
The one thing I'd plan for is breaking in the heel. On my first loaded outing, the back of the heel rubbed, and you can see where on my pair: the collar lining there is roughed up, with some pilling. I finished with blisters and wore my old shoes on the next outing.
That's a familiar new-shoe story. The heel counter and collar padding haven't shaped to your heel yet, and a pack adds weight to every stride, so a little movement at the heel repeats thousands of times on a walk. Short wears first give the collar time to soften and shape to you.
GORUCK designs the Mackall to be ready out of the box, and SEALgrinderPT reported a secure heel from the start. My heel wanted a few short wears first. Different feet, different heels, and I'm sticking with them.
These are hydrocolloid blister pads. When they puff up white like that, they're doing their job. I should have put them on before the walk.
### What I'd try next
Before a long walk in them, this is what I'd try:
- **A blister pad or moleskin on the heel before the walk,** not after. It puts a slick layer between skin and collar before the friction builds.
- **A thin liner sock under a thicker sock, or double-layer socks.** You want the sock to take the friction, not the skin. Two layers slide against each other, so the rubbing happens between fabrics. Our [rucking sock guide](/gear/best-rucking-socks-blister-prevention) covers the options.
- **Shorter wears first:** around the house, a small errand, then a short ruck. Short wears let the collar soften and let you catch a hot spot while it's still a warm patch.
Two more pieces of general fit advice, not results from my pair:
- **Check the heel at home.** Wear them indoors in your rucking socks, climb some stairs and watch whether your heel lifts out of the counter. A little lift is normal in a new shoe; a lot is a warning. If you're between sizes, the size that holds your heel without cramping your toes is usually the better bet.
- **Try a heel-lock lace.** Looping the laces at the top eyelets pulls the heel back into the counter. Our [foot care guide](/injuries/rucking-foot-care-blister-prevention) shows how, along with taping and hot-spot care.
## How other reviewers found the fit
Other reviewers have had a smoother start, which fits the different-heels point. These are their accounts, on different colorways, not mine.
[SEALgrinderPT](https://sealgrinderpt.com/reviews/gear-reviews/navy-seal-field-tested-goruck-mackall-45-shoe-review.html/) wore the Black + Gum version and reported a comfortable initial fit, a secure heel and a planted feel in the first hours.
[MindBodyDad](https://www.mindbodydad.com/body/goruck-mackall-45-review) wore the Americana for rucking and yard work. He liked the support under load and the traction, and wanted a little more room in the forefoot.
Put together with my outing, the picture is consistent: the sole and the traction earn praise across the board, and heel fit varies from foot to foot.
For how the Mackall compares with other shoes on pavement, trail and mixed routes, see our [rucking shoes by terrain guide](/gear/best-rucking-shoes-by-terrain).
## Warranty and care
GORUCK's SCARS guarantee works differently for footwear than for its bags. [The footwear terms](https://www.goruck.com/pages/scars-lifetime-guarantee) cover manufacturing defects and exclude normal wear, which is narrower than the lifetime guarantee on its packs.
To clean them, GORUCK says to take the insert out, rinse the shoes and let them air dry, with no washer or dryer. GORUCK doesn't list the Mackall 45 as waterproof.
## Should you buy the Mackall 45?
**Buy it if:**
- **You want one low-cut shoe for loaded walks and everyday wear.** It's built for rucking and still looks normal with jeans.
- **You like a dense, supportive sole.** That was the best part of the shoe for me under a 20 lb plate.
- **You ruck on rough or loose ground.** The tread dug in like a trail shoe's and gave me solid footing on climbs.
- **You like a raised heel under a pack.** GORUCK lists a 13 mm drop, and that thicker heel suits a heel-first stride.
**Skip it if:**
- **You want a flatter shoe or a different style.** Our [rucking shoes by terrain guide](/gear/best-rucking-shoes-by-terrain) covers other picks for pavement, trail and mixed routes.
- **Your routes are often wet.** A waterproof trail shoe is the better tool there, and the same terrain guide covers those.
- **You mostly walk without a pack.** A cushioned daily trainer is the better tool, and Kit Authority ranks the [best walking shoes](https://kitauthority.com/fitness/best-walking-shoes?utm_source=ruckauthority&utm_medium=cross-site) for that kind of mileage.
## Frequently asked questions
### Is the GORUCK Mackall 45 comfortable?
Yes, underfoot especially. The sole felt dense and supportive with a loaded GR1 on my back, like standing on a dense memory foam mattress. Like a lot of new shoes, the heel wanted a few short wears on my foot before a long ruck. Other reviewers report a comfortable heel from the start: different feet, different heels.
### Does the Mackall 45 need a break-in period?
GORUCK designs it to be ready out of the box. My heel rubbed on the first loaded outing, so I'd give them a few short wears first, with good socks and a heel blister pad.
### Is the Mackall 45 a backpack?
No. It's a low-cut rucking and training shoe. The name refers to Camp Mackall and 1945, not a 45-liter pack.
### How high is the Mackall 45's heel drop?
GORUCK lists a 13 mm heel-to-toe drop, so the heel sits higher than the forefoot. That raised heel suits the heel-first stride most of us fall into under a pack.
### Is the Mackall 45 waterproof?
No. GORUCK doesn't list it as waterproof, and the suede upper is perforated across the forefoot. For routes that are often wet, a waterproof trail shoe is the better pick.
### Does the GORUCK warranty cover the Mackall 45?
GORUCK's footwear coverage is for manufacturing defects. It excludes normal wear, so it's narrower than the guarantee on GORUCK's bags.
────────────────────────────────────────────────────────────────────────────────
URL: https://ruckauthority.com/gear/goruck-ruck-plate-carrier-3-vs-rucker-5
Title: GORUCK Ruck Plate Carrier 3.0 vs Rucker 5.0
Description: Compare the GORUCK RPC 3.0 and Rucker 5.0 for plate fit, water and gear storage, sizing, and event use. Choose around what you actually carry.
Published: 2026-09-06
The **GORUCK Ruck Plate Carrier 3.0** suits a session where the weight is the only thing you need on your back. The **Rucker 5.0** makes more sense when you also need a place for water, a jacket, food, or event equipment. That storage decision should come before comparing padding or choosing a heavier plate.
This is a specification-based buying comparison. GORUCK's published product details support the dimensions and features below; the recommendations are our interpretation of those differences. The photographs are GORUCK product imagery, not evidence of Ruck Authority field testing.
## What changes when you choose the Rucker?
| Decision | RPC 3.0 | Rucker 5.0 |
| --- | --- | --- |
| Main job | Carry a ruck plate | Carry plates and other equipment |
| Storage | Plate pocket; plan separately for essentials | 20L or 25L pack with main storage |
| Size choices | Standard, Long, Heavy | 20L and 25L |
| Internal access | Padded plate-pocket lid | Full-opening pack with magnetic internal pocket closures |
| Hip belt | No waist belt | Optional belt sold separately |
| Practical starting point | Local loops with essentials already accounted for | Outings where you need one bag for the complete load |
The [RPC specifications](https://www.goruck.com/products/ruck-plate-carrier) and [Rucker specifications](https://www.goruck.com/products/rucker) describe their construction. A larger storage compartment is useful only if your route or activity needs it. Equally, a compact carrier saves little inconvenience if every outing leaves you looking for somewhere to put a bottle.
## Choose the RPC for a plate-only setup
The RPC is an uncomplicated choice for someone who has already solved the storage question. A loop from home, a session near a water station, or training where you can leave your other belongings nearby can suit this format.
Before buying, list the things that have to leave home with you: phone, keys, water, weather protection, and anything the route requires. Decide where each one will go. If your solution involves buying another bag and several accessories, compare that complete setup with the Rucker before deciding the carrier is better value.
The card above describes the **Standard** RPC. The Long and Heavy versions change plate accommodation; they do not turn the carrier into a general storage pack.
## Choose the Rucker for weight and equipment together
The Rucker earns its extra bulk when you need to carry more than the training weight. Its main compartment gives you somewhere to organize equipment for a route away from home, a club outing, or an event with a packing list.
Both sizes have two plate compartments. GORUCK lists the 20L at 18 inches tall and the 25L at 20 inches tall. Its [pack-selection guidance](https://faq.goruck.com/hc/en-us/articles/4406961826573-Choosing-the-Right-Ruck) points longer-torso buyers toward the 25L and discusses how an optional hip belt sits. Use that as a starting point for a fit check; liters alone cannot tell you where the bag will sit on your body.
If you already own a Rucker 4.0, read the [5.0 versus 4.0 comparison](/gear/goruck-rucker-5-0-vs-4-0-review) before replacing it. Choosing between a carrier and a backpack is a different decision from upgrading a pack that already does the job.
## Check the plate you own before ordering
Plate weight does not identify plate shape. Two plates marked 30 lb can need different pockets.
GORUCK specifies these RPC combinations:
| RPC version | Listed GORUCK plate fit |
| --- | --- |
| Standard | 10, 20, or 30 lb Standard |
| Long | 30 or 45 lb Long |
| Heavy | Two Long pockets; examples include two 45 lb Long plates |
Those are equipment compatibility statements, not suggested training loads. Use the [starting-weight guide](/guides/how-heavy-should-your-ruck-be) to decide your load separately.
For the Rucker, check the current size-specific guidance as well as the plate's dimensions. GORUCK's [support page](https://faq.goruck.com/hc/en-us/articles/4406961826573-Choosing-the-Right-Ruck) distinguishes the rear-pocket compatibility of the 20L and 25L, including the 45 lb Long plate. Do not transfer a fit claim from an older Rucker generation or from one size to another.
For a third-party plate, compare width, height, thickness, and closure clearance against the exact pocket. Leave an uncertain fit unresolved until the manufacturer confirms it; a shared weight label is insufficient evidence.
## For an event, start with the organizer's list
A route requiring water, food, layers, or other equipment may make a storage pack the practical choice. That does not establish a universal rule banning a carrier or requiring a particular brand of plate.
Read the instructions for your specific event before purchasing. Record the required weight, what counts toward it, and how the rest of your equipment must be carried. The [event packing guide and printable worksheet](/training/ruck-event-packing-lists) keep those questions together.
## Compare the complete setup
Check the current offers through the product cards, then compare:
1. The carrier or pack in the correct size.
2. A compatible plate, if you do not already own one.
3. Any separate water or essentials storage you would need.
4. Optional accessories, delivery, and the applicable return terms.
Choose the RPC when that complete setup stays simple. Choose the Rucker when its storage solves a recurring problem on your actual outings. Neither purchase requires starting with a heavier load.
## Frequently asked questions
### Is the RPC 3.0 a weighted vest?
It carries its plate on your back. If you are comparing front-and-back weight distribution, start with the broader [weighted vest versus rucksack guide](/training/weighted-vest-vs-rucksack).
### Can the RPC carry a hydration bladder?
Its published storage is for the plate. Plan another way to carry water, or choose a pack with room for your hydration setup. Check the dimensions and attachment requirements of that setup before ordering.
### Is the Rucker 5.0 automatically more comfortable?
A specification sheet cannot settle that. Try the correct size with a load you already tolerate and assess strap position, movement, and pressure. Padding thickness alone does not establish a comfort winner.
### Which should a beginner buy?
Start with what you need to carry and a manageable load. If you already have a suitable backpack, the [regular-backpack guide](/guides/ruck-with-regular-backpack) explains what to check before buying a dedicated setup.
────────────────────────────────────────────────────────────────────────────────
URL: https://ruckauthority.com/gear/goruck-rucker-5-0-review
Title: GORUCK Rucker 5.0 Review: Tested on Wisconsin Trails With a 20 lb Plate
Description: Hands-on GORUCK Rucker 5.0 review: the 25L with a 20 lb plate on hilly Wisconsin trails, the lumbar pad, plate pockets, and how it beats the GR1 and GR2.
Published: 2026-09-23 / Updated: 2026-09-29
The GORUCK Rucker 5.0 stayed solid against my back on a hilly, uneven trail with a 20 lb plate and extra gear. I was wobbling around on the ground more than the bag was moving on me. That secure feel is the strongest reason I would choose it for dedicated rucking.
The large lumbar pad felt supportive, and I soon stopped noticing it while walking. My traps were sore once I got home, which I put down partly to carrying without the optional hip belt; that's the next thing I'll try.
GORUCK supplied this 25L pack for review. The GR1 and GR2 comparison further down comes from my own time with both bags. If you already own a Rucker 4.0, my [Rucker 5.0 vs 4.0 upgrade guide](/gear/goruck-rucker-5-0-vs-4-0-review) covers what changed and whether it's worth replacing.
The full review film plays at the top of this page. The [watch page](/videos/goruck-rucker-5-0-review) has chapter jumps and the complete transcript.
## What I carried and where I used it
| Review detail | My setup |
|---|---|
| Pack | Rucker 5.0, 25L |
| My height | 6 feet 2 inches |
| Weight plate | 20 lb; additional gear made the total load higher |
| Filmed hike | Uneven ground and hills in Wisconsin's Northwoods |
| Hip belt | None fitted |
| Other gear | Camera equipment inside; water and first-aid pouches attached to the sides |
| Evidence period | Trail footage and review recorded in September 2026 |
The 20 lb figure is the plate weight. I also carried camera equipment, water and other supplies, but did not weigh the complete load.
The side pouches visible in some trail footage are third-party accessories. They are not included with the Rucker. The table breakdown also shows the pack with those attachments removed.
## Fit, stability and shoulder comfort
### The 25L felt right on my back
GORUCK sent the larger size because I'm 6'2". The size felt good, and the pack stayed close and stable even where I had to work to keep my own balance. I didn't notice the plate shifting around inside.
I'd give most of the credit to where the plate sits. A plate held high and tight against your spine keeps the weight close to your own center of mass, so when you step down off a root or catch yourself on a slope, it has very little leverage to swing with. The same 20 lb riding low and a few inches off your back works like a longer lever: it pulls you backward on climbs and keeps moving after you've stopped. If you want the same planted feel, snug the shoulder straps until there's no gap between the pack and your back, and pack anything heavy beyond the plate close to the back panel rather than toward the front.
If you're choosing between the 20L and 25L, pay attention to where the lumbar pad and bottom of the pack sit on your back, as well as how much room you need.
### The lumbar pad was less intrusive than it looks
On the table, the lumbar pad looks enormous. On my back, it felt supportive and soon faded into the background. I didn't have any lower-back discomfort during the filmed hike.
My guess is that it works by filling the hollow of the lower back. Without a pad, the bottom of a pack tends to bridge that curve and rock against you with each step. With one, the pack gets a second point of contact below the shoulder blades, which probably helped the stability as much as the comfort. That only works if the pad lands in the curve. If it sits on your belt or lower, the pack is riding too low or it's the wrong size for your torso, and that's the thing to check before anything else.
### My traps were sore afterward
I didn't notice a specific shoulder problem while walking. The soreness in my traps showed up after I got home. Without a hip belt, the shoulder straps carried the whole load, and they rest right on the upper traps. Those same muscles spend the walk holding your shoulders up against the pull of the pack, so sore traps afterward aren't much of a mystery. My load was also more than 20 lb, since the camera gear and supplies came along unweighed.
Next, I'd like to try the same load with the optional hip belt. My own conditioning is probably part of the story too.
If you get the same thing, the setup is the first place to look. Snug the straps enough that the pack rides high, but not so tight that you're shrugging; your shoulders should sit down and back. The Rucker's removable sternum strap pulls the shoulder straps in toward your chest, which can take pressure off the outer edge of the shoulders and stop the straps sliding outward. Both the sternum strap and a hip belt matter more as the plate gets heavier. On a pack this size, a belt is likely more about stopping sway and taking some pressure off your shoulders than carrying the load the way a framed hiking pack's belt does. Our [rucking form guide](/guides/rucking-form-guide) covers strap setup, and [how heavy your ruck should be](/guides/how-heavy-should-your-ruck-be) covers building up the weight gradually.
### Expect contact with your back, and some sweat
The close fit that keeps the Rucker stable also means it sits flat against your back, so like any bag worn this close, it's a warm place to be; my shirt was damp across the back when I took it off. A synthetic or wool shirt and a dry one for the drive home take care of it. In hot weather, plan water and pace too; our [summer heat safety guide](/training/summer-rucking-heat-safety) covers that.
I didn't notice hot spots, chafing or numbness during this outing.
## Plate storage, pockets and everyday use
The elevated plate pocket kept my 20 lb plate secure, while the main compartment still had room for camera gear, with space left above it.
There are two dedicated plate pockets: a short one sized for GORUCK's Standard plates and a long one for its Long plates. I'd use the pocket sized for your plate. The point of the design is that the plate stays high on your back rather than settling at the bottom of the bag, and it's the difference I noticed when I carried the GR1 with the same plate. Its open sleeve let the plate ride lower, and I suspect the GR2's sleeve did the same.
The magnetic internal pocket was a convenient place for my keys. Opening the bag flat also makes it easy to see and reach the compartments.
The external webbing let me put a water pouch on one side and a first-aid pouch on the other. That setup stayed sturdy on the hike.
The Rucker is built for rucking first. If you also want a laptop compartment, a built-in bottle pocket and easy access to small items, our [Rucker versus GR1 comparison](/gear/goruck-rucker-vs-gr1) covers that choice.
## Features shown in the video
These are the construction details demonstrated in the close-ups. Material grades and capacity limits are manufacturer specifications, not measurements from my hike.
- **Shell and contact fabric:** 1000D CORDURA on the body; smoother 210D HT CORDURA against the back and beneath the straps.
- **Plate pockets:** the short pocket accepts GORUCK Standard 10, 20 and 30 lb plates. The long pocket accepts Long 30 and 45 lb plates and can also hold Standard plates. GORUCK rates the pair to 75 lb combined.
- **Structure:** a built-in frame sheet and a 30mm lumbar pad.
- **Hardware:** YKK zippers with 550 cord pulls, a removable sternum strap, four padded carry handles and front/side MOLLE webbing.
- **Water and hydration:** bottom drain holes, an internal bladder attachment point and a hose exit beneath the top handle.
Source: [GORUCK's current Rucker specifications](https://www.goruck.com/products/rucker), checked September 23, 2026. My actual plate load was 20 lb; the maximum capacity is not a recommended starting weight.
This review covers my first week with the bag, in dry weather, so rain and long-term wear are still ahead of it. The stitching looked substantial in the close-ups, and the SCARS lifetime guarantee backs it.
## How it compares with the GR1 and GR2
I've also carried the [GR1](/gear/goruck-gr1) and the [GR2](/gear/goruck-gr2-review) with a 20 lb plate. They're GORUCK's everyday and travel bags, and both hold the plate in an open sleeve with no lumbar pad, which is exactly where the Rucker pulls ahead. For pure plate rucking, it's the one built for the job; the other two win when the bag has more to do than carry weight.
| | GR1 (26L) | GR2 (34L) | Rucker 5.0 (25L) |
|---|---|---|---|
| Plate holder | Open elastic sleeve with a couple of straps | Open elastic sleeve with a couple of straps | Two dedicated plate pockets that hold the plate up high |
| Lumbar pad | None; I missed one | None; I missed one | Big lumbar pad that felt supportive |
| Chest strap on my bag | None | None | Yes, removable |
| Organization | One big room plus small top pockets; small things get buried | Two full compartments that open flat; the front one kept my drone kit reachable | Room for camera gear beside the plate; internal pockets handy for keys |
| How 20 lb carried | A solid ruck; the straps felt stiff out of the box, then broke in | Lower back a little numb after about 90 minutes of non-stop use | Stable on rough, hilly ground; my traps were sore afterward |
| Best for | Everything in between: an everyday bag that also rucks | Carrying gear you need to reach, and travel | Pure plate rucking |
Each column is my own use of that bag with a 20 lb plate, not a side-by-side test. My [GR1 review](/gear/goruck-gr1) and [GR2 review](/gear/goruck-gr2-review) cover each bag in full.
## Who I would recommend it to
The Rucker 5.0 makes sense if you want a dedicated bag for carrying plates and doing ruck workouts. Its secure feel on rough ground, comfortable lumbar support and room for my extra equipment made a positive first impression.
**Buy it if:**
- Most of what you carry is a plate, water and keys, and you want the plate held high and still.
- You ruck on rough or hilly ground, where a load that stays put matters most.
- You want lumbar support built into the bag rather than a flat back panel.
- You want room for a few extras, like camera gear, alongside the plate without moving up to a bigger bag.
**Skip it if:**
- You're starting out with lighter loads and want to spend less. The [Basic Rucker](/gear/goruck-basic-rucker) is GORUCK's simpler, cheaper option.
- You want one bag for everyday carry and travel that can also ruck. The [GR1](/gear/goruck-gr1) handles all three.
- You carry a lot of gear you need to reach on the move. The [GR2](/gear/goruck-gr2-review)'s front compartment kept my drone kit apart from the plate.
If you only want to carry a plate, our [plate carrier versus Rucker comparison](/gear/goruck-ruck-plate-carrier-3-vs-rucker-5) looks at when the extra storage earns its place.
I enjoyed carrying the Rucker 5.0 and it's the bag I reach for when the plate is the point. I'll add notes here after longer outings and a run with the hip belt.
## Frequently asked questions
────────────────────────────────────────────────────────────────────────────────
URL: https://ruckauthority.com/gear/goruck-rucker-5-0-vs-4-0-review
Title: GORUCK Rucker 5.0 vs 4.0: Should You Upgrade?
Description: What changed from the GORUCK Rucker 4.0 to the 5.0, what the new lumbar pad and magnetic pockets felt like on my back, and who should upgrade.
Published: 2026-08-24 / Updated: 2026-09-29
The Rucker 5.0 refines the 4.0 where you feel it most. GORUCK kept the dedicated plate pockets, the 1000D CORDURA shell, the frame sheet and the lifetime guarantee, and changed the two things you touch most: the lumbar pad against your lower back and the closures on the internal pockets.
I've carried the 25L Rucker 5.0 with a 20 lb plate on hilly Wisconsin trails, and my full [Rucker 5.0 review](/gear/goruck-rucker-5-0-review) covers that in detail. I haven't carried a 4.0, so the older bag's side of this comparison comes from GORUCK's published information. GORUCK supplied my 5.0 for review.
## What changed from the 4.0 to the 5.0
| Detail | Rucker 4.0 | Rucker 5.0 |
|---|---|---|
| Lumbar pad | Flat pad | Contoured 30mm dual-density foam |
| Internal pocket closures | Hook-and-loop | Recessed magnets |
| Shell | 1000D CORDURA | 1000D CORDURA, with 210D HT CORDURA on the back panel |
| Plate storage | Elevated plate pocket | Two elevated pockets, one for Standard plates and one for Long plates |
| Sizes | 20L and 25L (plus a 15L) | 20L and 25L |
| Guarantee | SCARS lifetime | SCARS lifetime |
| How I know | GORUCK's published information | My own use of the 25L, plus GORUCK's specifications |
GORUCK released the 5.0 on May 8, 2026. For the full launch breakdown, including why the magnetic closures matter at pre-dawn training and events, see our [Rucker 5.0 launch analysis](/guides/goruck-rucker-5-0-brings-magnetic-closures-and-lumbar).
## What the changes felt like on my back
### The lumbar pad is the upgrade you'd feel
On the table, the 5.0's lumbar pad looks enormous. On my back, it felt supportive and soon faded into the background, and I had no lower-back discomfort on the filmed hike.
The reason a contoured pad matters is the curve of your lower back. A flat pad bridges that hollow, so the bottom of the pack can rock against you with each step. A contoured pad fills it and gives the pack a second point of contact below your shoulder blades. That second contact probably did as much for the 5.0's stability on rough ground as the plate pocket did.
So the upgrade question mostly comes down to your 4.0's lumbar pad. If you finish a ruck with a sore or rubbed lower back, or you feel the bottom of the pack moving, that's the problem the 5.0 was built to fix. If you never think about your lower back in a 4.0, you already have most of what the 5.0 offers.
### The magnetic pockets are a quality-of-life change
I kept my keys in a magnetic internal pocket, and it was simply easy: one hand, no rip of hook-and-loop. Magnets are quiet and don't clog with lint, sand or dog hair the way hook-and-loop does over years of use. They're a genuine quality-of-life upgrade, and if your 4.0's pockets have worn out and stopped holding, they count for even more.
### What didn't change
The plate still rides high and tight against your back, which is why both generations carry better than an everyday bag with a plate sleeve. With a 20 lb plate, the 5.0 stayed stable where I had to work to keep my own balance. Strap setup, the sternum strap and the optional hip belt work the same way in both generations, and my [full review](/gear/goruck-rucker-5-0-review) goes into what I'd change for heavier loads.
## Should you upgrade from a Rucker 4.0?
**Upgrade to the 5.0 if:**
- Your lower back gets sore, rubbed or hot in the 4.0, or you feel the bottom of the pack rocking.
- The hook-and-loop on your 4.0's internal pockets has worn out and no longer holds.
- You're moving up to heavier plates, where lumbar contact and stability matter more.
- You've been meaning to change sizes anyway.
**Keep your 4.0 if:**
- It fits well and you finish rucks without lower-back complaints.
- Most of your frustration is shoulder soreness. The lumbar pad won't fix that; a snug sternum strap, a hip belt or building up the weight more gradually will do more. Our [rucking form guide](/guides/rucking-form-guide) covers strap setup.
- You'd rather put the money toward a heavier plate or better shoes.
GORUCK hasn't announced a way to retrofit the new lumbar pad or magnetic closures to a 4.0, so upgrading means replacing the bag.
## Buying your first Rucker
If you don't own either, I'd buy the 5.0. It's the version I've carried, and the lumbar pad is the change you'd notice on every ruck. A discounted 4.0 is still a proper dedicated ruck with the same plate-first design, so if you find one on sale and you'd rather keep the difference, it's a sensible buy. If you're only starting out with light loads, GORUCK's cheaper [Basic Rucker](/gear/goruck-basic-rucker) is worth a look first.
Deciding between a Rucker and GORUCK's everyday bags instead? I've carried all three with the same 20 lb plate, and my [GR1 review](/gear/goruck-gr1) and [GR2 review](/gear/goruck-gr2-review) compare them directly.
## Frequently asked questions
────────────────────────────────────────────────────────────────────────────────
URL: https://ruckauthority.com/gear/goruck-rucker-vs-gr1
Title: GORUCK Rucker 5.0 vs GR1 2026: Which Pack to Buy
Description: GORUCK Rucker 5.0 vs GR1 in 2026: compare dual elevated plate pockets, training fit, laptop carry, materials, sizes, price, and daily utility.
Published: 2026-04-18 / Updated: 2026-08-26
## GORUCK Rucker 5.0 vs GR1 for training: short answer
If you are buying a GORUCK pack primarily for rucking, choose the GORUCK Rucker 5.0. Its dual elevated plate pockets keep the load high against the upper back and accept up to 75 lb combined. Choose the GORUCK GR1 when the same bag also needs to handle a laptop, travel, and daily carry.
The GORUCK GR1 wins if you need one bag for work, travel, and occasional rucking. It has the laptop sleeve, cleaner daily-carry profile, and better non-training utility. The tradeoff is load geometry: the GR1 can carry a plate, but its sleeve sits lower than the Rucker's purpose-built pocket. If you ruck weekly with 30+ lb, buy the Rucker. If you commute or travel with the same bag, buy the GR1.
## Which GORUCK pack should you buy?
| Your main use | Better pick | Reason |
| --- | --- | --- |
| Rucking workouts, hill repeats, and event prep | **GORUCK Rucker 5.0** | Dual elevated plate pockets, extra handles, and training-first geometry |
| One bag for office, travel, and light rucks | **GORUCK GR1** | Laptop sleeve, cleaner profile, and stronger daily-carry utility |
| 30+ lb weekly training | **GORUCK Rucker 5.0** | Weight rides high instead of pulling from the lower back |
| 20-25 lb occasional fitness rucks | **GORUCK GR1** | The plate sleeve is good enough if daily utility matters more |
| Dedicated GORUCK training setup | **GORUCK Rucker 5.0** | Purpose-built plate carry and a redesigned lumbar pad |
## At-a-glance decision table
| | GORUCK Rucker 5.0 | GORUCK GR1 |
| --- | --- | --- |
| **Best for** | Training, GORUCK events, heavy-plate sessions | Travel, commute, EDC + occasional rucking |
| **Capacity** | 20 / 25L | 21 / 26L |
| **Plate-friendly** | Dual elevated plate pockets - up to 75 lb combined | Internal sleeve - better suited to light-to-moderate training loads |
| **Price** | $245-285 | $300-500 |
## The short version
Both packs use durable Cordura construction and carry GORUCK's SCARS lifetime warranty. The Rucker 5.0 pairs a 1000D Cordura shell with a smoother 210D HT Cordura back panel; the GR1 uses a 1000D Cordura shell and adds a separate laptop compartment.
The difference is what each pack is *for*. The Rucker is a rucking tool. The GR1 is a travel pack that happens to ruck really well.
For training specifically, the Rucker wins. Its elevated plate pocket places weight against the upper back instead of the lower back, which is the difference you feel on long or heavy sessions. For life outside training, the GR1 wins because it has a laptop sleeve, cleaner profile, and better travel utility.
## Side-by-side at a glance
| Spec | Rucker 5.0 25L | GR1 USA 26L |
|---|---|---|
| **Price** | $245-285 | $300-500 |
| **Volume** | 20L / **25L** | 21L / **26L** |
| **Weight** | 4.1 lbs (25L) | 3.3 lbs |
| **Material** | 1000D Cordura shell / 210D HT Cordura back | 1000D Cordura |
| **Plate pocket** | **Dual elevated pockets**, up to 75 lb combined | Low (small of back) |
| **Laptop sleeve** | No | Yes (15") |
| **Handles** | Multiple (event-ready) | Two |
| **Aesthetic** | Utility / gym | Civilian / work |
| **Warranty** | SCARS Lifetime | SCARS Lifetime |
| **Lumbar pad** | 30mm contoured dual-density foam | No dedicated lumbar pad |
The two specs that actually matter for choosing: **plate pocket position** and **laptop sleeve**.
## Training decision matrix
| Use case | Better pick | Why |
| --- | --- | --- |
| Heavy rucks over 30 lbs | Rucker 5.0 | Dual elevated plate pockets keep the load high and stable |
| GORUCK Tough or Heavy prep | Rucker 5.0 | Built for plates, PT, abrasion, and event use |
| Daily commute plus 1-2 light rucks/week | GR1 | Laptop sleeve and civilian look matter more |
| Travel one-bag setup | GR1 | Clamshell layout and laptop compartment are useful outside training |
| Ruck-only buyer | Rucker 5.0 | Current training geometry and redesigned lumbar pad |
| One premium backpack for everything | GR1 | More versatile even though it is less specialized |
## Why the elevated plate pocket matters
Most GORUCK alternatives - and even the GR1 - position their plate pocket low in the main compartment, close to the small of your back. That's fine at 10 or 20 lb. At 30+ lb, it pulls your hips forward and your shoulders back, compensating posture you feel the next morning.
The Rucker moves the plate pocket up - the weight sits against your shoulder blades, above the lumbar curve. This is closer to how rucksacks are designed in military load-carry research (the Army's MOLLE II system uses the same geometry). The result: you walk more naturally, your hips stay neutral, and the pack feels 20% lighter than it actually is.
If you plan to carry 30+ lb regularly, the elevated pockets and contoured lumbar pad are the main reasons to choose the Rucker 5.0.
## Why the GR1 still wins for most people
The Rucker is single-purpose. The GR1 is a travel backpack with a plate pocket bolted on.
The GR1's clamshell opening, laptop sleeve, and civilian aesthetic mean it goes places the Rucker can't:
- **Into an office** without looking like you're heading to basic training
- **Through TSA** as a carry-on (it fits under the seat in front of you on most airlines)
- **Onto a commuter train** next to a suit
- **To a weekend trip** with room for two days of clothes
The Rucker works in all those contexts too - it's a great pack. But it screams "gear." If you want one pack that covers everything and doesn't broadcast "rucking-gear identity," the GR1 is still the right answer.
## Who should buy the Rucker 5.0
Testing against heavy carries backs this up: the elevated pocket changes how heavy carries feel. The weight stays where your trapezius and rhomboids can handle it, above the lumbar curve. Community reports and GORUCK's own design literature both point the same direction on this.
## Who should buy the GR1
The GR1 is the pack GORUCK built for itself - Jason McCarthy's daily carry. That context matters: it's designed for people who ruck, travel, and carry work stuff across a single day. Most buyers are that person.
## The lifetime warranty changes the math
Both packs cost more than tactical-style alternatives like the budget-tier [5.11 RUSH 24](/gear/best-rucking-backpacks) or the mid-tier [Mystery Ranch 2 Day Assault](/gear/best-goruck-alternatives). The GR1 commonly costs several times as much as the RUSH.
Here's what that extra money actually buys: GORUCK's SCARS warranty covers *any* failure, including your own wear-and-tear, for the life of the pack. You wear it out at mile 800, they send you a new one. You don't even need the receipt.
GORUCK also sells direct - no third-party retail, no licensed dealers, no shelf inventory at REI or Backcountry. That's part of why the SCARS math works at all: they own the cost of every replacement, not a retailer's returns department. If you want to see one in person before you buy, you're checking Reddit for a local rucker willing to let you handle theirs, not driving to a store. RUSH and Mystery Ranch sell through dozens of retailers, which is convenient at purchase and irrelevant at year ten.
The higher price buys purpose-built load placement, more abrasion-resistant materials, and the SCARS warranty. The GR1 costs more because it also covers commuting, travel, and laptop carry.
## Our picks
**For dedicated training: Rucker 5.0 in 20L or 25L.** Choose 20L for a compact training load or 25L when you need more room around the plates. Both use the current dual-pocket system and redesigned lumbar pad.
**For multi-role carriers: GR1 26L.** Choose it when the laptop sleeve, cleaner profile, and travel utility matter as much as rucking.
**If you want to ruck without buying GORUCK at all:** the [Mystery Ranch 2 Day Assault](/gear/best-goruck-alternatives) is the best non-GORUCK alternative. Trade-offs are visible - no dedicated elevated plate pocket and a less purpose-built rucking layout - but you save real money and get better mixed-gear carry than most tactical-style alternatives.
## Choose Rucker if / Choose GR1 if
The pack decision usually maps cleanly to a single sentence in one of these columns.
| Choose the **Rucker 5.0** if... | Choose the **GR1** if... |
| --- | --- |
| Your training will hit 30+ lb plates regularly | You want one pack for ruck + work commute + travel |
| You're training for a GORUCK event | You need a padded laptop sleeve |
| You want the lowest-friction tool for the job | You want a pack that doesn't read as "tactical" in business settings |
| You don't need to carry a laptop on training days | Your plate load stays under 30 lb |
| You want dual elevated plate pockets and a contoured lumbar pad | The lifetime warranty supports the most-used bag you own |
## Quick comparison against the mid-tier
| Pack | Price | Plate pocket | Laptop | Warranty |
|---|---|---|---|---|
| **GORUCK Rucker 5.0** | $245-285 | Dual elevated | No | SCARS Lifetime |
| **GORUCK GR1** | $300-500 | Low | Yes | SCARS Lifetime |
| Mystery Ranch 2 Day Assault | $150-300 | None (fits plate in main compartment) | Yes | Lifetime |
| 5.11 RUSH 24 2.0 | $50-150 | None | Yes | Limited |
## FAQ
## Where to buy
Both packs are made by GORUCK and sold direct at [goruck.com](https://www.goruck.com). The Rucker is also available on Amazon (usually at MSRP); the GR1 typically isn't. If you're buying during a GORUCK sale (they run 2-3 per year, typically Memorial Day, Black Friday, and Veterans Day), buy direct - they discount up to 25% off their own inventory during promotions.
Use the shop buttons on each product card above to go directly to GORUCK. If you're buying during a sale, buying direct saves more - Amazon typically holds MSRP while GORUCK.com discounts their own inventory.
────────────────────────────────────────────────────────────────────────────────
URL: https://ruckauthority.com/gear/goruck-tough-packing-list
Title: GORUCK Tough Packing List: Complete Gear Guide (2026)
Description: GORUCK Tough packing list with required gear, smart add-ons, blister care, layers, hydration, food, and event-ready loadout notes.
Published: 2026-04-18 / Updated: 2026-08-26
## What a GORUCK Tough actually is
A GORUCK Tough is a 10-12 hour, cadre-led team event built around loaded movement, physical work, and group tasks. GORUCK describes the Tough as a challenge rather than a race, and the route, distance, start time, terrain, and class-specific items can vary.
The packing list attached to your registration is non-negotiable. This guide was checked against an [official GORUCK Tough registration page](https://registration.goruck.com/event/tough-challenge-911-new-york-ny) on August 31, 2026, but it is not a substitute for the page and emails tied to your class.
This guide separates the baseline items visible on that official page from additions that can make a long event more manageable. We have not yet completed an evidence-recorded field test of this full loadout, so product judgments here are based on current manufacturer specifications, official event guidance, and fit-for-purpose editorial analysis.
## If you are buying today, buy in this order
Most people over-shop the small stuff and under-decide the big stuff. For a Tough, your money should go first toward the items that protect your start line, your feet, and your ability to keep moving after hour six.
| Priority | Decision | Best move | Why it matters |
| --- | --- | --- | --- |
| 1 | Required weight | [GORUCK Ruck Plate](/gear/ruck-plate-comparison) for a compatible GORUCK pack; [Titan Fitness Ruck Plate](/gear/ruck-plate-comparison) for some budget or non-GORUCK setups | Match the load and dimensions on your event page, then verify that the plate is secured in your pack. |
| 2 | Pack | [GORUCK Rucker 5.0](/gear/goruck-rucker-vs-gr1) for events; [GORUCK GR1](/gear/goruck-gr1) if you also want daily carry | The pack is what you suffer in for 10-12 hours. Fit matters more than pocket count. |
| 3 | Feet | [Salomon XA Pro 3D V9 GTX](/gear/best-rucking-shoes-by-terrain), [Darn Tough socks](/gear/best-rucking-socks-blister-prevention), [Leukotape](/injuries/rucking-foot-care-blister-prevention), and [Body Glide](/injuries/rucking-foot-care-blister-prevention) | Blisters are the easiest preventable reason to turn a strong body into a slow teammate. |
| 4 | Water and night movement | [Source WXP 3L](/gear/best-hydration-packs-for-rucking), LMNT, and a [Petzl Actik Core](/gear/best-headlamps-for-rucking) | Hydration and light are boring until they fail. Then they become the whole event. |
| 5 | Visibility | Reflective pack panel, belt, or other event-approved solution | The official page we checked required reflectivity on the rucksack. Your event may specify the form it must take. |
## Three event kits that actually make sense
**Budget start, no wasted money.** Use the pack you own if it carries the required weight safely, then add a compatible secured weight, event-approved reflectivity, [Darn Tough socks](/gear/best-rucking-socks-blister-prevention), [Body Glide](/injuries/rucking-foot-care-blister-prevention), and the hydration capacity specified for your event. This gets you training without pretending a full premium setup is required on day one.
**Best event-ready setup.** [GORUCK Rucker 5.0](/gear/goruck-rucker-vs-gr1), [GORUCK Ruck Plate](/gear/ruck-plate-comparison), [Source WXP 3L](/gear/best-hydration-packs-for-rucking), [Salomon XA Pro](/gear/best-rucking-shoes-by-terrain), [Leukotape](/injuries/rucking-foot-care-blister-prevention), and [Petzl Actik Core](/gear/best-headlamps-for-rucking). This is the kit I would build if the goal is to finish the event comfortably, not merely comply with the list.
**Buy-once, use-everywhere setup.** [GORUCK GR1](/gear/goruck-gr1), [GORUCK Ruck Plate](/gear/ruck-plate-comparison), [Garmin Instinct 3 Solar](/gear/best-gps-watches-for-rucking), [Petzl Actik Core](/gear/best-headlamps-for-rucking), and [Salomon XA Pro](/gear/best-rucking-shoes-by-terrain). This costs more, but every item still makes sense after the event for training, travel, and daily use.
## Buy, recommend, or skip - the whole list at a glance
Everything below is sorted into three buckets. "Official-page baseline" reflects the GORUCK registration page cited above. "Confirm for your class" covers items that vary. "Editorial add-on" means it can solve a practical problem but is not presented as a universal requirement.
| Status | Item | Why |
| --- | --- | --- |
| **OFFICIAL-PAGE BASELINE** | Rucksack with reflectivity | The cited page requires a rucksack with reflectivity; it does not require a GORUCK-branded pack. |
| **OFFICIAL-PAGE BASELINE** | Assigned ruck weight | The cited page lists 20 lb below 150 lb bodyweight and 30 lb at or above 150 lb. Use the rule shown for your class. |
| **OFFICIAL-PAGE BASELINE** | 3L hydration, required medication, and photo ID | These appear on the official page we checked. Keep medication and ID protected from water. |
| **CONFIRM FOR YOUR CLASS** | Reflective belt or panel, headlamp, cash, class weight, flag, or other team item | These may be specified by the location, timing, or class. Do not assume either required or optional without checking. |
| **RECOMMENDED** | Trail shoes with aggressive sole (Salomon XA Pro, Lone Peak, similar) | Cadre takes you through sand, water, mud, and asphalt for 12 hours. |
| **RECOMMENDED** | Foot care (Leukotape, Body Glide, ENGO patches, moleskin) | Blisters end more Tough attempts than injuries. Pre-tape before mile zero. |
| **RECOMMENDED** | Hydration bladder, 3L (Source WXP, Osprey Hydraulics) | Hands-free water is the difference between sipping and getting dehydrated. |
| **RECOMMENDED** | Headlamp (Petzl Actik Core or similar) | Pre-dawn start and night-movement sections. Rechargeable beats batteries. |
| **RECOMMENDED** | Calorie-dense food + electrolyte mix | 10-12 hours under load demands fuel. Bonking is a real risk past hour six. |
| **EDITORIAL ADD-ON** | Compact personal first aid supplies | Carry only what you know how to use, without treating a personal kit as a substitute for event medical support. |
| **RECOMMENDED** | Waterproof notebook + space pen | Cadre may give written tasks during cognitive PT. Wet paper is useless. |
| **AFTER-EVENT BAG** | Full change of clothes | GORUCK recommends after-event clothing. Keep it with your transport unless your event page tells you to carry it. |
| **SKIP** | Large first aid kits | AMK Ultralight .7 is compact enough for the realistic scenarios. |
| **SKIP** | Camping gear (stove, pad, sleeping bag) | This is not a thru-hike. You move every minute the cadre tells you to. |
| **SKIP** | Anything fragile (glass, GoPro without cage, expensive headphones) | Water features and team challenges break things. Leave it at home. |
| **SKIP** | Hardshell rain jacket | A cheap windbreaker handles temperature drops; rain on a Tough is part of the workout. |
## Baseline items on the official page we checked
### 1. A rucksack
The cited event page requires a rucksack with reflectivity, not a particular brand. The pack must hold the assigned load securely, carry 3L of hydration, and stay controllable during group work. A purpose-built event pack can make that easier, but it is not permission to skip fit and training.
- **Default: [GORUCK GR1](/gear/goruck-gr1) 26L.** A common Tough pack with broad everyday use.
- **Purpose-built alternative: [GORUCK Rucker 5.0](/gear/goruck-rucker-vs-gr1) in 20L or 25L** ($245-285). Its dual elevated plate pockets and contoured lumbar pad are built for long training and event loads. [Full Rucker vs GR1 comparison →](/gear/goruck-rucker-vs-gr1)
- **Budget starter: [5.11 RUSH 24 2.0](/gear/best-rucking-backpacks).** Works, but its load geometry is less event-specific than the Rucker's elevated plate system.
### 2. A ruck plate (the weight)
On the official event page checked for this update, required weight depended on bodyweight:
- **Under 150 lb:** 20 lb plate
- **150 lb and over:** 30 lb plate
That is one event page, not a permanent system-wide promise. Always use the load shown on your own registration page.
- **Default: [GORUCK Ruck Plate](/gear/ruck-plate-comparison)** (20 or 30 lb, $79-$89). Fits GR1 and Rucker perfectly.
- **Budget: [Titan Fitness Ruck Plate](/gear/ruck-plate-comparison).** Works in many packs and makes sense while you are still testing whether events are for you.
- **Non-GORUCK pack: [Hyperwear FlexLoad](/gear/best-weighted-vests-for-rucking-in-2026).** Flexible weight that conforms to any pack geometry.
### 3. Rucksack reflectivity
The official page we checked requires the rucksack to have reflectivity. A reflective belt may satisfy that requirement for some classes, while another class may specify a panel or a different setup. Match the wording on your event page instead of buying from a generalized checklist.
- **Cheapest viable:** Glow Belt Military Reflective PT Belt. Orange, yellow, or blue are commonly available.
- **Upgrade:** Noxgear Tracer2 illuminated vest. More than a Tough requires, but useful for anyone who rucks in traffic regularly.
[Browse the Reflective Safety tab on our shop →](/shop)
### 4. Photo ID
State ID or passport. Cadre need to verify identity for event rosters and emergency contacts.
### 5. 3L hydration and required medication
The cited page lists a 3L hydration bladder and any required medication. Test the bladder under load before the event and protect medication according to its storage instructions.
### 6. Class-specific items
Cash, a headlamp, a flag, a team weight, or other shared equipment may appear in class communications. They were not universal required items on the official page used for this update, so treat them as "confirm" items rather than permanent rules.
## Strongly recommended items
These are not officially required, but the difference between showing up prepared and showing up naive.
### Footwear
The cadre will put you through sand, water, asphalt, and uneven terrain for 12 hours. Shoes are the single most underweighted decision on most packing lists. The community default for event day is the Salomon XA Pro 3D V9 GTX - aggressive Contagrip outsole for water and mud, 10mm drop, GORE-TEX waterproofing, and stable enough for ruck-with-coupons. Break them in for at least 50 miles before the event.
### Foot care kit
Blisters end Tough attempts more often than injuries do. Pre-tape your hot spots before the event starts and keep refill supplies in a small zip-lock inside your pack.
- **[Leukotape P](/injuries/rucking-foot-care-blister-prevention).** Goes over hot spots before blisters form. Pre-tape your heels, your arches, and the balls of your feet.
- **[Trail Toes](/injuries/rucking-foot-care-blister-prevention) or [Body Glide](/injuries/rucking-foot-care-blister-prevention)** ($10-$17). Anti-friction balm on the feet, thighs, nipples, and anywhere else straps meet skin.
- **[ENGO blister patches](/injuries/rucking-foot-care-blister-prevention).** Stick to the inside of your shoe to reduce friction at known hot-spot locations.
- **Moleskin.** Emergency blister cover if a blister forms mid-event.
[See the full Foot Care tab on our shop →](/shop)
### Hydration system
Tough events last 10-12 hours, and the official page checked for this update lists 3L of hydration. Do not assume a resupply schedule; train with the system you will carry.
- **[Source WXP 3L bladder](/gear/best-hydration-packs-for-rucking).** A durable option with a kink-resistant tube, sealed bite valve, and dishwasher-safe reservoir.
- **Backup bottle:** Nalgene 32 oz or [HydraPak Stow 1L](/gear/best-hydration-bladders-for-rucking-in-2026) collapsible. Stuff in a side pocket for refills.
- **LMNT Electrolytes.** Carry packets for refills if they agree with your stomach; do not try a new drink mix for the first time during the event.
[Browse the Water & Hydration tab on our shop →](/shop)
### Rite in the Rain notebook + Sharpie
GORUCK cadre love assignments that require writing things down. Numbers, team member names, mission objectives. A regular notebook turns to pulp in the first water feature.
- **Rite in the Rain #946.** A compact waterproof notebook that fits a pack lid pocket.
- **Waterproof Sharpie.** Keep one clipped to the notebook.
### Windbreaker / rain shell
Packable, lightweight, just enough to block wind. Tough events go through the night in most seasons - ambient temperature drops and you will spend time stationary during team tasks.
### Dry bag
A simple roll-top dry bag inside your pack keeps your notebook, ID, cash, phone, and any electronics usable after the water feature at mile 12.
- **Sea to Summit Ultra-Sil Dry Sack 8L.** A compact way to keep the dry layer separate.
### Headlamp
Most Toughs start before sunrise or finish after sunset. Hands-free light is required for any task where you need both hands (rope work, reading the notebook, pulling gear from the pack in the dark).
- **[Petzl Actik Core](/gear/best-headlamps-for-rucking).** Rechargeable with enough output for night movement and close work.
- **Budget: [Black Diamond Spot 400](/gear/best-headlamps-for-rucking).** A simpler light with replaceable-power flexibility.
[See the Headlamp tab on our shop →](/shop)
### Calorie-dense food
Food needs vary sharply with body size, effort, weather, and what you can tolerate while moving. Use long training rucks to determine a simple fueling rhythm, then confirm whether your event page places any restrictions on what you carry.
- **Honey Stinger Organic Energy Chews.** Easy to chew while walking.
- **GU Energy Gels.** Compact carbohydrates for the middle miles; test them in training first.
- **Bars:** Cliff Bar, RXBar, Honey Stinger Waffle. Pick what you have actually eaten during training rucks.
- **Small jar of peanut butter or nut butter packets.** Slow-burn calorie density that holds up at hour 8.
### First aid kit
A small dedicated kit for personal use. Team first aid is good, but you do not want to be the person digging through someone else's kit at mile 15.
- **Adventure Medical Kits Ultralight .7.** Waterproof roll-top and compact enough to carry without turning the ruck into a medic bag.
- **Israeli Emergency Bandage 6".** For the serious-wound scenario. Not typical at Toughs but compact enough to carry.
### Cold-weather layers (Oct-April events)
- Merino wool base layer ([Smartwool Merino 150](/gear/smartwool-merino-base-layers))
- Fleece mid-layer or beanie
- Insulated gloves (Mechanix M-Pact Coyote)
- Wool socks ([Darn Tough Light Hiker](/gear/best-rucking-socks-blister-prevention))
### Hot-weather gear (May-Sept events)
- Buff or neck gaiter (sun, sweat, breathing through it in dust)
- Moisture-wicking t-shirt
- Electrolyte supplements (LMNT 30-pack)
- Additional water bottle for refills
### Pants
A Tough starts in daylight and finishes in the cold, and you will not get a
chance to change. Convertible pants solve that without adding a layer to carry:
zip the legs off when the work heats up, zip them back on when you stop moving
and the sweat turns cold. The Columbia Silver Ridge Convertible is the
long-running default here - ripstop nylon, gusseted crotch, and cheap enough
that shredding a knee in the surf zone does not hurt. GORUCK's own Simple Pants
are the tougher option if you would rather have one pair that survives
everything than legs that come off.
## Small additions worth deciding in training
These solve common problems, but they are editorial suggestions rather than a claim about what every finisher carries:
- Extra pair of socks (changed at mile 10, game-changing for feet)
- Ziploc bags (for wet gear segregation, trash, organization)
- Sunglasses (Goodr or any cheap polarized)
- Duct tape strip wrapped around a pen (gear repair field-expedient)
- Small multi-tool or knife
- A small repair strip of duct tape wrapped around a pen
## Items you do not need (despite what other packing lists say)
Common over-packs to question unless your event specifically calls for them:
- Anything heavier than needed (you carry everything all day)
- Large first aid kits you are not trained to use
- Camping gear (it is not a thru-hike)
- Anything fragile (water features + team challenges = broken gear)
Keep a dry change of clothes with your transportation for after the event; the official page checked for this update recommends it.
## The GORUCK Event kit (pre-built)
If you want this list narrowed to the highest-leverage event gear, use the GORUCK Event Day loadout. It keeps the pack, plate, reflective belt, [Salomon XA Pro](/gear/best-rucking-shoes-by-terrain), Leukotape, Source bladder, and Petzl headlamp together instead of making you rebuild the list from scratch.
[See the GORUCK Event Day loadout →](/loadouts/goruck-event-day)
## Event-day timeline
**2 weeks out:**
- Recheck your registration page and event emails, then close any actual gaps
- Use your event footwear and pack on several progressively longer training sessions
- Complete a long rehearsal with the event load only if it fits your current program and recovery
- Practice pre-taping your feet
**72 hours out:**
- Hydrate normally and consistently rather than forcing excess water
- Eat familiar meals and avoid last-minute fueling experiments
- Protect sleep as much as your schedule allows
**Event day:**
- Eat a real breakfast 2-3 hours before start
- Pre-tape feet, apply Body Glide to chafe points
- Arrive 30+ minutes early for check-in
- Carry the official packing list printed out in a dry bag
**Post-event:**
- Rehydrate and eat according to thirst, appetite, weather, and any medical guidance you follow
- Change into dry clothes and inspect your feet
- Resume loaded training when soreness, gait, and normal daily movement have recovered rather than obeying an arbitrary countdown
## Ready to train?
- [See the GORUCK Event Day loadout →](/loadouts/goruck-event-day)
- [Read the Rucker vs GR1 comparison if you are choosing your pack →](/gear/goruck-rucker-vs-gr1)
- [Browse all reflective safety gear on our shop →](/shop)
- [Browse all foot care on our shop →](/shop)
## Frequently Asked Questions
────────────────────────────────────────────────────────────────────────────────
URL: https://ruckauthority.com/gear/hyperwear-hyper-vest-pro
Title: Hyperwear Hyper Vest PRO Review: Thin Vest, Premium Price
Description: Hyper Vest PRO review: a thin, low-bounce weighted vest up to 40 lb, with fabric-wear complaints at a premium price. Who it suits, what to buy instead.
Published: 2026-04-15 / Updated: 2026-09-26
The Hyperwear Hyper Vest PRO sits at the premium end of the [weighted vest](/glossary#weighted-vest) market. Its thin profile and stretch fabric are a real step up from budget vests, but the longer-term review picture is more complicated, especially for ruckers loading the vest three or four days a week.
For rucking, treat the Hyper Vest PRO as a low-profile crossover tool, not a pack replacement. It makes sense if you want load for short walks, stair sessions, travel workouts or bodyweight circuits where a backpack gets in the way. If your goal is long neighborhood rucks, heavier progression, or carrying water and layers, compare it against the broader [best weighted vests for rucking](/gear/best-weighted-vests-for-rucking-in-2026) roundup, where it scores 7.2/10, and the [weighted vest vs rucksack](/training/weighted-vest-vs-rucksack) guide before buying.
## What the Community Says
### Comfort
This is where the Hyper Vest PRO earns its reputation. Reddit threads keep coming back to its thin profile and comfort during movement. Hyperwear uses steel weights about a quarter of an inch thick in stretch compression fabric, so the vest sits closer to the body than bulkier alternatives, which means less bounce during running and bodyweight movements. Amazon reviews echo this: owners say the vest doesn't shift or restrict breathing during activity.
The thin profile that makes the vest comfortable at lighter weights can concentrate pressure at higher loads, though. Several users report that the comfort advantage fades as they approach their size's maximum, with chafing appearing on longer sessions.
### Durability
The vest feels premium out of the box but can show wear faster than its price suggests. Customer service is a recurring theme in community feedback: some owners describe warranty claims as slow or rigid. For a premium product, that's a serious concern. What the extra money buys is comfort and a slim fit, not a longer life.
### Performance
The vest performs well for CrossFit-style workouts and short to medium sessions. It stays in place, has a low-bounce profile and spreads weight evenly at moderate loads. For [rucking](/glossary#rucking), the limits show up on longer sessions: the size-based ceiling (20-40 lb) limits usefulness for heavier [ruck training](/pillars/rucking-training-programs), and the thin profile that provides comfort can also concentrate weight on pressure points during extended wear.
## Who It's Best For
**Good fit:**
- CrossFit athletes doing varied movements who need minimal bounce
- Runners wanting a low-profile weighted vest
- Users who value a thin profile over maximum weight capacity
- Short to medium sessions rather than long loaded walks
**Poor fit:**
- Long-distance ruckers who want to progress past 40 lb
- Budget-conscious users looking for the most load per dollar
- Anyone prioritizing durability over initial comfort
- Users who want flexible warranty support
Women who find the unisex cut sits wrong can look at Hyperwear's Hyper Vest FIT, which the company designs for women.
## How It Compares
**vs. Budget vests:** The Hyper Vest PRO offers better initial comfort and a thinner profile than budget vests. At several times the price, though, the durability reports work against it. The [CAP Barbell Adjustable Vest](/gear/cap-barbell-adjustable-weighted-vest) costs a fraction as much and, while bulkier and less comfortable, is a reasonable way for beginners to test weighted vest training.
**vs. Plate-loaded vests:** Plate-loaded vests typically offer higher weight capacities and more stable load. GORUCK's Rucking Weighted Vest, the rucking-specific pick in our [weighted vest roundup](/gear/best-weighted-vests-for-rucking-in-2026), uses curved plates shaped for the torso. The Hyper Vest PRO trades capacity for a thinner, more comfortable profile at lower weights.
**vs. A [rucksack](/glossary#rucksack):** For dedicated ruck training, a rucksack with weight plates often provides better load distribution, higher weight capacity and room for water and layers. See our [weighted vest vs rucksack comparison](/training/weighted-vest-vs-rucksack) for which approach fits your training goals.
## Bottom Line
## Frequently Asked Questions
────────────────────────────────────────────────────────────────────────────────
URL: https://ruckauthority.com/gear/injinji-toe-socks-for-rucking
Title: Injinji Toe Socks for Rucking: Do They Actually Prevent Blisters?
Description: Injinji's toe-sleeve design targets toe-to-toe friction, but toe socks are a specific blister fix, not a universal rucking upgrade.
Published: 2026-05-04 / Updated: 2026-05-24
Toe socks for rucking sound like a gimmick until your third blister in a month makes you question everything. Injinji toe socks separate each toe to eliminate skin-on-skin friction - the theory being that most blisters form between toes, not just on them.
The honest answer is narrower than the marketing: Injinji can help when your problem is toe-to-toe rubbing, especially on long hot efforts, but it will not fix blisters caused by bad shoe fit, heel slip, wet feet, or a pack load that changes your gait.
## Overview
Injinji toe socks wrap each toe individually, like gloves for your feet. The brand offers multiple models designed for different activities, from lightweight running versions to cushioned hiking styles more suitable for rucking with a [weighted ruck](/gear/goruck-rucker-vs-gr1).
The core promise: by preventing toe-to-toe contact, you eliminate the friction that causes most foot blisters. Each toe gets its own moisture-wicking pocket, theoretically keeping feet drier during long rucks.
## Key specs
Based on Injinji's product specifications:
**Materials**: Merino wool blends for hiking models, synthetic blends for running versions
**Cushioning**: Varies by model - from minimal liners to full cushion hiking socks
**Heights**: No-show, mini-crew, crew, and boot heights available
**Key features**:
- Individual toe pockets
- Moisture-wicking fibers
- Reinforced heel and toe areas
- Seamless toe construction
- Anti-odor treatment on wool models
**Sizing**: Standard shoe sizes with specific toe sock fit guidelines
**Care**: Machine washable, air dry recommended for longevity
## What ruckers are saying
Injinji socks split people because they solve one specific problem extremely well and leave other blister causes untouched.
### Where they make sense
The strongest case for Injinji is straightforward: each toe gets wrapped in its own sleeve, so skin-on-skin friction between toes drops dramatically. Injinji also emphasizes moisture-wicking yarns and seamless toe construction in its trail line, which is exactly the feature set you want when your usual hot spot is between toes.
That does not make them magic. It means the mechanism lines up with a real rucking problem: long mileage, sweaty feet, toe crowding, and repetitive rubbing under load. If your blisters show up between toes, Injinji deserves a trial.
They work best with footwear that has enough toe-box room. If your boot already squeezes your forefoot, adding fabric around every toe can make pressure worse. That is why a roomy boot like the [Salomon Quest 5 GORE-TEX](/gear/best-rucking-boots-for-beginners-2026) is a better pairing than a tight tactical boot.
### Where they fall short
The tradeoff is durability and feel. Individual toe sleeves create more seams, more fabric interfaces, and more chances for wear than a traditional hiking sock. Some ruckers also hate the separated-toe sensation and never adapt to it.
Common failure points to watch:
- Durability issues, especially toe separation seams
- Difficult to put on, especially when feet are wet or sweaty
- Some find the toe separation uncomfortable initially
- Higher price point than traditional hiking socks
### Mixed experiences
Injinji is not a universal upgrade. It is a targeted fix for toe blisters. If your hot spots are on the heel, ball of foot, arch, or outside edge of the forefoot, you should look first at boot fit, lacing, moisture management, and a proven hiking sock.
## Who it's best for
Injinji toe socks work best for:
**Chronic toe-blister sufferers**: If you consistently get blisters between toes during long rucks, toe socks are worth trying before changing boots or adding more tape.
**Long-distance ruckers**: The value rises as mileage rises. On short neighborhood rucks, a traditional merino hiking sock is often simpler.
**Hot climate ruckers**: Moisture-wicking toe separation is most useful when sweat and swelling make toes rub, especially when paired with trail-ready footwear like the [Salomon XA Pro 3D](/gear/best-rucking-shoes-by-terrain).
**Boot wearers**: Go with the Trail Midweight Crew instead - the taller crew height keeps debris out and fits better in most boots than the mini-crew cut.
**Minimal shoe users**: Lower-drop, wider-toe-box shoes give toe sleeves more room to work without adding pressure.
**Skip if**: You rarely get blisters with current socks, prefer maximum durability over features, or dislike the feeling of separated toes.
## Comparison to alternatives
Against traditional hiking socks:
**[Smartwool Hike Classic Crew](/gear/best-rucking-socks-blister-prevention)** - Better immediate comfort and a simpler fit. Choose Smartwool if you don't have chronic toe blisters.
**[Darn Tough Light Hiker](/gear/best-rucking-socks-blister-prevention)** - Lifetime guarantee and the durability benchmark. Slightly less toe-specific friction control, but better long-term confidence if you destroy socks quickly.
**[Feetures Elite Max Cushion](/gear/best-rucking-socks-blister-prevention)** - Anatomical fit with targeted arch support. Different approach to blister prevention (friction management through tight fit rather than toe separation). Worth comparing if you want cushion without toe sleeves.
Against blister prevention alternatives:
- **Toe lubricants**: Cheaper per use but need reapplication on long rucks
- **Liner sock systems**: Double-layer approach works well but adds bulk in boots
- **Better boot fit**: More expensive initially but solves multiple issues beyond blisters
## Bottom line
Injinji toe socks make sense when toe-to-toe friction is the problem. The design directly addresses that mechanism, and the trail models have the cushioning and moisture management ruckers usually need.
However, they're not magic socks. Durability concerns are real, the adaptation period is genuine, and they won't solve blister problems caused by poor boot fit or other friction points.
The honest assessment: if you get blisters between your toes during long rucks, Injinjis are worth trying despite the premium price. If your current sock setup works, the benefits probably don't justify switching - [Darn Tough](/gear/best-rucking-socks-blister-prevention) or [Smartwool](/gear/best-rucking-socks-blister-prevention) will serve you better long-term.
For ruckers curious about toe socks: start with the Liner Crew under your current socks before committing. If the concept works for you, upgrade to the Trail Mini-Crew for standalone use, or the Trail Crew if you primarily ruck in boots. You'll know within a few long rucks whether toe separation helps your specific feet.
## Frequently asked questions
────────────────────────────────────────────────────────────────────────────────
URL: https://ruckauthority.com/gear/ruck-plate-comparison
Title: Best Ruck Plates 2026: Match the Plate to the Pocket
Description: Compare GORUCK Standard and Long plates, Rogue vest pairs, Yes4All and flexible weights by dimensions, retention and the pack you own.
Published: 2026-03-10 / Updated: 2026-09-14
## Best Ruck Plates 2026: Match the Plate to the Pocket
### Check the Plate Format Before the Weight
For a Basic Rucker, start with a GORUCK Standard plate. For a Rucker 5.0, choose Standard or Long to match the pocket you will use. The same 30 lb weight is sold in both shapes. Buying the right weight in the wrong shape is an expensive way to discover that distinction.
A conventional backpack, an open GR1 sleeve and a front-and-back weight vest need different retention. Below, we compare the six product entries we currently carry, including single plates, pairs and flexible weights. The table separates their footprints and buying limits instead of assigning untested durability scores.
This is a research-based buying guide, not a completed hands-on comparison. Manufacturer dimensions establish likely fit; they do not prove that a third-party plate stays secure in your particular bag.
Specifications checked September 14, 2026: [GORUCK plates](https://www.goruck.com/products/ruck-plates), [Ruck Plate Carrier](https://www.goruck.com/products/ruck-plate-carrier), [Rogue Echo](https://www.roguefitness.com/rogue-echo-weight-vest-plates), [Hyperwear FlexLoad](https://hyperwear.com/products/hyperwear-adjustable-flexible-rucking-weights-copy), and [Ruckercise’s Yes4All listing](https://www.ruckercise.com/products/rucking-weight).
Disclosure: Wolf Tactical pays Ruck Authority a higher commission on its own gear through Amazon's Creator Connections program, which is why it appears in this guide. We have not tested it - the specs below come from the manufacturer's listing, and each entry says so.
### Quick picks
- **Matching GORUCK pocket:** GORUCK Ruck Plates (Check current price)
- **Adjustable flexible weight:** Hyperwear FlexLoad Weights (Check current price)
- **Compatible weight vest:** Rogue Echo Weight Vest Plates (Check current price)
- **Two smaller rigid plates:** Yes4All Cast Iron 10 lb Pair (20 lb total) (Check current price)
### Budget and use-case tiers
- **One flat plate (Compare the exact weight):** A single plate is the straightforward choice when the pocket closes around it. Standard and Long are different footprints, even at the same weight.
- **Two plates (Check per-plate and total weight):** Vest pairs split weight between front and back. In a backpack, two plates need enough depth and restraint for both; a 20 lb total is not automatically interchangeable with one 20 lb plate.
- **Flexible, adjustable weight (Single or pair):** FlexLoad uses removable half-pound weights. Its fabric sleeve still has a defined footprint, so measure it rather than assuming flexibility means universal fit.
### Comparison table
pack: GORUCK Ruck Plates; format: Single; Standard or Long; size: Standard: 9 × 11.5 in; Long: 9.5 × 15 in; limit: Match the named pocket format; 30 lb exists in both
pack: Hyperwear FlexLoad; format: 6, 9 or 10 lb; singles and pairs; size: 12.25 in high; 9.80–10.50 in wide by size; limit: Too tall for a Basic Rucker’s listed 11.5 in plate pocket
pack: Rogue Echo; format: Two 5, two 10 or two 20 lb plates; size: About 9.3 × 11.3 in; double-curved; limit: Vest-shaped; width and curvature differ from Standard GORUCK
pack: Yes4All 10 lb pair; format: Two separate plates; 20 lb total; size: Check both plates and combined thickness; limit: Do not infer a secure stacked fit from total weight
pack: Yes4All 20 lb Long; format: Single 20 lb plate; size: 6 7/8 × 14 13/16 in; 7/8 in thick; limit: Longer than the Basic Rucker pocket; needs side restraint in a wider sleeve
pack: Wolf Tactical curved plates; format: Selected weight-vest pair; size: Check the selected pair’s published size; limit: A vest option; not a claimed GORUCK Standard replacement
### For a Basic Rucker, buy the Standard format.
That pocket is sized for a single GORUCK Standard plate up to 30 lb. A Long plate, curved vest pair or flexible sleeve is a different purchase. If you already own another pack, measure its actual pocket and closure first.
### Best Ruck Plate for GORUCK Packs
GORUCK’s current rigid Ruck Plates are powder-coated ductile iron. The important split is Standard versus Long, not a claim that every GORUCK bag shares one universal pocket.
- **Basic Rucker:** One Standard 10, 20 or 30 lb plate. The listed pocket is 9 × 11.5 × 1.38 inches.
- **Rucker 5.0:** The short pocket takes Standard plates; the long pocket takes Long plates and can also hold Standard. Follow the stated pocket capacities rather than stacking whatever fits.
- **Ruck Plate Carrier:** Check Standard, Long or Heavy on the carrier itself. GORUCK lists Standard for Standard 10/20/30 lb plates, Long for a Long 30/45 lb plate, and Heavy for two Long pockets.
- **GR1 and GR2:** These have travel storage rather than the Rucker’s closed training pockets. An open sleeve containing a plate is not proof that the plate will stay in place during PT.
### Our Pick by Use Case
- **Already own a Basic Rucker:** Buy a Standard plate in the load you can use now. Check the shape in the variant selector; a 30 lb Long is not the same purchase.
- **Already own a compatible weight vest:** Consider Rogue Echo or the selected Wolf pair. Count both plates and the empty vest when calculating total carried weight.
- **Need smaller load changes:** Consider FlexLoad’s removable half-pound weights. Measure the sleeve first; flexibility does not make a 12.25-inch-tall sleeve fit inside every short pocket.
- **Shopping on price:** Compare the same total weight and quantity, including delivery. Yes4All’s 10 lb pair and 20 lb Long solve different packing problems.
### GORUCK Event Weight Requirements
Open the packing list for your specific event before buying the weight. Check the required dry load, any body-weight threshold, what counts toward that load, and how the weight must be secured. Event names alone are not a substitute for the current instructions.
A GORUCK-branded plate is not automatically required just because it is a GORUCK event. Buy to the published rules and your pack’s retention system. Do not buy a heavier plate solely because another event uses it.
### How to Stop Plate Shift
The closure must hold the load before you try to quiet it down.
1. **Check the opening, height and depth.:** Insert the unloaded plate carefully. The flap or closure must fasten fully without forcing the seam.
2. **Check movement with the bag closed.:** Lean forward and walk a few steps. If the plate can rise out of the pocket or tip, use the intended restraint or a better-fitting plate.
3. **Pad remaining gaps.:** Dense foam can reduce side movement. Do not use a towel as the only thing holding a plate in place, and do not force a plate into a hydration compartment.
4. **Keep the first check short.:** Stop and adjust if the load shifts or creates a pressure point. Only add distance once the packing arrangement stays secure.
### Also Considered
This comparison keeps six current product entries rather than preserving older Rep, SH Sports, Aduro and Vulcan rows with unverified dimensions or stock. Titan is also not a current product pick on this page. If you are considering one, get the exact model’s dimensions and quantity before comparing it with the formats above.
### Do You Need a Ruck Plate?
A plate is useful when it solves a packing problem. To try rucking, secure a manageable load in a sturdy bag you already own. Buy a dedicated plate when you know the pocket size and the load you want; there is no required number of walks before upgrading.
### Weight Positioning
Keep the load close to the back panel and secure it in the compartment intended for weight. Do not assume the highest available sleeve is strong enough, or put a loose plate beside a laptop. For a pack without a weight pocket, follow the pack’s load guidance and use a restraint that prevents both vertical and sideways movement.
### Plate Compatibility Guide
- **Same weight, different shape:** The 30 lb GORUCK Standard is shorter and thicker than the 30 lb Long. Use the chosen variant’s dimensions, not the first photo or the product-family name.
- **Single versus pair:** Rogue’s 10LB Pair means two 10 lb plates, or 20 lb before adding the vest. Its 20LB Pair totals 40 lb. Neither description means one flat 20 lb backpack plate.
- **Flexible still has dimensions:** Hyperwear lists 6, 9 and 10 lb sleeves at 12.25 inches high, with widths from 9.80 to 10.50 inches. Check width and height as well as the amount of removable weight.
- **Flat fit is not secure fit:** A plate fitting through a zipper only answers the first question. It must also be held against movement when the bag is closed.
Compare the pocket systems before choosing the bag. [Best Rucking Backpacks](/gear/best-rucking-backpacks)
### DIY Alternatives to Ruck Plates
For a trial walk, use a sealed weight bag or securely packed items with no exposed sharp edges. Protect the bag and restrain the load. Sand needs a sealed inner container; loose hardware-store steel needs proper edge finishing and is not a ready-to-use ruck plate. Skip improvised loads that you cannot keep secure.
### Which Plate Should You Buy?
Write down the pack model, pocket format and starting load. Compare only plates that satisfy those three requirements. If two options fit, decide whether smaller weight increments, a carry handle or compatibility with another piece of gear is worth the price difference.
Need the bag as well? [Compare Rucking Backpacks](/gear/best-rucking-backpacks)
For a complete low-cost setup: [Budget Rucking Starter Kit](/gear/budget-rucking-starter-kit)
### Bottom line
Match the format first: Standard for the Basic Rucker, the appropriate short or long pocket in the Rucker 5.0, and a compatible front-and-back pair for a vest. Then choose the load and compare the delivered price of that exact option. Keep the plate you already own if it fits securely; a different logo alone is no reason to replace it.
### Frequently asked questions
**What is the best ruck plate for a GORUCK Rucker or GR1?**
For a Rucker, choose the Standard or Long format accepted by the pocket you will use. For a GR1, check the open sleeve and separate restraint rather than assuming it has the Rucker’s closed pocket. The pack model and plate format matter more than a blanket brand recommendation.
**Do ruck plate dimensions matter?**
Compare the plate width, height and thickness with the usable pocket and its opening. Check that the closure fastens completely. GORUCK Standard and Long are different formats; a bag’s external dimensions cannot establish plate retention.
**Can you use any weight plate for rucking?**
Use weight that the bag can hold securely without exposed sharp edges or pressure against your back. A round gym plate may be awkward to restrain, but changing to a rectangular plate only helps if the new shape fits the pocket.
**What weight should I start with for a ruck plate?**
Choose a load you can carry with controlled posture on a short walk, then build gradually. Do not buy an event-weight plate just to meet a number before you are ready. Our ruck weight guide covers starting loads and progression.
**Is a GORUCK plate worth the price?**
For a dedicated GORUCK Standard pocket, the matching plate removes a major fit question. In an ordinary backpack, compare the exact dimensions and restraint first; brand alone does not establish a better carry.
**Do Rogue Echo plates fit GORUCK packs?**
Do not assume so. Echo plates are double-curved vest plates, roughly 9.3 inches wide, rather than the 9-inch-wide GORUCK Standard format. Check the exact pocket, depth and closure. Rogue specifies compatible vests; that is not a GORUCK backpack fit guarantee.
**What plate should I buy for a GORUCK event?**
Read the specific event packing list, including required dry load and restraint. Choose a compatible plate at that weight. A GORUCK event name does not by itself establish a requirement to buy GORUCK-branded weight.
**What's the difference between cast iron and steel ruck plates?**
GORUCK currently uses ductile iron; Yes4All uses cast iron. Different alloys and manufacturing methods do not establish fit or long-term durability by themselves. Use the published dimensions and inspect the finish rather than assuming every premium plate is thinner steel.
**Can I use two 10 lb plates instead of one 20 lb plate?**
Only if the pocket is designed to retain both and has enough depth. Count the combined thickness and check that both plates are held securely. In a vest, a pair usually divides the load between the front and back.
**What if my backpack does not have a plate pocket?**
Flexible weights or a securely packed weight bag may suit it, but they still need restraint. FlexLoad has published sleeve dimensions; it does not fit every bag simply because it bends.
**When should I upgrade from a budget plate to a premium one?**
Replace it when fit, secure retention or condition is a problem. A budget plate that fits and remains in good condition does not need replacing on an arbitrary schedule.
**How does plate weight progression work for rucking?**
Increase load only after the current setup and distance are manageable. Smaller removable weights allow finer changes, while a fixed plate requires another plate or a compatible way to add weight. Follow our beginner progression guidance rather than treating the largest plate in stock as the next step.
# Best Ruck Plates 2026: Match the Plate to the Pocket
For a Basic Rucker, start with a GORUCK Standard plate. For a Rucker 5.0, choose Standard or Long to match the pocket you will use. The same 30 lb weight is sold in both shapes. Buying the right weight in the wrong shape is an expensive way to discover that distinction.
A conventional backpack, an open GR1 sleeve and a front-and-back weight vest need different retention. Below, we compare the six product entries we currently carry, including single plates, pairs and flexible weights. The table separates their footprints and buying limits instead of assigning untested durability scores.
This is a research-based buying guide, not a completed hands-on comparison. Manufacturer dimensions establish likely fit; they do not prove that a third-party plate stays secure in your particular bag.
Specifications checked September 14, 2026: [GORUCK plates](https://www.goruck.com/products/ruck-plates), [Ruck Plate Carrier](https://www.goruck.com/products/ruck-plate-carrier), [Rogue Echo](https://www.roguefitness.com/rogue-echo-weight-vest-plates), [Hyperwear FlexLoad](https://hyperwear.com/products/hyperwear-adjustable-flexible-rucking-weights-copy), and [Ruckercise’s Yes4All listing](https://www.ruckercise.com/products/rucking-weight).
Disclosure: Wolf Tactical pays Ruck Authority a higher commission on its own gear through Amazon's Creator Connections program, which is why it appears in this guide. We have not tested it - the specs below come from the manufacturer's listing, and each entry says so.
## Quick picks
- Matching GORUCK pocket: GORUCK Ruck Plates.
- Adjustable flexible weight: Hyperwear FlexLoad Weights.
- Compatible weight vest: Rogue Echo Weight Vest Plates.
- Two smaller rigid plates: Yes4All Cast Iron 10 lb Pair (20 lb total).
## Comparison table
| Plate / weight | What you buy | Published footprint | Fit check that matters |
| --- | --- | --- | --- |
| GORUCK Ruck Plates | Single; Standard or Long | Standard: 9 × 11.5 in; Long: 9.5 × 15 in | Match the named pocket format; 30 lb exists in both |
| Hyperwear FlexLoad | 6, 9 or 10 lb; singles and pairs | 12.25 in high; 9.80–10.50 in wide by size | Too tall for a Basic Rucker’s listed 11.5 in plate pocket |
| Rogue Echo | Two 5, two 10 or two 20 lb plates | About 9.3 × 11.3 in; double-curved | Vest-shaped; width and curvature differ from Standard GORUCK |
| Yes4All 10 lb pair | Two separate plates; 20 lb total | Check both plates and combined thickness | Do not infer a secure stacked fit from total weight |
| Yes4All 20 lb Long | Single 20 lb plate | 6 7/8 × 14 13/16 in; 7/8 in thick | Longer than the Basic Rucker pocket; needs side restraint in a wider sleeve |
| Wolf Tactical curved plates | Selected weight-vest pair | Check the selected pair’s published size | A vest option; not a claimed GORUCK Standard replacement |
## Best Ruck Plate for GORUCK Packs
GORUCK’s current rigid Ruck Plates are powder-coated ductile iron. The important split is Standard versus Long, not a claim that every GORUCK bag shares one universal pocket.
- **Basic Rucker:** One Standard 10, 20 or 30 lb plate. The listed pocket is 9 × 11.5 × 1.38 inches.
- **Rucker 5.0:** The short pocket takes Standard plates; the long pocket takes Long plates and can also hold Standard. Follow the stated pocket capacities rather than stacking whatever fits.
- **Ruck Plate Carrier:** Check Standard, Long or Heavy on the carrier itself. GORUCK lists Standard for Standard 10/20/30 lb plates, Long for a Long 30/45 lb plate, and Heavy for two Long pockets.
- **GR1 and GR2:** These have travel storage rather than the Rucker’s closed training pockets. An open sleeve containing a plate is not proof that the plate will stay in place during PT.
## Our Pick by Use Case
- **Already own a Basic Rucker:** Buy a Standard plate in the load you can use now. Check the shape in the variant selector; a 30 lb Long is not the same purchase.
- **Already own a compatible weight vest:** Consider Rogue Echo or the selected Wolf pair. Count both plates and the empty vest when calculating total carried weight.
- **Need smaller load changes:** Consider FlexLoad’s removable half-pound weights. Measure the sleeve first; flexibility does not make a 12.25-inch-tall sleeve fit inside every short pocket.
- **Shopping on price:** Compare the same total weight and quantity, including delivery. Yes4All’s 10 lb pair and 20 lb Long solve different packing problems.
## GORUCK Event Weight Requirements
Open the packing list for your specific event before buying the weight. Check the required dry load, any body-weight threshold, what counts toward that load, and how the weight must be secured. Event names alone are not a substitute for the current instructions.
A GORUCK-branded plate is not automatically required just because it is a GORUCK event. Buy to the published rules and your pack’s retention system. Do not buy a heavier plate solely because another event uses it.
## How to Stop Plate Shift
The closure must hold the load before you try to quiet it down.
1. **Check the opening, height and depth.** Insert the unloaded plate carefully. The flap or closure must fasten fully without forcing the seam.
2. **Check movement with the bag closed.** Lean forward and walk a few steps. If the plate can rise out of the pocket or tip, use the intended restraint or a better-fitting plate.
3. **Pad remaining gaps.** Dense foam can reduce side movement. Do not use a towel as the only thing holding a plate in place, and do not force a plate into a hydration compartment.
4. **Keep the first check short.** Stop and adjust if the load shifts or creates a pressure point. Only add distance once the packing arrangement stays secure.
## Also Considered
This comparison keeps six current product entries rather than preserving older Rep, SH Sports, Aduro and Vulcan rows with unverified dimensions or stock. Titan is also not a current product pick on this page. If you are considering one, get the exact model’s dimensions and quantity before comparing it with the formats above.
## Do You Need a Ruck Plate?
A plate is useful when it solves a packing problem. To try rucking, secure a manageable load in a sturdy bag you already own. Buy a dedicated plate when you know the pocket size and the load you want; there is no required number of walks before upgrading.
## Weight Positioning
Keep the load close to the back panel and secure it in the compartment intended for weight. Do not assume the highest available sleeve is strong enough, or put a loose plate beside a laptop. For a pack without a weight pocket, follow the pack’s load guidance and use a restraint that prevents both vertical and sideways movement.
## Plate Compatibility Guide
- **Same weight, different shape:** The 30 lb GORUCK Standard is shorter and thicker than the 30 lb Long. Use the chosen variant’s dimensions, not the first photo or the product-family name.
- **Single versus pair:** Rogue’s 10LB Pair means two 10 lb plates, or 20 lb before adding the vest. Its 20LB Pair totals 40 lb. Neither description means one flat 20 lb backpack plate.
- **Flexible still has dimensions:** Hyperwear lists 6, 9 and 10 lb sleeves at 12.25 inches high, with widths from 9.80 to 10.50 inches. Check width and height as well as the amount of removable weight.
- **Flat fit is not secure fit:** A plate fitting through a zipper only answers the first question. It must also be held against movement when the bag is closed.
Compare the pocket systems before choosing the bag. [Best Rucking Backpacks](/gear/best-rucking-backpacks).
## DIY Alternatives to Ruck Plates
For a trial walk, use a sealed weight bag or securely packed items with no exposed sharp edges. Protect the bag and restrain the load. Sand needs a sealed inner container; loose hardware-store steel needs proper edge finishing and is not a ready-to-use ruck plate. Skip improvised loads that you cannot keep secure.
## Which Plate Should You Buy?
Write down the pack model, pocket format and starting load. Compare only plates that satisfy those three requirements. If two options fit, decide whether smaller weight increments, a carry handle or compatibility with another piece of gear is worth the price difference.
Need the bag as well? [Compare Rucking Backpacks](/gear/best-rucking-backpacks).
For a complete low-cost setup: [Budget Rucking Starter Kit](/gear/budget-rucking-starter-kit).
## Which should you buy?
Match the format first: Standard for the Basic Rucker, the appropriate short or long pocket in the Rucker 5.0, and a compatible front-and-back pair for a vest. Then choose the load and compare the delivered price of that exact option. Keep the plate you already own if it fits securely; a different logo alone is no reason to replace it.
## Frequently asked questions
### What is the best ruck plate for a GORUCK Rucker or GR1?
For a Rucker, choose the Standard or Long format accepted by the pocket you will use. For a GR1, check the open sleeve and separate restraint rather than assuming it has the Rucker’s closed pocket. The pack model and plate format matter more than a blanket brand recommendation.
### Do ruck plate dimensions matter?
Compare the plate width, height and thickness with the usable pocket and its opening. Check that the closure fastens completely. GORUCK Standard and Long are different formats; a bag’s external dimensions cannot establish plate retention.
### Can you use any weight plate for rucking?
Use weight that the bag can hold securely without exposed sharp edges or pressure against your back. A round gym plate may be awkward to restrain, but changing to a rectangular plate only helps if the new shape fits the pocket.
### What weight should I start with for a ruck plate?
Choose a load you can carry with controlled posture on a short walk, then build gradually. Do not buy an event-weight plate just to meet a number before you are ready. Our ruck weight guide covers starting loads and progression.
### Is a GORUCK plate worth the price?
For a dedicated GORUCK Standard pocket, the matching plate removes a major fit question. In an ordinary backpack, compare the exact dimensions and restraint first; brand alone does not establish a better carry.
### Do Rogue Echo plates fit GORUCK packs?
Do not assume so. Echo plates are double-curved vest plates, roughly 9.3 inches wide, rather than the 9-inch-wide GORUCK Standard format. Check the exact pocket, depth and closure. Rogue specifies compatible vests; that is not a GORUCK backpack fit guarantee.
### What plate should I buy for a GORUCK event?
Read the specific event packing list, including required dry load and restraint. Choose a compatible plate at that weight. A GORUCK event name does not by itself establish a requirement to buy GORUCK-branded weight.
### What's the difference between cast iron and steel ruck plates?
GORUCK currently uses ductile iron; Yes4All uses cast iron. Different alloys and manufacturing methods do not establish fit or long-term durability by themselves. Use the published dimensions and inspect the finish rather than assuming every premium plate is thinner steel.
### Can I use two 10 lb plates instead of one 20 lb plate?
Only if the pocket is designed to retain both and has enough depth. Count the combined thickness and check that both plates are held securely. In a vest, a pair usually divides the load between the front and back.
### What if my backpack does not have a plate pocket?
Flexible weights or a securely packed weight bag may suit it, but they still need restraint. FlexLoad has published sleeve dimensions; it does not fit every bag simply because it bends.
### When should I upgrade from a budget plate to a premium one?
Replace it when fit, secure retention or condition is a problem. A budget plate that fits and remains in good condition does not need replacing on an arbitrary schedule.
### How does plate weight progression work for rucking?
Increase load only after the current setup and distance are manageable. Smaller removable weights allow finer changes, while a fixed plate requires another plate or a compatible way to add weight. Follow our beginner progression guidance rather than treating the largest plate in stock as the next step.
────────────────────────────────────────────────────────────────────────────────
URL: https://ruckauthority.com/gear/ruck-plate-vs-plate-carrier-for-rucking
Title: Ruck Plates vs Steel Plate Carriers for Rucking
Description: Ruck plate vs steel plate carrier comparison for 2026. Compare weight distribution, comfort, and training effectiveness for different rucking goals.
Published: 2026-05-31
## Ruck Plate vs Steel Plate Carrier: Which Works Better?
### Compare How Each Load Sits
The rucking community debates whether weight belongs in your pack or strapped to your body. Reddit users consistently report different experiences with ruck plates versus steel plate carriers - each system affects posture, endurance, and training outcomes differently. Community feedback shows the choice impacts everything from shoulder comfort to core engagement during longer rucks.
We analyzed community consensus across forums, aggregated reviewer feedback, and cross-referenced specs to compare these two weight distribution approaches. The decision comes down to your training goals, comfort preferences, and how you want the weight to affect your movement patterns during rucks.
### Quick picks
- **Best Overall:** GORUCK Ruck Plates ($50-150)
- **Best Value:** GORUCK Ruck Plate Carrier 3.0 (Standard) ($50-150)
### Budget and use-case tiers
- **Tier 1: Premium Complete System ($150-300):** Purpose-built carrier with dedicated plates for serious rucking programs where comfort and durability justify the investment.
- **Tier 2: Plates Only ($50-150):** Dedicated ruck plates that fit properly in existing packs without the specialized carrier system.
- **Tier 3: DIY Weight (Under $25):** Household alternatives like sand-filled gallon jugs or wrapped weight plates for testing the waters before investing in purpose-built gear.
### Comparison table
product: GORUCK Ruck Plates; price: $50-150; rating: 8.8/10; type: Weight Plates; bestFor: GORUCK pack owners
product: GORUCK Ruck Plate Carrier 3.0; price: $50-150; rating: 8.5/10; type: Plate Carrier; bestFor: Plate-only training
### Weight Distribution Mechanics
Ruck plates in backpacks position weight behind your center of gravity, creating a posterior load that engages your posterior chain muscles differently than front-loaded systems. This positioning encourages a slight forward lean that many find natural for walking and hiking motions. The weight sits primarily on your shoulders and hips through the backpack's suspension system, distributing load across multiple contact points.
Plate carriers position weight both front and back, creating a more balanced load around your torso's center of gravity. This distribution changes your posture and gait mechanics significantly. Reddit users consistently report that the same weight feels heavier in a plate carrier due to the restriction of natural torso movement and the way the weight compresses against your chest and back.
The physics matter for training adaptation. Backpack loading allows for more natural arm swing and breathing patterns, making it suitable for longer duration efforts. Plate carrier loading restricts these natural movements intentionally, creating a more challenging cardiovascular demand even at lighter weights. Many reviewers note feeling more winded during plate carrier rucks despite carrying less total weight.
Weight distribution also affects joint stress patterns. Backpack systems tend to load the spine in extension, while plate carriers create more compression loading. This difference becomes significant for people with existing back issues or those training for specific occupational demands where body armor is standard equipment.
### Comfort and Usability Factors
Traditional ruck plates excel in comfort for extended efforts. The rounded edges and proper thickness prevent pressure points that plague improvised weight solutions. Quality ruck plates like those from GORUCK feature smooth surfaces and dimensions optimized for backpack carry, eliminating the hot spots and sharp edges common with standard weight plates.
Backpack systems also provide superior ventilation compared to plate carriers. Air circulation around your torso prevents the significant heat buildup that occurs when plates press directly against your body. Community feedback consistently highlights overheating as a major limitation of plate carrier systems, particularly in warm weather or during high-intensity efforts.
Storage versatility gives backpack systems another advantage for longer rucks. You can carry hydration, food, and gear alongside your weight plates, making the system practical for actual hiking or extended training sessions. Plate carriers typically offer minimal storage, limiting their utility for anything beyond focused weight-bearing exercise.
However, plate carriers provide advantages in specific training scenarios. The weight sits closer to your body's center of mass, reducing the pendulum effect that can occur with heavy backpack loads during dynamic movements. This makes plate carriers superior for training that involves running, jumping, or rapid direction changes.
Adjustment and fit also differ significantly between systems. Quality backpacks offer extensive adjustment for torso length, shoulder width, and load positioning. Plate carriers typically provide less adjustment range, making proper fit more critical during initial selection. Reviewers note that poorly fitted plate carriers become unusable quickly, while backpacks offer more forgiveness in sizing.
### Training Specificity and Goals
The choice between systems often aligns with training objectives and background. Military personnel, law enforcement, and first responders frequently prefer plate carrier training because it mimics their operational equipment. The restricted movement and breathing patterns created by plate carriers provide specific conditioning for wearing body armor during demanding physical tasks.
Recreational ruckers generally benefit more from backpack-based systems. The comfort and versatility support longer training sessions and make rucking sustainable as a regular fitness practice. The natural movement patterns align better with hiking and walking, which represent the foundational activities most people want to improve through rucking.
Distance considerations also influence system selection. Backpack systems remain practical for rucks extending beyond 10-12 miles, while plate carriers typically become uncomfortable for extended efforts. The compression and heat buildup inherent in plate carrier design limit their utility for long-distance training.
Training progression differs between systems as well. Backpack rucking allows for gradual weight increases over longer distances, supporting endurance development. Plate carrier training typically emphasizes shorter, more intense efforts that build strength and conditioning under equipment restrictions.
Competition rucking almost universally uses backpack systems. Events like GORUCK challenges, ruck races, and endurance competitions assume backpack carry. Training with a plate carrier for backpack-based competition creates a mismatch that can hurt performance and comfort during actual events.
### Bottom line
Start with standard ruck plates in a quality pack if you're new to weighted rucking - they're more forgiving and let you focus on form. Consider a steel plate carrier once you're comfortable with 30+ pound loads and want the different training stimulus that front-loaded weight provides for core and posture work.
### Frequently asked questions
**What's the best weight carrier for rucking beginners?**
The GORUCK Ruck Plate Carrier 3.0 Standard offers excellent stability and comfort for new ruckers. Community feedback shows it distributes weight evenly against your back, preventing the shifting that causes discomfort. Pair it with GORUCK Ruck Plates for a complete system that grows with your fitness level.
**Are GORUCK ruck plates worth the premium price?**
GORUCK Ruck Plates have flat surfaces and rounded corners made for compatible plate pockets. That purpose-built fit may justify the higher price for frequent use, but a lower-cost plate can also work if its dimensions match the pocket and the weight can be secured.
**Can I use regular weight plates instead of ruck-specific plates?**
Standard gym plates aren't ideal for rucking due to their round shape and sharp edges. They shift during movement and can damage both your pack and back. GORUCK Ruck Plates feature flat surfaces and rounded corners specifically designed for comfortable, stable carry during dynamic movement.
**How do I choose the right ruck plate weight to start with?**
Start with 10-20 pounds regardless of your fitness level. Reddit users report that proper form matters more than heavy weight initially. The GORUCK system lets you add plates gradually as you build endurance. Focus on maintaining good posture for 30-45 minutes before increasing load.
Ruck plates carried in a backpack and plates worn in a carrier put the load in different places. That changes comfort, heat, movement, storage, and the kinds of training each setup suits.
For walking, hiking, and longer rucks, a backpack is usually the more practical choice. A plate carrier is better suited to short conditioning sessions or training that needs to resemble body armor.
*This comparison uses manufacturer specifications and recurring fit and comfort themes in r/[goruck](/glossary#goruck), military-fitness forums, and retailer reviews.*
The sections below compare how each setup carries, what it can hold, and where it works best.
## Weight Distribution Mechanics
Ruck plates in backpacks position weight behind your center of gravity, creating a posterior load that engages your [posterior chain](/glossary#posterior-chain) muscles differently than front-loaded systems. This positioning encourages a slight forward lean that many find natural for walking and hiking motions. The weight sits primarily on your shoulders and hips through the backpack's suspension system, distributing load across multiple contact points.
Plate carriers position weight on the front and back of the torso. The load stays close to the body, but the carrier can restrict torso movement and press against the chest and back. Do not assume the same weight will feel the same in both systems.
Backpack loading leaves more room for natural arm swing and breathing, which makes it better suited to longer efforts. A plate carrier can restrict both. Start lighter when changing systems and judge the load by how you move and breathe, not by the number on the plate.
Weight distribution also affects joint stress patterns. Backpack systems tend to load the spine in extension, while plate carriers create more compression loading. This difference becomes significant for people with existing back issues or those training for specific occupational demands where body armor is standard equipment.
## Comfort and Usability Factors
Traditional ruck plates excel in comfort for extended efforts. The rounded edges and proper thickness prevent pressure points that plague improvised weight solutions. Quality ruck plates like those from GORUCK feature smooth surfaces and dimensions optimized for backpack carry, eliminating the hot spots and sharp edges common with standard weight plates.
Backpacks also leave more of the chest open to air. A plate carrier covers the front and back of the torso, so it usually feels hotter in warm weather or during hard efforts.
Storage versatility gives backpack systems another advantage for longer rucks. You can carry hydration, food, and gear alongside your weight plates, making the system practical for actual hiking or extended training sessions. Plate carriers typically offer minimal storage, limiting their utility for anything beyond focused weight-bearing exercise.
However, plate carriers provide advantages in specific training scenarios. The weight sits closer to your body's center of mass, reducing the pendulum effect that can occur with heavy backpack loads during dynamic movements. This makes plate carriers superior for training that involves running, jumping, or rapid direction changes.
Adjustment also differs. Many backpacks let you change torso length, shoulder fit, and load position. Plate carriers often have a narrower adjustment range, so checking the maker's sizing chart matters.
## Training Specificity and Goals
The choice between systems often aligns with training objectives and background. Military personnel, law enforcement, and first responders frequently prefer plate carrier training because it mimics their operational equipment. The restricted movement and breathing patterns created by plate carriers provide specific conditioning for wearing body armor during demanding physical tasks.
Recreational ruckers generally benefit more from backpack-based systems. The comfort and versatility support longer training sessions and make rucking sustainable as a regular fitness practice. The natural movement patterns align better with hiking and walking, which represent the foundational activities most people want to improve through rucking.
Distance considerations also influence system selection. Backpack systems remain practical for rucks extending beyond 10-12 miles, while plate carriers typically become uncomfortable for extended efforts. The compression and heat buildup inherent in plate carrier design limit their utility for long-distance training.
Training progression differs between systems as well. Backpack rucking allows for gradual weight increases over longer distances, supporting endurance development. Plate carrier training typically emphasizes shorter, more intense efforts that build strength and conditioning under equipment restrictions.
Competition rucking almost universally uses backpack systems. Events like GORUCK challenges, ruck races, and endurance competitions assume backpack carry. Training with a plate carrier for backpack-based competition creates a mismatch that can hurt performance and comfort during actual events.
## Frequently asked questions
────────────────────────────────────────────────────────────────────────────────
URL: https://ruckauthority.com/gear/rucking-for-weight-loss-gear-guide
Title: Best Rucking Gear for Weight Loss: The Complete Starter Kit
Description: Exactly what gear you need to start rucking for weight loss - the right pack, weight, shoes, and socks - plus what to skip. Starter kit under $200.
Published: 2026-04-18 / Updated: 2026-09-25
## Best first pack for weight-loss rucking
If you are buying one pack for fat-loss-first rucking, start with the 5.11 RUSH 24 2.0. It is the right middle ground: cheaper than a GORUCK, more structured than a normal daypack, and big enough for water, a plate, and the small items that keep a 30-minute walk from turning into a shoulder-and-lower-back problem.
## The four-piece weight-loss rucking kit at a glance
**Expect roughly $300-350 for the upgraded setup or $100-150 for the budget version.** Four items get you started; everything else is an upgrade for month two or three. Check the linked product cards for current prices.
| Category | Premium pick | Budget pick | Why it matters |
| --- | --- | --- | --- |
| **Pack** (15-25 lb starter) | [5.11 RUSH 24 2.0](/gear/best-rucking-backpacks) | [CONDOR 3-Day Assault](/gear/best-rucking-backpacks-under-150) | A structured back panel keeps the load high and stable. Both have the geometry to hold a flat plate. |
| **Plate** (20 lb starter) | [GORUCK Ruck Plate](/gear/ruck-plate-comparison) | [Titan Fitness Cast Iron Plate](/gear/ruck-plate-comparison) | The single biggest comfort upgrade. Loose weight shifts and makes consistent progression harder. |
| **Shoes** (3.5 mph pavement) | [Salomon XA Pro 3D V9 GTX](/gear/best-rucking-shoes-by-terrain) | Existing walking shoes | Your current shoes are fine for week one. Upgrade only when miles climb or terrain changes. |
| **Watch** (Zone 2 HR tracking) | [Garmin Instinct 3 Solar](/gear/best-gps-watches-for-rucking) | Phone tracking | A watch is a later upgrade if rucking sticks; a phone tracks pace and distance in month one. |
## Buy now, buy later, or skip - the whole starter kit at a glance
If you only have ten minutes to read this guide, this table is the whole answer. Buy the four required items, defer the recommended ones to month two or three, and skip the things competitor articles try to sell you on day one.
| Status | Item | Why |
| --- | --- | --- |
| **BUY NOW** | Pack with a structured back panel (Condor, 5.11 RUSH 24, or a current GORUCK Rucker) | A floppy daypack lets the load shift and create pressure points. |
| **BUY NOW** | Ruck plate at 10-15% bodyweight (budget cast iron or fitted GORUCK) | Books, bricks, and loose sandbags move around. A stable plate makes progression predictable. |
| **BUY NOW** | Merino socks | Cotton holds moisture. Merino or a good synthetic blend reduces friction on longer walks. |
| **BUY NOW** | Anti-chafe | Apply before, not after, anywhere you reliably develop friction. |
| **ADD LATER** | Trail running shoes for terrain transitions | Your existing walking shoes are fine for the first four weeks. Upgrade only when you start adding terrain or mileage. |
| **ADD LATER** | Hydration bladder (Source WXP 3L) | A water bottle in the side pocket works until you start doing 60+ minute rucks. |
| **ADD LATER** | GPS watch (Garmin Instinct 3 Solar) | Your phone tracks pace and distance fine. A watch is a later upgrade if rucking sticks. |
| **SKIP** | Trekking poles | Not needed on flat pavement or gentle trails. Buy when terrain demands them. |
| **SKIP** | Plate carrier vest | The pack-and-plate combo is the beginner default. Vests are a different category, not an upgrade. |
| **SKIP** | Reflective belts, headlamps, MOLLE accessories | Buy these when you have a specific use case (events, night rucks). Not weight-loss starter gear. |
| **SKIP** | Books, bricks, or sandbags as weight | They shift, pressure-point, and are the reason half of beginners quit. Buy an actual plate. |
## Why rucking works for weight loss
A 170-pound person walking unloaded at 3 mph on flat pavement burns roughly 280 calories an hour. Add a 25-pound pack at the same pace and that rises to about 310. The pack earns its keep on hills: the same 25 pounds up a 5% grade is about 485, and 35 pounds up an 8% grade is about 620, close to jogging at 5 mph, without the impact.
Those numbers come from the Pandolf load-carriage equation, the model behind our [calorie calculator](/tools/calorie-calculator). It tends to under-predict heavier loads, so treat them as conservative. The practical lesson for weight loss: choose a hillier route before a heavier plate.
What makes it sustainable - more than calorie math - is the low-impact profile. Running at a pace that burns 500 calories per hour also puts 2.5x your bodyweight of ground-reaction force through your knees with every stride. Rucking at the same caloric rate stays closer to 1.5x. For anyone who has knees, hips, or a history of running injuries, that difference matters enormously over the years it takes to actually change your body composition.
The catch: you need the right gear, or you will quit at week three when your lower back hurts every time you put the pack on.
## The four-item starter kit
Rucking does not need ten items. It needs four. Everything else is optional or upgradeable later.
### Buy in this order
| Priority | Buy | Why it comes first |
| --- | --- | --- |
| 1 | Pack that holds weight close | If the load shifts, every walk feels worse than it should. |
| 2 | Known weight | A plate or flexible weight lets you progress instead of guessing. |
| 3 | Merino socks and anti-chafe | Blisters end consistency faster than lack of motivation. |
| 4 | Hydration | Longer repeatable walks need water before they need more gadgets. |
### 1. A pack that holds weight properly
The #1 mistake new ruckers make: using an old hiking daypack that has no plate pocket and a soft back panel. The weight slides to your lower back, shifts every step, and creates lumbar pain by mile two.
**What to look for:**
- A structured back panel (not floppy foam)
- Either a dedicated plate pocket OR enough structure to hold a flexible weight flat
- Padded shoulder straps (not flat nylon webbing)
- 20-40 liters of capacity (bigger is not better)
**Starter budget:** [CONDOR 3-Day Assault](/gear/best-rucking-backpacks-under-150). Tactical, 50L, MOLLE, 600D polyester. Fine for moderate use while you learn what fit you prefer.
**Recommended:** [5.11 RUSH 24 2.0](/gear/best-rucking-backpacks). 1050D water-repellent nylon, 37L, durable. The best balance of capacity, build, and price.
**Premium ($245-$285):** [GORUCK Rucker 5.0](/gear/goruck-rucker-vs-gr1). Dual elevated plate pockets, a contoured lumbar pad, a 1000D Cordura shell, and the SCARS lifetime guarantee. Buy this if you already know rucking is your sport.
**Daily-carry premium:** GORUCK GR1 26L. It adds broader daily and travel utility to the durable 1000D Cordura build and SCARS lifetime warranty. If you are choosing between a training-first Rucker and a work-and-travel GR1, [see our full Rucker vs GR1 comparison](/gear/goruck-rucker-vs-gr1).
### 2. The weight itself
Start with 10-15% of your bodyweight. For a 170-pound person that is 17-25 pounds.
**What not to do:** do not use books, bricks, or sandbags for your first four weeks. They shift, they create pressure points, and they are the reason half of beginners quit. Buy an actual ruck plate.
**Budget:** [Titan Fitness Cast Iron Ruck Plate](/gear/ruck-plate-comparison) (20 lb). Works in many packs and uses a protective coating.
**Premium fit:** [GORUCK Ruck Plate](/gear/ruck-plate-comparison) 20 lb. Its shape is designed for compatible GORUCK pockets.
**Non-GORUCK pack? The flex pick:** [Hyperwear FlexLoad](/gear/best-weighted-vests-for-rucking-in-2026) (~$55-$129). A flexible weight that conforms to any pack without shifting. Solves the "my pack has no plate pocket" problem without needing a plate carrier insert.
### 3. Socks that prevent blisters
Cotton socks will end your weight-loss journey in the first week. Merino wool is non-negotiable.
**Default:** [Darn Tough Light Hiker](/gear/best-rucking-socks-blister-prevention). Merino construction, made in Vermont, with Darn Tough's published lifetime guarantee.
**Alternative:** [Smartwool Hike Full Cushion Crew](/gear/best-rucking-socks-blister-prevention). A softer full-cushion option that is widely stocked.
**Toe-separation option:** [Injinji Trail Midweight](/gear/injinji-toe-socks-for-rucking). For anyone prone to inter-toe blisters.
### 4. Hydration
The only item where cheapest works great.
**Simple bottle:** Nalgene 32 oz Wide Mouth. Durable and sized for many pack side pockets.
**Insulated upgrade ($45-$55):** Hydro Flask 32 oz. It keeps water colder on long summer rucks.
## The first four weeks
The gear is only half the equation. The other half is the progression that keeps you from quitting. The four weeks below get you started; for the full ramp, follow our [12-week rucking for weight loss plan](/pillars/rucking-for-weight-loss).
**Week 1:** 20-30 minute rucks, 3x per week, at 10% of your bodyweight. Flat terrain, normal pace. Goal: get your connective tissue used to load.
**Week 2:** Same weight, same frequency, bump to 35-40 minutes per ruck.
**Week 3:** If no knee or back pain, add 5 pounds. Stay at 40 minutes.
**Week 4:** If still feeling good, extend one ruck per week to 60 minutes. Keep the others at 40.
**Red flags - back off immediately:**
- Sharp lumbar pain (not muscle fatigue)
- Numbness in hands or fingers (rucksack palsy - adjust straps wider)
- Knee pain that persists 24+ hours after a ruck
- Any foot pain that is not a simple blister
By week four you will have a working baseline. From there, add weight in 5-pound increments every 2-3 weeks until you reach 25-30% of bodyweight (roughly double where most people start).
## What you do not need to buy (yet)
Save your money. These are nice-to-have, not necessary:
- **GPS watch** - your phone tracks pace and distance fine. A watch is a year-two upgrade.
- **Trekking poles** - not needed for flat pavement or gentle trails.
- **Hydration bladder** - a water bottle in the side pocket works.
- **Plate carrier vest** - the pack-and-plate combo is the beginner default.
- **Expensive tactical gear** - reflective gear, headlamps, paracord, MOLLE accessories. Buy these when you have a specific use case.
## The recomp starter kit (if you want it done for you)
If the research above is too much, use the beginner starter loadout. It keeps the pack, weight, shoes, socks, hydration, and anti-chafe picks together so you can review each current product before buying.
The kit lives on our shop page as "Recomp Starter." It is the same kit the above research converges on, just pre-assembled.
## How rucking compares to other weight-loss cardio
| Activity | Calories/hr (170 lb) | Joint impact | Gear cost | Sustainability |
|---|---|---|---|---|
| **Rucking (25 lb)** | about 310 flat, 485 up a 5% grade (3 mph) | Low-moderate | Moderate; lower if you own a pack | **High** |
| Walking (unloaded) | about 280 (3 mph, flat) | Low | No dedicated equipment required | High |
| Running | about 670-790 (5-6 mph) | High | Shoes | Moderate |
| Cycling | 400-600 | Very low | Usually the highest entry cost here | Moderate (weather-dependent) |
| Elliptical | 350-500 | Low | Gym access or home machine | Low for people who dislike indoor cardio |
| HIIT | 500-700 | High | Little dedicated equipment required | Depends on recovery and preference |
Rucking, cycling, and walking can all support sustainable weight loss. Rucking combines higher energy demand than unloaded walking with equipment that can last for years, but the best choice is still the one you can repeat consistently.
## Ready to start?
- [See the Recomp Starter kit and review each pick →](/shop)
- [Browse every rucking gear category on our shop →](/shop)
- [Read the full Rucker vs GR1 comparison if you are shopping premium →](/gear/goruck-rucker-vs-gr1)
- [Best rucking backpacks under $200 (the budget-conscious version of this guide) →](/gear/best-rucking-backpacks-under-150)
## Frequently Asked Questions
────────────────────────────────────────────────────────────────────────────────
URL: https://ruckauthority.com/gear/smartwool-merino-base-layers
Title: Smartwool Merino Base Layers Review: Best Base Layers for Rucking?
Description: Smartwool merino base layers reviewed for rucking: moisture control, odor resistance, warmth, durability, fit, and layering value.
Published: 2026-04-27 / Updated: 2026-05-02
When you're hauling a [weighted ruck pack](/gear/goruck-gr1) for miles, your base layer becomes your first line of defense against moisture buildup and temperature swings. Smartwool's merino base layers have earned a reputation in hiking and military communities for their natural odor resistance and temperature regulation - but do they hold up under the unique demands of weighted movement?
This is a specification-led review of where Smartwool's fabric weights, blends, fit, and care requirements make sense for loaded walking. Ruck Authority has not completed an evidence-recorded field test of these layers, so the page does not present anonymous forum comments as firsthand performance data.
## Overview
Smartwool's merino base layer line includes the Classic Thermal series, Merino 150, and Merino 250 collections, each targeting different activity levels and weather conditions. According to manufacturer specifications, these are made from what Smartwool claims to be responsibly sourced merino wool blended with synthetic fibers for durability, with ZoneKnit construction placing different fabric weights where your body needs them most.
What sets merino apart from synthetic base layers is its natural properties: odor resistance that actually works, moisture management that keeps you comfortable during exertion, and temperature regulation that adapts as conditions change. For ruckers dealing with sustained effort under load, these characteristics matter more than marketing claims.
The product line covers everything from lightweight 150gsm options for warm weather rucks to heavier 250gsm pieces for cold conditions, with both crew neck and zip options for tops, plus full coverage bottoms.
## Key Specs
The specs reveal a thoughtful approach to construction:
**Materials**: Many models feature an 87% merino wool, 13% nylon blend, though blend ratios vary across different models in the product line. According to Smartwool, the merino comes from New Zealand farms following responsible land use practices.
**Weight Categories**:
- Merino 150: 150gsm fabric weight for mild to warm conditions
- Classic Thermal: Medium-weight option around 200gsm
- Merino 250: 250gsm for cold weather layering
**Construction Features**: ZoneKnit technology places different knit structures strategically - lighter, more breathable panels where you sweat more, denser knits for core warmth retention.
**Fit Options**: Slim fit designed for layering under other garments without bulk, available in both men's and women's cuts with extended size ranges.
**Care**: Follow the label for the exact garment. Smartwool's published wool-care guidance recommends a gentle cycle with mild detergent, avoiding bleach and fabric softener, and air drying when possible.
## What the product specifications mean for rucking
Smartwool separates its current line by fabric and temperature role rather than claiming one shirt works everywhere.
**Classic All-Season**: Smartwool lists this as a 150 g/m² merino blend with a nylon core. It is the most logical starting point for mild-weather rucking because the lighter fabric is intended for year-round activity and layering.
**Classic Thermal**: The current crew is a 250 g/m², 100% merino layer intended for cool-to-cold conditions. It uses a slim fit, flatlock seams, and offset shoulder and side seams, which are relevant under pack straps, but the warmer fabric can be too much for hard efforts in mild weather.
**Intraknit**: Smartwool uses body-mapped construction and ventilation zones. It is the more technical option when articulation and heat management justify the higher price.
**Durability question**: A nylon-core blend should be the first comparison for repeated use under pack straps. Ruck Authority has not completed an abrasion or wash-cycle field test, so this page does not assign a lifespan to any model.
## Who It's Best For
Smartwool merino base layers work best for:
**Multi-Day Ruckers**: Merino's manufacturer-stated odor resistance makes it a reasonable category to consider when washing is not practical.
**Variable Weather Ruckers**: A 150 g/m² all-season layer can bridge cool starts and warmer movement more easily than a 250 g/m² thermal piece.
**Ruckers sensitive to seam placement**: Flatlock and offset seams are worth comparing against the exact contact points of your [weighted pack](/gear/ruck-plate-comparison). Fabric preference still requires an individual fit check.
**Not Ideal For**: Budget-conscious ruckers doing primarily day training, or those who prioritize maximum durability over natural fiber benefits. If you're doing basic neighborhood [ruck training](/pillars/rucking-training-programs) and washing after each session, synthetic options provide similar moisture management at lower cost.
## Comparison to Alternatives
Compare alternatives on the same measurable dimensions:
**Other merino brands**: Match fabric weight, merino percentage, nylon reinforcement, seam placement, fit range, care instructions, warranty, and current price. A brand name alone does not establish durability under straps.
**Synthetic options**: Usually cost less and may dry faster. They make sense for day training when the garment is washed after every use and odor management across several days is not a priority.
**Merino blends**: Sit between the two. A nylon-core blend trades some merino percentage for a construction intended to improve durability and shape retention.
Smartwool sits in the premium tier. The price makes sense if you value natural fiber benefits, but budget alternatives still work for basic moisture management needs.
## Bottom Line
Smartwool merino base layers are most compelling for [rucking](/glossary#rucking) when odor management, multi-day wear, and warmth across changing conditions matter more than low price or maximum abrasion resistance.
However, durability limits and premium pricing may not align with every [rucker](/glossary#rucker)'s priorities. If you're doing multi-day events, have sensitive skin, or frequently ruck in variable conditions, the performance characteristics justify the investment. For basic training rucks where you're washing after each session, synthetic alternatives provide adequate moisture management at lower cost.
The 150 g/m² Classic All-Season is the broadest starting point for most rucking applications. Move to the 250 g/m² Classic Thermal when cold-weather warmth is the actual requirement.
## Frequently Asked Questions
## TRAINING HUB (25 articles)
────────────────────────────────────────────────────────────────────────────────
URL: https://ruckauthority.com/training/30-lb-vs-45-lb-ruck-when-to-make-the-jump
Title: 30 lb vs 45 lb Ruck: Calorie Burn, Training Effect, and When to Make the Jump
Description: In a 180-pound, 4 mph calculator example, moving from 30 lb to 45 lb adds 50% more pack load but about 7% more estimated calories. Learn when the heavier load fits the goal.
Published: 2026-05-22 / Updated: 2026-09-25
Moving from a 30-pound pack to a 45-pound pack adds 50% more pack load. In the 180-pound, 4 mph calculator example below, it adds about 7% to estimated energy use. That tradeoff matters because tissue load and calorie estimates do not rise at the same rate.
The better choice depends on the goal, training history, form, and recovery.
This is general training guidance, not medical advice. If you have recent knee, hip, back, foot, bone-density, or cardiovascular issues, get a clinician or physical therapist to sanity-check your load progression before moving from 30 to 45 pounds.
## The short answer
**Stay at 30 pounds** if it supports general fitness, weight loss, or repeatable weekly volume. The sample calorie estimate changes only slightly at 45 pounds, while the added load increases the demand on the whole body.
**Consider 45 pounds** when a specific event or selection goal requires heavier load tolerance and you already handle 30 pounds with stable form and recovery. The heavier pack adds more strength-endurance and tissue-loading demand; it does not stop being cardio.
The middle case - intermediate ruckers ramping for an event in 3 to 6 months - usually benefits from a phased progression rather than a clean swap. More on that below.
## What 30 lb Trains
At 30 pounds, a 180-pound rucker is carrying roughly 17% of body weight. At 3.5 to 4 mph on flat pavement, the [rucking calorie calculator](/tools/calorie-calculator) estimates about 410 to 505 calories for 60 minutes. Those figures are model outputs, not measured expenditure or a universal safe-load threshold.
What gets trained:
- **Aerobic capacity.** Depending on body size, pace, grade, and fitness, 30 lb may place a rucker in [Zone 2 or Zone 3](/tools/zone-2-heart-rate-calculator).
- **Postural endurance.** The upper back and trunk hold the pack position throughout the session. On longer rucks, postural fatigue may become the limiter before breathing does.
- **Repeatable weekly volume.** A trained rucker may tolerate 30 lb more often than 45 lb, but frequency still depends on duration, terrain, health, and recovery.
The thing 30 lb does not train hard is absolute strength under load. Your posterior chain (glutes, hamstrings, low back) gets a real workout, but it's not the kind of stress that produces the structural adaptations heavier loads do.
## What 45 lb Trains
At 45 pounds, the same 180-pound rucker carries 25% of body weight. The [calorie calculator](/tools/calorie-calculator) estimates about 440 to 535 calories for the same 60-minute session, about 7% more than the 30-pound example at the same pace. There is no exact 25% threshold where one type of adaptation replaces another. The higher load simply adds more structural demand for a relatively small change in this calorie estimate.
Compared with 30 lb, the 45-pound load places greater demand on:
- **Posterior-chain strength endurance.** Hip extension, trunk stabilization, and calf endurance work harder under the larger load.
- **Connective tissue.** Tendons and ligaments often adapt more slowly than muscle. A heavier session can add stimulus, but it can also exceed current tolerance.
- **Form.** A larger load makes gait or pack-fit problems more costly, so stop the progression when posture or stride changes.
The 45-pound load is not automatically better for cardio, weekly frequency, fat loss, or long-session quality. If it reduces frequency or changes gait, the lighter load may produce more useful weekly work.
## How the Calorie Estimate Changes
For a 180-pound person walking at 4 mph on flat pavement for 60 minutes:
| Load | Calories burned | % of body weight | vs unloaded |
| --- | --- | --- | --- |
| **0 lb (unweighted)** | ~440 | 0% | baseline |
| **30 lb** | ~505 | 16.7% | +14% |
| **45 lb** | ~535 | 25% | +21% |
| **60 lb (event ceiling)** | ~575 | 33% | +30% |
On flat pavement the first 30 lb adds about 14 percent over walking unweighted. Each additional 15 lb adds a similar small amount: 30 to 45 adds about 35 calories, 45 to 60 about 40. Doubling the load from 30 to 60 only adds 14 percent more calories per hour.
For weight loss, the table supports consistency at a manageable load rather than a jump to 45 or 60 pounds solely to raise calorie burn.
## When to make the jump to 45 lb
Three signals that the jump is the right call:
1. **You're intentionally training heavier than your expected event load.** [GORUCK's own ruck-plate guidance](https://www.goruck.com/products/ruck-plates) frames the 45 lb plate as a way to "train harder than you perform," while noting that many Challenge athletes use a 30 lb ruck plate at the event itself. Check the current event sheet before you build your training plan, because event load requirements can shift by format and bodyweight.
2. **You've held 30 lb consistently for 4+ months, training 3+ times per week, with no recent overuse flags.** If the current load no longer supports the event goal, a trial increase may be appropriate.
3. **You can hold a 60-minute 30 lb ruck at goal pace without form breakdown in the last 15 minutes.** That is one useful readiness check, not a guarantee that 45 lb will be safe.
## When NOT to make the jump
Stay at 30 if any of these match:
- You're rucking fewer than 2 times per week consistently. Frequency is the limiter on most weight-loss and general-fitness ruckers - going heavier reduces it further.
- You've had any overuse flag in the last 6 weeks (shin splints, plantar fasciitis, lower back stiffness, shoulder discomfort that lingers past the session). The jump amplifies whatever was building.
- Your only reason is the 7% calorie estimate. The added load may not be worth the recovery cost for general fitness or weight loss.
- You're under 12 months into rucking and don't have a barbell-strength training background. Connective tissue adapts on a slower clock than the rest of you - patience here matters.
## How to handle the transition safely
A more conservative progression isn't 30 → 45. It's 30 → 35 → 40 → 45, with 2 to 3 weeks at each step and a deload week between any two progressions. Adjustable plate systems make this easy; if you're on fixed plates, the practical path is a 5 lb sandbag or pair of 2.5 lb weights added incrementally to your existing 30 lb ruck.
What to watch during the transition:
- **First 5 to 10 minutes of each session.** Form breakdown in the warm-up phase predicts session-end fatigue. If your gait feels off in the first half-mile under the new load, the jump was too aggressive.
- **Recovery quality at 24 and 48 hours.** Sleep disruption, lingering soreness, or motivation drops are the early signals you're outpacing adaptation.
- **Pace at the same effort.** If a 30 lb ruck at HR 130 used to clock 17 min/mile, the 45 lb version at the same HR should clock about 18 to 19 min/mile. If you're hitting 21+, the load is past your current envelope - drop back.
The [ruck weight calculator](/tools/ruck-weight-calculator) can build a 4-week progression toward 45 lb from wherever you are now, including the deload weeks.
### Plate and load-building options
Three different ways to compose a 30-to-45 lb load, depending on your budget and how granular you want the progression steps. The GORUCK Ruck Plates line is the canonical pick for plate pockets on the Rucker / GR1; FlexLoad is the right call when you want 5 lb adjustments without buying multiple plates; Titan Fitness covers the budget end with the same cast-iron-plate form factor at roughly half the price.
## Frequently asked questions
### Does rucking 45 lb burn twice as many calories as 30 lb?
No - it adds about 7 percent more calories per hour at the same pace. The Pandolf load-carriage equation captures the fact that calorie cost and load don't scale 1:1. Doubling the load from 30 to 60 lb only adds about 14 percent more calories per hour. If you're rucking for weight loss, frequency at 30 lb wins over progression to 45.
### Will 45 lb make me stronger than 30 lb?
For posterior-chain strength and connective-tissue resilience, yes - meaningfully. For general cardiovascular fitness, no. The training adaptations are different: 30 lb is a cardio tool with a strength side effect; 45 lb shifts toward a strength tool with a cardio side effect.
### What's a safe progression from 30 to 45 lb?
Two to three weeks at each 5 lb step (30 → 35 → 40 → 45), with a deload week between any two progressions. Total time to the new load: roughly 8 to 12 weeks. The faster you ramp, the higher your overuse-injury risk.
### What if I can only fit one 45 lb plate in my ruck?
The [GORUCK Standard 30 lb Ruck Plate](/shop) plus a small sandbag or two 7.5 lb soft weights gets you to 45 lb cleanly. Dedicated 45 lb plates are less common because they exceed most ruck-pack plate-pocket dimensions. A combination load is the standard solution.
### How do I know if 45 lb is too much for me?
Three indicators: (1) form breakdown in the first half-mile of the session, (2) lower back or hip pain that lingers more than 48 hours, or (3) pace at the same heart rate dropping more than 2 minutes per mile compared to your 30 lb baseline. Any of those means drop back to 35 or 40 and ramp again over more weeks.
### Is 45 lb the right load for GORUCK events?
Not automatically. [GORUCK's plate guidance](https://www.goruck.com/products/ruck-plates) describes 30 lb as the common Challenge plate for ruckers over 150 lb and 45 lb as an overload option for people who are already comfortable at 30. For Light, Tough, Heavy, and Star Course events, always check the event-specific packing list before you travel.
---
## Related
- [Rucking Calorie Calculator](/tools/calorie-calculator) - dial in the calorie burn for your specific load and pace
- [Ruck Weight Calculator](/tools/ruck-weight-calculator) - build a 4-week progression to a new load
- [How Heavy Should Your Ruck Be?](/guides/how-heavy-should-your-ruck-be) - the full weight-by-fitness-level guide
- [Best Ruck Plates for GORUCK Rucking (2026)](/gear/ruck-plate-comparison) - the plate roundup
- [GORUCK Event Readiness Estimator](/tools/event-readiness) - check your prep score for Light, Tough, or Heavy
────────────────────────────────────────────────────────────────────────────────
URL: https://ruckauthority.com/training/does-rucking-build-muscle
Title: Does Rucking Build Muscle? What the Evidence Supports
Description: Rucking trains strength endurance more than muscle size. Learn which muscles it loads, who may gain size, and when to add resistance training.
Published: 2026-07-09
## The short answer
Rucking mainly builds muscular endurance and work capacity. Because it is submaximal, high-repetition loaded walking, it is less effective for [hypertrophy](/glossary#hypertrophy), or increased muscle size, than progressive resistance training.
Beginners, deconditioned people, and some older adults may gain strength and a modest amount of muscle because the load is a new stimulus. A trained lifter is more likely to gain endurance than size from rucking alone.
## What Rucking Trains
When you walk under load, a lot of your body is working, even though it feels like "just walking."
Your **quads, hamstrings, glutes, and calves** drive each step and control your descent, especially downhill. Your **core and spinal erectors** work continuously to keep you upright against a load that's trying to pull you backward and sideways. Your **traps, rhomboids, and shoulders** stabilize the pack. Even your **feet and lower legs** (including the tibialis) get a steady training effect from the extra weight.
The main demand falls on the muscles used for walking, posture, and pack control rather than on the arms or chest.
## Why rucking isn't a great hypertrophy tool
To understand why rucking doesn't build big muscles, it helps to know what does.
Muscle growth is driven mainly by mechanical tension - challenging a muscle with enough load, through enough range, close enough to failure, and then progressively adding more over time. That's why lifting works: you take a muscle near its limit for a handful of reps, then add weight next month.
Rucking provides many submaximal repetitions rather than sets taken close to muscular failure. Pack weight can be progressed, but it cannot target a specific muscle as precisely as a squat, row, or hip thrust. That makes it a less efficient way to increase muscle size.
## What Rucking Can Do for Muscle
**It adds a loading stimulus.** Weight loss can reduce lean mass as well as fat. Rucking provides some weight-bearing resistance, though resistance training and adequate protein have stronger direct support for muscle preservation. This distinction matters for people [rucking on GLP-1 medications](/weight-loss/rucking-on-glp-1-medications).
**It builds work capacity and strength endurance.** The ability to carry, climb, and keep moving under load can transfer to hiking and some daily carrying tasks.
**It trains postural endurance.** The trunk, spinal erectors, and upper back work throughout the walk. Rucking can strengthen those muscles, but it can also aggravate back pain when the load, fit, or progression is wrong. See [is rucking bad for your back](/training/is-rucking-bad-for-your-back).
**It loads bone.** Rucking is weight-bearing and usually lower impact than running, but the external load still increases stress on the feet, joints, and spine. It is not risk-free.
## Who will build visible muscle from rucking alone
Whether rucking noticeably grows your muscles depends heavily on where you're starting.
Muscle growth is more plausible if you are new to exercise, returning after a long layoff, or starting from a low activity level. Even then, the amount is uncertain. Anyone returning from injury should use a clinician-approved plan rather than assuming loaded walking is appropriate.
If you already lift or train regularly, rucking is less likely to add noticeable size. It may improve muscular endurance, but it should not be assumed to maintain all muscle during a calorie deficit.
## How to make your rucking more muscle-building
You can nudge rucking toward more of a strength stimulus. It won't turn into a leg day, but these tweaks meaningfully raise the muscular demand.
**Add hills and stairs.** Incline raises the demand on the glutes, hamstrings, and quads, while descents add braking work. Our [hill ruck training guide](/training/hill-ruck-training) has structured sessions.
**Go heavier for shorter walks.** A heavier load over 20 to 30 minutes shifts the stimulus toward strength; a light load over two hours shifts it toward endurance. Progress load sensibly using precise increments - a [ruck plate](/gear/ruck-plate-comparison) lets you add 2 to 5 lbs at a time.
**Build in loaded carries and circuits.** Stop mid-ruck for walking lunges, step-ups, or bodyweight squats with the pack on. Use controlled form and choose repetitions that leave room for the walk home.
**Pair it with resistance training.** Two weekly sessions are a practical starting point when muscle growth is the goal. See [rucking and lifting](/training/rucking-and-lifting) for scheduling options.
## Expectations by Training Background
The table summarizes likely differences without promising an outcome:
| Your situation | Rucking alone | Rucking + hills + 2 lifting days |
|---|---|---|
| Total beginner / deconditioned | Possible strength and modest muscle gain | More direct strength stimulus |
| Older adult, sedentary | Possible strength and function gain | Better support for strength and muscle maintenance |
| Recreational exerciser | Muscular endurance more likely than size | Strength and modest size gains are more plausible |
| Trained lifter | Endurance benefit; little added size expected | Lifting supplies the main growth stimulus |
| Losing weight (any method) | Some loading, but preservation is uncertain | Stronger muscle-preservation plan with adequate protein |
---
## Your next step
---
## Related reading
- [Rucking and lifting](/training/rucking-and-lifting) - how to combine loaded carries with the gym for maximum results
- [Hill ruck training](/training/hill-ruck-training) - the fastest way to raise rucking's strength demand
- [Rucking on GLP-1 medications](/weight-loss/rucking-on-glp-1-medications) - using rucking to protect muscle during weight loss
- [Rucking for seniors](/training/rucking-for-seniors) - building and keeping strength later in life
- [The benefits of rucking](/guides/rucking-benefits) - the full rundown of what loaded walking does for you
## Frequently Asked Questions
────────────────────────────────────────────────────────────────────────────────
URL: https://ruckauthority.com/training/fall-ruck-event-8-week-countdown
Title: 8 Weeks to a Fall Ruck Event: A Countdown Plan
Description: An adjustable eight-week fall ruck-event plan for athletes with an existing baseline, covering event requirements, one weekly long ruck, gear checks, heat decisions, and taper.
Published: 2026-08-01 / Updated: 2026-08-30
## Eight weeks is enough only from a baseline
Use this countdown if you already:
- ruck at least once each week
- complete 45-60 minutes with a repeatable load
- maintain normal gait during and after the session
- know the event date and format
If you are starting regular walking now, eight weeks is not a reason to compress the [Couch to Ruck plan](/guides/couch-to-ruck-program). Choose a shorter event, extend the calendar, or change the goal.
## Build the event card
Before Week 1, write down:
| Requirement | Your event |
| --- | --- |
| Date and start time | |
| Expected distance or duration | |
| Required dry load | |
| Does water count? | |
| Required gear | |
| Terrain and elevation | |
| Pace or cutoff | |
| PT, carry, or teamwork demands | |
Use the [event readiness tool](/tools/event-readiness) to compare that card with your recent longest ruck, current load, and available weeks.
## Weekly structure
| Day | Session |
| --- | --- |
| Monday | Full-body strength |
| Tuesday | Unloaded easy aerobic work, 30-50 minutes |
| Wednesday | Rest or easy walk |
| Thursday | Short event-skill practice or unloaded brisk intervals |
| Friday | Rest or light strength |
| Saturday | Primary event-preparation ruck |
| Sunday | Rest |
Established ruckers may add one short easy loaded session. It should remain optional and clearly easier than Saturday.
## The eight-week countdown
Scale the primary ruck from your **recent repeatable baseline**. “+5-10%” is a conservative planning range, not a proven safety threshold.
| Week | Primary ruck | Load | Event work |
| --- | --- | --- | --- |
| 1 | Repeat recent longest comfortable session | Current comfortable load | Pack and foot baseline |
| 2 | Add up to 5-10% time or distance | Hold | Brief target-pace or terrain check |
| 3 | Add up to 5-10% again, or hold | Hold | Test one required gear item |
| 4 | Reduce primary ruck by 20-30% | Optional small required-load step | Finalize pack, socks, footwear, and water access |
| 5 | Return near Week 3 only if load held; otherwise repeat the shorter Week 4 duration | Hold | Confirm the changed load before adding terrain or tasks |
| 6 | Longest sub-event rehearsal; for shorter events this may reach 70-80% of expected time or distance | Required load | Final gear, start time, food, water, and route type |
| 7 | Reduce Week 6 duration by about 35-45% | Hold | Short controlled event-pace sections |
| 8 | One 20-40 minute easy ruck early, then event | Required load | Recheck instructions; no hard simulation |
For long events, 70-80% can be far too much for one rehearsal. Use a substantially smaller, already repeatable fraction and follow the specific [GORUCK training guide](/training/goruck-challenge-training) or [military plan](/training/military-rucking-program) instead of applying the shorter-event range.
## Weeks 1-3: Establish and extend the baseline
The first session should look familiar. Keep load and route type stable.
Add one factor in Weeks 2 and 3:
- time or distance
- brief target-pace walking
- mild event-relevant grade
- one required gear item
Do not add all four. If the event load is above your current load, save that change for the shorter Week 4 session.
## Week 4: Consolidate and confirm gear
Reduce duration and solve:
- pack movement
- foot hot spots
- strap pressure
- water access
- required-item placement
- clothing that chafes or stays wet
If you need to move toward required load, test one small change on this shorter session and hold everything else.
By the end of the week, no major equipment decision should remain.
## Weeks 5-6: Practice event specifics
Week 5 returns near the prior peak only when Week 4 held load. If Week 4 introduced a new required load, repeat the shorter duration first. Extend only after that exposure is repeatable.
Week 6 is the final meaningful rehearsal. Use:
- the event start time when practical
- the final pack and required load
- event footwear and socks
- relevant surface and hills
- food and water already tested
- a short controlled task block when the event uses PT or carries
The rehearsal is sub-event distance or duration. Its job is to verify the system, not duplicate the event.
## Weeks 7-8: Reduce fatigue and attend
Week 7 reduces the long session. Week 8 includes one short easy ruck early in the week.
Do not add:
- a missed long ruck
- a new shoe or sock
- a heavier load
- a hard hill test
- a full-distance rehearsal
The final week can reduce fatigue; it cannot create a new endurance base.
## Heat during the countdown
Late-summer heat can make a familiar pace much harder. Do not “use” dangerous heat as extra training stress.
- move sessions to cooler hours
- shorten or move indoors when conditions are inappropriate
- use shaded routes and accessible water
- know heat-illness warning signs
- follow local alerts and event guidance
See the [summer heat-safety guide](/training/summer-rucking-heat-safety).
## The gear shakedown
Test the complete system by Week 6:
- secure load high and close
- confirm required items remain accessible
- wear final footwear and socks
- practice foot care at the first hot spot
- confirm the water system does not leak
- test reflective gear and headlamp when required
Use the [event packing guide](/training/ruck-event-packing-lists) for a requirement-led checklist.
## What to do when training is interrupted
**Miss one session:** Continue the schedule. Do not stack loaded days.
**Miss one week:** Resume the last repeatable week and shorten the next progression.
**Miss two or more weeks:** Reassess the event gap. A shorter event or later date may be the better decision.
**Develop warning symptoms:** Stop loaded training and get qualified guidance. A countdown does not make symptoms negotiable.
## Frequently asked questions
### Can I start from zero eight weeks before an event?
Not with this schedule. It assumes a 45-60 minute loaded baseline. Use Couch to Ruck, choose an entry-level event that matches the actual baseline, or move the date.
### Should I complete the full event distance in Week 6?
Usually not. This template uses a sub-event rehearsal. Exact needs depend on event duration, training history, and official programming.
### When should I reach event load?
Reach it before the Week 6 rehearsal. If your current load is lower, make the change on a shorter session and hold it before extending distance.
### Should I train in the hottest part of the day?
No. Heat is a condition to manage, not free fitness. Adjust time, route, duration, or venue based on current conditions.
### What if the event page changes?
Use the current organizer instructions. Recheck in Week 8 and update packing without adding untested optional gear.
────────────────────────────────────────────────────────────────────────────────
URL: https://ruckauthority.com/training/goruck-challenge-training
Title: How to Train for a GORUCK Event: Light, Basic, Tough and Heavy
Description: An evidence-led GORUCK training guide that starts with the current event page, separates Light, Basic, Tough, and Heavy preparation, and provides an adjustable 8-week plan.
Published: 2026-03-27 / Updated: 2026-08-30
## Week 0: Copy the event requirements
Do not train from the words “GORUCK Challenge” alone. Open the exact event page and record:
- Light, Basic, Tough, Heavy, or another named format
- scheduled duration or range
- required ruck weight and how GORUCK defines it
- whether water counts toward that weight
- required packing list
- any team weight, sandbag, flag, reflective, headlamp, or themed items
- date, start time, location, and likely conditions
GORUCK’s current event catalog includes multiple tiers. A 2026 event listing, for example, describes Light and Tough options with different durations and required loads. Your event page is the source of truth because formats and special items can change.
## Which tier fits this plan?
| Tier | Use this page when | How to scale the primary ruck |
| --- | --- | --- |
| Light | You can walk 45 minutes and are learning the required load | Begin at 30-45 minutes; cap the longest rehearsal around 75-90 minutes |
| Basic | You can ruck 45-60 minutes at the required load | Begin at 45-60 minutes; cap the longest rehearsal around 90-120 minutes |
| Tough | You can ruck 60-75 minutes at the required load and strength train twice weekly | Use the full schedule below |
| Heavy | You already have a substantial loaded-endurance base and event-specific coaching | Use a longer plan; this eight-week schedule is not sufficient |
Durations above are editorial scaling points, not official event promises. Cadre, weather, terrain, theme, and class can change the work.
## What a GORUCK event asks you to do
Distance is only one demand. Preparation should cover:
1. **Loaded walking:** moving at the required ruck weight for sustained periods.
2. **Basic strength endurance:** repeated squat, hinge, push, pull, trunk, and get-up patterns.
3. **Carries:** handling an awkward object without sacrificing grip or posture.
4. **Transitions:** moving between walking, ground work, and carries.
5. **Feet and gear:** keeping the pack, footwear, water, and required items functional for hours.
6. **Team behavior:** communicating, sharing work, and following instructions while tired.
You do not need to reproduce the full event in training. Build each demand in a dose you can recover from.
## Weekly structure
| Day | Session | Loaded? |
| --- | --- | --- |
| Monday | Full-body strength | No |
| Tuesday | Easy unloaded aerobic work, 30-50 minutes | No |
| Wednesday | Task practice, 20-35 minutes | Only if the task requires it |
| Thursday | Rest or easy unloaded walk | No |
| Friday | Full-body strength, reduced leg volume | No |
| Saturday | Primary event-load ruck | Yes |
| Sunday | Rest | No |
Established ruckers can add one **optional** 20-40 minute easy ruck on Wednesday. It should be lighter or shorter than Saturday and should become unloaded when recovery is uncertain.
## How to choose training load
Use the current event-required ruck weight once you can carry it with normal gait over your baseline duration. If you are not there yet:
1. begin with a load you have already completed comfortably
2. use a shorter consolidation week for one small load change
3. hold distance and terrain during that change
4. hold the new load for the next block
Do not automatically train 5 or 10 pounds heavier than the event requirement. Heavier training is another variable, not free insurance.
The full Tough schedule below assumes the required load is already repeatable for 60-75 minutes. If it is not, keep the shorter duration, establish the load first, and extend the calendar rather than combining a load change with the next time increase.
## The eight-week plan
The full schedule below is for a Tough participant who already handles 60-75 minutes at the required event load. Light and Basic participants use the scaled durations above.
| Week | Primary ruck | Event-specific practice | Strength and aerobic support |
| --- | --- | --- | --- |
| 1 | 75 min at the repeatable required load | Pack fit, foot check, controlled transitions | 2 strength, 1-2 unloaded easy sessions |
| 2 | 90 min, same load and route type | 3 short carry sets with full recovery | Same support schedule |
| 3 | 105 min, same load | Brief PT clusters separated by walking | Same support schedule |
| 4 | 75 min easy | Fix gear and foot problems; no test | Reduce strength volume slightly |
| 5 | 120 min, holding required load | Finalize packing list and water system | 2 strength, 1 unloaded easy session |
| 6 | 135 min | Practice carries and transitions for 20-30 min total | Keep all work controlled |
| 7 | 150 min rehearsal | Event start time, gear, socks, food, water, and one short task block | One lighter strength session |
| 8 | 30-45 min easy early in week, then event | No last-minute simulation | Short easy movement and rest |
The primary ruck grows by time because routes and terrain differ. Keep effort mostly conversational. If the route becomes much steeper or rougher, hold or reduce duration.
## Weeks 1-3: Build repeatable event-load time
The first block is not a toughness contest. It establishes a weekly session you can recover from.
Task practice can use:
- 3-5 controlled sets of squats or step-ups
- push-ups or elevated push-ups
- rows, pull-ups, or band pulls
- sandbag bear-hug or suitcase carries
- get-ups practiced without rushing
Stop sets before movement quality degrades. GORUCK events are unpredictable; accumulating sloppy repetitions in training is not useful specificity.
## Week 4: Consolidate
Cut loaded duration and solve the practical problems exposed by Weeks 1-3:
- pack bounce or shifting weight
- shoulder or low-back irritation
- foot hot spots
- poor access to water
- food that is hard to tolerate while moving
- clothing that stays wet or chafes
If warning symptoms or altered gait appeared, do not advance to Week 5.
## Weeks 5-7: Add event-specific practice
The last three work weeks extend the main ruck and combine a small amount of task practice with it. They do not recreate a 10-12 hour event.
A Week 6 practice can look like:
1. 30 minutes easy rucking
2. 3 rounds of a short carry, 8 controlled squats, and 5-10 push-ups
3. 45 minutes easy rucking
4. one final carry set
5. easy movement to finish the planned duration
Scale every repetition and object. Do not use a partner as improvised weight without competent supervision and consent.
## Week 7: Rehearse the event system
Use:
- the exact required ruck load
- final pack and weight placement
- event footwear and socks
- required reflective gear and headlamp if applicable
- the likely start time
- the same food and water plan
Keep the rehearsal to the scheduled duration. A four-hour exhaustion session one week before taper is not required to “prove” readiness.
## Week 8: Taper and attend
Fitness will not meaningfully improve from a late hard simulation. Reduce volume and arrive able to work.
- complete one short easy ruck early in the week
- keep strength light and stop far from failure
- check the event page again for updates
- prepare required items without adding extras “just in case”
- follow event staff instructions
## Strength and carry practice
Load-carriage research supports combining specific loaded walking with aerobic and resistance training. A simple strength template is:
| Pattern | Session A | Session B |
| --- | --- | --- |
| Squat or step | Goblet squat | Step-up or split squat |
| Hinge | Romanian deadlift | Deadlift or hip hinge |
| Push | Push-up or bench press | Overhead press |
| Pull | Row | Pull-up or pulldown |
| Carry | Suitcase carry | Sandbag bear-hug carry |
| Trunk | Side plank | Dead bug or Pallof press |
Use controlled sets and keep two or three good repetitions in reserve. Friday’s session should not sabotage Saturday’s primary ruck.
## Gear to test
The event page may require specific items. Whatever is optional should earn its place.
- **Ruck:** secure the required load high and close; nothing should shift.
- **Weight:** use the format the event permits and confirm how required weight is measured.
- **Feet:** use footwear and socks already tested on long sessions.
- **Water:** make refilling and drinking possible without unpacking the ruck.
- **Headlamp and reflective gear:** test them in the dark when required.
- **Food:** choose compact options you have already tolerated while moving.
Use the [GORUCK gear guide](/goruck) to compare current products, and the [event packing guide](/training/ruck-event-packing-lists) to separate required items from optional comfort gear.
## Common mistakes
**Training every session under load.** Unloaded aerobic work and strength can improve the event capacities without more pack stress.
**Going heavier than required by default.** Extra load can reduce useful pace and increase recovery cost. Required load first.
**Turning task practice into punishment.** Small, technically sound doses are easier to repeat and evaluate.
**Using a Tough plan for Heavy.** Heavy adds duration, fatigue, foot exposure, and recovery demands that an eight-week template cannot responsibly cover from a modest baseline.
**Skipping the current event page.** Special items and format details can change.
## When to stop or hold
Stop the session for sharp pain, weakness, numbness, dizziness, chest pressure, fainting, or unusual shortness of breath. Hold the next week when gait changes, pain persists, foot damage affects normal walking, or recovery is no longer stable.
## Frequently asked questions
### How heavy should I train for a GORUCK event?
Use the exact current event requirement as the target. Build to it from a repeatable baseline. Do not assume that training heavier is better.
### How long should my longest training ruck be?
For this Tough-oriented template, the longest rehearsal is about 150 minutes. Light and Basic participants scale that down. Heavy preparation needs a longer, individualized build rather than one enormous rehearsal.
### Do I need to do PT wearing the ruck?
Practice the transitions and movements your event may use, but keep the dose controlled. The event page and cadre determine actual tasks. Most strength development can happen without wearing the ruck.
### Can a beginner finish a GORUCK Light?
A Light is the most approachable tier, but “beginner” covers a wide range. First establish regular walking, then carry the required load for a short repeatable session. Use the Light duration scaling in this plan and verify the exact event page.
### Is this plan enough for a GORUCK Heavy?
No. It can serve as an early block for an already trained athlete, but Heavy preparation needs more calendar time, individualized progression, and experience managing long-duration feet, gear, fueling, and recovery.
────────────────────────────────────────────────────────────────────────────────
URL: https://ruckauthority.com/training/hill-ruck-training
Title: Hill Ruck Training: Elevation Workouts for Every Terrain
Description: Hills are where rucking gets real. Here's how to train uphills, downhills, and stairs - plus workouts for flat-landers who don't have hills nearby.
Published: 2026-03-27
## Flat Rucking Got You Here. Hills Get You Everywhere Else.
Flat [rucking](/glossary#rucking) builds your aerobic base. You can log miles, manage steady effort, and dial in your pace. It's foundational. But if you've been rucking on pavement for a few weeks and want to accelerate your fitness gains, elevation is the fastest way to get there.
Hills do something pavement can't: they force your body to work harder without you adding more weight. A 10% grade ruck with 20 lbs feels roughly like a flat ruck with 35 lbs, but your joints take a fraction of the pounding. Hills teach power, resilience, and the mental toughness that shows up in every other part of your training.
This guide breaks down why hills work, how to train them safely, and what to do if the closest elevation near you is a parking garage (spoiler: that's enough).
## Why Hills Change Everything
### The Physics of Elevation
When you ruck uphill, you're not just overcoming air resistance and rolling friction. You're lifting your bodyweight plus your pack against gravity with every step. This changes everything about the training stimulus.
Here's what the data shows: a 10% grade hill reduces your ruck pace by roughly a third compared to flat ground. But here's the cheat code - your cardiovascular demand roughly *doubles*. Your heart rate climbs into zone 3 or 4 even at a walking pace. That's why a 30-minute hill ruck can feel like work that would normally take 60 minutes flat.
Uphill training creates concentric loading on your glutes, calves, and quads. These are powerful, resilient muscles when trained correctly. Your entire [posterior chain](/glossary#posterior-chain) lights up. Downhill, by contrast, creates eccentric loading - the muscle is lengthening under tension. This teaches deceleration and builds joint resilience, but it also creates more muscle soreness initially and higher injury risk if you rush it.
The net effect: hills add training stimulus without adding pack weight. You get the cardio hit, the power development, and the durability gains of a heavier ruck - all without the joint stress of carrying 40 lbs up a mountain.
### Uphill vs. Downhill (You Need Both)
Most people love uphill rucking. It's hard, the effort is obvious, and you feel accomplished when you reach the top.
Most people neglect downhill. It's boring, it's easy to mess up your knees if you don't know what you're doing, and there's no ego in walking slowly down a hill.
Train both. Here's why:
**Uphill** teaches power and cardio. Your quads, glutes, and calves do the work. Heart rate spikes. You build the engine that accelerates your fitness.
**Downhill** teaches deceleration and eccentric strength. You're teaching your quads, knees, and hips to control momentum. This is critical for anyone doing mountain events, trail rucks, or military selection courses where you spend as much time descending as ascending.
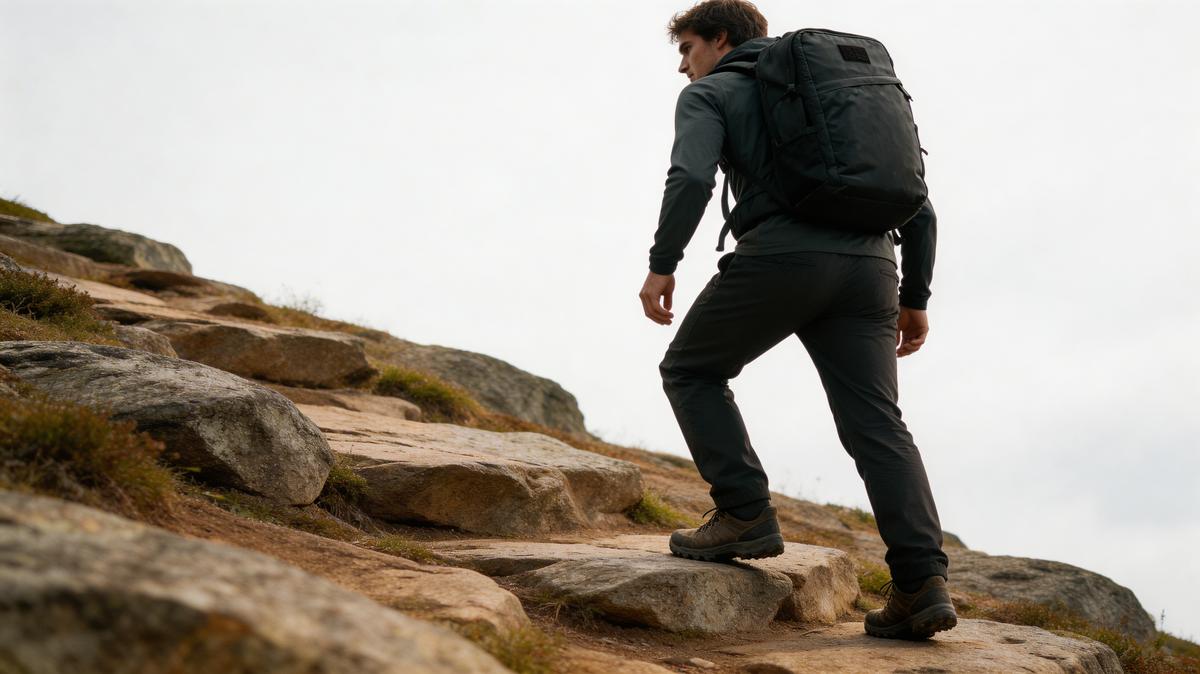
## Hill Rucking Form: The Details Matter
Four items earn their slot before you take a hill seriously. The pack, the shoes, the poles, and the watch - each one solves a specific failure mode that only shows up on grade.
| Role | Pick | What it solves on hills |
|------|------|--------------------------|
| Pack | 5.11 RUSH 24 | Frame sheet + sternum strap keep weight high. Stops the side-to-side sway on descents. |
| Shoes | Salomon XA Pro 3D | Aggressive lugs grip steep dirt. Reinforced toe box absorbs the downhill braking force. |
| Poles | Black Diamond Trail | Reduces knee impact 20-30% on 15%+ descents. Folds small enough to clip to your pack. |
| Watch | Garmin Instinct Solar | Live elevation gain, barometric altitude, Zone 2 alerts on steep climbs. |
### Uphill Form
When you're climbing, everything changes from flat rucking.
**Stride:** Shorten your stride. You're not striding through - you're driving through. Each step is deliberate and powerful. Think 2-foot-per-second pace on a steep hill, not 3-4.
**Posture:** Lean from your ankles, not your waist. Your torso should stay mostly upright. Bending at the waist puts stress on your lower back and makes the hill harder. Lean slightly forward from the ankles, and let your pack sit high on your shoulders.
**[Foot strike](/glossary#foot-strike):** Drive through your heels. This engages your glutes and quads more effectively than landing on your midfoot. On a steep climb, heel-first is more stable and powerful.
**Arms:** Pump harder. Your arms and upper body help drive you uphill. This isn't wasted motion - it's efficient power transfer.
**Breathing:** Breathe hard. This isn't a sign you're going too fast (unless you can't speak at all). Uphill rucking is supposed to be intense. If your breathing is steady and easy, you're going downhill or you live in Colorado.
### Downhill Form
Downhill is where people get hurt. Most [knee pain from rucking](/injuries/rucking-knee-pain) comes from descents, not ascents.
**Knees:** Keep your knees *slightly* bent the entire time. Never lock them straight. Locked knees turn your legs into rigid shock absorbers - bad. Slightly bent knees let your muscles absorb the impact.
**Stride:** Shorter steps on the way down. The temptation is to let gravity do the work and take long strides. Resist this. Short, controlled steps keep you stable and protect your knees.
**Foot strike:** Midfoot or heel-first. Let your foot land under your center of gravity, not out in front of you. Landing far in front (overstriding) puts massive eccentric load on your quad - a recipe for knee pain and DOMS. Shoes like the [Salomon XA Pro 3D](/gear/best-rucking-shoes-by-terrain) with aggressive tread and good ankle support make a dramatic difference on steep descents - they let you focus on form instead of fighting to stay upright.
**Pace:** Slower than you think is necessary. On a steep descent with a pack, walking slowly isn't boring - it's smart.
**Pack positioning:** Make sure your pack isn't pulling you forward or shifting side to side. A well-fitted pack like the [5.11 RUSH 24](/gear/best-rucking-backpacks) with the weight sitting high makes downhill rucking easier and safer.
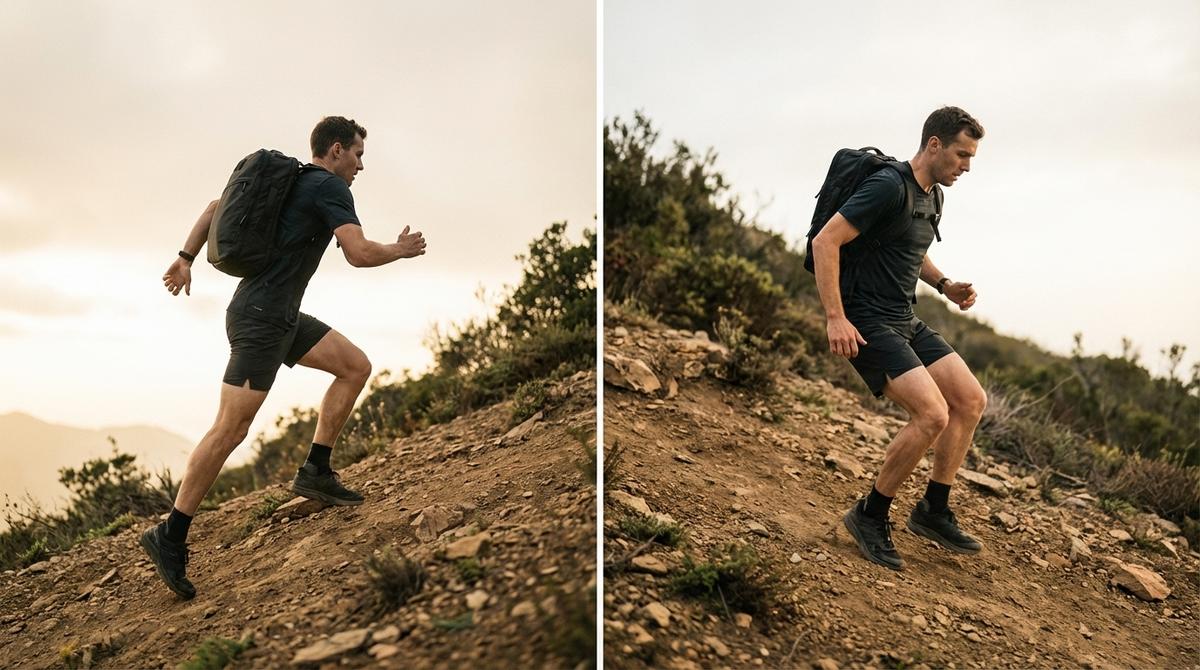
## Five Hill Workouts You Can Actually Do
Pick one or two of these and rotate them into your weekly schedule.
### Workout 1: Hill Repeats (The Classic)
This is the bread and butter of hill training. Find a hill between 200-400 meters long with a consistent 8-15% grade.
**The structure:**
- Ruck up the hill at 80% effort (you can speak in short sentences, but you're definitely working)
- Walk down easy for recovery (2-3 min)
- Repeat
- Start with 4 repeats, work up to 8 over 4-6 weeks
- Pack weight: 20-25 lbs
- Rest 1-2 minutes at the bottom between repeats
**Why it works:** Hill repeats give you the cardiovascular stimulus of hard intervals without the impact of running. Each repeat teaches your body to recover quickly, and the repeated efforts build power.
**Progression:** Add one repeat per week until you hit 8. Then add 5 lbs to your pack or find a slightly steeper hill.
### Workout 2: Stair Intervals
No natural hills? Stairs work identically.
**The structure:**
- Find a staircase: stadium stairs, parking garage, apartment building with accessible stairs
- Ruck up at a hard pace (5-10 flights depending on the height)
- Walk down easy for recovery
- 6-10 rounds
- Pack weight: 20-30 lbs
- Rest 1-2 minutes between rounds
**Why it works:** Stairs compress a hill workout into a smaller space. The steep grade (often 25-30%) means fewer repeats needed for the same stimulus.
**Parking garage ramps:** Where pedestrians are allowed and vehicle traffic is controlled, garage ramps provide a consistent grade and an easy way to adjust route length. Start on level 1, ruck to level 4 or 5, and return by the ramp. Repeat.
### Workout 3: Treadmill Incline Ruck
For people without hills, this is your answer.
**The structure:**
- Set treadmill to 10-15% incline
- Speed: 2.5-3.0 mph (about 20-24 min/mile)
- Duration: 20-30 minutes sustained
- Pack weight: 15-25 lbs
- Intensity: "[zone 2](/glossary#zone-2)-3" - you can hold a conversation with effort, but you're definitely working
**Why it works:** The cardiovascular stimulus is nearly identical to a real hill. Your body doesn't care if it's a mountain or a machine - it responds to grade.
**The flat-lander special:** If you live somewhere truly flat (Florida, Kansas, West Texas), treadmill incline rucking is your hill training. Don't write it off as "not real." The adaptation is identical.
**Pro setup:** Most gyms allow backpacks on treadmills if you hold the straps and don't use them for balance. Some require you to use the back handles instead. Wear a small pack (not a 30L hiking pack) to make this work.
### Workout 4: The Roller (Mixed Terrain)
Not all terrain is uniform. This workout teaches you to pace effort, not pace.
**The structure:**
- Find a route with multiple small to medium hills (not one massive climb)
- Ruck the whole route at a steady *effort* level, not steady pace
- Your pace will vary with the terrain - faster on downhills and flats, slower on uphills, but your heart rate and breathing stay consistent
- Duration: 45-60 minutes
- Pack weight: Moderate (20-30 lbs)
**Why it works:** Real terrain isn't uniform. Rolling routes teach you to manage effort on variable grades. This is the closest you can get to trail conditions without actually being on a trail.
**How to pace it:** Use your breathing and heart rate as the guide, not your watch. Aim for "zone 2-3" the whole time. Slow down on hills until your breathing settles back to your target zone. A [Garmin Instinct 3 Solar](/gear/best-gps-watches-for-rucking) helps you track elevation gain and maintain pace consistency across varying terrain.
### Workout 5: The Long Climb
For people training for mountain rucks, Bataan, or military selection courses.
**The structure:**
- Find the longest, most sustained uphill you can
- Ruck it at a steady, sustainable pace
- Duration: 60-90 minutes
- Pack weight: Moderate to challenging (25-35 lbs depending on event)
- Pace yourself: If you're breathing through your mouth in the first 10 minutes, you started too fast
**Why it works:** These events test your ability to move uphill for extended duration. This workout builds that capacity.
**The pacing trick:** Start conservatively. The first 15 minutes should feel easy. The middle 30-45 minutes is where the work happens. The final 15 minutes tests whether you went out too hard. If you can still think straight and your pace hasn't dropped, you paced it right.
## Training for Hills When You Live Somewhere Flat
The good news: you don't need mountains.
**Stairs:** Any multi-story building works. Office building, apartment complex, parking garage. Even 4-5 flights of stairs creates enough of a grade for training stimulus. The downside: the repetitive stepping is harder on your knees than gradual hill inclines.
**Parking garages:** Underrated. A typical parking garage ramp has a 5-8% grade (sometimes more). You can ruck up multiple levels and come down the ramp. This gives you both the uphill work and a gentler descent.
**Treadmill incline:** As covered above. Set it to 10-15% and you get nearly identical stimulus to outdoor hills.
**Bridges and overpasses:** Many highway overpasses and pedestrian bridges have noticeable grades. They're usually short, but they work.
**Artificial hill runs:** Some gyms have "ski erg" or rowing-based hill simulation machines. These aren't ideal (you're not actually rucking), but they're better than nothing.
## Programming Hills Into Your Week
Don't add hill work on top of your existing rucking volume. Swap it in.
**The basic progression:**
- **Weeks 1-2:** 1 hill session per week (start with Workout 1 or 2), reduce pack weight by 5-10 lbs, keep other rucks easy
- **Weeks 3-4:** Still 1 hill session per week, start adding back pack weight (2-3 lbs per week)
- **Weeks 5-6:** Increase hill volume (more repeats or longer duration) before increasing weight
- **Week 7+:** You can add a second hill session per week if you want, but don't exceed 2
**The critical rule:** Add volume on hills before adding weight on hills. This protects your knees and gives your stabilizer muscles time to adapt.
**Weekly structure example:**
- Monday: Easy ruck 30 minutes, flat terrain, 15 lbs
- Wednesday: Hill repeats or stairs (your choice), 20 lbs, 8-10 reps
- Friday: Moderate ruck 45 min, mixed terrain, 20 lbs
- Saturday or Sunday: Optional - a long easy ruck 60+ minutes, flat, 15-20 lbs
Hill rucking is a stimulus, not a punishment. The goal is to get stronger, not to accumulate suffering.
## Downhill Training (The Neglected Half)
Most people skimp on downhill work because it seems easier. It's not easier - it's *different*.
The eccentric loading on your quadriceps when you descend is substantial. You'll likely experience more soreness (DOMS) from downhill work than uphill work initially. This is normal and doesn't mean you did something wrong.
**Building downhill tolerance:**
- Start with short downhill sections (50-100 meters) and walk them slowly
- Build up to longer descents over 2-3 weeks
- Expect muscle soreness in your quads for 24-48 hours
- This is an adaptation response, not an injury
**Critical for:** Anyone doing mountain rucking events, trail rucks, or selection courses where you spend 40-50% of the time descending. If your event has elevation loss, your training needs to match.
**Knee pain on downhill?** Usually one of three causes:
1. Too much weight too soon
2. Too fast (overconfident on the descent)
3. Overstriding (landing with your foot far in front of your body)
All three are fixable. Reduce weight, slow down, and shorten your stride.
## Common Hill Mistakes (And How to Avoid Them)
**Mistake 1: Going too heavy too soon**
You can handle 35 lbs on flat ground. That doesn't mean you can handle 35 lbs on hills. Start 5-10 lbs lighter than your flat ruck weight. Build volume first, weight second.
**Mistake 2: Only training uphill**
Downhill work is critical for durability and for any event that has elevation loss. Don't skip it just because it's "easier."
**Mistake 3: Starting hill work without a flat base**
If you've been rucking for fewer than 4 weeks, do that on flat ground first. Your aerobic base and joint resilience need to be established before you add hill work.
**Mistake 4: Locking your knees on descent**
Straight, locked knees are shock absorbers with no give. Bent knees let your muscles absorb impact. Always maintain a slight bend.
**Mistake 5: Adding hill work on top of existing volume**
Your body has a total training load threshold. If you're already doing 3 rucks per week at 45-60 minutes each, don't add a fourth hill ruck. Replace one of your existing rucks with hill work.
## Progression and Periodization
Hills are demanding. They should make up about 20-30% of your weekly rucking volume, not 100%.
A sustainable long-term approach:
- **Weeks 1-4:** Build your flat ruck base (3-4 easy to moderate rucks per week)
- **Weeks 5-12:** Add 1 hill session per week, keep other rucks easy
- **Weeks 13-16:** Increase hill intensity (more repeats, longer climbs) or add a second hill day
- **Weeks 17-20:** Deload week (reduce volume 40-50%)
- **Repeat**
This pattern prevents burnout and lets your body adapt without grinding down your joints.
## Your Next Step
Pick one of the five workouts above. If you have natural hills or stairs nearby, go with Workouts 1, 2, or 4. If you're flat, start with treadmill incline rucking. Give yourself 4 weeks on that single workout before adding variety.
Hills feel hard because they *are* hard. That hardness is where the adaptation lives.
---
## Related Reading
- [Rucking Pace Chart - Find Your Target Speed](/training/rucking-pace-chart)
- [Pavement vs. Trail vs. Treadmill - Which Is Best?](/guides/pavement-vs-trail-vs-treadmill)
- [Rucking Form Guide - Master the Basics](/guides/rucking-form-guide)
- [Rucking Knee Pain - Causes and Solutions](/injuries/rucking-knee-pain)
- [Speed Rucking Intervals - Advanced Cardio](/training/speed-rucking-intervals)
- [Training Programs - Full Schedule](/pillars/rucking-training-programs)
## Frequently Asked Questions
────────────────────────────────────────────────────────────────────────────────
URL: https://ruckauthority.com/training/how-often-should-you-ruck
Title: How Often Should You Ruck? A Baseline-First Answer
Description: Most people can build a useful week around one primary ruck. Learn when a second easy loaded session makes sense and what to do on the other days.
Published: 2026-03-27 / Updated: 2026-08-30
## The short answer
Start with **one primary loaded ruck per week**.
If you already walk regularly and the first session becomes repeatable, add **one shorter, easier loaded session**. Use strength and unloaded aerobic work on the other training days.
That gives most people one or two loaded sessions per week, not a ladder that ends at four or five.
## Choose frequency from your baseline
| Current baseline | Loaded sessions | What the week needs |
| --- | --- | --- |
| Regular walking is not yet comfortable | 0 at first | Build unloaded walking with [Couch to Ruck](/guides/couch-to-ruck-program) |
| Active walker, new to load | 1, then optionally 2 | One primary ruck; add only a short easy ruck after recovery is stable |
| Established recreational rucker | 1-2 | One goal-specific ruck; optional easy loaded practice |
| Timed event or military standard | Usually 1-2 | Follow the current event or unit document; use unloaded conditioning for added work |
| Returning after pain, illness, or a long layoff | 0-1 | Restart below the old baseline and get guidance when symptoms make exercise uncertain |
These are conservative editorial starting points. They are not universal medical limits.
## Why more rucking is not automatically better
The strongest load-carriage guidance does not say to build fitness entirely through loaded marching. Reviews and U.S. Army injury-prevention material support a combined approach:
- loaded walking for task-specific practice
- aerobic training without the pack
- resistance training
- recovery between demanding lower-body sessions
Loaded foot marching is specific, but it also adds repetitive stress. More sessions can improve specificity while leaving less room for strength, aerobic development, and recovery.
The goal is the smallest useful dose of loaded practice, not the highest number of days you can survive.
## One loaded session per week
Use one session when:
- you are new to rucking
- your recent activity is inconsistent
- you also run or lift several days per week
- the pack causes foot, shoulder, or back problems you are still solving
- the primary ruck takes more than a couple of days to feel recovered from
A useful beginner week can include:
| Day | Session |
| --- | --- |
| Monday | Full-body strength |
| Tuesday | Easy unloaded walk |
| Wednesday | Rest |
| Thursday | Full-body strength |
| Friday | Easy unloaded aerobic work |
| Saturday | Primary ruck |
| Sunday | Rest or easy walk |
One ruck does not mean one exercise day. It means the rest of the week can build capacity without another pack session.
## When a second loaded session makes sense
Add a second session only after at least four weeks of stable recovery from the primary ruck. Make it:
- shorter
- easier
- on familiar terrain
- at the same or lighter load
- separated from the primary session
Example:
| Day | Session | Role |
| --- | --- | --- |
| Tuesday | 20-30 minute easy ruck | Pack fit and easy practice |
| Saturday | 45-75 minute primary ruck | Main goal-specific session |
Remove the optional session first when sleep, gait, foot condition, ordinary activity, or performance starts to slip.
## Why this page does not recommend daily rucking
Daily loaded walking may be part of a job, commute, expedition, or short event. That does not make it the best default training plan.
For general fitness, daily rucking is unnecessary. The U.S. physical activity guidelines can be met through a mix of aerobic and muscle-strengthening activity. The pack is one tool, not a requirement for every walk.
If you enjoy walking every day, keep most of those walks unloaded. You preserve the habit without turning every day into load-carriage exposure.
## Fit rucking around lifting
Count a hard leg session and a demanding ruck as lower-body stress. Avoid placing them back-to-back when performance or recovery suffers.
Simple options:
- lift Monday and Thursday, ruck Saturday
- lift Monday and Friday, easy ruck Wednesday, primary ruck Sunday
- combine an easy short ruck with an upper-body day only when the total week remains recoverable
Do not label a loaded walk "active recovery" merely because it is short. If the pack changes effort or gait, count it as training.
## Fit rucking around running
Running and rucking both use the legs and aerobic system. Keep the hard sessions apart.
One workable week is:
- one primary ruck
- one hard unloaded run or interval session
- one or two easy unloaded runs or walks
- one or two strength sessions
Do not add loaded running to solve a crowded schedule. Use the [ruck running guide](/training/ruck-running-training-speed-intervals-and-shuffle) to separate fast walking from running under load.
## How to know the frequency is working
Track trends across several weeks:
- the same session feels similar or easier
- gait stays normal
- foot and shoulder issues are manageable
- sleep and ordinary activity are stable
- strength and running performance are not steadily declining
- you can repeat the primary ruck without needing to prove anything
One bad day is not a diagnosis. A repeated decline is a reason to reduce frequency, duration, load, or intensity.
## When to stop or get help
Stop for sharp pain, weakness, numbness, dizziness, chest pressure, fainting, unusual shortness of breath, or unsafe loss of balance.
Persistent pain, recurring numbness, swelling, or an altered gait needs qualified assessment. A calendar cannot diagnose the cause.
## Frequently asked questions
### Is rucking once a week enough?
Yes, especially when strength and unloaded aerobic work fill the rest of the week. One well-chosen loaded session can provide specific practice without crowding out other training.
### Is twice a week enough to improve?
It can be. Make one session primary and one clearly easier. Progress only one variable in the primary session.
### Can I ruck three days a week?
Some established ruckers or official programs may use three loaded days, but this site does not use that as the default. Before adding a third, ask what it accomplishes that unloaded aerobic or strength work cannot.
### Can I ruck every day with a light pack?
Daily loaded rucking is not required for general fitness. "Light" is also relative to the person, duration, terrain, and recent training. Keep most daily walks unloaded unless a specific plan calls for more.
### How much rest do I need between rucks?
There is no universal hour count. Start with at least one unloaded day between loaded sessions and add more when the previous session changes gait, symptoms, sleep, or normal activity.
### Do dog walks count as rucks?
They count as loaded training when you wear a pack. An unloaded dog walk can be useful easy activity between rucks.
────────────────────────────────────────────────────────────────────────────────
URL: https://ruckauthority.com/training/indoor-rucking-plan-a-4-week-treadmill-program-for-year
Title: Indoor Rucking Plan: A 4-Week Treadmill Program
Description: A four-week treadmill rucking plan that holds pack load steady, separates incline from duration progressions, and uses two loaded sessions plus unloaded aerobic work.
Published: 2026-05-15 / Updated: 2026-09-14
## Who should use this plan
This plan is for a rucker who can already walk **20-25 minutes with the intended pack load** without warning symptoms or a changed gait.
If you are new to regular walking, start with [Couch to Ruck](/guides/couch-to-ruck-program). If you walk regularly but have not carried load, use [Your First 30 Days of Rucking](/guides/first-30-days-of-rucking).
Indoor rucking is useful when heat, cold, darkness, smoke, ice, or schedule makes the outdoor route a poor choice. A treadmill also makes grade and duration repeatable. It does not make an aggressive progression harmless.
## Replacing an outdoor session when the evenings get darker
Use an indoor session in place of that day's outdoor ruck. Keep the unloaded days in your week; a change of venue does not need to add another workout.
Start with the baseline below, even if your summer route was longer or faster. Record pack weight, time, incline and effort so you can repeat the session next week. Treat the treadmill's distance as a record of that session, without trying to make it equal your trail mileage.
Use walking shoes that fit comfortably on the belt, secure loose pack straps and keep water within reach. You do not need new shoes or a heavier plate just to move indoors. Check the machine's load rules before putting the pack on.
When you return outside, choose a familiar route and allow time to adjust to its footing. Our [headlamp guide](/gear/best-headlamps-for-rucking) covers the darker part of the day; the [cold-weather guide](/training/winter-rucking-cold-weather) covers clothing and decisions about staying indoors.
## Choose the baseline
Use:
- your recent comfortable pack load
- a pace that allows a natural walking stride without holding the rails
- 0-1% incline for the first steady session
- a total training time of 20-25 minutes
Hold pack load for the full block. Body weight does not determine an appropriate treadmill load by itself.
## The four-week schedule
| Week | Loaded steady walk | Loaded incline practice | Unloaded aerobic work |
| --- | --- | --- | --- |
| 1 | 25 min at 0-1%, easy talk-test pace | 20 min at 0-1%, steady | 30 min easy walk, bike, or elliptical |
| 2 | 30 min at the same pace and grade | 5 min easy, 3 x 2 min at 3-4% with 2 min easy, cool down | 30 min easy |
| 3 | 35 min at the same pace and grade | 5 min easy, 4 x 2 min at 3-4% with 2 min easy, cool down | 35 min easy |
| 4 | 25 min easy | 20 min easy at 0-1% | 25-30 min easy |
Keep at least one unloaded day between the two rucks. Strength training can replace the unloaded aerobic session or sit on another day, but avoid heavy leg work immediately before the longer ruck.
## Week 1: Establish treadmill pace
The first session teaches you what the same load feels like on a moving belt.
### Setup
1. Confirm the belt is stopped.
2. Put on and secure the pack.
3. Clip the emergency stop key to your clothing.
4. Start slowly and increase speed in small steps.
5. Settle at a pace you can walk without touching the rails.
The displayed speed is not a target. Treadmill calibration, stride, incline, footwear, and load change the effort.
If you need the handrails for balance, reduce speed or stop the loaded session. Holding the rails changes mechanics and hides the actual demand.
## Week 2: Add duration and short incline blocks
The steady session adds five minutes while pace, load, and incline remain fixed.
The second session keeps the same total load and uses three short incline blocks. Slow the belt before raising grade when needed. Grade is the variable; do not also force Week 1 speed.
There is no reliable rule that 1% treadmill incline perfectly reproduces outdoor walking. Use treadmill grade as its own repeatable setting.
## Week 3: Extend the two session types
The steady walk reaches 35 minutes. The incline session adds one repeat, not more load.
Use the talk test:
- full sentences during the steady session
- short but controlled phrases during incline blocks
- normal breathing again during recovery
If recovery from Session 1 is not stable, repeat Week 2 rather than adding the fourth incline block.
## Week 4: Consolidate
Reduce loaded time and return both rucks to low grade. This gives you a clearer read on the next block.
Record:
- pack load
- belt speed
- incline
- duration
- effort from 1 to 10
- whether you touched the rails
- any gait, foot, shoulder, or back change
Progress only one variable next:
- add five minutes to the steady session, or
- add one incline repeat, or
- test a small load change on a shorter, low-grade session
## Strength support
One or two unloaded full-body sessions can include:
- squat or step-up
- hinge
- push
- pull
- calf raise
- trunk work
Do not wear the ruck for every exercise merely because the program is about rucking. Resistance training and specific loaded walking can remain separate.
## Treadmill safety and form
### Do
- use the safety clip
- leave clear space behind the treadmill
- keep the load secured
- wear shoes already comfortable for walking
- reduce speed before changing a pack or setting
- choose a speed you can maintain without rails
### Do not
- step onto a moving belt with the pack
- adjust or remove the pack while the belt moves
- chase a programmed speed with a run or shuffle
- use steep incline and a heavier load in the same progression
- block vents or interfere with treadmill controls
## How indoor training transfers outside
The treadmill can preserve aerobic and loaded-walking consistency, but it does not reproduce:
- uneven ground
- descents
- lateral stability
- changing weather
- route finding
- outdoor pack access
If an event is outdoors, include outdoor sessions before the event. Test footwear, load security, and downhill control on the relevant terrain.
## Common mistakes
**Increasing load every week.** Hold load and use the machine’s controllable duration and grade first.
**Three loaded treadmill days for a beginner.** Two loaded sessions plus unloaded aerobic work is enough for this block.
**Treating the rails as normal form.** Reduce speed or incline until your arms can swing naturally.
**Using speed and incline as simultaneous tests.** Practice one while holding the other.
**Making Week 4 a capstone.** Consolidation produces better information than an exhaustion test.
## Frequently asked questions
### Can I ruck on a treadmill?
Yes, when the treadmill permits the combined user and pack weight and you can walk independently without the rails. Follow the manufacturer’s instructions and use the safety clip.
### What speed should I use?
Use the speed that preserves a normal walking gait and easy talk-test effort. The display is a repeatable setting, not a universal prescription.
### What incline should I use?
Begin at 0-1%. This plan introduces short 3-4% blocks while load remains fixed. Reduce speed as grade rises.
### Should I increase weight during the four weeks?
No. Hold pack load. After Week 4, test one small load change only on a shorter low-grade session if the prior block was stable.
### Can this replace outdoor event training?
It can maintain and build some capacity, but an outdoor event still requires practice on relevant surface, grade, descents, weather, and gear.
────────────────────────────────────────────────────────────────────────────────
URL: https://ruckauthority.com/training/is-rucking-bad-for-your-back
Title: Is Rucking Bad for Your Back? What the Science Says
Description: Learn how load, pack fit, training volume, and existing back conditions affect spinal stress during recreational rucking.
Published: 2026-03-10 / Updated: 2026-04-12
## The short answer
Recreational [rucking](/glossary#rucking) can train trunk endurance, but it also increases spinal and muscular demand. The risk depends on the load, duration, pack fit, progression, health, and symptoms. Military studies using 40-60% of body weight for long marches describe a different exposure from a 30-minute neighborhood ruck with 20-25 pounds, but that difference does not make every recreational load safe for every back.
---
## What the military research shows
Much of the load-carriage injury research comes from military populations. Its load, distance, pace, equipment, and limited recovery must be considered before applying it to recreational rucking.
Military studies show increased rates of lower back injury in soldiers carrying loads exceeding 40% of bodyweight over extended durations (4-12 hours). These studies typically involve loads of 60-100+ pounds for 20-40+ kilometers. The researchers were investigating occupational hazards in contexts where soldiers have no choice but to maintain pace and distance despite fatigue and pain.
Multiple investigations report greater spinal compression and back symptoms with heavy loaded marching. Some studies using loads below 25% of body weight found short-term changes that resolved during follow-up, but that should not be turned into a universal 24-hour recovery rule.
This is the critical distinction: occupational [load carriage](/glossary#load-carriage) (a soldier's job, performed daily, at heavy loads, often in compromised conditions) is not the same as fitness rucking (a deliberate training activity, done intermittently, at moderate loads, in controlled settings).
---
## What recreational rucking does for your back
Loaded walking requires the back and trunk muscles to hold posture under load. That can train endurance when the dose is appropriate.
**Spinal erector activation.** The erector spinae run along the spine and help maintain posture under a pack. Repeated, tolerable loading may improve endurance. Rehabilitation programs sometimes use loaded carries, but the exercise and dose are selected for the individual.
**Core endurance.** The abdominal wall, obliques, multifidus, and other trunk muscles help control the load. A 30-60 minute ruck can provide sustained work, but more duration or load is not always better.
**Posture awareness.** A pack gives immediate feedback when it shifts or pulls away from the body. That may help a rucker notice posture, but carryover to sitting posture is not guaranteed.
**Bone loading.** Bone responds to mechanical load, and rucking is weight-bearing. Direct evidence for vertebral bone-density gains from recreational rucking is limited, especially in people with osteoporosis or fracture risk.
**Loaded carry practice.** Farmer carries, suitcase carries, and rucking all involve moving under load, but the position and duration differ. Safety in one exercise does not prove safety in another; both need an appropriate load and progression.
---
## When rucking CAN cause back problems
Rucking may contribute to back pain in several situations. Avoiding them can reduce risk but cannot prevent every problem.
**Weight too heavy for your current fitness level.** If you jump from no rucking to 35 pounds, your stabilizer muscles aren't prepared for the load. Your form breaks down under fatigue, and your tissues absorb stress they're not ready to handle. Start lighter than you think you need to.
**Weight positioned too low in the pack.** A pack that sits low on your back (near your lumbar spine) pulls you backward and forces forward lean from your lower back, not your ankles. This compresses your lumbar discs and overloads the erector spinae. Proper pack positioning is high and tight against your spine, with weight distributed toward your upper back and shoulders.
**Excessive forward lean from the waist.** Instead of leaning from your ankles (which keeps your spine neutral), leaning from your waist (bending forward at the L4-L5 junction) compresses your discs. This is a form error that creates localized stress exactly where most back pain originates.
**Weak core providing insufficient stability.** If your core muscles can't brace against the load, your spine has to work harder to stay stable. Each step compounds the problem. This is why beginners with weak cores sometimes develop back soreness even at modest weights.
**Pre-existing disc issues not being managed.** If you have a known herniated disc, stenosis, or previous serious back injury, rucking needs to be progressive and often requires specific modifications or professional guidance.
**Sudden load jumps.** No weekly increase is automatically safe. Add one variable at a time, and reduce the progression when soreness, pain, gait, or recovery worsens.
---
## How to protect your back while rucking
Gear can improve fit and comfort, but it cannot remove spinal risk. The table shows two structured packs and an optional recovery tool.
| Role | Pick | What it protects |
|------|------|------------------|
| Pack | 5.11 RUSH 24 | Internal frame sheet. Keeps the load high and tight against the spine instead of pulling backward at hour two. |
| Heavy-load pack | Mystery Ranch 2 Day Assault | Futura yoke and frame designed to transfer some load to a compatible hip belt. |
| Recovery | TriggerPoint GRID Foam Roller | Optional tool for lats and upper-back mobility; it does not diagnose or treat the cause of low-back pain. |
These practices can reduce avoidable fit and progression problems:
**Load the pack correctly.** The top of your pack should sit at your shoulder blades or slightly higher. The weight should be pressed firmly against your spine (not floating away from your back), and straps should be snug. A proper [hip belt](/glossary#hip-belt) distributes weight to your hips rather than overloading your shoulders and upper back. The weight should feel directly underneath you, not pulling you backward. A [well-designed pack like the 5.11 RUSH 24](/gear/best-rucking-backpacks) makes this much easier - poor pack geometry can't be compensated for with form alone.
**Use a hip belt when the pack is designed for load transfer and it improves comfort.** A [pack such as the Mystery Ranch 2 Day Assault](/gear/best-goruck-alternatives) has a frame and belt system for this purpose. A belt is not automatically required above 20 pounds, and a poorly fitted belt can create other pressure points.
**Train the trunk directly if needed.** Dead bugs, bird dogs, planks, side planks, farmer carries, and suitcase carries are options. Ten minutes three times per week is one sample dose. A prehab routine can build capacity, but it does not guarantee injury prevention.
**Lean from your ankles, not your waist.** When climbing hills or leaning forward, the movement should come from your ankles and hips, not from flexion at your lower back. Keep your spine relatively neutral. This maintains the integrity of your discs and prevents localized lumbar compression.
**Progress gradually using [the 10% rule](/glossary#ten-percent-rule).** Add no more than 10% to your volume (weight + distance) per week. If you rucked 2 miles at 20 pounds this week, next week could be 2.2 miles at 20 pounds, or 2 miles at 22 pounds-not both. This allows your tissues to adapt.
**Use mobility work if it helps.** Cat-cow, child's pose, and knee-to-chest stretches are options after a ruck, but no movement is safe or useful for every back condition. Stop any drill that increases pain or neurological symptoms.
---
## If you already have back pain
If you have existing back pain, ask a doctor or physical therapist about loaded walking before you start, especially with a herniated disc, stenosis, prior surgery, fracture risk, or neurological symptoms.
Once cleared, start conservatively: very light loads (5-10 pounds), short distances (0.5-1 mile), and easy pace. The goal is to build tolerance gradually. Focus on core strengthening before adding substantial load. Many people with back pain benefit from doing a prehab routine for 2-3 weeks before their first ruck.
A hip belt may improve comfort when the pack frame and torso fit allow load transfer. It does not make rucking appropriate for an injured or painful back.
During and after rucking, monitor symptoms. Stop for sharp or worsening pain, radiating pain, numbness, weakness, loss of coordination, or changes in bowel or bladder control. Seek urgent medical care for severe neurological symptoms.
If pain develops, stop the session and assess the cause before trying again. A lighter load may help in some cases, but persistent, recurrent, radiating, or severe pain needs clinical evaluation.
## Frequently Asked Questions
────────────────────────────────────────────────────────────────────────────────
URL: https://ruckauthority.com/training/military-rucking-program
Title: 12-Mile Military Ruck Training Plan: A 12-Week Program
Description: A 12-week plan for an official 12-mile military ruck test, built around one weekly foot march, unloaded aerobic work, strength, pace practice, and the exact standard in your unit document.
Published: 2026-03-27 / Updated: 2026-08-30
## First, identify the actual standard
“The Army standard” is too broad to program against. A unit foot march, school entrance requirement, graduation requirement, badge event, and selection process can use different loads, equipment, routes, and cutoffs.
Several current official documents do use a **12-mile movement, a 35 lb dry load, and a 3-hour limit**:
| Program | Published requirement | Important detail |
| --- | --- | --- |
| Expert Infantryman Badge | 12 miles, 35 lb dry, within 3 hours | The current E3B page identifies the governing EIB publication; the pamphlet includes required packing and event procedures |
| Infantry Basic Officer Leader Course | 12 miles, 35 lb dry, within 3 hours | The welcome letter includes course-specific preparation and packing information |
| Sapper Leader Course graduation | 12 miles, 35 lb, within 3 hours | Entrance and graduation requirements are not the same thing |
| 75th Ranger Regiment recruiting assessment | 12 miles, 35 lb plus weapon, under 3 hours | The weapon and other conditions add work beyond “35 pounds” |
Those examples do not create one rule for the entire military. Print or save your current official document before using this plan.
## Who should start this 12-week plan
Start here only if all of the following are true:
- you can walk or run aerobically for 45 to 60 minutes
- you have completed a recent 4-mile loaded walk without warning symptoms
- the load used for that walk is documented and repeatable
- you can complete two basic full-body strength sessions per week
- you know the test date, required dry load, added equipment, and cutoff
If you are not at that baseline, use the [16-week base-building plan](/training/rucking-base-building-16-week-periodization-program-for-long) first. If you are new to regular exercise, begin with [Couch to Ruck](/guides/couch-to-ruck-program).
## Weekly structure
The plan uses one specific loaded foot march. The rest builds the capacities that support it without adding another long march.
| Day | Session | Purpose |
| --- | --- | --- |
| Monday | Full-body strength | Squat or step-up, hinge, push, pull, calf, and trunk work |
| Tuesday | Unloaded easy aerobic work, 30-50 minutes | Build time at an easy talk-test effort |
| Wednesday | Rest or mobility | Protect Thursday and Saturday quality |
| Thursday | Unloaded intervals or brisk hills, 25-40 minutes | Improve pace without running under the ruck |
| Friday | Full-body strength, reduced leg volume | Maintain strength without exhausting the long march |
| Saturday | Primary foot march | Practice load carriage, distance, feet, gear, and pace |
| Sunday | Rest or easy unloaded walk | Recover and review the session |
Army H2F guidance advises against placing a long foot march next to an endurance run or heavy lower-body strength session. Adjust the calendar if your duty schedule forces those sessions together.
## How to choose load
Use the heaviest load you have completed comfortably in recent training as the Week 1 load. Do not let this page choose a military load from body weight alone.
If your test requires more:
1. Hold load during Weeks 1-3.
2. Use a shorter consolidation week to add a small amount.
3. Hold the new load while distance grows.
4. Use the next consolidation week for the final load change.
5. Include water and required equipment exactly as the official document defines them.
This keeps a load change separate from a major distance increase. The required test load may exceed the scope of a civilian calculator.
## The 12-week schedule
The distances below assume your recent repeatable baseline is about 4 miles. If it is lower, extend the plan rather than compressing the first four weeks.
| Week | Primary foot march | Pack load | Pace work | Decision before advancing |
| --- | --- | --- | --- | --- |
| 1 | 4 miles, familiar route | Recent comfortable load | None; talk-test effort | Gait and recovery remain normal |
| 2 | 4.5 miles | Hold | Last 5 minutes brisk, still walking | No persistent foot or joint symptoms |
| 3 | 5 miles | Hold | 2 x 5 minutes at controlled test pace | Pace does not cause shuffling or running |
| 4 | 4 miles | Optional small load change | Easy | New load remains secure and repeatable |
| 5 | 5.5 miles if load held; repeat 4 miles if load changed | Hold | Easy after a load change; otherwise 3 x 5 minutes at test pace | New load is repeatable before distance rises |
| 6 | 6 miles if Week 5 was stable; otherwise 5.5 miles | Hold | Middle 15 minutes steady only when load is stable | No gait change late in the session |
| 7 | 7 miles | Hold | 2 x 10 minutes at test pace | Finish able to walk normally afterward |
| 8 | 5 miles | Hold; use required load only if already repeatable | Easy | Extend the calendar if required load is not stable |
| 9 | 7.5 miles only with a stable required load; otherwise repeat 5 miles | Hold required load | 3 x 10 minutes at test pace only when stable | Gear and packing list are final |
| 10 | 8.5 miles | Hold | Middle 30 minutes near target pace | Target pace remains a walk |
| 11 | 10 miles | Hold | Rehearse start time, route type, gear, and fueling | Recover before test week |
| 12 | Official 12-mile test, or 4 easy miles if test is later | Official requirement | Test only | Do not add extra distance afterward |
Distances are editorial starting points, not validated clinical thresholds. Repeat a week if the prior session changed your gait, produced persistent pain, or disrupted normal recovery.
## Weeks 1-4: Establish the baseline
The first block makes the schedule repeatable. Keep the route familiar and the effort conversational. The goal is not to prove that 4 miles is easy; it is to learn how the current pack, footwear, feet, and recovery respond every week.
Use unloaded intervals for faster work. A simple Thursday session is:
- 10 minutes easy
- 4 x 2 minutes brisk with 2 minutes easy
- 5 to 10 minutes easy
Do not run with the ruck to make a pace number. U.S. Army injury-prevention guidance cautions that ruck running may increase injury risk.
## Weeks 5-8: Extend distance and reach required load
Distance grows during Weeks 5-7. If Week 4 changed load, Week 5 repeats the shorter distance before progression resumes. Week 8 reduces distance and confirms the required load; it is not permission to introduce that load for the first time and jump to 7.5 miles the next week.
Do not raise load in Week 8 merely because the table allows it. Hold the current load when:
- the Week 7 session changed your stride
- foot hot spots are unresolved
- shoulder or back discomfort is accumulating
- the official requirement is still weeks away and you need a smaller step
- the required load has not already become repeatable on a shorter march
Strength remains submaximal. Stop sets with two or three clean repetitions still available.
If the conditional repeats leave you behind the later mileage targets, extend the calendar or move the test. Do not skip the repeat weeks to force the original date.
## Weeks 9-11: Practice the test
These weeks are specific, not maximal. Rehearse:
- the exact dry load and packing method
- any weapon or additional equipment when authorized
- event footwear and socks
- start time and likely weather
- target pace as controlled walking
- foot-care and refilling procedures
The 10-mile Week 11 march is the longest scheduled training session. You do not need to prove 12 miles every weekend to prepare for a 12-mile test.
## Week 12: Taper or test
If the official test occurs in Week 12:
- reduce strength volume early in the week
- keep aerobic work short and easy
- perform no loaded workout designed to create fatigue
- execute the current official packing list and instructions
If the test is later, use 4 easy miles at the required load and repeat a short taper in the actual test week.
## Pace for a 3-hour 12-miler
Twelve miles in three hours requires a **15:00 per mile average**, including any time lost to stops. Training should separate pace skill from long-distance fatigue.
Use short test-pace blocks only after the required load is stable. If a 15:00 pace forces running, shuffling, or overstriding, improve unloaded aerobic speed and walking mechanics rather than forcing the loaded pace.
[Use the pace calculator](/tools/pace-calculator) for exact splits.
## Strength that transfers
The load-carriage training review by Knapik and colleagues found the best support for a combination of aerobic training, resistance training, and progressive load-carriage practice.
Two weekly strength sessions can use:
| Pattern | Examples | Working approach |
| --- | --- | --- |
| Squat or step | Goblet squat, split squat, step-up | 2-4 controlled sets |
| Hinge | Deadlift, Romanian deadlift, hip hinge | 2-4 controlled sets |
| Push | Push-up, bench press, overhead press | 2-4 controlled sets |
| Pull | Row, pull-up, pulldown | 2-4 controlled sets |
| Lower leg | Calf raise, tibialis raise | 2-3 controlled sets |
| Trunk | Side plank, dead bug, Pallof press | 2-3 controlled sets |
Avoid turning Friday into a heavy leg test before Saturday’s march.
## Fuel, water, and heat
There is no one fluid or carbohydrate number that fits every body, climate, speed, and event rule. Practice the food and water approach you can actually use under the official conditions. Do not intentionally dehydrate to mimic a restricted event.
Use current heat guidance, local conditions, and unit policy. [See the heat-safety guide](/training/summer-rucking-heat-safety) for symptoms and route decisions.
## Feet and equipment
Pack security and foot care are training variables:
- secure dense weight high and close so it cannot shift
- use issued equipment when the test requires it and training rules permit
- test the complete packing list before Week 11
- treat hot spots during the session, not after they become blisters
- replace or adjust equipment that repeatedly changes gait
See the [ruck-event packing guide](/training/ruck-event-packing-lists) and [foot-care guide](/injuries/rucking-foot-care-blister-prevention).
## A 12-mile plan is not a 20-mile plan
This page previously told readers to jump from a much shorter peak to a 20-mile “capstone.” That was not a responsible progression and has been removed.
A real 20-mile requirement needs:
- the exact official distance, dry load, added equipment, terrain, and cutoff
- a longer calendar than this 12-week plan when your current long march is 4 miles
- repeated sub-distance work that establishes several hours of comfortable movement
- fueling, foot-care, and equipment practice specific to the requirement
- no sudden 20-mile test after peaking at 10 miles
If your requirement is truly 20 miles, use this plan only as an early block. Add a separate extension based on your recovered 10-mile baseline and qualified unit or coaching guidance. Do not infer a 20-mile standard from a school that actually publishes a 12-mile test.
## When to stop or hold
Stop the session for sharp pain, weakness, numbness, dizziness, chest pressure, fainting, or unusual shortness of breath. Hold or reduce the next week when pain persists, gait changes, or normal recovery is slipping.
Do not use anti-inflammatory medication or pain medication to conceal symptoms and complete a training distance.
## Frequently asked questions
### Is 12 miles with 35 pounds in 3 hours the Army standard?
It is a published standard for several specific badges, courses, and assessments, but not a universal standard for every Army unit or military program. Water, weapon, packing list, sequence, and terrain can also differ. Use the current official document for your requirement.
### How often should I ruck during this plan?
The plan uses one primary loaded foot march each week. Unloaded aerobic work and strength support it. Some unit programs may prescribe a different schedule; follow the current official plan when it is supervised and specific to your requirement.
### Should I train heavier than the test load?
Not automatically. First become consistent at the required load. A heavier pack is another progression variable and can compromise pace, gait, and recovery. Use it only when a qualified program gives it a clear purpose.
### Do I need a 12-mile rehearsal?
Not necessarily. This plan peaks at 10 training miles, then uses the official test as the 12-mile effort. A unit may schedule a rehearsal; that official plan takes precedence.
### Can I use this for a 20-mile ruck?
Only as an early base block. It does not prepare a 4-mile baseline for a 20-mile capstone in 12 weeks. Extend the calendar from a recovered 10-mile baseline and use the exact official 20-mile requirement.
────────────────────────────────────────────────────────────────────────────────
URL: https://ruckauthority.com/training/ruck-event-packing-lists
Title: Ruck Event Packing Lists: What to Bring
Description: Build your ruck event packing list from organizer rules. Download a one-page worksheet for required weight, water, gear, and your final weigh-in.
Published: 2026-03-28 / Updated: 2026-09-06
## The short answer
Start with the exact registration page and organizer messages for your event. Copy every required item into a checklist without changing the wording. Only then add personal support gear for weather, feet, food, navigation, and the trip home.
There is no universal GORUCK load or event kit. On the official Tough page checked for this update, GORUCK lists a rucksack with reflectivity, a bodyweight-based ruck load, 3L of hydration, required medication, photo ID, and class-specific recommendations. Another event can differ. A community ruck can use entirely different rules.
## Printable ruck event packing worksheet
[Download the one-page packing worksheet (PDF)](/downloads/ruck-event-packing-worksheet.pdf). Print it on US Letter paper and fill it out beside your organizer's checklist. It has space for the required weight, weighing rule, permitted ballast, water, required items, and your measured pack weight. Attach the organizer's list if you need more rows.
### Does a 25 lb or 35 lb ruck include water and gear?
The number alone does not answer that. If your event specifies a **25 lb ruck** or **35 lb ruck**, copy the full requirement before packing. Confirm whether the organizer weighs ballast alone, the dry pack with gear, or another combination. Record what counts, what is excluded, when the pack is weighed, and whether the rule applies to your participant category. Neither number establishes a universal Army, GORUCK, or community-event requirement.
Use the worksheet to keep two measurements separate: **the weight that qualifies under the organizer's rule** and **the complete weight you will carry**, including water and extras. A total carried weight of 35 lb does not prove that you meet a 35 lb requirement if the organizer excludes some of those items. Confirm unclear wording and permitted ballast with the organizer before making substitutions.
## Build the list in three layers
### 1. Required by the organizer
Write these items exactly as published. Do not substitute a different load, container, visibility system, or capacity because another event accepted it.
- Pack or carrier type
- Required dry load and the rule used to assign it
- Whether water counts toward that load
- Hydration capacity
- Reflectivity, lighting, or high-visibility gear
- Identification, medication, waiver, or emergency information
- Navigation equipment
- Team, class, or charity weight
- Start-time, cutoff, or route requirements that affect batteries and layers
For a GORUCK event, a GORUCK-branded pack may be a sensible purchase, but the official page determines whether a brand is required. The Tough page checked here says "rucksack with reflectivity," not "buy a GR1."
### 2. Personal support gear
These items solve predictable problems but are not automatically required.
**Footwear and socks.** Use shoes or boots you have already worn under load on comparable terrain. Waterproof footwear is not universally better; it can help in sustained wet or cold conditions, but it also dries more slowly after water enters from above. Match tread, drainage, fit, and socks to the route.
**Foot and skin care.** Carry a compact version of products you already know how to use. [Body Glide](/injuries/rucking-foot-care-blister-prevention), tape, blister patches, and a dry pair of socks can be useful when they address a known friction point. They do not replace properly fitted footwear.
**Food.** Bring familiar food in portions tested on long training sessions. There is no responsible universal calorie-per-hour number for every body, pace, weather condition, and event format. If you have diabetes, gastrointestinal issues during endurance exercise, or another condition that changes fueling needs, build the plan with a qualified clinician or sports dietitian.
**Layers.** Use the forecast, start time, expected exposure, and organizer rules. A light shell or insulating layer may matter more than an extra gadget. Keep a dry change of clothes with your transportation when the organizer recommends after-event clothing.
**Light and power.** Carry a headlamp only when the event, timing, or contingency plan calls for one. Confirm the runtime in the mode you will use and test the controls with cold or wet hands. A backup light is often more useful than an oversized power bank.
**Navigation and communication.** Self-navigated events may require a map, compass, phone, GPS, or all four. A marked group event may require none of them beyond a charged phone. Follow the event's actual rules and know what happens when a battery or signal fails.
### 3. Travel and after-event gear
Do not confuse what rides in the ruck with what belongs in the car or hotel.
- Dry clothes and footwear
- Towel and a bag for wet gear
- Food and water for the trip home
- Charger
- Event confirmation and travel details
- Any recovery or medical supplies you normally use
Keeping after-event gear out of the ruck is an easy way to reduce dead weight without sacrificing comfort later.
## A current GORUCK Tough example
The [official Tough page used for this update](https://registration.goruck.com/event/tough-challenge-911-new-york-ny) describes a 10-12 hour event. It lists:
- A rucksack with reflectivity
- 30 lb for participants at or above 150 lb bodyweight, or 20 lb below 150 lb
- 3L hydration bladder
- Required medication
- Photo ID
It separately recommends gloves, a windbreaker, an extra layer, a dry bag, after-event clothing, supportive footwear, and food. That distinction matters. Required items protect eligibility; recommended items are decisions to validate in training.
## Match the packing method to the event
| Event format | First questions | Common support decisions |
|---|---|---|
| Cadre-led challenge | What exact load, reflectivity, hydration, ID, and class items are published? | Pack fit, footwear, food, layers, dry storage, lighting |
| Self-navigated distance event | What navigation tools, checkpoints, cutoffs, and resupply rules apply? | Battery margin, map backup, route food, weather protection |
| Timed military or badge march | Which regulation or local standard controls load, uniform, footwear, and time? | Nothing that changes the measured load or violates the uniform standard |
| Community ruck | Does the organizer specify a load, pace, distance, regroup policy, or water access? | Simple hydration, visible clothing, phone, familiar footwear |
The same participant may need four different packs for four different rule sets, or the same pack with four different contents. Duration alone does not determine the list.
## Run a real shakedown
At least one rehearsal should answer these questions:
- Is the dry load correct on a scale?
- Is the weight secured high and close enough that it does not swing?
- Can you drink without removing the pack?
- Do straps, seams, socks, or shoes create a hot spot?
- Can you reach required ID or medication without unpacking everything?
- Does the headlamp last in the mode you plan to use?
- Can food wrappers and wet gear be contained?
- Does the full setup still work after rain, sweat, or darkness?
Do not force a full-distance simulation if your training plan has not earned it. A sequence of shorter checks can validate fit, hydration, lighting, and food without creating a last-minute overuse problem.
## What to leave out
- Gear copied from another event but absent from yours
- Unfamiliar medication, supplements, drink mixes, or food
- A heavier plate than the published requirement
- Duplicate tools with no failure plan
- Fragile electronics you cannot protect
- "Just in case" layers that do not match the forecast or rules
- A personal first-aid kit full of items you do not know how to use
The point is not minimalism for its own sake. Every item should answer either "the organizer requires this" or "this solution worked during a rehearsal."
## Copyable final checklist
**Official requirements**
- [ ] Event page and organizer messages rechecked
- [ ] Pack/carrier type matches the rule
- [ ] Dry load and bodyweight rule verified
- [ ] Hydration capacity verified
- [ ] Reflectivity/lighting requirement verified
- [ ] ID, medication, waiver, and class items packed
- [ ] Navigation and cutoff requirements understood
**Tested support gear**
- [ ] Footwear and socks used under load
- [ ] Known foot/chafe supplies
- [ ] Familiar food and drink plan
- [ ] Weather-appropriate layers
- [ ] Dry storage where needed
- [ ] Charged light/navigation/phone with appropriate backup
**Travel and recovery**
- [ ] Dry clothes and shoes left with transportation
- [ ] Towel and wet-gear bag
- [ ] Food, water, charger, and route home
## Frequently asked questions
### Is there one packing list for every GORUCK event?
No. Use the registration page and communications for the exact event. Even when two events share a name, location, season, start time, and class details can change the required or recommended gear.
### Can I use a non-GORUCK pack?
Only the event rule can answer that. The official Tough page checked for this update requires a rucksack with reflectivity but does not require the GORUCK brand. Your pack still needs to secure the specified load and carry the required hydration and gear.
### How much food should I bring?
Use long training sessions to learn what you tolerate, then scale that familiar plan to the event format and available resupply. Do not rely on a generic calorie total from someone with a different body size, pace, weather, or medical history.
### Do I need boots?
Not universally. Choose broken-in footwear that matches terrain, weather, drainage, support preference, and the organizer's rules. Trail shoes can be right for one route and boots for another.
### What should I do about a developing blister?
Address a hot spot early using a method you have practiced. Stop and seek event medical support for severe pain, bleeding, signs of infection, loss of sensation, or an altered gait you cannot correct safely.
## Your next step
---
## Related reading
- [8 weeks to a fall ruck event](/training/fall-ruck-event-8-week-countdown) - the August countdown plan, including when every packed item must be trail-tested
- [GORUCK Tough packing list](/gear/goruck-tough-packing-list) - the complete cadre-inspected Tough kit with brand-specific picks
- [GORUCK Challenge training guide](/training/goruck-challenge-training) - 12-week progression program from beginner to event-ready
- [Rucking form guide](/guides/rucking-form-guide) - proper posture and technique to stay injury-free under load
- [Best rucking shoes by terrain](/gear/best-rucking-shoes-by-terrain) - detailed footwear breakdown for different conditions
- [Best rucking backpacks](/gear/best-rucking-backpacks) - pack selection guide including GORUCK GR1, 5.11 RUSH 24, and budget alternatives
- [Ruck plate comparison](/gear/ruck-plate-comparison) - GORUCK plates vs. Titan Fitness vs. Rogue - what to buy at each budget
- [Rucking nutrition guide](/guides/rucking-nutrition-guide) - fueling strategy for events and long-distance training
- [Rucking foot care and blister prevention](/injuries/rucking-foot-care-blister-prevention) - deep dive into blister science and prevention tactics
────────────────────────────────────────────────────────────────────────────────
URL: https://ruckauthority.com/training/ruck-progression-rules-how-to-safely-increase-weight-and-dis
Title: Ruck Progression: How to Increase Weight and Distance
Description: A practical ruck-progression framework that starts from recent training, changes one factor at a time, and explains why the 10 percent rule and pound-miles are not safety guarantees.
Published: 2026-04-30 / Updated: 2026-08-30
## The short answer
Progress a ruck from a session you have already completed comfortably. Change one factor, then observe gait, symptoms, effort, and recovery before changing another.
The factors are:
- distance or duration
- pack load
- pace
- grade
- terrain
- loaded-session frequency
- required equipment or conditions
There is no formula that turns those factors into a universal safe dose.
## Start from a real baseline
A useful baseline includes:
- the pack load actually carried
- time and distance
- route, surface, and elevation
- effort from 1 to 10
- any gait change or symptom
- whether the session felt repeatable after 48 hours
If you have not rucked recently, your baseline is not an old personal best. Begin with the [First 30 Days plan](/guides/first-30-days-of-rucking) or enter zero recent loaded miles in the [program builder](/tools/program-builder).
## Why “pound-miles” is not a safety formula
Multiplying pack weight by distance can describe two sessions:
- 20 lb x 4 miles = 80 pound-miles
- 40 lb x 2 miles = 80 pound-miles
Those sessions are not physiologically interchangeable. The heavier load can alter gait and local tissue stress differently; the longer distance adds more steps and exposure. Grade, surface, pace, pack design, and the person carrying it are absent from the number.
Pound-miles can be a logbook label. It is not a validated threshold that guarantees a week is safe, and this site no longer uses it to generate programs.
## A progression decision tree
### 1. Was the baseline repeatable?
Hold or reduce when:
- gait changed under load
- pain persisted or worsened
- foot damage affected normal walking
- ordinary sleep or daily activity deteriorated
- the route or conditions were harder than expected
Advance only when the session was stable enough to repeat.
### 2. What does the goal actually require?
| Goal | First variable to consider |
| --- | --- |
| General fitness | A small amount of time or distance |
| Longer event | Duration or distance at current load |
| Higher required load | Load on a shorter familiar route |
| Time standard | Short controlled pace blocks after load is stable |
| Hilly event | Mild grade while load and duration hold |
| More training days | Unloaded aerobic or strength work first |
### 3. Can you isolate that variable?
If load changes, hold route, pace, and duration or reduce duration. If terrain changes, hold load and planned time. If pace changes, use short blocks rather than turning the full ruck into a test.
### 4. Did the response match the plan?
Record the session and make the next decision from the result, not the calendar.
## Distance progression
Use distance first when the current load is stable and the goal requires more time on feet.
Example four-week block from a 4-mile baseline:
| Week | Primary ruck | Load |
| --- | --- | --- |
| 1 | 4 miles | Hold |
| 2 | 4.3 miles | Hold |
| 3 | 4.3 miles | Hold |
| 4 | 3.5-3.7 miles | Hold |
The exact decimal is not magic. A route may make 4.25 or 4.5 miles more practical. The important part is a modest change followed by a hold and an easier review week.
## Load progression
Change load only when the current distance is stable and a real goal requires more weight.
Example:
| Week | Primary ruck | Load |
| --- | --- | --- |
| 1 | Recent comfortable distance | Current load |
| 2 | Shorter familiar route | One small measurable increase |
| 3 | Same as Week 2 | Hold new load |
| 4 | Return toward baseline distance if stable | Hold |
Body-weight percentages can define a calculator’s scope, but they do not prescribe the correct increase. A 5 lb plate jump is proportionally different for a small beginner and a large experienced athlete.
Use water or smaller adjustable increments when the available plate jump is too large.
## Pace progression
Establish required load and distance before making pace the main variable.
A first pace session can use:
- 10 minutes easy
- 4 x 3 minutes brisk walking
- 2 minutes easy between brisk blocks
- easy walking to finish
Keep a walking gait. U.S. Army injury-prevention guidance cautions that ruck running may increase injury risk. Use unloaded intervals to build more speed without another hard loaded session.
## Grade and terrain progression
Hills, descents, loose surface, roots, sand, and snow each change the task.
For the first terrain exposure:
- hold pack load
- shorten the planned distance or time
- keep pace easy
- choose a route with an exit option
- record elevation and surface
Do not use dangerous heat, cold, smoke, ice, or storms as deliberate overload. Environmental conditions are risks to manage.
## Frequency progression
Add unloaded aerobic or strength work before adding another ruck.
A beginner can build a useful week from:
- one primary ruck
- one or two unloaded easy sessions
- one or two strength sessions
An established rucker may add one shorter easy loaded session. Keep it clearly easier than the primary ruck and remove it when recovery slips.
## Consolidation weeks
After two or three progressive weeks, an easier week can reduce fatigue and reveal whether the new baseline is stable.
“Easier” may mean:
- 15-30% less loaded duration
- familiar terrain
- no pace blocks
- the same pack load
- one fewer optional session
The percentage is an editorial range, not a biological switch. Reduce sooner when needed; do not force three hard weeks merely to earn a deload.
## What to monitor
Useful signals:
- normal walking gait
- stable talk-test effort
- foot condition
- sleep and ordinary daily activity
- session RPE
- recovery relative to your own normal pattern
A watch can add pace, heart rate, and elevation, but population heart-rate formulas are estimates. Do not let a zone number overrule symptoms or a changed gait.
## When to stop
Stop the session for:
- sharp pain
- weakness or numbness
- dizziness or fainting
- chest pressure
- unusual shortness of breath
- loss of balance that makes loaded walking unsafe
Persistent or recurring symptoms need qualified assessment. Do not use medication to hide symptoms and complete the planned number.
## Common mistakes
**Using 10% as permission.** It is a heuristic, not a guarantee.
**Combining weight and distance into one “safe” score.** The arithmetic hides meaningful differences between sessions.
**Adding terrain because the distance felt easy.** Terrain deserves its own exposure.
**Turning every available day into a ruck.** Unloaded aerobic and strength work build useful capacity.
**Progressing after an old personal best.** Use recent, recovered work.
**Catching up missed sessions.** Resume the last repeatable week.
## Build a baseline-led block
The builder holds pack load, adds only a small amount of distance, and uses unloaded support work. Its 25% body-weight limit is a product scope boundary, not a medical or event standard.
## Frequently asked questions
### Is the 10% rule evidence based?
It is widely used, but evidence for a universal 10% injury threshold is limited and conflicting. Use it as a conservative screen, then evaluate the actual person, session, and response.
### Can I track pound-miles?
Yes, as a descriptive logbook number. Do not treat equal pound-mile totals as equal stress or use a 10% pound-mile increase as a validated safety rule.
### Should I increase weight or distance first?
For general fitness, add a small amount of time or distance while holding load. If a documented event or job requires more load, test that load change on a shorter familiar route.
### How often should I increase?
Only after the current session is repeatable. That may be the next week, several weeks later, or not at all. The calendar is not the decision maker.
### What if the next available plate is a large jump?
Use water or another secure adjustable load, shorten the session substantially, or hold the current weight. Product increments do not define training increments.
### Can I add speed and hills together?
Not for the first exposure. Hold one while introducing the other so you can evaluate the response.
────────────────────────────────────────────────────────────────────────────────
URL: https://ruckauthority.com/training/ruck-running-training-speed-intervals-and-shuffle
Title: Ruck Running vs Fast Walking: What Should You Train?
Description: Why loaded running is not the default way to get faster, what a ruck shuffle actually is, and how to improve pace with fast walking and unloaded conditioning.
Published: 2026-05-07 / Updated: 2026-08-30
## The short answer
Most ruckers do not need to run with a loaded pack.
For a faster ruck time, practice brisk walking under a stable load and build additional speed through unloaded conditioning. U.S. Army injury-prevention guidance says ruck running may increase injury risk and describes strong load-carriage programs as a mix of occasional loaded marching, resistance training, and unloaded aerobic intervals.
## Ruck walking, shuffling, and running are not the same
**Ruck walking** keeps a walking gait while load, distance, terrain, or pace creates the demand.
**Ruck shuffle** is an informal label, not a standardized technique. People often use it for the awkward transition between fast walking and running. The name does not make the movement safer or more efficient.
**Ruck running** adds a flight phase in which both feet leave the ground. That changes impact and pack movement. It should not be treated as the automatic next level after walking.
The useful question is not, "Am I advanced enough to run with a pack?" It is, "Does my actual standard require this movement?"
## Why loaded running is not the default
Foot marching already adds repetitive load to the feet, lower legs, knees, hips, back, shoulders, and skin. Running adds impact and often makes the pack bounce.
The available research does not provide a universal load, pace, or interval progression that makes loaded running safe for every person. It does support improving load-carriage performance with combined training rather than simply doing more loaded miles.
For general fitness, loaded running is unnecessary. For a timed walking event, it is usually the wrong movement to practice. For an occupational requirement, it belongs inside the official preparation system for that requirement.
## Get faster without running under load
Use three separate tools:
1. **Loaded specificity:** one weekly brisk-walking interval session at a stable load.
2. **Unloaded aerobic work:** easy running, walking intervals, cycling, rowing, or swimming.
3. **Strength:** lower-body, trunk, and upper-back work that supports posture and force production.
Separating those jobs keeps one loaded session from trying to build every quality at once.
### Loaded pace session
Use the [six-week speed-rucking block](/training/speed-rucking-intervals). It holds pack load steady and lengthens brisk walking intervals gradually.
### Unloaded interval session
If you already run comfortably, a simple unloaded session can be:
- 10 minutes easy
- 6 x 1 minute brisk or hard but controlled
- 2 minutes easy between efforts
- 5 to 10 minutes easy
If you do not run, use brisk walking, a bike, rower, or pool. The conditioning goal does not require loaded impact.
### Strength session
Build around movements you can perform with control:
- squat or split squat
- hip hinge
- step-up
- row or pull
- loaded carry held in the hands
- trunk anti-extension or anti-rotation work
Two short full-body sessions can support the week without adding another ruck.
## A five-day template
This is a starting structure for someone who already tolerates a 45-minute loaded walk.
| Day | Session | Pack? |
| --- | --- | --- |
| Monday | Strength | No |
| Tuesday | Easy unloaded aerobic work | No |
| Wednesday | Brisk loaded walking intervals | Yes |
| Thursday | Rest or easy walk | No |
| Friday | Strength | No |
| Saturday | Unloaded intervals or easy aerobic work | No |
| Sunday | Rest | No |
The five days describe total training, not five rucks.
## If the required pace feels too fast to walk
First confirm the standard. Check the current source rather than a forum post, old video, or remembered number.
Then inspect the variables:
- Is the pack heavier than the required load?
- Is the route hillier or more technical than the test route?
- Is the pack moving or sitting too low?
- Are you starting too fast and fading?
- Is basic unloaded aerobic fitness the limiting factor?
Improve one limiting factor at a time. If the official standard truly demands running under load, get guidance from the program responsible for that standard.
## Do not manufacture a shuffle
There is no single evidence-based ruck-shuffle form to copy. Trying to force tiny steps, a forward lean, or a bouncing jog can create a new problem without solving the pace requirement.
For fast walking:
- keep the pack high and stable
- keep the trunk tall enough to breathe freely
- increase cadence before overstriding
- let the arms move naturally
- slow down on descents and uncertain footing
- stop when gait control is lost
Movement should stay recognizable as walking.
## When to stop
Stop for sharp pain, weakness, numbness, dizziness, chest pressure, fainting, unusual shortness of breath, or loss of balance. Do not use pain medication to finish a pace target.
Persistent pain, recurring numbness, swelling, or a gait change needs qualified assessment before more loaded speed work.
## Frequently asked questions
### Is ruck running good cardio?
It can be physically demanding, but demand alone does not make it the best choice. Unloaded running, cycling, rowing, or swimming can build aerobic fitness without another loaded-impact session.
### Is a ruck shuffle safer than ruck running?
"Ruck shuffle" has no standardized definition or validated safety advantage. Judge the actual gait, impact, pack movement, symptoms, and requirement rather than the label.
### Can I run with a light weighted vest?
This page does not assign a safe vest weight for running. A lighter load still changes impact and movement. Use unloaded running unless a specific, supervised goal requires otherwise.
### How do I improve a 12-mile ruck time?
Build the required load and distance first, then add one weekly brisk-walking interval session. Improve aerobic fitness and strength without the pack. Use the current official standard for equipment, load, route, and time.
### What if my event allows running?
Allowed does not mean required. A controlled fast walk may be more sustainable. If you choose to run, the event rule does not establish that the movement is appropriate for your training history or symptoms.
────────────────────────────────────────────────────────────────────────────────
URL: https://ruckauthority.com/training/rucking-and-lifting
Title: Rucking + Lifting: How to Program Both Without Burning Out
Description: Learn how to combine loaded carries with strength training while managing fatigue, recovery, and lower-body overlap.
Published: 2026-03-27
## Can You Combine Rucking and Lifting?
Rucking and lifting can share a training week. The main constraint is recovery: both can fatigue the legs, hips, and lower back, especially when loads are heavy. A workable plan separates the hardest sessions and adjusts total weekly volume to the goal.
## The Science of Concurrent Training
Concurrent training means doing strength and endurance work in the same training phase. It can improve both qualities, but poor scheduling can add more fatigue than useful training.
A Mountain Tactical Institute study compared three groups: strength-only, endurance-only, and hybrid (2 days strength + 3 days endurance). In that study, the hybrid group outperformed endurance-only on strength measures, matched strength-only on those measures, and scored higher than both groups on work capacity. One study does not establish the best split for every athlete, but it shows that well-planned concurrent training can work.
Rucking is a [loaded carry](/glossary#load-carriage), so it combines endurance work with demand on the [posterior chain](/glossary#posterior-chain) and trunk. It is lower impact than running, but heavy or long rucks still create meaningful recovery demands. The "interference effect," in which endurance work can limit strength gains, can often be managed by controlling volume and separating hard sessions.
## Scheduling Rules
Use these rules as starting points, then adjust them to your training history and recovery.
**Rule 1: Avoid a Heavy Ruck and Heavy Lower-Body Lift on the Same Day**
Squatting, deadlifting, and carrying weight all load the legs and spinal erectors. Combining a heavy squat (5x3 @ 85%+) with a 45-pound, 60-minute ruck on the same day may make fatigue harder to manage. A [well-fitted Mystery Ranch 2 Day Assault backpack](/gear/best-goruck-alternatives) and hip belt can improve load distribution, but they do not remove the shared training demand.
**Rule 2: Separate Hard Sessions by 24+ Hours**
If Monday is a heavy lower-body day, keep Tuesday's ruck light (15-20 lbs for 30 minutes) or take the day off. Avoid placing a hard ruck (35+ lbs for 45+ minutes) immediately after heavy squats until you know that you recover well from the combination.
**Rule 3: Treat Light Rucking as Low Training Stress, Not Zero Stress**
A 30-minute ruck with 15-20 lbs at an easy pace usually demands less recovery than a heavy session, but it still counts toward weekly load. Some trained people can do this 4-5 days per week. Beginners and anyone with pain or poor recovery may need less. Easy movement can support [active recovery](/glossary#active-recovery), but added weight is not required for that purpose.
**Rule 4: Total Weekly Training Load Matters More Than Any Single Session**
You can fit rucking and lifting together, but you can't do both at maximum intensity every week. If you're pushing hard on your lifts, rucking volume should be moderate that week. If you're building a long rucking distance, don't also chase 1RMs on your lifts. Periodize focus.

## Three Sample Splits
### Split A: Alternating Days
This is the split we recommend for most people because it's flexible and doesn't require precision timing.
**Weekly Layout:**
- **Monday:** Upper body lift (push or push/pull)
- **Tuesday:** Moderate ruck (30-45 min, 25-35 lbs)
- **Wednesday:** Lower body lift (squats, deadlifts, or variation)
- **Thursday:** Rest or light ruck (20 min, 15-20 lbs, easy pace)
- **Friday:** Full body lift or push/pull split focus
- **Saturday:** Long ruck (60-90 min, 20-30 lbs, [conversational pace](/glossary#conversational-pace))
- **Sunday:** Rest
**Why it works:** You're never stacking heavy lower body with heavy rucking. Upper body days get paired with rucking, which is fine because your legs are fresher. Saturday's long ruck is at an easy pace, so it's more work capacity building than training stress.
**Who it's for:** People juggling a 4-5 day lifting routine with consistent rucking. Office workers who can break rucking into a lunchtime session.
### Split B: Morning and Evening Sessions
This is higher frequency but demands more discipline.
**Structure:**
- AM ruck / PM lift (or vice versa), 3-4 days per week
- Minimum 6 hours between sessions
- Full rest day Friday or Sunday
- This might look like: Mon AM ruck + Mon PM lift, Tue rest, Wed AM ruck + Wed PM lift, etc.
**Requirements:**
- Sleep: enough to recover consistently, usually 7-9 hours for adults
- Nutrition: dialed in, with refueling between sessions
- Experience: you need to know your body well enough to dial back one modality if you're getting wrecked
**Why it works:** Higher frequency, but lower daily volume. Each session is shorter and more focused.
**Who it's for:** People with limited windows per day but flexibility on timing. Advanced lifters with good recovery practices.
### Split C: Three Training Days
Not everyone wants to train 5-6 days per week. This is the "maintain both without obsessing" approach.
**Weekly Layout:**
- **Monday:** Full body lift (compound focus)
- **Wednesday:** Moderate ruck (45 min, 30-35 lbs)
- **Saturday:** Full body lift + short ruck warm-up (5-10 min, 20 lbs)
**Why it works:** You hit the gym hard twice, get a solid ruck in the middle, and you're done. Minimal time, full-body adaptations.
**Who it's for:** People who work long hours, have limited schedule flexibility, or aren't competing in lifting or rucking specifically. Anyone who wants to be generally strong and fit without obsessing.
## Exercise Selection That Supports Rucking
Not all lifts are created equal when you're also rucking. Here's what to prioritize:
**Do These:**
- **Squats and deadlifts** - These build hip extension power and posterior chain strength, which directly transfers to rucking power and efficiency
- **Farmer's carries and loaded carries** - Rucking-specific grip and core strength; this is almost identical to rucking minus the weight distribution
- **Rows and pull-ups** - Spinal stability and upper back strength under load, critical for posture during long rucks
- **Pallof press and anti-rotation work** - Core stability under unilateral load (your ruck pulls to one side)
- **Face pulls** - Shoulder health, which takes a beating under load
**Minimize or Skip:**
- High-volume leg accessories (leg press, leg curls) in heavy rucking weeks - your legs are already fatigued from loading
- Excessive core work (high-rep crunches) - loaded carries already thrash your core; you don't need more flexion work
- Plyometrics on heavy ruck days - the impact is extra stress your nervous system doesn't need
The principle: keep lifts complementary, not redundant with rucking.
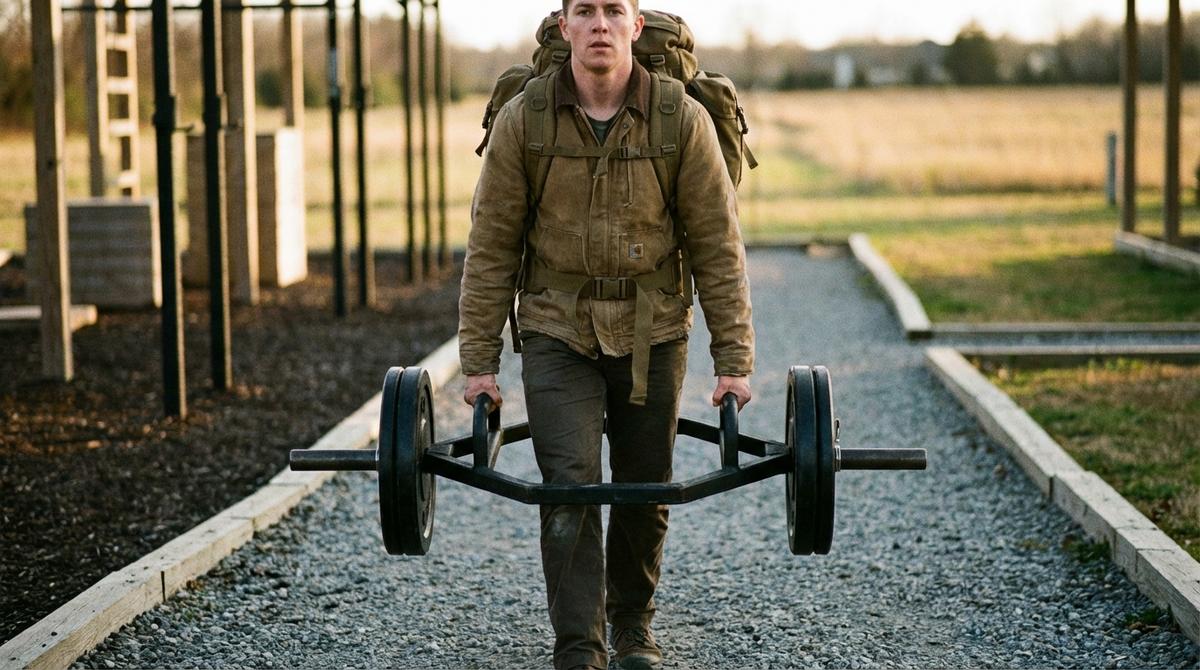
## Recovery Management When Doing Both
Recovery problems often start when rucking is treated as "just walking" instead of training stress.
### Sleep
Aim for 7-9 hours of sleep per night and watch how you recover. A persistent drop in sleep can reduce performance and make combined training harder to tolerate.
### Nutrition
Protein needs go up. Aim for 0.8 to 1 gram per pound of bodyweight daily. You're building muscle from lifting and repairing muscle from rucking; protein is the raw material.
Carbs matter too, especially if you're doing a ruck and a lift on the same day. Refuel between sessions or the second session will suffer.
### Deload Weeks
A planned deload is one option when fatigue is building. For example, every fourth week you could cut lifting and rucking volume by 40-50%. Not everyone needs the same schedule, so use performance, soreness, sleep, and motivation to decide when to reduce volume.
### Signs You're Overdoing It
- Grip strength drops or plateau despite trainer frequency
- Chronic shoulder or hip tightness that won't resolve
- Your [rucking pace](/training/rucking-pace-chart) degrades at the same weight (you're slowing down on familiar routes)
- Elevated resting heart rate (5+ bpm higher than baseline) - easier to spot if you're tracking trends on a watch like the [Garmin Instinct 3 Solar](/gear/best-gps-watches-for-rucking)
- Irritability or mental fog
If you're seeing these, you're accumulating debt faster than you can repay. Cut volume 20-30% for a week and reassess.
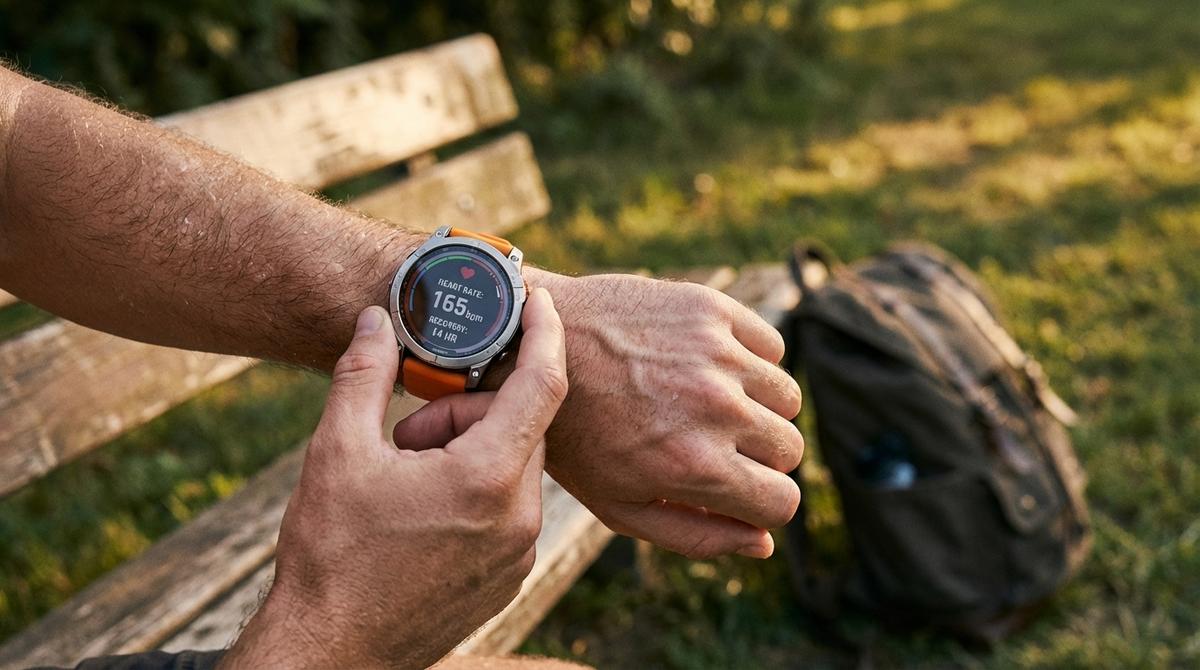
## Common Programming Mistakes (And How to Avoid Them)
**Mistake 1: Treating Rucking as "Just Walking"**
Rucking is strength training. It requires recovery. If you're rucking 45 minutes at 35+ lbs, you've done meaningful work. Your body needs to adapt. Don't program it like it's an afternoon stroll.
**Mistake 2: Heavy Squats + Heavy Ruck Back-to-Back Days**
Back-to-back heavy sessions can leave the lower back and legs under-recovered. Separate them or make one session light.
**Mistake 3: No Deload Weeks**
Three weeks of feeling strong doesn't mean you're not fatigued. Deload weeks prevent injury and extend your training career.
**Mistake 4: No Clear Training Priority**
If the schedule repeatedly falls apart, the plan probably includes too many sessions. Choose a primary goal, reduce the weekly load, and build from a schedule you can follow.
Try one split for 4-6 weeks, then compare performance and recovery with your baseline. Adjust the number or difficulty of sessions if either measure worsens.
## A Practical Starting Point
Rucking and lifting can complement each other, but neither is free of recovery cost. A hybrid plan works best when the hard sessions are separated and total weekly load fits your current capacity.
The alternator split (Split A) works for most people because it naturally prevents heavy overlap and maintains progression in both modalities. If you're just starting out with either rucking or lifting, master one first, then layer in the other. If you're already training both, pick one of these splits, commit to it for a month, and reassess based on how you feel.
Track your lifting performance, ruck pace, sleep, and soreness for a month. Keep the split if both forms of training are progressing without persistent fatigue; reduce volume or set a clearer priority if they are not.
---
## Related Reads
- [Rucking Weekly Routine](/training/rucking-weekly-routine) - A concrete week-by-week plan
- [How Often Should You Ruck](/training/how-often-should-you-ruck) - Volume guidelines from scratch
- [Rucking Prehab Routine](/injuries/rucking-prehab-routine) - Bullet-proofing your body before load
- [Benefits of Rucking](/guides/rucking-benefits) - The science of why rucking works
- [Training Programs](/pillars/rucking-training-programs) - All our training resources in one place
## Frequently Asked Questions
────────────────────────────────────────────────────────────────────────────────
URL: https://ruckauthority.com/training/rucking-base-building-16-week-periodization-program-for-long
Title: Rucking Base Building: A 16-Week Training Plan
Description: A 16-week rucking base plan with one primary weekly ruck, unloaded aerobic work, strength, consolidation weeks, and optional load or pace practice.
Published: 2026-04-23 / Updated: 2026-08-30
## What “base” means here
A rucking base is not the heaviest pack you can survive. It is the ability to complete one useful loaded session every week while strength, unloaded aerobic work, sleep, and ordinary life remain intact.
This plan is for someone who can already:
- ruck 45 minutes with a documented comfortable load
- walk or perform another aerobic activity for 45-60 minutes
- strength train at least once per week
- recover from the ruck without persistent pain or altered gait
If that is not your baseline, use [Your First 30 Days of Rucking](/guides/first-30-days-of-rucking) or the [four-week program builder](/tools/program-builder).
## Weekly structure
| Day | Session | Purpose |
| --- | --- | --- |
| Monday | Full-body strength | Build general force and tissue capacity |
| Tuesday | Unloaded easy aerobic work, 30-50 min | Add aerobic time without pack stress |
| Wednesday | Rest or mobility | Recover |
| Thursday | Full-body strength | Repeat major movement patterns |
| Friday | Optional easy unloaded aerobic work | Add volume only when recovery is stable |
| Saturday | Primary ruck | Practice the current load and one planned variable |
| Sunday | Rest or easy walk | Recover and record the session |
Established ruckers may replace Friday with a 20-30 minute easy ruck, but it should remain optional, lighter or shorter than Saturday, and clearly easy.
## Choose the baseline load
Use the heaviest load you have completed comfortably for 45 minutes in the last month. Hold it through Weeks 1-4.
Do not derive the load from body weight alone. Pack design, route, terrain, training history, symptoms, and event rules all matter.
If you have no event or occupational requirement for a heavier load, you can hold the same load for all 16 weeks. More distance, hills, and pace do not require a heavier pack.
## The 16-week primary-ruck schedule
| Week | Primary ruck | Load | Planned variable |
| --- | --- | --- | --- |
| 1 | 45 min, familiar route | Baseline | None |
| 2 | 50 min | Hold | Duration |
| 3 | 55 min | Hold | Duration |
| 4 | 40 min easy | Hold | Consolidate |
| 5 | 45 min if load holds; 35-40 min if load changes | Hold, or one small required-load step | Load only if needed |
| 6 | 50 min if load held; repeat 35-40 min before extending a new load | Hold | Duration only after the new load is repeatable |
| 7 | 60 min | Hold | Duration |
| 8 | 45 min easy | Hold | Consolidate |
| 9 | 60 min | Hold | Familiar route |
| 10 | 65 min with 3 x 5 min brisk | Hold | Pace |
| 11 | 70 min | Hold | Relevant mild terrain or steady pace, not both |
| 12 | 50 min easy | Hold | Consolidate |
| 13 | 75 min | Hold | Duration |
| 14 | 85 min | Hold | Duration |
| 15 | 90 min | Hold | Rehearse stable gear and route type |
| 16 | 50-60 min easy | Hold | Review and choose next block |
The table is a starting point. Repeat or reduce a week when gait, symptoms, or normal recovery changes.
## Weeks 1-4: Make the weekly ruck repeatable
Hold load, route type, and talk-test effort. Only duration changes.
The support work matters:
- two full-body strength sessions
- one or two unloaded easy aerobic sessions
- at least one true rest day
Load-carriage reviews support combining specific loaded practice with aerobic and resistance training. They do not support making all aerobic work loaded.
Week 4 reduces duration. Use it to resolve pack fit, foot hot spots, or scheduling problems before the next block.
## Weeks 5-8: Hold or change load
Most general-fitness users should hold load and continue the duration schedule.
Change load only when:
- an event or job has a documented requirement
- the current 45-minute baseline is repeatable
- the load can be increased in a small measurable step
- the shorter Week 5 session gives room to evaluate it
When load changes, use the shorter Week 5 duration and repeat it in Week 6 before extending time. Keep route and pace familiar. Hold the new load through Week 8.
The common “10% rule” is not a universal injury boundary. Use it to reject obvious jumps, then let gait, symptoms, route, and recovery determine whether the actual change was appropriate.
## Weeks 9-12: Add pace or terrain
Load stays fixed. Add one specific factor:
- short brisk walking sections, or
- mild hills, or
- a surface similar to the next event
Do not add faster pace and steeper terrain in the same first exposure.
For Week 10, “brisk” means controlled walking. If it becomes running or shuffling, slow down. Use unloaded intervals on another day to improve aerobic speed.
## Weeks 13-16: Extend durability and review
This block extends the primary session to 90 minutes without changing pack load. It is not a peak event simulation.
Use Week 15 to test only equipment you already plan to use:
- pack and weight placement
- footwear and socks
- water access
- route type
- a simple food option if the session requires it
Week 16 reduces duration. Review the full block before selecting a specialized military, GORUCK, hill, or pace plan.
## Strength sessions
A simple two-day template:
| Pattern | Day A | Day B |
| --- | --- | --- |
| Squat or step | Goblet squat | Step-up or split squat |
| Hinge | Romanian deadlift | Deadlift or hip hinge |
| Push | Push-up or bench press | Overhead press |
| Pull | Row | Pull-up or pulldown |
| Lower leg | Calf raise | Tibialis raise |
| Trunk | Side plank | Dead bug or Pallof press |
Use controlled sets and stop with two or three good repetitions available. Keep heavy lower-body work away from the primary ruck when possible.
## How to measure progress
Record the primary ruck:
- duration and distance
- pack load
- route and elevation
- effort from 1 to 10
- gait or symptom changes
- whether you could repeat it after 48 hours
Progress can mean the same session at a lower effort, cleaner gait, fewer foot problems, or better recovery. It does not require a heavier load.
## When to hold or stop
Hold or reduce the plan when:
- the load changes your gait
- pain persists or worsens
- soreness no longer follows your usual recovery pattern
- sleep or ordinary daily activity deteriorates
- a new route or weather condition adds more stress than expected
Stop for sharp pain, weakness, numbness, dizziness, chest pressure, fainting, or unusual shortness of breath.
## Common mistakes
**Four to six rucks every week.** Add unloaded aerobic and strength work before adding more loaded days.
**Changing load because a new block starts.** The calendar does not create a need for more weight.
**Treating easy as a heart-rate formula only.** Use the talk test and gait alongside device data.
**Making Week 15 an exhaustion test.** The plan ends with a repeatable 90-minute session, not a maximal march.
**Assuming periodization guarantees an adaptation.** The blocks organize decisions; your completed sessions supply the evidence.
## After Week 16
- For a current GORUCK event, use the [GORUCK event plan](/training/goruck-challenge-training).
- For a documented 12-mile military test, use the [12-week military plan](/training/military-rucking-program).
- For general fitness, repeat Weeks 9-16 with one small change.
- For indoor continuity, use the [four-week treadmill plan](/training/indoor-rucking-plan-a-4-week-treadmill-program-for-year).
## Frequently asked questions
### How many rucks per week are in this plan?
One primary ruck. Established ruckers may add one optional short easy ruck. The remaining work is unloaded aerobic training and strength.
### Do I need to add pack weight?
No. General-fitness users can hold the same load for all 16 weeks. Change load only when a real goal requires it and your baseline supports the step.
### Is this an 80/20 plan?
The plan keeps most work easy and uses a small amount of brisk practice, but it does not claim that one universal 80/20 split has been validated for civilian rucking.
### Can a beginner use this plan?
Use it after a 45-minute loaded walk is repeatable. New walkers should begin with Couch to Ruck; active walkers new to load should use the First 30 Days plan.
### What should I do if I miss a week?
Resume the last repeatable week. Do not stack the missed primary ruck with the next one.
────────────────────────────────────────────────────────────────────────────────
URL: https://ruckauthority.com/training/rucking-for-seniors
Title: Rucking for Seniors 2026: Safe Loaded Walking After 60
Description: Rucking is one of the best exercises for adults over 50 - for bone density, balance, and cardiovascular health. Here's how to start safely.
Published: 2026-03-10 / Updated: 2026-08-26
## The senior-starter kit
Five items that handle the bone-density + cardiovascular + joint-friendly use case for adults 50+. Lighter loads, more cushion, real tracking - the gear emphasis shifts from "maximum performance" to "sustainable mileage for decades."
| Priority | Item | Why this one |
| --- | --- | --- |
| 1 | A well-fitting pack with a structured back panel (5.11 RUSH 24, GORUCK Rucker 5.0) | A structured pack helps keep the load stable and close to the back. Fit and a conservative starting load matter more than brand. |
| 2 | A ruck plate at 5-10% bodyweight (compare current Titan Fitness and GORUCK options) | Per Snow et al. (2000), weighted-vest walking at 5-10% bodyweight increased femoral neck bone density. Start at the LOW end of that range. |
| 3 | [Garmin Instinct 3 Solar](/gear/best-gps-watches-for-rucking) GPS watch | Multi-week battery + Zone 2 heart rate tracking. Zone 2 is the longevity zone - aerobic base without joint-pounding intensity. The watch you'll actually keep wearing. |
| 4 | [Darn Tough Light Hiker](/gear/best-rucking-socks-blister-prevention) merino socks | Lifetime warranty - mail back any hole, they replace. Cotton + walking + aging skin = blisters that don't heal as fast. Merino is non-negotiable. |
| 5 | [Body Glide Original](/injuries/rucking-foot-care-blister-prevention) anti-chafe | Apply before, not after. Older skin is more friction-sensitive. This is the cheapest insurance you'll buy. |
## Why rucking is especially good for adults over 50
Rucking isn't just a trendy fitness tool-it's one of the most effective and practical exercises for older adults. Here's why:
**[Bone density](/glossary#bone-density) protection.** Osteoporosis is a genuine health threat after 50, particularly for women entering and past menopause. Bone responds to load. Medications help, but loaded walking is one of the most effective non-pharmacological interventions. Unlike high-impact running (which is hard on arthritic joints), rucking provides bone-building stimulus without excessive joint stress. You're using natural loading, not fighting gravity.
**Balance and fall prevention.** Falls are the leading cause of injury-related death in older adults. A [heart rate monitor like the Garmin Instinct 3 Solar](/gear/best-gps-watches-for-rucking) helps you train in the right intensity zone. Rucking itself improves proprioception (body awareness) and balance by challenging your stability under load. The shifting weight in a pack and the slight forward lean demand constant micro-adjustments from your stabilizer muscles and balance systems. Over weeks, this dramatically improves your ability to catch yourself if you stumble.
**Cardiovascular health.** Sustained rucking at a [conversational pace](/glossary#conversational-pace) is Zone 2 cardio-the training zone most effective for reducing cardiovascular disease risk, improving aerobic efficiency, and building endurance. You're building the aerobic base that allows you to walk with grandkids, travel, and maintain independence.
**Functional strength.** Carrying groceries, navigating stairs, playing with grandchildren, and moving around daily life require strength. Rucking builds practical strength that directly translates to functional capacity. You don't need to look strong-you need to be strong enough to do what you want to do.
**Low-impact loading.** Unlike running (which involves impact forces of 2-3x bodyweight), walking is genuinely low-impact. Adding load increases the training stimulus without adding joint stress. Your knees and hips get strengthened without the pounding.
**Social aspect.** Group rucks are hugely popular among older adults. The combination of exercise, outdoor time, and social connection addresses multiple dimensions of health simultaneously. Loneliness is a genuine health risk; group rucks are a built-in social structure.
**Cognitive benefits.** Outdoor walking is linked to reduced dementia risk and improved cognitive function. Add the challenge of loaded walking and varied terrain, and you're engaging cognitive systems. The combination of physical challenge and environmental variety is protective for brain health.
---
## Before you start
Medical clearance is a good idea if you fall into these categories:
- Sedentary for the past 6+ months
- History of joint replacement surgery
- Diagnosed osteoporosis or osteopenia
- Cardiac conditions or history of heart disease
- Balance disorders or dizziness
- Recent surgery or recovery
If you're already reasonably active, walking regularly without issues, and have no major health conditions, you likely don't need formal medical clearance. Just use common sense: start light and slow, and listen to your body.
The most important principle: there is zero rush. You have decades ahead of you to ruck. Spending an extra month getting a slow, safe start pays massive dividends in consistency and injury prevention.
---
## Starting weight recommendations for adults over 50
Start lighter than you think you need. A common mistake is comparing yourself to younger ruckers or trying to "make up for" years of inactivity by jumping to heavier loads. This is how injuries start.
**Conservative starting weight: 5-10 pounds,** regardless of your bodyweight. This sounds almost too light, but there's wisdom here. Tendons and ligaments lose elasticity with age. Bone density may be lower. Your nervous system needs time to adapt to the novel stimulus of loaded walking. A 5-pound pack barely feels like anything-which is exactly the point. You're not trying to crush yourself in week one; you're establishing a habit and allowing your tissues to adapt.
**Why not heavier?** A 70-year-old starting with 25 pounds is significantly different from a 35-year-old starting with 25 pounds. Your metabolic recovery capacity, collagen turnover rate, and joint resilience are different. The research on aging physiology consistently shows that slower progressions produce better long-term outcomes.
**Progression: add 2 pounds every 2-3 weeks,** not the 5-pound jumps some younger ruckers use. This pace allows your tissues to adapt properly. Use [Darn Tough socks](/gear/best-rucking-socks-blister-prevention) and [Body Glide Original](/injuries/rucking-foot-care-blister-prevention) to prevent blisters from the start - foot problems compound quickly in older adults. Over a 12-week period, you'll go from 5 pounds to 15-20 pounds, which is substantial progress without overloading your system.
**Maximum recommended load for most older adults: 15-25% of bodyweight.** This is lower than the general 20-30% guideline because of individual variation in bone density, joint health, and conditioning. A 150-pound 60-year-old with osteopenia shouldn't be rucking 45 pounds. A 200-pound 65-year-old in good health can work toward 40-45 pounds. Context matters.
## Safe starter protocol over 60 (first 4 weeks)
If "build slowly" feels too vague, this is the prescription. Print it, stick it on the fridge, and check the box each week.
| Week | Weight | Distance | Frequency |
| --- | --- | --- | --- |
| **Week 1** | 5 lb | 0.5 mi | 2 sessions |
| **Week 2** | 8 lb | 1 mi | 2 sessions |
| **Week 3** | 10 lb | 1.5 mi | 3 sessions |
| **Week 4** | 12 lb | 2 mi | 3 sessions |
Finish week 4 without sharp joint pain or persistent next-day soreness? Move into the 8-week program below. If anything in weeks 1-4 hurts in a "not just soreness" way, hold the current weight and let the body catch up before progressing.
---
## The 8-week senior-start program
This progression balances structure with safety and allows for adaptation at each phase:
**Weeks 1-2: Foundation building**
- Weight: 5 lbs
- Distance: 0.5-1 mile
- Frequency: 2x/week
- Terrain: Flat, familiar terrain (park, flat neighborhood streets)
- Pace: Very easy, conversational
- Rest days: 48-72 hours between sessions
The goal is to feel comfortable carrying a pack and establish the habit. Distance and pace matter less than consistency and recovery. You'll likely feel minimal soreness; this is correct.
**Weeks 3-4: Light stimulus**
- Weight: 5-8 lbs
- Distance: 1 mile
- Frequency: 2x/week
- Terrain: Flat, some variety (different routes, adding slight inclines)
- Pace: Easy, conversational
- Rest days: 48 hours between sessions
Your body is starting to adapt. You might feel moderate soreness in your legs or glutes after the first ruck; this is normal and should improve by day 3. If soreness lingers beyond 72 hours, your progression is too aggressive.
**Weeks 5-6: Volume increase**
- Weight: 8-10 lbs
- Distance: 1-1.5 miles
- Frequency: 2-3x/week
- Terrain: Mix of flat and gentle rolling terrain
- Pace: Easy to moderate, still conversational
- Rest days: 48 hours minimum between sessions
You're building a real fitness base now. Three rucks per week is approachable if recovery is good. If you're not sleeping well or feeling excessive fatigue, dial back to 2x/week.
**Weeks 7-8: Establishing baseline**
- Weight: 10-12 lbs
- Distance: 1.5 miles
- Frequency: 3x/week
- Terrain: Varied (flat, rolling, some stairs or inclines)
- Pace: Easy to moderate, still sustainable
- Rest days: 48 hours minimum
By week 8, rucking feels normal. Soreness is minimal or absent. You're breathing harder but can still have a conversation. This is the foundation you build future progression on.
**The principle throughout:** extend the timeline, not the load. A common mistake is adding weight too quickly. Patience here compounds into years of rucking. Someone who spends 8-12 weeks getting a solid base at light loads will ruck forever. Someone who jumps to 25 pounds in week 2 will get injured and quit.
---
## Special considerations
### Joint health
Knee and hip arthritis are genuinely common in adults over 50, and they don't disqualify you from rucking. But they do require adjustments.
Start with lighter weights (5 lbs, not 15) and give your joints several weeks to adapt. Use supportive footwear with good arch support and traction. Consider trekking poles if your balance is shaky-they're not a sign of weakness, they're a legitimate training tool that reduces load on your knees and hips by 15-20%.
If your knees or hips hurt while rucking, the instinct might be to stop rucking. More often, you just need to reduce the weight (drop from 10 lbs to 5 lbs) and give your joints more time to adapt. Reduce weight before reducing frequency. Three rucks per week at 5 pounds often works better than two rucks per week at 12 pounds for people with joint issues.
### Balance
A loaded pack shifts your center of gravity slightly forward and changes your proprioceptive feedback. If balance is a concern, start on flat, even surfaces. Concrete paths and sidewalks are fine for the first month. Avoid roots, rocks, and uneven terrain until you're confident on level ground.
Trekking poles help tremendously with balance and are widely used by older adults. They reduce the load on your lower joints and provide stability during uneven terrain. They also normalize the movement pattern-you're using them like an older adult uses them, not as "training gear."
Graduate to uneven terrain gradually, once flat walking feels easy and your proprioceptive system has adapted.
### Bone density
If you have a diagnosis of osteoporosis or osteopenia, rucking is genuinely protective. Loaded walking builds bone density more effectively than most other interventions. Start very light (5 lbs) and progress slowly, but proceed confidently that rucking is helping your bones.
Get medical clearance before starting, but don't be surprised when your doctor-especially your physical therapist-encourages rucking. It's exactly what's prescribed for bone health in older populations.
### Recovery
Recovery takes longer after 50, and that's okay. Plan for 48 hours between rucks minimum during the first month. Your sleep matters even more-poor sleep compounds poor recovery. Hydration needs increase with age, partly because your thirst mechanism becomes less sensitive. Drink water proactively, not just when thirsty.
Protein intake becomes more critical for muscle synthesis. Make sure you're eating adequate protein at every meal. Your musculoskeletal system needs the building blocks to adapt to training stimulus.
---
## Gear for older adults
A few items make rucking much safer and more comfortable:
**Pack with a hip belt (mandatory).** A [pack with a padded hip belt](/gear/best-rucking-backpacks) is essential, not optional. It distributes load to your pelvis and hips rather than overloading your shoulders and spine. Don't try rucking with a pack that puts all the load on your shoulders.
**Supportive shoes with good traction.** Your feet are now carrying extra load, and your balance is being challenged. Good shoes prevent twisted ankles and [shin splints](/glossary#shin-splints). [Trail-specific shoes](/gear/best-rucking-shoes-by-terrain) with a hydration bottle like the Nalgene Wide Mouth 32oz provide better ankle support and traction on varied terrain than road running shoes.
**Trekking poles (optional but recommended for the first month).** They reduce stress on knees and hips, improve balance, and provide a sense of security. Using poles is normalized among older adults, so there's no social awkwardness. They'll likely become one of your favorite training tools.
**Lighter starting weights.** Use a 5-10 pound sandbag or small dumbbell for your initial weight, not a 20-25 pound plate. A sandbag distributes weight and is easier to hold than a single hard object.
For detailed gear recommendations, see our [rucking gear guide](/pillars/rucking-gear-guide) or start with our [budget starter kit](/gear/budget-rucking-starter-kit).
---
## Related reading
- [Rucking training programs](/pillars/rucking-training-programs) - structured plans for every goal, including the maintenance program
- [How often should you ruck?](/training/how-often-should-you-ruck) - frequency guidance with recovery factors
- [Is rucking bad for your back?](/training/is-rucking-bad-for-your-back) - research on loaded walking and spinal health
- [Rucking injury prevention](/pillars/rucking-injury-prevention) - [the 10% rule](/glossary#ten-percent-rule), prehab routine, and when to stop
- [How heavy should your ruck be?](/guides/how-heavy-should-your-ruck-be) - weight calculator and progression guide
- [Ruck weight calculator](/tools/ruck-weight-calculator) - find your recommended starting weight
- Prefer a vest over a pack? Our sister site Kit Authority's [weighted vest walking for beginners](https://kitauthority.com/fitness/weighted-vest-walking-for-beginners?utm_source=ruckauthority&utm_medium=crosslink) is the gentler on-ramp
## Frequently Asked Questions
────────────────────────────────────────────────────────────────────────────────
URL: https://ruckauthority.com/training/rucking-pace-chart
Title: Rucking Pace Chart 2026: 2, 6 & 12 Mile Times by Load
Description: Your target pace depends on the load on your back, and the number most people quote is the wrong one for a 40 lb pack. Chart by weight and effort, 2/6/12 mile times, and the 12-mile standard.
Published: 2026-03-10 / Updated: 2026-09-02
## The short answer
Most ruckers should target 13:00-17:00 per mile pace. Beginners trend toward the slower end (17:00-18:00/mile), while experienced ruckers with lower loads move toward the faster end (12:00-14:00/mile). If you landed here before the basics, our [what is rucking](/guides/what-is-rucking-weighted-walking-explained) explainer covers the practice itself; this page covers how fast to do it. But here's the critical insight: pace matters far less than heart rate and perceived effort. Two people at the same pace might be in completely different training zones depending on their load, fitness level, and terrain.
For fat loss and aerobic fitness-the goals of most recreational ruckers-heart rate zone matters more than the actual numbers on your watch. You could ruck at 16:00/mile in Zone 2 and get better results than rucking at 13:00/mile in Zone 3, simply because the slower pace is more sustainable and allows you to accumulate more total volume.
---
## Pace chart by fitness level and load
A chart gives you a range. If you want the number for your actual load and distance, including your finish time, run it here:
**How to use this chart:** Find your experience level (horizontal), then match it with your current load ([vertical](/gear/best-gps-watches-for-rucking)). The resulting number is your target pace range for that combination. These are guideline ranges, not absolute laws. If you're breathing harder than expected at a given pace, slow down. [Conversational pace](/glossary#conversational-pace) (can speak in complete sentences without gasping) is a reliable indicator that you're in the right zone.
The underlying principle: as load increases, pace naturally decreases. A beginner with 25 pounds will move slower than an advanced rucker with 15 pounds-this is physics and biomechanics, not weakness. Account for load in your pace expectations. How that load rides matters too - a pack that holds weight high and tight against your back keeps your pace and form steadier over distance than one that sags, which is most of what separates the picks in our [best rucking backpacks](/gear/best-rucking-backpacks) guide.
**Approximate targets by experience and load:**
- Beginner + light (10-15 lb): 16:00-18:00/mile
- Beginner + moderate (20-25 lb): 17:00-20:00/mile
- Intermediate + light (10-15 lb): 14:00-16:00/mile
- Intermediate + moderate (20-25 lb): 15:00-17:00/mile
- Intermediate + heavy (30-35 lb): 16:00-18:00/mile
- Advanced + light (10-15 lb): 12:00-14:00/mile
- Advanced + moderate (20-25 lb): 13:00-15:00/mile
- Advanced + heavy (30-40 lb): 14:00-16:00/mile
These ranges assume flat to gently rolling terrain and a conversational effort level. Mountainous terrain or race effort will be slower. Easy recovery efforts will be slower still. To see how real ruckers compare at your load and terrain, add a finished ruck to our [Rucking Pace Benchmark](/tools/pace-benchmark), which publishes pace percentiles once each group reaches 30 results.
### Minutes-per-mile by load bracket (the scannable table)
If you don't want to dig through ranges by experience, this is the same data collapsed into a single load × effort matrix. Cells are minutes per mile at a conversational effort, with light variance for fitness level.
| | 10 lb | 20 lb | 30 lb | 40 lb |
| --- | --- | --- | --- | --- |
| **Easy** (talk in full sentences) | 16:00 | 17:00 | 18:30 | 20:00 |
| **Moderate** (talk in short sentences) | 14:30 | 15:30 | 16:30 | 18:00 |
| **Brisk** (talk in phrases only) | 13:00 | 14:00 | 15:00 | 16:30 |
For tracking pace under load in real time, the [Garmin Instinct 3 Solar](/gear/best-gps-watches-for-rucking) is the watch most ruckers settle on - multi-week battery, GPS pace alerts, and heart-rate zone display that makes the "effort row" above easy to verify on the wrist.
---
## Why pace is secondary to effort
This is counterintuitive for people coming from running, but it's critical to understand: pace is just a number. What actually matters is the training stimulus you're creating.
**Heart rate and RPE are better training signals.** If you're at 13:00/mile but your heart rate is 140 bpm, you're in a completely different training zone than someone at 13:00/mile with a heart rate of 130 bpm. Load, terrain, fitness, sleep, and hydration all affect how hard a given pace feels. Your heart rate tells the truth about actual intensity; pace is just a convenient measurement.
A [Garmin Instinct 3 Solar](/gear/best-gps-watches-for-rucking) or [COROS PACE 4](/gear/best-gps-watches-for-rucking) gives you reliable heart rate data. The practical application: work from [perceived exertion](/glossary#rpe) and heart rate zones, and let pace fall where it falls. Conversational effort (Zone 2) should produce a heart rate of roughly 60-70% of your max heart rate. If your pace is 16:00/mile at that effort, that's your pace. If it's 14:00/mile, that's fine too. The consistency of effort matters more than the specific pace.
**Pace varies wildly with terrain, weather, and fatigue.** Rucking the same 2-mile loop with 20 pounds might take 31 minutes on a flat day and 38 minutes if there's 500 feet of elevation gain. Both are legitimate rucks. A pace-focused rucker might stress that they're "slower," but the terrain rucker recognizes they're doing more work. Pace without context is misleading.
**Two ruckers at the same pace might be doing different workouts.** A 150-pound person at 15:00/mile with 20 pounds is doing less total work than a 200-pound person at 15:00/mile with 15 pounds. Add in fitness level differences, and the training stimulus diverges further. Comparing yourself to others based on pace alone is meaningless.
**Zone 2 is the right intensity for 80% of your rucking.** This is the conversational pace zone where you can speak in complete sentences, your breathing is elevated but controlled, and you could sustain the effort for hours. Most [rucking benefits](/guides/rucking-benefits)-aerobic base building, fat loss, cardiovascular health, [bone density](/glossary#bone-density) improvement-happen at this intensity. You don't need to ruck fast to get fit. You need to ruck consistently at sustainable pace.
---
## How pace affects calorie burn
There's a common assumption that faster pace always burns more calories, which is true in absolute terms but misleading for program design.
**Faster pace burns exponentially more calories.** Going from 17:00/mile to 15:00/mile increases your pace by about 13%, but calorie burn increases by roughly 20-25%. The relationship is nonlinear because power requirements increase with velocity. The original [Pandolf equation (1977)](https://pubmed.ncbi.nlm.nih.gov/908672/), published in the *Journal of Applied Physiology*, anchors this prediction - load, speed, and grade are the three inputs that determine metabolic cost, and speed contributes nonlinearly. This is why sprinting burns more calories than walking, even though you're moving the same distance.
**But faster pace is harder to sustain, which reduces total volume.** Here's the catch: if you ruck at 13:00/mile for 30 minutes, you cover 2.3 miles. If you ruck at 16:00/mile for 30 minutes, you cover 1.9 miles. The faster effort covers less distance, despite being more intense. Total calorie burn might actually be lower because you're doing less total work.
**The math often favors slower plus longer over faster plus shorter.** For fat loss-the goal most ruckers mention-sustaining a 16:00/mile pace for 50 minutes might burn more total calories than sustaining a 13:00/mile pace for 35 minutes. The slower, longer session accumulates more total volume, and total volume is the primary driver of fat loss progress.
The principle: use pace as a training tool for specific goals (event prep, fitness testing), but don't assume faster is always better for general fitness. Sustainable pace accumulates more volume, which drives more total adaptation.
Run your own numbers - pace, load, and bodyweight all feed the same Pandolf equation:
---
## Pace targets by goal
Different goals call for different pace strategies:
**Fat loss: 14:00-17:00/mile**
Stay in Zone 2 (conversational). This is the pace you can sustain for 45-60 minutes. Fat loss is driven primarily by total volume and consistency, not intensity. Rucking at this pace three times per week for 50 minutes each is more effective for fat loss than rucking twice per week at a hard pace for 30 minutes. Choose sustainability over speed.
**General fitness: 13:00-16:00/mile**
This is the moderate-intensity zone where aerobic fitness and work capacity improve. You can still speak, but you're breathing harder. This pace is appropriate for intermediate and advanced ruckers on their harder sessions. Not race-hard, but noticeably harder than your easy effort.
**Event prep: 12:00-15:00/mile**
If you're training for a GORUCK event, ruck race, or rucking-specific competition, you need to spend time at the pace demands of your event. Practice at or slightly faster than your goal event pace. This teaches your body to move efficiently at that speed and builds the work capacity to handle it for the required distance. A 6-mile GORUCK at 14:00/mile pace is demanding; practicing at 13:30/mile builds confidence.
**Recovery: 17:00-20:00/mile**
This is genuinely easy. Conversational, minimal breathing elevation, could do this indefinitely. Recovery rucks are low-intensity efforts on easy days designed to promote blood flow and adaptation without adding training stress. They're rejuvenating, not exhausting.
---
## How to improve your rucking pace
If pace improvement is your goal, here are the leverage points:
**Lose bodyweight.** A lighter body naturally moves faster. Losing 10 pounds is functionally similar to removing 10 pounds from your pack. This is the single most reliable lever for pace improvement without increasing injury risk. Every pound lost reduces the load your legs have to propel.
**Improve aerobic base.** Run more [Zone 2 rucking](/weight-loss/zone-2-rucking-guide) volume. More aerobic capacity means more efficient movement at all paces. Ruckers with a strong aerobic base move faster with lower perceived effort than those with weak aerobic bases. This takes months, but the returns are substantial.
**Strengthen your legs.** Squats (bodyweight or loaded), lunges (forward and reverse), and calf raises build the leg power that propels you forward. Stronger muscles produce more force with less perceived effort, translating to faster pace at the same effort level. Do leg work 2-3x per week in cycles focused on strength or power.
**Improve running form.** Shorter stride, quicker cadence, and efficient foot strike reduce wasted motion. Many people ruck with exaggerated stride lengths that waste energy. Video yourself rucking and compare to runners with efficient form. Shorter stride + quicker cadence is faster and less injurious than long stride at slow cadence.
**Hill training.** Repeated hill efforts build strength and power that transfer to flat speed. A 4-week block of rucking hilly terrain, once per week, will noticeably improve your flat pace when you return to flat terrain. The gains come from the power built on hills.
**Interval rucking.** Alternate 2-3 minute hard efforts (close to race pace) with 2-3 minutes easy effort, within a single [ruck session](/glossary#ruck). Start with 4-6 repeats, gradually building to 8-10. This develops the ability to handle faster pace while improving recovery during hard work. Do this 1x per week on a dedicated training ruck.
---
## Related reading
- [Rucking pace calculator](/tools/pace-calculator) - your target pace and finish time for a specific load and distance
- [Rucking calorie calculator](/tools/calorie-calculator) - see exactly how many calories you burn at your current pace and load
- [How heavy should your ruck be?](/guides/how-heavy-should-your-ruck-be) - adding more weight is more effective than chasing pace
- [Best rucking gear 2026](/gear/best-rucking-gear-2026) - includes GPS watch picks for tracking your pace accurately in the field
- [Rucking statistics 2026](/guides/rucking-statistics) - sourced data on calorie burn, growth, and the Army pace standard
## Frequently Asked Questions
────────────────────────────────────────────────────────────────────────────────
URL: https://ruckauthority.com/training/rucking-vs-crossfit
Title: Rucking vs CrossFit: Which Is Right for You?
Description: Complete comparison of rucking and CrossFit for strength, endurance, and community. Cost, injury risk, and hybrid approach breakdown.
Published: 2026-03-28 / Updated: 2026-08-26
## The Short Answer
Both are excellent. CrossFit is a gym-based, high-intensity strength and power program with strong community. [Rucking](/glossary#rucking) is a low-skill, low-cost outdoor endurance and conditioning method.
Choose CrossFit if you want coached mixed-modal training, technical lifts, and a built-in group setting. Choose rucking if you want accessible outdoor aerobic work and practice carrying a load. Many people do both, but a ruck is still training stress rather than automatic recovery.
## Head-to-Head Comparison
| Factor | CrossFit | Rucking |
| --- | --- | --- |
| **Monthly Cost** | Varies by box, coaching, and region | Can start with existing walking gear; specialized gear is optional |
| **Injury Evidence** | Depends on coaching, exposure, athlete history, and reporting method | Load-carriage injuries rise with load, volume, fatigue, terrain, and poor progression |
| **Skill Barrier** | Technical movements benefit from coaching | Walking is familiar, but pack fit and load progression still matter |
| **Equipment Needed** | Barbell, plates, boxes, pull-up rig | Backpack, [Titan Fitness plates](/gear/ruck-plate-comparison) or sand |
| **Calorie Burn** | Varies by workout structure, body size, and effort | Varies by body size, load, pace, grade, and terrain |
| **Primary Adaptation** | Mixed-modal strength and conditioning | Aerobic endurance and load-carriage capacity |
| **Community Factor** | Very strong (box culture) | Growing ([GORUCK](/glossary#goruck) events) |
| **Scalability** | Movements, loads, and volume can be coached and scaled | Load, time, distance, pace, and terrain can be adjusted one at a time |
| **Mechanical Demand** | Varies widely by movement and load | Walking pattern with added external load; not zero impact |
| **Time Requirement per Session** | 60 - 90 minutes | 45 - 120 minutes (flexible) |
For a rucking estimate based on body mass, load, pace, grade, and terrain, use the [rucking calorie calculator](/tools/calorie-calculator). Treat the result as a planning estimate, not a measurement or a reason to force a larger calorie deficit.
## What CrossFit Does Well
### Maximum Strength and Power
CrossFit's focus on Olympic lifts (snatch, clean and jerk), powerlifting movements (squat, bench, deadlift), and gymnastics (pull-ups, muscle-ups, handstands) builds strength faster than rucking. If your goal is to deadlift 500 lbs or nail a double bodyweight squat, CrossFit programming is built for that.
### Competition and Community
The CrossFit box model creates strong community bonds. The shared WOD (workout of the day), leaderboards, and local/regional competitions build accountability and social connection. For many people, this is the primary value of membership.
### Specificity
If you want to train for competition (Crossfit Games, local competitions, obstacle course races), CrossFit's periodized programming and technical coaching are essential. Rucking alone will not prepare you for barbell lifts under fatigue.
## What Rucking Does Well
### Accessible aerobic and load-carriage work
Rucking can turn a familiar walking pattern into progressively harder aerobic work. That accessibility does not make it risk-free: military [load-carriage](/glossary#load-carriage) research documents foot, lower-limb, back, and nerve problems as load, distance, fatigue, and exposure accumulate.
### Near-Zero Barrier to Entry
You do not need coaching, a $200/month membership, or months of movement prep. [Buy a backpack, add weight, and go walk](/gear/budget-rucking-starter-kit). This accessibility is why rucking scales so well - from complete beginners to elite athletes can progress meaningfully at their own pace.
### Endurance and Body Composition
Rucking can build aerobic capacity and loaded-walking tolerance. Fat loss still depends on sustained energy balance, and neither method guarantees muscle preservation or a particular body-composition result.
### Cost
A decent backpack costs $50 - 150. Plates and sand are one-time expenses under $100. A CrossFit membership costs $150 - 250 per month - $1,800 to $3,000 per year. If you are cost-conscious or traveling frequently, rucking's economics are unbeatable.
## The hybrid approach: combine them only when recovery allows
The two methods can complement each other, but simply adding their full weekly volumes can create more stress than benefit. Start with the discipline tied most directly to your goal, then add the minimum dose of the other that you can recover from.
- Keep added rucks conversational and light enough that they do not degrade the next coached session.
- Avoid placing a heavy or fast ruck next to a high-volume lower-body workout.
- Count rucking as training load, not free [active recovery](/glossary#active-recovery).
- Add frequency only after sleep, soreness, movement quality, and performance remain stable.
The potential benefit is broader exposure to strength, power, aerobic work, and load carriage. There is no evidence cited here that the combination universally outperforms either method alone, and it does not automatically reduce injury risk.
## GORUCK Events: Rucking Meets CrossFit
If you want to understand the hybrid potential, look at GORUCK Challenge events. A current Tough page describes a 10-12 hour cadre-led team event with a bodyweight-based ruck load. The exact movements, route, and class equipment can vary.
The Challenge combines the aerobic demands of rucking with strength and power work familiar to CrossFit athletes. The training overlap helps, but neither discipline fully prepares you for the other. If you are seriously eyeing one of these events, a purpose-built pack like the [GORUCK Rucker 5.0](/gear/goruck-rucker-vs-gr1) is made for plate carry, ground work, and repeated handling that can expose a lightly built daypack.
## Decision Framework
Ask yourself these questions to decide where to focus:
1. **Do you have consistent access to a quality gym or box?** If no, start with rucking.
2. **Do you want to compete in CrossFit or learn its technical movements?** If yes, coached CrossFit practice is specific to that goal.
3. **Are you returning from injury?** If yes, choose the option and starting dose your clinician and coach can scale around your current capacity.
4. **Is cost a constraint?** Rucking can start with gear you own, while coached CrossFit pricing varies by location.
5. **Do you value community and accountability?** If yes, CrossFit's box culture delivers that better than solo rucking.
6. **Are you training for a specific goal (race, strength standard, event)?** If yes, match your training method to that goal.
## Final Verdict
**For coached mixed-modal strength and a built-in group:** CrossFit is the more direct fit.
**For accessible outdoor aerobic work and load carriage:** Rucking is the more direct fit.
**For a broader program:** Combine them conservatively and keep at least one true recovery day while you learn how the total volume affects you.
---
## Frequently asked questions
### Can I do CrossFit and rucking in the same week?
Yes, but there is no universally optimal schedule. Keep the added ruck easy at first, separate it from demanding lower-body sessions, and reduce volume if soreness, sleep, technique, or performance deteriorates. A coach can help reconcile the two programs.
### Is rucking a good complement to CrossFit training?
It can add sustained aerobic and load-carriage work when a particular CrossFit program does not already provide enough of it. Start with one easy session and watch total training load; extra rucking can interfere with recovery when volume or load is too aggressive.
### Do I need CrossFit coaching to start rucking?
No, but a familiar walking pattern does not remove the need for pack fit and progression. Start with a manageable load or the lower result from our calculator, secure it close to the back, keep the pace conversational, and change only one of load, time, distance, pace, or terrain at a time.
### How does GORUCK training fit into a CrossFit program?
Train specifically for the event's published load, duration, and required pack while preserving enough recovery for coached work. Use the [GORUCK Challenge training guide](/training/goruck-challenge-training) as a planning framework, then adjust it to your current CrossFit volume rather than stacking both plans unchanged.
### Is CrossFit safer than rucking?
The available percentages cannot support a clean winner. Studies use different populations, exposure periods, injury definitions, and reporting methods. Appropriate coaching and scaling matter in CrossFit; appropriate load, distance, terrain, pack fit, and progression matter in rucking.
---
## Your next step
---
## Related reading
- [How heavy should your ruck be?](/guides/how-heavy-should-your-ruck-be) - personalized weight recommendations by fitness level and goal
- [The complete beginner's guide to rucking](/pillars/beginners-guide-to-rucking) - everything you need to know before your first ruck
- [First 30 days of rucking](/guides/first-30-days-of-rucking) - weekly progression plan with form and safety checkpoints
- [Zone 2 rucking guide](/weight-loss/zone-2-rucking-guide) - aerobic training for endurance and fat loss
- [Rucking vs running for weight loss](/weight-loss/rucking-vs-running-weight-loss) - calorie burn, injury risk, and sustainability comparison
────────────────────────────────────────────────────────────────────────────────
URL: https://ruckauthority.com/training/rucking-vs-cycling
Title: Rucking vs Cycling: Which Cardio Should You Choose?
Description: Detailed comparison of rucking and cycling with calorie burn data, equipment costs, and practical guidance for choosing the right cardio.
Published: 2026-03-28 / Updated: 2026-09-25
## The Short Answer
Both are excellent low-impact cardio options, but they excel in different areas. Cycling burns more calories per hour (about 580 - 1,000 depending on speed) and is mechanically easier on your joints. [Rucking](/glossary#rucking) burns fewer calories per hour on flat ground (about 395 - 430, more on hills) but builds total-body strength, requires virtually no equipment cost, and works anywhere.
**The real difference:** Cycling is pure aerobic efficiency. Rucking is strength-building cardio. Choose cycling if you want maximum cardio output. Choose rucking if you want to build strength while training cardio.
## Calorie Burn Comparison
| Activity | Body Weight | Intensity | Calories per Hour | Equipment Cost | Notes |
| --- | --- | --- | --- | --- | --- |
| Cycling | 180 lbs | Moderate (12-14 mph) | about 685 | $800-2000+ | Road or gravel bike required |
| Cycling | 180 lbs | High (16-18 mph) | about 1,030 | $800-2000+ | Requires fitness and access |
| Rucking (40 lb pack) | 180 lbs | Moderate (3.5 mph, flat) | about 430 | $80-150 | Any pack, any terrain |
| Rucking (20 lb pack) | 180 lbs | Moderate (3.5 mph, flat) | about 395 | $50-100 | Great for beginners |
| Walking (unloaded) | 180 lbs | Moderate (3.5 mph, flat) | about 365 | $0 | Baseline for comparison |
Cycling figures come from the 2024 Adult Compendium of Physical Activities (8 and 12 METs); walking and rucking from the Pandolf equation, all for a 180-lb individual. A 40-lb ruck up a 5% grade is about 665 cal/hr, which is where rucking closes on moderate cycling. For your own body weight, load, pace and grade, the [rucking calorie calculator](/tools/calorie-calculator) runs the same Pandolf math.
Cycling wins on raw cardio output per hour. But output is not the only factor that determines whether an activity sticks long-term.
## The Core Differences
### Impact Level and Joint Health
Cycling is zero-impact. Your feet never leave the pedals. This is a genuine advantage for people with knee, ankle, or hip issues. Rucking is weight-bearing - you absorb impact with every step, though it is far lower than running (roughly half the ground reaction force).
For people with joint damage or arthritis, cycling is objectively gentler. For people with healthy joints, the weight-bearing nature of rucking actually strengthens bones through mechanical loading.
### Strength and Muscle Building
This is where the difference matters most.
Cycling works your legs hard, but it does almost nothing for your upper body, core, or [posterior chain](/glossary#posterior-chain). Your arms, shoulders, and back are essentially passengers. A cyclist's physique reflects this - strong legs, everything else relatively underdeveloped.
Rucking engages your entire body. The pack compresses your spine and core (forcing stabilization), loads your legs and lower back (building posterior chain strength), and forces your upper back and shoulders to work against the pack weight. You walk away from a ruck stronger in ways cycling cannot deliver.
For body recomposition (gaining muscle while losing fat), rucking is significantly better than cycling alone.
### Equipment and Cost
Cycling requires a bike. A decent road or gravel bike costs $800 - 2000+. Add helmet, lights, repair kit, and you are easily at $1000+. An e-bike is $2000 - 4000+.
Rucking requires a backpack. A [quality ruck costs $80 - 150](/gear/budget-rucking-starter-kit) - something like the [5.11 Tactical RUSH 24](/gear/best-rucking-backpacks) is a common starting point. A budget pack is $50. You already own shoes.
This matters for sustainability. A low barrier to entry (rucking) leads to more consistent participation than a high barrier (cycling).
### Weather and Accessibility
Cycling requires roads, gravel, or dirt trails. Bad weather means staying home. Winter becomes difficult in cold climates.
Rucking works in a parking lot, on a treadmill, in your neighborhood, on a trail, or down a city street. Rain is annoying but not stopping. You start from your doorstep.
### Cardiovascular Ceiling
If your goal is pure cardiovascular peak - VO2 max, lactate threshold, heart rate ceiling - cycling gets you there faster and harder. You can sustain higher intensities for longer on a bike than on foot.
Rucking is a steady-state, moderate-intensity activity. You will not spike your VO2 max as effectively through rucking alone.
## When Cycling Wins
Cycling is the better choice if:
- **You want pure cardio efficiency:** Cycling burns about 580 - 1,000 cal/hr. Rucking does not compete on that metric.
- **You have joint problems:** Zero-impact movement is safer with diagnosed arthritis, old injuries, or chronic joint pain.
- **You have 30 minutes and want maximum output:** Cycling gets more work done in less time.
- **You want to train for a cycling event:** Sport-specific training requires the sport.
- **You live in an area with great cycling infrastructure:** Roads, trails, and a cycling community lower friction.
## When Rucking Wins
Rucking may be the better choice if:
- **You want loaded carrying work:** Rucking trains postural and lower-body endurance in a way cycling does not.
- **You have a tight budget:** $100 ruck vs. $1000+ bike is a real difference.
- **Weather and travel logistics are constraints:** Rucking can be done in many places without a bike or cycling route.
- **You want loaded, weight-bearing exercise:** Rucking provides that stimulus; cycling is non-weight-bearing.
- **Consistency is your limiting factor:** Lower entry cost and simpler logistics may make rucking easier to repeat.
- **You want bone-loading exercise:** Weight-bearing activity can support [bone health](/glossary#bone-density), although outcomes depend on the person, dose, and overall program.
## The Hybrid Approach
The activities can be combined. One sample week is:
- **Ruck two to three times per week** for strength-building, steady cardio, and bone loading.
- **Cycle once per week** for higher-intensity cardiovascular work and leg endurance.
- **Walk unloaded once per week** for [active recovery](/glossary#active-recovery) and building the habit.
This combines the loaded, weight-bearing [benefits of rucking](/guides/rucking-benefits) with cycling-specific aerobic work. The example totals roughly 150 - 180 minutes, but it is not a proven optimal dose and does not guarantee a body-composition result.
## The Decision Framework
Ask yourself these questions:
1. **Is joint health a constraint?** Cycling removes impact and external pack load, but the right option depends on the condition; ask a qualified clinician when pain or a diagnosis affects exercise.
2. **Do you want upper body and core strength?** If yes, rucking should be your foundation.
3. **Do you have a bike and cycling infrastructure nearby?** If yes, cycling costs less in time and friction.
4. **Is your budget tight?** Rucking wins decisively ($80 - 150 vs. $1000+).
5. **Do you want maximum calorie burn in minimum time?** Cycling is more efficient per hour.
## Final Verdict
**For higher aerobic output per hour:** Cycling often allows more sustained intensity, depending on pace and terrain.
**For loaded carrying and weight-bearing work:** Rucking provides a stimulus cycling does not. Neither activity alone guarantees muscle gain or a particular body-composition change.
**For simple logistics:** Rucking needs a pack and a safe walking route; cycling needs a bike and suitable route or indoor setup. Injury risk depends on load, volume, skill, terrain, and the individual.
**For a mixed plan:** Use one as the primary activity and add the other at a dose you can recover from. A four-to-six-week trial is enough to judge whether the schedule is practical, but it does not predict long-term adherence.
---
## Frequently asked questions
### Is cycling or rucking better for weight loss?
Either can contribute to weight loss when total energy balance supports it. Calorie estimates vary widely with body size, intensity, terrain, and equipment, so the ranges above should not be treated as personal predictions. Rucking adds external load, but evidence does not establish that it preserves more lean mass than cycling. Choose the activity you can repeat, and use resistance training and adequate protein when lean-mass preservation is a priority.
### Can I switch from cycling to rucking?
Some aerobic fitness will carry over, but loaded walking adds a different demand on the feet, trunk, and legs. Start with a light pack and judge adaptation by comfort, gait, and recovery rather than assuming a fixed two-to-three-week timeline. A switch does not by itself guarantee a body-composition change.
### Do I need special shoes for rucking?
No. Any durable shoe works - running shoes, hiking boots, or casual sneakers. The main factor is comfort and ankle support. For heavier packs (40 lbs+), a hiking boot or trail shoe with a stiffer sole reduces foot fatigue. For light packs (under 20 lbs), your everyday shoes are fine.
### Can I ruck and cycle on the same day?
You can, but there is no universal order. Put the session that matters most first, keep the second easy, or use separate days if fatigue changes your technique. Alternating days is a conservative starting point; the evidence here does not support a fixed six-hour separation or claim that one order prevents injury.
### Which activity is better for bone density?
Rucking is weight-bearing, while cycling provides little skeletal loading. Weight-bearing and resistance exercise are commonly included in bone-health guidance, but the effect depends on intensity, progression, age, nutrition, and medical history. Rucking-specific bone-density evidence is limited, so anyone with osteoporosis or fracture risk should get individual guidance before adding load.
---
## Your next step
---
## Related reading
- [Zone 2 rucking guide](/weight-loss/zone-2-rucking-guide) - the science of low-intensity loaded cardio and how to train it
- [How heavy should your ruck be?](/guides/how-heavy-should-your-ruck-be) - personalized weight recommendations by fitness level and goal
- [Rucking for weight loss](/pillars/rucking-for-weight-loss) - the complete pillar guide with training programs and calorie data
- [Rucking vs running for weight loss](/weight-loss/rucking-vs-running-weight-loss) - how rucking compares to the other popular cardio option
- [The complete beginner's guide to rucking](/pillars/beginners-guide-to-rucking) - everything you need to start, from form to gear selection
────────────────────────────────────────────────────────────────────────────────
URL: https://ruckauthority.com/training/rucking-vs-swimming
Title: Rucking vs Swimming: Low-Impact Training Showdown
Description: Both are excellent low-impact options. Here's how they compare on joint stress, bone density, accessibility, and real-world strength.
Published: 2026-03-28 / Updated: 2026-09-25
## The short answer
Swimming burns more calories per hour. Rucking builds bone density and works anywhere. Both protect your joints.
If you have access to both, do both. If you can only pick one, the real question isn't "which is the better workout?" - it's **what your body actually needs**:
| If your main goal is... | Pick | Why |
| --- | --- | --- |
| Maximum calorie burn in 60 minutes | Swimming | 400 - 700 cal/hr vs rucking's 395 - 430 on flat ground |
| Bone density (especially over 40) | Rucking | Weight-bearing load is the only stimulus that works |
| Joint relief (severe arthritis, post-surgery) | Swimming | Water supports 90% of your body weight |
| Functional strength for real life | Rucking | Loaded carries transfer to hiking, travel, daily tasks |
| Works anywhere, costs almost nothing | Rucking | A [pack and some weight](/gear/budget-rucking-starter-kit) is the whole kit |
| Upper body development | Swimming | Strokes load shoulders, lats, and core in ways rucking doesn't |
| Social, talkable, weather-flexible | Rucking | Pool lanes are solitary; trails are not |
The rest of this page is the long answer with the data behind it.
## Calorie burn and intensity
| Activity | Calories per hour | Impact | Muscle emphasis | Where |
| --- | --- | --- | --- | --- |
| Swimming, moderate | 400 - 500 | Zero | Upper body dominant | Pool required |
| Swimming, high intensity | 550 - 700 | Zero | Upper body dominant | Pool required |
| Rucking, 20 lb @ 3.5 mph, flat | about 395 (180 lb person) | Weight-bearing | Full body, legs dominant | Anywhere |
| Rucking, 40 lb @ 3.5 mph, flat | about 430 (180 lb person) | Weight-bearing | Full body, legs dominant | Anywhere |
The data here comes from ACSM metabolic equations and established research on aquatic exercise and [load carriage](/glossary#load-carriage). Swimming edges out rucking on raw calorie burn, particularly at higher intensities. But this advantage flattens when you account for sustainability, consistency, and training cost.
One caveat on calorie math: **wrist-based heart rate is unreliable in water and unreliable under shoulder straps.** Your watch will undercount both modalities by 10-30%. A chest strap captures real HR through both - it stores swim data underwater and syncs after. Use our [ruck calorie calculator](/tools/calorie-calculator) for the math, paired with a dual-sport watch that handles both pool laps and outdoor pace.
#### Calorie tracking gear
## The case for swimming
### Zero impact
Swimming is truly non-impact. The water supports 90 percent of your body weight, eliminating the ground reaction forces that plague runners and even ruckers. If you have severe joint degeneration, post-surgery recovery, or inflammatory conditions like rheumatoid arthritis, swimming is unmatched.
### Upper body dominance
Swimming is one of the few cardio activities that builds significant upper body and core strength. You are resisting water with every stroke. Rucking, by contrast, is primarily a lower body and [posterior chain](/glossary#posterior-chain) activity. If upper body development matters, swimming wins decisively.
### Calorie efficiency
Swimming at moderate to high intensity burns 400 - 700 calories per hour depending on stroke, speed, and body weight. A 40-lb ruck on flat ground is about 430 at 3.5 mph, and hills push it past 600. For pure calorie output on flat routes, swimming is more efficient.
## The case for rucking
### Weight-bearing stimulus
Swimming is zero-impact, which is its strength. But zero impact also means zero bone-loading stimulus. Your skeleton doesn't experience the weight-bearing force that triggers bone density adaptation. Over decades, this matters. Rucking, by contrast, loads your skeletal system directly. Studies consistently demonstrate that weight-bearing exercise is the most effective stimulus for bone mineral density in both younger and older adults.
### Accessibility and cost
A pool membership runs $300 to $800 a year. A [rucksack and some weight](/gear/budget-rucking-starter-kit) is $60 to $200 once - the [5.11 Tactical RUSH 24](/gear/best-rucking-backpacks) lands in the sweet spot - and works anywhere: your neighborhood, a trail, a parking lot. If cost and access are barriers, rucking eliminates them entirely. Pool access is not guaranteed across all geographies, seasons, or life circumstances.
### Functional strength
Rucking builds strength that transfers to real life. Carrying a load on your back under controlled conditions trains stabilizer muscles, lower body power, and postural endurance. These adaptations carry over to hiking, moving furniture, travel, and everyday resilience. Swimming builds fitness and upper body strength, but the movement pattern is specific to aquatic environments.
### Social accessibility
Rucking is infinitely more social than swimming. You can ruck and talk. You can ruck with friends, a group, or a community. Swimming requires lane discipline and is largely solitary. For solo rucks, a pair of bone-conduction headphones lets you bring podcasts or music along without plugging your ears - critical on roads and trails where situational awareness matters. If community and social accountability matter for your consistency, rucking has a decisive advantage.
#### Solo ruck essentials
## Head-to-head: rucking vs swimming
## When to choose each
### Choose swimming if:
- You have severe joint pain, arthritis, or post-surgical constraints that require true zero-impact training
- Your primary goal is upper body strength development (rowing and freestyle dominate)
- You have reliable pool access and enjoy the aquatic environment
- You want maximum calorie burn in a single activity
- You are training for a swimming event or need stroke-specific conditioning
### Choose rucking if:
- Bone density matters to you (over 40, female, family history of osteoporosis, or concerned about long-term bone health)
- You lack reliable pool access or want a low-cost option
- Functional, real-world strength matters more than sport-specific fitness
- You value social and community aspects of training
- You want a training modality that works in any weather, terrain, or geography
## The hybrid approach (and why it wins)
The best option for most people is both. You get bone-loading stimulus, upper body development, cardiovascular fitness, and joint-friendly recovery in one week. Here's a sample template:
| Day | Session | Why |
| --- | --- | --- |
| Mon | Ruck - 45 min, 20 lb | Bone density + posterior chain |
| Tue | Swim - 30-40 min | Upper body, shoulder mobility |
| Wed | Rest or unloaded walk | [Active recovery](/glossary#active-recovery) |
| Thu | Ruck - 60 min, 25 lb | Longer load tolerance |
| Fri | Swim - 30 min easy | Joint decompression |
| Sat | Long ruck - 60-90 min | Endurance + community ruck if available |
| Sun | Full rest | Sleep is the third workout |
**Three rucks** drive bone density and functional strength (your highest-consistency activity). **Two swims** complement with upper body work and joint-friendly recovery - the zero-impact nature means swimming doesn't interfere with [rucking recovery](/injuries/rucking-mobility-guide). You avoid the boredom of any single modality and gain the synergistic benefits of both.
#### Hybrid week starter kit
If you're new to the pool side, the kit is genuinely small: anti-fog goggles, a compact microfiber towel that packs down to fit in your ruck, and a pull buoy if you want freestyle to become pure upper-body work.
#### Recovery + hair care for the two-a-week swimmer
---
## Frequently asked questions
### Does swimming build bone density like rucking does?
No. Swimming does not provide weight-bearing stimulus to trigger bone density adaptation. Your skeleton needs loading - your own body weight plus external load - to signal bone-building responses. Swimming is excellent for cardiovascular fitness and upper body strength, but for bone health specifically, weight-bearing exercise like rucking is the gold standard.
### How many calories do I need to burn to see weight loss results?
This depends on your diet, baseline metabolism, and consistency. Burning 250 more calories per day through swimming versus rucking is meaningful over time - roughly 1,750 extra calories per week, or 0.5 lbs of body weight. But adherence matters more than any single number. Consistent rucking at 300 calories per session beats sporadic swimming at 500 calories per session. Choose the activity you will actually do.
### Can I ruck after swimming on the same day?
Yes, but sequence it carefully. Swim first if you are doing both in one day. Swimming is lower-intensity and does not fatigue your stabilizer muscles. Rucking afterward on fatigued legs is possible but increases injury risk. Better approach: alternate days, or swim in the morning and ruck in the evening with at least six hours between. Either way, you'll sweat more than you think on a two-a-day - even in the pool. An electrolyte mix (1,000 mg sodium per stick) keeps you from cramping in the back half of session two.
### Is rucking better than swimming for weight loss?
Not necessarily. Swimming burns more calories per unit time, but rucking is more accessible and more sustainable for most people. The "better" option is whichever one you will do consistently. For weight loss, adherence matters more than intensity. That said, rucking preserves more lean muscle during a caloric deficit because of the loaded resistance stimulus, so your body composition improvements may be more visible with rucking than with swimming alone.
### What if I have joint pain in my shoulders or hips?
If shoulder pain is your issue, swimming aggravates many shoulder conditions. Freestyle and butterfly are high-load for the rotator cuff. Rucking is gentler on shoulders, though loaded walking does place some stress through the core and shoulders. Backstroke or breaststroke may be safer if you want to swim. If hip pain is the concern, both are low-impact, but rucking loads the hip joint more directly. In both cases, consult a physical therapist before starting either activity at volume.
---
## Your next step
---
## Related reading
- [Ruck calorie calculator](/tools/calorie-calculator) - get your personalized number for any pack weight and pace
- [Rucking vs running for weight loss](/weight-loss/rucking-vs-running-weight-loss) - comparing two weight-bearing cardio options
- [The complete beginner's guide to rucking](/pillars/beginners-guide-to-rucking) - everything you need to start today
- [How heavy should your ruck be?](/guides/how-heavy-should-your-ruck-be) - personalized weight recommendations by fitness level
- [Zone 2 rucking guide](/weight-loss/zone-2-rucking-guide) - sustainable cardio for fat loss and base building
- [Rucking for seniors](/training/rucking-for-seniors) - modifications and progressions for older adults
────────────────────────────────────────────────────────────────────────────────
URL: https://ruckauthority.com/training/rucking-weekly-routine
Title: Rucking Weekly Routine: Schedules Built Around One Main Ruck
Description: Choose a three-, four-, or five-day training week without turning every session into a ruck. Each schedule uses one primary loaded day and unloaded support work.
Published: 2026-03-27 / Updated: 2026-08-30
## Pick the week you can repeat
A useful rucking routine does not need four or five loaded walks. It needs one clear primary ruck, enough strength and aerobic work to support it, and enough recovery to repeat the week.
Choose by total training days:
- **Three days:** one ruck, one strength day, one unloaded aerobic day
- **Four days:** one ruck, two strength days, one unloaded aerobic day
- **Five days:** one ruck, two strength days, two unloaded aerobic days
An established rucker can make one unloaded aerobic day a short easy ruck. That is optional.
## Before choosing a schedule
Use [Couch to Ruck](/guides/couch-to-ruck-program) when regular unloaded walking is not yet comfortable.
Use the [First 30 Days plan](/guides/first-30-days-of-rucking) when you already walk for 30 minutes and are new to carrying load.
Use the schedules below when you have a recent loaded baseline and want to organize rucking around the rest of your training.
## Three-day weekly routine
This is enough for a beginner and useful for anyone with a busy week.
| Day | Session | Purpose |
| --- | --- | --- |
| Tuesday | Full-body strength | Squat, hinge, push, pull, carry, trunk |
| Thursday | Unloaded easy aerobic work | Walk, run, bike, row, or swim |
| Saturday | Primary ruck | One goal-specific loaded session |
### Primary ruck
Start from a load and duration you have completed recently with normal gait. Keep the pace conversational unless a stable test requirement makes pace the current variable.
### Strength day
Use controlled movements and leave good repetitions in reserve. The goal is repeatable strength work, not soreness that compromises the ruck.
### Aerobic day
Keep it unloaded. General aerobic capacity supports rucking without another foot march.
## Four-day weekly routine
Add a second strength day before adding another ruck.
| Day | Session | Purpose |
| --- | --- | --- |
| Monday | Full-body strength | Main strength work |
| Wednesday | Unloaded easy aerobic work | Aerobic base and recovery |
| Friday | Full-body strength | Shorter or different emphasis |
| Sunday | Primary ruck | Goal-specific loaded practice |
This is the default structure used by the [program builder](/tools/program-builder). It gives the pack one job and leaves room to build the qualities that support it.
## Five-day weekly routine
Add another unloaded aerobic day when training five days.
| Day | Session | Purpose |
| --- | --- | --- |
| Monday | Full-body strength | Main strength work |
| Tuesday | Unloaded easy aerobic work | Easy volume |
| Thursday | Primary ruck | Goal-specific loaded practice |
| Friday | Full-body strength | Controlled strength work |
| Saturday | Unloaded intervals or easy aerobic work | Pace or aerobic capacity without the pack |
Keep only one hard lower-body session at a time. If Thursday becomes a demanding pace or hill ruck, Saturday should be easy.
## Optional second ruck for established ruckers
After at least four stable weeks, you may replace one easy unloaded day with a short easy ruck.
Keep it:
- shorter than the primary ruck
- on familiar terrain
- conversational
- at the same or lighter load
- far enough from the primary session to recover normally
The optional ruck is for pack fit and easy practice. Do not turn it into a second progression day.
## How to progress the primary ruck
Change one factor:
- duration or distance
- pack load
- pace
- grade
- terrain
Hold the others. The [ruck progression guide](/training/ruck-progression-rules-how-to-safely-increase-weight-and-dis) explains why the 10% rule and pound-miles cannot guarantee a safe increase.
A simple four-week distance block can look like:
| Week | Primary ruck | Load |
| --- | --- | --- |
| 1 | Recent comfortable distance | Hold |
| 2 | Small distance increase | Hold |
| 3 | Repeat Week 2 | Hold |
| 4 | Shorter review week | Hold |
Repeat or reduce sooner when gait, symptoms, sleep, or ordinary activity worsens.
## Combine rucking and lifting
Count heavy leg lifting and a demanding ruck as lower-body work. Separate them when placing them together reduces form or performance.
Good patterns include:
- strength Monday and Thursday, ruck Saturday
- strength Monday and Friday, ruck Wednesday or Sunday
- upper-body strength the day before an easy ruck when recovery is stable
There is no rule that lifting must always happen before or after rucking. The priority session goes first, and the full week must remain recoverable.
## Combine rucking and running
Keep the hard run and hard ruck apart. Easy running can fill an unloaded aerobic day if you already tolerate running.
For pace goals:
- use one loaded brisk-walking interval session
- use unloaded running or another modality for additional intervals
- do not add running under load as the automatic advanced step
See [Ruck Running vs Fast Walking](/training/ruck-running-training-speed-intervals-and-shuffle) for the evidence boundary.
## Adjust for an event or military standard
Read the current event or unit document first. It should determine:
- required load and whether water counts
- required equipment
- distance and time
- terrain and route conditions
- whether outside assistance is allowed
Then make the primary ruck specific to that requirement. Keep most supporting work unloaded unless the official plan says otherwise.
## Signs the week is too dense
Reduce the optional session or primary-ruck demand when:
- gait changes under load
- the same session gets harder for several weeks
- foot damage affects ordinary walking
- sleep or normal daily activity deteriorates
- strength or running performance steadily falls
- pain persists or worsens
Stop for sharp pain, weakness, numbness, dizziness, chest pressure, fainting, unusual shortness of breath, or unsafe loss of balance.
## Frequently asked questions
### What is the best weekly rucking routine for a beginner?
One primary ruck, one or two full-body strength sessions, and one or two unloaded aerobic sessions. If regular walking is not yet comfortable, start unloaded with Couch to Ruck.
### Do advanced ruckers need four or five rucks per week?
No. Advanced describes the goal and training history, not a required number of loaded days. Many goals can be trained with one primary ruck and one optional easy ruck.
### Can I ruck on consecutive days?
This site does not use consecutive loaded days as a default. Separate them with unloaded work or rest, especially when either session is long, heavy, fast, hilly, or unfamiliar.
### What if I only have weekends?
Use one weekend day for the primary ruck and the other for unloaded aerobic or strength work. If you already tolerate two loaded days, keep one clearly shorter and easier.
### Should I make up a missed ruck?
No. Continue with the next scheduled session or repeat the week. Doubling the next session changes the plan.
### How long should I follow one routine?
Use it for at least four stable weeks before adding complexity. A changing work schedule, illness, pain, or poor recovery is a reason to simplify sooner.
────────────────────────────────────────────────────────────────────────────────
URL: https://ruckauthority.com/training/speed-rucking-intervals
Title: Speed Rucking: Walking Intervals to Improve Your Pace
Description: A six-week speed-rucking plan built around one loaded interval session, a stable pack load, unloaded conditioning, and a walking gait.
Published: 2026-03-27 / Updated: 2026-08-30
## The short answer
Speed rucking is brisk loaded walking. Use one interval session per week to practice a required pace while keeping the pack load, route, and walking gait stable.
Do not add a second loaded speed day simply because the first one went well. U.S. Army injury-prevention guidance describes successful conditioning as a mix of occasional loaded foot marching, unloaded aerobic intervals, and resistance training. It also cautions that ruck running may increase injury risk.
## Decide whether speed matters
Pace work is useful when you have a real time requirement or want to improve a personal walking pace. It is optional for general fitness.
Use speed work when:
- an event or official test has a pace standard
- your required load and distance already feel stable
- you can keep a walking gait while moving faster
- your recent training has no unresolved pain or foot damage
Stay with easy rucking when:
- you are still learning pack fit
- the required load changes your stride
- a 45-minute loaded walk is not yet repeatable
- pain, numbness, dizziness, or unusual shortness of breath is present
The 45-minute prerequisite is an editorial screen. It gives you a recent loaded baseline before pace becomes another variable.
## What the research can and cannot tell us
Load-carriage reviews support combined programs that include loaded practice, aerobic conditioning, and strength work. They do not establish a universal interval ratio, a guaranteed pace gain, or a safe percentage of weekly speed mileage for every rucker.
That means this page does not promise that a 2:1 interval will improve pace by a specific amount. It also does not use a running-derived 80/20 rule as a load-carriage safety threshold.
The practical rules are simpler:
1. Start from a loaded session you already tolerate.
2. Change pace while load and route stay stable.
3. Use one loaded pace session per week.
4. Build additional aerobic capacity without the pack.
5. Repeat or reduce when gait or recovery worsens.
## Set up the session
### Pack load
Use the same light-to-moderate load you have recently carried for 45 minutes with normal gait. Do not add weight during this block.
If a test requires a heavier load that is not yet stable, build load tolerance first with the [ruck progression guide](/training/ruck-progression-rules-how-to-safely-increase-weight-and-dis). Do not try to solve load and pace in the same session.
### Route
Choose a familiar, mostly flat route with predictable footing and an easy exit. Save hills and technical trail for a separate block because grade and terrain change the task.
### Effort
The brisk intervals should feel purposeful but controlled. You may be limited to short phrases, but you should not be sprinting, bouncing, or losing posture. The easy portions should restore full-sentence conversation.
### Pace measurement
A watch or measured loop can help, but effort and gait come first. GPS pace can jump under tree cover or around buildings. Use a lap average rather than chasing each instant reading.
## The six-week speed block
Do this session once per week. Warm up with 10 minutes of easy walking and finish with at least 5 easy minutes.
| Week | Brisk walking work | Easy recovery | Pack load | Purpose |
| --- | --- | --- | --- | --- |
| 1 | 6 x 1 minute | 2 minutes after each | Hold baseline | Learn the effort without straining |
| 2 | 8 x 1 minute | 2 minutes after each | Hold | Add repetitions only |
| 3 | 6 x 2 minutes | 2 minutes after each | Hold | Lengthen controlled work |
| 4 | No intervals | Easy loaded walk | Hold | Consolidate and check recovery |
| 5 | 5 x 3 minutes | 2 minutes after each | Hold | Extend controlled work |
| 6 | Controlled pace check | Easy walking as needed | Hold | Compare with the real requirement |
For Week 6, use a distance shorter than the full event or test. Finish knowing you could continue. An all-out practice test adds fatigue but does not tell you how well you can repeat the work.
If a week changes your gait, causes pain that persists, or disrupts normal recovery, repeat the previous stable week or return to easy walking.
## A complete training week
The speed session is one piece of the week, not the whole program.
| Day | Session | Loaded? |
| --- | --- | --- |
| Monday | Strength | No |
| Tuesday | Easy unloaded aerobic work | No |
| Wednesday | Speed-rucking intervals | Yes |
| Thursday | Rest or easy walk | No |
| Friday | Strength | No |
| Saturday | Easy unloaded walk, run, bike, or swim | No |
| Sunday | Rest | No |
An established rucker may replace Saturday with a shorter easy ruck when two loaded days are already well tolerated. Keep it clearly easier than Wednesday and remove it first when recovery slips.
## Build speed without another loaded day
Unloaded training lets you work on aerobic capacity and leg speed without adding another foot march.
Useful options include:
- brisk unloaded walking intervals
- easy running if you already run comfortably
- cycling, rowing, or swimming
- lower-body and trunk strength work
- calf and foot capacity work
The systematic review of load-carriage training found the best performance results in combined programs, not in programs made only of loaded marching.
## Walking faster without a manufactured technique
Do not force an exaggerated stride or copy a "ruck shuffle" from a short video. Walk tall, let the arms move naturally, and increase cadence before reaching far in front of the body.
Slow down when you notice:
- both feet leaving the ground
- bouncing that makes the pack move vertically
- a widening or crossing stride
- aggressive forward lean
- loss of control on descents
Fast walking should still look like walking.
## Common mistakes
**Adding speed and load together.** You cannot tell which change caused the response.
**Doing two or three loaded interval days.** More hard sessions are not automatically better. Use unloaded conditioning for the extra work.
**Testing the full distance every week.** Repeated tests replace training with fatigue.
**Using a target pace from another event.** Train against the current standard that applies to you.
**Treating discomfort as proof of effort.** Altered gait, numbness, sharp pain, dizziness, chest pressure, or unusual shortness of breath are reasons to stop.
## Frequently asked questions
### How many speed-rucking sessions should I do each week?
Start with one. Add aerobic work without the pack rather than adding a second hard loaded day.
### Should I use a lighter pack for intervals?
Use a load you already tolerate with stable gait. If the required event load is not stable, build that first. This plan holds load constant so pace is the only deliberate change.
### Should I run to meet a fast standard?
Not as the default. Army injury-prevention guidance cautions that ruck running may increase injury risk. Improve brisk walking, unloaded aerobic fitness, and strength first. Occupational requirements that specifically require running under load deserve official or supervised programming.
### What if I cannot hold the brisk effort?
Shorten the interval or extend the easy recovery. Do not speed up by running or adding a second pace day.
### When should I retest?
Use a controlled submaximal check after the block. Save a full test for when it is required and recovery time is available.
────────────────────────────────────────────────────────────────────────────────
URL: https://ruckauthority.com/training/summer-rucking-heat-safety
Title: Summer Heat Rucking Safety: Science-Backed Tips for Training in High Temperatures
Description: Heat acclimatization, hydration math, when to reduce weight, warning signs of heat illness, and the buddy system for safe hot weather rucking.
Published: 2026-03-28 / Updated: 2026-06-19
## The Short Answer
You can ruck safely in hot weather. Military personnel, Special Forces, and ultralight hikers do it every day. The difference between a great summer ruck and a dangerous one comes down to five factors: heat acclimatization, hydration math, load management, timing, and knowing when to stop.
If you have not trained in heat before, expect 10 to 14 days to adapt. Your body will sweat more efficiently, your heart rate will stabilize, and your thermal tolerance will improve measurably. Skip this adaptation window and you are asking for heat exhaustion.
## The hot-weather rucking kit
Five items that determine whether you finish a hot ruck strong or limp home with heat exhaustion. Two of them (shoes, electrolytes) are non-obvious; ruckers consistently under-spec them and pay the price by mile four.
| Priority | Item | Why this one |
| --- | --- | --- |
| 1 | LMNT Variety Pack electrolytes ($25-50) | 1000mg sodium per packet, no sugar. Long, hot efforts can require electrolytes as well as water; match intake to conditions and your own needs. |
| 2 | [Salomon XA Pro 3D V9 GTX](/gear/best-rucking-shoes-by-terrain) trail shoes ($150-300) | Aggressive Contagrip handles dust, dry creek beds, and sun-baked road shoulders. GORE-TEX matters less in summer but the stable platform matters more. |
| 3 | [5.11 Tactical RUSH 24 2.0](/gear/best-rucking-backpacks) pack ($50-150) | Open mesh back panel allows airflow; the dark colors common in tactical packs absorb heat, so choose a lighter color when available. |
| 4 | Nalgene Wide-Mouth 32 oz bottle (under $25) | Fits ice cubes; the wide mouth lets you mix electrolyte powder without a funnel mid-ruck. |
| 5 | [Mystery Ranch 2 Day Assault](/gear/best-goruck-alternatives) pack ($150-300) | Bigger volume option when you need to carry 3L of water, electrolytes, and a spare shirt for a 90+ minute hot ruck. |
## How Heat Acclimatization Works
Heat acclimatization is a real physiological adaptation, not mental toughness. When you expose yourself to elevated temperatures over days, your body makes permanent changes: improved blood plasma volume, earlier onset of sweating, and lower core temperature at rest.
These adaptations take time. Evidence suggests that meaningful acclimatization requires daily heat exposure for 10 to 14 consecutive days. You cannot skip this.
Here is how to acclimatize safely:
- **Days one to three:** Ruck in heat for 30 to 40 minutes at an easy pace. Keep pack weight at 50 percent of normal.
- **Days four to seven:** Increase duration to 45 to 60 minutes. Bump pack weight to 75 percent of normal.
- **Days eight to 14:** Return to normal [rucking](/glossary#rucking) protocol. Your body will now tolerate higher temperatures without the same cardiovascular strain.
Track your resting heart rate each morning. When it stabilizes or drops despite heat exposure, acclimatization is progressing.
## Hydration Math for Hot Weather
The amount of fluid you need depends on temperature, pack weight, pace, and body size. Generic advice ("drink eight glasses a day") fails because you might lose a liter of sweat per hour in 95-degree heat with a 40-lb pack.
Here is the math:
| Temperature Range | Pack Weight | Hydration Rate | Recommended Duration |
| --- | --- | --- | --- |
| 55-75F | 20-40 lbs | 8-12 oz/hour | 60-90 minutes |
| 75-85F | 20-40 lbs | 12-16 oz/hour | 45-75 minutes |
| Above 85F | 15-25 lbs | 16-20 oz/hour | 30-45 minutes |
**Why the ounces matter:** If you weigh 180 lbs and are rucking at a 3.5 mph pace in 90-degree heat with a 40-lb pack, you are losing roughly two to 2.5 liters of sweat per hour. Drinking only eight ounces every 20 minutes (24 oz/hour) means you are still in a net water deficit. Aim to drink close to what you lose.
### Electrolytes Matter More Than You Think
Sweat contains sodium. Drinking pure water without electrolytes in hot conditions can lead to hyponatremia (low blood sodium), which is dangerous and less common than dehydration but more dangerous when it happens.
Include 300 to 600 mg of sodium per liter of fluid you drink. LMNT Electrolyte Variety Pack is a no-nonsense option. Military ruckers also pair water with salted energy bars or electrolyte capsules. Using a dedicated hydration system - whether it's a [5.11 RUSH 24 hydration pack](/gear/best-rucking-backpacks) or bottles in accessible locations - makes it easier to maintain consistent hydration schedules throughout your ruck.
## When to Reduce Pack Weight
Above 85 degrees Fahrenheit (29 degrees Celsius), reduce your pack weight by 20 to 30 percent. This is not weakness - it is physics.
A lighter pack reduces the total metabolic demand and heat production from your body. The equation is simple: less load equals less heat generation equals lower core temperature. Military guidelines universally recommend load reduction above 85F, and civilian ultralight hikers follow the same protocol.
If your normal ruck weight is 40 lbs, carry 30 lbs in heat. If your normal ruck is 25 lbs, drop to 18 lbs. You will still get a training stimulus. You will also get home without heat illness.
## Timing: Early Morning and Evening Win
Schedule summer rucks for early morning (before 9 AM) or evening (after 6 PM). This avoids peak solar radiation and typically captures lower ambient temperatures.
If you must ruck during the day, choose shaded routes: tree-lined paths, urban areas with tall buildings, or trails through forests in proper footwear like [Salomon XA Pro 3D shoes](/gear/best-rucking-shoes-by-terrain). Shade can reduce the effective temperature by 10 to 15 degrees.
Avoid midday (11 AM to 4 PM) entirely during heat acclimatization or in extreme heat conditions (above 95F).
## Clothing: Sweat Management Beats Cotton Every Time
Wear moisture-wicking fabrics (polyester, nylon, merino wool) that pull sweat away from your skin. Cotton absorbs sweat, traps heat, and increases chafing. This is not optional in hot weather.
Light colors (white, light gray, tan) reflect more solar radiation than dark colors. You will be noticeably cooler in a light-colored shirt versus a dark one, even in the same conditions. Light colors also make it easier to spot ticks - our [tick prevention guide for rucking](/guides/tick-prevention-for-rucking) covers the layered defense for trail seasons.
Consider removing your pack periodically to allow air circulation underneath - a 30-second break every 10 to 15 minutes can significantly reduce back temperature and discomfort.
## Heat Illness Warning Signs: Know Them Cold
Heat exhaustion and heat stroke are different conditions requiring different responses.
### Heat Exhaustion
Heat exhaustion is your body overheating but still regulating:
- Heavy sweating (your cooling system is working hard)
- Weakness, dizziness, or lightheadedness
- Nausea or headache
- Cool, clammy skin
- Heart rate elevated even at rest
- Normal or slightly elevated core temperature (below 104F)
**Response:** Stop immediately. Move to shade. Drink cool fluids. Cool your neck, wrists, and inner elbows with cool water or ice if available. Rest for at least 30 minutes. Do not resume exercise that day.
### Heat Stroke
Heat stroke is a medical emergency. Your body has stopped sweating and core temperature is rising uncontrolled:
- Confusion, irritability, or slurred speech
- Little to no sweating (this is the danger sign)
- Flushed, hot skin (not cool and clammy)
- Core temperature above 104F (if you can measure it)
- Loss of consciousness or seizures in severe cases
**Response:** Call emergency services immediately. Cool the person aggressively - ice bath, spray with cool water, remove excess clothing. This is not a "walk it off" situation.
## The Buddy System: Never Ruck Alone in Heat
Train with a partner in hot conditions. A buddy notices if your pace drops, your gait changes, or your speech becomes slurred. These are early heat illness warning signs you might not notice about yourself.
Before your ruck, establish a "check-in" plan:
- Call or text every 15 to 20 minutes.
- Agree on a specific turnaround time (no "just one more mile" decisions).
- Share your route and estimated return time.
- If either person feels off, the ruck stops immediately - no negotiation.
Military rucking protocols mandate the buddy system precisely because of this. It works.
## Route Planning: Shade and Water Access
Scout your route before you ruck in heat:
- **Identify shade stops:** Parks, underpasses, or tree-lined sections where you can sit for two to five minutes.
- **Locate water sources:** Public fountains, convenience stores, or cached Nalgene Wide Mouth 32oz bottles at known points.
- **Know your escape route:** Plan how you would get home if you needed to bail early (rideshare, parked car, familiar neighborhoods).
Avoid out-and-back routes in extreme heat. A loop route gives you options to cut distance if needed without doubling back. For longer sessions (60+ minutes), a [Mystery Ranch pack built for rucking](/gear/best-goruck-alternatives) is worth the investment - it keeps water easily accessible and distributes the weight better than a traditional pack with a bladder.
## Wet Bulb Globe Temperature (WBGT): A Tool to Know
You may have heard of "wet bulb temperature" in news stories about extreme heat. This is the wet bulb globe temperature (WBGT), a combined measurement of temperature, humidity, wind, and solar radiation.
You do not need a special device. Here is the simplified version:
- **Below 28C (82F) WBGT:** Safe for unlimited outdoor exercise with standard precautions (hydration, breaks).
- **28-32C (82-90F):** Limit intense exercise. Use all precautions: hydration, electrolytes, shade, reduced load.
- **Above 32C (90F) WBGT:** Avoid strenuous outdoor exercise entirely. Ruck at reduced intensity or postpone.
On a hot day, if it is 90F with high humidity and full sun, the WBGT is likely above 32C. This is not a day for your long ruck. This is a day for an air-conditioned strength session or a short shaded walk.
Military guidelines recommend suspending hard training when WBGT exceeds 32C. Follow their lead.
## Your Next Step
---
## Frequently asked questions
### How long does heat acclimatization last?
Heat acclimatization improvements persist for about two to three weeks after your last heat exposure. If you have acclimatized and then spend three weeks indoors or in cool weather, you will have lost maybe 25 to 30 percent of your adaptations. The good news: re-acclimatization happens faster the second time - roughly 50 to 75 percent of the original adaptation period. So if you took 14 days the first time, expect 7 to 10 days to regain it.
### Can I ruck in 95+ degree heat?
Technically yes, but should you? No. At 95F with high humidity (above 80 percent), the wet bulb temperature climbs above 32C, which military guidelines classify as unsafe for strenuous exertion. Even elite ruckers respect this limit. On days above 95F, either wait for cooler hours (very early morning or late evening) or substitute an indoor ruck on a treadmill at reduced speed. This is not giving up. This is respecting the limits of human thermoregulation.
### What should I drink - water or sports drinks?
For rucks under 60 minutes, water is fine. For rucks lasting 60 to 90 minutes in heat, a sports drink with four to eight percent carbohydrates and 300 to 600 mg sodium per liter is ideal. This provides both fluid replacement and a carbohydrate boost to maintain energy. If you prefer plain water, pair it with an electrolyte tablet or salty snack. The sodium is the critical part, not the sugar.
### Should I do heat training every day?
No. Heat acclimatization requires daily exposure for 10 to 14 days, but once adapted, you do not need daily heat training. Two to three rucks per week in warm conditions maintains acclimatization. The rest of your week can be indoors, at cooler times of day, or with reduced intensity. Overtraining in heat increases injury and heat illness risk.
### Can I ruck in heat with a running watch or heart rate monitor?
Yes, and it is helpful to track your heart rate response to heat. Your resting heart rate should drop over the acclimatization period, and your maximum heart rate at a given pace should decrease once adapted. One note: in very high heat, your heart rate can plateau even as intensity increases - this is a sign to slow down and cool your core. Do not chase pace targets in hot conditions.
---
## Related reading
- [Rucking injury prevention](/pillars/rucking-injury-prevention) - a complete guide to avoiding common [rucking injuries](/pillars/rucking-injury-prevention), including heat-related strain
- [How heavy should your ruck be?](/guides/how-heavy-should-your-ruck-be) - weight recommendations by fitness level and goal, with load reduction strategies for special conditions
- [Rucking nutrition guide](/guides/rucking-nutrition-guide) - hydration, electrolytes, and fueling strategies for training sessions of all lengths
- [Training programs for rucking](/pillars/rucking-training-programs) - the pillar guide with progressive programming, including heat-adapted workouts
- [First 30 days of rucking](/guides/first-30-days-of-rucking) - how to get started safely, even in warm weather
- [Summer rucking gear kit](/loadouts/summer-heat) - the hot-weather loadout: hydration vest, mesh-upper shoes, and the electrolytes most ruckers underdose
────────────────────────────────────────────────────────────────────────────────
URL: https://ruckauthority.com/training/weighted-vest-vs-rucksack
Title: Weighted Vest vs Rucksack: Which Is Better for Fitness?
Description: Weighted vest vs rucksack for walking, rucking, strength work, fat loss, and events. Includes a decision matrix by goal, load, and training style.
Published: 2026-03-10 / Updated: 2026-09-25
## The key difference
For fitness walking, a weighted vest and a rucksack produce similar calorie burn at the same load. A 20-lb vest and a 20-lb rucksack both make your body move 20 extra pounds. The difference isn't the calorie math: the [rucking calorie calculator](/tools/calorie-calculator) gives you nearly identical numbers whether you call the load a vest or a pack. The difference is **where the weight sits** and how that changes comfort, posture, muscle emphasis, and practical use.
Use this quick rule:
| If your main goal is... | Choose | Reason |
| --- | --- | --- |
| Long rucks or hikes | Rucksack | Carries water, layers, and heavier loads better |
| Bodyweight workouts | Weighted vest | Stays tight during push-ups, pull-ups, squats, and stairs |
| GORUCK/event prep | Rucksack | Matches the tool used in the event |
| General fat loss walks | Either | Same load means similar energy cost |
| 30+ lb training | Rucksack | Hip belt and pack structure matter more |
| Desk-worker posture reset | Rucksack | Posterior-chain loading is the point |
| Low-profile neighborhood walks | Rucksack | Looks like a normal backpack |
Both weighted vests and rucksacks add load to your body while walking, creating the training stimulus of [loaded carry](/glossary#load-carriage) work. But they're fundamentally different tools because they distribute weight differently.
A rucksack concentrates weight on your [posterior chain](/glossary#posterior-chain) (back and rear muscles). The pack sits on your upper back and sometimes extends to your lower back, creating a postural adjustment where you lean slightly forward to balance the load.
A [weighted vest](/glossary#weighted-vest) distributes weight around your entire torso (front, sides, back), creating more symmetrical loading. Your posture remains more upright because the weight is distributed rather than concentrated.
This architectural difference changes which muscles work hardest, how your spine loads, what your posture looks like, and ultimately what the training stimulus is. Neither is universally better, but they aren't interchangeable.
---
## What the 2026 research adds
Two questions sit under this comparison: does walking with extra weight actually do anything, and does it matter whether that weight is on your chest or your back? This year produced the best evidence yet on the first and some useful lab data on the second. We cover all fifteen 2026 papers in our [rucking research review](/guides/rucking-research-2026); these are the three that bear on vests versus packs.
## Head-to-head comparison
## Fitness decision matrix
| Training style | Better tool | Starting load | Working range | Notes |
| --- | --- | --- | --- | --- |
| Beginner loaded walking | Rucksack | 10-15 lbs | 15-25 lbs | More useful outside training because it carries gear |
| Fat-loss walking | Either | 10-20 lbs | 20-35 lbs | Pick the tool you will use 3-5 days per week |
| Calisthenics circuit | Weighted vest | 5-10 lbs | 10-30 lbs | Vest stays closer to the torso during reps |
| Long-distance rucking | Rucksack | 15-20 lbs | 25-45 lbs | Pack fit and hip support become decisive |
| Stair or hill repeats | Weighted vest | 10-15 lbs | 15-30 lbs | Symmetrical loading feels better for vertical work |
| Event preparation | Rucksack | 20-30 lbs | 30-45 lbs | Sport specificity beats convenience |
---
## When to choose a rucksack
A rucksack is the better choice if:
**You want to carry gear simultaneously.** A rucksack functions as both a training tool and a practical backpack. You can throw in water, phone, keys, a snack, or extra layers. A weighted vest is dead weight only-it has no utility beyond training. If you want a single piece of gear that serves double duty, a rucksack wins.
**You plan to exceed 30 pounds regularly.** Beyond 25-30 pounds, weighted vests become uncomfortable because all the load is distributed around your shoulders and torso. Weight starts pulling down on shoulder straps in ways that create neck and shoulder strain. Rucksacks with proper hip belts stay comfortable at 40-60 pounds because the hip belt transfers weight to your pelvis. If you're planning heavy rucking (GORUCK events, loaded marching), a rucksack is purpose-built for the job.
**You want posterior chain emphasis.** Rucksacks load your posterior chain (spinal erectors, glutes, hamstrings, calf muscles) more heavily than vests. If you're using rucking primarily for posterior chain strengthening, a rucksack provides more direct stimulus to those muscles. This is relevant for people doing strength training or athletic prep where posterior chain dominance is desired.
**You're training for a specific event.** GORUCK events, Tough Mudder, military fitness tests, and ruck races all use rucksacks. Training with a rucksack means you're practicing with the exact tool you'll use in competition. Sport specificity matters for event prep.
**You want one tool for fitness and daily carry.** Many ruckers use their training pack as their daily backpack for commuting, hiking, or travel. A good rucking pack is genuinely practical. A weighted vest has no non-training applications.
---
## When to choose a weighted vest
A weighted vest is the better choice if:
**You want symmetrical, balanced loading.** The circumferential weight distribution means your posture stays more upright and balanced. There's no forward lean, no posterior chain emphasis, just evenly distributed loading across all stabilizer muscles. This is genuinely different stimulus than a rucksack provides.
**You prefer more upright posture during walks.** Some people find the slight forward lean of a rucksack uncomfortable or undesirable. A vest keeps you upright, which some find more natural or comfortable for extended walking.
**You plan to use it for exercises beyond walking.** A weighted vest is excellent for bodyweight exercises: push-ups, pull-ups, dips, squats, lunges. If you want a training tool that works for both rucking and strength training, a vest adds versatility. You can build a full workout around weighted vest exercises, whereas a rucksack is really only for walking and carrying.
**You ruck lighter loads (under 25 lbs).** At light loads, a vest is perfectly comfortable and appropriate. You don't need hip belt functionality for 15 pounds. The vest stays put, doesn't dig into your back, and distributes weight evenly.
**You have shoulder or upper back issues.** Rucksack straps sometimes aggravate shoulder problems in people with existing shoulder dysfunction. A vest distributes pressure more widely and often feels better. If rucksack straps cause you discomfort, a vest is worth trying.
**You're a woman shopping in the broader market.** Many mainstream weighted vests are designed and marketed toward women with better fit, smaller shoulder spacing, and more adjustability. Many rucksacks are designed with a men's-default fit (broader shoulders, longer torso), which can be uncomfortable for women. If finding a well-fitting rucksack is difficult, a quality weighted vest made for women often feels better.
A 2024 study by [Looney et al. (2024)](https://pubmed.ncbi.nlm.nih.gov/38291646/) in *Medicine & Science in Sports & Exercise* measured cardiometabolic responses to weighted-vest training specifically and confirmed it produces meaningful aerobic + load-bearing stimulus across a range of body sizes - useful evidence if you're choosing a vest as a primary training tool rather than a rucksack alternative.
Decided the vest is your lane? Our sister site Kit Authority's [vest quiz](https://kitauthority.com/tools/vest-quiz?utm_source=ruckauthority&utm_medium=crosslink) matches you to the right one for walking and general fitness, and their [walking-vest guide](https://kitauthority.com/fitness/best-weighted-vests-for-walking?utm_source=ruckauthority&utm_medium=crosslink) covers the picks. We keep the rucksack side covered below.
---
## Can you use both?
Absolutely. Some advanced ruckers alternate between vest and rucksack across the week. Here's how:
**Light/short rucks + vest.** Use a weighted vest for your easy sessions or shorter rucks (1-2 miles, 15 lbs). The vest is more convenient (grab it, go), slightly more comfortable for light loads, and useful for occasional bodyweight training.
**Heavy/long rucks + rucksack.** Use a rucksack for longer efforts, heavier loads (30+ lbs), or events. The rucksack is built for these demands and carries gear simultaneously.
This approach gives you training variety (different stimulus from different tools) and flexibility (the right tool for the specific session). It requires owning two pieces of gear, but rucksacks and vests together cost less than many single premium rucksacks, so the budget impact is minimal.
---
## Our recommendation
**Starting out: rucksack.** A rucksack is the more versatile entry point. You're learning rucking, you don't know if you'll love it yet, and you want a tool that has dual purpose (training plus daily carry). Spend $80 - 150 on a [solid 5.11 RUSH 24 pack](/gear/best-rucking-backpacks), or compare purpose-built [weighted backpacks for rucking](/gear/best-weighted-backpacks-for-rucking) if you want a dedicated plate pocket. The adjustability and hip belt support will feel better as you add weight. If budget is tight, check out the [budget rucking starter kit](/gear/budget-rucking-starter-kit) for reliable gear that won't break the bank.
**Want a second tool: add a weighted vest.** Once rucking is a consistent habit and you understand your preferences, consider adding a weighted vest for cross-training days or shorter sessions. Vests are often cheaper ($40-100) and provide different stimulus. This combination gives you maximum flexibility. For budget options, the [CAP Barbell Adjustable Weighted Vest](/gear/cap-barbell-adjustable-weighted-vest) offers solid value, while the [Hyperwear Hyper Vest PRO](/gear/hyperwear-hyper-vest-pro) is worth considering if comfort is your priority.
**Women choosing a primary tool: consider a vest.** If fit is an issue with available rucksacks (and it often is), don't force it. A quality weighted vest designed for women might be your better primary tool. You can add a rucksack later if you want to try heavier loads or events. For women starting out, explore our guide to best [rucking gear for women](/gear/best-rucking-gear-for-women) - better fit and comfort often matter more than which tool you choose.
**Budget pick: whatever is cheaper.** Both tools produce nearly identical training outcomes at the same weight. The calorie burn is virtually identical. The [bone density](/glossary#bone-density) stimulus is virtually identical. The cardiovascular benefit is virtually identical. If one is significantly cheaper than the other, pick the cheaper one. Consistency matters infinitely more than which tool you use.
## Frequently Asked Questions
For a choice between two back-loaded GORUCK designs, see [Ruck Plate Carrier 3.0 versus Rucker 5.0](/gear/goruck-ruck-plate-carrier-3-vs-rucker-5). That comparison covers plate fit and the space needed for water, layers, and event equipment.
────────────────────────────────────────────────────────────────────────────────
URL: https://ruckauthority.com/training/winter-rucking-cold-weather
Title: Rucking in Cold Weather: Safety, Gear, and Training Guide
Description: Science-backed strategies for winter rucking - layering, moisture management, footwear, visibility, and when to stay home.
Published: 2026-03-28 / Updated: 2026-09-14
## What changes on the first cool evenings of fall?
Plan for the weather on the way home. A warm afternoon does not tell you what the last half-hour after sunset will feel like. Check the forecast and choose a familiar loop with places to cut it short.
Keep a removable layer accessible rather than buried under your weight plate. Before leaving, check whether your jacket still closes comfortably over your base layer and whether you can reach its vents with the pack on. The [National Weather Service](https://www.weather.gov/safety/cold-during) recommends layers, shelter from wind and dry clothing when you get back inside wet.
For the darker return leg, use our [headlamp guide](/gear/best-headlamps-for-rucking). When ice, wind or poor visibility makes the route unsuitable, replace the outing with a session from the [four-week indoor plan](/training/indoor-rucking-plan-a-4-week-treadmill-program-for-year).
## The Short Answer
Winter [rucking](/glossary#rucking) can be done safely when clothing, traction, route choice, visibility, and turnaround decisions match the conditions.
Sweat can become a problem when pace slows or the ruck stops. A wet base layer increases heat loss, so manage effort and adjust layers before clothing becomes soaked. Frostbite, wind chill, ice, poor visibility, and route exposure remain separate hazards.
The rest is systems: the right layers, waterproof insulated footwear with aggressive tread, reflective gear and a headlamp for shortened daylight, and honest decision-making about when temperature, wind chill, or conditions are too severe to train.
## The four-item cold-weather kit
These four items address common winter needs, but the full kit still depends on temperature, wind, precipitation, route length, and distance from shelter.
| Priority | Item | Why this one |
| --- | --- | --- |
| 1 | [Salomon Quest 5 GORE-TEX](/gear/best-rucking-boots-for-beginners-2026) waterproof boots | A waterproof membrane and aggressive outsole can help in snow and slush. Add traction when the surface requires it. |
| 2 | [Smartwool Merino 150 long-sleeve base layer](/gear/smartwool-merino-base-layers) | Merino manages moisture and retains some insulation when damp. A suitable synthetic base layer can also work. |
| 3 | Kahtoola MICROspikes | Slip-on traction for packed snow and ice. They are not suitable for every surface or a substitute for careful footing. |
| 4 | [Mystery Ranch 2 Day Assault](/gear/best-goruck-alternatives) | Enough capacity for a removed layer and emergency gear when the route is away from quick shelter. |
## Why Winter Rucking Is Different (And Worth It)
Cold conditions can increase heat production needs, reduce dexterity, and make muscles feel stiff at the start. Snow and ice change footing, while shorter daylight reduces visibility. Those demands make pace, load, and route choice more important; they do not guarantee extra calorie burn, better form, or greater injury resilience.
## The Moisture Trap - Why Sweating in Winter Is Dangerous
Wet clothing is one preventable source of cold stress, so it deserves its own section.
You start a winter ruck at 20F. You are moving. Your body generates heat. Within 10 to 15 minutes, you are warm - sometimes warmer than you'd be in 50F conditions because the load and exertion create real metabolic heat. Your impulse is to shed layers.
Adjust layers early, in a safe place, so you limit sweat without exposing yourself to wind or precipitation.
When sweat stays in clothing, it can increase heat loss as pace slows or during a stop. Water conducts heat far faster than air. Watch for persistent shivering, loss of coordination, confusion, and slurred speech, and do not rely on exertion alone to keep you warm.
Start slightly cool rather than already sweating, and carry enough insulation for stops or a slower return. Use a moisture-managing base layer. Cotton holds moisture and is a poor choice next to the skin when cold exposure is possible.
## The Winter Layering System
There is no single winter outfit. Many conditions call for a base layer, an insulating layer, and a shell, but mild or dry weather may not require all three while moving.
### Base Layer (Moisture Wicking)
- **Material:** Merino wool (natural temperature regulation, doesn't smell) or synthetic (polyester, nylon blends). Never cotton.
- **Fit:** Snug but not restrictive. Moisture needs to transfer away from your skin.
- **Examples:** [Smartwool Merino Base Layer Crew](/gear/smartwool-merino-base-layers), Icebreaker, or Patagonia Merino lightweight tops and bottoms.
Merino is comfortable across a wide temperature range and resists odor. Synthetic base layers often dry faster and cost less. Fit and moisture management matter more than a universal material ranking.
### Mid Layer (Insulation)
- **Material:** Fleece (R-value 2 to 4), down (if you stay dry), or wool sweater (natural and durable).
- **Function:** Traps warm air without absorbing moisture.
- **Examples:** Patagonia R3 fleece, Arc'teryx Atom LT, or plain merino wool sweater.
Fleece is durable, affordable, and retains useful insulation when damp. Down is lighter and warmer for its weight but loses much of its insulation when wet, so protect it from moisture and use it mainly during low-output periods or stops.
### Outer Shell (Wind and Water Resistance)
- **Material:** Hard shell (rigid, waterproof) or soft shell (more breathable, some water resistance).
- **Function:** Blocks wind and light precipitation. Should breathe enough to let moisture escape.
- **Examples:** Arc'teryx Beta SL, Patagonia Synchilla, or any jacket rated for 10k+ waterproof rating and taped seams.
Hard shells are warmer and more protective in storms. Soft shells breathe better in exertion. For rucking, a soft shell with high water resistance is often the better choice because you are generating heat and moisture.
## Match Footwear and Traction to the Surface
Snow and ice raise fall risk, and a loaded pack can make balance recovery harder. Use traction designed for the surface, slow down, and turn around when footing remains unsafe.
### Traction Devices
- **Microspikes (ice cleats):** Lightweight metal points that strap over your hiking boot. Best for technical terrain and steep iced slopes. Cost $50 to $100.
- **Nails/Ice Cleats:** Integrated cleats built into boot soles. Excellent for on-trail winter rucking. Cost $150 to $250 per pair of boots.
- **Gaiters/Crampons:** Heavier, more aggressive. Use only if you are climbing steep snow or ice regularly.
Microspikes work well on packed snow and ice and fit over many boots. They can be awkward or unsafe on bare pavement, loose deep snow, and some technical terrain, so follow the manufacturer's surface guidance.
### Boot Requirements
- **Insulation:** Choose insulation for the temperature, activity level, circulation, and length of exposure. Boots commonly list insulation in grams, but there is no universal minimum.
- **Waterproofing:** A waterproof membrane or removable liner can help in wet snow. Gaiters reduce snow entry from above.
- **Sole Grip:** Aggressive tread. Vibram rubber is the gold standard.
- **Examples:** Sorel Caribou, The North Face ThermoBall Utility, [Salomon Quest 5 GORE-TEX](/gear/best-rucking-boots-for-beginners-2026), or Danner Insulated Boots.
Price alone does not determine fit, warmth, traction, or durability. Test winter boots with the socks you plan to wear, leaving enough toe room without heel lift. A [well-fitted pack such as the Mystery Ranch 2 Day Assault](/gear/best-goruck-alternatives) should also leave room for a spare layer and emergency gear.
## Hand, Head, and Face Protection
Exposed skin loses heat rapidly. At wind chill of -20F and below, frostbite can form in under 30 minutes.
| Temperature / Wind Chill | Frostbite Risk | Gear Recommendation |
| --- | --- | --- |
| 32 to 0F | Low | Standard liner gloves or mittens, beanie |
| 0 to -10F | Moderate | Insulated gloves or mittens, face gaiter, beanie with ear coverage |
| -10 to -25F | High | Heavy insulated mittens, full face coverage (balaclava), goggles if windy |
| Below -25F | Severe | Reduce ruck duration and distance, consider canceling |
### Glove and Mitten Strategy
Mittens are warmer than gloves because fingers stay together. But you lose dexterity. Merino wool liner gloves plus a mitten shell (removable) is the compromise - you get warmth and the option to drop the mitten if you need grip.
### Head and Face
- **Beanie:** Merino wool, covers ears fully. Not a baseball cap.
- **Face gaiter or balaclava:** Covers nose and cheeks below 0F. Wool is again the standard.
- **Goggles (optional):** Use only if wind chill is severe or you are moving fast and wind is harsh.
Heads lose 10 percent of your body heat in any conditions. In winter, it is closer to 40 percent because bare skin on a bald or buzzed head bleeds heat aggressively.
## Visibility and Daylight Management
Winter daylight is short. Sunrise at 7 a.m. in March in most of the northern US, sunset at 6 p.m. In December and January, you might have only 9 hours of light.
If you work 9 to 5, that does not leave much daylight for rucking.
Plan your route and timing carefully. Do not assume you will finish before dark. Carry a headlamp or wear a lightweight running light. Wear a reflective vest or strips. Other trail users, cyclists, and vehicles need to see you.
### Lighting Gear
- **Headlamp:** Choose a lamp with glove-friendly controls, enough beam for ice patches, and battery behavior you trust in the cold. Our [headlamp guide for rucking](/gear/best-headlamps-for-rucking) breaks down road, trail, winter, and group options.
- **Reflective vest or strips:** A bright orange or yellow safety vest adds zero weight and makes you visible from a mile away.
- **Wrist or arm lights:** Not as effective as a headlamp but better than nothing.
## Hydration in Cold Weather
This is counterintuitive: you are still dehydrated in winter, but you do not feel thirsty.
Cold air is dry. Your breath carries moisture out of your lungs. You are sweating under layers, but the sensation of cold overrides the signal to drink. Sports science studies consistently find that cold-weather athletes drink 30 to 50 percent less fluid than they need, leading to dehydration that impairs performance and recovery.
Drink on schedule, not thirst. Aim for 6 to 8 ounces every 15 to 20 minutes, same as summer. Use an insulated water bottle or pack your [hydration bladder](/glossary#hydration-bladder) close to your core (inside your ruck) so it does not freeze. If you are rucking longer than 90 minutes, include a sports drink with carbs and electrolytes - the sugar is fast fuel and encourages drinking.
## When to Reduce Weight or Stay Home
Cold weather is not an excuse to skip training, but it is a valid reason to modify.
### Reduce Weight If:
- Wind chill is below -10F. You are taking longer, burning less calories, and staying in the cold longer. Reduce pack weight by 25 to 33 percent.
- Daylight is less than 4 hours of usable daylight remaining. Lighter is faster, and you want to finish before dark.
- You are sick or recovering from illness. Cold stresses your immune system. A light ruck is fine. A heavy ruck while sick can tip you into serious trouble.
### Stay Home If:
- Wind chill is below -20F or ice storm warnings are in effect. The risk is no longer training benefit - it is survival.
- You have not prepared (no microspikes, improper footwear, no reflective gear). Do not improvise winter rucking gear.
- You are exhausted or have poor body awareness that day. Cold weather hides the signs of fatigue and hypothermia.
- Road or trail conditions are so bad that even light hiking is unsafe.
## Warm-Up Importance in Cold
Your muscles are stiffer in cold. Collagen, the structural protein in tendons and ligaments, becomes less elastic. You can injure yourself stretching aggressively in cold.
Warm-up matters more in winter than summer.
Spend the first 10 to 15 minutes moving slowly. Walk at easy pace before you pick up speed. If you are starting a ruck on a treadmill or indoors, fine - move for 10 minutes before heading out. Your core body temperature and muscle pliability need that ramp-up time.
Dynamic stretching (arm circles, leg swings, walking lunges) is better than static stretching in cold. Save static stretching for indoors, post-ruck, when you are warm.
## Keep the Goal Secondary to Safety
Cold-weather practice can make layering, pacing, and route decisions more familiar. It does not justify training in a storm, ignoring warning signs, or treating cold exposure as a test of character.
---
## Frequently asked questions
### Can I get frostbite while rucking if I am moving?
Yes. Movement generates heat, but it does not make your extremities immune to cold. At extreme wind chill (below -20F), exposed skin can frostbite in 30 minutes regardless of exertion. Frostbite typically starts on nose, ears, and fingertips because those areas are furthest from your core. Wear full coverage and keep gloves/mittens on. Check your face and ears frequently in severe cold.
### Should I ruck on a treadmill in winter instead of outside?
[Treadmill rucking](/guides/pavement-vs-trail-vs-treadmill) removes wind, ice, and terrain changes. It is a valid substitute when outdoor conditions are unsafe, and it can be the primary option for anyone who needs a controlled surface or temperature.
### How do I prevent my pack from getting wet in snow?
A good rain cover or a waterproof pack liner (dry bag inside your ruck) keeps your gear dry. Most modern rucks have some weather resistance, but snow that compacts and melts will eventually seep through. For longer winter rucks, invest in a pack cover ($30-50) or pack your gear in a dry bag. Your electronics, documents, and food will thank you.
### Can I ruck on ice without microspikes?
Bare ice creates a high fall risk. Use traction designed for ice or choose another route. Microspikes often cost $60 to $100, but price and ownership do not make a route safe; technique, surface, slope, and product condition still matter.
### How do I know if I am getting hypothermia while rucking?
Warning signs include persistent shivering, confusion, slowed movement, slurred speech, and poor coordination. End the outing, get to shelter, replace wet clothing, and seek emergency help when confusion, slurred speech, loss of coordination, or worsening symptoms are present. Carry a charged phone or other communication device, and tell someone your route and expected return time.
### Is it better to ruck alone or with a buddy in winter?
Buddy system is smarter. Your buddy can spot early signs of hypothermia that you might miss on yourself (confusion, slurred speech, disorientation). They can help if you fall or twist an ankle on ice. Winter rucking with a friend also forces accountability - you are less likely to push too hard or stay out too long if someone is counting on you to stay safe. If you do ruck alone, tell someone exactly where you are going and when you will be back.
---
## Your next step
---
## Related reading
- [Rucking injury prevention](/pillars/rucking-injury-prevention) - comprehensive guide to staying healthy year-round
- [How heavy should your ruck be?](/guides/how-heavy-should-your-ruck-be) - weight recommendations by fitness level and goal
- [Rucking nutrition guide](/guides/rucking-nutrition-guide) - fueling cold weather training and recovery
- [Rucking training programs](/pillars/rucking-training-programs) - progressive training structures including seasonal periodization
- [Best headlamps for rucking](/gear/best-headlamps-for-rucking) - visibility options for early, dark, and winter rucks
- [First 30 days of rucking](/guides/first-30-days-of-rucking) - foundational progression whether you start in winter or summer
────────────────────────────────────────────────────────────────────────────────
URL: https://ruckauthority.com/training/zone-2-training-for-ruckers-building-your-aerobic-base-found
Title: Zone 2 Training for Ruckers: Building Your Aerobic Base Foundation
Description: Build a zone 2 rucking base with heart rate targets, session length, load guidance, progression rules, and aerobic capacity checks.
Published: 2026-04-25
Heavy loads and long distances do not replace easy aerobic work. Zone 2 training uses a sustainable effort to build the aerobic base needed for longer rucks.
*The heart rate targets, adaptation timelines, and training guidelines here draw from exercise physiology research, rucking forum logs, and endurance training practice.*
This guide uses 60-70% of estimated maximum heart rate as a rough Zone 2 range. Zone systems differ, and estimated maximum heart rate can be inaccurate. For ruckers, the practical target is a weighted walk at a sustainable pace where conversation remains comfortable.
## Understanding zone 2 training for rucking
Zone 2 is easy enough to sustain for a relatively long time while still providing an aerobic stimulus. At lower intensities, fat supplies a larger share of energy than it does during hard work. Repeated aerobic training can also increase mitochondrial capacity.
Zone 2 sets an intensity ceiling for easy days. It usually creates less fatigue than threshold or interval work, though a long loaded walk still adds musculoskeletal stress.
## Heart rate targets and monitoring
Calculating your zone 2 heart rate starts with estimating maximum heart rate. The traditional 220-minus-age formula provides a rough starting point, but individual variation is significant. A more accurate approach involves field testing or using the "talk test" as your primary guide.
Under this guide's model, Zone 2 sits between 60-70% of maximum heart rate. For a 40-year-old with an estimated maximum of 180 beats per minute, that is about 108-126 BPM. Treat the numbers as a starting estimate. The talk test helps confirm moderate effort, while a multisport watch such as the [Garmin Instinct 3 Solar](/gear/best-gps-watches-for-rucking) can track heart rate and pace.
During [zone 2 rucking](/weight-loss/zone-2-rucking-guide) sessions, you should be able to maintain steady conversation throughout the entire duration. This means no huffing between words, no building fatigue that gradually makes talking harder, and no urge to speed up or push the pace.
Heart rate monitors help quantify your effort, but don't become enslaved to the numbers. Environmental factors like heat, humidity, caffeine intake, sleep quality, and stress levels all influence heart rate independent of exercise intensity. Use heart rate data as one input among several.
Start with a 15-20 minute easy ruck to adjust pace and load before extending the session. It may take several sessions to find a repeatable combination.
## Load selection for zone 2 rucking
Choose pack weight by measured effort and by how well you tolerate the load. Unloaded walking may reach Zone 2 for some people, while even a light pack may push others above it.
A Zone 2 load may be 5-10 pounds lighter than a normal training load. If 30 pounds pushes heart rate too high, try 20-25 pounds and reassess with the same pace and terrain.
Start conservatively. Begin zone 2 sessions with 15-20 pounds regardless of your normal training load. Spend 2-3 weeks at this weight, focusing on maintaining [conversational pace](/glossary#conversational-pace) rather than hitting specific speeds or distances.
Pack fit becomes critical for longer zone 2 sessions. Poor-fitting packs create pressure points and discomfort that force you to stop or adjust frequently, interrupting the steady-state nature of the training. Invest time in proper pack fitting and adjustment before committing to extended zone 2 sessions.
Sex, menstrual status, medication, sleep, and energy availability can affect heart-rate response. There is not enough evidence to promise women a special cortisol or fat-loss benefit from holding one heart-rate zone.
[Progressive overload](/glossary#progressive-overload) in zone 2 training comes primarily from duration increases rather than load increases. Build up to 60-90 minute sessions before considering heavier packs. The aerobic adaptations you're seeking require time under tension, not maximal resistance.
## Duration and frequency guidelines
There is no universal minimum session that produces Zone 2 benefit. Thirty minutes is a practical target, while beginners can start with 20. Experienced ruckers may extend some sessions to 45-90 minutes when the load remains comfortable.
Begin with 20-30 minute sessions 2-3 times per week. Recheck a standard route after 3-4 weeks rather than assuming a specific improvement.
Progression follows a time-before-intensity model. Extend session duration by 5-10 minutes every other week until you reach 60-75 minutes. Only then consider increasing pack weight or frequency. This approach builds training tolerance while minimizing injury risk.
Experienced ruckers often perform one long zone 2 session (60-90 minutes) and 2-3 shorter sessions (30-45 minutes) per week. This pattern provides sufficient stimulus for adaptation while allowing recovery between sessions.
Zone 2 usually creates less metabolic fatigue than high-intensity work, but the pack still loads the feet, legs, and trunk. Beginners should start every other day. More experienced ruckers can test consecutive easy days only when recovery remains normal.
Useful weekly volume targets:
- Beginners: 90-120 minutes total zone 2 time
- Intermediate: 120-180 minutes total zone 2 time
- Advanced: 180-240 minutes total zone 2 time
These volumes represent time spent in actual zone 2 intensity, not including warm-up, cool-down, or rest periods.
## Programming zone 2 into your training
Zone 2 can support higher-intensity work without replacing it. The sample week uses three easy rucks and one optional hard session; adjust that volume to the rest of the training plan.
A typical week might include:
- Monday: 45-minute zone 2 ruck
- Tuesday: Strength training or rest
- Wednesday: 30-minute zone 2 ruck
- Thursday: High-intensity interval session or heavy carry work
- Friday: Rest
- Saturday: 60-75 minute zone 2 ruck
- Sunday: Active recovery walk or rest
This pattern provides 135-150 minutes of zone 2 work while allowing for strength training and higher-intensity sessions that develop power and anaerobic capacity.
Seasonal periodization affects zone 2 emphasis. During base-building phases (typically fall and early winter for spring event preparation), zone 2 work might comprise 85-90% of total training volume. As competition or testing dates approach, this percentage decreases to maintain aerobic fitness while developing race-specific intensity.
Integration with strength training requires careful scheduling. Zone 2 sessions can be performed on the same day as strength training, but sequence matters. Perform strength work first when possible, as zone 2 training shouldn't compromise strength session quality. Conversely, quality strength training can enhance zone 2 adaptation by improving movement efficiency.
For ruckers training for specific events, zone 2 work should mimic event demands where possible. If your goal event involves sustained hiking with elevation gain, incorporate hills into zone 2 sessions. If it's primarily flat terrain, focus on maintaining zone 2 intensity on similar surfaces.
## Common mistakes and troubleshooting
The most frequent zone 2 training error is intensity drift - starting in zone 2 but gradually pushing harder throughout the session. This happens unconsciously as you warm up and feel stronger. Combat this by checking in with your breathing and conversation ability every 10-15 minutes.
Many ruckers also underestimate how light their zone 2 load should be. Pride and previous training experience create pressure to carry "meaningful" weight, but zone 2 training prioritizes cardiovascular adaptation over load tolerance. Trust the process and use lighter packs than feel challenging.
Environmental factors commonly derail zone 2 sessions. Heat, humidity, altitude, and wind all affect heart rate and [perceived exertion](/glossary#rpe). Adjust your expectations and load selection based on conditions rather than forcing predetermined targets.
Aerobic changes may take several weeks to measure. Compare the same route, pace, and load after 4-6 weeks, and adjust if no measure changes or recovery worsens.
Technology can create more problems than it solves. Heart rate monitor inaccuracies, GPS tracking obsession, and pace anxiety all distract from the primary goal: maintaining conversational pace for extended periods. Use technology as a training aid, not a taskmaster.
Recovery issues often stem from treating zone 2 sessions like workouts rather than training. Zone 2 rucking should leave you feeling energized, not depleted. If you're consistently fatigued after zone 2 sessions, reduce load, duration, or frequency until you find sustainable parameters.
## Measuring progress and adaptation
Zone 2 training adaptations manifest gradually but measurably. The most reliable progress indicator is your ability to maintain faster paces or carry heavier loads while staying conversational. Track pace and load combinations that keep you in zone 2 over time.
Resting heart rate provides another adaptation marker. As aerobic fitness improves, resting heart rate typically decreases, though individual responses vary significantly based on training history, age, and other factors. Take resting measurements upon waking, before getting out of bed, using consistent methodology.
[Heart rate variability](/glossary#hrv) (HRV) can indicate improving recovery capacity, though individual responses vary significantly. Some ruckers see steady HRV improvements with consistent zone 2 training, while others show little change despite clear performance gains. The [COROS PACE 4](/gear/best-gps-watches-for-rucking) tracks overnight HRV for free without a subscription, which is a nice alternative to ecosystems that paywall the data.
Performance benchmarks should focus on sustainable metrics rather than maximal efforts. Test your ability to maintain zone 2 intensity at progressively faster paces or with heavier loads. A typical progression might look like:
Week 1-2: 20 pounds at 18-minute mile pace
Week 3-4: 20 pounds at 17-minute mile pace
Week 5-6: 25 pounds at 17-minute mile pace
Week 7-8: 25 pounds at 16-minute mile pace
Recovery between sessions also improves with zone 2 adaptation. Early in your training, you might need full rest days between zone 2 sessions. As fitness improves, you'll recover faster and potentially perform zone 2 work on consecutive days without fatigue accumulation.
Blood lactate testing provides the gold standard for zone 2 verification, but it's impractical for most recreational ruckers. Laboratory testing can establish precise zone boundaries, but the talk test correlates well enough for training purposes.
Body-composition change depends on energy balance, not Zone 2 training alone. A higher share of fat use during an easy session does not guarantee greater long-term fat loss.
## Frequently Asked Questions
## INJURIES HUB (10 articles)
────────────────────────────────────────────────────────────────────────────────
URL: https://ruckauthority.com/injuries/rucking-foot-care-blister-prevention
Title: Rucking Foot Care: How to Prevent Blisters, Hot Spots, and Sore Feet
Description: Blisters are the #1 reason people quit rucking early. Here's the complete foot care playbook - socks, taping, lacing, and recovery.
Published: 2026-03-27 / Updated: 2026-08-24
## The four-item foot-care kit
The simplest blister-prevention system is a kit you keep packed and do not have to rebuild before every ruck. These four items cover moisture, friction, hot spots, and stable footwear.
| Priority | Item | Why this one |
| --- | --- | --- |
| 1 | [Darn Tough Light Hiker Micro Crew](/gear/best-rucking-socks-blister-prevention) socks ($25-50) | Merino and covered by Darn Tough's guarantee. A durable alternative to replacing lower-cost socks repeatedly. |
| 2 | Leukotape P Athletic Tape | Gold standard for pre-taping hot spots. Lipman et al. (2014) RCT showed paper tape reduced blister incidence in distance walking. |
| 3 | Body Glide Original Anti-Chafe Balm (under $25) | Apply BEFORE the ruck, not after. Reduces friction at the sock-skin interface. |
| 4 | A stable rucking shoe (e.g., [Salomon XA Pro 3D V9 GTX](/gear/best-rucking-shoes-by-terrain), $150-300) | Aggressive Contagrip outsole, GORE-TEX waterproofing, and a stable platform under load. |
## The Blister Problem (And Why It's Preventable)
Blisters are the most common complaint we hear from new ruckers - and the #1 reason people quit before they finish their first month. A painful blister on mile 3 of a 5-mile ruck can turn a fun outing into absolute misery. The frustrating part? They're almost entirely preventable.
The good news: you don't need luck or tougher skin. You need a system. We researched foot care strategies across hundreds of community [rucking](/glossary#rucking) reports, event-ruck packing lists, and sports medicine sources, and the strategies that work share a common theme - they eliminate the conditions that create blisters in the first place. This guide breaks down exactly what those conditions are, and how to defend against all of them.
Your feet are about to carry 20-50+ pounds of gear for hours. They deserve more than hope. They deserve a plan.
## Why Rucking Creates Blisters (The Friction + Moisture + Heat Triangle)
Here's the blister formation mechanics: a blister forms when the outermost layer of skin (the epidermis) separates from the layer beneath it (the dermis), creating a fluid-filled pocket. This happens when three conditions align: **friction**, **moisture**, and **heat**. Eliminate any one and you're safe.
Rucking is a blister factory because it creates all three simultaneously.
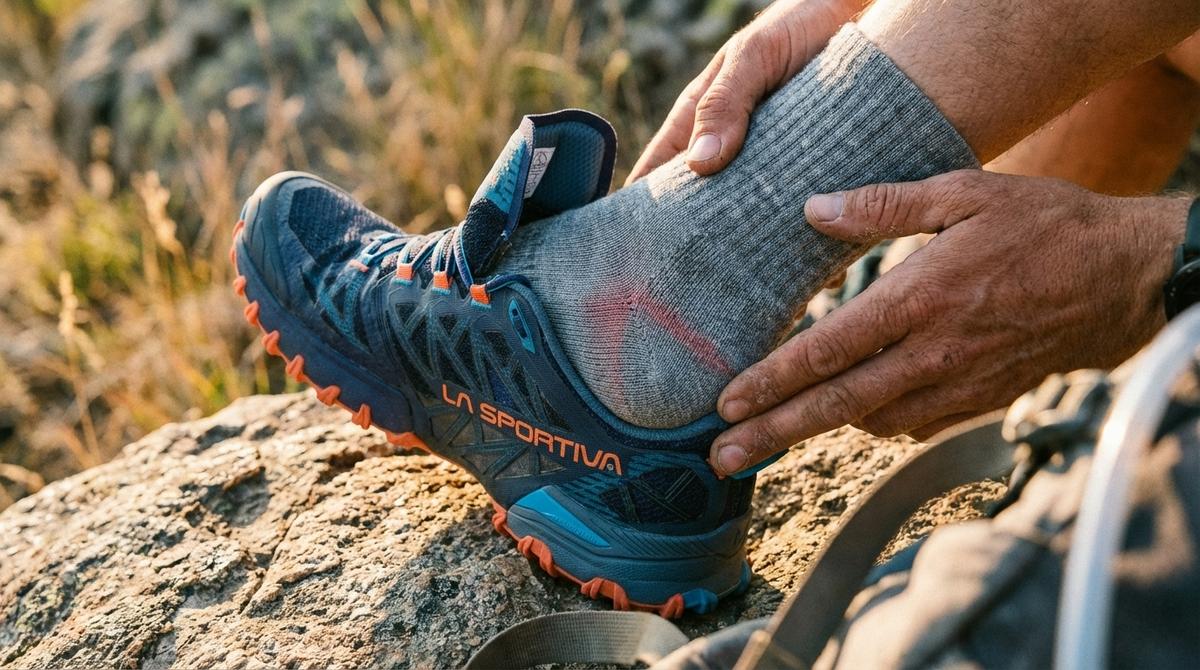
**Friction** comes from the combination of weight (your body + the ruck) creating downward pressure, and micro-movements of your foot sliding inside the shoe. When you're carrying 35 pounds, that friction force is magnified. Your foot doesn't just land; it *compresses* into the shoe with each step, then tries to adjust inside the shoe to find stability - that's where shear forces come in. Shear is particularly brutal because it's not just pressure; it's pressure combined with sideways movement.
**Moisture** is sweat. Your feet sweat more than almost any other body part - they have the highest concentration of sweat glands. When a 5-mile ruck happens on a humid day or in a shoe that doesn't breathe, your foot becomes essentially a moisture chamber. Wet skin is weaker skin. Wet skin also loses its structural integrity, becoming more susceptible to tearing under pressure.
**Heat** accelerates all of the above. Friction + moisture + heat = blister formation at 2-3x the speed of any one factor alone.
Rucking *specifically* amplifies this risk compared to regular hiking or walking because:
- The load is distributed across your entire body, with a significant portion borne by your feet
- Rucking typically happens at a faster pace than casual hiking, increasing friction frequency
- You're often covering longer distances without elevation change (which means constant horizontal friction, not [vertical](/gear/best-gps-watches-for-rucking) climbing)
The solution isn't to accept blisters as a cost of entry. It's to break the friction + moisture + heat triangle at every possible point.
## The Sock System: Your First Line of Defense
If there's one thing that separates ruckers who get blisters from those who don't, it's socks. Socks aren't an afterthought. Socks *are* your first line of defense.
**The cotton myth:** Cotton is the worst possible choice for rucking. Cotton absorbs water, holds moisture against your skin, and loses all structural integrity when wet. If you wear cotton, you're essentially guaranteed blisters on anything longer than 3 miles. Stop wearing cotton socks immediately.
**Your options:**
- **Merino wool** - the gold standard. Merino regulates temperature, wicks moisture, resists odor, and maintains cushioning even when wet. It feels soft (not itchy like traditional wool). Merino socks cost $15-25 per pair but last 2-3 years of regular use.
- **Synthetic blends** (polyester, acrylic, nylon) - excellent second choice if cost is a concern. Look for brands that blend synthetics with a small percentage of merino (70/30 synthetic-merino splits are common). These wick well and dry faster than 100% merino.
- **Bamboo viscose blends** - decent, though not as durable as merino for high-friction activities.
**Sock thickness:** Merino comes in ultralight, lightweight, midweight, and heavyweight. For rucking:
- Ultralight merino: Good for shorter rucks (under 5 miles), minimal cushioning
- Lightweight merino: The versatile choice. Works for most rucking distances.
- Midweight merino: Best for longer rucks (10+ miles) and if you have naturally thin soles
- Heavyweight: Overkill for most ruckers, though some prefer the extra padding
Start with lightweight. You want enough cushioning to absorb impact without creating so much bulk that your shoe fit changes.
**Brands to consider:** What matters is fiber content - merino wool or synthetic blends, 50%+ of the blend. Our recommendation:
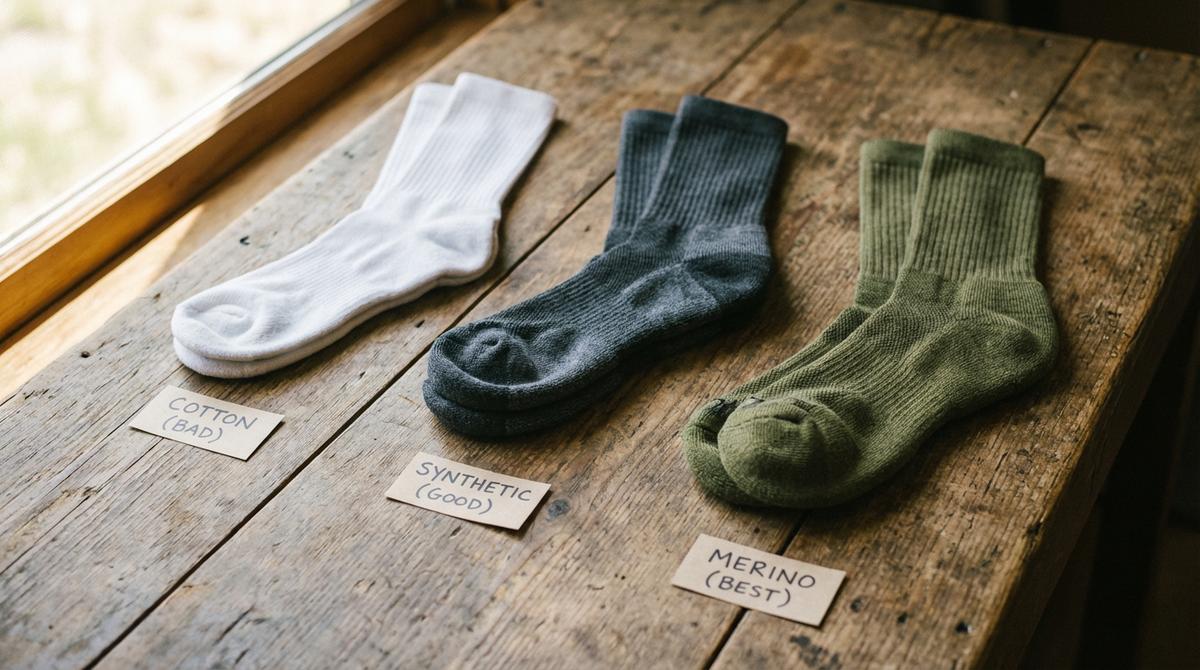
## Footwear Fit: How Rucking Changes the Rules
You think you know how to fit shoes. You probably do - for regular walking or running. Rucking changes the equation because your feet aren't static inside the shoe. Under load, your feet swell (sometimes a full half-size larger), they slide forward in the shoe during downhills, and they need a wider toe box to accommodate natural spreading under pressure.
**The break-in protocol:**
1. Wear new rucking shoes for regular walking first - 2-3 weeks of casual wear
2. Then: one short ruck (2-3 miles) to assess fit under load
3. Then: gradual progression to longer distances
4. Don't wear brand-new shoes on a 10-mile ruck. This is the #1 blister mistake we see.
**Fit rules specific to rucking:**
*Heel lock:* Your heel should not slip. When you're carrying weight, any heel movement creates friction with each step. Lace snug at the ankle. A good test: with the shoe on but unlaced, you should barely be able to lift your heel out. Then lace it snugly - not painfully, but with noticeable tension.
*Toe box width:* You need room for your toes to splay naturally under load. The "thumb width rule": when laced and wearing rucking socks, you should be able to barely fit your thumb between your longest toe and the shoe's end. Not half a thumb - one full thumb. Your toes will swell on longer rucks.
*Midfoot pressure:* The arch shouldn't feel like it's being crushed, but it should feel supported. You're looking for snug, not painful.
Evidence suggests that shoes fitted for regular walking are often too tight in the toe box for rucking. If you're between sizes, go up half a size for rucking shoes. Your toes will thank you.
For detailed shoe selection guidance including options for different terrain types and foot shapes, try the [Salomon XA Pro 3D](/gear/best-rucking-shoes-by-terrain) or see our full [best rucking shoes by terrain](/gear/best-rucking-shoes-by-terrain) guide. If you're just starting out and want a complete beginner setup with tested shoes and gear, check out our [budget rucking starter kit](/gear/budget-rucking-starter-kit).
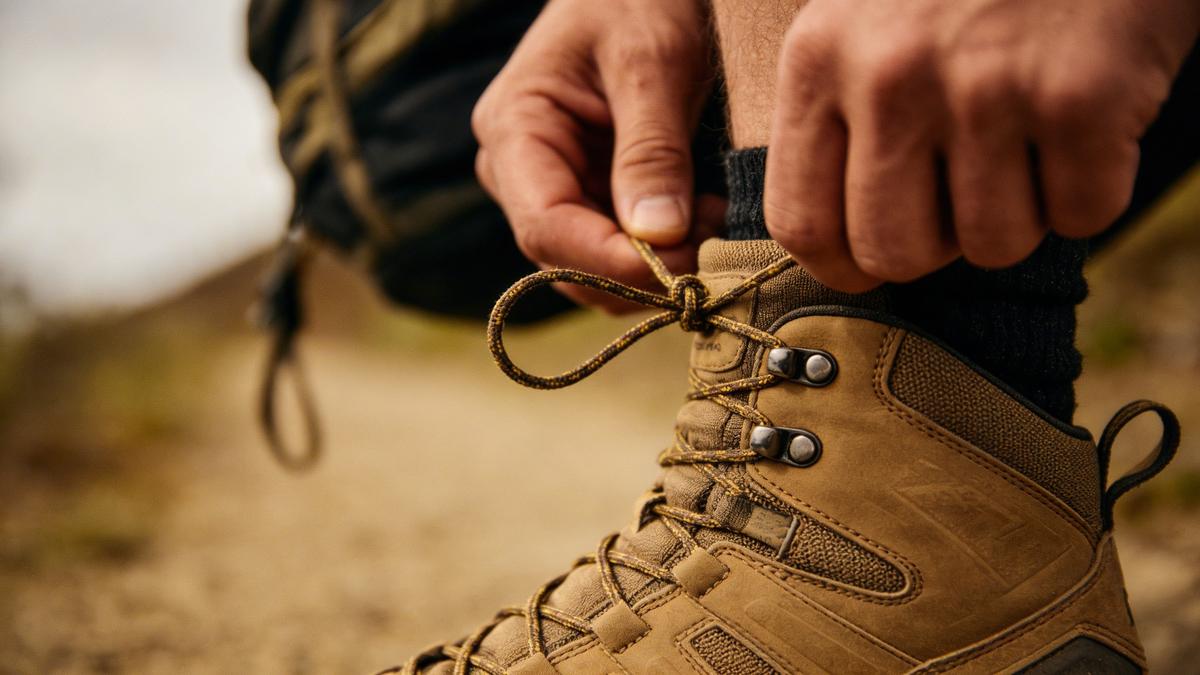
## Pre-Taping and Hot Spot Prevention: Stop Blisters Before They Start
A blister doesn't appear out of nowhere on mile 5. It starts as a "hot spot" - a red, tender area where friction is building. The magic of pre-taping is this: if you tape a hot spot *before* it becomes a blister, you'll never develop the blister.
**Leukotape P is the gold standard.** It's what ultradistance hikers, the military, and professional athletes use. It sticks like crazy, it moves with your foot, and it doesn't peel off mid-ruck. A roll costs $6-8 and lasts months. It's the best $8 you'll spend on blister prevention.
**Common hot spot locations:**
- Inside heel (where shoe rubs during push-off)
- Heel-to-ball transition (top of foot, around your arch)
- Ball of foot (under the metatarsal heads - those bumpy areas under your toes)
- Pinky toe side (outer edge of your foot)
- Between toes (if your toes are crowded)
**The pre-taping strategy:**
1. Before you leave your house, identify where *you personally* get hot spots. (Track this over 2-3 rucks if you're new.)
2. Clean and dry those areas completely.
3. Cut a piece of Leukotape and round the corners (prevents peeling).
4. Apply directly to skin, press firmly for 30 seconds.
5. Wear socks over the tape.
**Alternative products:**
- Moleskin: Cheaper than Leukotape, but less durable and peels off more easily. Use if you can't find Leukotape.
- Body Glide Original: Reduces friction proactively across your entire foot or at known blister hotspots. Apply before each ruck on areas prone to chafing. It's cheaper than tape and works best as a prevention layer - the gold standard for ruckers who want to skip blisters entirely.
## Lacing Techniques: Fine-Tuning Your Shoe Performance
You probably lace your shoes the same way everyone does. Two techniques can dramatically reduce heel slip and pressure points:
**Heel lock lacing** (if you have heel slip issues):
1. Lace your shoe normally through the toe box
2. At the top two eyelets, cross the laces as usual
3. Before tightening, thread each lace through the loop created by the lace on the opposite side (this creates a small "lock" at the heel)
4. Pull snug and tie
This keeps your heel anchored without restricting blood flow. Takes 10 seconds to learn.
**Window lacing** (if you have pressure points on top of your foot):
Instead of crossing the laces at every eyelet, skip certain eyelets to create a "window" where that section of shoe isn't pulling down. This reduces pressure on the ball of your foot or arch if that's where you get hot spots.
Most ruckers don't need anything fancy - standard lacing with a snug heel lock is enough. Only experiment if you're dealing with specific hot spots that tape isn't solving. If lacing techniques alone don't solve your issues, the shoe itself may not be the right fit - try the [Salomon XA Pro 3D](/gear/best-rucking-shoes-by-terrain) or browse our [best rucking shoes by terrain](/gear/best-rucking-shoes-by-terrain) guide to find a better match for your foot shape.
## Mid-Ruck Foot Management: Addressing Problems Before They Escalate
Even with perfect socks and taping, you might feel the beginnings of a hot spot mid-ruck. The key question: do you stop and address it, or push through?
**Stop and address it.** This isn't toughness. This is efficiency. Five minutes addressing a hot spot now beats an hour-long blister that ruins the rest of your ruck.
**What to do if you feel a hot spot forming:**
1. Stop and find shade or a safe spot to sit
2. Remove your shoe and sock
3. Assess: is the skin red and tender, or is there actual fluid (early blister)?
4. If it's just red: clean the area, apply Leukotape, and continue
5. If there's fluid: apply Leukotape first (don't lance it yet unless it's about to burst), replace your socks, and monitor
6. If the blister is about to burst and is causing pain with every step, you can lance it mid-ruck (see the treatment section below)
Time spent preventing blisters now saves you from 2-3 days of painful walking later.
## Treatment: If You Do Get a Blister
Despite your best efforts, you might develop a blister. Here's what to do.
**Should you drain it?** It depends on size and pain level:
- Small blisters (smaller than a pencil eraser) with no pain: leave it alone. Let it reabsorb.
- Medium blisters (larger than a pencil eraser) with pain: drain it to reduce pressure and pain.
- Large, painful blisters: definitely drain.
**How to drain safely:**
1. Wash your hands
2. Clean the blister area with soap and water
3. Sterilize a needle (hold over a flame for a few seconds, or use alcohol wipe)
4. Poke a small hole at the edge of the blister (not the center)
5. Gently press fluid out (don't squeeze hard)
6. DO NOT remove the skin roof of the blister - that skin protects the wound
7. Apply antibiotic ointment (Neosporin) and a sterile bandage
8. Change the bandage daily and keep it clean
**Dressing options:**
- Hydrocolloid bandages (the fancy blister bandages): These absorb fluid and speed healing. They're pricey ($1-2 per bandage) but worth it for serious blisters.
- Gauze + antibiotic ointment: The classic approach. Change daily.
- Leukotape over the blister: Works, but less comfortable than a proper dressing.
## Post-Ruck Foot Recovery: Setting Up for Your Next Session
What you do in the 2 hours after a ruck sets the stage for how your feet feel for the next 3 days.
**Immediate post-ruck (first 30 minutes):**
1. Remove your shoes and socks immediately
2. Wash your feet with soap and water (gets rid of salt and sweat) - also wash off any remaining Body Glide Original to prevent buildup
3. Dry completely between the toes (moisture = infection risk)
4. If you have any blisters, apply antibiotic ointment and a fresh bandage
**Within 1-2 hours:**
- Elevate your feet above heart level for 15-20 minutes (reduces swelling)
- Optional: ice your feet for 10-15 minutes if they're sore (not necessary, but feels good)
**Evening routine:**
- Soak your feet in warm Epsom salt water for 15-20 minutes (magnesium sulfate reduces inflammation and softens calluses)
- Gently towel dry
- Check for any new blisters or issues
- Trim toenails straight across, not curved (curved trimming can cause ingrown nails)
- Leave toenail edges slightly long (trim short causes problems)
**Sock and gear care:**
- Wash your rucking socks after every ruck (don't let sweat dry in the fabric)
- Air-dry your shoes (don't use heat - it can damage the glue)
- If your shoes smell, sprinkle baking soda inside overnight
## Common Mistakes That Lead to Blisters
You now know the system. Here are the traps to avoid:
**Mistake #1: Wearing new shoes on a long ruck.** Your feet need 2-3 weeks to adapt to new footwear. The shoe materials soften, the insole compresses to your foot shape, and your feet adjust to the new geometry. Do this gradually.
**Mistake #2: Cotton socks.** If you're using cotton, you're pre-blister. Switch to merino or synthetic today. This single change solves blisters for about 60% of people.
**Mistake #3: Ignoring hot spots.** A hot spot is your early warning system. By the time you have a blister, it's too late. Tape hot spots immediately.
**Mistake #4: Skipping the break-in protocol.** Just because you "know" shoe sizing doesn't mean you know your rucking shoe size. Your feet swell under load. Test under load before committing to a long ruck.
**Mistake #5: Wrong sock thickness.** Lightweight merino is usually the sweet spot. If you wear ultralight socks and your feet hurt, move up a thickness. If you wear heavyweight and your feet feel cramped, move down.
**Mistake #6: Lacing too loose.** Heel slip = friction = blisters. If you're not sure your shoe is snug enough, it probably isn't.
**Mistake #7: Cutting toenails too short.** Short toenails can curl into the nail bed or create sharp edges that dig into adjacent toes. Trim them straight across, just at the edge of your toe. Slightly long is better than slightly short.
**Mistake #8: Not drying feet immediately after your ruck.** Wet skin is weak skin. Dry and air-dry your feet immediately post-ruck.
## Preventing blisters
Blisters aren't inevitable. They're not a rite of passage. They're a sign that one or more of these systems isn't working: your socks, your shoe fit, your taping, or your foot hygiene.
You now have all the pieces: merino wool socks, proper shoe fit, Leukotape for hot spots, lacing techniques, and a post-ruck recovery routine. Start with socks (the biggest impact) and build from there.
For longer distances, test the full sock, shoe, lacing, and taping setup during shorter rucks first.
---
## Related Articles
- [Best Rucking Socks: Blister Prevention Under Load](/gear/best-rucking-socks-blister-prevention) - the seven socks that actually work at 30+ lb, plus the two-sock system for events
- [Best Rucking Shoes by Terrain](/gear/best-rucking-shoes-by-terrain) - footwear selection guide; try the [Salomon XA Pro 3D](/gear/best-rucking-shoes-by-terrain) or [Darn Tough socks](/gear/best-rucking-socks-blister-prevention)
- [Best Shoes for Rucking on Pavement](/gear/best-shoes-for-rucking-on-pavement) - max-cushion and stability picks for concrete miles
- [Rucking Plantar Fasciitis](/injuries/rucking-plantar-fasciitis) - prevention and treatment for heel and arch pain
- [Rucking Prehab Routine](/injuries/rucking-prehab-routine) - strengthen feet and ankles before they get injured
- [Rucking Injury Prevention Pillar](/pillars/rucking-injury-prevention) - full injury prevention framework
- Hiking unloaded instead? Our sister site Kit Authority covers [blister prevention for hikers](https://kitauthority.com/hike/how-to-prevent-blisters-while-hiking?utm_source=ruckauthority&utm_medium=crosslink) - same physiology, no pack weight
- [Rucking Form Guide](/guides/rucking-form-guide) - correct movement patterns reduce foot stress
## Frequently Asked Questions
────────────────────────────────────────────────────────────────────────────────
URL: https://ruckauthority.com/injuries/rucking-hip-flexor-tightness-why-it-happens-and-how-to-fix
Title: Hip Flexor Stiffness After Rucking: What to Try and When to Get Help
Description: Hip stiffness after rucking can have several causes. Learn how load, gait, strength, and mobility may contribute, plus pain-free options and signs that need assessment.
Published: 2026-05-24 / Updated: 2026-08-31
Some ruckers feel stiffness or discomfort at the front of the hip after loaded walking. That feeling is not a diagnosis. It can reflect fatigue, a change in stride or posture, limited hip motion, training load, or a problem unrelated to the hip-flexor muscles.
This guide explains the anatomy and offers conservative movement options. It cannot identify the cause of persistent hip or groin pain.
**The short answer:**
- A stiff feeling does not prove that a hip-flexor muscle is physically shortened.
- Load, distance, hills, pace, gait, strength, and time spent sitting may all affect symptoms.
- Gentle mobility or strength work may help when it is comfortable, but neither is a universal fix.
- Reduce the aggravating part of the ruck and seek an assessment when pain persists, limits daily activity, follows a fall, or comes with weakness, numbness, swelling, fever, locking, or trouble bearing weight.
## What are the hip flexors and why do they matter?
Your hip flexors are a group of muscles that help bring the thigh toward the trunk. The iliopsoas, rectus femoris, and sartorius are among the muscles involved. They have different attachment points, but each crosses the front of the hip and contributes to hip flexion.
During rucking, these muscles help advance the leg with each step. A pack can also change trunk angle, pelvic motion, stride, and muscle demand. The response varies with load placement, body shape, pace, grade, pack fit, and training history.
## How rucking may contribute to hip stiffness
Several parts of loaded walking may contribute to a stiff or tired feeling at the front of the hip. None of them can be confirmed from symptoms alone.
### Forward pack loading effects
A rear-loaded pack changes the position of the combined body-and-pack mass. People may respond with changes in trunk lean, pelvic position, stride, or all three. Those changes can alter hip demand, but they do not show that the hip flexors have shortened or that one posture caused the symptoms.
### Repetitive hip flexion
Every step requires hip flexion. Added load, longer distance, hills, or a faster pace can increase the work of walking. Fatigue may change how the hip feels or moves, but a short-term stiff feeling is not proof of tissue shortening.
### Compensatory patterns
Fatigue in the hip, glutes, trunk, or lower back can change movement during a ruck. It is not possible to infer that the glutes are "shut off," the core is failing, or the hip flexors are dominant from stiffness alone.
Knapik and colleagues' 2004 review in *Military Medicine* describes postural and gait changes during load carriage. It does not establish a single mechanism for hip-flexor stiffness or prove that those changes cause chronic shortening.
## Symptoms that may involve the front of the hip
The following observations can help describe the problem, but they do not identify its cause:
**During or after rucking:** A pulling or tired feeling at the front of the hip, a shorter stride, or discomfort when the leg moves behind the body
**Daily activities:** Stiffness after sitting, discomfort on stairs, or reduced comfort while walking
**Movement:** Less comfortable hip extension or extra lower-back arching during a lunge or step
Pain deep in the groin, clicking or locking, symptoms after a fall, or pain that changes the way you walk deserves more caution than ordinary post-exercise stiffness.
## Why "tight" does not identify the cause
People use "tight" to describe several sensations: stiffness, fatigue, guarding, pain, or limited motion. Stretching may feel useful for one person and irritate another. Strength work may help when reduced capacity is part of the problem, but a stiff feeling does not prove weakness either.
A clinician can compare range of motion, strength, gait, symptoms, and the rest of the hip and lower back. A single home test cannot make that distinction.
### Simple movement check
The modified Thomas test is used in clinical settings to examine hip motion, but positioning and interpretation matter. At home, use the setup only as a gentle movement check. Do not use it to diagnose a short or weak muscle.
1. Sit close enough to the edge for one thigh to move toward the floor without feeling unstable.
2. Lower onto your back and bring one knee toward your chest without forcing it.
3. Let the other leg relax toward the floor. Stop if the hip, groin, or back pinches or hurts.
4. Compare sides for comfort and range. A difference is useful information to share with a clinician, not a diagnosis.
Do not ask a partner to force the leg or pelvis into position. Stop if you feel unstable or have sharp, pinching, radiating, or increasing pain. A physical therapist or other qualified clinician can assess persistent limits and consider other sources of hip or groin pain.
## Mobility protocols for tight hip flexors
If a gentle stretch feels comfortable and does not worsen symptoms later, it can be one option. Do not force range or assume that more stretching will solve the cause.
### Couch stretch progression
The couch stretch places the hip and knee in a demanding position. Start with a half-kneeling version if the full setup strains the knee, hip, or back.
**Setup:**
- Place your back foot on a couch, chair, or wall; your shin should rest flat against the vertical surface, with the foot relaxed
- Step your front foot forward into a half-kneeling lunge position with the front knee stacked over the front ankle
- Use a small pelvic tuck and light glute tension if that makes the position more comfortable; do not force either cue
- Keep your torso upright. If you can't stay upright without your lower back arching, place your hands on the front thigh for support and start there
**Progression:**
- Start with 30-60 seconds per side, only as deep as you can hold without losing the tucked-tailbone position
- Push your hips forward gently. If your lower back arches, back off until you're tucked again
- Hold only as long as the position remains comfortable; longer is not necessarily better
- Stop immediately if you feel anything sharp in the front of the hip or anywhere in the spine
### Dynamic hip flexor stretches
Dynamic movements are one warm-up option. There is no need to use them when they increase symptoms.
**Walking high knees:**
- Lift each knee toward your chest while walking forward
- Focus on the lengthening sensation in the opposite hip flexor
- 10-15 steps per leg
**Reverse lunges with reach:**
- Step backward into a lunge position
- Reach your arms overhead on the same side as your back leg
- Feel the stretch along the front of your hip and torso
- 8-10 repetitions per side
### Post-ruck restoration
After rucking, a gentle lunge can be used if it feels comfortable. It may change the short-term feeling of stiffness, but it does not prove or permanently restore muscle length.
**Low lunge hold:**
- From a kneeling position, step one foot forward
- Sink your hips forward and down
- Hold for a comfortable period rather than forcing a set time
- Focus on breathing and allowing the stretch to develop gradually
## Strengthening protocols for hip flexor balance
Strength work is another option when it is pain-free. It can build capacity around the hip, but it does not confirm why the hip felt stiff or guarantee that symptoms will resolve.
### Eccentric hip flexor strengthening
Eccentric exercise loads a muscle while it lengthens. Start with a small range and stop before the lower back arches or symptoms rise.
**Reverse Nordic curls (advanced - see regression first):**
- Kneel on a padded surface (folded mat or pillow under the knees) with hips fully extended and torso upright
- Keeping a straight line from knees to shoulders (no bending at the hip), slowly lean backward, controlling the descent over 3-5 seconds with your quads and hip flexors
- Only go as far as you can return from under control
- Drive back up to vertical
- Start with a few controlled repetitions rather than forcing a target
**Regression - Assisted reverse Nordic (start here):**
- Set up the same way, with a sturdy chair or wall within easy reach
- Lean back only as far as you can reach the chair/wall with your hands, then push off to return to upright
- Use the support for the return rather than pushing through a range you cannot control
- Stay with the supported version if it remains the more comfortable choice
### Hip flexor isometric holds
Isometric exercises create muscle force without much joint movement. They can be tried separately from the eccentric work; there is no required pairing or schedule.
## Adjusting pack fit and rucking posture
Pack fit and posture may affect comfort, but neither should be assumed to be the root cause of hip or groin symptoms.
### Pack positioning
Pack position can change how the load feels:
- **Load placement:** Keep dense items close to the back panel so the load does not swing
- **Belt usage:** A [hip belt](/glossary#hip-belt) may transfer some load to the pelvis when the pack is designed for it and the belt fits well
- **[Sternum strap](/glossary#sternum-strap):** Use it to keep the shoulder straps in a comfortable position, not to force the chest or shoulders into one posture
### Postural awareness
Use a [rucking posture](/guides/rucking-form-guide) that feels stable and lets you take a normal stride:
- **Trunk:** Avoid bracing as hard as possible; use enough tension to control the pack
- **Hip position:** Do not force a pelvic tuck if it causes hip or back discomfort
- **Chest position:** Stay tall enough to breathe and look ahead without exaggerating the lower-back arch
A hip belt is optional. Try it if the pack supports load transfer and it improves comfort. It does not prevent hip symptoms or replace a reduction in load when the current ruck is aggravating pain.
### Movement breaks during long rucks
On a longer ruck, a short break can show whether fatigue or duration is contributing. There is no proven interval that prevents hip stiffness.
**Optional movement break:**
- Remove or loosen the pack for a moment
- Walk a few unloaded steps and change position gently
- Use small hip circles or a comfortable lunge only if they reduce stiffness
- Skip standing back bends if they cause hip or back pain
## Complementary strengthening for hip flexor health
Glute and trunk exercises can build general capacity for loaded walking. They are options, not proof that a specific muscle imbalance caused the symptoms.
### Glute activation and strengthening
Glute bridges and clamshells train the hip without adding pack load. Use a comfortable range and stop if the front of the hip pinches.
### Core stability work
Planks and bird dogs train trunk control. Their effect on hip symptoms varies.
## When to seek professional help
Seek medical assessment for symptoms that do not behave like ordinary post-exercise stiffness, including:
- Pain that persists, worsens, changes your gait, or limits sleep or daily activity
- Pain after a fall or sudden injury, or trouble bearing weight
- Deep groin pain, catching, or locking
- Numbness or tingling in your legs or feet
- New weakness, marked swelling, redness, warmth, or fever
A physical therapist, sports-medicine clinician, or other qualified professional can assess the hip, lower back, gait, and training load rather than treating the word "tightness" as a diagnosis.
Persistent or severe pain should be evaluated by a healthcare professional. This guide is educational and does not replace medical advice.
## Prevention strategies for long-term hip health
No warm-up, stretch, or pack setup is proven to prevent every episode of hip stiffness. These are optional ways to prepare, cool down, and build capacity.
Reduce or change any exercise that makes the hip worse during the session or afterward.
## Frequently asked questions
────────────────────────────────────────────────────────────────────────────────
URL: https://ruckauthority.com/injuries/rucking-knee-pain
Title: Is Rucking Bad for Your Knees? Knee Pain Causes + How to Fix It
Description: Is rucking bad for your knees? Added load raises joint forces, but pain is not inevitable. Use this evidence-linked guide to reduce the aggravating dose, recognize common patterns, and rebuild carefully.
Published: 2026-03-10 / Updated: 2026-08-26
## Is rucking bad for your knees?
Short answer: rucking is not automatically bad for your knees, but no activity is universally safe for every knee. The useful question is whether the load, distance, pace, and terrain fit your current capacity.
[Rucking](/glossary#rucking) uses a walking gait, but the added weight is not mechanically neutral. In a military load-carriage study, [Birrell, Hooper, and Haslam found that ground-reaction-force measures rose proportionally as load increased](https://pubmed.ncbi.nlm.nih.gov/17337189/). That does not prove that recreational rucking causes knee injury; it does explain why reducing the load is a rational first response when symptoms appear.
Training-load jumps and movement capacity are plausible parts of the picture, but knee pain rarely has one universal cause. A [systematic review of running-related injuries](https://pubmed.ncbi.nlm.nih.gov/30534459/) found only limited evidence linking sudden load changes with injury, and it did not validate a universal 10% threshold. Rucking-specific evidence is thinner, so this guide uses conservative adjustments rather than pretending to diagnose a single cause.
Muscles and tendons adapt to progressive loading, which is why the answer is not always permanent avoidance. For patellar tendon pain, a randomized trial found better 24-week outcomes with [progressive tendon-loading exercise than with eccentric exercise alone](https://pubmed.ncbi.nlm.nih.gov/33219115/). That trial studied diagnosed patellar tendinopathy, not rucking, so its direct lesson is progressive, tolerable loading—not a promise that every sore knee should keep training.
One important caveat: if you have a pre-existing knee condition like a torn meniscus, severe arthritis, or a history of ACL injury, you need medical evaluation before starting a rucking program. Rucking can be rehabilitative for many conditions, but it's not universal. Talk to a sports medicine doctor first if you're uncertain.
---
## Identify your knee pain type
Before you adjust training, describe where the pain is and what provokes it. Location can narrow the possibilities, but [patellofemoral-pain guidance calls for history and physical examination](https://pubmed.ncbi.nlm.nih.gov/31773479/); it does not support diagnosing one weak muscle from a pain map alone.
| Pain location | What it may feel like | Possible pattern—not a diagnosis | Conservative first move |
|---|---|---|---|
| Front / around the kneecap | Dull ache, often worse on stairs, squats, or downhill | Patellofemoral pain is one possibility | Reduce the provoking load; use combined hip-and-knee exercise if appropriate |
| Outside of the knee | Burning or rubbing on the outer knee | Lateral-knee or IT-band-related pain is one possibility | Reduce provoking distance and hills; assess hip control and gait |
| Below the kneecap | Local tenderness that worsens with loading | Patellar tendon pain is one possibility | Reduce the provoking dose; use progressive tendon loading if the pattern is confirmed |
| Inside of the knee | Pain along the inner joint line | Several joint, tendon, or movement causes are possible | Avoid self-diagnosing from location; seek assessment if it persists, locks, or swells |
### Front of knee (patellofemoral)
This is the most common [rucking knee pain](/pillars/rucking-injury-prevention). You'll feel it under or around the kneecap, usually a dull ache that gets worse with stairs, downhill, or long rucks. The pain might feel like it's coming from directly behind the kneecap or along the inside edge of it.
Patellofemoral pain is not simply a weak-VMO problem. A current review describes a mix of joint stress, kinetic-chain factors, training errors, behavior, and pain sensitivity, with treatment individualized to the person ([Sisk and Fredericson, 2019](https://pubmed.ncbi.nlm.nih.gov/31773479/)). Combined hip- and knee-focused exercise has better support than trying to isolate one small portion of the quadriceps.
### Outside of knee (IT band syndrome)
You'll feel a burning or rubbing sensation on the outside of the knee, usually developing gradually over the course of a ruck or appearing the day after. Some people describe it as tightness on the lateral knee.
The IT band is a thick fascial structure, so treating it as a rope that can simply be stretched longer is an oversimplification. Hip strength, gait, terrain, and a rapid distance increase may all matter, but outside-knee pain does not prove glute weakness. If reducing the provoking dose does not settle it, an examination is more useful than guessing at one muscle.
### Below the kneecap (patellar tendinopathy)
Pain in the tendon that connects your kneecap to your tibia (shinbone) - you'll feel it directly below the kneecap, often aching and tender to the touch. It typically gets worse going downhill and might feel better once you warm up. This is the classic overuse pattern: your quads and patellar tendon are being loaded faster than they can adapt.
Load matters for tendon symptoms, but the diagnosis should not come from location alone. A clinical review supports [load management combined with progressive tendon loading](https://pubmed.ncbi.nlm.nih.gov/34623447/) for patellar tendinopathy. That evidence supports a graded approach after the pattern is identified; it does not prove that every below-kneecap ache is tendinopathy.
### Inside of knee (medial)
Pain along the inside of the knee joint or medial joint line has several possible sources. Foot motion and hip control may contribute, but pain here can also involve structures that cannot be distinguished with a web article.
Footwear fit and a temporary prefabricated foot orthosis can be reasonable comfort experiments for some patellofemoral presentations; the [2018 consensus](https://pubmed.ncbi.nlm.nih.gov/29925502/) treats orthoses as an individually selected supporting intervention, not a universal fix. The insole below is therefore a fit option, not a diagnosis or treatment guarantee.
---
## The fix: a 3-phase approach
This is a conservative return-to-ruck framework, not a validated treatment protocol. Its evidence-supported parts are load management and progressive exercise for specific overuse conditions; the exact percentages, exercise menu, and timeline are Ruck Authority's practical translation for recreational ruckers.
### Phase 1: Reduce the aggravating load (Days 1-7)
The first decision is whether you can still walk with a normal gait and without escalating symptoms. Do not use a deload to push through locking, giving way, major swelling, significant weakness, or rapidly worsening pain.
If ordinary walking is comfortable, use a deload as a starting experiment: reduce ruck weight by roughly 30 to 50 percent, shorten the distance—often by about half—and choose flat terrain. If you've been carrying 30 pounds, that might mean 15 to 20 pounds for a short, easy session. These numbers are deliberately conservative editorial guardrails, not values established by a rucking clinical trial.
For diagnosed patellar tendinopathy, published guidance favors load management and progressive loading over indefinite avoidance ([Rosen et al., 2022](https://pubmed.ncbi.nlm.nih.gov/34623447/)). That does not mean every painful knee should stay under a pack. Use symptom-tolerable movement when appropriate; stop and get assessed when it is not.
Reassess after each easy session and again the next morning. If the same reduced session still changes your gait, raises pain meaningfully, or leaves symptoms worse the next day, stop rucking and seek individual guidance rather than repeatedly testing it.
### Phase 2: Strengthen the weak links (Weeks 2-4)
Exercise can build capacity, but the pain location does not prove one muscular imbalance. Choose the closest pattern below as a starting menu, and get assessed if the response is poor or the diagnosis is uncertain.
**For a patellofemoral pattern:** The [international consensus supports combined hip- and knee-focused exercise](https://pubmed.ncbi.nlm.nih.gov/29925502/), not VMO isolation as a universal answer. Wall sits, controlled step-ups, and a hip-strength exercise are practical options. Start with a tolerable range and resistance; the set-and-rep prescriptions below are examples, not clinical dosing.
**For an outside-knee pattern:** Hip-abductor work such as clamshells, side-lying leg raises, or banded walks can be a useful capacity exercise, but outside-knee pain does not by itself confirm weak glutes. Pair the exercise with a reduction in the distance, hills, or pace that provokes symptoms.
**For confirmed patellar tendinopathy:** Progressive tendon loading has stronger support than declaring one eccentric drill the universal gold standard. In a randomized trial, [progressive tendon-loading exercise produced better 24-week clinical scores than eccentric exercise alone](https://pubmed.ncbi.nlm.nih.gov/33219115/). A slow squat progression may be part of that work, but a clinician can match the range and load to irritability.
**For medial knee pain:** Do not assume the answer is adductor strength or an insole. Reduce the provoking load and consider an assessment, especially if pain is on the joint line, follows a twist, or comes with swelling, catching, or locking.
Pair all of this with the mobility work from the [Rucking Mobility](/injuries/rucking-mobility-guide) Guide, especially hip flexor and calf stretches.
### Phase 3: Gradual return to full loading (Weeks 4-8)
Once ordinary walking and the reduced session are comfortable, rebuild one variable at a time: weight, distance, pace, or terrain. The familiar 10% rule can be a conservative planning heuristic, but a [systematic review found very limited evidence for a universal training-load threshold](https://pubmed.ncbi.nlm.nih.gov/30534459/).
For example, if 15 pounds for 2 miles is comfortable during the session and the next morning, the next step could be 16 to 17 pounds at the same distance, or 15 pounds for about 2.2 miles—not both. A 2-to-3-out-of-10 ceiling is an editorial monitoring cue, not a diagnostic test. Any pain that changes your gait, keeps climbing, or remains worse the next day is a reason to step back.
Do not promise yourself a fixed 4-to-8-week recovery. Tendon trials and clinical guidelines operate over weeks to months, but an individual's timeline depends on the actual condition, symptom duration, training history, and response to load.
---
## Prevention going forward
Once symptoms settle, the goal is to build enough capacity that ordinary training changes are less provocative. No routine can guarantee that knee pain never returns.
Start doing a prehab routine 2 to 3 times per week. The Rucking Prehab Routine takes 15 minutes and targets the exact joints and muscles stressed by loaded walking. This should become non-negotiable, especially in the first 8 to 12 weeks of rucking.
If you overstride under load, experiment with shorter, quieter steps and a cadence around 100 to 110 steps per minute. Treat that range as a coaching cue, not a medically established target; comfort, terrain, height, and pace all change the right cadence.
Use the 10% rule as a guardrail, not a law. Its real value is that it discourages large simultaneous jumps. Do not move from 10 to 15 miles or from 20 to 30 pounds in one step, and do not add hills at the same time. The evidence supports avoiding abrupt load changes more clearly than it supports any single percentage ([Damsted et al., 2018](https://pubmed.ncbi.nlm.nih.gov/30534459/)).
Choose footwear for fit, terrain, and a stable feel under your load. No shoe can treat an undiagnosed knee problem, and more support is not automatically better for every foot. A shoe or insole is a comfort and load-management choice alongside training changes.
The [Salomon Quest 5 GORE-TEX](/gear/best-rucking-boots-for-beginners-2026) is one high-support footwear option for people who prefer a structured boot. A fitted plate such as the [Titan Fitness ruck plate](/gear/ruck-plate-comparison) can keep the load from shifting inside a compatible pack. Neither product treats knee pain; the relevant benefit is predictable fit and load placement.
If you are already using a knee brace, [Body Glide Original](/injuries/rucking-foot-care-blister-prevention) can reduce skin friction where the brace rubs. It does not change the source of the knee pain.
For a complete guide, see [Best Rucking Shoes by Terrain](/gear/best-rucking-shoes-by-terrain).
Finally, keep lower-body strength work in the week if you tolerate it. One or two sessions built around movements such as squats, hinges, step-ups, or lunges can build capacity outside the ruck itself. For footwear options organized by surface and fit rather than treatment claims, use our [best rucking shoes by terrain guide](/gear/best-rucking-shoes-by-terrain).
---
## When to see a professional
Only an individual assessment can determine whether knee pain needs professional care. Mild symptoms that steadily settle after reducing the provoking load may be reasonable to monitor, but the following signs lower the threshold for a sports-medicine or physical-therapy assessment.
If pain persists after 2 weeks of deloading and proper strength work, something more complex might be happening. You could have a structural issue like a meniscal tear, early arthritis, or a tendon that needs more specialized treatment.
Swelling that doesn't resolve after a few hours of rest - or swelling that comes back with each ruck - is another red flag. A little puffiness is normal; persistent fluid is not.
Locking or catching sensations (your knee feels like it's catching or getting stuck momentarily) or giving way (your knee buckles unexpectedly) suggest structural damage that won't resolve with prehab alone.
Pain at rest or pain that repeatedly wakes you deserves attention because it does not follow the simple "only when loaded" pattern. It does not identify one specific diagnosis on its own.
Finally, if you have a history of ACL, MCL, or meniscal injuries, get cleared by a professional before starting a rucking program. Previous injuries change the equation significantly.
---
## Related reading
- [Rucking prehab routine](/injuries/rucking-prehab-routine) - 15-minute routine that targets the joints and muscles most stressed by loaded walking
- [Best rucking shoes by terrain](/gear/best-rucking-shoes-by-terrain) - shoes with proper support prevent the foot instability that causes knee compensation
- [How heavy should your ruck be?](/guides/how-heavy-should-your-ruck-be) - use our weight calculator to choose a conservative load before adding distance or hills
- [Ruck plate comparison](/gear/ruck-plate-comparison) - if you're adjusting your load, know your plate options
## Frequently Asked Questions
────────────────────────────────────────────────────────────────────────────────
URL: https://ruckauthority.com/injuries/rucking-mobility-guide
Title: Rucking Mobility: Warm-Up, Cool-Down & Recovery
Description: Pre-ruck warm-up, post-ruck cool-down, and weekly mobility routines designed specifically for the demands of loaded walking.
Published: 2026-03-10 / Updated: 2026-06-10
## Why mobility matters for ruckers
[Rucking](/glossary#rucking) is repetitive. Over the course of a 10-mile ruck, you're taking roughly 15,000 identical steps under load. That's 15,000 repetitions of the exact same movement pattern, with your hips in a slightly forward position, your shoulders slightly rolled under the pack, and your ankles plantarflexed (pointing downward).
Do that every week for a few months without mobility work, and your body adapts by tightening. Your hip flexors shorten from being held in that flexed position. Your shoulders round slightly, matching the position of being under load. Your ankles stiffen from the repetitive plantarflexion. Your lower back loses some extension mobility because you're moving in a narrow range.
These adaptations don't hurt right away. But by month 3 or 4, they stack up. Your hips get tight enough to affect your gait. Your shoulders start rounding enough to pull on your neck. Your ankles become stiff enough that you can't land properly, so your knees compensate. Injuries follow.
The fix is simple and costs nothing: targeted mobility work. Just 10 to 15 minutes, 2 to 3 times per week, prevents most of these problems. Add a 5-minute post-ruck cool-down on every training day, and you've effectively eliminated the slow accumulation of tightness that leads to injury.
---
## Pre-ruck warm-up (5 minutes)
Your pre-ruck routine is not about stretching. Static stretching - holding a stretch for 30 seconds - actually reduces muscle performance for a short time if done before activity. Instead, your goal is to raise your core temperature, lubricate your joints, and activate the muscles that will stabilize you under load.
**Leg swings (10 repetitions each direction per leg):** Stand with one hand on a wall or railing for balance. Swing one leg forward and backward 10 times in a controlled motion. Then swing it side to side across your body 10 times. Repeat on the other leg. This wakes up your hip flexors, glutes, and hip stabilizers, and it takes your hip through a large range of motion.
**Walking lunges with twist (8 repetitions each side):** Step forward into a lunge, then rotate your torso toward the front leg. Hold for a second, return to center, and step forward with the other leg. This combines a hip flexor stretch with thoracic rotation and quads activation. You're preparing your hips, spine, and legs for loaded movement.
**Ankle circles (10 repetitions each direction per foot):** Stand on one leg and draw circles with your other foot - 10 circles one direction, 10 the other. This mobilizes your ankle joint and improves proprioception (your sense of where your foot is in space). Ankle stability is foundational for all loaded walking.
**Arm circles (10 forward, 10 backward):** Slow, controlled arm circles in both directions. This prepares your shoulder girdle for the weight of the pack and primes your rotator cuff. Don't rush these - let them be deliberate and full range.
**Cat-cow (8 repetitions):** On your hands and knees, alternate between arching your back (cow) and rounding your spine (cat). This mobilizes your entire spine, especially your thoracic spine and lower back, which will be under load during your ruck.
**Two-minute easy walk:** Before you put on the pack, walk at a comfortable pace for 2 minutes. Get your heart rate up slightly, let your muscles warm up, and establish your walking rhythm. Then load the pack and begin your ruck.
This entire routine takes about 5 minutes and sets your body up for success. The warm-up is not about stretching; it's about preparation.
---
## Post-ruck cool-down (5-8 minutes)
This is where most ruckers fail, and it's the single biggest regret people express when they develop chronic tightness or injury. They finish the ruck, take off the pack, and go straight to the couch or car.
Your post-ruck cool-down is the highest-ROI habit you can build. Now that your muscles are warm and your nervous system is already engaged, they're most receptive to lengthening and returning to their baseline range of motion. This 5-minute window is more valuable than 30 minutes of stretching on a rest day.
Perform all of these stretches with a relaxed posture, holding each for about 30 seconds. You're not trying to be flexible; you're trying to signal recovery and gently return your muscles to their pre-ruck length.
**Calf stretch (wall lean, both legs):** Face a wall, place your hands on it, and step one leg back until you feel a stretch in the calf. Keep your heel down and your body straight. Hold 30 seconds each leg. Your calves have been in plantarflexion for miles; this releases that.
**Hip flexor stretch (kneeling lunge position):** Kneel on one knee (use a pad if you need it), step the other foot forward, and gently press your hips forward. You'll feel a stretch along the front of your back hip. Hold 30 seconds each side. This is crucial because hip flexors tighten quickly under load.
**Hamstring stretch (standing or seated):** If standing, keep one leg straight and bend forward from the hips, letting your torso fall toward your leg. If seated, extend both legs and gently fold forward. Hold 30 seconds. Your hamstrings are in a lengthened position under load, and they benefit from this gentle return.
**Chest and shoulder doorway stretch:** Place your forearm on a doorframe with your elbow at 90 degrees and step forward gently. You'll feel a stretch across your chest and anterior shoulder. Hold 30 seconds. The pack weight pulls your shoulders forward; this gently reverses that position.
**Thoracic spine rotation (seated or lying):** If seated, cross your arms over your chest and gently rotate side to side. If lying on your back with knees bent, drop one knee toward the opposite arm. Hold 30 seconds each direction. This restores rotation to a spine that's been locked in forward flexion.
**Quad stretch (standing):** Pull one foot toward your glute, keeping your torso upright. Hold 30 seconds each leg. Your quads have been working hard; this returns them to a lengthened position.
Finish with 30 seconds of deep breathing, standing tall with your arms at your sides. This signals your nervous system that the work is done and recovery has begun.
---
## Weekly deep mobility session (15-20 minutes)
On at least one rest day per week, dedicate 15 to 20 minutes to deeper mobility work. This is where you address accumulated tension that daily cool-downs miss, where you work on chronic tightness, and where you build resilience in the tissues that matter most for loaded walking.
You'll need a foam roller for most of these. A standard 12-inch foam roller costs $15 to 25 and lasts for years. New to rolling? Our sister site Kit Authority's [how to foam roll](https://kitauthority.com/fitness/how-to-foam-roll?utm_source=ruckauthority&utm_medium=crosslink) guide covers technique and pressure basics, and their [foam roller picks](https://kitauthority.com/fitness/best-foam-rollers?utm_source=ruckauthority&utm_medium=crosslink) compare densities.
**Foam roll calves (60 seconds each leg):** Sit on the ground with your legs extended, place the foam roller under one calf, and roll from your ankle to your knee. Apply as much pressure as you can tolerate. Your calves are dense tissue and benefit from aggressive self-massage. Do 60 seconds each side.
**Foam roll quads (60 seconds each leg):** Face down on the ground with the foam roller under your quads. Roll from your hip toward your knee. This is tender tissue; apply firm pressure but don't injure yourself. 60 seconds each leg.
**Foam roll IT band (60 seconds each leg):** Lie on your side with the foam roller under your hip and IT band area (upper outer thigh). Roll up and down this region. Expect this to be uncomfortable. It's where a lot of tension accumulates in ruckers. 60 seconds each side.
**Foam roll upper back (60 seconds):** Lie on your back with the foam roller under your upper back at mid-scapula level. Support your head with your hands and gently roll up and down the thoracic spine. This is crucial for counteracting the rounded-shoulder posture that packs create. 60 seconds.
**Pigeon pose or figure-four stretch (60 seconds each side):** Sit with one leg extended and the other leg bent in front of you (pigeon), or lie on your back and cross one ankle over the opposite knee while pulling your lower leg toward you (figure-four). Either position deeply stretches the glutes and hip external rotators. Hold 60 seconds each side. If you only do one stretch for tight hips, this is it.
**World's greatest stretch (8 repetitions each side):** Step forward into a lunge, place your hands on the ground, rotate toward your front leg, then extend your arm overhead. This single movement combines hip flexor stretching, thoracic rotation, and hip mobility. Do 8 controlled repetitions each side.
**Thoracic spine extension over foam roller (10 repetitions):** Place the foam roller perpendicular to your spine (supporting your mid-back) and gently extend backward over it, hands supporting your head. This directly reverses the flexed position you're in during loaded walking. Do 10 controlled repetitions.
**Banded shoulder dislocates (15 repetitions):** Hold a resistance band or light stick with a wide grip (about 3 to 4 feet apart), raise it overhead, and pull it behind your body in an arc, then return it over your head. This mobilizes your shoulder joint and counteracts the internal rotation that pack straps create. 15 smooth repetitions.
**Deep squat hold (60 seconds):** Squat to the deepest position you can hold with your feet flat on the ground. Stay there for 60 seconds. This isn't a strength exercise; it's mobility work. It opens your ankles, hips, and knees simultaneously. If you can't hold it, hold for as long as you can and work up to 60 seconds over weeks.
**Ankle dorsiflexion stretch (30 seconds each):** Kneel on one knee, place the other foot in front with your toes tucked under (toes pointing back), and gently press your hips forward. You'll feel a deep stretch along the top of your foot and anterior ankle. Hold 30 seconds each. This reverses the plantarflexion you've been in all ruck.
This session takes 20 minutes and should leave you feeling noticeably less tight than before. The earlier you establish this habit, the less you'll need it as a corrective measure.
---
## Mobility by problem area
If you're experiencing specific tightness, these targeted approaches will address the root cause.
### Tight hips (most common)
Hip tightness is nearly universal in ruckers, and it's the most common cause of lower back strain and knee pain because tight hips force compensation throughout the chain. When your hips can't move properly, your lower back takes over. When your lower back takes over, your knees suffer.
Rucking tightens your hip flexors because you're holding them in a flexed position for hours. Add sitting at a desk all day, and your hip flexors are borderline shortened.
Your fix: daily hip flexor stretching (30 seconds each side, every single day), pigeon pose (the single best hip mobility movement), 90/90 stretches (lying on your side with your hip at 90 degrees and knee at 90 degrees, gently pressing your top knee toward the ground), and the couch stretch (one foot elevated on a couch, hips pressed forward). Do at least one of these every day, and all of them 2 to 3 times per week. Your hips will open up noticeably within 3 weeks.
### Rounded shoulders
Pack straps pull your shoulders forward and inward. Over time, this creates a rounded-shoulder posture that persists even when you're not rucking. Rounded shoulders affect your breathing, your neck, and your upper back stability.
Your fix: doorway stretches (place your forearm on the doorframe with elbow at 90 degrees, step forward), band pull-aparts (hold a light resistance band, pull it apart in front of your body against resistance), thoracic extension work (foam rolling your upper back, extension over a foam roller), and wall angels (stand with your back and arms against a wall, slide your arms overhead and back down while maintaining contact with the wall). These directly reverse the position you're in under load. Do these 2 to 3 times per week.
### Stiff ankles
Repetitive plantarflexion under load stiffens your ankles. Stiff ankles reduce your ability to land properly, which throws more stress on your knees and hips.
Your fix: ankle dorsiflexion stretches (toes tucked under, hips pressed forward), ankle circles (full range of motion in both directions), calf raises through full range of motion (stand on the edge of a step and go up and down through your entire ankle's range), and eventually single-leg balance work on uneven ground. These restore dorsiflexion mobility, which improves your foot mechanics during walking.
Footwear that allows natural ankle mobility matters too. Check our [Salomon XA Pro 3D](/gear/best-rucking-shoes-by-terrain) or explore more in our [shoes by terrain guide](/gear/best-rucking-shoes-by-terrain) to find shoes that support ankle movement without restricting dorsiflexion.
### Lower back tightness
Your lower back gets hammered during loaded walking because it's asked to stabilize a load while your hip flexors and core fatigue. Lower back tightness is often a sign of core fatigue and excessive forward lean.
Your fix: cat-cow (mobilizes your entire spine), child's pose (gently decompresses your lower back), dead hangs (hang from a pull-up bar for time, which decompresses and lengthens your spine), and knee-to-chest stretches (lying on your back, gently pulling one knee toward your chest). These decompress and lengthen your lower back. Also address your core strength with the prehab routine, because weakness is often the root cause of lower back tightness.
---
## Recovery tools worth the investment
Two items return the highest ROI of any recovery purchase you can make. The foam roller addresses the tissue tightness that mobility drills can't reach on their own, and proper trail shoes prevent the ankle-restriction problems that mobility work has to reverse week after week.
| Role | Pick | Why it pays for itself |
|------|------|-------------------------|
| Foam roller | TriggerPoint GRID | Textured surface targets fascia better than flat rollers. Lasts 5+ years for $30. |
| Shoes | Salomon XA Pro 3D | Real arch support + ankle stability. Stops the mobility-work treadmill you're stuck on with worn-out shoes. |
Not all recovery gear is created equal. Some tools return massive value for modest cost; others are marketing hype.
**Foam roller ($15-25):** This is non-negotiable. A standard 12-inch foam roller is the single best recovery investment you can make. It costs almost nothing, lasts for years, and directly addresses soft tissue tightness. The TriggerPoint GRID is the one we keep recommending - the textured surface targets fascia better than a flat roller.
**Lacrosse ball ($5):** Use this for targeted trigger point work on feet (especially arch fascia), glutes (often harboring tight spots), shoulders, and anywhere else you have a tender point. It's small enough to carry and versatile. Cheap and effective.
**Proper footwear ($100-200):** After a foam roller, this is your next mobility investment. Shoes with arch support and ankle stability prevent the mobility restrictions that mobility work has to reverse. Spending on supportive gear now saves you months of tight hips and stiff ankles later. The [Salomon XA Pro 3D](/gear/best-rucking-shoes-by-terrain) is a great choice, or find the right fit in our [best rucking shoes guide](/gear/best-rucking-shoes-by-terrain).
**Massage gun ($50-150):** Convenient and feels good, but not essential. If you enjoy using it and consistency matters more than the tool, this is worth it. Otherwise, a foam roller does most of what a massage gun does for much cheaper.
**Yoga mat ($15):** Makes floor stretches and foam rolling more pleasant. Not essential, but it beats doing mobility work on bare tile or concrete.
**Skip these:** Cryotherapy, compression boots, expensive recovery gadgets, weighted recovery devices, and anything else marketed as a shortcut to mobility. Consistency with simple tools beats sporadic use of expensive ones every time.
Your [shoes matter too](/gear/best-rucking-shoes-by-terrain) - stiff or poorly fitting footwear limits ankle mobility and forces compensations up the chain. And if your pack doesn't fit properly, no amount of mobility work will fix the postural problems it creates. Our [best rucking backpacks](/gear/best-rucking-backpacks) guide covers fit and sizing in detail.
## Frequently Asked Questions
────────────────────────────────────────────────────────────────────────────────
URL: https://ruckauthority.com/injuries/rucking-plantar-fasciitis
Title: Rucking Plantar Fasciitis: Prevention, Treatment, Footwear
Description: Heel and arch pain from rucking is preventable. Here's what causes plantar fasciitis under load, how to treat it, and which shoes help.
Published: 2026-03-10 / Updated: 2026-05-19
## Why rucking stresses the plantar fascia
The plantar fascia is a thick band of connective tissue running along the bottom of your foot from your heel to your toes. Every time you take a step, this fascia stretches and absorbs impact. It's designed to handle this work - your body adapts to load over time.
But add 20 to 40 pounds to your frame, and everything changes. Your ground reaction forces - the force your foot experiences with each step - increase by 15 to 25 percent. Combined with the repetitive nature of [rucking](/glossary#rucking) (thousands of identical steps per hour), this becomes a significant stress on the plantar fascia.
Now, this stress is manageable if you progress gradually and have mobility work to balance it. But if you increase distance too fast, have chronically tight calves, wear shoes without good arch support, or have a foot structure that's mechanically disadvantaged (very flat arches or very high arches), the plantar fascia can become overloaded faster than it can adapt.
Most people who develop [plantar fasciitis](/glossary#plantar-fasciitis) from rucking didn't have a sudden, traumatic injury. They had weeks of overuse that they didn't notice until suddenly, one morning, they couldn't walk.
---
## Symptoms and diagnosis
Plantar fasciitis has a very recognizable signature. The classic symptom is sharp heel pain with your first steps in the morning. You wake up, put your feet down, and there's an immediate stabbing pain in your heel or along your arch. Often it eases a bit as you walk around and your foot warms up, but it returns after sitting for a long time.
Some people feel the pain along the entire arch rather than just the heel. Others describe it as a sharp, localized tenderness you can feel by pressing on the bottom of your foot, especially along the inside edge of your arch.
The pain gets worse after long periods of sitting - your foot shortens while you're resting, tightening the fascia. Then you stand up and suddenly stretch it, causing pain. This is why it's often worst in the morning or right after rucking.
Interestingly, many people report that the pain eases once they start moving during a ruck. The tissue warms up, and the repetitive motion actually feels better. But then pain returns once they stop. This on-off pattern is classic for plantar fasciitis.
To distinguish this from other foot pain, ask yourself: Is the pain worse in the morning with first steps? Is it along the heel or arch specifically? Does it ease as you warm up? If you answer yes to these, plantar fasciitis is almost certainly what you're dealing with.
---
## Treatment protocol
Plantar fasciitis is frustrating because it's slow to respond to treatment. Unlike an acute injury that improves week-to-week, fasciitis often takes 6 to 8 weeks to fully resolve even with perfect adherence. But it does respond reliably to the right combination of load management, stretching, and strengthening.
### Acute phase (first 1-2 weeks)
Your immediate goal is to reduce inflammation and prevent further microtrauma. Reduce your ruck distance by 50 percent - if you've been doing 5-mile rucks, drop to 2 to 3 miles. Reduce weight proportionally.
Ice your foot after activity for 10 to 15 minutes. A frozen water bottle under your arch works perfectly - you get the ice benefit while simultaneously doing a massage. Do this immediately post-ruck while inflammation is highest.
Stretch your calves three times daily. Calf tightness is the upstream cause of most plantar fascia problems. A 30-second wall calf stretch (standing facing a wall, one leg extended behind you, gentle forward lean) takes 2 minutes total for both sides and is non-negotiable. Do this morning, afternoon, and evening.
Use a tennis ball to roll your arch. Place the ball on the ground and roll your foot over it, applying pressure. Do this for 2 to 3 minutes per foot. This combines massage with gentle loading in a pain-tolerable range.
If you have access to over-the-counter anti-inflammatory medications and appropriate for you, NSAIDs can help reduce inflammation, especially for the first few days. Talk to your doctor about this if you're uncertain.
The key point: don't stop walking entirely. Resting completely often prolongs recovery. Walking gently and with reduced load keeps blood flow to the area, maintains muscle strength, and prevents deconditioning. You're managing the load, not eliminating it.
### Strengthening phase (weeks 2-6)
Once acute inflammation has dropped, it's time to build capacity in your foot. Your plantar fascia needs to be stronger to handle rucking loads.
**Calf raises:** Eccentric calf raises (lowering slowly) are particularly effective. Stand on the edge of a step, rise up on your toes, then lower yourself down slowly over 3 to 5 seconds. Do 3 sets of 12 repetitions. Start on two legs; progress to single-leg as your foot strengthens.
**Towel scrunches:** Place a small towel on the ground and use your toes to scrunch it toward you. This engages the small intrinsic muscles of your foot and arch. Do 3 sets of 15 repetitions.
**Arch doming:** Without curling your toes, try to create a dome in the arch of your foot by pulling the ball of your foot toward your heel. Hold for 2 seconds, repeat. Do 3 sets of 15. This directly strengthens the muscles that support your arch.
**Foot intrinsic exercises:** Single-leg balance (10 to 20 seconds per foot) helps your foot stabilizers engage. Slowly progress to balancing on one foot on a slightly unstable surface like a pillow.
Pair this strengthening with continued calf stretching - your foot is getting stronger, but if your calf remains tight, you're fighting upstream resistance.
### Return to full loading (weeks 6-8)
Once pain has dropped significantly (you're barely noticing it), you can start adding volume back. Use the 10 percent rule: increase either distance or weight by no more than 10 percent per week. If you're at 3 miles comfortably, the next week you could do 3.3 miles. Then 3.6 miles the week after.
Your symptom guide is morning pain. If you wake up with no heel pain, you're improving. If morning pain returns even slightly, you've added volume too fast. Step back one week and progress slower.
Most people can return to their baseline within 6 to 8 weeks if they're consistent with all three components: load management, stretching, and strengthening.
---
## Prevention
Three pieces of kit do most of the prevention work. Shoes with a firm heel counter and structured arch keep load off the fascia, an aftermarket insole upgrades the arch support of any shoe you already own, and a boot with a rockered outsole handles repeat-flare recovery.
| Role | Pick | What it prevents |
|------|------|------------------|
| Trail shoes | Salomon XA Pro 3D | Firm heel counter + real arch support. Stops the heel-strike collapse that radiates into the fascia. |
| Insole | Superfeet Green | $40-50 aftermarket arch support. Works in most shoes. Massive upgrade over flat insoles. |
| Boots | Salomon Quest 5 GORE-TEX | Mid-rise + rockered outsole. Reduces fascia strain across long rucks if you've had repeat flares. |
Once you've had plantar fasciitis, you're at higher risk for it recurring. Prevention is your best investment.
Daily calf stretching is non-negotiable. Even on non-ruck days, 30 seconds each side of wall calf stretches will keep your calves from tightening up. This is the single most important prevention strategy. Tight calves are the upstream cause of most plantar fascia problems.
Invest in footwear with good arch support. When rucking, wear shoes designed for hiking, work boots, or specifically supportive running shoes - not minimalist shoes, not flats, and not worn-out shoes. Your feet are the foundation of load distribution. Try the [Salomon XA Pro 3D](/gear/best-rucking-shoes-by-terrain) or explore our [shoes by terrain guide](/gear/best-rucking-shoes-by-terrain) to find options by environment so you can match footwear to your rucking surface.
If you have flat feet or very high arches, consider over-the-counter orthotic insoles. [Superfeet Green](/gear/best-rucking-gear-2026) insoles (around $40-50) have solid arch support and work in most shoes. They're not custom, but they're a huge upgrade from flat insoles.
Progress distance and weight slowly. The 10 percent rule isn't just for rehab; it's preventive. Your plantar fascia needs time to adapt to increased load.
Post-ruck foot rolling with a tennis ball or frozen water bottle addresses small amounts of tension before it accumulates. Ten minutes of rolling once or twice per week prevents the buildup that leads to plantar fasciitis.
---
## Footwear recommendations for plantar fasciitis
Shoes are not the only solution to plantar fasciitis, but they're part of it. If your shoes provide poor support and you add loaded walking, plantar fasciitis becomes much more likely.
Look for shoes with structured arch support - you should be able to feel a distinct arch support when you run your hand inside the shoe. Your feet should feel supported, not sinking or rolling.
Firm heel counters are important. The heel counter is the rigid part of the shoe that wraps your heel. A firm counter helps stabilize your heel and reduces excessive motion that stresses the fascia.
Moderate cushioning in the heel is good; too much cushioning can actually reduce stability. A midsole that's supportive but not mushy is ideal.
Avoid minimalist shoes, flat shoes, or worn-out shoes with no structure. Don't switch to barefoot rucking as an experiment if you have or have had plantar fasciitis - your foot needs support to load safely.
If you're in the market for rucking shoes specifically, look at hiking boots or structured trail shoes. Running shoes can work if they have good arch support, but boots are often better for loaded walking because they provide more ankle stability and typically have firmer arch support.
For more options and detailed terrain-specific guidance, try the [Salomon Quest 5 GORE-TEX](/gear/best-rucking-boots-for-beginners-2026) or see our [Best Rucking Shoes by Terrain guide](/gear/best-rucking-shoes-by-terrain).
If you're starting from zero and want a complete setup that includes supportive footwear, our [budget rucking starter kit](/gear/budget-rucking-starter-kit) includes shoe recommendations paired with other essentials you'll need.
## Frequently Asked Questions
────────────────────────────────────────────────────────────────────────────────
URL: https://ruckauthority.com/injuries/rucking-prehab-routine
Title: Rucking Prehab: 8 Exercises to Prevent Injury
Description: A 15-minute routine that bulletproofs your body for loaded walking. Targets the joints and muscles most stressed by rucking - with progressions for all levels.
Published: 2026-03-10 / Updated: 2026-06-10
## Why prehab beats rehab
Prehab is the practice of strengthening your weak links before they become injuries. Rehab is fixing them after they break. Prehab is dramatically more efficient.
This 8-exercise routine takes 15 minutes, requires no equipment beyond your bodyweight, and targets the exact weak links that cause [rucking injuries](/pillars/rucking-injury-prevention): weak ankles, poor arch stability, weak quads, weak glutes, unstable hips, weak core, rounded shoulders, and poor shoulder mobility.
If you do this routine 2 to 3 times per week, you'll address most of the common weak links that lead to injury in new ruckers. You can do it as a warm-up before [rucking](/glossary#rucking), as a standalone session on rest days, or split between multiple days depending on your schedule.
Prehab is most effective when paired with proper footwear. Shoes that support your arches and ankles amplify what your prehab work achieves. Check out our [Salomon XA Pro 3D](/gear/best-rucking-shoes-by-terrain) or explore more options in our [best rucking shoes by terrain](/gear/best-rucking-shoes-by-terrain) guide to find footwear that matches your rucking environment.
Most people who skip prehab because they're "too busy" end up injured by month 3 or 4, at which point they wish they'd invested 45 minutes per week in prevention. This routine is insurance.
## The 8 exercises
### 1. Calf raises (3×15)
Calf raises build strength and endurance in your calves and the intrinsic muscles of your foot. Your calves are the engines of walking, and under loaded conditions, they need to be strong.
**Beginner:** Stand on flat ground, rise up onto your toes, pause briefly at the top, then lower back down under control. Do 3 sets of 15 reps at a slow, deliberate pace - speed defeats the purpose here.
**Intermediate:** Stand on the edge of a step so your heel can go below the level of your toes. Rise up, then lower down below the step level. This increases the range of motion and targets the muscle more completely. Do 3 sets of 12 to 15.
**Advanced:** Perform single-leg calf raises on the edge of a step. This dramatically increases difficulty and builds unilateral strength and balance. Do 3 sets of 8 to 10 per leg.
Do these slowly - there's no benefit to fast calf raises. A 2-second rise, 2-second pause at the top, and 2-second lower is ideal.
### 2. Bodyweight squats (3×12)
Squats build quad strength (essential for knee health) and glute activation. Your quads and glutes work together under load, and weak quads lead to knee pain and lower back strain.
**Beginner:** Stand with feet shoulder-width apart, lower your butt back and down until your thighs are roughly parallel to the ground. Your chest should stay upright and your weight should be on your heels. Push back up to standing. Do 3 sets of 12.
**Intermediate:** Lower further into a deep squat - ass to grass if you have the mobility. The deeper you go, the more you challenge your quads and hips. Full-range squats are worth the extra effort. Do 3 sets of 12.
**Advanced:** Hold a weight at your chest (goblet squat) or add a pause at the bottom (hold for 2-3 seconds before rising). Either variation increases difficulty significantly.
Don't rush squats. Full range of motion matters more than reps. If you can only do 8 full-range squats, do 3 sets of 8. Partial reps are less valuable.
### 3. Glute bridges (3×12)
This is the single most important exercise in this routine. Weak glutes are the root cause of most knee pain, lower back strain, and hip tightness in ruckers. Your glutes are the prime movers for loaded walking, and they need to be strong and activated.
**Beginner:** Lie on your back with knees bent and feet flat on the ground, hip-width apart. Drive through your heels, extend your hips, and lift your butt off the ground until your body forms a straight line from knees to shoulders. Squeeze your glutes hard at the top for a 2-second pause. Lower back down. Do 3 sets of 12.
**Intermediate:** At the top position, hold for 2 to 3 seconds and really focus on squeezing your glutes. The glute squeeze matters more than the height. Some people do single-leg glute bridges: lift one foot off the ground while the other leg does the work. Do 3 sets of 10 to 12 per leg.
**Advanced:** Hold a barbell or heavy weight on your hips. Or do single-leg glute bridges and hold a weight. This adds significant resistance.
The key cue: squeeze your glutes at the top. This muscle activation is what matters. Many people perform glute bridges but fail to actually activate their glutes - they just lift their hips. Focus on the squeeze.
### 4. Bird dogs (3×8 each side)
Bird dogs develop core stability, spinal erector endurance, and anti-rotation strength. This is crucial because your lower back stabilizes load during rucking, and weak stabilizers lead to pain.
**Beginner:** On your hands and knees, extend one arm forward and the opposite leg backward until they're in line with your body. Hold for 1 second, return to starting position. Alternate sides. Do 3 sets of 8 each side.
**Intermediate:** Hold the position for 2 to 3 seconds. Move slowly and deliberately. Focus on not rotating - your body should stay square to the ground throughout.
**Advanced:** Add a 2 to 3-second hold at full extension to increase the stability demand, or loop a resistance band around your extended leg for added resistance. Keep your hips perfectly level throughout - any rotation means the load is too much.
Bird dogs are about quality and control, not speed. A 1-second hold that's perfectly stable is worth more than a fast repetition that lets your hips rotate.
### 5. Dead bugs (3×8 each side)
Dead bugs develop anti-extension core strength. Your lower back is under constant load during rucking, and it needs to resist extending and rounding. Dead bugs directly train this pattern.
**Beginner:** Lie on your back with arms extended toward the ceiling and knees bent at 90 degrees (thighs perpendicular to ground, shins parallel to ground). Slowly lower one arm overhead while extending the opposite leg until it's nearly straight. Return to starting position. Alternate sides. Do 3 sets of 8 each side.
**Intermediate:** Make the movement slower. A 2-second lower, 1-second pause, and 2-second return makes this significantly more challenging.
**Advanced:** Extend both opposite limbs at the same time instead of alternating - this doubles the anti-extension demand on your core. Alternatively, strap on ankle weights to increase resistance without changing the movement pattern.
The critical rule: your lower back must stay flat against the ground throughout. If your lower back arches up, you're extending too far. Stop before that point. This exercise is about training the core to resist that extension.
### 6. Banded clamshells (3×12 each side)
Clamshells strengthen your hip abductors (glute medius and minimus) and external rotators. These muscles stabilize your hips under load and prevent your knees from caving inward (valgus collapse). Weak hip abductors are the primary cause of IT band syndrome and lateral knee pain.
**Beginner:** Lie on your side with knees bent at 90 degrees and your feet together. Keep your feet touching while you raise your top knee toward the ceiling. The movement comes from your hip; your feet stay together and your bottom knee stays on the ground. Do 3 sets of 12 each side.
**Intermediate:** Loop a light resistance band around your thighs just above your knees. The band adds tension throughout the full range of motion, forcing your hip abductors to work harder on every rep and making the muscle engagement much more deliberate. If you don't own bands yet, our sister site Kit Authority's [resistance band guide](https://kitauthority.com/fitness/best-resistance-bands?utm_source=ruckauthority&utm_medium=crosslink) covers which resistance levels to start with.
**Advanced:** Do banded walks instead - with a band looped around your thighs, walk sideways in a quarter-squat position for 20 to 30 steps.
Clamshells are often done too fast. Slow down. A 1-second raise, 1-second squeeze at the top, and 2-second lower is better than rapid repetitions. Focus on feeling your hip abductors engage.
### 7. Wall angels (3×10)
Wall angels develop shoulder mobility and thoracic extension while activating the muscles that counteract rounded-shoulder posture. Pack straps pull your shoulders forward and inward; wall angels fight that.
**Beginner:** Stand with your back against a wall, feet about 6 inches from the wall. Raise your arms to 90 degrees with elbows bent (like a goal post), and touch your arms and head to the wall. Slowly slide your arms overhead while maintaining contact with the wall. If you lose contact, stop at that point. Do 3 sets of 10.
**Intermediate:** Work toward full overhead range while keeping your arms, back, and head in contact with the wall the entire time. Most people lose contact around shoulder height - that's your current mobility ceiling, and that's exactly where you need to work.
**Advanced:** Switch to prone Y raises: lie face down and raise your arms in a Y shape above shoulder level, squeezing your shoulder blades hard at the top. This removes the wall as a guide and forces your thoracic muscles to do all the work against gravity.
Wall angels teach your shoulders and thoracic spine to move together and develop strength in the muscles that keep you upright under load.
### 8. Ankle circles (2×15 each direction, each foot)
Ankle circles develop ankle mobility and proprioception (your sense of where your foot is in space). Your ankles are under load during every step, and mobility issues lead to poor foot mechanics, which cascade into knee and hip problems.
**Beginner:** Stand on one leg (hold a wall for balance if needed). Lift the other foot off the ground slightly. Slowly draw circles with your foot - large, controlled circles. Do 15 circles one direction, then 15 circles the other direction. Repeat on the other leg.
**Intermediate:** Do the same movement on one leg without holding the wall. This increases balance demand and makes the ankle stabilizers work harder.
**Advanced:** Stand on a folded pillow, foam pad, or balance board while drawing your circles. The unstable surface forces your ankle stabilizers, calf muscles, and foot intrinsics to actively fire to keep you upright while you work through the full range of motion.
The goal isn't speed; it's full range of motion. Large, controlled circles that take your ankle through its full range.
Strong ankles and proper arch support work together. This prehab routine builds ankle strength; supportive footwear maintains that strength under load. We recommend [shoes with structured arch support](/gear/best-rucking-shoes-by-terrain) for every ruck.
## How to use this routine
You have three options for implementation depending on your schedule and preferences.
**Option A: Pre-ruck warm-up.** Do all 8 exercises with lighter sets (2 sets instead of 3, slightly fewer reps) before you put on the pack. This takes 10 to 12 minutes and warms you up perfectly for loaded walking. This is ideal if you're rucking several times per week.
**Option B: Standalone prehab session.** Do the full routine 2 to 3 times per week on non-ruck days. This takes 15 minutes and requires no equipment. Perfect if you ruck only once or twice per week.
**Option C: Split routine.** Do exercises 1 through 4 (lower body focus) before rucks, and do exercises 5 through 8 (core and upper body focus) on separate days. This spreads the work across your week.
Whichever option you choose, consistency matters more than perfection. Doing this routine twice per week prevents most injuries. Doing it zero times per week almost guarantees that you'll get injured if you ruck regularly.
## Progressions by level
| Exercise | Beginner | Intermediate | Advanced |
|----------|----------|--------------|----------|
| Calf raises | 2 legs, flat ground (3×15) | Edge of step, full ROM (3×12) | Single-leg on step (3×8) |
| Bodyweight squats | Half or parallel depth (3×12) | Full depth (3×12) | Goblet squat or pause squat (3×10) |
| Glute bridges | 2 legs, quick tempo (3×12) | 2 legs, 2-sec pause (3×12) | Single-leg (3×10) or weighted (3×12) |
| Bird dogs | 1-sec hold (3×8) | 2-sec hold (3×8) | Banded or slow tempo (3×8) |
| Dead bugs | Standard tempo (3×8) | Slow tempo, 2-sec lower (3×8) | Weighted or both limbs (3×8) |
| Clamshells | No band (3×12) | Banded (3×12) | Banded walks (20-30 steps) |
| Wall angels | Against wall (3×10) | Full range against wall (3×10) | Prone Y raises (3×10) |
| Ankle circles | With balance assist (2×15) | Free balance (2×15) | On unstable surface (2×15) |
Start at whatever level feels sustainable. If you're choosing between an easier progression you'll do consistently and a harder one you'll skip, choose consistency every time.
Prehab is half the equation - the other half is [the right gear](/gear/best-rucking-backpacks). A pack that doesn't fit properly forces your body to compensate, which is exactly what prehab tries to prevent. And [proper shoes](/gear/best-rucking-shoes-by-terrain) are critical for the ankle and foot stability these exercises build.
## Frequently Asked Questions
────────────────────────────────────────────────────────────────────────────────
URL: https://ruckauthority.com/injuries/rucking-shin-splints-prevention-early-signs-and-recovery-pro
Title: Rucking Shin Splints: Early Signs, Prevention, Recovery
Description: How rucking shin splints feel, what prevention trials support (strength work, not stretching), stress-fracture red flags, and a realistic recovery time.
Published: 2026-04-26 / Updated: 2026-09-26
Shin splints from rucking usually means [medial tibial stress syndrome](/glossary#shin-splints) (MTSS): a diffuse ache along the inner rear edge of the shinbone that comes on with activity, typically after a jump in pack weight, distance, or hills. The best-supported prevention is strength and balance work, not stretching. Pain in one small spot, pain at rest, or pain at night is a different story and needs a clinician, because it can be a stress fracture.
Pain at the front of the shin can have other causes too, so "shin splints" isn't a diagnosis for every lower-leg symptom. Below: the usual MTSS pattern, who is at higher risk, what prevention trials support, and how to come back without rushing it. This is educational, not a diagnosis; persistent shin pain deserves an exam.
## Understanding shin splints in rucking
MTSS is defined by diffuse pain and tenderness along the posteromedial tibia that is related to activity. It is considered a load-related condition, but its biology is not explained by inflammation alone. Bone loading, remodeling, muscle and fascial forces, training history, and individual risk factors may all contribute.
A pack increases the work of walking and can change gait. That added demand may matter when load, distance, speed, hills, or training frequency rises faster than the person can tolerate. It does not establish that every case of shin pain during rucking is MTSS.
MTSS and tibial bone stress injuries can cause overlapping symptoms. Focal tenderness, pain at rest or at night, swelling, or pain with ordinary walking should prompt medical evaluation rather than a home diagnosis of either condition.
## Primary causes in loaded walking
MTSS is multifactorial. A 2017 meta-analysis of risk factors in active people found five with consistent evidence: female sex, higher body weight, greater navicular drop (the arch flattening more under load), a previous running injury, and greater hip external rotation ([Reinking et al., 2017](https://pubmed.ncbi.nlm.nih.gov/27729482/)). A risk factor raises the odds; it doesn't prove the cause in any one person. Training decisions are the part you control.
**Training load changes** can matter. A large jump in distance, pack weight, speed, hills, or frequency may exceed current capacity. The popular 10% rule is not a validated injury-prevention threshold and should not be treated as a target or ceiling.
**Surface and terrain** change gait and loading. Pavement, trails, hills, and uneven ground each create different demands. Softer ground does not always reduce tibial stress, and mixed surfaces have not been proved to prevent MTSS in ruckers.
**Footwear changes** may affect comfort and gait. Replace shoes when fit, tread, or structure no longer works for you, and reduce training while adapting to a very different shoe. There is no universal replacement mileage or shoe type that prevents MTSS.
**Pack load and movement** can change stride and [foot strike](/glossary#foot-strike). A bouncing or shifting pack may be uncomfortable, but pack position has not been established as a direct cause of MTSS.
## Describe the pain before deciding what it is
MTSS does not follow a reliable three-stage sequence. Note where the pain is, whether it is spread out or focal, when it starts, what happens after the session, and whether ordinary walking is affected.
The pattern used in MTSS research is **diffuse, activity-related pain along the posteromedial tibial border**, and it's the definition the 2017 risk-factor meta-analysis used ([Reinking et al., 2017](https://pubmed.ncbi.nlm.nih.gov/27729482/)). No home test rules other conditions in or out.
Pain distribution and response to rest are useful history, not a definitive distinction. A clinician may use an exam and, when needed, imaging to evaluate tibial bone stress injury, exertional compartment syndrome, nerve symptoms, or another source of lower-leg pain.
## What prevention evidence supports
A 2025 meta-analysis pooled 12 randomized prevention trials with more than 8,000 participants ([Marques et al., 2025](https://pubmed.ncbi.nlm.nih.gov/40633262/)). Neuromuscular training prevented MTSS with high-certainty evidence, and overpronation insoles helped with moderate certainty. Shock-absorbing insoles showed no significant effect, and there was no evidence for static stretching or special socks. Study quality varied, and none were rucking studies, but it's the best evidence available.
**Manage training load.** Change one variable at a time, then judge symptoms and recovery before changing another. There is no evidence-based weekly percentage that guarantees prevention.
**Use terrain you can control.** Changing surfaces can vary the demand, but surface rotation is not a proven MTSS-prevention protocol. Uneven or sloped ground may increase symptoms for some people.
**Choose comfortable footwear.** Transition gradually when heel-to-toe drop, cushioning, stiffness, or fit changes substantially. A max-cushion option such as the [Hoka Bondi 9](/gear/best-shoes-for-rucking-on-pavement) may feel comfortable on pavement, but cushioning does not guarantee MTSS prevention.
**Neuromuscular training** has the strongest prevention signal in the 2025 meta-analysis. The studied programs varied, so there is no single proven rucking routine. Calf raises, controlled toe raises, and single-leg balance are reasonable low-equipment options when they are pain-free, but they are not guaranteed protection.
**Static stretching is not a prevention treatment.** Gentle ankle mobility can be used when it helps movement, but the 2025 review found no evidence that static stretching programs prevent MTSS. Special socks were not supported either.
**Overpronation insoles may help selected people.** The prevention review found moderate-certainty support in the studied populations. That does not mean everyone needs an insole; consider an assessment when overpronation, foot pain, or recurrent MTSS is a concern.
## Pack fit and loading considerations
Pack fit affects comfort and gait, but no setup is proven to prevent or treat MTSS. Keep the load stable enough that it does not swing with each step.
**Weight distribution:** Keep dense items close to the back panel. If a placement makes you lean, shorten your stride, or changes symptoms, reduce or reposition the load.
**Hip belt use:** A belt may transfer some load to the pelvis when the pack is designed for it. It does not reduce the total load carried by the legs and is not an MTSS treatment.
The [Osprey Tempest 20 Women's](/gear/best-rucking-backpacks-for-women) is one pack designed for a smaller torso range. Fit the pack with the intended load; a particular model does not make a painful progression safe.
## Building training load
There is no universal starting load or distance that prevents MTSS. Begin below the point where gait changes or symptoms appear, especially after time away from loaded walking.
**Weekly progression:** [The 10% rule](/glossary#ten-percent-rule) is a coaching heuristic, not a safety threshold. Change one variable at a time and hold or reduce the plan when pain, gait, or recovery worsens.
**Load progression:** Use the smallest practical increase and keep distance, pace, and hills steady while you assess it. Cardiovascular comfort does not prove that the tibia is ready for more load.
**Recovery:** Space demanding sessions so symptoms and gait return to baseline. The number of rest days and the size or timing of an easier week depend on the person and program.
## What to do when shin pain starts
Do not assume new shin pain is harmless MTSS. Stop or modify the activity that brings it on, then monitor walking and daily symptoms.
**Activity modification:** Remove the pack or stop the session if pain is building or changing gait. A fixed 30-50% reduction is not a tested treatment, and moving to a softer surface may not be enough.
**Ice:** Cold may provide short-term comfort, but it has not been shown to heal MTSS or prevent recurrence. Protect the skin and use it only if it feels helpful; do not use numbness to continue painful training.
**Cross-training:** Swimming, cycling, or upper-body strength work may preserve fitness when they do not reproduce symptoms. Stop any alternative that increases pain.
**Return to activity:** Start with ordinary walking and daily activity. Reintroduce load only after those are comfortable, using a smaller load and distance than before. There is no validated 50%-75%-100% schedule or universal one-to-two-week return.
## When to seek medical attention
Arrange medical evaluation for pain that is focal, worsening, present at rest or at night, or not settling after you stop the aggravating training. Those features can occur with conditions other than MTSS and should not be diagnosed from an article.
Seek prompt care for trouble bearing weight, marked swelling, numbness, weakness, a cold or pale foot, or severe pain after an injury. Night pain and rest pain also warrant evaluation.
Redness, warmth, fever, or rapidly increasing swelling needs medical review because infection, vascular problems, and other conditions can also cause lower-leg symptoms.
## Recovery and return-to-training protocols
Recovery depends on the diagnosis, symptom severity, and training demand. Complete rest, continued pain-free activity, and return timing should be chosen for the individual rather than prescribed by a fixed calendar.
**Step 1: Settle the aggravating load.** Avoid activities that reproduce or increase pain. Gentle movement or cross-training can continue only when comfortable. Static stretching is not a proven MTSS treatment.
**Step 2: Recheck ordinary walking.** Use a short unloaded walk on a predictable surface. Judge symptoms during the walk and later that day rather than relying on a fixed duration.
**Step 3: Reintroduce one rucking variable.** Start below the previous load and distance. Keep pace and terrain easy to control, then wait long enough to judge the response before adding another variable.
**Step 4: Build toward the required training.** Increase only while ordinary walking, gait, and the prior step remain comfortable. A clinician should guide the return when symptoms were focal, recurrent, severe, or diagnosed as a bone stress injury.
## Long-term prevention maintenance
These practices may help manage training, but none guarantees that MTSS will not recur:
**Surface choice:** Use terrain that lets you keep a comfortable gait. There is no evidence-based rule limiting pavement to 50% of weekly volume.
**Neuromuscular work:** Keep a pain-free strength and balance program if it fits your training. The evidence does not establish that two 15-minute sessions are enough for every person.
**Equipment monitoring:** Replace footwear when fit, tread, or structure is no longer suitable. Rotating shoes and buying more cushioning have not been proved to prevent MTSS.
**Load management:** Return from a break below your former training level and change one variable at a time. The 10% rule is not a universal requirement or guarantee.
## Frequently asked questions
────────────────────────────────────────────────────────────────────────────────
URL: https://ruckauthority.com/injuries/rucking-with-arthritis
Title: Rucking with Arthritis: What the Research Says and How to Do It Right
Description: How to ruck with arthritis safely: what the research says, how to start light, when to stop, and how loaded walking can support joint health.
Published: 2026-03-31 / Updated: 2026-05-19
## Can you ruck with arthritis?
It's a fair question - especially for older adults considering the sport for the first time, veterans managing wear-and-tear injuries, or anyone who's been told at some point to "take it easy on your joints."
The short answer is yes, in most cases. The longer answer is worth understanding.
---
## Arthritis is not one thing
Before we talk about [rucking](/glossary#rucking), the word "arthritis" needs to be unpacked. It's an umbrella term covering over 100 conditions. For ruckers, two types are most relevant.
**Osteoarthritis (OA)** is the most common. It's the degenerative wear-and-tear version - cartilage between joints breaks down over time, leading to pain, stiffness, and reduced range of motion. It's most common in knees, hips, and spine. The majority of people asking about rucking and arthritis have OA.
**Rheumatoid arthritis (RA)** is an autoimmune condition where the immune system attacks joint tissue. It's systemic, affects multiple joints simultaneously, and comes with flares - periods of heightened inflammation that require a completely different approach than OA.
The research picture and practical approach differ significantly between the two, so knowing which you have matters before you do anything else.
---
## What the research says about OA
Here's the counterintuitive thing about osteoarthritis: rest is not the answer.
Cartilage is avascular tissue - it has no direct blood supply. It receives nutrients primarily through diffusion from synovial fluid. Movement supports this process: mechanical loading stimulates chondrocytes (the cells that maintain cartilage) and multiple studies demonstrate that acute exercise upregulates amino acid metabolism in synovial fluid, helping replenish the building blocks cartilage needs. The relationship is not as simple as "movement pumps nutrients in" - but the net effect of appropriate loading on cartilage health is well-supported.
This is why long periods of inactivity tend to worsen OA symptoms over time. The joints stiffen, the surrounding muscles weaken, and the load-bearing demands on the cartilage itself increase because there's less muscular support around the joint.
Loaded walking - which is exactly what rucking is - offers several specific benefits for OA:
**Muscle strengthening.** The quadriceps, glutes, and calves all take on extra demand when you add weight to your pack. Stronger muscles around arthritic joints consistently reduce pain and improve function - though the mechanism is more complex than simply "absorbing force." Multiple clinical trials show strength training improves pain and mobility in knee OA without necessarily changing the compressive forces measured during walking, suggesting benefits come through pain modulation, improved joint stability, and neurological adaptations rather than purely mechanical load reduction. The outcome is the same: less pain, better movement.
**Weight management.** Biomechanical research shows that each pound of bodyweight lost reduces the load on the knee by approximately four pounds per step during daily activities. Being just 10 pounds overweight adds 30 to 60 pounds of force to the knee with every stride. Rucking burns 300 to 600 calories per hour depending on weight and pace, making it an effective tool for weight management - which directly addresses one of the primary drivers of OA progression. Controlled trials show a 10% weight loss produces measurable reductions in knee joint compressive force.
**Synovial fluid circulation.** The rhythmic compression of walking keeps joint fluid circulating, delivering nutrients to cartilage and clearing out inflammatory byproducts.
**[Bone density](/glossary#bone-density).** OA is sometimes accompanied by concern about bone health, particularly in older adults. Loaded walking is one of the most effective non-pharmaceutical interventions for maintaining and improving bone mineral density.
---
## What the research says about RA
Rheumatoid arthritis requires more caution and a more dynamic approach.
The general consensus in rheumatology supports regular low-to-moderate intensity exercise for RA patients - it reduces fatigue, improves mood, maintains joint function, and doesn't accelerate joint damage in controlled circumstances. But RA introduces a variable that OA does not: flares.
During an active flare, affected joints are acutely inflamed. Rucking through a flare - or any significant exercise through one - can worsen inflammation and delay recovery. This is not a "push through the pain" situation.
The approach for RA ruckers:
- **Remission or low disease activity:** Rucking can be appropriate with medical clearance. Start very light (5-10 lbs), short duration (15-20 minutes), and on flat terrain.
- **Active flare:** Rest the affected joints. Light walking without load is often acceptable if your doctor approves, but adding pack weight during a flare is not.
- **Post-flare return:** Treat it like returning from any injury. Drop back to your baseline load and duration, rebuild gradually.
RA medications also matter. Some immunosuppressants used in RA treatment affect how the body responds to exercise and infection risk. Your rheumatologist needs to be part of the conversation.
---
## How to ruck with arthritis: practical framework
Assuming you have medical clearance, here's how to approach rucking with arthritis - specifically OA in weight-bearing joints.
### Start lower than you think
For most ruckers, the starting recommendation is 10% of bodyweight or less. For ruckers with arthritis, start at half that. If you weigh 180 lbs, begin with 8-10 lbs, not 18.
Your joints need time to adapt to loaded walking - the muscles, tendons, and cartilage all respond to mechanical stress, but the adaptation timeline is longer with arthritis. A pack that feels light is doing the adaptive work without overwhelming the joint's capacity to recover.
### Shorter, more frequent sessions beat long ones
A 20-minute ruck three times per week is a better starting point than a 60-minute ruck once a week. Shorter sessions keep total joint stress manageable, allow for recovery, and build the movement pattern consistently.
Progress to longer sessions only after the shorter ones feel fully comfortable - no increased pain, no significant stiffness the next morning.
### Flat terrain first
Hills amplify compressive forces on arthritic knees and hips significantly. Start on flat pavement or soft track surfaces. Once you've built a base over 4-6 weeks, introduce gentle inclines.
Downhills are harder on arthritic joints than uphills. When you add terrain, pay more attention to how your joints feel on the descent. Trekking poles can take meaningful load off the knees on descents - the [Black Diamond Trail Trekking Poles](/gear/best-trekking-poles-for-rucking) are a straightforward, affordable pair that many ruckers use specifically for downhill joint relief.
### Footwear matters more than usual
For ruckers without arthritis, footwear is about comfort and stability. For ruckers with arthritis - particularly knee or hip OA - footwear can meaningfully affect the stress traveling up through those joints.
Look for shoes with good cushioning in the midsole, a stable heel counter, and a low-to-moderate drop (4-8mm for most people). Avoid maximalist cushioning that makes foot feedback hard to read - you want to feel what your foot is doing without absorbing excessive impact. The [Salomon Quest 5 GORE-TEX](/gear/best-rucking-boots-for-beginners-2026) is a representative example of a supportive midcut with a stable heel and moderate drop, which is the rough profile to look for.
### Read the signals correctly
Not all discomfort is a stop sign. Here's a rough guide:
**Normal:** Mild muscle soreness in the 24-48 hours after a ruck. Mild, diffuse joint aching that resolves within a couple of hours of finishing.
**Slow down:** Joint pain during the ruck that increases as you continue. Swelling during or immediately after. Pain that rates above a 3 out of 10.
**Stop and reassess:** Sharp, localized joint pain. Any pain above a 5 out of 10. Swelling that persists into the next day. Pain that changes your gait and causes you to compensate.
The rule that applies to all injury-adjacent rucking applies here: pain that changes how you walk is your body routing around a problem. That compensation creates new problems elsewhere. Stop, recover, and address the underlying issue before continuing.
### Allow more recovery time
For ruckers without arthritis, 48 hours between sessions is a standard recovery window. With arthritis, build in 48-72 hours between sessions initially, and pay attention to how your joints feel 24 hours post-ruck rather than just during the activity. Some inflammatory response is delayed - what feels fine on the ruck may show up the following morning.
---
## What rucking won't do
It's worth being clear about the limits.
Rucking will not regenerate cartilage. Cartilage degradation from OA is not reversible through exercise. The goal of exercise - including rucking - is to reduce symptoms, slow progression, improve surrounding muscle strength, manage weight, and maintain quality of life. That's a meaningful set of outcomes. It's just not a cure.
Rucking is also not a replacement for medical management of arthritis. If you're managing with medication, physical therapy, or other interventions, those continue. Rucking is additive, not substitutive.
---
## The short version
Rucking is not off-limits with arthritis. For many people with osteoarthritis, controlled loaded walking is one of the best things they can do for their joints. For rheumatoid arthritis, it requires more care and tighter collaboration with your rheumatologist - but it's still on the table for most people in remission or with low disease activity.
The key variables are load, duration, terrain, and recovery. Start conservatively on all four. Progress slowly. Listen to your joints - not just during the ruck, but the morning after.
Get medical clearance before you start. That's not a liability disclaimer; it's genuinely good advice. A sports medicine physician or physiatrist who understands exercise-based management of arthritis is worth talking to. They can tell you specifically what's appropriate for your joint, your disease stage, and your current fitness level.
If you clear all of that - get outside and start walking. The research is on your side.
---
## Frequently Asked Questions
────────────────────────────────────────────────────────────────────────────────
URL: https://ruckauthority.com/injuries/rucksack-palsy-numb-hands
Title: Numb Hands While Rucking? Rucksack Palsy Fix
Description: Tingling or numbness under a ruck can come from strap-related nerve pressure, but persistent numbness or weakness needs assessment. Use these immediate fit changes, prevention steps, and evidence-linked warning signs.
Published: 2026-03-10 / Updated: 2026-08-26
## What's happening
[Rucksack palsy](/glossary#rucksack-palsy) is a load-carriage-related nerve injury involving compression or traction of the brachial plexus, with shoulder straps as the usual mechanism. Symptoms can include tingling, numbness, pain, cramping, or weakness in the upper limb ([Knapik et al., 2016](https://pubmed.ncbi.nlm.nih.gov/28088822/)). Similar symptoms can also come from the neck, a single peripheral nerve, circulation, or another condition, so numb hands under a pack are not a diagnosis by themselves.
Mild tingling that settles completely after the pack comes off may be transient pressure. Weakness, persistent sensory loss, or muscle wasting is a different category: documented military cases involved true brachial-plexus neuropathy and sometimes prolonged recovery. In a Finnish case series, [80% recovered fully within nine months while 15% had prolonged symptoms](https://pubmed.ncbi.nlm.nih.gov/21429232/). A later Dutch military review found incomplete recovery was common in its recorded follow-up, which is a reason not to dismiss weakness or persistent numbness ([Dorhout Mees et al., 2020](https://pubmed.ncbi.nlm.nih.gov/31925878/)).
That evidence supports a simple boundary: treat any new tingling as a signal to remove the pressure, not as proof that no damage has occurred. Do not continue [rucking](/glossary#rucking) through weakness or persistent numbness while waiting for it to "loosen up."
The brachial plexus runs from the neck through the shoulder into the arm. A load-carriage review identifies heavier load, longer distance, improper distribution, and strap pressure as plausible risk factors, while also noting that much of the prevention evidence is not from randomized trials ([Knapik et al., 2016](https://pubmed.ncbi.nlm.nih.gov/28088822/)).
---
## The 5 most common causes
The following factors can increase shoulder pressure or nerve traction. They are useful fit checks, not a way to diagnose the source of numbness.
**High shoulder-strap pressure.** Over-tightened straps can concentrate pressure across the shoulder. Straps should control the pack without creating a hard pressure line, but there is no universal "correct" notch for every body and pack.
**Narrow or poorly padded straps.** Narrow straps can concentrate a given load over less surface area. A load-carriage review recommends wider, better-padded straps as one way to reduce traction and compression symptoms ([Knapik et al., 2016](https://pubmed.ncbi.nlm.nih.gov/28088822/)).
**More load than you or the pack can distribute comfortably.** Heavier loads are associated with greater strength loss in rucksack-palsy cases, and load at symptom onset affected severity in the Finnish follow-up study ([Nylund et al., 2011](https://pubmed.ncbi.nlm.nih.gov/21429232/)). Compression is not inevitable at one universal number, but symptoms are a reason to reduce the load immediately.
**No effective load transfer.** A properly fitted [hip belt](/glossary#hip-belt) can shift some load away from the shoulders. Research reviews support considering one, but neither a 15-pound threshold nor a guaranteed percentage of transfer applies to every pack and torso.
**Holding the straps for long periods.** Gripping the straps can keep the arms and shoulders in one position and can mask a poor fit. Let the arms swing naturally when terrain allows. This is a practical comfort cue; the cited studies do not establish strap-gripping as a measured cause of rucksack palsy.
---
## How to fix it immediately (during a ruck)
If tingling or numbness begins under the pack, stop rather than trying to diagnose it while walking. The first goal is to remove the pressure and see whether the symptoms settle completely.
**Step 1: Take the pack off.** Set it down safely and note whether the tingling, numbness, pain, or weakness changes. Removing the load is more informative than making several strap changes while the nerve is still under pressure.
**Step 2: Let your arms rest in a neutral position.** Gentle arm movement is fine if comfortable, but do not aggressively stretch or pull on a numb or weak arm.
**Step 3: End the session if symptoms persist, return, or include weakness.** Persistent sensory change or weakness deserves medical assessment; it is not a fit problem to troubleshoot under load.
**Step 4: Before the next ruck, reduce the load and repack it symmetrically.** Check for twisted straps, hard objects under the straps, and a low or unstable load. The [load-carriage review](https://pubmed.ncbi.nlm.nih.gov/28088822/) supports lower weight and more symmetric distribution as sensible risk-reduction steps.
**Step 5: Refit the suspension without chasing a magic percentage.** Wider padded straps and a well-fitted hip belt may reduce shoulder pressure. One finger of strap slack is a useful field cue, not a medical threshold.
There is no cited five-minute cutoff that separates harmless pressure from nerve injury. If numbness does not settle promptly and completely, or if you notice weakness, end the ruck and get medical guidance rather than testing the pack again.
---
## How to prevent it long-term
Gear can reduce specific sources of friction or poor load distribution, but no product handles a known percentage of brachial-plexus risk. Start with lower load, good fit, padded straps, and an even pack; treat the products below as equipment options, not medical devices.
| Role | Pick | Relevant boundary |
|------|------|------------------|
| Pack | GORUCK GR1 26L | Wide padded straps and optional load-transfer accessories may improve fit for some bodies. No pack makes nerve compression impossible. |
| Anti-chafe | Body Glide Original | Reduces skin friction where straps rub. It does not reduce load or treat nerve symptoms. |
| Winter traction | Kahtoola MICROspikes | Improves grip on suitable icy terrain. Any connection to rucksack-palsy prevention is indirect and has not been clinically tested. |
Fit and load choices can reduce risk, but they cannot guarantee prevention.
**Use straps that spread pressure comfortably on your body.** The [2016 load-carriage review](https://pubmed.ncbi.nlm.nih.gov/28088822/) recommends wider, better-padded, properly adjusted straps. The [GORUCK GR1](/gear/goruck-gr1) is one option with substantial padding, but its fit still depends on torso, load, adjustment, and whether you add a compatible hip belt. Our [best rucking backpacks guide](/gear/best-rucking-backpacks) compares those fit variables.
**Use a hip belt when it fits the pack and your torso well.** Reviews suggest a hip belt can reduce shoulder loading, but there is no universal 20-pound cutoff and no zero-risk setup. If a pack cannot transfer load comfortably, reduce the load before buying around the problem. [Body Glide Original](/injuries/rucking-foot-care-blister-prevention) can help with skin friction; it does not address nerve compression.
**Let your arms move when terrain allows.** If you need to hold the straps to keep the pack stable, revisit the packing and suspension. This is a practical fit cue rather than a clinically tested prevention rule.
**Check fit during long rucks.** A 15-to-20-minute check can help you notice pressure before it becomes distracting, but the interval is an editorial field cue, not a studied threshold. Stop immediately for tingling, numbness, or weakness.
**Build upper-back and shoulder capacity.** The review includes resistance training among possible risk-reduction measures, although direct prevention trials are limited. Rows, face pulls, and other tolerable upper-back work can support general load carriage. Kahtoola MICROspikes may improve footing on appropriate ice; that is a terrain benefit, not evidence that they prevent nerve injury.
**Check the whole fit.** Pack height, strap path, load symmetry, torso length, and hip-belt contact work together. Ask someone to check the back view under the actual training load; avoid any setup that creates a hard pressure point or requires constant strap gripping.
---
## When to be concerned
Some under-pack tingling settles when the pressure is removed, but documented rucksack palsy is a real nerve injury. The following signs are reasons to stop and seek assessment rather than continue adjusting the pack.
**Numbness that persists after the pack comes off.** There is no universal minute cutoff for "normal." Sensory change that does not settle promptly and completely—or that returns without the pack—needs assessment.
**Weakness in the hand, arm, or shoulder.** Reported cases can involve more than grip strength, including shoulder movement and individual nerves. New weakness is not a cue to finish the ruck; remove the load and seek medical care.
**Numbness that occurs without rucking.** If you're experiencing hand numbness even when you're not rucking, this could indicate a cervical spine problem (nerve compression in your neck), thoracic outlet syndrome, or another condition not related to your pack. This deserves medical evaluation.
**Symptoms in one arm only.** Backpack-related nerve injury can be one-sided; bilateral symptoms are not required. Unilateral numbness also has other possible causes, so it deserves assessment rather than a diagnosis from pack symmetry.
**Any of the above symptoms.** If you are uncertain, see a clinician. The correct nerve and cause are not always obvious from symptoms alone, and published case series used neurological examination and sometimes electrodiagnostic testing.
---
## Management and next steps
If brief tingling settles completely after removing the pack, reduce the next session's load and correct the fit before trying again. If a clinician has diagnosed rucksack palsy, follow that plan rather than treating a gear change as the whole intervention.
Recovery is variable. In the Finnish follow-up, 80% of patients with diagnosed backpack palsy recovered fully within nine months, while 15% had prolonged symptoms ([Nylund et al., 2011](https://pubmed.ncbi.nlm.nih.gov/21429232/)). That is a military case series rather than a forecast for recreational ruckers, but it directly contradicts promises that true palsy always resolves within minutes or days.
The best-supported practical changes are reducing load, improving load symmetry, using wider padded and properly adjusted straps, and considering a hip belt that fits correctly ([Knapik et al., 2016](https://pubmed.ncbi.nlm.nih.gov/28088822/)). The available sources do not establish a 70-to-80% prevention effect for a commercial pack or fit technique.
Most incidence and recovery data come from military populations carrying demanding loads. We should not convert those numbers into an unsupported recreational incidence estimate; the relevant lesson is to act early on symptoms and avoid assuming a lighter civilian load makes nerve injury impossible.
## Frequently Asked Questions
────────────────────────────────────────────────────────────────────────────────
URL: https://ruckauthority.com/injuries/vagus-nerve-hrv-for-ruckers
Title: HRV and the Vagus Nerve for Rucking Recovery
Description: Learn what HRV can and cannot tell you about rucking recovery, how to measure it consistently, and when to reduce training.
Published: 2026-05-15 / Updated: 2026-09-12
## What vagal tone means
Your autonomic nervous system has two main branches. The sympathetic branch is the "go" signal. It raises heart rate, dilates the pupils, pauses digestion, and sends glucose into the blood. The parasympathetic branch is the "rest and rebuild" signal. Much of it runs through the vagus nerve. This nerve links the brainstem to the heart, lungs, gut, and other organs.
"Vagal tone" is a shorthand for parasympathetic influence on the heart and other organs. It is one part of recovery, not a complete score for sleep, fitness, digestion, or health.
At home, you can track heart rate variability (HRV), the change in time between one heartbeat and the next. RMSSD is one HRV measure commonly used to estimate cardiac parasympathetic activity. It is affected by age, sex, breathing, posture, measurement length, device, time of day, health, and training status. Shaffer and Ginsberg's 2017 review explains why readings taken under different conditions should not be compared as if they were interchangeable.
## Why load can increase training stress
Adding a pack raises the energy and cardiovascular cost of walking at a given speed. The size of that increase depends on the load, pace, grade, terrain, heat, and the person carrying it.
Three forms of stress can stack during a ruck:
1. **A steady heavy load.** The pack stays on for the whole session. Your trunk and shoulder muscles work the entire time. This muscle tension can raise sympathetic activity even at a moderate heart rate.
2. **Higher cardiovascular demand.** Looney and colleagues (PMID 33652153) found that relative peak heart rate increased as soldiers walked with heavier loads. The study did not establish one heart-rate range for recreational ruckers.
3. **Heat.** A pack covers part of the back and can reduce airflow. Hot or humid conditions add to the total strain.
Together, these factors can increase recovery needs. The appropriate response may be less weight, a slower pace, a shorter route, or more time before the next hard session.
## How HRV is measured
Two HRV metrics matter for at-home tracking.
- **RMSSD** (root mean square of successive differences): most consumer trackers report this measure. It has the closest link to vagal tone. A higher number points to a stronger parasympathetic state.
- **SDNN** (standard deviation of normal-to-normal intervals): this broader measure covers both branches of the autonomic system. It has a weaker link to vagal tone but is used in some clinical settings.
Consumer wearables may report RMSSD directly or convert it into a proprietary score. A chest strap records beat-to-beat intervals differently from an optical wrist sensor. Whichever device you choose, use the same one under the same conditions so the trend is comparable.
For most ruckers, a GPS watch can track HRV, pace, and heart rate in one place. We often recommend the Instinct 3 Solar for this use. Its HRV Status feature uses a 7-day baseline, solar charging helps on multi-day trips, and it costs less than half as much as a Fenix.
RMSSD is reported in milliseconds, but there is no single healthy target that works across devices and measurement methods. Published reference values change with age, sex, recording length, posture, and context. Track your own trend instead of comparing one wearable's score with another person's result.
## Read the 7-day trend
Do not react to a single HRV reading. HRV can swing 20-30 percent from one day to the next in healthy people. Sleep, alcohol, time-zone shifts, early illness, hydration, and stress can all change it. One low reading tells you little.
Use the 7-day rolling average. Do not change training based on one reading alone.
Use HRV as one input:
| Reading and context | Training decision |
|---|---|---|
| Within your usual range and you feel normal | Train as planned. |
| One unusual reading without symptoms | Check the measurement conditions and avoid changing the week on that number alone. |
| Several readings below your usual range with poor sleep, soreness, unusual fatigue, or declining performance | Reduce the load, pace, or duration, or take a rest day. |
| An unusual reading with chest pain, fainting, severe shortness of breath, palpitations, or signs of illness | Do not use a training chart to self-diagnose. Stop and seek appropriate medical care. |
## Slow breathing and HRV
Slow breathing can increase HRV during the exercise and requires no equipment. Evidence for a lasting increase in resting HRV is less certain.
The breathing method matters. Wim Hof-style rapid breathing lowers HRV in the short term because it creates a sympathetic response. Some pranayama methods are hard to study. The three methods below have the strongest evidence for this use.
### 1. Slow nasal breathing at 5-6 breaths per minute
This is also called "coherent breathing" or "resonance-frequency breathing." At about 5-6 breaths per minute, breathing interacts with the baroreflex and can increase HRV during the session. Laborde and colleagues (PMID 28265249) discuss paced breathing as a methodological and biofeedback consideration when studying cardiac vagal activity.
Try breathing in gently for about 5-6 seconds and out for the same length of time for 5-10 minutes. Stop if you feel lightheaded or uncomfortable. The goal is a calm, sustainable pace, not a particular score after the session.
### 2. Box breathing (4-4-4-4)
Inhale for 4 seconds, hold for 4, exhale for 4, and hold for 4. Breath holds can feel uncomfortable for some people. Use a shorter count or skip the holds if needed.
### 3. The physiological sigh
Take two breaths in through the nose, one normal breath followed by a short top-up, then breathe out slowly through the mouth. In a four-week remote trial, Balban et al. (2023, PMID 36630953) found that five minutes of daily cyclic sighing improved mood and reduced respiratory rate compared with mindfulness meditation. The study does not establish cyclic sighing as a treatment for poor recovery.
## Heat and cold exposure
Sauna and cold exposure change heart rate, blood pressure, and perceived stress in the short term. Evidence that either reliably improves resting HRV or rucking recovery is limited.
**Sauna** raises heart rate and heat strain during use. It may feel relaxing afterward, but this article does not have enough evidence to prescribe a temperature, duration, or weekly dose for raising HRV. Avoid sauna when dehydrated or ill, and ask a clinician first if you have a cardiovascular condition or take medication that affects blood pressure.
**Cold exposure** creates an immediate stress response. Evidence for cold plunges as a recovery tool is mixed, and sudden cold can be dangerous for some people. It is not a proven shortcut for improving HRV.
Neither practice is required. Sleep, food, hydration, sensible training load, and medical care when needed matter more.
## Foam rolling, percussion massage, and HRV
Foam rolling and percussion massage may reduce soreness or help you relax, but evidence for a meaningful long-term change in resting HRV is thin.
A pack can leave the upper traps, lats, spinal erectors, and calves feeling tight. Brief, comfortable rolling may help those areas feel better. Avoid painful pressure and do not use a change in the wearable score as proof that the tissue has recovered.
A foam roller is the least costly option with the most evidence. Many clinicians and physical therapists use the TriggerPoint Grid. Its texture helps target tight spots without the harsh pressure of a dense roller, and it holds up to long-term use.
Percussion guns work faster on a small tight spot and are easier to use on a stiff back. The Lifepro Sonic offers similar percussion depth to a Theragun at about one-third of the price. That makes it a practical choice unless you use a massage gun every day.
After a hard ruck, try the roller on the calves, glutes, and lats for 5-10 minutes. If you use a percussion device, follow its instructions and avoid injured, numb, swollen, or painful areas.
## A 4-week HRV tracking trial
This four-week plan adds one change at a time so you can track whether it helps.
**Week 1: baseline only.**
- Take an HRV reading at the same time every morning. Track it.
- Do not change anything else. You need a clean baseline to measure against.
- Note your average sleep duration and any alcohol intake. These dominate HRV more than anything you can train.
**Week 2: add 5-10 minutes of comfortable slow breathing daily.**
- Use the same time each day if possible.
- A timer or metronome is enough. You do not need a paid subscription.
**Week 3: keep the measurement and breathing routine stable.**
- Note soreness, mood, illness symptoms, training performance, and perceived effort.
- Do not add another intervention yet; changing several things at once makes the result harder to interpret.
**Week 4: review the trend.**
- Compare the four-week HRV trend with your sleep, symptoms, and training notes.
- Keep the routine only if it is useful and does not make you anxious about normal day-to-day changes.
There is no promised percentage increase. A stable number can still be useful if it helps you recognize how hard sessions, poor sleep, travel, illness, or alcohol affect your own baseline.
## What an HRV-guided ruck week looks like
Use HRV trends to adjust training load.
| Day | HRV reading | Plan |
|---|---|---|
| Mon | Within baseline | 60 min ruck at 30 lb, easy pace |
| Tue | Above baseline | Strength + 30 min walk |
| Wed | At baseline | 75 min ruck at 30 lb, steady |
| Thu | -1 SD below baseline | Reduce to 45 min at 20 lb, easy |
| Fri | Rebound, above baseline | Rest day. Coherent breathing only |
| Sat | At baseline | Long ruck. 90+ min at planned weight |
| Sun | Below baseline | Walk only, no pack |
Treat this as an example, not a prescription. HRV can support a decision to reduce training, but a high reading is not a reason to exceed the planned load.
The [Program Builder](/tools/program-builder) makes a four-week plan that you can adjust with the green/yellow/red guide above. The [Zone 2 calculator](/tools/zone-2-heart-rate-calculator) gives pace targets for a chosen heart rate zone.
## How this fits with the rest of the program
This guide covers recovery. The [Zone 2 rucking guide](/weight-loss/zone-2-rucking-guide) covers effort during a session, and the [injury prevention pillar](/pillars/rucking-injury-prevention) covers broader recovery and load management.
If you track HRV, combine the trend with perceived effort, sleep, soreness, symptoms, and training performance. Use that combined picture to choose between the planned session and an easier day.
## Frequently Asked Questions
### Is HRV useful for planning ruck training?
HRV may help with training decisions when it is measured consistently and interpreted with other recovery signs. Most research involves endurance athletes rather than recreational ruckers, so use the trend as supporting information rather than a command.
### Which HRV tracker should I get for rucking?
A compatible chest strap can provide beat-to-beat intervals for a short morning reading. WHOOP, Oura, and Garmin offer overnight or rolling trends with different sensors and algorithms. Choose one device and keep the measurement conditions consistent; values from different products may not be directly comparable. If overnight recovery trends fit the way you train, you can [see current WHOOP membership options](/shop).
_Disclosure: The WHOOP link is an affiliate link. If you subscribe through it, Ruck Authority may earn a commission at no extra cost to you. That does not change the comparison above._
### Can supplements raise vagal tone?
Do not take a supplement just to move an HRV score. Evidence for products marketed as "vagus nerve support" is weak, and supplements can interact with medication or be inappropriate for some medical conditions. Before paying for one, [check what Examine says about the ingredient and claimed outcome](/shop). Its research summaries are not personal medical advice; discuss a suspected deficiency with a qualified clinician.
_Disclosure: The Examine link is a referral link. If you subscribe through it, Ruck Authority may earn a commission at no extra cost to you._
### How long until I see HRV improvement from breathwork alone?
HRV often changes during slow breathing because respiration affects the spacing between heartbeats. That immediate effect does not guarantee a lasting change in your morning baseline. Track several weeks under consistent conditions if you want to see whether the practice changes your own trend.
### Will rucking improve my HRV over time?
Regular aerobic training may change your HRV over time, but the direction and size vary by person and measurement method. Track the trend without treating a higher number as the goal of training.
### What about vagus nerve reset claims online?
Be skeptical of products or videos promising a "vagus nerve reset" in seconds. HRV is not a diagnosis, and a short-lived change in a wearable reading does not prove better health or recovery.
## Related Articles
- [Zone 2 rucking guide](/weight-loss/zone-2-rucking-guide) - the work-side counterpart to this recovery piece
- [Zone 2 heart rate calculator](/tools/zone-2-heart-rate-calculator) - calculate your zone-2 band using Karvonen + Tanaka
- [Program Builder](/tools/program-builder) - generates a 4-week ruck plan you can overlay HRV on
- [Rucking injury prevention pillar](/pillars/rucking-injury-prevention) - broader recovery and load-management framing
## WEIGHT-LOSS HUB (10 articles)
────────────────────────────────────────────────────────────────────────────────
URL: https://ruckauthority.com/weight-loss/can-rucking-be-your-only-exercise
Title: Can Rucking Be Your Only Exercise? What It Covers and Misses
Description: Rucking covers aerobic fitness and loaded endurance, but it misses upper-body strength, power, and full-range mobility. Learn how to fill the gaps.
Published: 2026-03-10 / Updated: 2026-04-12
## The short answer
For a previously sedentary person, [rucking](/glossary#rucking) can be a useful primary activity. It trains aerobic fitness, loaded walking, and [posterior-chain](/glossary#posterior-chain) endurance. It does not guarantee fat loss, and it does not fully train upper-body strength, power, or mobility. Public-health guidelines also recommend muscle-strengthening work at least two days per week, so rucking alone is not a complete program by that standard.
---
## What rucking covers
Rucking combines aerobic exercise with the muscular demand of carrying a pack.
**Cardiovascular fitness.** Rucking can provide moderate aerobic work when load and pace place the effort near [Zone 2](/weight-loss/zone-2-rucking-guide). It can build an aerobic base, though heart-rate zone and VO2 max response vary.
**Muscular endurance** comes from the load. The glutes, hamstrings, back extensors, trunk stabilizers, and calves work through many repetitions. Some of that endurance may transfer to hiking and daily carrying tasks, but rucking is not a substitute for full-range resistance training.
**[Bone loading](/glossary#bone-density)** is another potential benefit. Loaded walking is weight-bearing and gives the skeleton a mechanical stimulus. The amount of bone-density change from rucking alone is not well established, and anyone with osteoporosis or fracture risk should get individual guidance before adding load.
**Mental health and stress.** Regular activity and outdoor time may support mood or stress management. Rucking is not a substitute for mental-health treatment, and the response varies.
**Energy use** rises with body weight, pack load, pace, grade, and terrain. Calculator estimates often fall around 400-600 calories per hour for some scenarios, but wearables and equations are estimates. A [Garmin Instinct 3 Solar](/gear/best-gps-watches-for-rucking) can track pace and heart-rate trends.
**Task-specific fitness.** Loaded walking can make stairs, hiking, and carrying gear feel easier when those tasks resemble the training.
---
## What rucking doesn't cover well
Rucking does not develop every fitness quality strongly.
**Upper body pushing strength**-chest, shoulders, triceps-gets minimal stimulus from rucking. The load is on your back, distributed through your core and lower body. Your upper body muscles aren't being pushed under heavy tension. If maximum chest strength matters to you, this is a gap.
**Maximal strength** in the lower body is limited. Rucking doesn't place the same kind of heavy, brief mechanical tension on muscles that heavy squats or deadlifts do. The load is relatively light and the reps are very high. You'll build strength, but it's not equivalent to progressive resistance training.
**Power and explosiveness**-sprinting, jumping, rapid changes of direction-are largely absent from rucking. You're not moving explosively. If athletic performance matters to you, this is a meaningful gap. Zone 2 rucking is deliberate and steady, not explosive.
**Flexibility and deep range of motion** don't improve with rucking. In fact, if you're rucking frequently and doing nothing else, your hips, hamstrings, and shoulders may gradually tighten. Rucking doesn't include loaded ranges of motion through full extension.
**Upper body pulling**-beyond what your traps and upper back handle during load carrying-is absent. Your lats, rhomboids, and rear delts don't get targeted pulling stimulus. Rucking alone won't build the balanced shoulder and back musculature that rowing or pull-ups provide.
---
## Rucking as your only exercise: who it works for
Rucking may work well as a primary activity for these groups, though "only" still leaves gaps.
**People focused on aerobic health and weight management.** Rucking can add repeatable activity and energy expenditure. Fat loss still requires an energy deficit, and general-health guidance still includes strength work.
**People transitioning from little exercise.** A simple rucking habit may be easier to follow than a complex plan. Start with 4-6 weeks of manageable loaded walks, then add strength or mobility work as capacity allows. Our [budget starter kit](/gear/budget-rucking-starter-kit) covers beginner options.
**People who dislike gyms.** Rucking can be done outside, alone or with others. Bodyweight and band exercises can cover some strength gaps without a gym.
**Adults over 50 who want lower-impact aerobic work.** Rucking is generally lower impact than running but adds external load to joints and the spine. Start light, and get guidance when osteoporosis, balance problems, joint pain, or cardiovascular conditions are present.
**People with limited time.** Three 45-minute rucks can provide meaningful weekly aerobic work. Two brief strength sessions would cover more of the missing qualities.
---
## The minimum viable supplement
If you decide you want to add just one thing to rucking to fill the biggest gap, here are three options.
**Option A: Upper body push-pull (15 minutes, 2x per week).** Do push-ups and inverted rows or band rows. This addresses the biggest weakness-upper body pushing and pulling. Bodyweight push-ups might be all you need, or add resistance gradually. Pair with horizontal pulling (rows) to maintain shoulder health. Fifteen minutes twice weekly takes 30 minutes total and fills the upper body gap substantially.
**Option B: Basic mobility routine (10 minutes, post-ruck, 2-3x per week).** Hip openers, thoracic rotations, shoulder passthroughs, and hamstring stretches require little equipment. A TriggerPoint GRID foam roller is optional. Mobility work may help maintain range of motion, but it does not guarantee pain prevention.
**Option C: Hill rucking (once per week).** Instead of adding another activity, dial up the intensity of your rucking. One per week at higher grade or faster pace provides the power and muscular strength stimulus that flat-ground rucking misses. Good footwear matters on technical terrain - check our [shoe selection guide](/gear/best-rucking-shoes-by-terrain). This doesn't add new time - it redistributes intensity within your existing rucking volume.
---
## The ideal rucking-plus program
If you have time for a comprehensive approach, here's the program that balances rucking's benefits with a minimal amount of additional work:
**Monday: Moderate ruck (2 - 3 miles).** This is your steady work. A comfortable pace, moderate load, emphasis on consistency. 45 - 60 minutes.
**Tuesday: Strength session (30 minutes).** Push-ups, inverted rows, weighted squats or lunges, planks. 3 sets of 8 - 12 reps each. This addresses upper body gaps and adds lower body strength work beyond what rucking provides.
**Wednesday: Easy ruck (1.5 - 2 miles).** This is recovery-oriented. Light load, comfortable pace, emphasis on moving without fatigue. 30 - 40 minutes.
**Thursday: Rest or mobility.** [Active recovery](/glossary#active-recovery) if you want it. A 10-minute mobility flow or complete rest. This prevents accumulated fatigue.
**Friday: Longer ruck (3 - 4 miles).** Your longer session. This builds aerobic capacity and creates the substantial calorie burn that makes weight loss sustainable. 60 - 90 minutes.
**Saturday: Active recovery.** Hiking (unloaded), yoga, swimming, or an easy walk. Something low-intensity and enjoyable. 30 - 60 minutes.
**Sunday: Rest.** Complete recovery day.
This is about 5-6 hours of structured activity per week, with rucking as the centerpiece. It covers more qualities than rucking alone, though individual goals may require different work.
---
## The verdict
Rucking is a useful primary activity, especially compared with remaining sedentary. It covers aerobic fitness and loaded endurance but leaves clear gaps in upper-body strength, power, and mobility.
If time allows, add push-ups, rows, squats, or similar resistance work twice per week. A simple plan you can follow is more useful than a comprehensive plan you abandon.
## Frequently Asked Questions
────────────────────────────────────────────────────────────────────────────────
URL: https://ruckauthority.com/weight-loss/long-term-rucking-for-weight-loss-a-periodization-approach
Title: Long-Term Rucking for Weight Loss: A Periodization Approach to Avoid Adaptation
Description: Structure your rucking in strategic phases to maintain consistent fat loss over 6-12 months. Learn how to periodize load, volume, and intensity to avoid plateaus.
Published: 2026-05-13 / Updated: 2026-08-31
Your body is smarter than you think. Give it the same [rucking](/glossary#rucking) stimulus for a couple of months, and it tends to adapt by becoming more efficient - burning fewer calories for the same work. This is one of the most common reasons ruckers see their early weight-loss progress slow down, even when they haven't changed anything about their training or diet.
The solution is not to ruck harder or longer every week. It is to structure training in phases that balance progression and recovery while preserving a sustainable calorie deficit. Periodization can organize the work, but it does not override nutrition, sleep, medication, health conditions, or individual response.
*Periodization is a sports-science framework formalized by coaches Tudor Bompa and Leonid Matveyev for endurance athletes, and now widely applied across recreational training. The phase structures and adaptation principles below draw from that literature and established exercise physiology. Rucking-specific notes reflect common practices in the [rucking community](/guides/how-to-start-a-ruck-club), not a controlled study.*
## Why your body adapts to rucking
When you start rucking, your body treats it as a novel stress. Your heart rate spikes, your muscles work harder, and you burn significant calories. Within roughly the first month or two of consistent training, however, your cardiovascular system becomes more efficient, your muscles adapt to the load, and the same workout burns fewer calories than it did at the start. Exact timelines vary by individual fitness, age, and training history - some people adapt faster, some slower.
This adaptation is actually a sign that your training is working - your body is getting fitter. But for weight loss, efficiency is the enemy. You need controlled variety to maintain metabolic demand without overreaching your recovery capacity.
## The three-phase periodization model
Effective rucking periodization for weight loss follows three distinct phases, each lasting 4-6 weeks:
### Phase 1: Base building (weeks 1-6)
**Focus**: Establish consistent volume and proper movement patterns
**Load**: 10-20% of body weight
**Volume**: Build to 8-12 miles per week
**Intensity**: [Conversational pace](/glossary#conversational-pace) ([Zone 2](/glossary#zone-2))
**Frequency**: 3-4 sessions per week
Start with shorter distances at lighter weights. Your goal is to build the habit and allow your connective tissues to adapt. Most people want to skip this phase, but it's the foundation for everything that follows.
Sample week 4 progression:
- Monday: 3 miles with 15 lbs
- Wednesday: 2 miles with 20 lbs
- Friday: 4 miles with 15 lbs
- Sunday: 3 miles with 10 lbs ([active recovery](/glossary#active-recovery) pace)
### Phase 2: Intensity development (weeks 7-12)
**Focus**: Add challenging elements while maintaining base volume
**Load**: Maintain current weights but add variety
**Volume**: Hold at 8-12 miles per week
**Intensity**: Mix paces - some conversational, some challenging
**Frequency**: 3-4 sessions per week
This phase introduces hills, intervals, and varied terrain while keeping your weekly mileage consistent. The metabolic demand increases through intensity variation rather than volume increases.
Sample week 10 progression:
- Monday: 3 miles with 20 lbs on hills
- Wednesday: 2 miles with 25 lbs at brisk pace
- Friday: 4 miles with 15 lbs, mixed terrain
- Sunday: 3 miles with 15 lbs, recovery pace
### Phase 3: Consolidation and reset (weeks 13-18)
**Focus**: Reduce intensity, maintain fitness, prepare for next cycle
**Load**: Reduce by 20-30% from previous phase
**Volume**: Maintain or slightly reduce
**Intensity**: Return to conversational pace
**Frequency**: 3 sessions per week
This isn't a break - it's strategic recovery that prevents burnout and sets you up for the next training block. Many ruckers are surprised to find they continue losing weight during this phase as their bodies catch up with previous training stress.
## Progressive variables in each phase
Rather than randomly changing everything, periodization targets specific variables in each phase:
**Weeks 1-6**: Distance and frequency progression
Start with 2-3 weekly rucks and build to 4. Increase total weekly mileage by 10-15% each week until you reach your target volume.
**Weeks 7-12**: Load and intensity progression
Weekly mileage stays consistent, but you add 5-10 lbs to your pack weight OR increase pace/hills, never both simultaneously. Discrete ruck plates like the [Titan Fitness Ruck Plate](/gear/ruck-plate-comparison) make the load jumps clean and repeatable.
**Weeks 13-18**: Recovery and movement quality
Reduce external load and focus on perfect form, breathing patterns, and movement efficiency. This phase builds the foundation for your next training block.
## Nutrition periodization to match training phases
Your eating should complement your training phases, not fight against them:
**Base building phase**: Moderate calorie deficit (300-400 calories below maintenance)
Focus on establishing consistent meal timing and adequate protein intake. Your body needs energy to adapt to the new training stimulus.
**Intensity phase**: Deeper deficit options (400-500 calories below maintenance)
Your fitness improvements allow for slightly more aggressive fat loss without compromising performance. Monitor energy levels closely.
**Consolidation phase**: Maintenance or small deficit (200-300 calories below maintenance)
This isn't a "diet break," but your calorie deficit can be more conservative as your body consolidates the previous training adaptations.
## Signs you need to adjust your periodization
Your body will tell you if the periodization isn't working:
**Red flags requiring immediate adjustment**:
- Joint pain that doesn't resolve with rest days
- Consistent fatigue that affects daily activities
- No weight loss for 3+ weeks during active phases
- Dreading your ruck sessions
- Sleep quality declining
**Green lights to continue**:
- Soreness that resolves within 24-48 hours
- Steady energy throughout the day
- Looking forward to ruck sessions
- Consistent sleep patterns
- Gradual strength improvements
## Sample 18-week periodized plan
Here's how a complete periodization cycle can be structured. The specific weights and distances scale to the individual - the structure is what carries over. Adjust pack loads downward if you're newer, lighter, or working around an old injury.
**Weeks 1-3: Foundation**
- 10-15 lbs pack weight
- 2-3 rucks per week
- 1-2 mile distances
- Build to 6 total weekly miles
**Weeks 4-6: Volume building**
- 15-20 lbs pack weight
- 3-4 rucks per week
- 2-3 mile distances
- Build to 10 total weekly miles
**Weeks 7-9: Intensity introduction**
- 20-25 lbs pack weight
- 3-4 rucks per week
- Add one hill session weekly
- Maintain 10 weekly miles
**Weeks 10-12: Peak intensity**
- 25-30 lbs pack weight
- 3-4 rucks per week
- Mix of hills, intervals, longer steady rucks
- 10-12 weekly miles
**Weeks 13-15: Active recovery**
- 15-20 lbs pack weight
- 3 rucks per week
- Focus on movement quality
- 8-10 weekly miles
**Weeks 16-18: Cycle transition**
- 20 lbs pack weight
- 3-4 rucks per week
- Prepare for next training block
- 10 weekly miles
## Planning your next training block
After completing an 18-week cycle, you have three options:
**Option 1: Repeat with higher baseline**
Start your next base building phase 5-10 lbs heavier than your previous cycle. This works well if you responded positively to the structure.
**Option 2: Extend phase lengths**
Move to 6-8 week phases instead of 4-6 weeks. This allows for deeper adaptations but requires more patience.
**Option 3: Add complexity**
Introduce new variables like pack placement, walking surfaces, or time of day. Only add one new variable per cycle.
The key is avoiding the temptation to make every subsequent cycle dramatically harder. Small, consistent progressions over multiple cycles beat aggressive jumps that lead to burnout.
## Common periodization mistakes
**Mistake 1: Skipping the base building phase**
Everyone wants to start heavy and fast. But your tendons and joints need 4-6 weeks to adapt to loaded walking. Rushing this phase leads to overuse injuries.
**Mistake 2: Making every session harder**
Periodization includes easy days and easy weeks. Not every ruck should be a suffer-fest. Easy sessions allow recovery while maintaining momentum.
**Mistake 3: Abandoning structure when progress slows**
Weight loss isn't linear. A well-designed periodization plan accounts for natural fluctuations and plateaus. Stick to the plan especially when progress seems slow.
**Mistake 4: Changing too many variables at once**
If you increase weight AND distance AND intensity simultaneously, you can't identify what's working. Change one variable per phase.
**Mistake 5: Ignoring the consolidation phase**
The recovery phase feels like "wasted time" but it prevents overtraining and sets up your next training block. Skip it at your own risk.
## Tracking progress beyond the scale
Weight loss periodization requires metrics beyond daily weigh-ins:
**Weekly measurements**:
- Total weekly mileage completed
- Average pack weight used
- Resting heart rate (measure before getting out of bed - a wrist tracker like the [Garmin Instinct 3 Solar](/gear/best-gps-watches-for-rucking) does this overnight automatically)
- Sleep quality (1-10 scale)
**Monthly assessments**:
- Body measurements (waist, hips, chest)
- Progress photos in consistent lighting
- Fitness benchmarks (how do the same routes feel?)
- Energy levels throughout the day
**Phase-end evaluations**:
- Which workouts felt sustainable vs. unsustainable?
- What pack weights felt appropriate for each phase?
- How did nutrition timing affect performance?
- What adjustments are needed for the next block?
This data helps you refine your approach for subsequent training cycles.
## When periodization isn't right for you
Periodization works best for people who can commit to 12+ weeks of structured training. It may not be appropriate if:
- You prefer completely flexible workout schedules
- You're dealing with significant life stress that makes planning difficult
- You have less than 8 weeks available for your weight loss timeline
- You strongly prefer variety and spontaneity in your exercise routine
In these cases, a more flexible approach like [zone 2 rucking](/weight-loss/zone-2-rucking-guide) might be more sustainable.
## Frequently asked questions
────────────────────────────────────────────────────────────────────────────────
URL: https://ruckauthority.com/weight-loss/progressive-overload-for-weight-loss-rucking-how-to-keep-bur
Title: Progressive Overload for Weight Loss Rucking: How to Keep Burning Fat as You Get Stronger
Description: Use progressive overload for rucking weight loss with practical ways to add weight, distance, hills, and pace without stalling or overdoing it.
Published: 2026-04-25 / Updated: 2026-05-24
After 2-3 months of consistent [rucking](/glossary#rucking), the same load and route may feel easier. That is a sign of adaptation. It can also mean the workout provides less of a training stimulus than it did at the start.
[Progressive overload](/glossary#progressive-overload) means increasing the challenge over time. For rucking, that can mean a small change in pack weight, distance, pace, terrain, or frequency. It can help fitness continue to improve, but fat loss still depends largely on food intake and total activity.
The progression recommendations below are conservative defaults synthesized from load-carriage research and basic endurance-training practice. Treat them as starting points, then adjust based on recovery, pain signals, and consistency.
Progressive overload is not limited to weightlifting. The same principle can guide rucking when a familiar session no longer feels challenging.
This is general training and weight-management guidance, not medical or nutrition care. If you have a history of disordered eating, are taking medication that affects appetite or metabolism, or have joint, bone, cardiovascular, or metabolic conditions, talk to a doctor, physical therapist, or registered dietitian before using rucking as a structured weight-loss tool.
## Understanding Progressive Overload for Rucking
Progressive overload means gradually increasing the stress placed on your body during exercise. In traditional strength training, this usually means adding more weight to the bar. In rucking, you have multiple variables to manipulate: pack weight, distance, pace, terrain, and frequency.
As fitness improves, the same session may require less effort. A measured increase in one training variable can raise the demand again.
For example, a 2-mile ruck with a 20-pound pack might initially raise heart rate to 140-150 beats per minute. Three months later, the same session might produce 120-130 bpm. That lower response suggests the route has become easier, though calorie burn also depends on body size, pace, grade, and other factors.
## The Four Pillars of Rucking Progression
### 1. Weight Progression
Adding pack weight is one way to progress, but large or frequent jumps raise the strain on joints and connective tissue.
**The Conservative Approach (Recommended):**
- Increase pack weight by 5-10 pounds every 3-4 weeks
- Never jump more than a moderate percentage of your current pack weight in a single increase
- Master your current weight for at least three consistent weeks before progressing
**The Aggressive Approach (Higher Injury Risk):**
- Adding weight weekly or bi-weekly
- Making large weight jumps at once
- Progressing weight while simultaneously increasing distance or pace
The conservative approach is boring, but it lines up with what load-carriage injury research keeps warning about: rapid jumps in load and volume are where overuse problems show up. For weight loss, staying healthy enough to repeat sessions matters more than winning a single heavy ruck.
### 2. Distance Progression
Increasing your rucking distance burns more total calories and builds greater aerobic capacity. Use the same patience you would bring to running progression.
**Weekly Distance Increases:**
- Add modest percentages to your total weekly rucking distance
- Focus the increase on your longest ruck of the week
- Every fourth week, reduce distance moderately for recovery
**Monthly Distance Targets:**
- Month 1: Establish your baseline (e.g., 3 rucks of 2 miles each = 6 miles/week)
- Month 2: Increase weekly distance gradually
- Month 3: Continue gradual increases
- Month 4: Deload to below recent peak, then restart progression
**Example Progression:**
- Week 1-3: 2 miles, 2 miles, 3 miles (7 total)
- Week 4-6: 2 miles, 2.5 miles, 3.5 miles (8 total)
- Week 7-9: 2.5 miles, 2.5 miles, 4 miles (9 total)
- Week 10: Deload to 2 miles, 2 miles, 3 miles (7 total)
### 3. Pace Progression
Speed work adds intensity without requiring heavier packs. This is particularly valuable for weight loss because higher-intensity work creates greater EPOC (Excess Post-Exercise Oxygen Consumption) - the "afterburn" effect where you continue burning extra calories for hours after exercise.
**Tempo Rucking:**
- Pick one ruck per week to focus on pace
- Target a pace that elevates your heart rate to 75-85% of max
- Start with 20-30 minute tempo sessions
- Gradually increase tempo duration by 5 minutes every 2 weeks
**Interval Training:**
- Alternate between high-intensity and recovery periods
- Example: 2 minutes fast, 2 minutes easy, repeat 5-8 times
- Gradually decrease rest periods or increase work periods
- Progress from 1:1 work-to-rest ratio toward 2:1 over 8-12 weeks
### 4. Terrain Progression
Hills and challenging terrain multiply the difficulty without requiring equipment changes. A 20-pound pack on steep terrain can feel like 30 pounds on flat ground.
**Elevation Strategies:**
- Add hills gradually - start with gentle grades under 5%
- Measure difficulty by total elevation gain, not just distance
- 100 feet of elevation gain roughly equals an extra 0.1 miles of flat distance in terms of effort
**Surface Progression:**
- Pavement → gravel paths → dirt trails → technical terrain
- Soft surfaces like sand or snow dramatically increase calorie burn
- Uneven terrain engages stabilizing muscles and increases energy cost
## Plateau-Breaking Techniques
If a simple progression no longer changes the training demand, these advanced strategies can vary the stimulus. They do not guarantee renewed weight loss.
### Periodization
Instead of linear progression, cycle through different training focuses:
- **Week 1-2:** Focus on distance (longer, slower rucks)
- **Week 3-4:** Focus on intensity (shorter, faster rucks)
- **Week 5-6:** Focus on load (heavier pack, moderate pace/distance)
- **Week 7:** [Active recovery](/glossary#active-recovery) (light ruck or just walking)
### Compound Challenges
Combine multiple stressors strategically:
- Heavy pack + hills (but shorter distance)
- Light pack + very long distance
- Medium pack + tempo pace + modest hills
### Ruck-Plus Workouts
Add bodyweight exercises to your ruck:
- Stop every 0.5 miles for 20 squats, 10 push-ups, 30-second plank
- Carry your pack during the exercises for extra challenge
- This changes the session from steady-state cardio to mixed cardio and strength work
## Monitoring Your Progress
Effective progression requires tracking more than just the scale:
### Performance Metrics
- Heart rate at consistent effort levels
- Pace at the same [perceived exertion](/glossary#rpe)
- Recovery time between challenging sessions
- Sleep quality and morning resting heart rate
### Body Composition Changes
- Progress photos (same lighting, poses, time of day)
- Measurements (waist, hips, chest, arms)
- How your clothes fit
- Energy levels throughout the day
### Weekly Assessment Questions
1. Does my regular ruck feel easier than it did 3 weeks ago?
2. Has my average heart rate decreased for the same route and pace?
3. Do I recover faster between challenging sessions?
4. Am I sleeping well and feeling energized?
If you answer "yes" to most of these questions, your body has adapted and it's time to progress.
## Common Progression Mistakes
### Mistake 1: Too Much, Too Fast
Jumping from 20 pounds to 40 pounds or doubling distance at once adds a sharp increase in injury risk without ensuring faster results.
### Mistake 2: Progressing Everything at Once
Adding weight AND distance AND pace simultaneously overwhelms your recovery capacity.
### Mistake 3: Ignoring Recovery Signals
Persistent fatigue, declining performance, or nagging aches mean you need to back off, not push harder.
### Mistake 4: Abandoning What Works
If 3x/week rucking is sustainable and effective, don't jump to 6x/week just because you want faster results.
### Mistake 5: Comparing Your Progression to Others
A 5-pound monthly increase may be appropriate even if someone else adds 10 pounds. Progress should reflect your current fitness, form, recovery, and injury history.
## When to Reset Your Progression
Sometimes the smartest move is stepping back:
**Reset Indicators:**
- Persistent fatigue lasting more than a week
- Declining performance despite adequate sleep and nutrition
- Nagging pain or injury symptoms
- Loss of motivation or enjoyment in rucking
**How to Reset:**
- Reduce all variables moderately for 1-2 weeks
- Focus on movement quality over quantity
- Prioritize sleep, nutrition, and stress management
- Gradually rebuild from the reduced baseline
## Sample 12-Week Progressive Overload Plan
This plan assumes you're starting from a base of 20-pound pack, 2-mile distances, 3x/week frequency:
**Weeks 1-3: Establish Baseline**
- Mon: 2 miles, 20 lbs, easy pace
- Wed: 2 miles, 20 lbs, easy pace
- Sat: 3 miles, 20 lbs, easy pace
**Weeks 4-6: Add Distance**
- Mon: 2 miles, 20 lbs, easy pace
- Wed: 2.5 miles, 20 lbs, easy pace
- Sat: 3.5 miles, 20 lbs, easy pace
**Weeks 7-9: Add Weight**
- Mon: 2 miles, 25 lbs, easy pace
- Wed: 2.5 miles, 25 lbs, easy pace
- Sat: 3.5 miles, 25 lbs, easy pace
**Weeks 10-12: Add Intensity**
- Mon: 2 miles, 25 lbs, tempo pace
- Wed: 2.5 miles, 25 lbs, easy pace
- Sat: 3.5 miles, 25 lbs, easy pace
## The Nutrition Connection
Progressive overload for weight loss only works with appropriate nutrition support:
**During Progression Phases:**
- Maintain a moderate calorie deficit (300-500 calories below maintenance)
- Prioritize protein (0.7-1g per pound bodyweight) to preserve muscle
- Time carbohydrates around your more challenging ruck sessions
- Stay hydrated - dehydration masks true adaptation
**During Reset/Recovery Phases:**
- Eat at maintenance calories or a smaller deficit
- Focus on nutrient density and anti-inflammatory foods
- Consider temporarily increasing calories if fatigue is persistent
Training cannot reliably offset a sustained calorie surplus, and progressive training still requires enough food to support recovery.
## Equipment Considerations for Progression
As you advance, your gear needs may change:
**For Weight Progression:**
- Invest in a quality pack that can handle 40-50+ pounds safely
- Consider a [GORUCK GR1](/gear/goruck-gr1) or similar military-inspired pack designed for heavy loads
- Use proper weight plates rather than improvised weights for even load distribution
**For Distance Progression:**
- Ensure your pack has adequate padding and ventilation for longer sessions
- Consider a hydration system for rucks over 90 minutes
- Invest in quality socks and foot care supplies
**For Terrain Progression:**
- Trail-specific footwear becomes important for off-road progression
- Consider trekking poles like the [Black Diamond Trail](/gear/best-trekking-poles-for-rucking) for steep terrain with heavy packs
- A headlamp enables early morning or evening progression sessions
## Frequently asked questions
────────────────────────────────────────────────────────────────────────────────
URL: https://ruckauthority.com/weight-loss/rucking-afterburn-effect
Title: Rucking Metabolism: How Weighted Walking Changes Your Calorie Burn (Even After You Stop)
Description: Discover how rucking creates the 'afterburn effect' through EPOC - extending your calorie burn for hours after your weighted walk ends. Science-backed insights into rucking's metabolic advantages.
Published: 2026-05-13 / Updated: 2026-05-24
When you finish a challenging ruck, your body doesn't just flip a switch and return to normal. For hours afterward, your metabolism stays elevated, burning extra calories as your system works to recover from the effort. This phenomenon - called excess post-exercise oxygen consumption (EPOC) - is one of rucking's underappreciated metabolic advantages.
Understanding how rucking affects your metabolism both during and after exercise can help you structure your training more effectively and set realistic expectations for weight loss progress.
*The metabolic effects and EPOC research below come from peer-reviewed exercise-physiology studies. The rucking applications are extrapolated from the demands of [weighted walking](/glossary#rucking), not tested directly in every case.*
This is general training and weight-management education, not medical advice. If you have a cardiovascular, metabolic, eating-disorder, pregnancy, or medication-related concern, talk with a qualified clinician or registered dietitian before using hard rucks or calorie targets as a weight-loss strategy.
## What is EPOC and why does it matter?
EPOC, often called the "afterburn effect," is the increased oxygen consumption and calorie burn that continues after exercise ends. Think of it like a car engine that stays warm after you turn off the ignition - your body continues burning energy as it works to return to its pre-exercise state.
The metabolic processes driving EPOC include:
- Replenishing oxygen stores in blood and muscles
- Converting lactate back to usable energy
- Repairing muscle proteins
- Restoring elevated heart rate and breathing
- Clearing stress hormones like adrenaline
- Returning core temperature to baseline
These recovery processes require energy, extending your calorie burn well beyond the actual exercise session.
## How rucking triggers EPOC
Rucking's unique combination of load-bearing and sustained effort creates conditions that promote significant EPOC. The added weight forces your cardiovascular system to work harder than normal walking, while the duration builds metabolic stress that takes time to resolve.
Several factors in rucking specifically enhance the afterburn effect:
**Intensity relative to fitness level**: Even moderate-pace rucking often pushes people into higher heart rate zones than they realize. A 30-pound pack can typically lift heart rate roughly 20-30 beats per minute above unweighted walking at the same pace, though individual responses vary based on fitness, body weight, and conditioning.
**Sustained muscular work**: The constant load on your back, core, and legs creates ongoing muscular stress throughout the session. This differs from interval training where work periods are brief.
**Full-body engagement**: Rucking activates stabilizing muscles throughout your torso and legs in ways that pure cardiovascular exercise doesn't, increasing the total energy cost of recovery.
**Heat generation**: Carrying weight generates more body heat, which requires additional energy to dissipate both during and after exercise.
## Rucking vs other cardio for metabolic effects
Research on EPOC shows that different types of exercise create varying degrees of afterburn. While most studies focus on running or cycling, we can extrapolate how rucking likely compares based on its physiological demands.
**Compared to steady-state cardio**: Traditional moderate-intensity cardio (like jogging at 60% max heart rate) typically produces modest EPOC - the figure most commonly cited in exercise physiology literature falls in the 6-15% of exercise calories range. Rucking at similar perceived effort levels likely produces greater EPOC due to the added resistance component, though precise comparisons in ruckers haven't been well studied.
**Compared to high-intensity intervals**: HIIT protocols consistently show the highest EPOC responses, with studies often reporting increases in the 15-20% range. Individual responses vary considerably. Rucking with hills or varied pace can approach similar effects while being more sustainable for most people.
**Compared to resistance training**: Weight lifting creates substantial EPOC through muscle protein synthesis demands. Rucking bridges this gap by combining cardiovascular work with load-bearing stress.
The practical takeaway: rucking likely produces more EPOC than walking or easy jogging, but less than dedicated HIIT or heavy strength training. However, its sustainability advantage means you can accumulate more total weekly afterburn through consistent rucking than sporadic high-intensity sessions.
## Maximizing EPOC from your rucks
While you shouldn't structure every ruck around maximizing afterburn (consistency trumps intensity), certain approaches can enhance your metabolic response:
**Include challenging terrain**: Hills, stairs, or soft surfaces like sand increase the effort required, boosting both during-exercise and post-exercise calorie burn.
**Vary your pace**: Incorporating periods of faster walking or brief jogging intervals can spike heart rate and metabolic demand without making the session unsustainable.
**Progressive load increases**: Gradually adding weight over time ensures your body continues adapting to new metabolic demands rather than becoming overly efficient. Discrete plates like the [Titan Fitness Ruck Plate](/gear/ruck-plate-comparison) make it easy to step up in clean 5- or 10-pound jumps instead of guessing with household weight.
**Longer durations**: EPOC magnitude correlates with total energy expenditure. A 90-minute moderate ruck often produces more total afterburn than a 30-minute intense session.
**Minimize rest periods**: Continuous movement maintains elevated heart rate and metabolic stress. Save extended breaks for safety or hydration needs only.
That said, chasing EPOC shouldn't override fundamental training principles. A sustainable routine of moderate-intensity rucking will ultimately burn more total calories than sporadic high-intensity sessions that lead to burnout or injury.
## The realistic impact on weight loss
EPOC sounds impressive in theory, but its practical contribution to weight loss deserves honest context. Most research suggests afterburn effects on the order of 15-50 extra calories for typical exercise sessions - meaningful over time, but nowhere near a weight-loss shortcut.
For a challenging 60-minute ruck that burns roughly 300 calories during exercise (a figure that varies significantly based on body weight, pack weight, terrain, and pace), EPOC might add another 30-60 calories over the following 2-3 hours. Use the [rucking calorie calculator](/tools/calorie-calculator) to estimate your session calories before you count any afterburn bonus. That's roughly equivalent to half an apple or a few crackers. Rucking won't out-train a poor diet - the calorie deficit that actually drives fat loss still comes mostly from food.
More significant metabolic adaptations from regular rucking include:
- Improved insulin sensitivity
- Better cardiovascular efficiency
- Increased daily energy expenditure through improved fitness
- Enhanced fat oxidation during exercise
- Better sleep quality affecting hormonal regulation
These chronic adaptations likely contribute more to weight management than acute EPOC responses, though both play a role in the total picture.
## Timeline and duration of afterburn
EPOC tends to follow a predictable pattern after exercise. Most of it occurs in the first 30-60 minutes post-workout, with effects potentially lingering for several hours - and in some cases up to roughly 24 hours - depending on exercise intensity and duration. These windows are approximate; individual response varies widely.
For typical rucking sessions:
**0-30 minutes post-ruck**: Highest rate of excess calorie burn as heart rate and breathing return to normal. This is when you're still feeling warm and slightly out of breath.
**30-120 minutes**: Continued elevated metabolism as your body clears lactate and begins protein synthesis. You might notice increased appetite during this window.
**2-12 hours**: Gradual return to baseline metabolism, though some studies suggest subtle elevation can persist much longer after demanding sessions.
**Next 24-48 hours**: If significant muscle stress occurred (from heavy loads or long duration), protein synthesis demands may maintain slightly elevated metabolism.
The exact timeline depends on your fitness level, the difficulty of your ruck, and individual metabolic factors. Well-trained ruckers typically return to baseline faster than beginners.
## Individual factors affecting EPOC
Your personal EPOC response to rucking varies based on several factors:
**Fitness level**: Less conditioned individuals often show greater EPOC responses to the same absolute workload, but recover more slowly.
**Body composition**: People with more muscle mass tend to have higher overall metabolic rates and may show greater afterburn effects.
**Age**: EPOC responses generally decrease with age, though regular exercise helps maintain metabolic flexibility.
**Nutrition timing**: Eating before exercise can affect substrate utilization during recovery, potentially influencing EPOC magnitude.
**Sleep and stress**: Poor recovery between sessions can blunt metabolic responses and extend the time needed to return to baseline.
**Training history**: Your body adapts to repeated stimuli, so the same ruck that initially produced significant EPOC may have diminished effects over time.
This individual variation is why focusing on consistent, progressive training matters more than optimizing for maximum afterburn on any single session.
## Measuring and monitoring metabolic effects
While precise EPOC measurement requires laboratory equipment, you can track indicators of metabolic stress and recovery:
**[Heart rate variability](/glossary#hrv)**: If you already use a wearable that tracks HRV, you'll often see it drop after a challenging ruck and gradually return to baseline as you recover. No wearable? Skip this one - HRV is useful but not necessary.
**Resting heart rate**: Your morning resting heart rate often stays elevated 1-2 days after demanding rucks, indicating ongoing metabolic stress. You can track this for free with a 60-second finger-on-wrist count first thing in the morning - no device needed. If you'd rather not think about it, a continuous-tracking watch like the [Garmin Instinct 3 Solar](/gear/best-gps-watches-for-rucking) logs resting HR overnight automatically.
**Sleep quality**: Intense exercise can temporarily disrupt sleep patterns as your nervous system remains activated.
**Appetite changes**: Increased hunger in the hours or day after challenging rucks reflects your body's attempt to replenish energy stores.
**Perceived energy levels**: Feeling unusually tired or energetic can indicate ongoing metabolic effects from previous training.
These subjective and objective markers help you understand how different ruck intensities and durations affect your individual metabolism, allowing you to optimize training stress and recovery.
## Programming rucks for metabolic benefits
To maximize the metabolic [benefits of rucking](/guides/rucking-benefits) without overdoing it, consider this weekly structure:
**2-3 moderate baseline rucks**: 45-75 minutes at [conversational pace](/glossary#conversational-pace) with a load you can carry comfortably. A common starting range is 15-25% of body weight for healthy adults building from a base; beginners and anyone with existing knee, back, or hip issues should start lighter (often 10% or less) and progress slowly. These sessions build aerobic fitness and consistent calorie burn.
**1 challenging session**: Hills, intervals, or longer duration to spike metabolic demand and EPOC. This might be your highest weekly calorie burn.
**1-2 lighter sessions**: Shorter duration or reduced weight for [active recovery](/glossary#active-recovery) while maintaining movement patterns.
This approach balances immediate calorie burn, afterburn effects, and long-term metabolic adaptations while remaining sustainable for most people's schedules and recovery capacity.
## Common misconceptions about afterburn
Several myths about EPOC and metabolic effects deserve clarification:
**"Afterburn burns as many calories as the workout itself"**: False. Even with intense exercise, EPOC rarely exceeds 20% of exercise calories burned.
**"You can out-train a bad diet with EPOC"**: Absolutely not. The extra 30-50 calories from afterburn won't offset poor nutrition choices.
**"Longer afterburn always means better workouts"**: Not necessarily. Excessive EPOC can indicate overreaching or incomplete recovery.
**"Feeling hungry after exercise means high EPOC"**: Appetite is influenced by many factors beyond metabolic rate, including hormonal responses and blood sugar changes.
**"You should exercise fasted to maximize afterburn"**: While fasted exercise can affect substrate utilization, it doesn't necessarily increase EPOC and may impair performance.
Understanding these limitations helps set appropriate expectations and prevents overreliance on afterburn effects for weight management goals.
## Frequently asked questions
────────────────────────────────────────────────────────────────────────────────
URL: https://ruckauthority.com/weight-loss/rucking-calorie-calculator-guide
Title: How Many Calories Does Rucking Burn?
Description: Calculate your rucking calorie burn using the Pandolf equation, MET values, and heart rate data. Includes comparisons to walking, running, and cycling.
Published: 2026-03-10 / Updated: 2026-09-25
## Calculate your rucking calorie burn
Use the calculator above to estimate how many calories you'll burn during your rucks. Enter your bodyweight, ruck load, distance or duration, pace, and terrain. The calculator will show you total calories burned, calories per mile, and calories per minute, plus how your calorie burn compares to walking, running, and cycling at the same intensity. If you just need the tool without the full guide, open the [standalone rucking calorie calculator](/tools/rucking-calorie-calculator).
The fast answer: most recreational rucks land between **240 and 550 calories per hour**. Light beginner rucks sit near the low end. Heavy, hilly, or fast rucks sit near the high end. The biggest variables are body weight, pack weight, walking speed, terrain, and grade.
| Example ruck | Estimated burn | Why |
| --- | --- | --- |
| 150-lb person, 15-lb pack, 2 miles flat | ~175-185 calories | Light load, short distance |
| 180-lb person, 25-lb pack, 3 miles flat | ~325-345 calories | Common beginner/intermediate ruck |
| 200-lb person, 35-lb pack, 4 miles flat | ~495-525 calories | Heavier body + heavier pack |
| 180-lb person, 30-lb pack, 3 miles with 3-5% hills | ~445-525 calories | Grade multiplies energy cost |
## Gear that changes the experience
| Goal | Gear that helps | Why it matters |
| --- | --- | --- |
| Make the load measurable | [Titan Fitness Ruck Plate](/gear/ruck-plate-comparison) | A known load makes the calculator useful instead of approximate. |
| Keep the habit comfortable | [Darn Tough socks](/gear/best-rucking-socks-blister-prevention) and [Body Glide](/injuries/rucking-foot-care-blister-prevention) | Weight-loss results come from repeatable sessions, not heroic one-offs. |
| Ruck longer without overdoing it | [Source WXP 3L](/gear/best-hydration-packs-for-rucking) and LMNT | Heat, hills, and duration make hydration part of the plan. |
---
## How we calculate this
Understanding the math behind calorie estimation helps you trust the numbers and understand their limits. For the full implementation notes, source block, and caveats, see our [rucking calorie calculator methodology](/tools/calorie-calculator/methodology).
### The Pandolf equation
The most scientifically rigorous approach comes from the Pandolf load-carriage equation, developed by the US Army Research Institute of Environmental Medicine in 1977. The Army needed to know the energetic cost of loaded marching for mission planning, so researchers studied metabolic cost across different loads, speeds, grades, and terrains.
The equation is: **M = 1.5W + 2.0(W+L)(L/W)² + η(W+L)(1.5V² + 0.35VG)**
Breaking down the variables: **W** is your body mass in kilograms, **L** is the load mass, **V** is speed in meters per second, **G** is grade expressed as a percent, and **η** is a terrain factor that accounts for surface conditions.
Terrain factors are key. On a paved road, η = 1.0 (baseline). On gravel, η = 1.2. Light brush or uneven ground adds η = 1.5. Heavy brush or forest floor requires η = 1.8. Sand is brutal: η = 2.1. This explains why the same load at the same pace feels dramatically harder on sand versus pavement.
The limitation: the equation was developed for military loads (typically 40 - 100 lbs on soldiers) and longer distances. It may overestimate calorie burn at lighter loads (10 - 15 lbs) or very slow paces. But it's the most validated method for [rucking](/glossary#rucking) specifically, which is why we use it as our primary calculation.
### MET values for loaded walking
An alternative approach uses MET values, or metabolic equivalent of task, expressed as multiples of your resting metabolic rate. The authoritative reference for these values is the [2024 Compendium of Physical Activities (Herrmann et al., PMC11336313)](https://pmc.ncbi.nlm.nih.gov/articles/PMC11336313/), a major NIH-published update that replaces older Ainsworth-era tables and is the source we use for MET cross-checks. Walking unloaded at 3.5 mph burns approximately 3.5 METs. Add a 10 - 20 lb load at the same pace and you elevate to roughly 5 - 6 METs. Add a 30 - 40 lb load and you're at 6.5 - 8 METs.
The formula: **Calories burned = METs × body weight (kg) × hours**
For example, a 180 lb person (82 kg) rucking for 1 hour at 6 METs: 6 × 82 × 1 = 492 calories. Simple, fast, and useful as a cross-check.
The limitation: MET values are population averages and don't account for individual variation in efficiency or fitness level. The 2024 Compendium notes the same caveat: METs are directionally correct but less precise than load-carriage-specific equations like Pandolf for rucking specifically.
### Which calorie method should you use?
| Method | Best for | Strength | Limitation |
| --- | --- | --- | --- |
| Pandolf | Rucking with known load, speed, grade, and terrain | Most specific to loaded walking | Can overestimate some light recreational rucks |
| MET estimate | Fast ballpark math | Simple and easy to explain | Does not model terrain or exact load well |
| Heart-rate tracker | Tracking your own trend over time | Personalized to your physiology | Often misses pack weight and terrain |
| Fitness app default | Rough motivation only | Convenient | Usually built for walking/running, not loaded walking |
Use Pandolf for planning, METs for cross-checking, and your watch for trend tracking. If all three disagree, trust the trend over the exact number: same route, same load, lower heart rate means you are getting more efficient.
---
## Quick reference: calories per mile by bodyweight and load
Here's a practical table for flat terrain at a steady 3.5 mph pace on pavement. Use this for quick estimates without running the full calculator:
| Bodyweight | 15 lb Load | 20 lb Load | 25 lb Load | 30 lb Load | 35 lb Load |
|------------|-----------|-----------|-----------|-----------|-----------|
| 140 lbs | 87 cal | 90 cal | 92 cal | 95 cal | 97 cal |
| 160 lbs | 99 cal | 101 cal | 103 cal | 106 cal | 109 cal |
| 180 lbs | 110 cal | 113 cal | 115 cal | 117 cal | 120 cal |
| 200 lbs | 122 cal | 124 cal | 126 cal | 129 cal | 131 cal |
| 220 lbs | 133 cal | 135 cal | 138 cal | 140 cal | 143 cal |
So a 180 lb person rucking 3 miles with a 25 lb pack at 3.5 mph burns approximately 345 calories. Add a 5% hill grade and the total rises by roughly 55%, to about 535 calories for the same distance. Fast reference: on flat pavement body weight moves the number more than pack weight does, and grade moves it most of all. These are Pandolf-equation figures, the same model the calculator uses.
---
## Factors that increase calorie burn
Calorie burn is not static. Several variables compound to create big differences in daily burn.
**Heavier load** is the most obvious. Each additional pound increases the work your body must do, but on flat ground the steps are small: for a 180 lb person at 3.5 mph, going from 15 lbs to 25 lbs adds about 16 calories an hour and 35 lbs to 45 lbs about 19. What rises faster than the calorie return is the strain, and beyond 35 - 40% of your bodyweight, the injury risk often exceeds the benefit. The sweet spot for most people is 20 - 30% of bodyweight. A [Titan Fitness ruck plate](/gear/ruck-plate-comparison) gives you precise weight increments to dial in that sweet spot. Check our [ruck plate comparison](/gear/ruck-plate-comparison) for more options.
**Faster pace** has an exponential rather than linear relationship with calorie burn. Walking at 3.0 mph versus 4.0 mph at the same load does not double your burn. It is not proportional, but it increases substantially. The faster you move, the more metabolic cost per unit distance. For weight loss purposes, a sustainable 3.0 - 3.5 mph pace is ideal. It is the speed where most people can maintain [Zone 2](/glossary#zone-2) intensity without overheating or degrading movement quality.
**Hill grade** raises the predicted energy cost of a ruck. The exact change depends on body weight, load, pace, and grade. Hills let you increase effort without adding more weight or walking faster.
**Soft terrain** multiplies the cost. Uneven ground, sand, mud, and deep grass all force your stabilizer muscles to work harder. Your feet don't compress and rebound off the surface as efficiently as on pavement. Walking in sand, for instance, increases calorie cost by roughly 1.7x compared to firm ground in the Pandolf model. Rocky or technical terrain requires more neuromuscular attention and balance work. Proper footwear helps - see our [terrain-specific shoe guide](/gear/best-rucking-shoes-by-terrain). Soft surfaces are harder but also higher injury risk - use strategically, not as a daily norm.
**Hydration and electrolytes** affect performance. For sessions over 60 minutes, LMNT Electrolyte Variety Pack helps maintain sodium balance and prevents the fatigue that comes with hyponatremia during long rucks. Better performance during the ruck means you maintain intensity and don't lose calorie burn to energy crashes.
**Temperature extremes** matter. In cold conditions, your body works harder to maintain core temperature. In hot conditions, you're also taxing your cardiovascular system to thermoregulate. Very hot or very cold rucking burns more calories than temperate conditions, though the effect is modest compared to load and grade.
**Altitude** increases calorie burn because there's less oxygen available. Your body works harder at the same pace to deliver oxygen to your muscles. If you're rucking at altitude, expect 10 - 15% higher calorie burn compared to sea level.
---
## Calorie burn vs other activities
The chart shows the shape of it. Unloaded walking at 3.5 mph on flat pavement burns about 365 calories per hour for a 180 lb person. Add 20 lbs and you're at about 395, a modest increase. Add 35 lbs and you're at about 420. The bigger jump comes from grade: a 30 lb ruck up a 5% incline is about 635. That's the value of rucking: the calorie burn compounds with load, the sustainability of walking, the strength benefit of loaded work, and a joint-friendly impact profile.
---
## Common calorie counting mistakes
Calorie math is useful for guiding behavior, but people make systematic mistakes that distort the value of their work.
**Fitness tracker estimates without calibration** are often 20 - 30% off for rucking specifically. Your Apple Watch or standard Garmin is built on population averages. A dedicated watch like the [Garmin Forerunner 265](/gear/best-gps-watches-for-rucking) has better [VO2 max](/glossary#vo2-max) estimation for rucking loads, but it doesn't know your exact fitness level, efficiency, or the specific terrain you're rucking. Use trackers directionally, but don't treat them as gospel. Compare your tracker's estimates to this calculator and adjust your assumptions if there's consistent divergence.
**Counting gross calories instead of net** is a critical error. You burn a baseline amount of calories just existing. If you burn 2,500 calories total during a ruck but would have burned 300 calories sitting, your net burn is 2,200. For weight loss, the net matters. Some people try to "eat back" all calories burned assuming they're additional. That's incorrect and stalls weight loss.
**Adding back all "earned" calories to your diet** is how people gain weight while exercising. A ruck burns 500 calories, so they add 500 calories to their diet. But if their goal is weight loss, they need a deficit. Rucking creates the deficit. Eating back the calories erases it. Be intentional about what you do with the caloric advantage rucking provides.
**Ignoring EPOC** (excess post-exercise oxygen consumption, or "afterburn") understates the total benefit. Rucking, particularly if it's moderately intense, leaves your metabolism elevated for hours afterward. The effect is modest compared to higher-intensity exercise, but it's real. You're not accounting for the full caloric benefit if you only count the hour of rucking itself. The afterburn effect might add 5 - 10% to your total daily expenditure on rucking days.
**Assuming the same burn every session** ignores adaptation. Your body becomes more efficient. The exact same load, pace, and distance in week 8 burns fewer calories than in week 1 because your neuromuscular system is more efficient. This is fine. It means you're adapting, but it's a factor if you're tracking calories burned. Periodically reassess your numbers rather than using week 1 estimates for month 6.
## Frequently Asked Questions
────────────────────────────────────────────────────────────────────────────────
URL: https://ruckauthority.com/weight-loss/rucking-for-women
Title: Rucking for Women: Fit, Starting Weight, and Training Guidance
Description: A practical guide to starting weight, pack and harness fit, menstrual-cycle questions, pregnancy, and progression for women who ruck.
Published: 2026-03-10 / Updated: 2026-08-31
Women do not need a separate set of rucking laws. The durable rules are the same for everyone: start with a load you can control, keep it close to your back, wear a pack that fits, and increase only one variable at a time.
Where women can run into different problems is equipment fit. Torso length, shoulder-strap spacing, chest-strap position, hip shape, pregnancy or postpartum status, and previous training all change how a loaded pack feels. Those are individual measurements and circumstances, not a reason to assume every woman needs the same pack or training plan.
## A sensible starting weight
For a first session, try **5-10 lb for 20-30 minutes on level ground**. That is a test load, not a target you must outgrow immediately.
Use the lower end if you are returning from inactivity, have a smaller frame, are postpartum, or have a history of foot, knee, hip, back, or pelvic-floor symptoms. A person with years of strength and hiking experience may be comfortable beginning above that range, but the first session should still feel controlled.
The useful checks are visible and repeatable:
- Your normal walking gait does not change.
- You can stand tall without leaning forward.
- The pack does not bounce, pull away from your back, or create numbness.
- You finish feeling as though you could have continued another 10 minutes.
- Ordinary muscle fatigue settles; joint pain, tingling, or increasing back pain is a stop signal.
Load-carriage research consistently finds that effort, posture changes, and discomfort increase as load rises. Female-specific studies also show that pack and belt fit can require individual adjustment; they do not establish one universal percentage that is right for every woman. See the [women's MOLLE fit study](https://pubmed.ncbi.nlm.nih.gov/15605942/) and the broader [load-carriage review](https://pubmed.ncbi.nlm.nih.gov/15677062/).
Treat the calculator result as a planning ceiling, not an instruction to load that amount on day one.
---
## Fit the pack to your body
Measure your torso from the prominent C7 vertebra at the base of your neck to the line between the tops of your hip bones. Then try the pack with weight inside it. Height and gender labels are only shortcuts; the loaded fit is what counts.
Check these five points:
1. **Harness range:** The pack's stated torso range includes your measurement.
2. **Shoulder spacing:** The straps wrap without cutting into the neck or sitting at the edge of the shoulders.
3. **Sternum strap:** It can sit comfortably across the upper chest without pressure on breast tissue.
4. **Load position:** Dense weight stays high, secure, and close to the back instead of sagging away from it.
5. **Hip belt, when used:** It lands on the hip crest and transfers load without digging into the abdomen.
Women-specific harnesses can help when their strap shape or torso range matches you, but a smaller unisex ruck may fit better than a poorly matched women's model. Try both when possible.
These are three useful starting points for fit, adjustable weight, and friction management:
| Role | Pick | Why it may fit the job |
|------|------|-----------------------------------------|
| Pack | Osprey Tempest Velocity 20 Women's | Adjustable harness and supportive hip belt for people who prefer a hiking-pack fit. |
| Weight | Titan Fitness Ruck Plate | Multiple weight options make gradual progression easier than a single heavy fixed load. |
| Anti-chafe | Body Glide Original | Useful on any repeat friction point; apply before the ruck rather than after irritation starts. |
Our [women's rucking backpack guide](/gear/best-rucking-backpacks-for-women) compares torso range, harness design, and load control in more detail.
---
## Fat loss and bone health: what the evidence can say
Adding load raises the energy cost of walking. That can make rucking a useful part of a fat-loss plan, particularly if it is more enjoyable and repeatable than running. It does **not** create a women-specific hormonal fat-loss effect. Long-term weight change still depends on total activity, food intake, recovery, and consistency.
The bone-health case deserves similar restraint. Weight-bearing and resistance exercise are important for bone and muscle health, but direct rucking studies are limited. Weighted-vest trials in older women have produced mixed results: one controlled program improved strength and balance without changing bone density, while other small studies reported localized gains. A larger 2025 randomized trial found that a weighted vest did not prevent hip bone loss during intentional weight loss. Read the [OsteoACTIVE trial](https://pmc.ncbi.nlm.nih.gov/articles/PMC4650105/) and the [2025 randomized clinical trial](https://pmc.ncbi.nlm.nih.gov/articles/PMC12181796/).
That makes rucking a reasonable form of loaded, weight-bearing exercise, not a proven osteoporosis treatment. Anyone with osteoporosis, a previous fragility fracture, or a high fracture risk should get individualized guidance before adding external load.
## Menstrual cycles and training
You may notice that energy, cramps, temperature tolerance, sleep, or perceived effort change during the month. Track those patterns if they affect your rucks, but do not assume a calendar phase automatically requires a heavier or lighter session.
A systematic review of 78 studies found only a **trivial average performance difference** across menstrual-cycle phases, with large variation between people and generally low-quality evidence. The practical conclusion was to use an individualized approach, not a universal phase-based prescription. See the [systematic review and meta-analysis](https://pmc.ncbi.nlm.nih.gov/articles/PMC7497427/).
Use symptoms to guide the day:
- If your normal load and pace feel normal, train normally.
- If cramps, migraine, heavy bleeding, poor sleep, or unusual fatigue change the session, reduce load, distance, or pace.
- If symptoms repeatedly disrupt daily life or exercise, discuss them with a clinician rather than treating them as a training problem to push through.
## Pregnancy, postpartum return, and pelvic-floor symptoms
Rucking with external load has not been studied well enough to offer a universal pregnancy prescription. The American College of Obstetricians and Gynecologists says most people with uncomplicated pregnancies can continue or begin appropriate aerobic and strength exercise after clinical evaluation, with modifications as needed. That broad guidance is not the same as clearance for a heavy pack. Review the [ACOG guidance](https://www.acog.org/clinical/clinical-guidance/committee-opinion/articles/2020/04/physical-activity-and-exercise-during-pregnancy-and-the-postpartum-period) with your obstetric clinician.
During pregnancy or a postpartum return:
- Get individualized clearance, especially after complications or a cesarean birth.
- Begin below your pre-pregnancy load and shorten the route.
- Avoid heat stress and keep hydration accessible.
- Stop for bleeding, dizziness, chest pain, painful contractions, fluid leakage, unusual shortness of breath, or calf pain.
- Treat pelvic pressure, heaviness, leakage, or pain as a reason to reduce load and consult a pelvic-health clinician.
Loaded walking is low impact, but low impact does not mean symptom-proof. A pack can still increase trunk and pelvic-floor demand.
---
## A conservative four-week start
This plan is suitable for a healthy beginner who can already walk for 30 minutes without pain. It is intentionally modest.
| Week | Sessions | Time | Load |
|------|----------|------|------|
| 1 | 2 | 20 minutes | 5-10 lb |
| 2 | 2 | 25 minutes | Same load |
| 3 | 2-3 | 30 minutes | Same load |
| 4 | 3 | 30 minutes | Add up to 5 lb only if every prior session felt controlled |
Keep the route level at first. Add time before pace, hills, or load. If form changes or discomfort accumulates between sessions, repeat the week or step back.
Women can and do adapt to demanding load carriage. In one small study, ten weeks of specific training improved strength and reduced the oxygen cost of a standardized loaded walk in recreationally active women. That finding supports gradual practice, not an aggressive first-day load. See the [female load-carriage training study](https://pubmed.ncbi.nlm.nih.gov/32102055/).
## Related reading
- [Rucking research 2026](/guides/rucking-research-2026): includes the 2026 trial that found loaded walking cut strength more in women than in men.
- [Best rucking backpacks for women](/gear/best-rucking-backpacks-for-women) - compare torso range, harness shape, and load support
- [Best rucking gear for women](/gear/best-rucking-gear-for-women) - footwear, socks, and friction-management options
- [Rucking for bone density](/guides/rucking-for-bone-density) - the evidence and its limits
- [Women's rucking loadout](/loadouts/womens-rucker) - a complete setup with exact product destinations
- [First 30 days of rucking](/guides/first-30-days-of-rucking) - a longer progression after the four-week baseline
## Frequently Asked Questions
────────────────────────────────────────────────────────────────────────────────
URL: https://ruckauthority.com/weight-loss/rucking-on-glp-1-medications
Title: Rucking on GLP-1 Medications: How to Protect Your Muscle on Ozempic
Description: Weight loss on GLP-1 medication can include lean-mass loss. Learn how rucking can complement protein and resistance training while you lose weight.
Published: 2026-07-09
## The short answer
If you are taking a [GLP-1](/glossary#glp-1) medication such as semaglutide (Ozempic, Wegovy) or tirzepatide (Mounjaro, Zepbound), [rucking](/glossary#rucking) can add weight-bearing exercise to your routine. Its main role here is not to create a larger calorie deficit. It is to give your muscles and skeleton a regular loading stimulus while you lose weight.
The reason matters. GLP-1 medications can reduce appetite and body weight, and rapid weight loss from any cause can reduce lean mass along with fat. Reviews of GLP-1 therapy commonly estimate that roughly 25 to 40 percent of total weight lost can be lean mass. Lean mass includes muscle, water, organs, and other non-fat tissue, so that figure should not be described as muscle loss alone. Losing skeletal muscle can reduce strength and physical function.
Rucking is loaded walking. It provides a mechanical loading signal to muscles and bone, and an easy session may be manageable on lower-energy days. It can support a muscle-preservation plan, but it does not replace resistance training or adequate protein.
## Why GLP-1s put your muscle at risk
Muscle maintenance depends in part on regular resistance and adequate protein. Appetite loss, a large calorie deficit, and reduced activity can make both harder during GLP-1 treatment.
First, the calorie deficit. When you eat far less, your body breaks down some muscle for energy and for the amino acids it needs elsewhere. This happens in any aggressive diet. GLP-1s just make the deficit easy to sustain, so it can run deep for months.
Second, the protein gap. Appetite suppression is the whole point of these drugs, but it often means people eat well under the protein their muscles need to stay maintained. Less protein plus less total food is a recipe for lean-mass loss.
Third, reduced activity. Lower energy and smaller meals can quietly shrink how much you move. Less loading tells your body that muscle is expensive tissue it no longer needs.
Rapid weight loss can also lower bone mineral density. This deserves extra attention in older adults and in women during or after [menopause](/guides/rucking-for-bone-density). Rucking is weight-bearing exercise, so it may be one useful part of a broader plan for muscle and bone health.
## Where rucking fits (and where it doesn't)
Rucking has a limited, specific role in this plan.
Rucking is not a maximal hypertrophy tool. If your only goal were to build the largest possible quads and glutes, heavy lifting beats loaded walking every time. Rucking is an endurance-leaning, moderate-load stimulus, not a set of heavy squats. (We break down the full picture in [does rucking build muscle](/training/does-rucking-build-muscle).)
Its practical advantage is that an easy loaded walk may be easier to repeat than a hard gym session:
- It loads the quads, hamstrings, glutes, calves, and postural muscles under gravity plus pack resistance.
- It is weight-bearing, which provides a bone-loading stimulus while you walk.
- At an easy pace and suitable load, it can provide Zone 2 cardio with less recovery demand than a hard gym session.
- It has a low skill barrier. A short neighborhood session may be workable when appetite or energy is low, as long as symptoms do not make exercise unsafe.
Rucking can be the repeatable base of the plan, while resistance training provides the stronger muscle-building stimulus. Some days may still call for rest rather than a ruck.
## How to ruck while you're on a GLP-1
The medication changes the rules a little. Adjust for it.
**Start lighter than you think.** Begin with 10 to 15 lbs, even if you are not brand new to fitness. You are training in a calorie deficit with potentially lower energy, so leave a bigger margin than usual. Use our [ruck weight guide](/guides/how-heavy-should-your-ruck-be) to find a sensible starting load, then hold it steady for a few weeks before adding more.
**Keep it easy - true Zone 2.** You should be able to hold a conversation the whole time. The goal is a repeatable loading habit, not a gasping workout. Easy effort also plays nicer with the lower energy availability that comes with eating less.
**Watch for medication-related symptoms.** GLP-1 medications can slow digestion, and nausea or low food intake can make hydration and fueling harder. Do not ruck fasted if that leaves you lightheaded. Stop if you become dizzy, unusually short of breath, or nauseated, especially after a dose increase.
**Fuel the session, at least a little.** A small amount of protein and carbohydrate an hour or two before helps you hold form and protects muscle better than rucking on an empty tank. It does not have to be much - the appetite suppression makes big pre-workout meals unappealing anyway.
**Progress slowly, by feel.** Add distance before weight, and add only 2 to 3 lbs at a time once easy sessions feel genuinely easy. If your food intake is very low that week, hold steady instead of progressing.
If you do not own a dedicated ruck yet, you can start with any sturdy backpack and a wrapped dumbbell or water jug. The [budget rucking starter kit](/gear/budget-rucking-starter-kit) covers low-cost options. A well-fitted hip belt can transfer some load from the shoulders to the hips, though fit and pack design determine how much it helps.
## The weekly template
You do not need to choose between rucking and lifting. The strongest muscle-protection plan on a GLP-1 uses both, with rucking filling the space around your strength work. Here is a simple, sustainable week:
| Day | Session | Why it protects muscle |
|-----|---------|------------------------|
| Monday | Full-body resistance (30 to 45 min) | The primary "keep this muscle" signal |
| Tuesday | Easy ruck, 10 to 15 lbs, 30 min | Loading + Zone 2 on a recovery day |
| Wednesday | Rest or gentle walk | Recovery matters more in a deficit |
| Thursday | Full-body resistance (30 to 45 min) | Second strength stimulus of the week |
| Friday | Easy ruck, 30 to 40 min | Loading habit, low cost to recover |
| Saturday | Longer easy ruck, 45 to 60 min | Aerobic base + bone loading |
| Sunday | Rest | - |
Two short resistance sessions and three easy rucks are a reasonable weekly starting point. Keep the resistance work if muscle preservation is the goal; even two bodyweight-and-band sessions add a training stimulus. For scheduling loaded carries around the gym, see [rucking and lifting](/training/rucking-and-lifting).
## What the research does and doesn't say
As of 2026, there is not a large randomized trial that specifically tests rucking as a way to limit lean-mass loss during GLP-1 treatment. The case for it comes from related research on weight-bearing exercise, resistance training, protein intake, and weight loss.
Weight-bearing and resistance-type loading can help preserve muscle and bone during calorie deficits, and adequate protein can reduce lean-mass loss. Because GLP-1-related weight loss can include lean mass, combining those measures is reasonable. Rucking plus protein plus resistance work is a strategy based on related evidence, not one proven in a rucking-specific GLP-1 trial.
The practical approach is to load your muscles, eat enough protein, and discuss the pace of weight loss with your care team. Rucking is one accessible way to add regular loading.
---
## Your next step
---
## Related reading
- [Rucking for weight loss: the complete plan](/pillars/rucking-for-weight-loss) - the full pillar on losing fat with loaded walking
- [Does rucking build muscle?](/training/does-rucking-build-muscle) - the honest breakdown of what rucking can and can't do for size and strength
- [Rucking and lifting](/training/rucking-and-lifting) - how to program loaded carries around the gym without burning out
- [Rucking for bone density](/guides/rucking-for-bone-density) - why loaded walking protects your skeleton during weight loss
- [Rucking nutrition guide](/guides/rucking-nutrition-guide) - fueling and protein timing around sessions
## Frequently Asked Questions
────────────────────────────────────────────────────────────────────────────────
URL: https://ruckauthority.com/weight-loss/rucking-results-what-to-expect
Title: Rucking Before and After: Realistic 30, 60, 90-Day Results
Description: Three rucks a week burn about 1 lb of fat a month on their own. Add a 300-500 calorie daily food deficit and 8-12 lb in 90 days is realistic.
Published: 2026-03-27 / Updated: 2026-09-26
A realistic rucking before and after looks like this: the route gets easier within a month, the scale moves slowly, and a photo-worthy change usually takes 60-90 days and a food deficit. Three 1-hour rucks a week burn roughly 1-1.5 lb of fat a month on their own. Pair them with a 300-500 calorie daily deficit and about 8-12 lb in 90 days is a reasonable target.
We don't publish reader transformation photos, and we'd be suspicious of any that promise a set result. What follows is the arithmetic, the research on what walking and load-carriage programs actually change, and a way to measure your own before and after honestly. For the full plan, from pack weight to food, start with our [rucking for weight loss guide](/pillars/rucking-for-weight-loss).
## What tends to change first
Fitness moves before appearance. A systematic review of load-carriage training ([Knapik et al., 2012](https://pubmed.ncbi.nlm.nih.gov/22130400/)) found large improvements in loaded-march performance when people trained at least 3 times a week for at least 4 weeks, and the biggest gains came from programs that included progressive load carriage itself. In practice, that's the familiar route feeling easier, or the same pace costing fewer heartbeats, well before the mirror notices anything.
Soreness in the calves, glutes, shoulders, and upper back is common in the first two weeks. Waist size and clothing fit come later, and how much they change depends mostly on food intake.
Daily rucking doesn't speed any of this up by itself. Three or four rucks a week with recovery between them is a sound start. Use the [frequency guide](/training/how-often-should-you-ruck) to set the schedule, then put your own numbers into the [rucking calorie calculator](/tools/calorie-calculator).
## The fat-loss arithmetic
Our [calorie calculator](/tools/calorie-calculator) uses the Pandolf load-carriage equation. For a 180 lb person walking 3.5 mph on flat pavement, it estimates:
| Session (1 hour, flat, 3.5 mph) | Calories |
|---------------------------------|----------|
| Walking, no pack | about 365 |
| Rucking with 20 lb | about 395 |
| Rucking with 30 lb | about 410 |
| Rucking with 40 lb | about 430 |
| Rucking with 30 lb up a 5% grade | about 635 |
The pack adds less than most people expect. Hills add more. Grade matters more than load.
Now the monthly math for three 1-hour rucks a week with 20 lb:
- **Gross burn:** about 1,185 calories a week, or roughly 5,100 a month. At 3,500 calories per pound, that's about 1.5 lb.
- **Net of what you'd burn anyway:** you would have used around 100 calories an hour sitting on the couch, so the extra is closer to 3,800 calories a month, or about 1 lb.
- **Add a 300-500 calorie daily food deficit:** that's another 9,000-15,000 calories a month, or roughly 2.5-4.3 lb.
Taken literally, the arithmetic says 3.5-5.5 lb a month and 11-16 lb in 90 days. Real results usually come in lower. A systematic review of exercise studies ([Riou et al., 2015](https://pubmed.ncbi.nlm.nih.gov/25988763/)) found that weight loss from exercise is usually less than the calories burned predict, and the gap grows with longer programs. The 3,500-calorie rule also overstates long-term loss because a lighter body burns less ([Hall et al., 2011](https://pubmed.ncbi.nlm.nih.gov/21872751/)). That's why this page plans on 8-12 lb in 90 days rather than the full arithmetic.
Two studies make useful reality checks. In a 10-month supervised trial, overweight adults who burned 400 or 600 calories per session, 5 days a week, without dieting, lost an average of about 9 lb and 11.5 lb, with wide individual spread ([Donnelly et al., 2013](https://pubmed.ncbi.nlm.nih.gov/23592678/)). And a meta-analysis of walking-only programs in inactive adults found average losses of about 3 lb and just over half an inch off the waist ([Murtagh et al., 2015](https://pubmed.ncbi.nlm.nih.gov/25579505/)). Exercise without a food change works, just slowly.
## Rucking before and after: the realistic timeline
The scenario: a beginner rucking 3-4 times a week with 10-25 lb and eating 300-500 calories a day below maintenance. Treat it as a planning range, not a promise.
| Timeframe | Body composition | Fitness | Visible change |
|-----------|------------------|---------|-----------------|
| Before (week 0) | Baseline weight, untrained cardio | Walking is hard with load, RPE 7-8 at 1 mile | None |
| After 30 days | About 2-4 lb down with the food deficit; about 1 lb without it | The same 1-mile route often feels closer to RPE 4-5 | Usually subtle; a slightly looser waistband at most |
| After 60 days | About 4-7 lb down with the food deficit | A 3-mile ruck feels sustainable | Clothes may fit differently |
| After 90 days | About 8-12 lb down with the food deficit | Longer rucks and hills become realistic | Side-by-side photos often show it; sometimes they don't |
If intake matches what you burn, the scale won't move no matter how often you ruck. Starting weight matters too: heavier people burn more per session and usually lose faster at first.
To run the numbers for your own weight, load, and schedule:
The curve flattens because a lighter body generally uses less energy to carry the same pack at the same pace. It appears as a band rather than a line because food intake and actual training vary. The dashed edge models partial replacement of exercise calories through food; it does not assume that everyone does this.
## Set a baseline you can repeat
Before you start, record five things: front, side, and back photos in the same light; waist measurement at the navel; resting heart rate; a timed 2-mile ruck at a fixed load; and how the same pair of pants fits. Repeat the check every 30 days. This gives you useful evidence even when scale weight moves slowly.
| Metric | Before | 30 days | 60 days | 90 days |
|--------|--------|---------|---------|---------|
| Waist at navel | Baseline | Often little change | Often under 1 in | Walking-only trials averaged about 0.6 in; more with a food deficit |
| 2-mile ruck effort | RPE 7-8 | May move toward RPE 4-5 | May move toward RPE 3-4 | May reach conversational effort |
| Resting heart rate | Baseline | Often little change | May start to drift down | Endurance programs (median 12 weeks) averaged about 4 bpm lower |
| Visible change | Baseline photo | Usually subtle | Easier to compare | Often clear enough to photograph |
The waist figure comes from the walking meta-analysis above ([Murtagh et al., 2015](https://pubmed.ncbi.nlm.nih.gov/25579505/)). The heart-rate figure comes from a meta-analysis of 121 endurance-training studies, where resting heart rate fell from about 72 to 68 bpm on average, with larger drops in people who started higher ([Reimers et al., 2018](https://pubmed.ncbi.nlm.nih.gov/30513777/)).
If you want to tighten the timeline, pair this page with three tactical guides: [how often should you ruck](/training/how-often-should-you-ruck) for weekly frequency, the [rucking calorie calculator guide](/weight-loss/rucking-calorie-calculator-guide) for burn-rate expectations, and [zone 2 rucking](/weight-loss/zone-2-rucking-guide) for effort control.
A phone timer and a simple notes app are enough to track pace and recovery. If you also want route, heart-rate, and sleep trends in one place, compare the [GPS watches we recommend for rucking](/gear/best-gps-watches-for-rucking). The Garmin Instinct 3 Solar is the durable, long-battery option in that guide.
## The First Week: Soreness and Baseline Measures
The first week may include:
- **Days 1-2:** Mild soreness in the quads, calves, glutes, shoulders, or lower back.
- **Days 3-5:** DOMS ([delayed onset muscle soreness](/glossary#doms)) may become more noticeable before it fades. Sharp pain, swelling, or an altered gait is not ordinary DOMS.
- **By day 7:** Soreness may begin to ease if the starting load and distance were appropriate. Sleep may change, but the direction and amount vary.
**What may change:** Visible change is unlikely after one week, but the sessions establish a baseline for pace, effort, and recovery. Well-fitting socks such as [Darn Tough light hikers](/gear/best-rucking-socks-blister-prevention) may reduce friction, and [Body Glide Original](/injuries/rucking-foot-care-blister-prevention) can help at known hot spots. Neither replaces proper pack fit, shoe fit, or gradual progression.
**What may not change:** The scale, clothing fit, and photos often show little after one week. Fat loss takes time and depends on energy balance.
## After 30 days: compare the same route
By week 4, compare the same measures you recorded at the start. Possible changes include:
**Body Composition:**
- **Fat loss:** The sample projection is 2-4 lbs with a modest, sustained calorie deficit. Maintenance intake can produce less or no scale loss.
- **Visible changes:** The waist or clothing fit might change slightly, though a photo may not show it yet.
- **Muscle:** Beginners may notice firmer legs or glutes, but visible definition is not assured.
**Posture & Movement:**
- Pack fit and greater trunk endurance may make an upright position easier to hold.
- Shoulder tension may improve, stay the same, or worsen. Adjust pack fit and stop if loaded walking causes pain, numbness, or tingling.
**Cardiovascular Fitness:**
- The same 2-mile route may feel easier or produce a lower heart rate at the same pace.
**Mental Health:**
- Regular outdoor exercise may help sleep or mood, but the effect varies and rucking is not treatment for anxiety or another mental health condition.
**Energy Levels:**
- Energy may rise after an easy session or fall after a hard one. Track the pattern rather than assuming either response.
**What may still be hard to see:** A month is often too short for a dramatic photo comparison. Pace, effort, waist measurement, and clothing fit can be more useful than comments from other people.
## After 60 days: look for repeatable changes
At 8-10 weeks, changes in pace, distance tolerance, and clothing fit may be easier to measure. Visible changes still depend heavily on food intake and starting body composition.
**Body Composition:**
- **Fat loss:** The sample projection reaches 4-7 lbs with a sustained deficit. Without one, scale loss may be smaller or absent.
- **Muscle definition:** Some beginners may see more definition in the legs, glutes, or upper back. The amount varies with body fat, genetics, protein intake, and other training.
- **Arms:** The shoulders and upper back help stabilize the load, but rucking is not direct arm-strength training.
**Cardiovascular Fitness:**
- A 25-30 lb ruck may feel more manageable, but only increase load if posture, gait, and recovery remain good.
- Breathing at a familiar pace may become easier to control.
- Resting heart rate may start to drift down. Endurance programs averaged about a 4 bpm drop over a median of 12 weeks ([Reimers et al., 2018](https://pubmed.ncbi.nlm.nih.gov/30513777/)), and illness, stress, medication, sleep, and caffeine all move it too. Take it the same way each time, ideally first thing in the morning.
**Posture & movement:**
- Trunk endurance and pack fit may make upright posture easier to maintain.
- Varied terrain can challenge balance and ankle control, but it also adds risk and should be introduced gradually.
- Rucking may strengthen the trunk, but it can also aggravate back pain. Persistent or radiating pain needs assessment.
**Mood and sleep:**
- Sleep duration or quality may improve with regular activity, but an extra 30-60 minutes is not guaranteed.
- Mood or anxiety may improve for some people. Worsening or persistent symptoms deserve appropriate care.
**Habits:**
- A repeatable schedule may feel more automatic after two months.
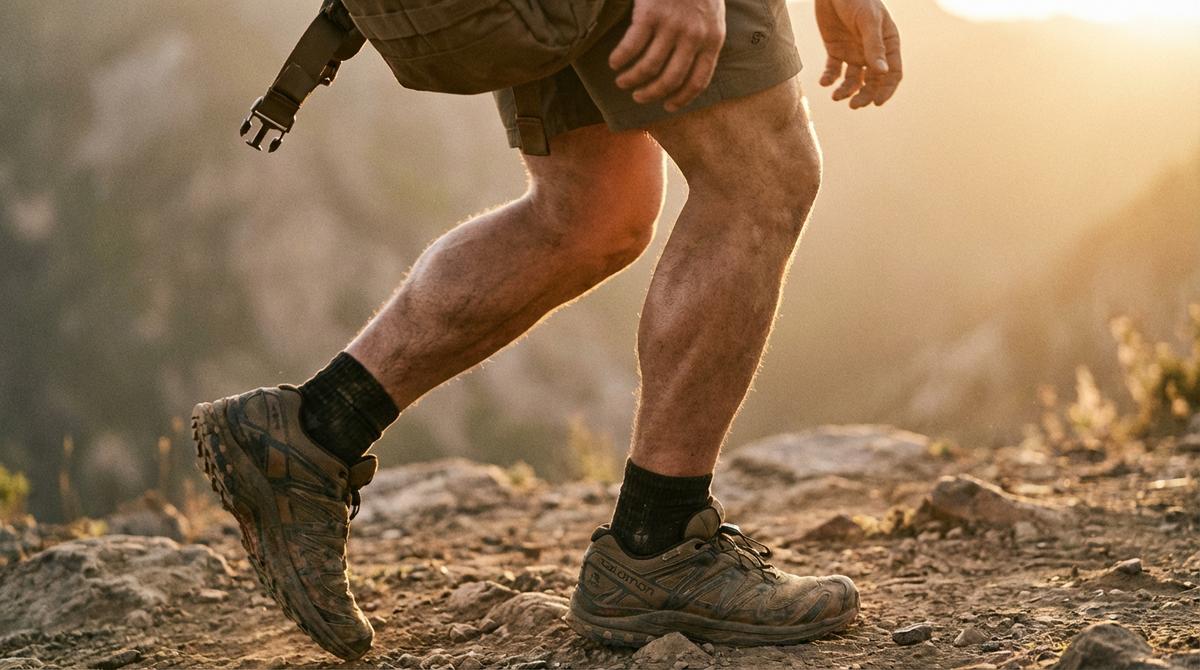
## After 90 days: compare the full trend
By 12 weeks, photos and measurements may show a difference, but a lack of visible change does not mean the training produced no fitness benefit.
**Body Composition:**
- **Fat loss:** The sample projection is 8-12 lbs, depending on the calorie deficit, starting weight, health, and adherence. It is not a typical outcome for every beginner.
- **Body recomposition:** Some beginners may gain a small amount of muscle while losing fat, which can make scale change differ from photo or waist change.
- **Visual changes:** Definition may become more visible, especially in the legs and back. It may also remain subtle.
- **Waist circumference:** The sample range is a 1-2 inch reduction; actual change can be smaller, larger, or zero.
**Cardiovascular Fitness:**
- Aerobic capacity: walking-program trials averaged about a 3 mL/kg/min gain, roughly 10% for an inactive beginner. You'd need a lab test or a consistent watch estimate to see it as a number.
- A 5-6 mile ruck may feel easier than it did at baseline.
- Hills or higher loads may be appropriate if the current program no longer challenges you and recovery remains good.
- Resting heart rate: about 4 bpm lower is the research average for 12-week endurance programs. People who start higher tend to drop more.
**Strength:**
- Muscular endurance in the legs and [posterior chain](/glossary#posterior-chain) may improve.
- Grip strength changes little unless the program also includes carries or other direct grip work.
- Trunk endurance may improve. Rucking does not guarantee that lower-back pain will resolve.
**Mental Health:**
- Mood, anxiety, and confidence may change with regular exercise, but the response differs by person.
- Rucking can support mental health; it is not a substitute for professional treatment when symptoms interfere with daily life.
**How You Feel When You Move:**
- Walking under the same load may feel smoother and more efficient.
- Transfer to hiking, sports, or daily tasks depends on how closely those activities match the training.
**Before-and-After:**
- Repeat the baseline photos under the same lighting and position. The comparison may show a change even when the scale does not, or it may confirm that more time is needed.
## What Changes Your Results (The Variables)
No two people follow the same timeline. These factors have the largest effect:
### Diet
Food intake is the main driver of weight change. On flat ground at 3.5 mph, a 180 lb person burns about 395 calories an hour with 20 lb and about 430 with 40 lb; a 5% grade pushes a 30 lb ruck to about 635. A post-ruck snack can erase most of that.
A 300-500 calorie daily food deficit works out to roughly 2.5-4.3 lb a month on paper, before the slowdown described above. Anyone with a medical condition, pregnancy, medication effects, or a history of disordered eating should get individual guidance first.
**Related:** See our [rucking calorie calculator guide](/weight-loss/rucking-calorie-calculator-guide) for your specific burn rate.
### Frequency
Three sessions per week is a practical starting schedule, not a biological minimum. Four or five may add volume if recovery is good, while one or two can still improve fitness. Frequency alone does not determine fat loss.
**Related:** [How often should you ruck](/training/how-often-should-you-ruck) breaks down the frequency tradeoffs by goal (fat loss vs. event prep vs. general fitness) and the recovery rules that keep you injury-free at higher volumes.
### Load
Starting too heavy can limit training volume and recovery. A lighter load of 10-20 lbs that you can repeat is often more useful than a heavy load you can manage only once per week. Our [budget starter kit](/gear/budget-rucking-starter-kit) covers beginner-friendly options.
As you adapt, a gradual load increase can renew the training stimulus. Moving from 15 lbs in week 1 toward 30 lbs by week 8 is one example, not a required schedule. Reference our [ruck plate comparison](/gear/ruck-plate-comparison) when adding load.
If you already know you want a dedicated beginner pack, the [GORUCK Basic Rucker review](/gear/goruck-basic-rucker) explains its fit, plate limits, and tradeoffs. A more stable pack can make a repeatable load more comfortable to carry. It does not produce faster fat loss on its own.
### Starting Fitness Level
A sedentary beginner may notice early fitness changes because loaded walking is a new training demand. Someone who already trains hard may see a smaller change because rucking adds less new work.
### Age & Recovery
Age can affect recovery, but training history, health, sleep, and the size of each progression also matter. Older beginners may need more recovery between hard sessions.
### Genetics
Genetics affect appetite, body composition, and training response. Two people can follow similar plans and see different changes at 90 days.
## Rucking before and after for women
The same rules apply, with two practical differences.
**Calorie burn scales with body weight.** The Pandolf estimate for a 140 lb person walking 3.5 mph with 20 lb on flat ground is about 315 calories an hour, against about 395 for a 180 lb person. Three 1-hour rucks a week therefore burn roughly 240 fewer calories, and the scale moves a little more slowly on the same schedule. The [calorie calculator](/tools/calorie-calculator) will give your own figure. When the calories burned are matched, the outcome evens out: in the 10-month exercise trial above, weight loss didn't differ significantly between men and women ([Donnelly et al., 2013](https://pubmed.ncbi.nlm.nih.gov/23592678/)).
**Water shifts can hide a week's progress.** In a year-long diary study of 62 women, self-reported fluid retention peaked on the first day of the period and was lowest mid-follicular ([White et al., 2011](https://pubmed.ncbi.nlm.nih.gov/21845193/)). If you menstruate, compare weigh-ins and photos taken at the same point in your cycle each month rather than week to week.
Load is personal too. Starting at the low end of this page's range, around 10 lb, leaves room to build. Our guide to [rucking backpacks for women](/gear/best-rucking-backpacks-for-women) covers packs cut for shorter torsos.
## Mental Health Changes Vary
Regular exercise can support sleep, mood, and confidence, but it does not follow a fixed weekly schedule. Track these changes alongside physical measures. If anxiety, low mood, insomnia, or another symptom persists or worsens, seek appropriate care rather than increasing training to solve it.
**Related:** [Can rucking be your only exercise?](/weight-loss/can-rucking-be-your-only-exercise) - exploring the full-body benefits.
## Comparing Rucking to Other Training Modalities
If you're wondering how rucking stacks up:
- **vs. Running:** Rucking generally has lower impact per step but adds external load. Either may be easier to sustain depending on the person and goal.
- **vs. Gym Training:** Rucking trains loaded endurance. Strength training is more direct for building maximal strength and muscle.
- **vs. Walking:** Rucking usually raises energy cost and muscular demand at the same pace, but the size of the increase depends on load and terrain.
**Deep dive:** [Rucking vs. Running for Weight Loss](/weight-loss/rucking-vs-running-weight-loss)
## How to adjust the plan
Focus on the parts of the plan you can measure and repeat:
1. **Sleep:** Most adults need roughly 7-9 hours. Poor sleep can impair recovery, but there is no fixed rule that it cuts results in half.
2. **Consistency:** A repeatable schedule matters more than a perfect streak. Missing a week does not erase all prior adaptation.
3. **[Progressive overload](/glossary#progressive-overload):** Review the plan every 2-3 weeks and change one variable only when the current work feels controlled and recovery is good.
4. **Food intake:** Track enough to know whether exercise calories are being replaced. This article plans around a 300-500 calorie daily deficit; that's a planning range, not a prescription.
5. **Recovery:** Use actual rest days when soreness, sleep, or performance starts to worsen. [Active recovery](/glossary#active-recovery) is optional.
**Deep dive:** [Zone 2 Rucking for Sustainable Fat Loss](/weight-loss/zone-2-rucking-guide) - how to dial in the effort level that gets results without burnout.
## How to Read the Timeline
For a beginner rucking 3-4 times a week with a 300-500 calorie daily food deficit:
- **Week 1:** Soreness is common; visible change is unlikely.
- **Month 1:** About 2-4 lb down, and a familiar route feels easier. Without the food deficit, about 1 lb.
- **Month 2:** Fitness and clothing fit change; visible muscle definition varies.
- **Month 3:** About 8-12 lb down, with fitness gains more reliable than any specific change in appearance.
These are projections built from stated assumptions. Training gains can fade when training stops, weight can return when energy balance changes, and mental health effects may not persist. Keep measuring the same route, load, waist point, and recovery markers so the comparison reflects your own response.
---
## Common Questions
**Q: What if I don't see results by 30 days?**
First confirm that measurements were taken consistently. Scale weight can stall because of water, medication, menstrual-cycle changes, or other factors even when fat mass changes. Review food intake and activity, and consider a modest 200-300 calorie adjustment only if it is appropriate for your health. A doctor or registered dietitian can help with a persistent or unexplained change.
**Q: Can I ruck every day?**
Daily rucking can work when most sessions are easy, but more days do not guarantee faster progress. Many beginners recover better with 3-4 planned sessions per week and at least one full rest day.
**Q: What if I'm already fit? Will rucking still work?**
It can add a different stimulus: loaded walking, muscular endurance, and postural work. A trained person may see smaller changes than a sedentary beginner, and improvement is not guaranteed if the program does not add a meaningful or recoverable demand.
**Q: How much weight should I use?**
Start with 10-15 lbs and choose a load you can repeat 3-4 times per week without worsening pain or recovery. Once the current load feels controlled, increase one variable at a time.
**Q: Do I need to diet to see results?**
Rucking alone can improve fitness. Fat loss requires an energy deficit, so food intake matters even when training is consistent. There is no universal percentage that applies to every person.
---
## Keep Reading
- [Rucking for Weight Loss: 12-Week Plan](/pillars/rucking-for-weight-loss) - the hub for load, frequency, food, and tracking
- [Rucking for Weight Loss Gear Guide](/gear/rucking-for-weight-loss-gear-guide) - the four-item starter kit in budget, mid-range, and premium tiers
- [Rucking Starter Kit](/loadouts/beginner-starter-kit) - the complete beginner loadout, with three budget tiers and exact links for each item
- [Rucking vs. Running for Weight Loss](/weight-loss/rucking-vs-running-weight-loss)
- [Zone 2 Rucking Guide](/weight-loss/zone-2-rucking-guide)
- [Rucking Calorie Calculator](/weight-loss/rucking-calorie-calculator-guide)
- [Can Rucking Be Your Only Exercise?](/weight-loss/can-rucking-be-your-only-exercise)
## Frequently Asked Questions
────────────────────────────────────────────────────────────────────────────────
URL: https://ruckauthority.com/weight-loss/rucking-vs-running-weight-loss
Title: Rucking vs Running for Cardio: Which Is Better?
Description: Rucking vs running for cardio, fat loss, injury risk, and long-term fitness. Includes calorie tables, adaptation framework, and when to choose each.
Published: 2026-03-10 / Updated: 2026-09-25
## The short answer
Running is better cardio if your goal is peak aerobic intensity, race performance, or the highest calorie burn in the least time. [Rucking](/glossary#rucking) is better cardio if your goal is sustainable Zone 2 volume, joint-friendly conditioning, fat loss, or fitness you can repeat several times per week.
The practical rule: choose **running** when speed and VO2 max are the priority. Choose **rucking** when consistency, lower impact, and whole-body conditioning are the priority. For most general fitness goals, the best program uses rucking as the aerobic base and running as an occasional higher-intensity layer.
| Goal | Better choice | Why |
| --- | --- | --- |
| Build Zone 2 cardio base | Rucking | Easier to repeat 3-5 days per week without pounding |
| Improve running race pace | Running | Specificity matters; you need to run to race well |
| Lose fat while preserving muscle | Rucking | Adds load and posterior-chain stimulus |
| Max calories in 30 minutes | Running | Higher per-minute energy cost |
| Train with knee or shin history | Rucking | Walking gait creates less impact than running |
| Tactical/event fitness | Rucking | Matches load carriage and long time under load |
## Cardio adaptation comparison
| Training effect | Rucking | Running | What it means |
| --- | --- | --- | --- |
| Aerobic base | Excellent | Excellent | Both improve endurance when kept conversational |
| Peak VO2 max | Moderate to high | High | Running reaches higher intensities more easily |
| Weekly volume tolerance | High | Moderate | Rucking is usually easier to repeat often |
| Joint impact | Low to moderate | High | Running has more bounce and landing force |
| Muscle engagement | Higher posterior chain and trunk | Higher calves/quads at speed | Rucking is more full-body; running is more gait-specific |
| Skill barrier | Low | Moderate | Most people can start rucking before they can run comfortably |
The cardio answer is not "rucking beats running" or "running beats rucking." The answer is training-specific: running is the sharper tool for high-end cardio, while rucking is the more repeatable tool for building an aerobic engine. The metabolic-cost meta-regression by [Looney et al. (2022)](https://pubmed.ncbi.nlm.nih.gov/34856578/) in *Medicine & Science in Sports & Exercise* documented the load-versus-pace tradeoff in detail: a 35-lb load at 3.5 mph drives oxygen consumption into the same VO2 range as an easy 5-6 mph run, with substantially lower joint impact.
## Calorie Burn Comparison
| Activity | Body Weight | Pace | Calories per Hour | Effort Level |
| --- | --- | --- | --- | --- |
| Running | 180 lbs | 6.0 mph | about 870 | Moderate to hard |
| Rucking (40 lb pack, 5% grade) | 180 lbs | 3.5 mph | about 665 | Moderate to hard |
| Rucking (40 lb pack, flat) | 180 lbs | 3.5 mph | about 430 | Moderate |
| Rucking (20 lb pack, flat) | 180 lbs | 3.5 mph | about 395 | Easy |
| Walking (no load, flat) | 180 lbs | 3.5 mph | about 365 | Baseline |
These numbers come from the [Pandolf equation](/glossary#pandolf-equation) for loaded walking and ACSM metabolic equations for running, adjusted for a 180-lb individual. For rucking, a [Titan Fitness ruck plate](/gear/ruck-plate-comparison) lets you dial in the exact load to reach your target calorie burn. Use the [rucking calorie calculator](/tools/rucking-calorie-calculator) if you want the same comparison for your body weight, pace, and pack load.
Running wins on raw calorie burn per minute. But calories per minute is not the only variable that matters for fat loss.
## Why Rucking Wins for Fat Loss
### Lower Injury Rate
Running produces two to three times the ground reaction force of rucking. A 180-lb runner absorbs 270 to 540 lbs of force per footfall. A rucker with a 40-lb pack absorbs 220 to 260 lbs. Choosing the right footwear matters - shoes like the [Salomon XA Pro 3D](/gear/best-rucking-shoes-by-terrain) reduce impact. Our [shoe selection guide by terrain](/gear/best-rucking-shoes-by-terrain) covers impact reduction across different surfaces. Prevent chafing and blisters with [Body Glide Original](/injuries/rucking-foot-care-blister-prevention), especially important on longer rucks where skin-on-fabric friction adds up.
This matters because fewer injuries mean more consistent training. More consistent training means better long-term fat loss. You do not get results sitting on the couch recovering from a stress fracture.
Research from Knapik et al. shows that [load carriage](/glossary#load-carriage) injuries are primarily overuse-related and highly preventable with proper progression, while running injuries have a higher incidence of acute onset.
### Muscle Preservation
The loaded resistance of rucking stimulates muscle protein synthesis more effectively than running alone. Running is catabolic at higher volumes - it breaks down muscle tissue. Rucking preserves lean mass while creating a caloric deficit.
For body composition (not just scale weight), this distinction is critical. Losing 10 lbs of fat while keeping your muscle looks and feels very different from losing seven lbs of fat and three lbs of muscle.
### Sustainability
Most people can ruck three to four times per week indefinitely without burnout. Running at the same frequency leads to higher dropout rates, particularly among beginners and people over 40.
## When Running Wins
Running is the better choice in specific scenarios:
- **Time-constrained workouts:** If you only have 25 minutes, running burns more calories in that window.
- **Sport-specific training:** If you are training for a running race, you need to run.
- **Variety in an existing program:** Running pairs well as a once-per-week complement to a rucking base.
## The Hybrid Approach
The best answer for most people is not either/or. Evidence suggests a combined approach optimizes fat loss:
- **Ruck two to three times per week** for load conditioning, muscle preservation, and steady-state calorie burn.
- **Run once per week** for cardiovascular peak and higher-intensity calorie burn.
- **Walk unloaded once per week** for [active recovery](/glossary#active-recovery).
This gives you roughly 12 to 15 miles of weekly volume with low injury risk and strong body composition results.
## The Decision Framework
Ask yourself these four questions:
1. **Do you have joint or injury history?** If yes, start with rucking exclusively. Our [budget starter kit](/gear/budget-rucking-starter-kit) gets you going without breaking the bank.
2. **Do you have 45-plus minutes per session?** If yes, rucking delivers better body composition per session.
3. **Do you need maximum calorie burn in under 30 minutes?** If yes, running is more efficient.
4. **Is consistency your weakness?** If yes, rucking has lower burnout and injury dropout rates.
## Final Verdict
**For raw calorie burn:** Running edges out rucking on a per-minute basis.
**For sustainable, injury-resistant fat loss that preserves muscle:** Rucking wins decisively.
For most people interested in long-term body composition improvement, rucking is the better foundation. Add running as a complement once your base is solid. If you want to know what's realistic from a rucking-only program, the [rucking before and after timeline](/weight-loss/rucking-results-what-to-expect) breaks down 30/60/90-day fat loss and visible body changes with specific benchmarks.
---
## Frequently asked questions
### Is rucking or running better for cardio?
Running is better for peak cardio intensity and race-specific speed. Rucking is better for sustainable aerobic conditioning because most people can hold a conversational Zone 2 effort longer and repeat it more often. If your goal is general heart health, fat loss, or low-impact conditioning, rucking can be the better primary cardio tool. If your goal is a faster 5K, 10K, or half marathon, running has to stay in the plan.
### Can rucking improve VO2 max?
Yes, rucking can improve VO2 max when the load, pace, or terrain is hard enough to raise heart rate above easy walking. It is most useful for building the aerobic base under VO2 max: mitochondrial density, stroke volume, and sustained Zone 2 capacity. Running usually remains better for pushing the highest intensities because it is easier to reach Zone 4 and Zone 5 without carrying heavy load.
### Can I switch from running to rucking without losing fitness?
Yes, if you manage the transition properly. Your cardiovascular base transfers directly - rucking at zone two heart rate maintains the aerobic engine you built through running. You may lose some running-specific speed in the first few weeks, but your overall fitness (VO2 max, resting heart rate, body composition) will not regress. Many former runners report that rucking actually improved their body composition because the loaded resistance preserved muscle mass that running was slowly eroding.
### How many calories does rucking burn compared to walking?
On flat ground, less than most people expect; on hills, a lot more. Using the Pandolf equation, a 180-lb person walking at 3.5 mph burns about 365 calories an hour. A 20-lb pack brings that to about 395 and a 40-lb pack to about 430, so each 10 lb adds roughly 15 to 20 calories an hour on the flat. Grade changes the picture: the same 40-lb ruck on a 5% incline is about 665. Pandolf tends to under-predict heavier loads, so treat these as conservative estimates.
### Is rucking safer than running for people with bad knees?
In most cases, yes. Rucking produces lower ground reaction forces than running because you are walking, not bouncing. The impact per footfall is roughly half of what running generates. That said, rucking does add external load to your joints, so starting light and progressing slowly is non-negotiable. If you have a diagnosed knee condition, consult a physical therapist before adding load. For more detail, see our [rucking knee pain guide](/injuries/rucking-knee-pain).
### Can I ruck and run on the same day?
You can, but sequence matters. If you are doing both, ruck first and run second - or better yet, run in the morning and ruck in the evening with at least six hours between sessions. Rucking fatigues your stabilizer muscles, and running on fatigued stabilizers increases injury risk. For most people, separating them into different days is the smarter approach.
---
## Your next step
---
## Related reading
- [Rucking for weight loss: complete beginner gear guide](/gear/rucking-for-weight-loss-gear-guide) - the exact kit at $180, $280, and $460 tiers plus the 4-week progression that drives results
- [Rucking for weight loss](/pillars/rucking-for-weight-loss) - the pillar guide this article supports, with calorie data and a 12-week fat loss program
- [The complete beginner's guide to rucking](/pillars/beginners-guide-to-rucking) - everything you need to start, from gear to form
- [How heavy should your ruck be?](/guides/how-heavy-should-your-ruck-be) - weight recommendations by fitness level and goal
- [Zone 2 rucking guide](/weight-loss/zone-2-rucking-guide) - the science of loaded low-intensity cardio for fat loss
- [Can rucking be your only exercise?](/weight-loss/can-rucking-be-your-only-exercise) - what rucking covers and what it does not
────────────────────────────────────────────────────────────────────────────────
URL: https://ruckauthority.com/weight-loss/zone-2-rucking-guide
Title: Rucking Heart Rate Zones: Zone 2 and Beyond
Description: A complete rucking heart rate zone guide: how Zone 1-5 apply to loaded walking, quantified HR shifts from load, grade, terrain, and heat, and how to program Zone 2 rucks.
Published: 2026-03-10 / Updated: 2026-08-26
## What is Zone 2?
Rucking heart rate zones work like running or cycling zones, but load changes the equation. A pace that would be Zone 1 while walking unloaded may become Zone 2 with a 25-lb pack, Zone 3 on a hill, or Zone 4 in heat. That is why ruckers should manage intensity with four levers: load, pace, grade, and terrain.
| Zone | % max HR | Rucking feel | Best use |
| --- | --- | --- | --- |
| Zone 1 | 50-60% | Very easy, full conversation | Recovery walks, beginner adaptation |
| Zone 2 | 60-70% | Conversational, steady effort | Aerobic base, fat loss, long rucks |
| Zone 3 | 70-80% | Short sentences, noticeably hard | Hills, tempo rucks, event prep |
| Zone 4 | 80-90% | Few words, hard breathing | Short intervals only |
| Zone 5 | 90-100% | Max effort | Rarely needed for recreational rucking |
[Zone 2](/glossary#zone-2) is the second heart-rate training zone. This guide uses 60-70% of estimated maximum heart rate, while some models use 60-75% or define the zone by lactate thresholds.
For a 35-year-old with an estimated maximum heart rate of 185 bpm, this model gives a Zone 2 range of 111-130 bpm. At that effort, complete sentences should still be possible. The estimate may differ from a tested threshold.
**What happens at Zone 2 intensity:** Fat generally supplies a larger share of energy than it does during hard work, and lactate remains relatively stable. Repeated aerobic training can improve mitochondrial capacity and cardiovascular fitness. A single session does not guarantee those changes.
Zone 2 is popular because it combines a sustainable effort with useful aerobic volume. It is not the only intensity that improves fitness, and a higher share of fat use during the workout does not guarantee greater fat loss over time.
The "talk test" is your practical Zone 2 indicator: you can hold a conversation, but it takes slight effort. You're breathing harder than at rest, but you're not gasping.
---
## How load, grade, terrain, and heat shift your zone
This is the part generic heart-rate-zone guides miss: in rucking, the *same pace* can sit in three different zones depending on four variables. A running zone chart assumes one variable (speed). A ruck has four. Here is the approximate heart-rate impact of each, holding pace constant, for a typical rucker - then verify against your own monitor, because individual response varies.
| Variable | Change | Approx. HR impact (same pace) | Zone effect |
| --- | --- | --- | --- |
| **Load** | +10 lb | +5-8 bpm | ~25-30 lb shifts unloaded Zone 1 into Zone 2 |
| **Grade** | +5% incline | +10-15 bpm | A moderate hill pushes Zone 2 into Zone 3 |
| **Terrain** | firm → soft (sand, mud, deep grass) | +10-20 bpm | Soft ground can cost as much as added load |
| **Heat** | ambient >80°F / 27°C | +5-15 bpm (cardiac drift) | Same ruck drifts up a zone as you heat up |
These ranges are modeled from the load-carriage metabolic literature - the [Pandolf equation](/guides/pandolf-equation-rucking) predicts energy cost from load, speed, and grade, and assigns soft surfaces a terrain factor up to ~2x firm ground. Heat adds cardiac drift on top, independent of mechanical work. The four effects stack.
**Worked example.** A 35-year-old whose flat-pavement Zone 2 is 111-130 bpm at 3.5 mph with 20 lb adds a 5% hill and 85°F heat. Grade adds ~12 bpm, heat adds ~10 bpm - the same pace and load now reads ~133 bpm, into Zone 3. To hold true Zone 2, they drop pace, shed 5-10 lb, or accept the higher zone for that segment. This is why a single "ruck in Zone 2" instruction fails in the field: the target pace is conditional on terrain and weather, not fixed.
**The practical rule:** pick the *one* variable you can hold constant (usually load), then manage zone with the others. On a hot or hilly day, the same ruck that was Zone 2 last week is Zone 3 today - and that is not a fitness regression, it is the variables stacking. Read effort from heart rate and the talk test, not from your usual pace.
---
## Why Rucking Can Work for Zone 2
Any activity that holds a sustainable aerobic effort can train Zone 2. Rucking adds load as another way to adjust intensity.
**Unloaded walking** may be enough for beginners, people returning to exercise, or anyone walking on hills or at a brisk pace. A fitter person may need more pace, grade, or load to reach the chosen range.
**Running** may push a beginner above Zone 2 at a comfortable running pace. Experienced runners can often hold an easy Zone 2 run, so the choice depends on training history and joint tolerance.
**[Rucking](/glossary#rucking) can bridge the gap.** Added weight raises energy cost at a given pace, but a 150-pound person walking at 3.5 mph with 25 lbs is not guaranteed to land in Zone 2. Measure the response, then adjust load, pace, or terrain.
Rucking requires a suitable pack and load but no gym, bike, or pool.
---
## How to find your Zone 2
Zone 2 can be estimated with the talk test alone. A heart-rate monitor adds data, while a bottle or hydration bladder matters only as the route and weather require. The products below are options, not a three-item requirement.
| Role | Pick | Why it earns the slot |
|------|------|------------------------|
| Watch | Garmin Instinct Solar | Native HR zone alerts, weeks of battery, pairs with chest straps for precision. |
| Watch alt | COROS PACE 4 | Half the price of the Instinct with built-in zone tracking. Better for road-focused ruckers. |
| Hydration | Nalgene 32oz Wide-Mouth | Wide enough to drop electrolyte tabs into without slowing your pace. |
There are several ways to estimate Zone 2, and each has limits. Cross-checking a heart-rate estimate with the talk test is a practical starting point.
**Method 1: Age-based formula.** The simplest calculation is (220 - age) × 0.60 - 0.70 for Zone 2. A 35-year-old: (220 - 35) × 0.60 = 111 bpm (lower end) and (220 - 35) × 0.70 = 129 bpm (upper end). So Zone 2 is roughly 111 - 129 bpm.
The limitation: this formula is population average. Some people have max heart rates 20 bpm higher or lower than the formula predicts.
**Method 2: MAF (Maximum Aerobic Function) method.** The MAF method, popularized by Phil Maffetone, calculates aerobic threshold as 180 - age, with adjustments. A 35-year-old has a MAF of 145 bpm. Zone 2 is typically considered 10 bpm below MAF, so 135 bpm.
This method produces different numbers from the 220-minus-age formula. It is a coaching method rather than a direct measurement of an individual's physiological threshold.
**Method 3: Talk test.** This requires no math. Full sentences generally indicate moderate effort, while only a few words indicate vigorous effort. The talk test does not separate every numbered zone precisely.
The talk test is less precise than heart rate but aligns well with Zone 2 for most people.
**Method 4: Lactate testing.** A lab can measure blood lactate across progressive intensities and estimate thresholds. Roughly 2 mmol/L is sometimes used as a marker, but individual baselines and zone models vary.
**Recommended approach:** Start with the age-based formula to get a ballpark range. Wear a chest strap heart rate monitor (more accurate than wrist-based monitors) or a dedicated watch like the [Garmin Instinct 3 Solar](/gear/best-gps-watches-for-rucking) and validate with the talk test. Start rucking and see where your natural heart rate lands. Over 2 - 3 sessions, you'll develop intuition for Zone 2.
Carry enough water for the temperature, duration, and refill access. A Nalgene Wide Mouth Sustain 32oz is one simple option.
---
## Programming Zone 2 rucking
Finding Zone 2 is the first step. Programming it effectively is the second.
### Finding your "Zone 2 load"
This is the load that, at a comfortable pace (3.0 - 3.5 mph), puts your heart rate into Zone 2 territory.
If you already tolerate loaded walking, 15-20% of body weight is one test range. Beginners should start lighter. Ruck for 10 minutes at a comfortable pace, then check heart rate and the talk test.
- **Too low (below Zone 2)?** Add 5 lbs or increase pace by 0.2 mph. Ruck another 5 minutes and recheck.
- **Too high (above Zone 2)?** Reduce load by 5 lbs or slow down slightly. Recheck.
The goal is a load where you naturally land in the Zone 2 band at your sustainable walking pace, with minimal perceived effort. Our [backpack guide](/gear/best-rucking-backpacks) will help you find a pack that distributes weight comfortably. This is your baseline Zone 2 load.
**Important:** Terrain changes this calculation. The same load uphill will produce a significantly higher heart rate than on flat ground. You might be in Zone 2 with 25 lbs on flat pavement, but Zone 3 with the same load on a 5% hill. Adjust accordingly.
### Weekly structure
Three sessions of 30-45 minutes per week are a practical starting plan, not a proven minimum effective dose. Use a load that keeps the effort moderate; experienced ruckers may test 15-20% of body weight, while beginners should start lighter. Our [plate comparison guide](/gear/ruck-plate-comparison) covers load options.
Experienced ruckers may use **4-5 sessions of 45-60 minutes per week**, including one 60-90 minute session. That is a high-volume example, not an optimal prescription for everyone.
**80/20 principle:** Keep 80% of your rucking volume in Zone 2, allowing 20% in Zone 3 (hills, faster segments, harder days). Don't live in Zone 2 so strictly that you never challenge yourself. But don't let Zone 2 become an afterthought-it's the foundation.
A practical weekly structure:
- **Monday:** 45 minutes Zone 2 ruck (moderate pace, moderate load)
- **Tuesday:** Rest or easy walk
- **Wednesday:** 60 minutes Zone 2 ruck (slightly longer)
- **Thursday:** 40 minutes Zone 2 ruck (shorter, recovery-oriented)
- **Friday:** Rest or mobility
- **Saturday:** 75 - 90 minute longer ruck (mostly Zone 2, allow some hills/faster sections)
- **Sunday:** Complete rest
This totals about 4.5 hours of Zone 2 rucking per week. Use it only if that volume is sustainable alongside the rest of the training plan.
### Progression
For progression, add either 5-10 minutes of total volume or 2-5 lbs, then hold the other variable steady. Raising both at once makes recovery and form problems harder to trace.
Track whether you can sustain 45-60 minutes comfortably. Reassess after 6-8 weeks rather than treating that window as a deadline. Progress only one of distance, load, frequency, or intensity at a time.
A progression metric is **aerobic drift.** As your fitness improves, your heart rate should drift less throughout a given ruck. Week 1, your average HR might start at 125 bpm and end at 135 bpm (drift). Week 6, the same load and pace should show less drift-maybe 125 to 128 bpm. This shows your aerobic system is more efficient.
---
## Measuring progress without the scale
Heart-rate data and scale weight can move in different directions. Scale weight also changes with water, food, medication, and other factors. Track more than one measure.
**Cardiac drift** within a single [ruck session](/glossary#ruck) is a marker of improving fitness. Early on, your heart rate will climb throughout a 60-minute ruck due to fatigue and heat accumulation. As you adapt, your HR should stay steady. If Week 1 shows 125 - 135 bpm across your ruck and Week 6 shows 127 - 131 bpm for the same workout, you're more efficient.
**Same route, same load, lower average HR** can indicate improved fitness when temperature, wind, caffeine, sleep, stress, and device conditions are similar. Repeat a 3-mile route every two weeks and look for a trend rather than one reading.
**Resting heart rate trending downward** may reflect cardiovascular adaptation, but illness, stress, sleep, medication, and measurement error also affect it. Measure under similar conditions. A change from 72 bpm to 66 bpm over eight weeks is worth noting, not proof of one cause.
**Can carry more weight at the same heart rate** is a practical marker. If Week 1 required 25 lbs to reach 120 bpm and Week 6 you reach 120 bpm with 32 lbs, you're stronger and more efficient.
These metrics all point to the same thing: improved aerobic fitness, metabolic efficiency, and cardiovascular health. The scale is just one data point. For a fuller picture of what to expect visually, see the [rucking before and after timeline](/weight-loss/rucking-results-what-to-expect) - 30/60/90-day changes in body composition that pair with the Zone 2 cardiovascular adaptations above.
---
## Common Zone 2 rucking mistakes
These errors make the intended effort harder to control.
**Going too hard.** Hills, heat, or a faster pace can move the session above the intended range. Slow down or reduce load when conversation becomes difficult. A hard segment does not erase the whole session, but repeated drift changes its purpose.
**Using only one signal.** Perceived effort and wrist-based heart rate both have limits. A $40-60 chest strap can improve measurement, and a watch such as the [COROS PACE 4](/gear/best-gps-watches-for-rucking) can show zone trends. Neither is essential if the goal is simply moderate aerobic exercise and the talk test is clear.
**Only doing Zone 2 for a goal that requires speed.** Hills or faster segments train qualities that easy work does not. The 80/20 principle is one option, not a required ratio. General-health beginners may spend a base phase at moderate intensity before adding hard work.
**Inconsistent pacing.** Walking fast then slow instead of maintaining steady state defeats the purpose. You're not creating consistent stimulus. Zone 2 rucking should be steady-state: find your pace and hold it. This teaches your body to work efficiently at that intensity.
**Ignoring terrain effects.** A hill segment can spike you from Zone 2 to Zone 4 without realizing it. If you're tracking average heart rate for the ruck, hills will distort the data. For true Zone 2 programming, flat terrain is preferable, at least until you understand how hills affect your specific heart rate. Then you can use hills strategically.
## Frequently Asked Questions